
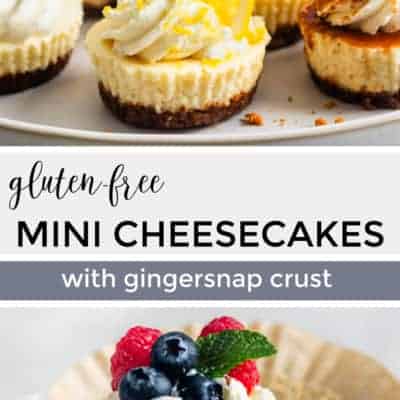
With a crisp gingersnap crust, these gluten-free mini cheesecakes have all the flavor of classic cheesecake in a convenient individual serving size. These quick-bake mini cheesecake bites can be eaten on their own or customized with your favorite toppings. The perfect mini dessert for your next gathering or party!
My daughter was born on Super Bowl Sunday, and every single year, my mom has to remind me that, no, I cannot throw her birthday party on Super Bowl Sunday. You see, I come from a football-obsessed family, but I only join in for the snacks (mini cheesecake, anyone?).
That's where these gluten-free mini cheesecakes come into play. They're the perfect no-fuss dessert to serve at your next party!
These gluten-free mini cheesecakes have a crisp gingersnap crust topped with a creamy vanilla-scented cheesecake, in convenient individual serving size. With no need for a water bath and a very short bake time, these mini cheesecakes couldn't be easier. Enjoy them on their own or with your favorite toppings.
Tips for baking perfect mini cheesecakes
Use room temperature ingredients to avoid lumps
One key factor in achieving a flawless cheesecake that doesn't crack is to avoid overmixing the batter so you don't work too much air into it. This makes using room temperature ingredients crucial, as they mix more seamlessly. Cold cream cheese is also more likely to leave clumps in your batter, which are super noticeable in a tiny cheesecake.
If your room temperature is below 70 degrees, I recommend slicing the cream cheese, placing it flat on a plate, and microwaving it for 8-10 seconds to soften it, ensuring a creamy and easily blendable texture.
Scrape Down the Sides
Scraping down the sides of the bowl during mixing is crucial, especially when making a cheesecake, for which you want to avoid overmixing the ingredients. This process ensures there are no lumps or clumps in the batter, enabling you to achieve thorough mixing without the need to overbeat it.
Do not overmix the eggs
Once the eggs are added, take care to mix the batter only until it is just combined. Overmixing the eggs can introduce to much air into the batter, increasing the likelihood of the cheesecakes puffing up quickly, and sinking or cracking as they cool.
Use scoops to divide the batter
I recommend using scoops to easily divide the cheesecake batter among the muffin cups with very little mess. For standard muffin-size cheesecakes, I use an ice cream scoop or a large cookie scoop for the filling, and for mini muffin tin cheesecakes, I use a small cookie scoop.

Gluten-Free Gingersnap Cheesecake Crust
Using gluten-free gingersnaps for the crust of these gluten-free mini cheesecakes offers a flavorful twist to a classic dessert, giving a spiced gingery kick to each bite. The flavor of gluten-free gingersnap cookies complements the creamy and velvety cheesecake filling and all of your favorite topping choices - from lemon zest to caramel sauce to fresh berries.
This gingersnap crust uses the exact same method as a traditional graham cracker crust but with a bit less butter. The result is just as crisp and crunchy. You end up with a crust that caters to dietary restrictions without compromising on taste or texture!
How to make mini cheesecakes in a muffin tin
Baking mini cheesecakes in a muffin tin is an easy way to create individual portions of this classic dessert. With no need to slice, they can be eaten without a fork and plate in just a few bites, so they're the perfect thing to put out on a dessert spread at your next gathering.
Here's how to make them:
- Preheat the oven to 350°F and line 1-2 muffin tins with 18-20 liners (or 48 mini liners if using a mini muffin tin).
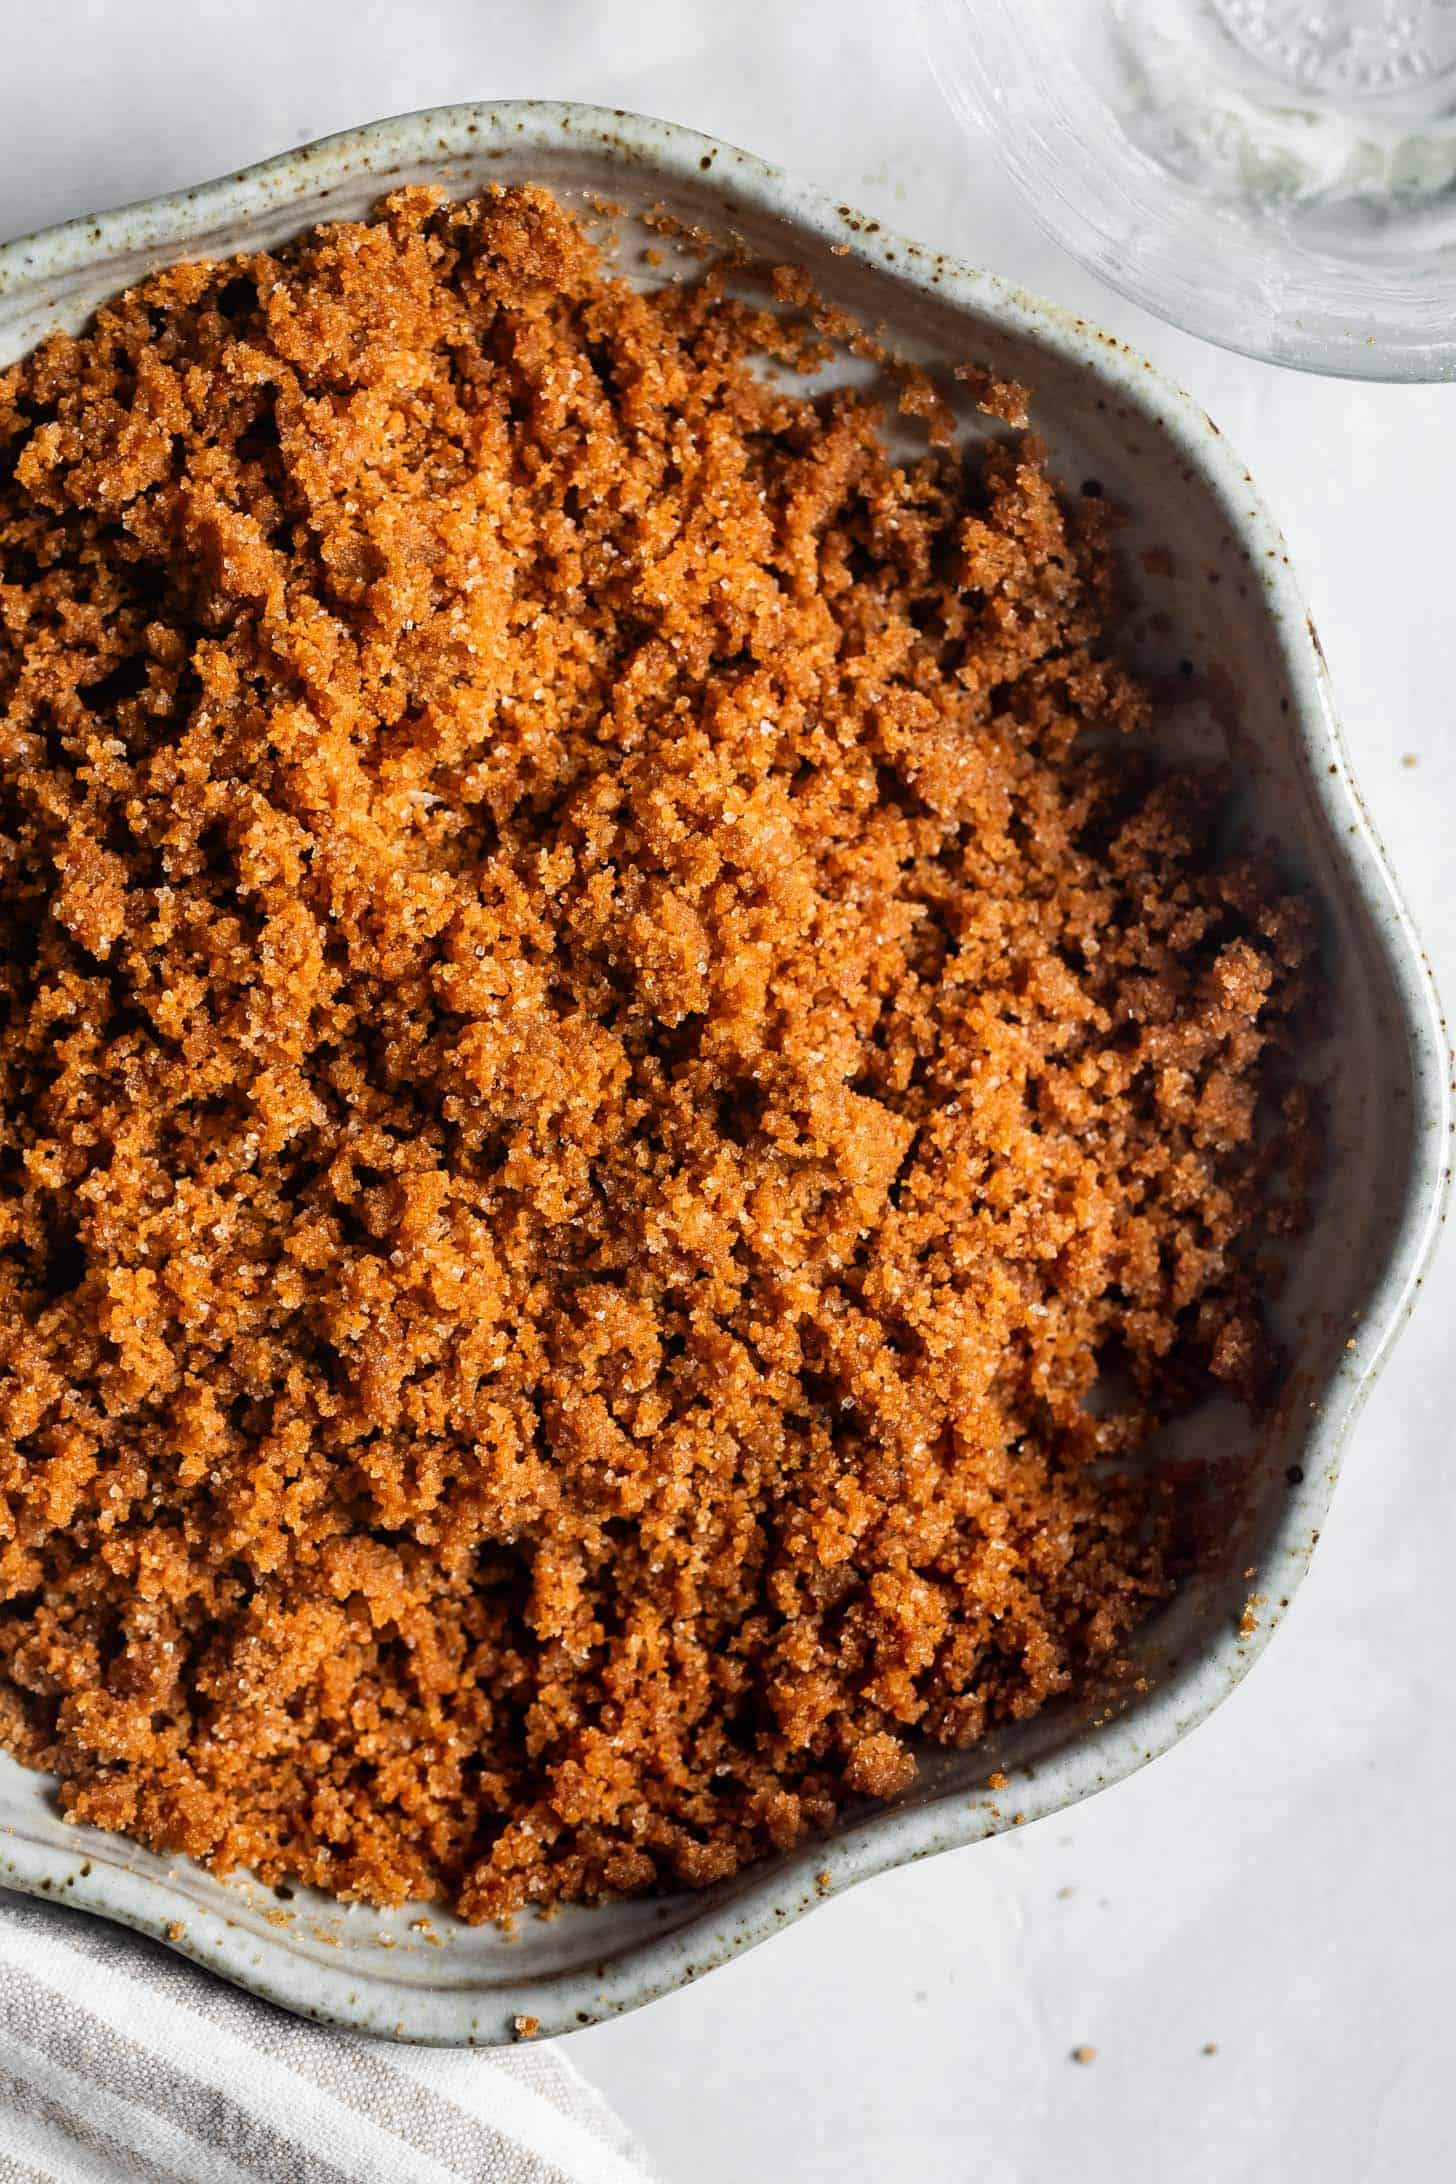
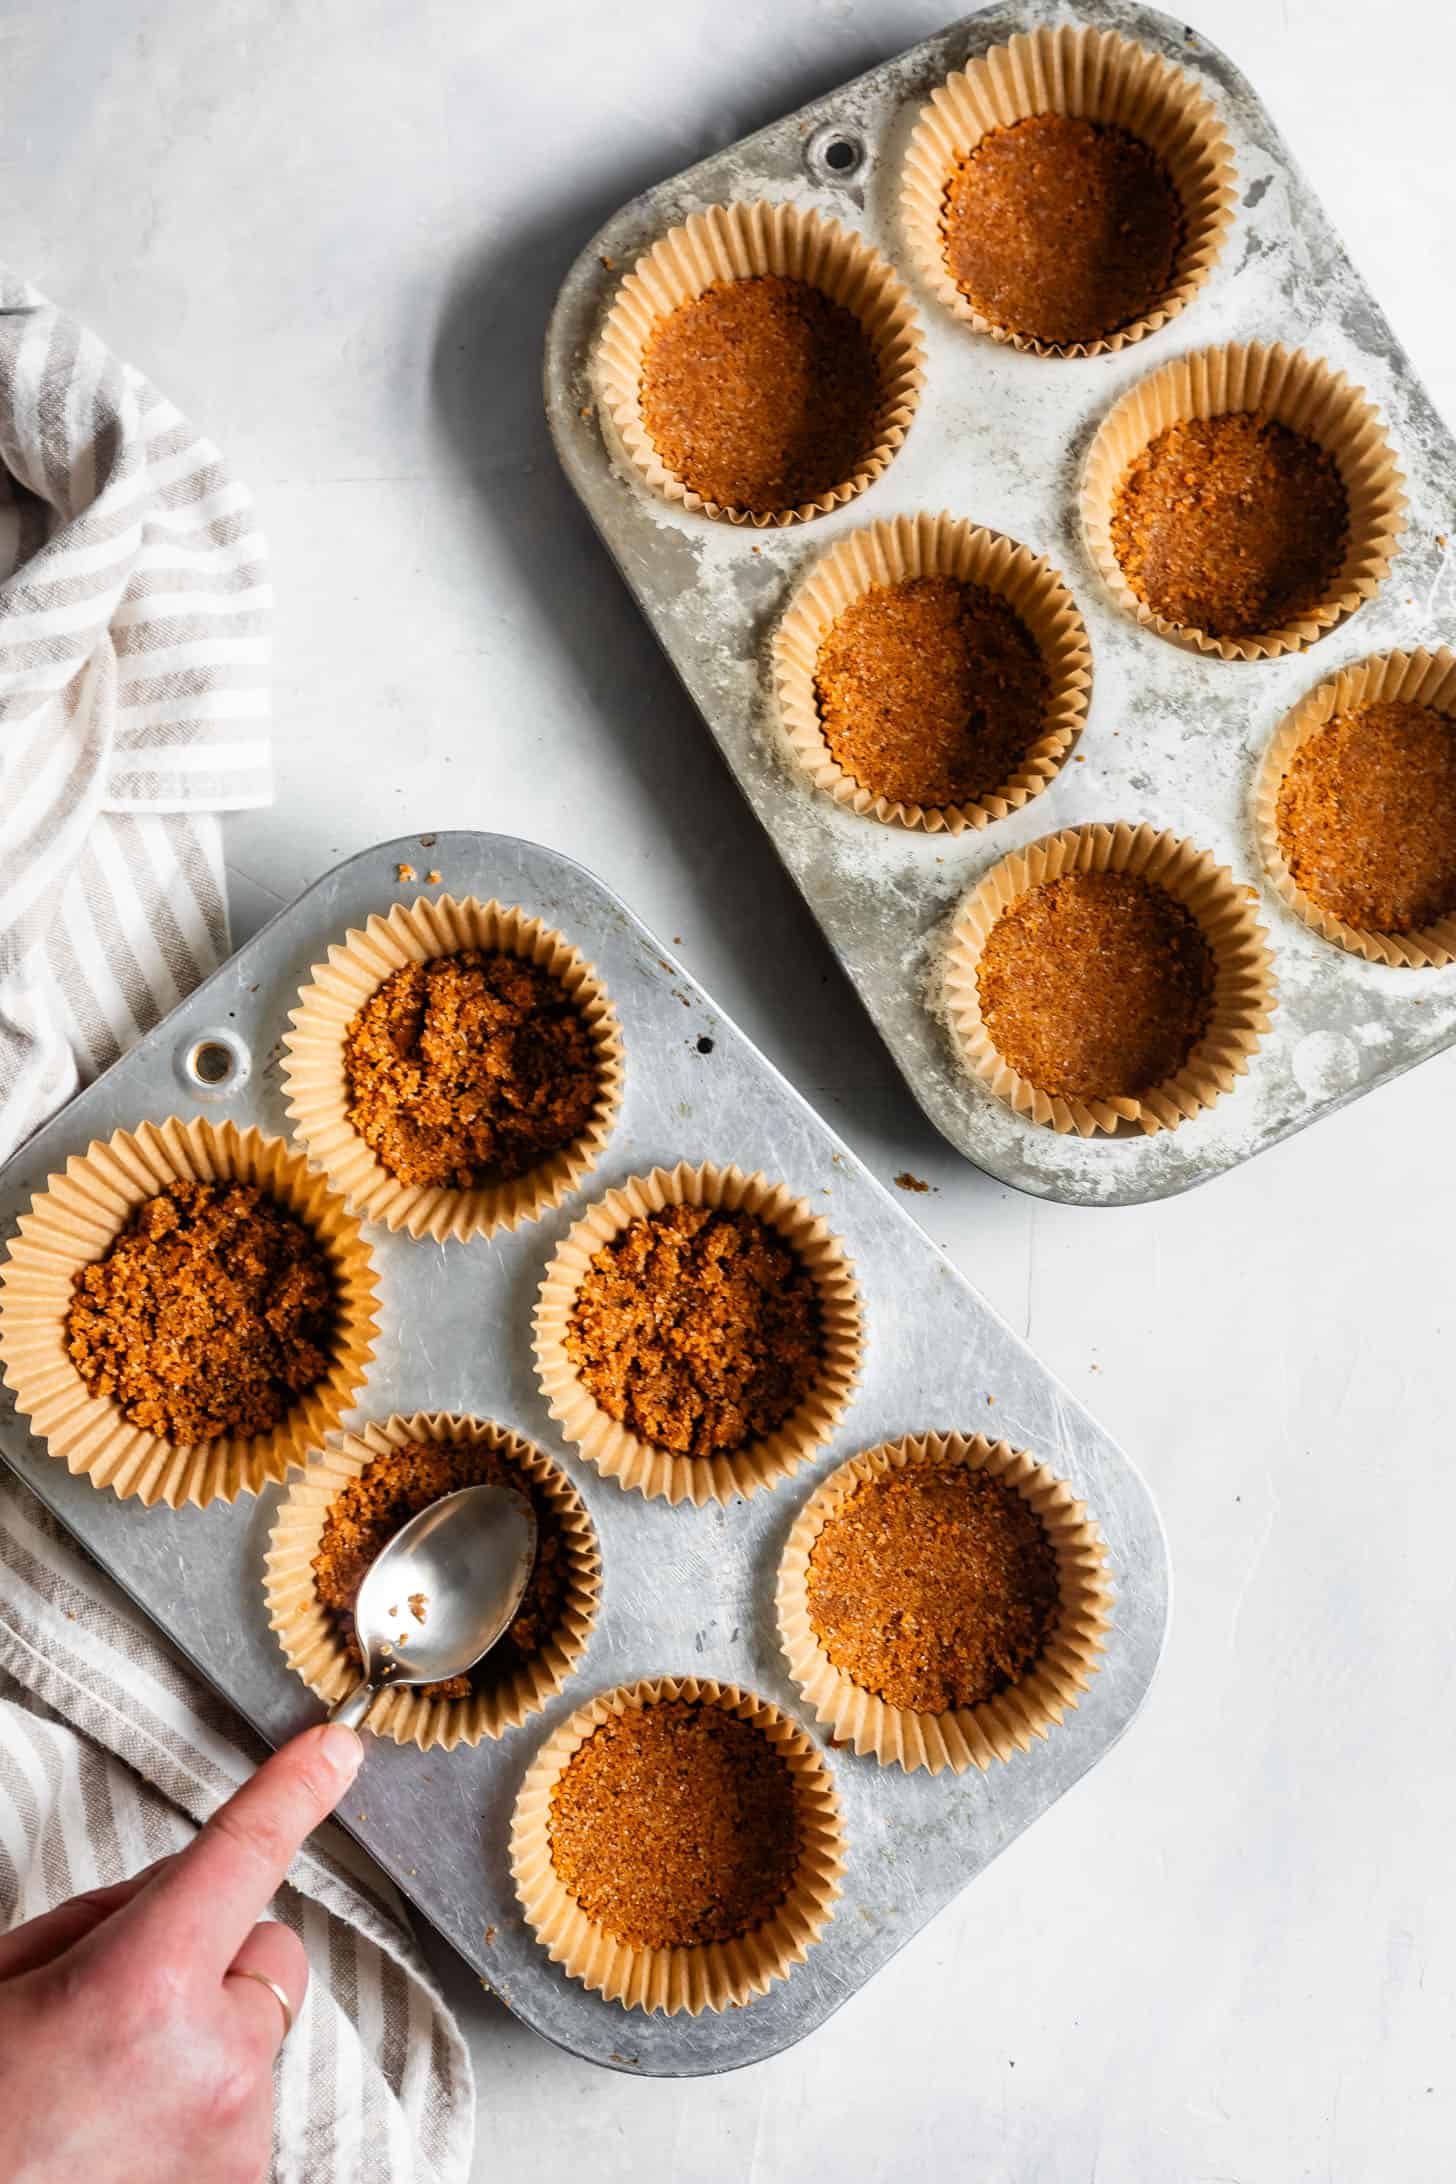
- Prepare the gingersnap crust: Mix together gingersnap crumbs, sugar, melted butter, and salt until the crumbs are well-moistened and clump together when pinched, but not wet.
- Press crust into muffin cups: Divide the crust crumbs among the lined muffin cups, scooping 1 tablespoon into each cup for regular-sized muffin tins, and 1 teaspoon for mini muffin tins. Use a small spoon to firmly pack the crumbs down into a layer on the bottom of each cup.
- Bake and cool: Bake until set, but not burnt, letting cool completely before filling.
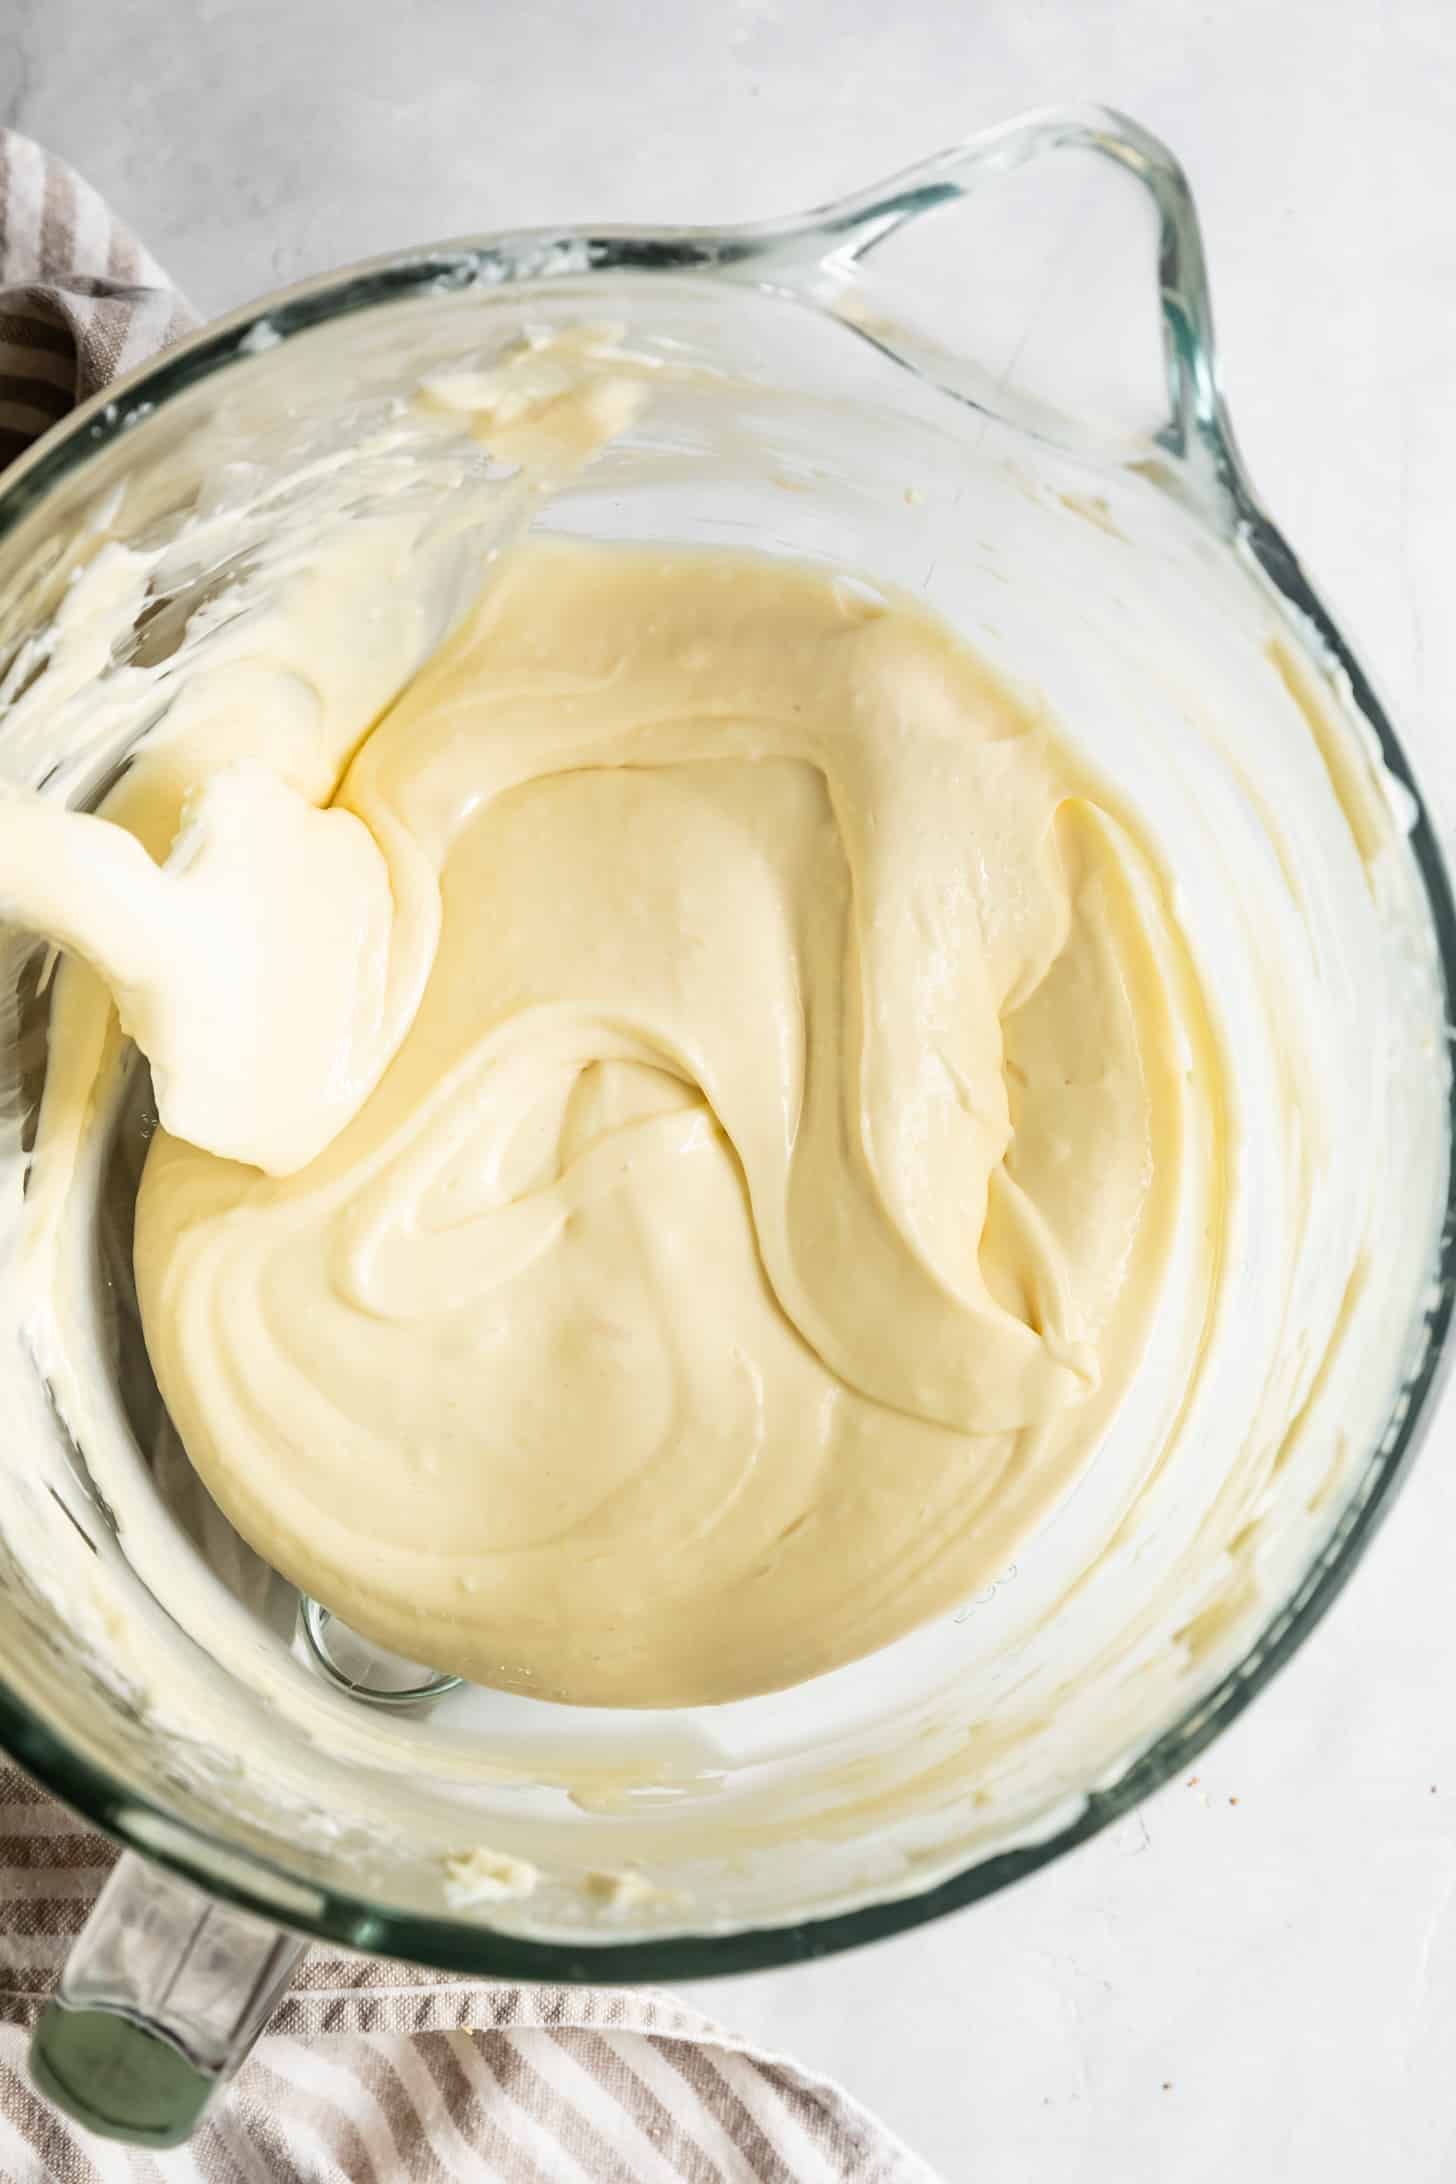
- Prepare the filling: Beat the cream cheese and sugar until smooth, scraping down the sides a few times. Add the sour cream, vanilla, and salt, and beat until combined, scraping down the sides again. Add the eggs, one at a time, mixing on medium speed until just combined, scraping down the sides after each addition
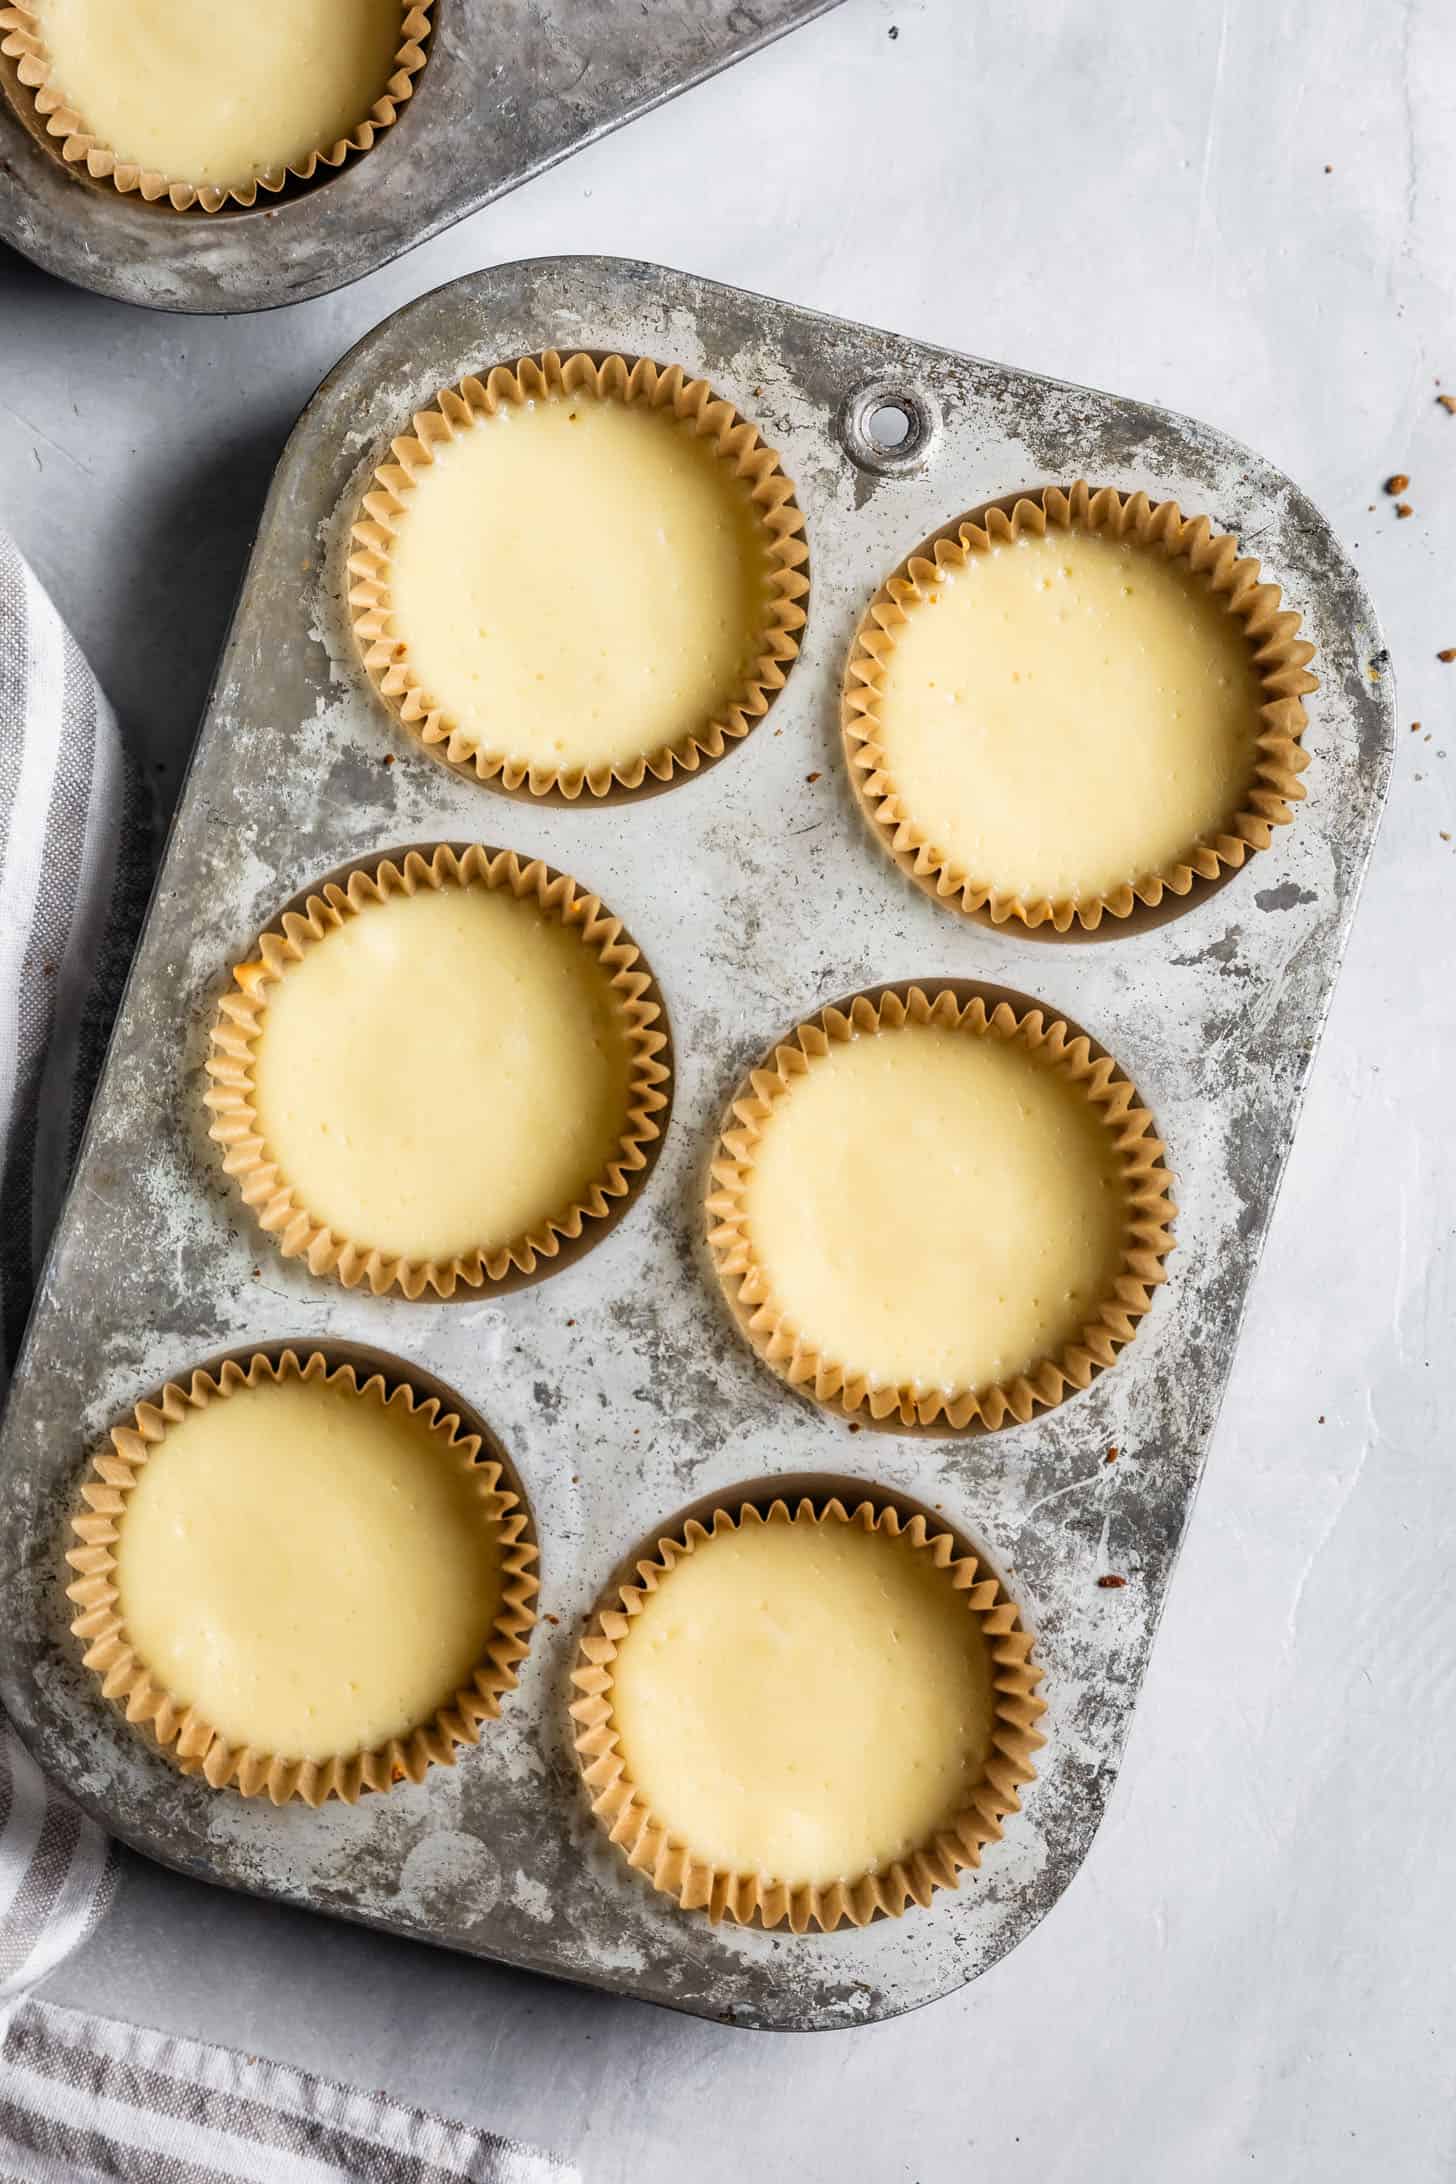
- Divide filling among crusts: Scoop 3-4 tablespoons of filling for regular-sized muffin tins or 1 tablespoon for mini muffin tins. Tap pans gently on the counter to release any air bubbles.
- Bake and cool: Bake for just 16-19 minutes for regular-size muffin tins, or 10-12 minutes for mini muffin tins, until the edges are set and the very center ever so slightly jiggles. Remove from oven and let cool completely.
- Cover and chill: Cover muffin tins with plastic wrap, and chill for at least 3 hours (1.5 hours for mini muffin tins) or up to two days. Alternatively, follow the instructions above to freeze the mini cheesecakes for longer storage.
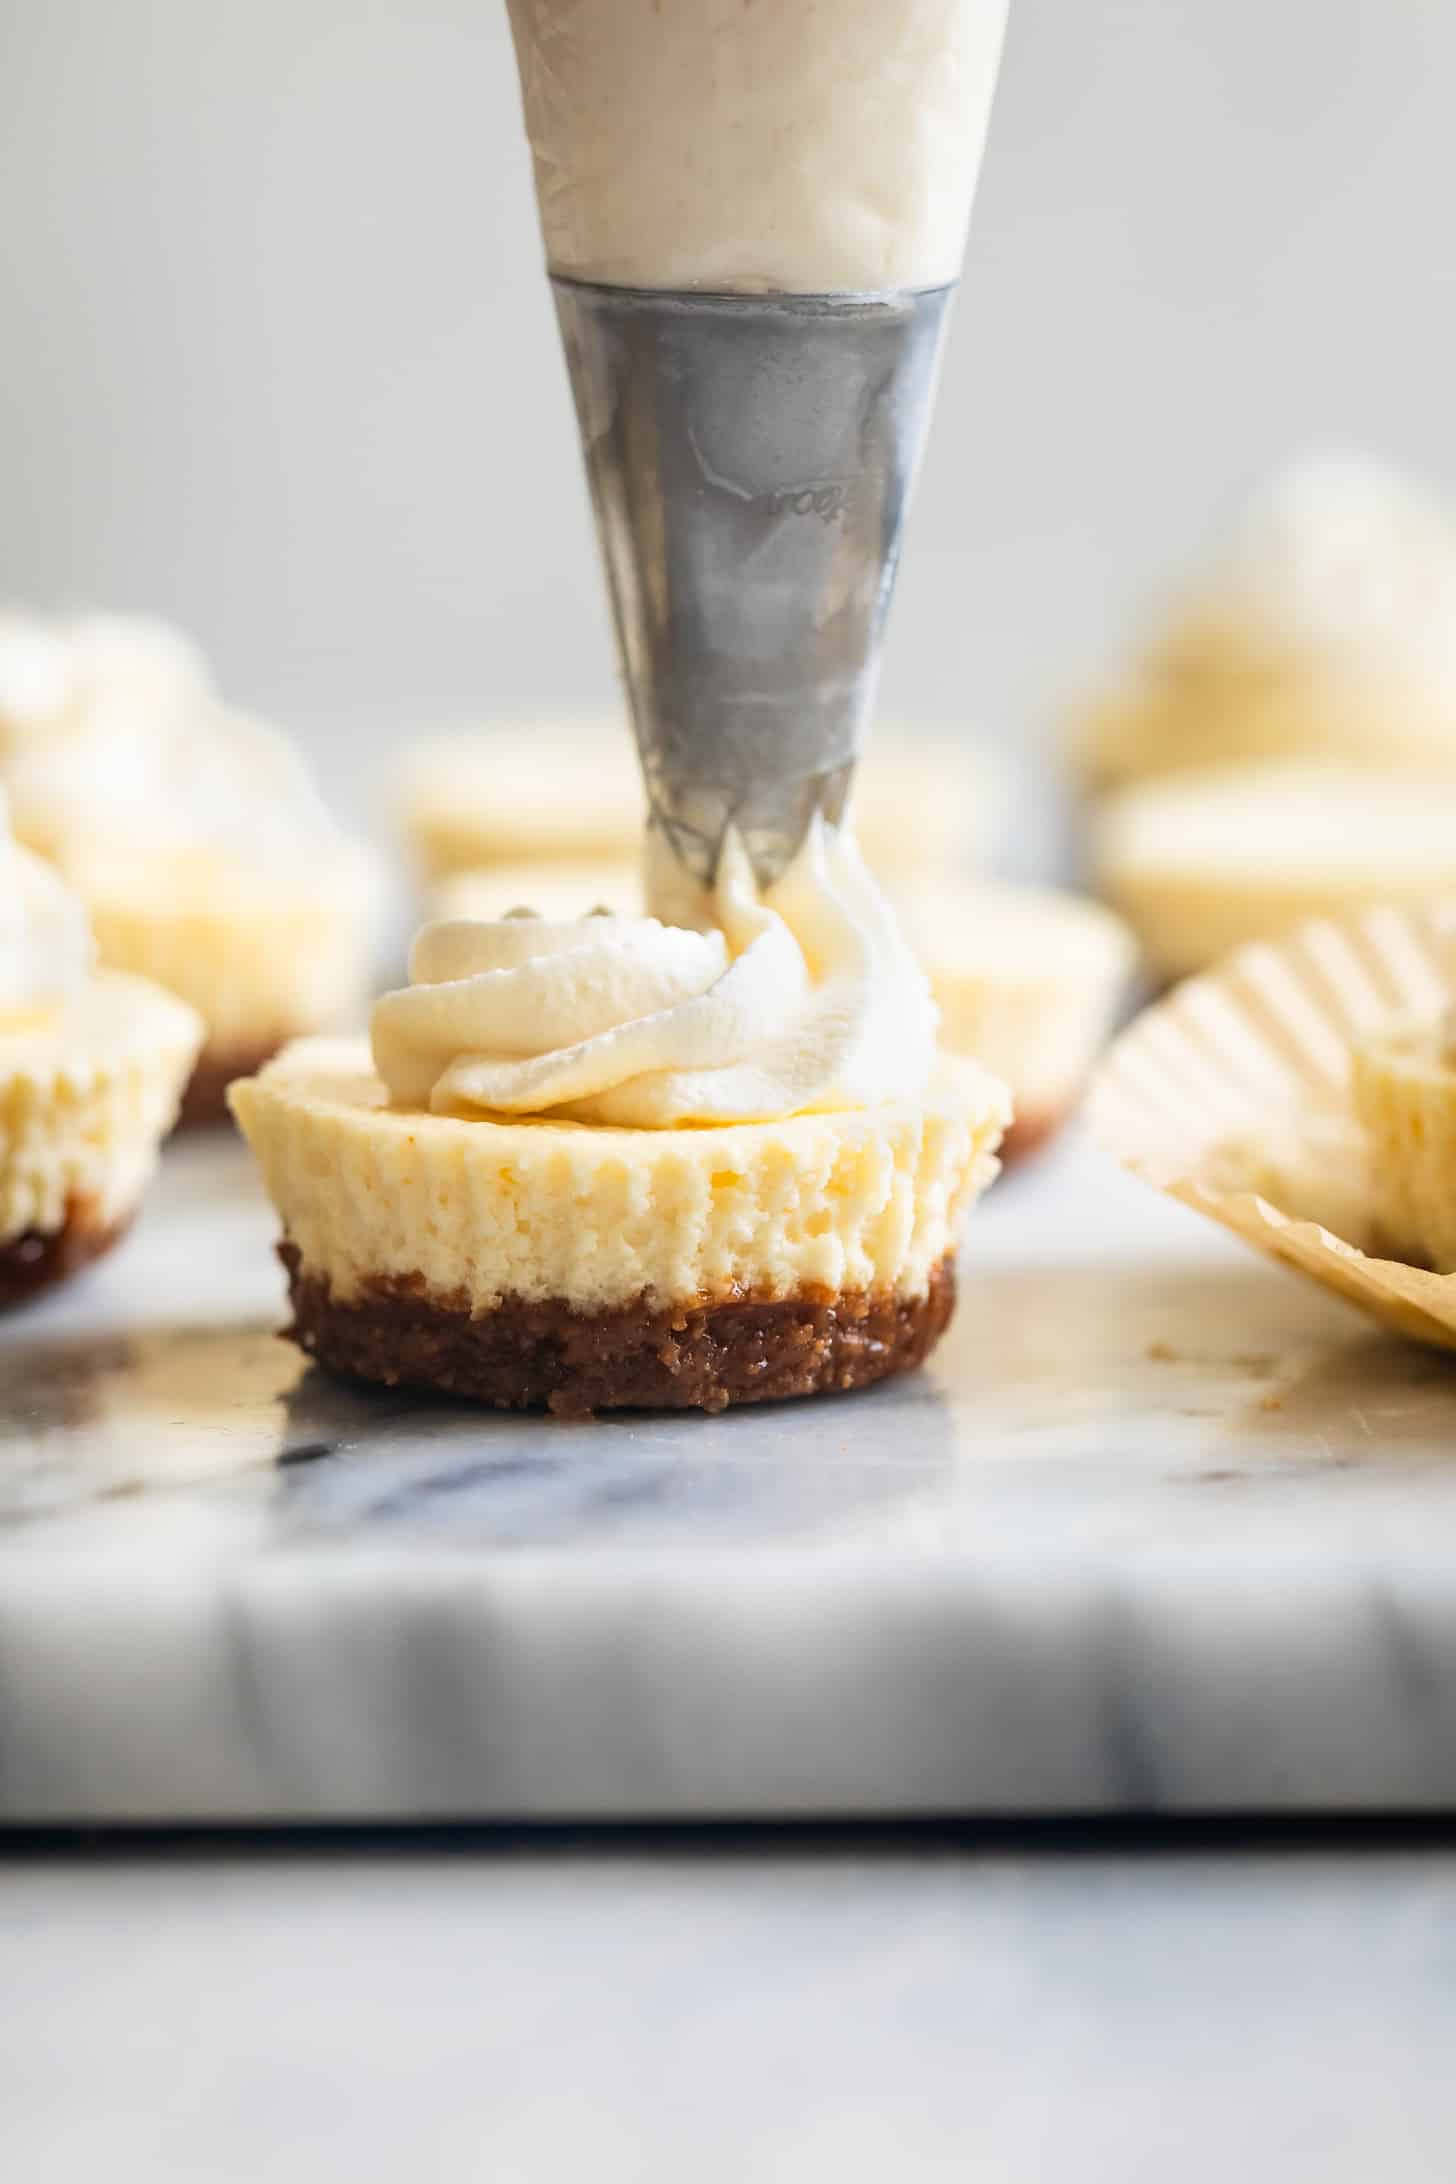
- Add toppings and serve: When ready to serve, remove the cheesecakes from the muffin liners and add your favorite toppings!
Recipe

Creamy Gluten-Free Mini Cheesecakes
Ingredients
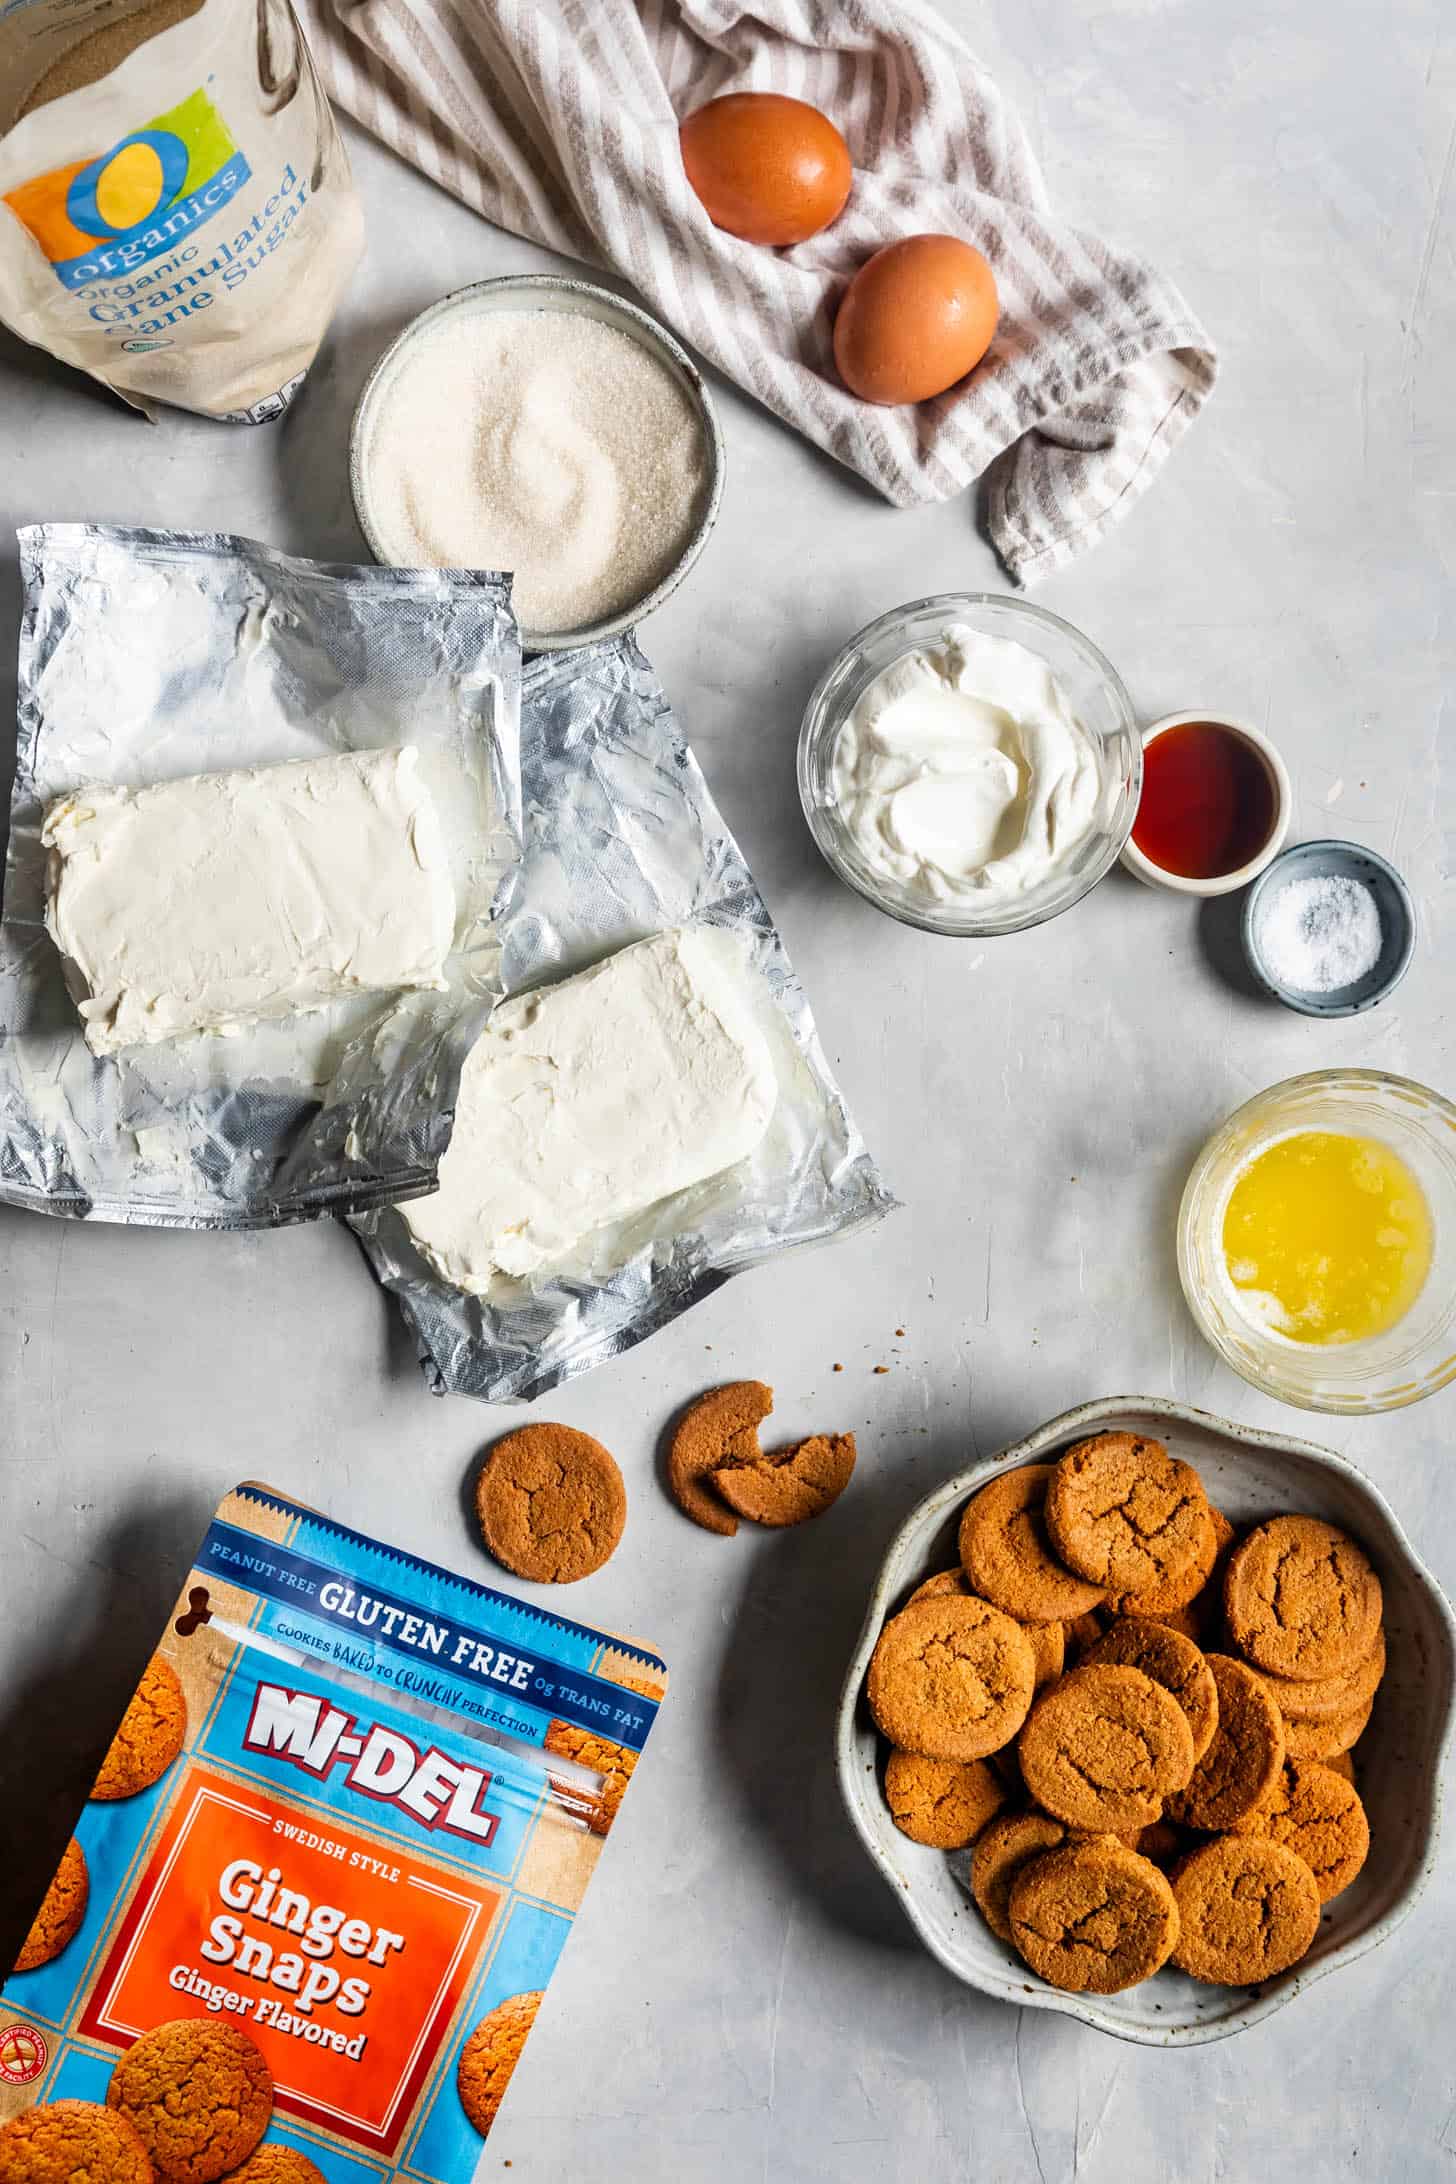
- 175 g (1¾ cups) gluten-free gingersnap cookie crumbs, see note for graham cracker crust
- ¼ cup granulated sugar
- 4 tablespoons unsalted butter, melted
- ¼ teaspoon kosher salt
- 16 ounces (2 8-ounce blocks) full-fat cream cheese (blocked), room temperature
- 121 g (½ cup + 1½ tablespoons) granulated sugar
- ½ cup (120 g) sour cream, room temperature
- 1 teaspoon pure vanilla extract
- Pinch kosher salt
- 2 large eggs, room temperature
INSTRUCTIONS
- Prepare your gingersnap crust. Preheat the oven to 350°F and line 1-2 standard muffin tins with 18-20 liners, or line mini muffin tins with 48 mini liners.
- Combine the gingersnap crumbs and sugar with a fork. Pour in the melted butter and salt and mix well until the crumbs are evenly moistened. The crumbs should be sandy, but a clump will just hold together when pinched. Note: Some brands may soak up moisture differently, if a clump will not hold together because your crumbs are too dry, add up to ½ tablespoon more melted butter. If your graham crackers are too wet, add up to ¼ cup more gingersnap crumbs.
- Divide the crust crumbs among the lined muffin cups, scooping 1 tablespoon into each cup for standard-sized muffin tins, or 1 teaspoon for mini-muffin tins. Use a small spoon to firmly pack the crumbs down into a layer on the bottom of each cup. Bake for 7-8 minutes, until set, but not burnt and remove from oven. Reduce heat to 325°F.
- Prepare the filling. Beat the cream cheese and sugar over medium-high speed in the bowl of a stand mixer or a large bowl with a hand mixer, until smooth and creamy, scraping down the sides a few times. Add the sour cream, vanilla, and salt, and beat on medium speed combined, scraping down the sides again.
- Add the eggs, one at a time, mixing on medium speed until just combined, scraping down the sides after each addition. Take care not to overmix the filling after you've added the eggs or you will incorporate too much air into the cheesecake, leading to potential cracks and sinking.
- Let the crusts cool completely before filling. Divide the filling among the cooled crusts, adding 3-4 tablespoons per standard-sized muffin tin cheesecake, or 1 heaping tablespoon for mini muffin tin cheesecake (For standard muffin-size cheesecakes, I use or for the filling, and for mini muffin tin cheesecakes, I use ). Give each muffin tray a couple of taps on the counter to release any air bubbles.
- Bake on the middle rack, for 16-19 minutes for standard-size muffin tins or 10-12 minutes for mini muffin tins. Remove from oven and let cool completely.
- Cover muffin tins with plastic wrap, transfer to the fridge, and let cool for at least 3 hours (1.5 hours for mini muffin tins) or up to two days. Alternatively, follow the instructions above to freeze the mini cheesecakes for longer storage.
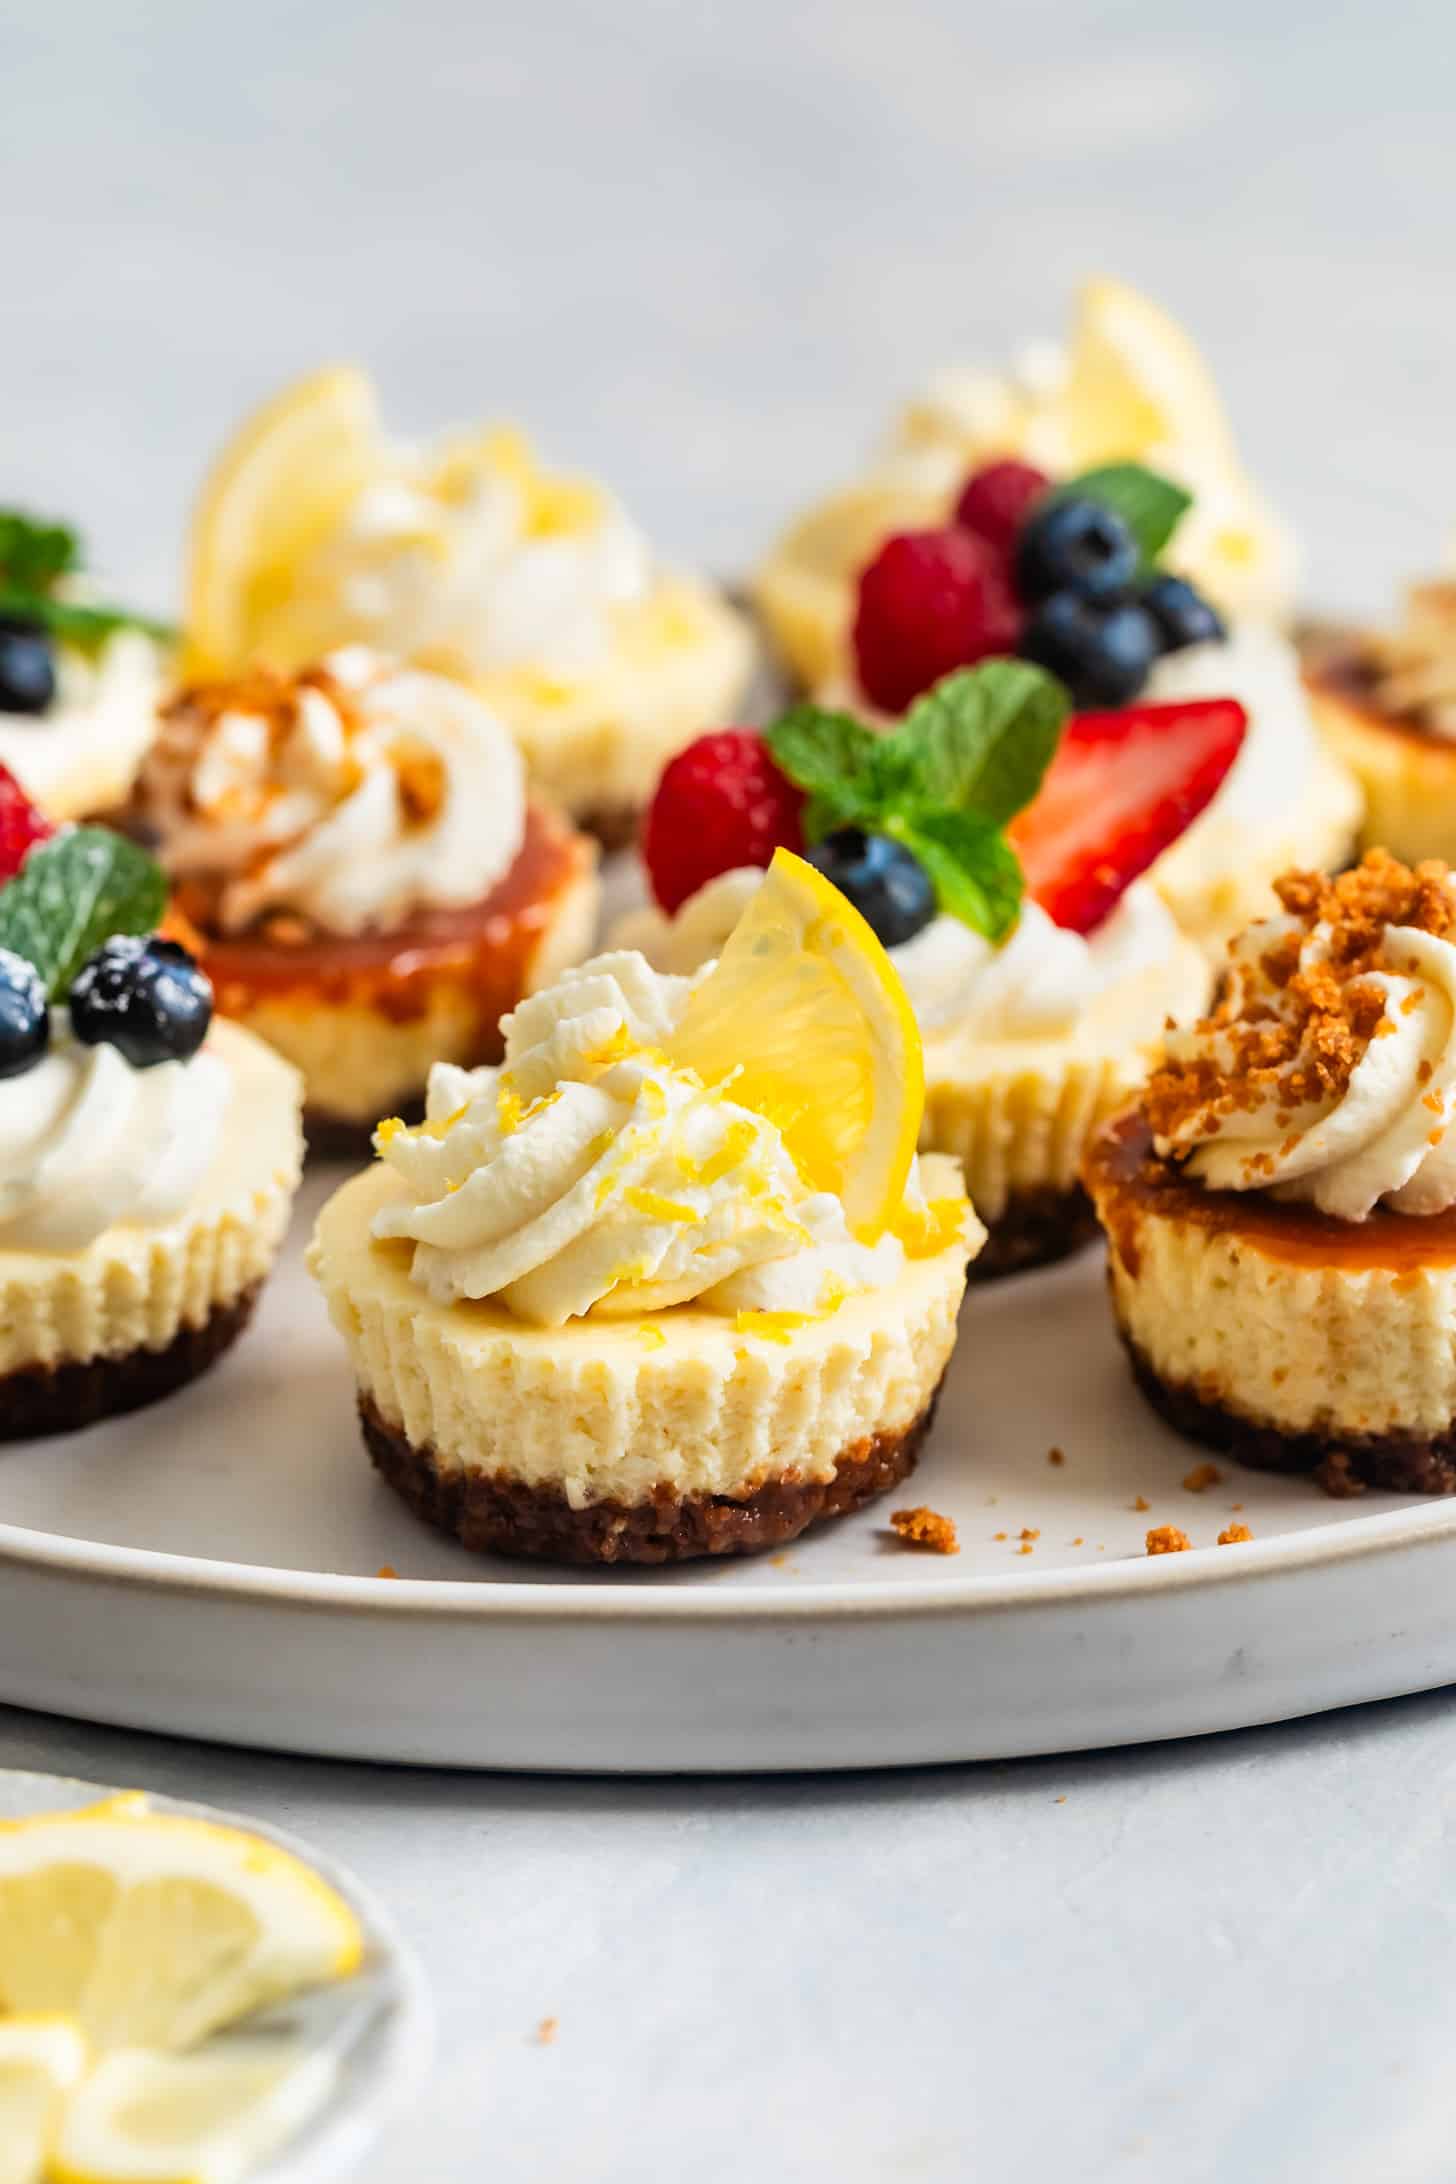
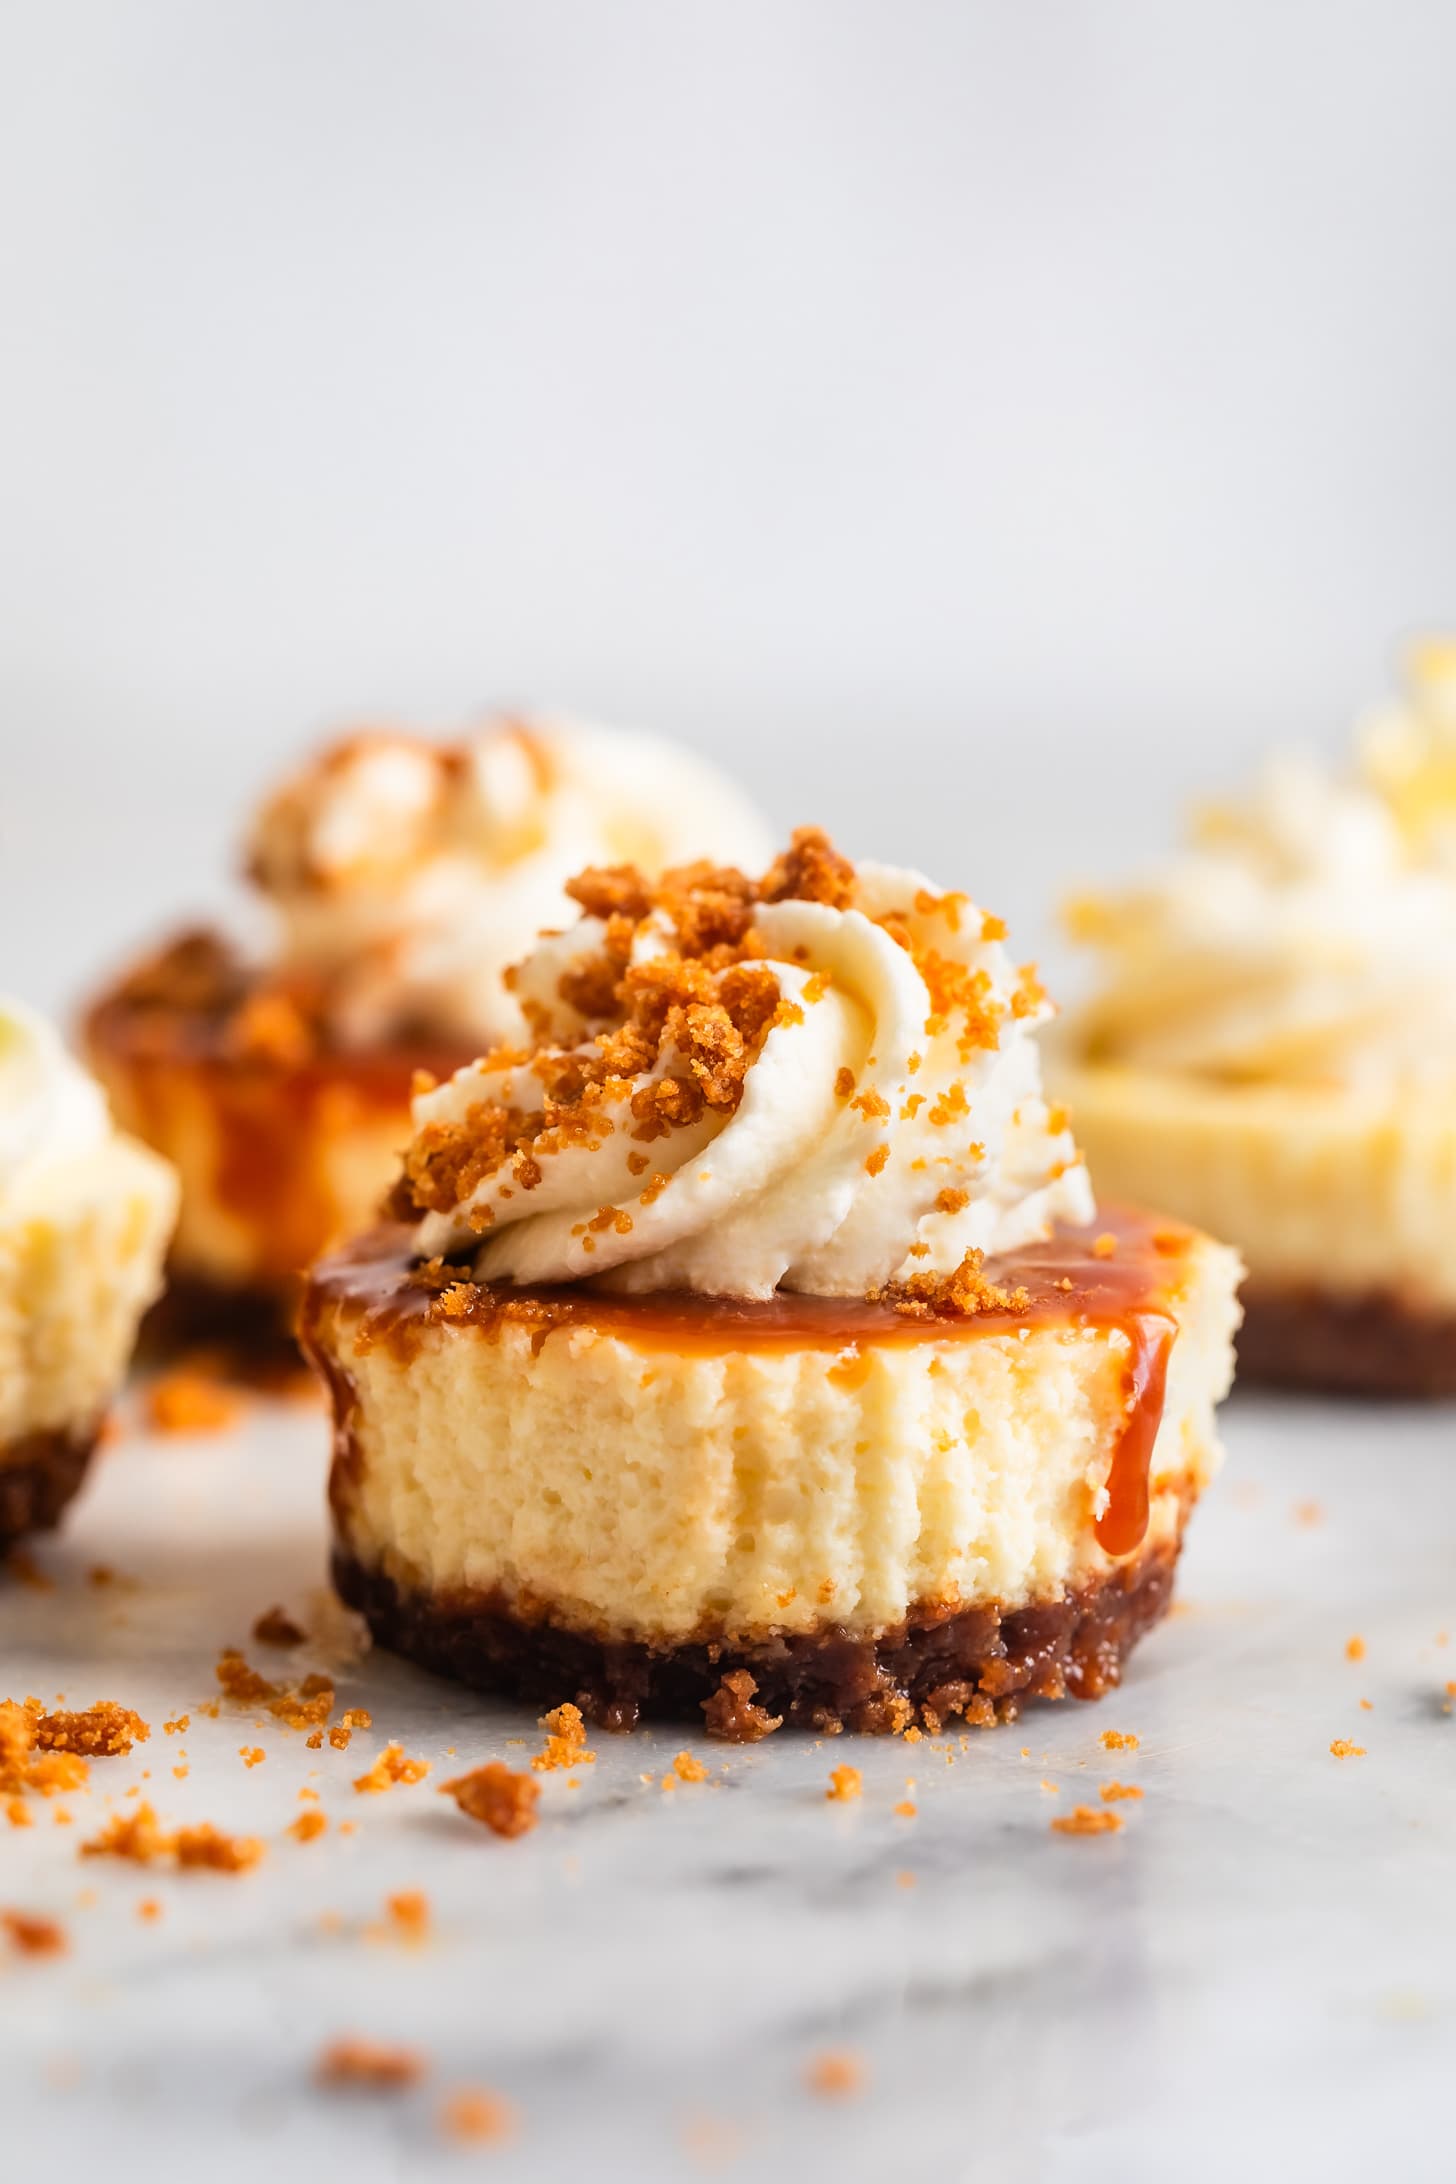
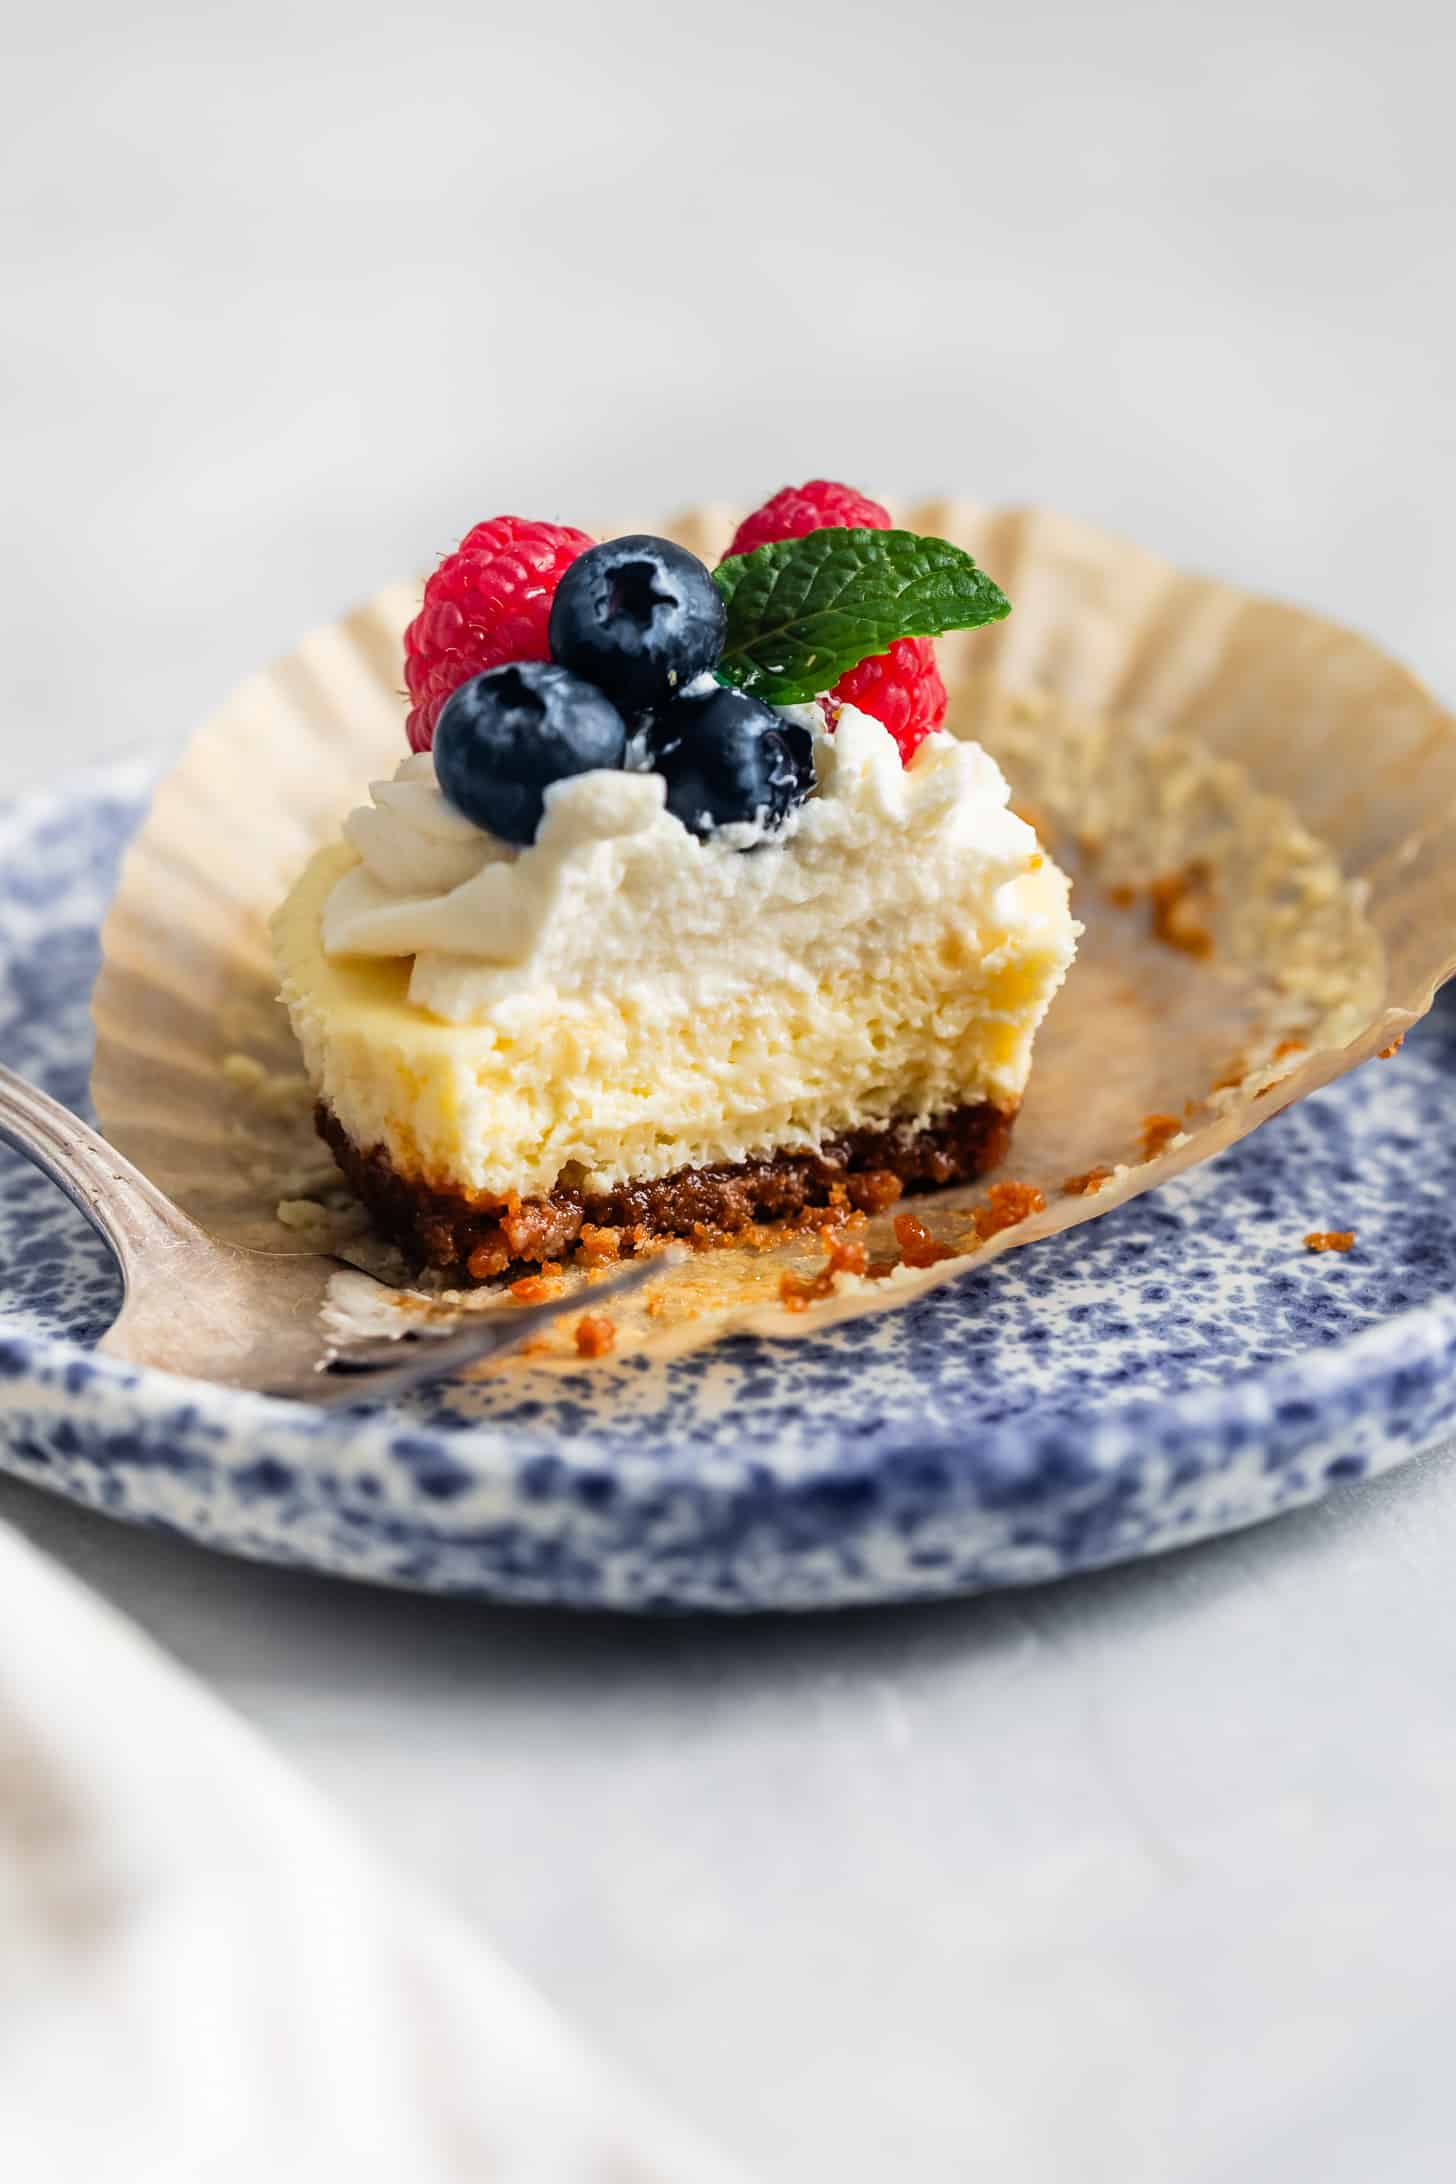
- When ready to serve, remove the cheesecakes from the paper liners and top with your favorite toppings, such as whipped cream and berries, whipped cream, lemon zest, and lemon wedge, or caramel, whipped cream, and gingersnap crumbs. Topped cheesecakes can be stored in the fridge for up to 2 days.
Notes
How to tell when mini cheesecakes are done baking
The most challenging part about cheesecake has to do with the bake time. With mini cheesecakes, it's much easier to tell when they're done, and they're a whole lot less finicky! Here's what to look for when your mini cheesecakes are done:
- Set edges: The edges will be set and slightly firm to the touch. When you gently press the edge with your finger, they will not indent or appear wet.
- Center slightly jiggly: The very very center will be ever-so-slightly jiggly when you gently shake the muffin tin. A gentle jiggle indicates that the center is still soft but will set as it cools. If you slightly overbake, the cheesecakes will turn out just a bit more firm and grainy, but most people will not notice!
- Center doesn't stick to your finger: While the center should be ever-so-slightly jiggly, it should also not stick to your finger when you gently touch it.
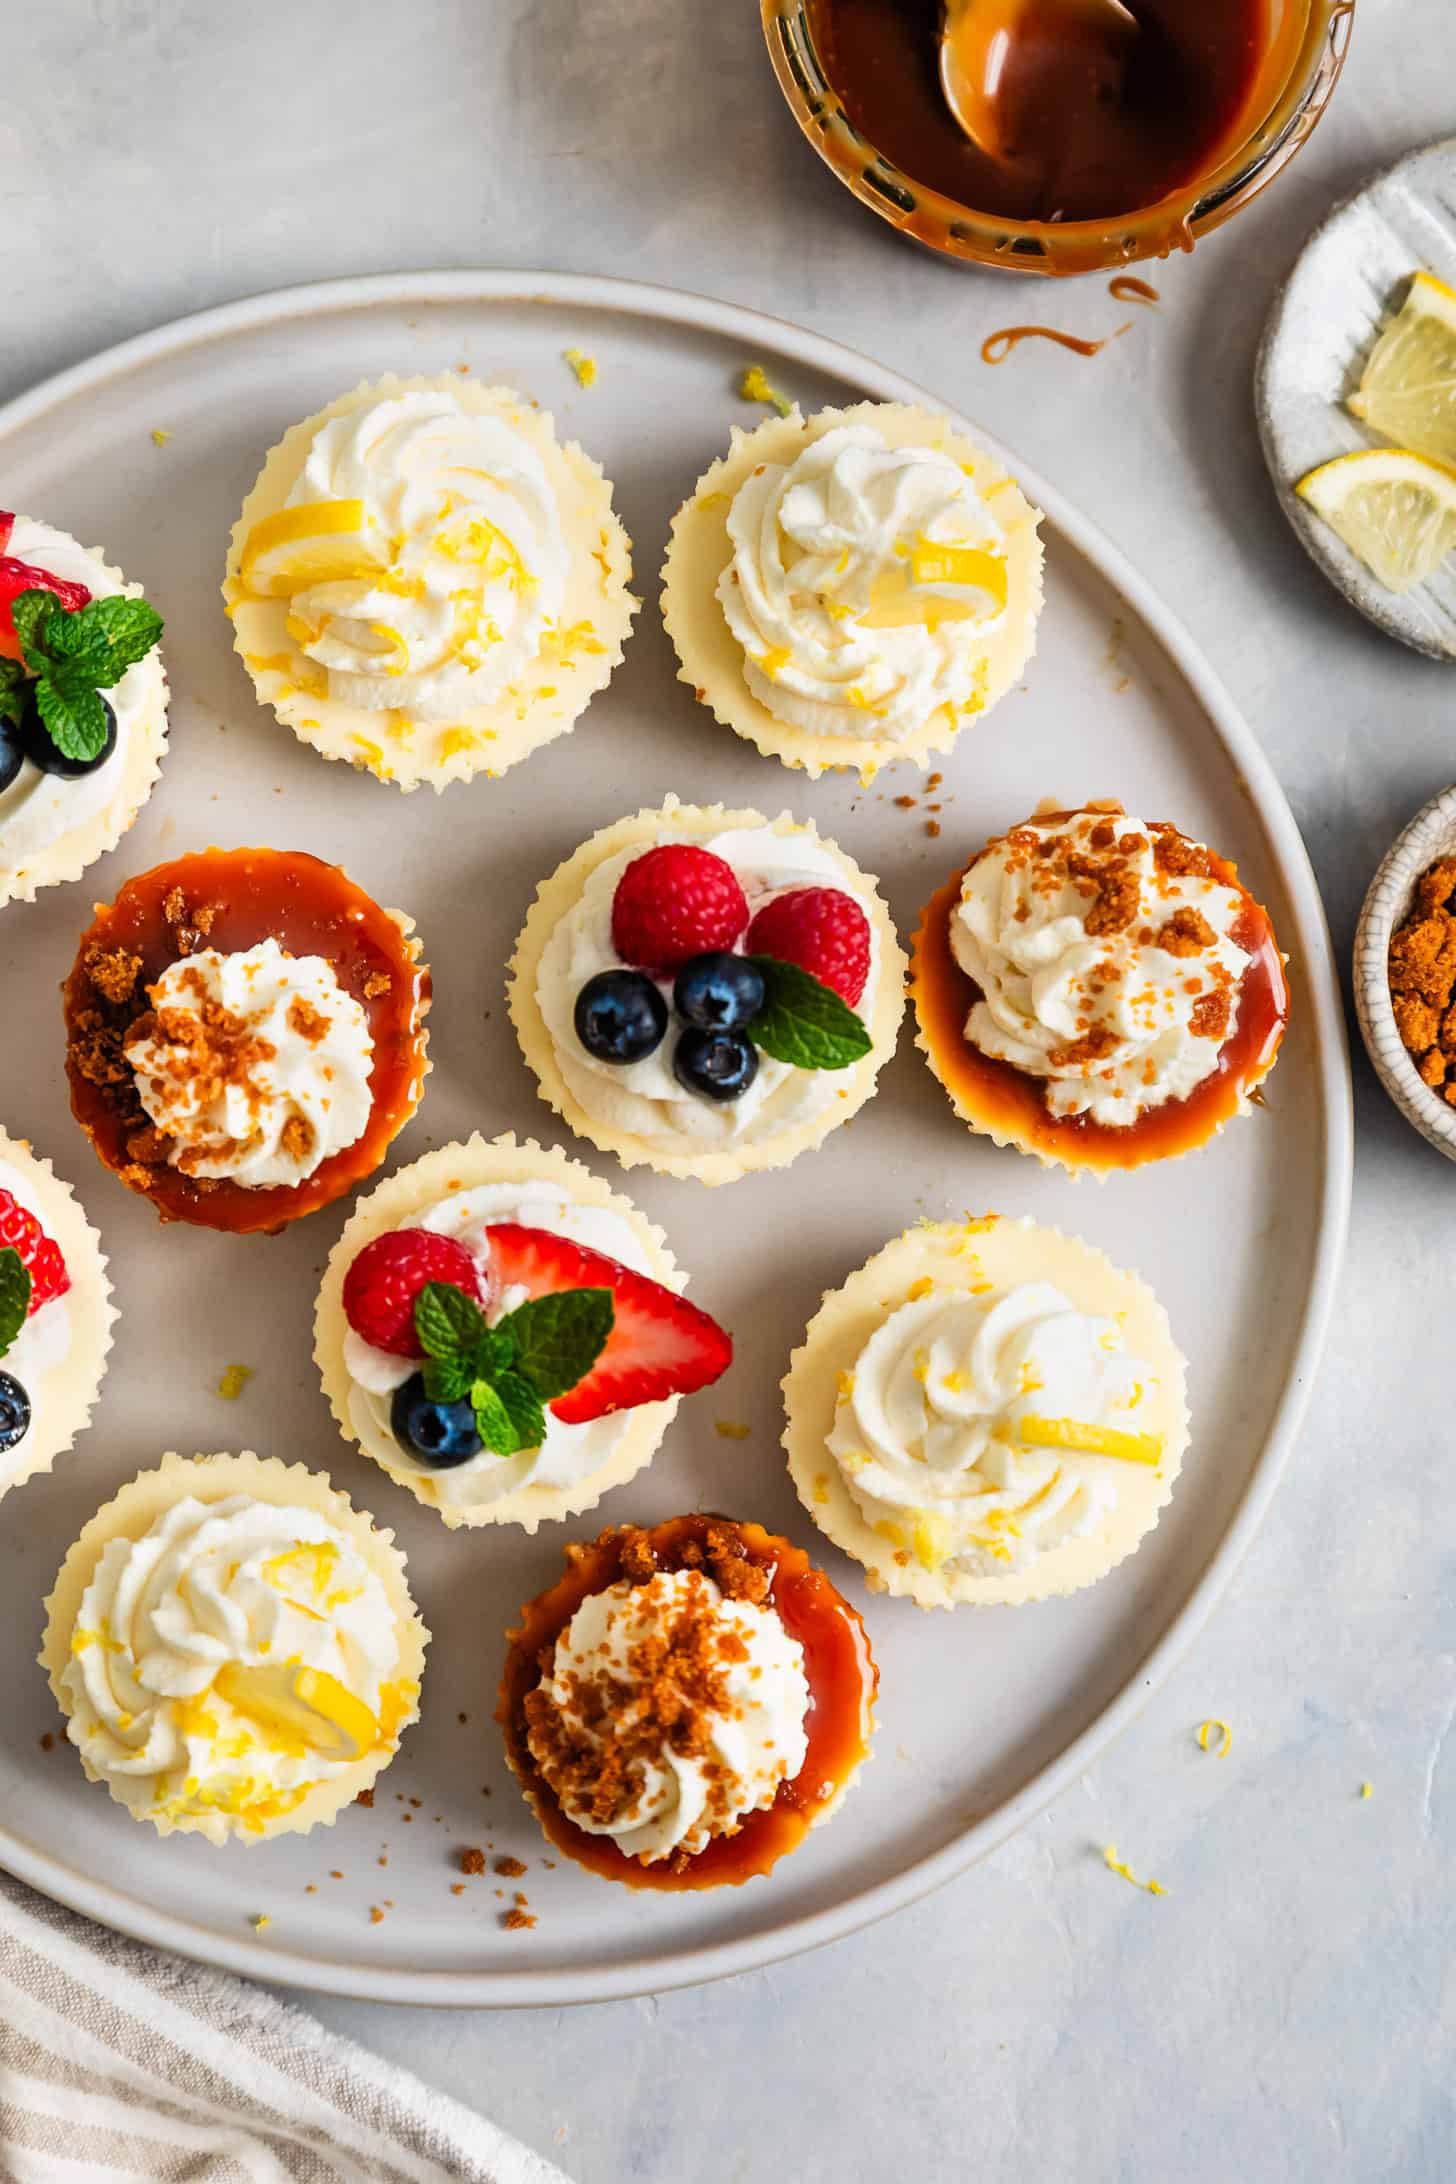
Topping ideas for gluten-free mini cheesecake cups
Get creative with your mini cheesecake toppings! I like to do a variety of options for guests to choose from, but use whatever you've got on hand. Below are some ideas for inspiration, but feel free to mix and match them or get creative with your own combinations. With the versatility of gluten-free mini cheesecakes, you can customize them to suit your preferences and the occasion.
Here's what's featured in this post:
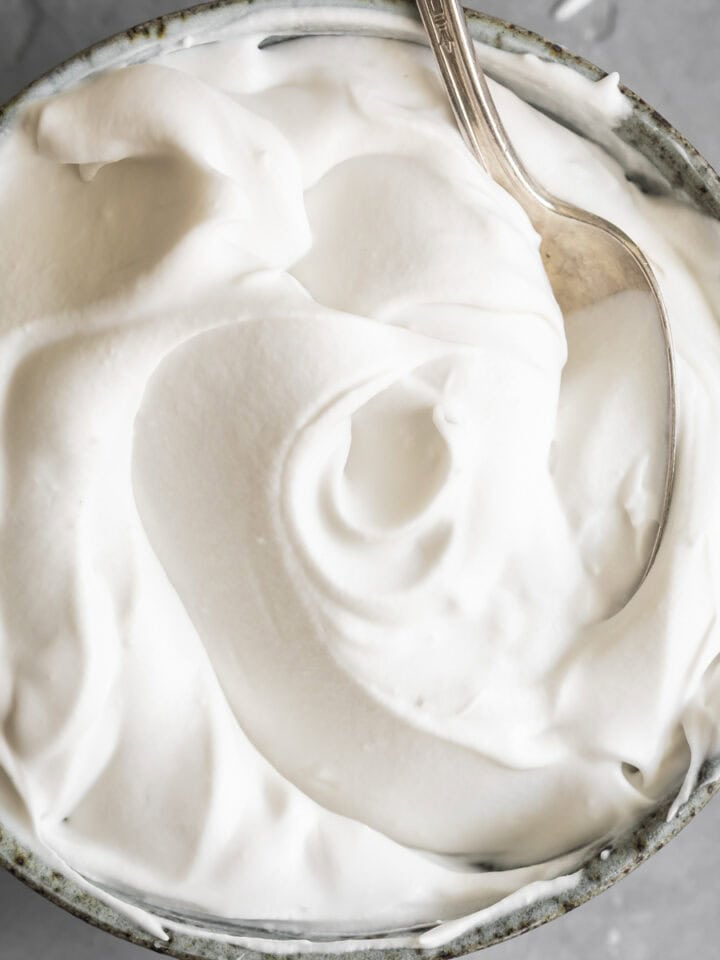
- Lemon: Whipped cream, lemon zest, and a lemon slice wedge. You could also add lemon zest to the cream cheese filling!
- Caramel Cookie: Salted caramel sauce (homemade or store-bought), whipped cream, crushed gluten-free ginger snap crumbs.
- Berries & cream: Whipped cream, fresh berries, mint garnish.
Additional topping ideas:
- Berry compote: Raspberry, blackberry, blueberry, strawberry rhubarb, mixed berry.
- Caramel apple pie: Apples chopped and sauteed in spices, then topped with caramel sauce.
- Chocolate ganache and fruit: Chocolate ganache with fresh strawberries or oranges.
- Chopped nuts: Either toasted or candied nuts. Or pair nuts with caramel!
- Whipped cream and sprinkles: because kids.
How to store gluten-free mini cheesecakes
You can store the cheesecakes for a short time in the fridge or for longer in the freezer, depending on when you plan to serve them!
Refrigeration: Short-Term Storage (1-2 Days):
Allow the mini cheesecakes to cool completely at room temperature. Once cooled, cover the muffin tin with plastic wrap or transfer the cheesecakes to an airtight container, leaving them in their paper muffin liners. and chill for up to 2 days. After 2 days, the moisture from the cheesecake begins to negatively affect the texture of the crust, leaving it softer than idea.
Can you freeze mini cheesecakes?
Yes, you can freeze mini cheesecakes! Freezing mini cheesecakes is a great way to bake them in advance or to keep leftovers to enjoy later. On-demand individual cheesecakes, anyone?
Allow the cheesecakes to cool completely before freezing. Store the cheesecakes still in their paper muffin liners without toppings in an airtight bag or container.
Thawing the mini cheesecakes in the refrigerator overnight will help maintain the best texture, but you can also thaw them at room temperature for 1-2 hours. Either way, keep them covered as they thaw to prevent condensation. Once thawed, remove the wrappers and add your favorite toppings!

Sheri Nix -
Yes please, I'll take one of each!!
Sheri Nix -
Yes please, I'll take one of each!!