
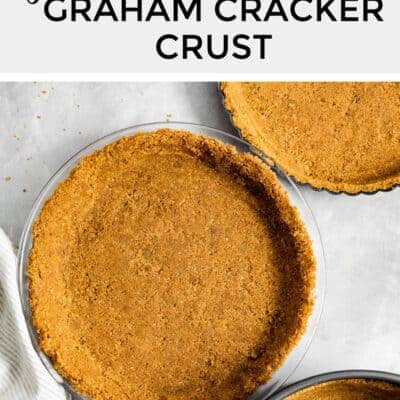
Easy gluten-free graham cracker crust at home using only 4 ingredients. This recipe works for baked pies and no-bake pies and can be used in a pie dish, tart pan, springform pan, or baking pan for any and all crusts.
Did you know that you can make almost any pie gluten-free? With either store-bought grahams or homemade crisp & snappy gluten-free graham crackers, you can quickly toss together this crisp and buttery gluten-free graham cracker crust that works in billions of pie recipes! Big win: the recipe also works dairy-free or as a no-bake crust!
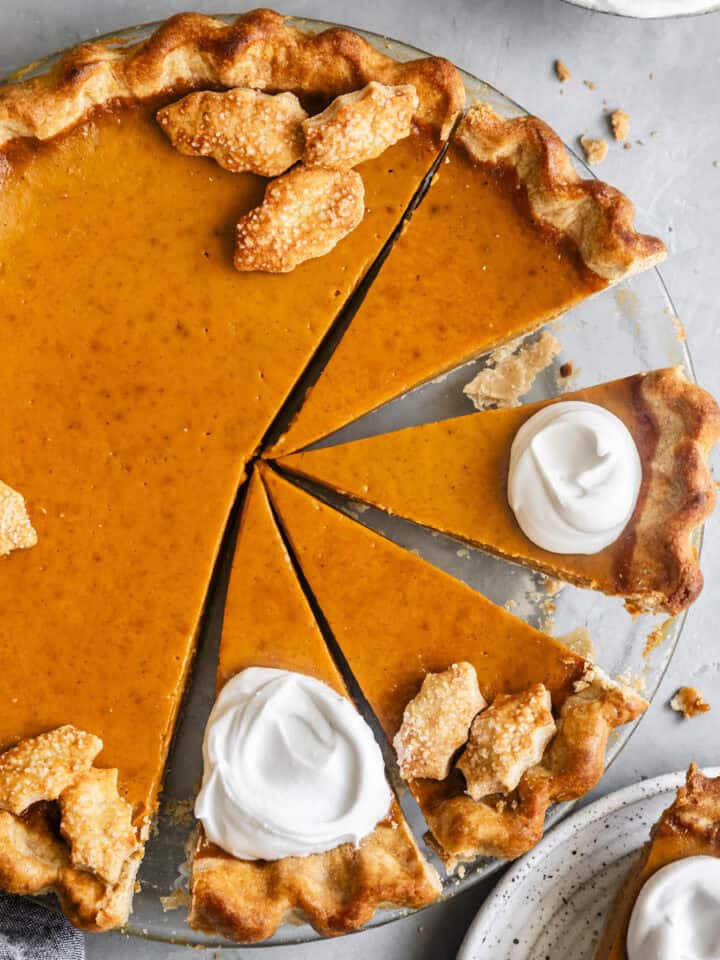
Let's talk about pie for a second. In my book, there are two main categories of pie. The kind you make on a slow Sunday with a buttery dough that you work into a flaky crust, like this triple berry gluten-free pie nestled into a flaky all-butter gluten-free crust. They take time, which somehow also adds to their charm.
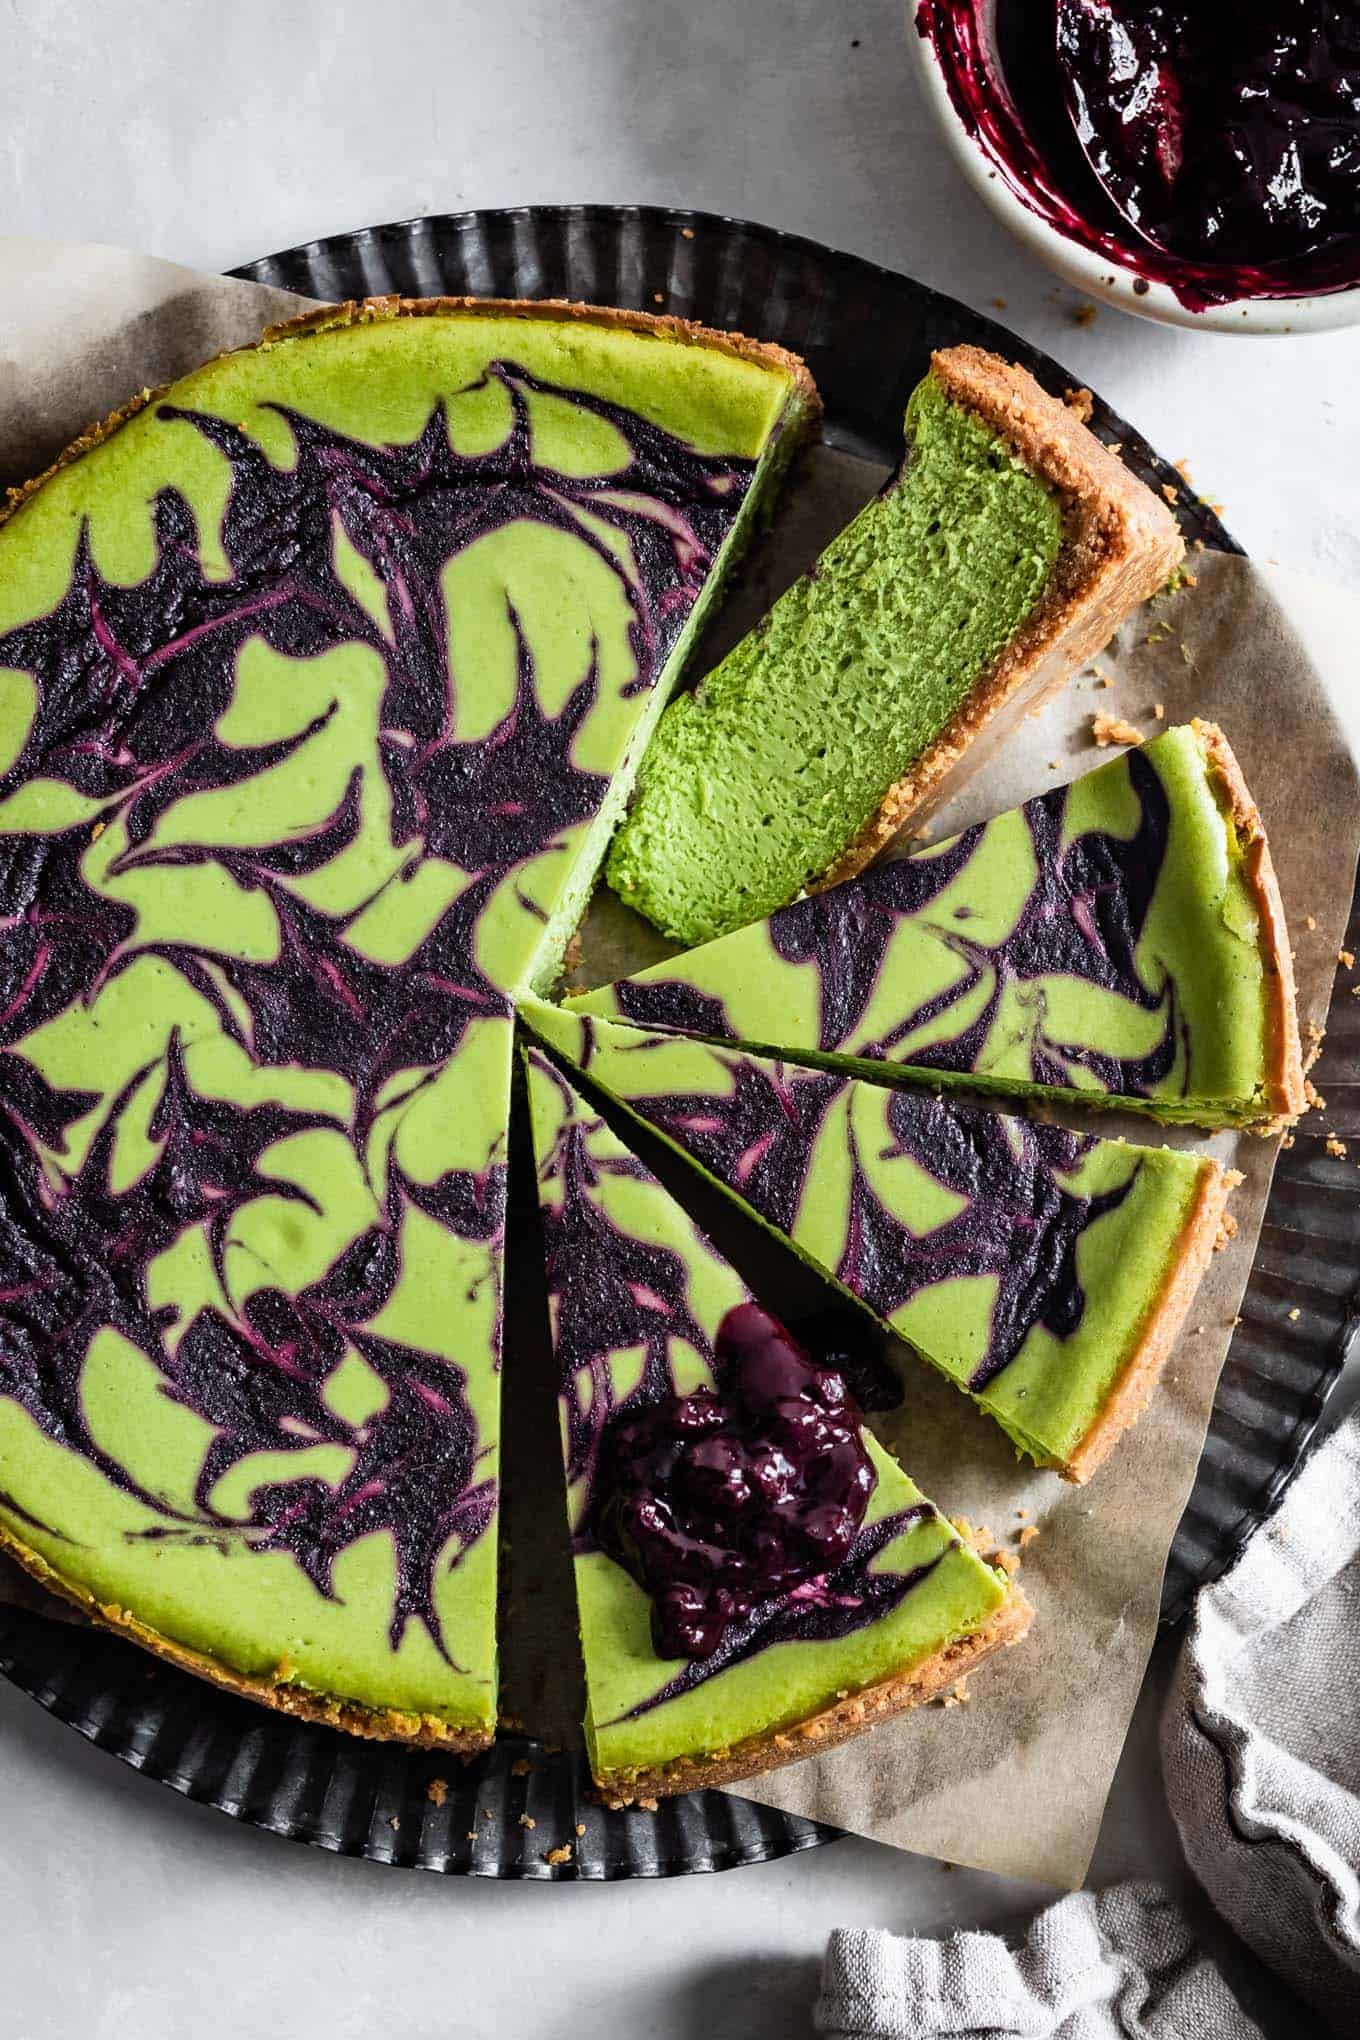
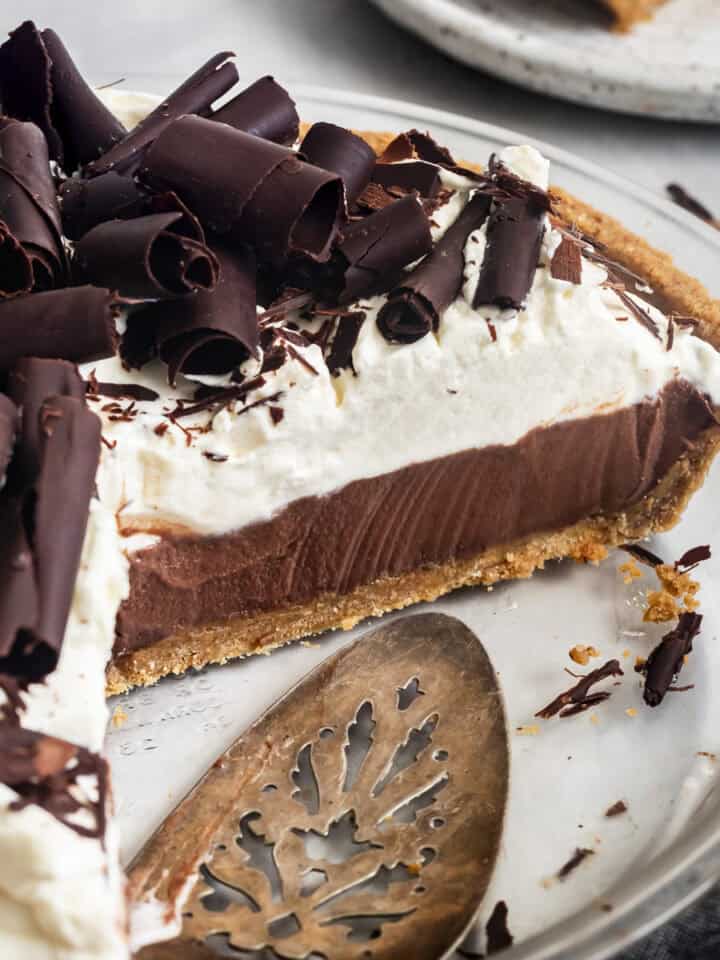
Then there's another equally delicious category of pie: the kind you can slap together really quickly with no fuss, like this gluten-free matcha key lime pie. With a gluten-free graham cracker crust recipe in your back pocket, you can go from zero to pie in almost no time at all.
How to make gluten-free graham cracker crust from scratch?
Making a gluten-free graham cracker crust at home couldn't be any easier. This is one of the easiest pie crusts to make!
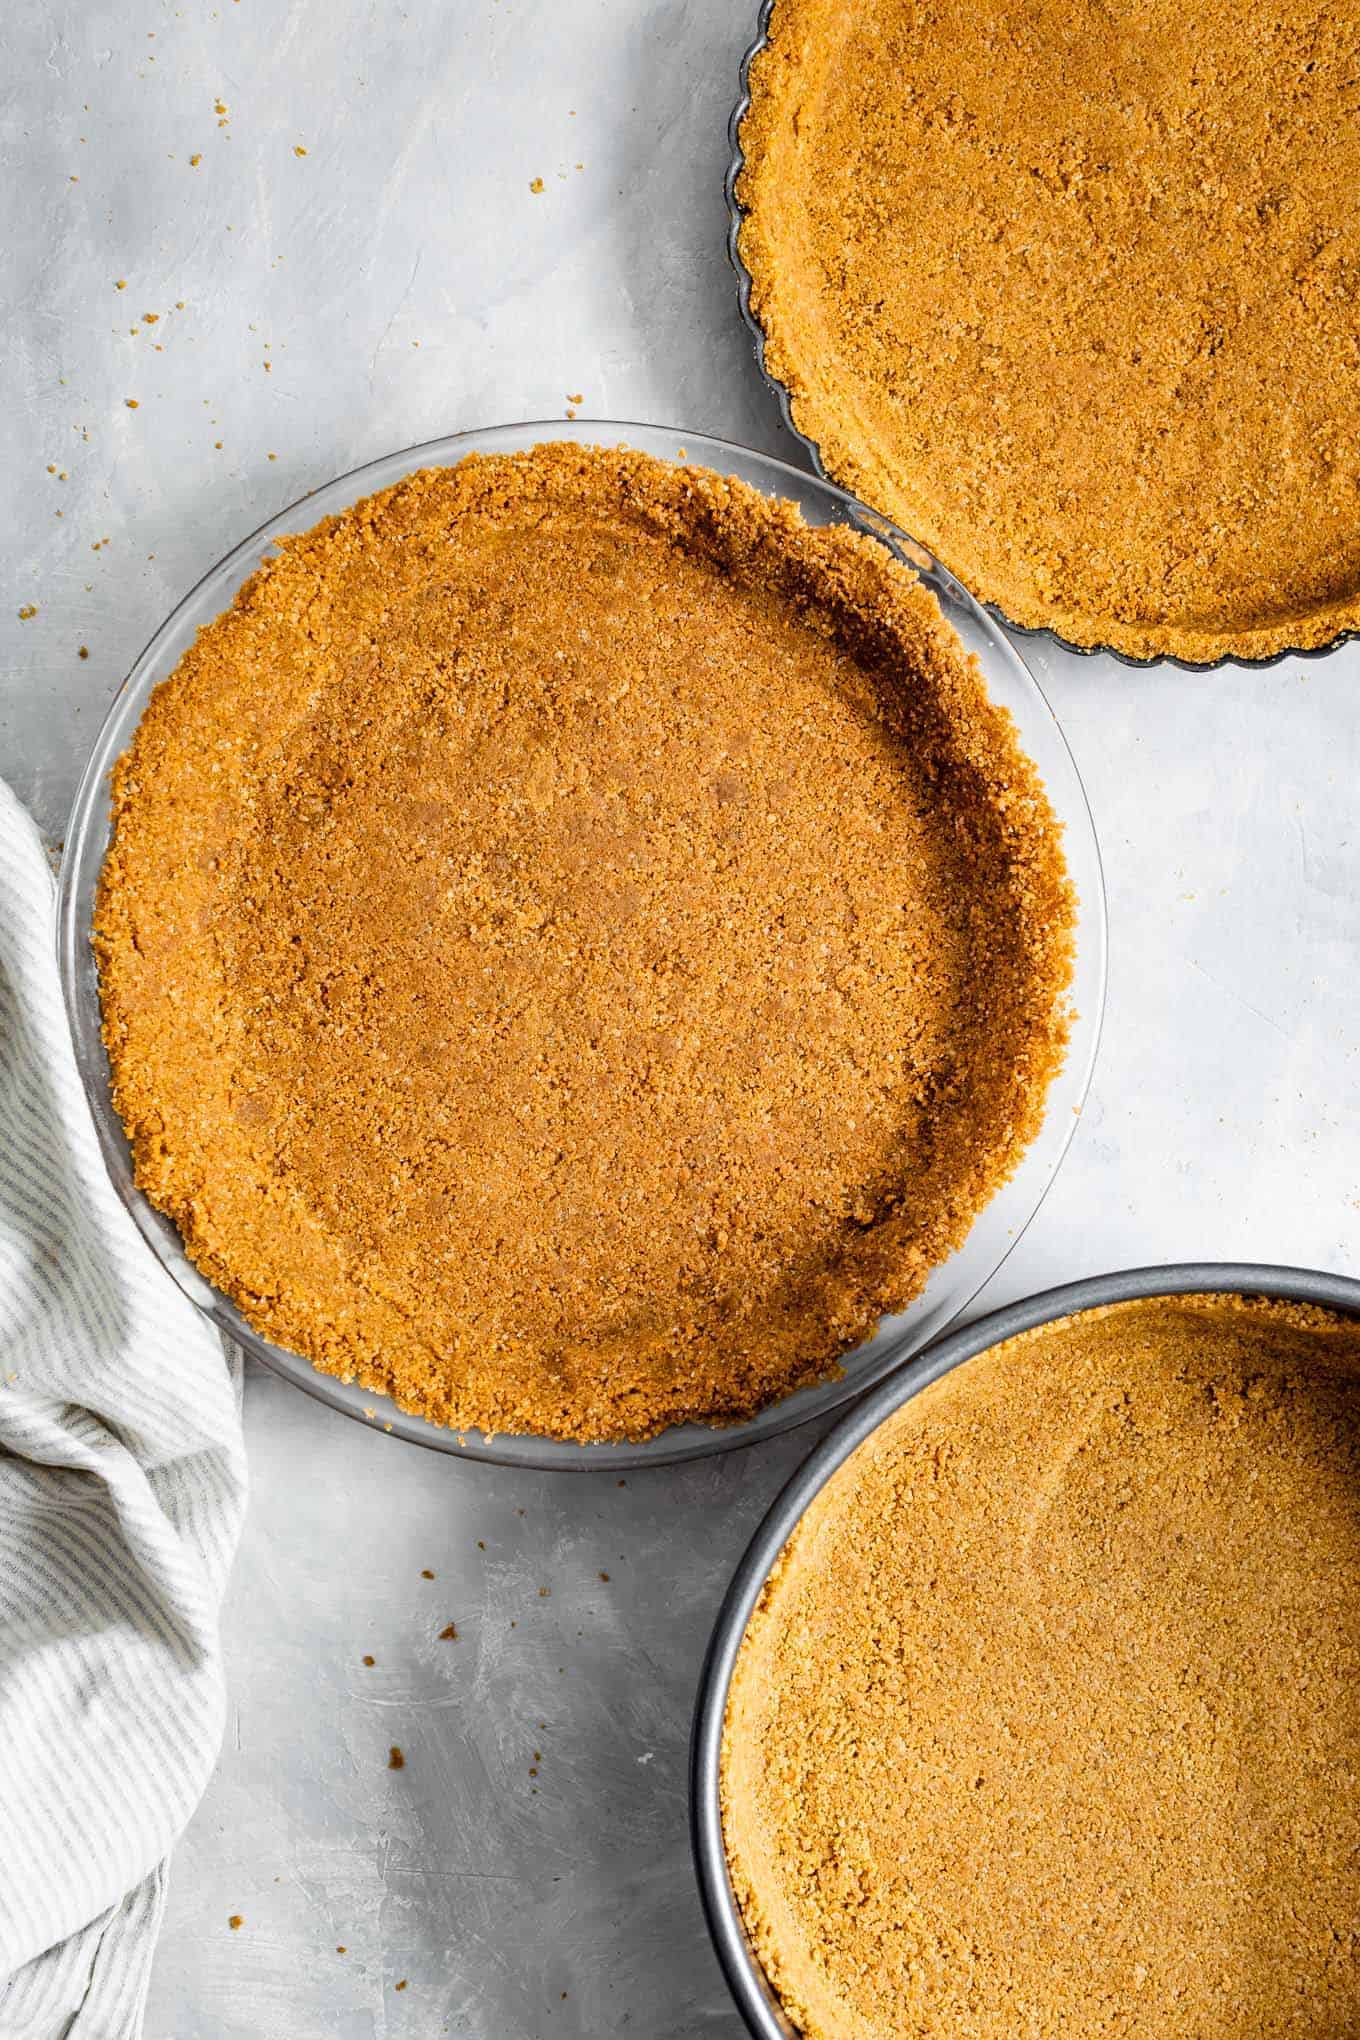
- Crush the gluten-free graham crackers. Use a food processor or a rolling pin over a bag of graham crackers to make gluten-free graham cracker crumbs.
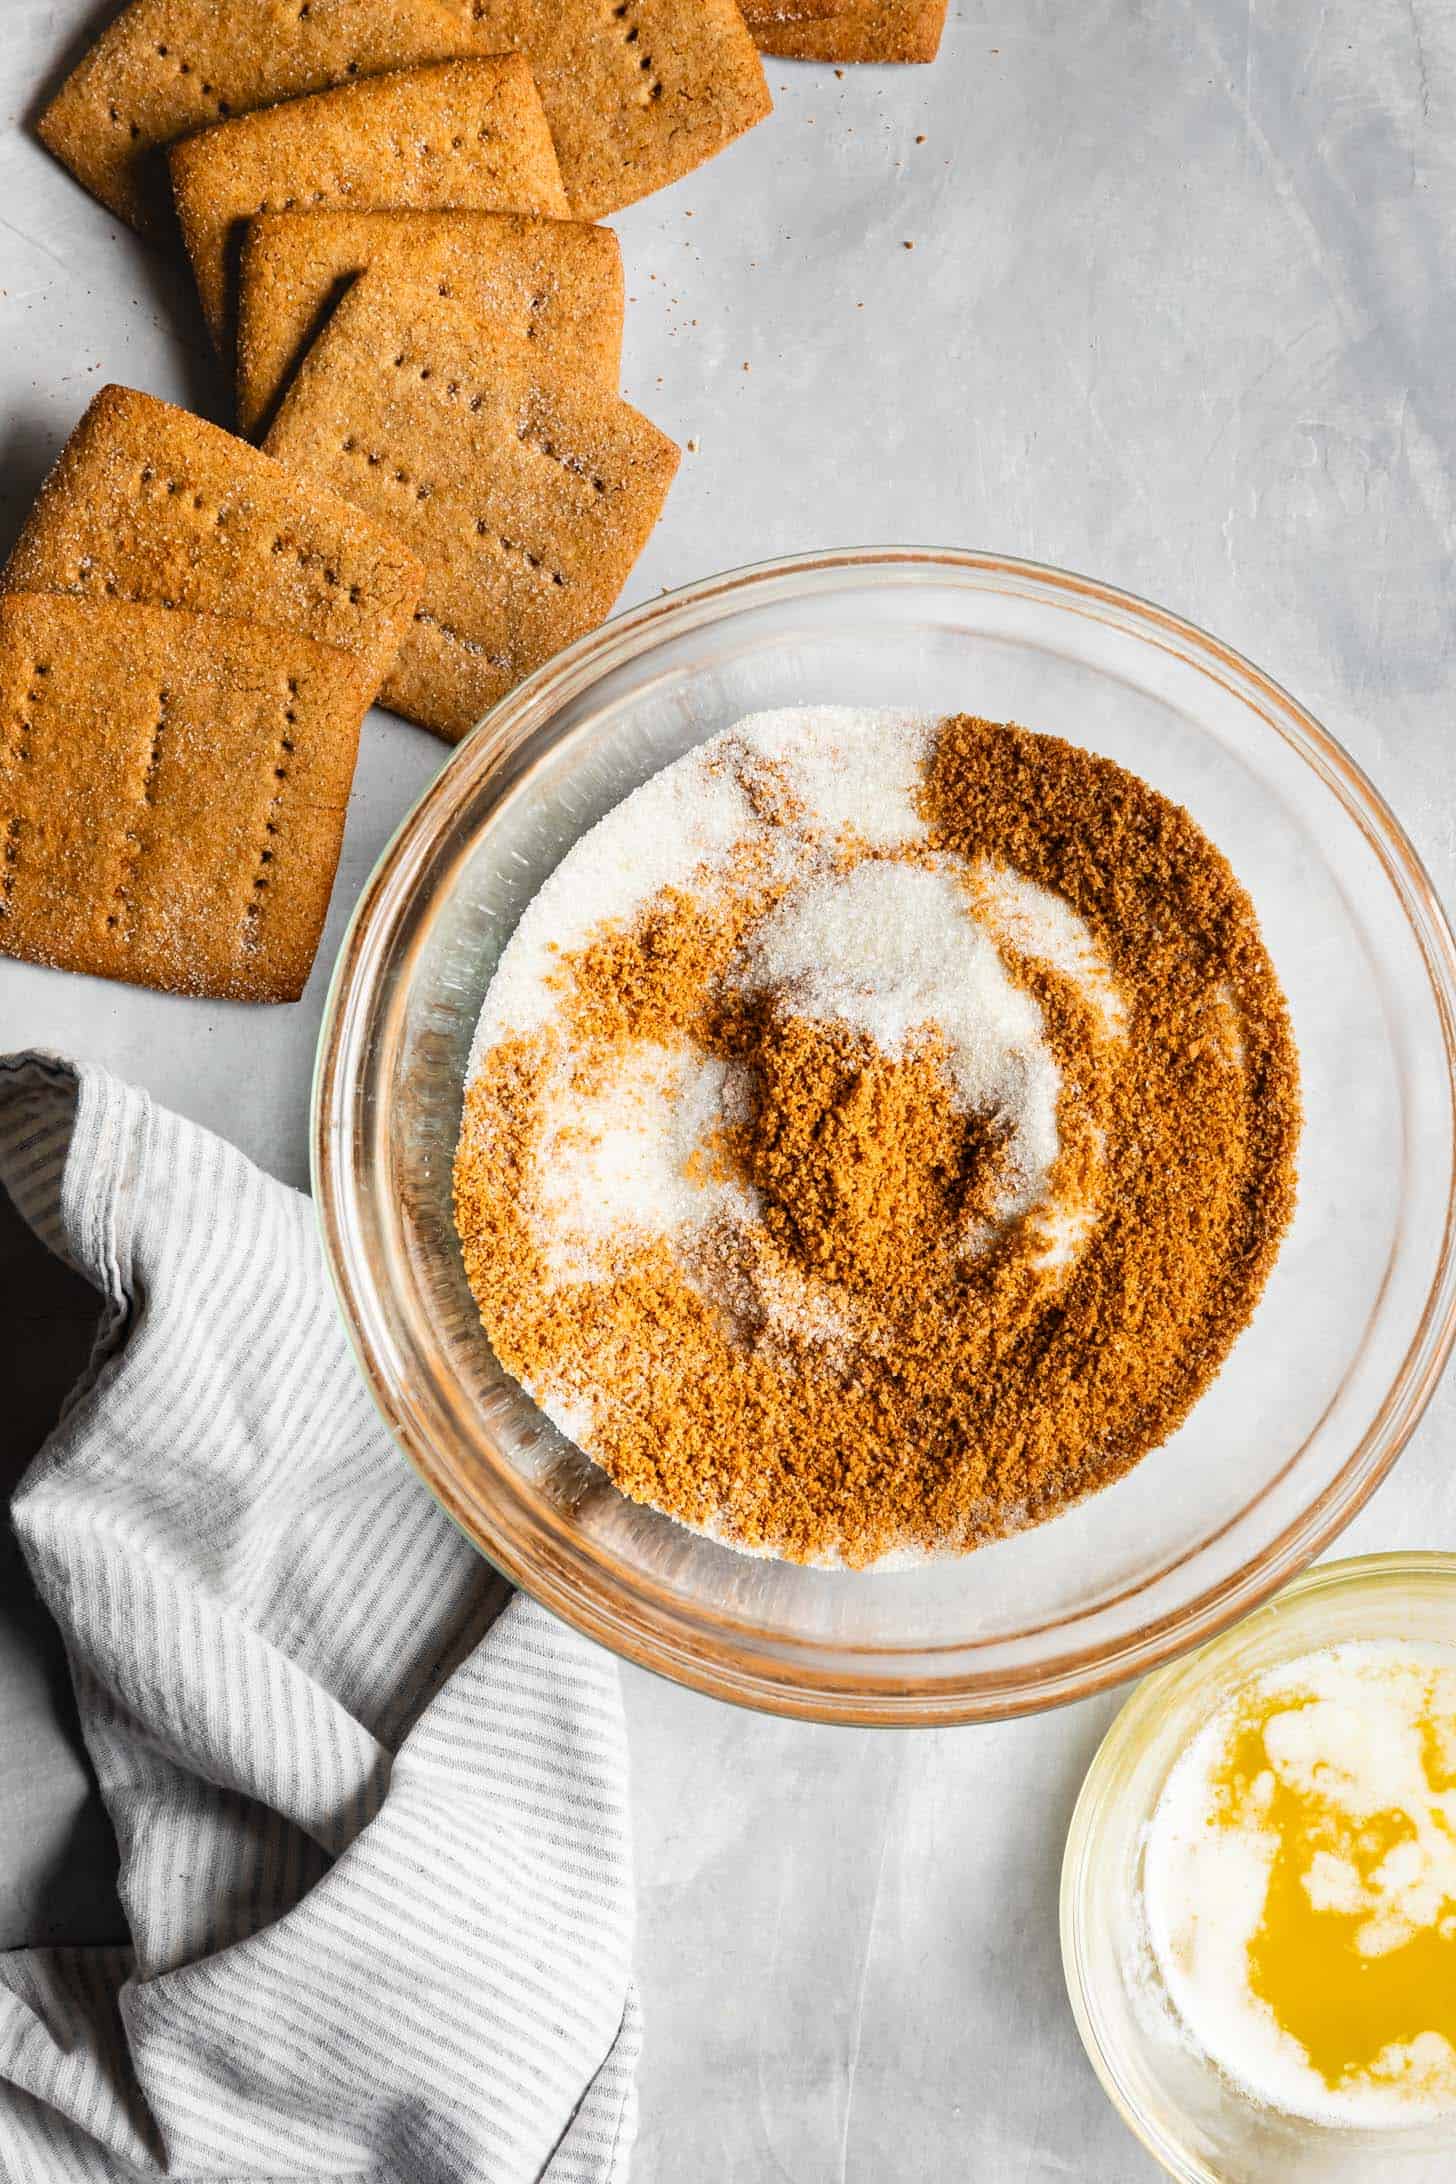
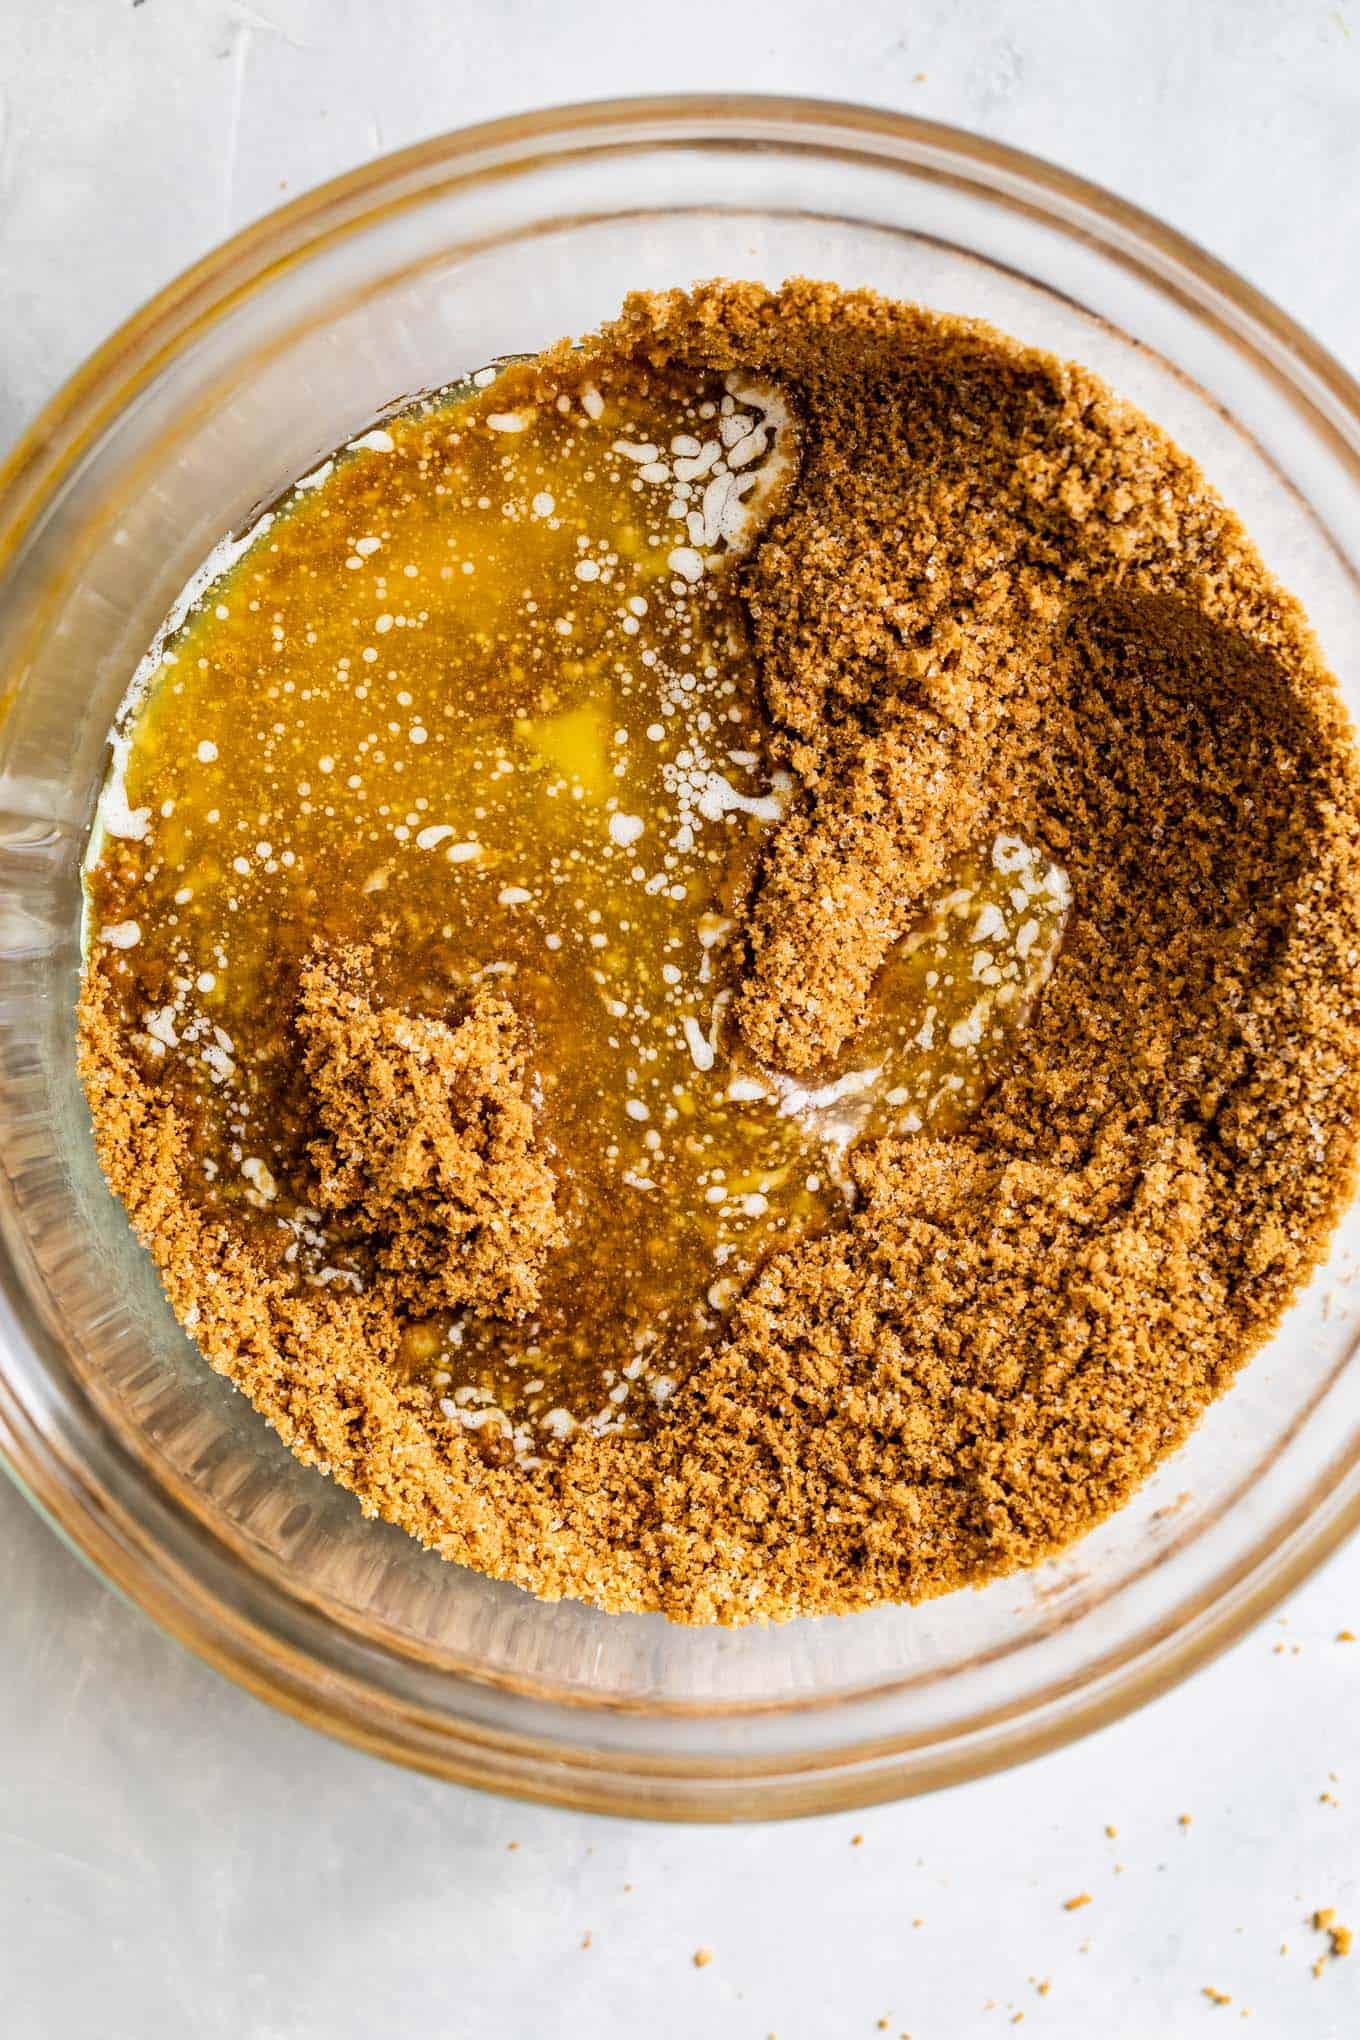
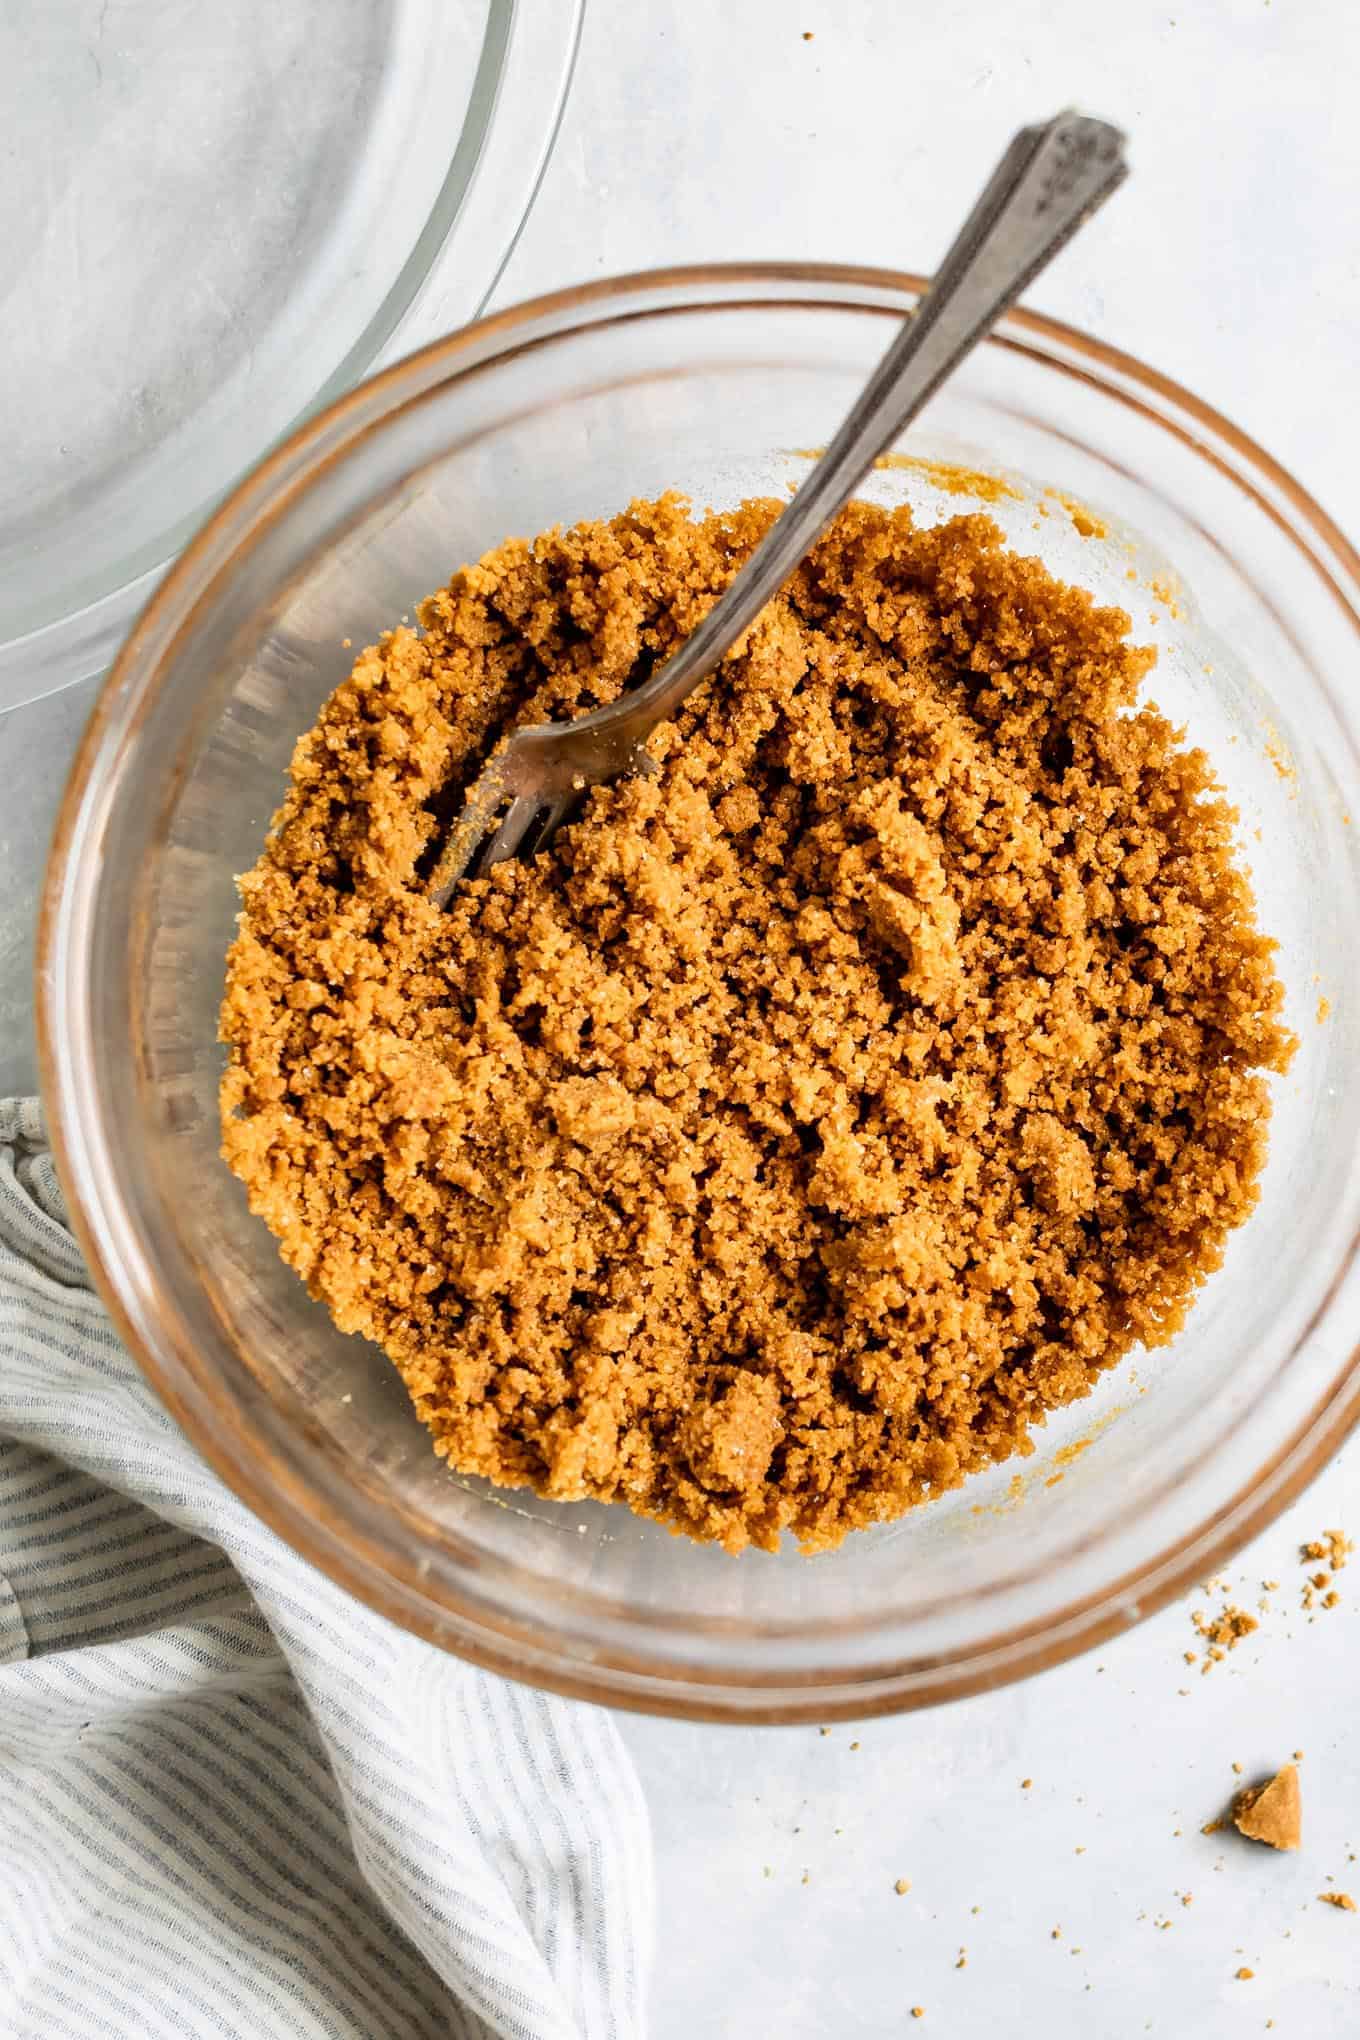
- Combine graham cracker crumbs, sugar, butter, and salt in a medium mixing bowl with a fork.
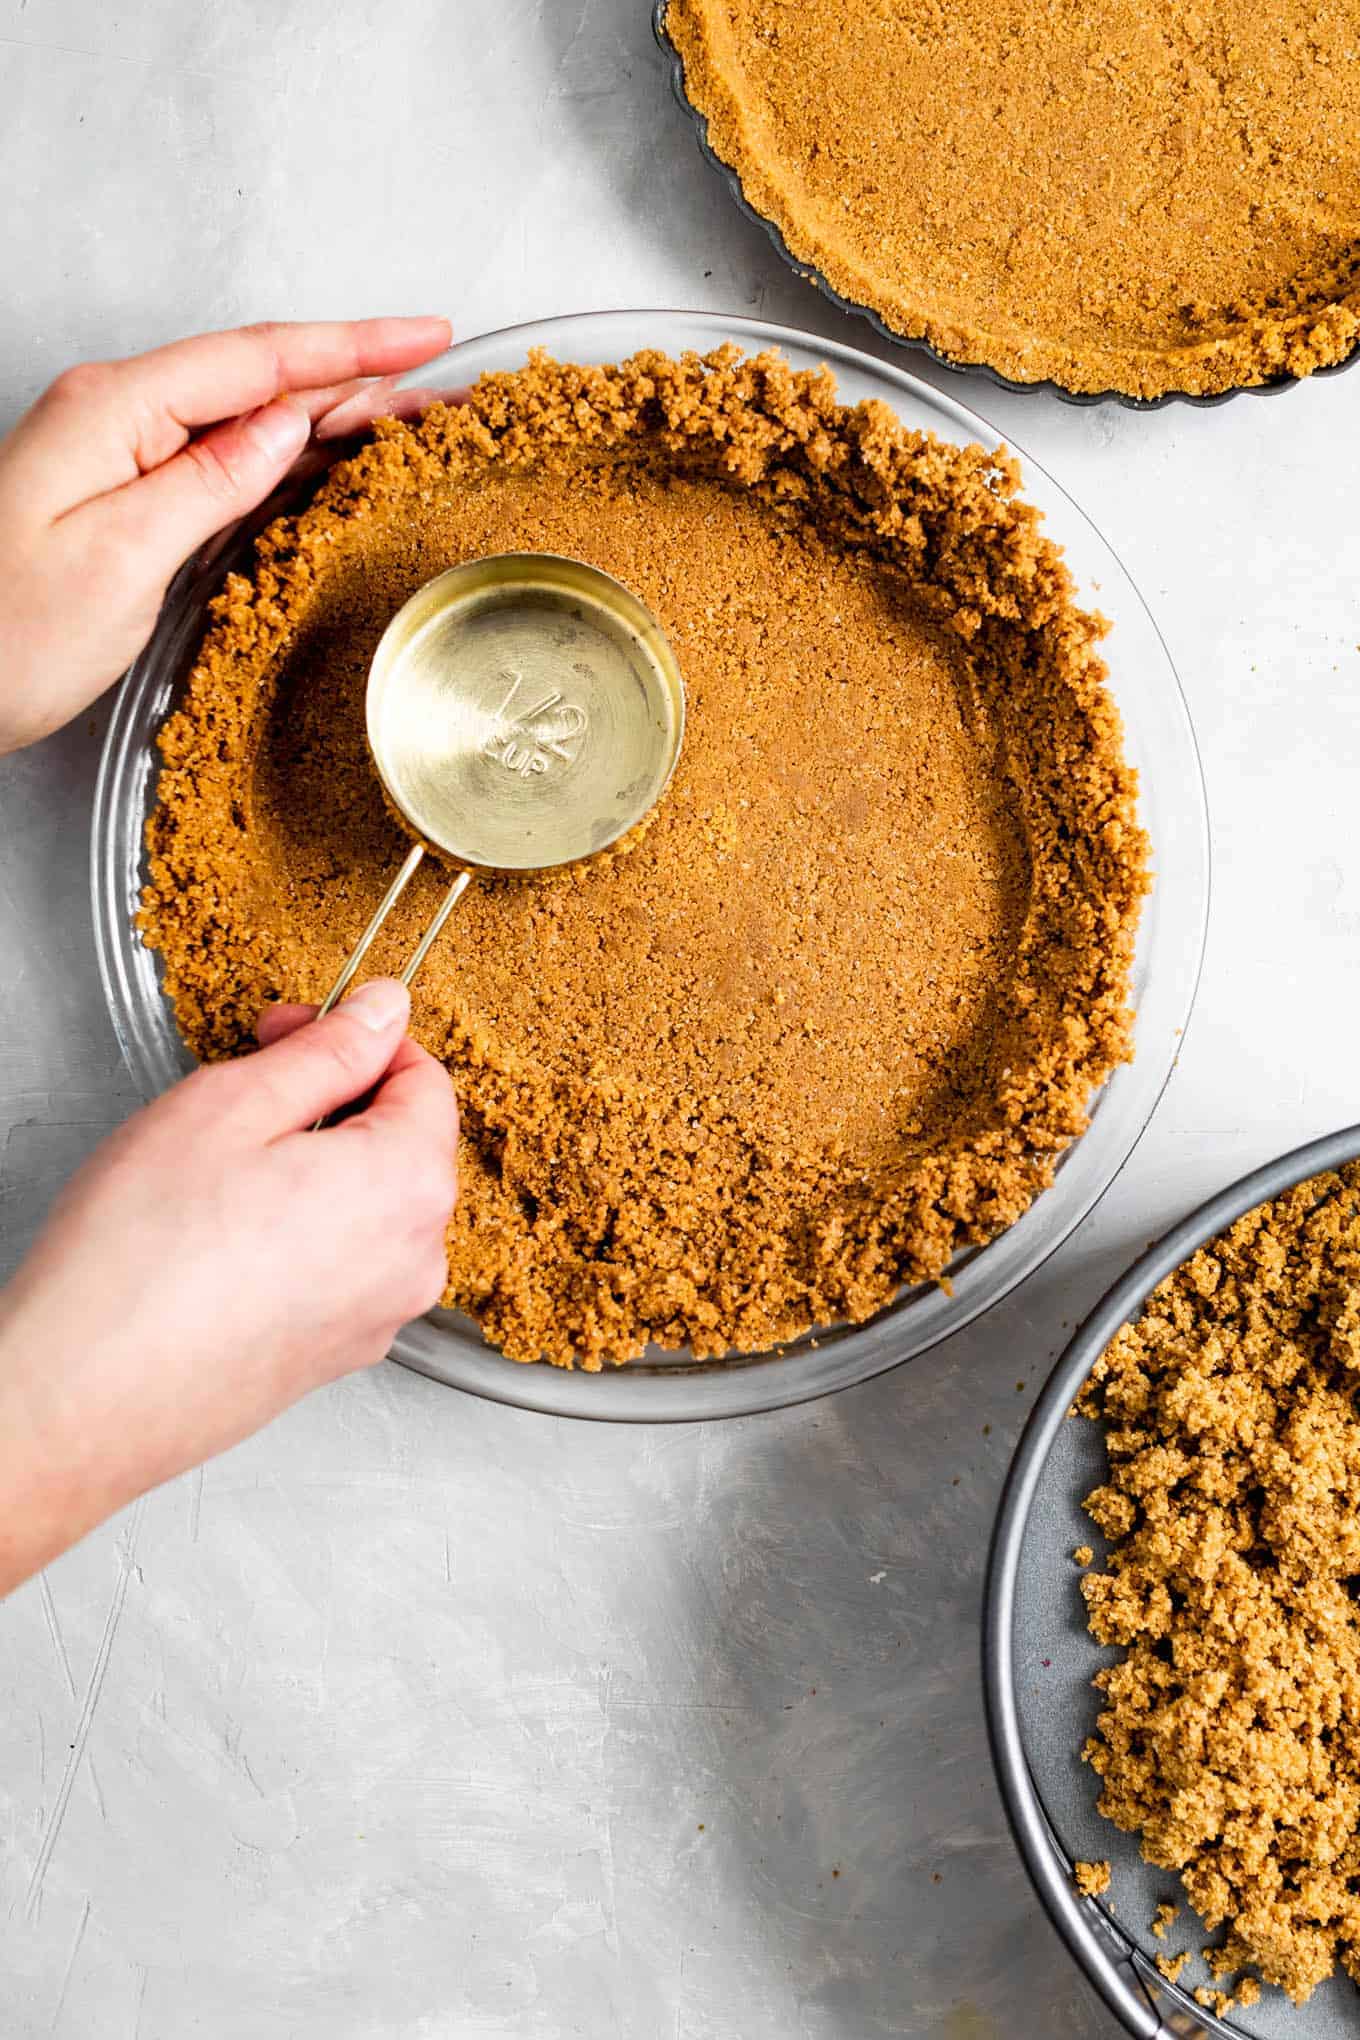
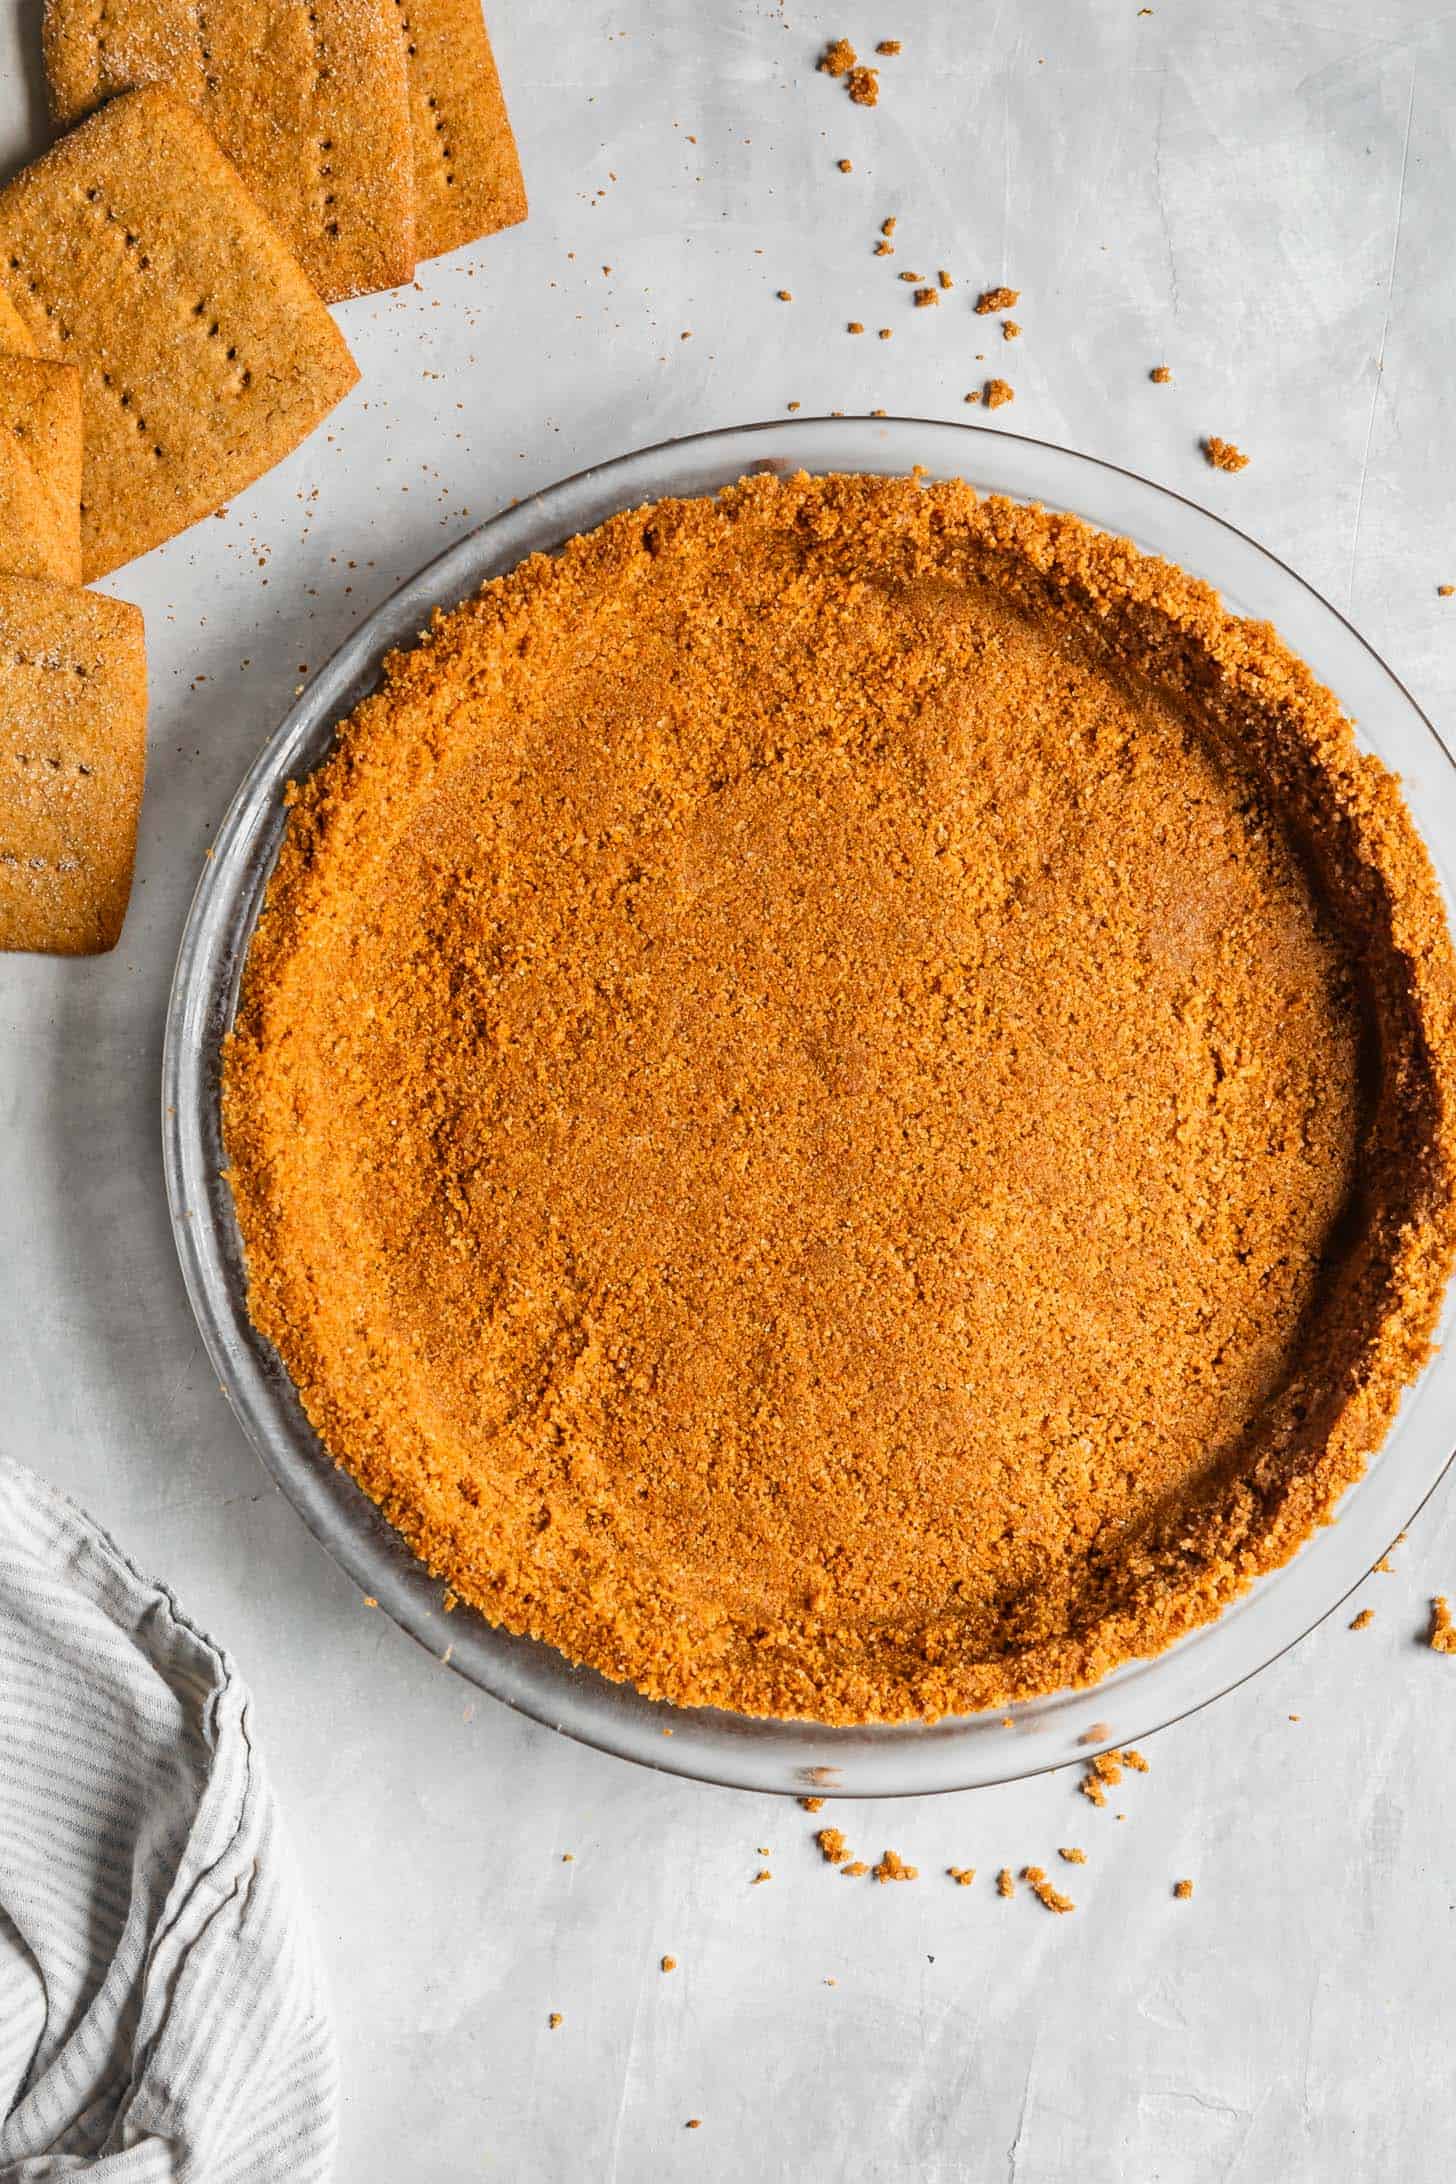
- Press the moistened graham cracker crumbs into your pie dish.
- Chill or bake then fill!
Gluten-Free Graham Crackers
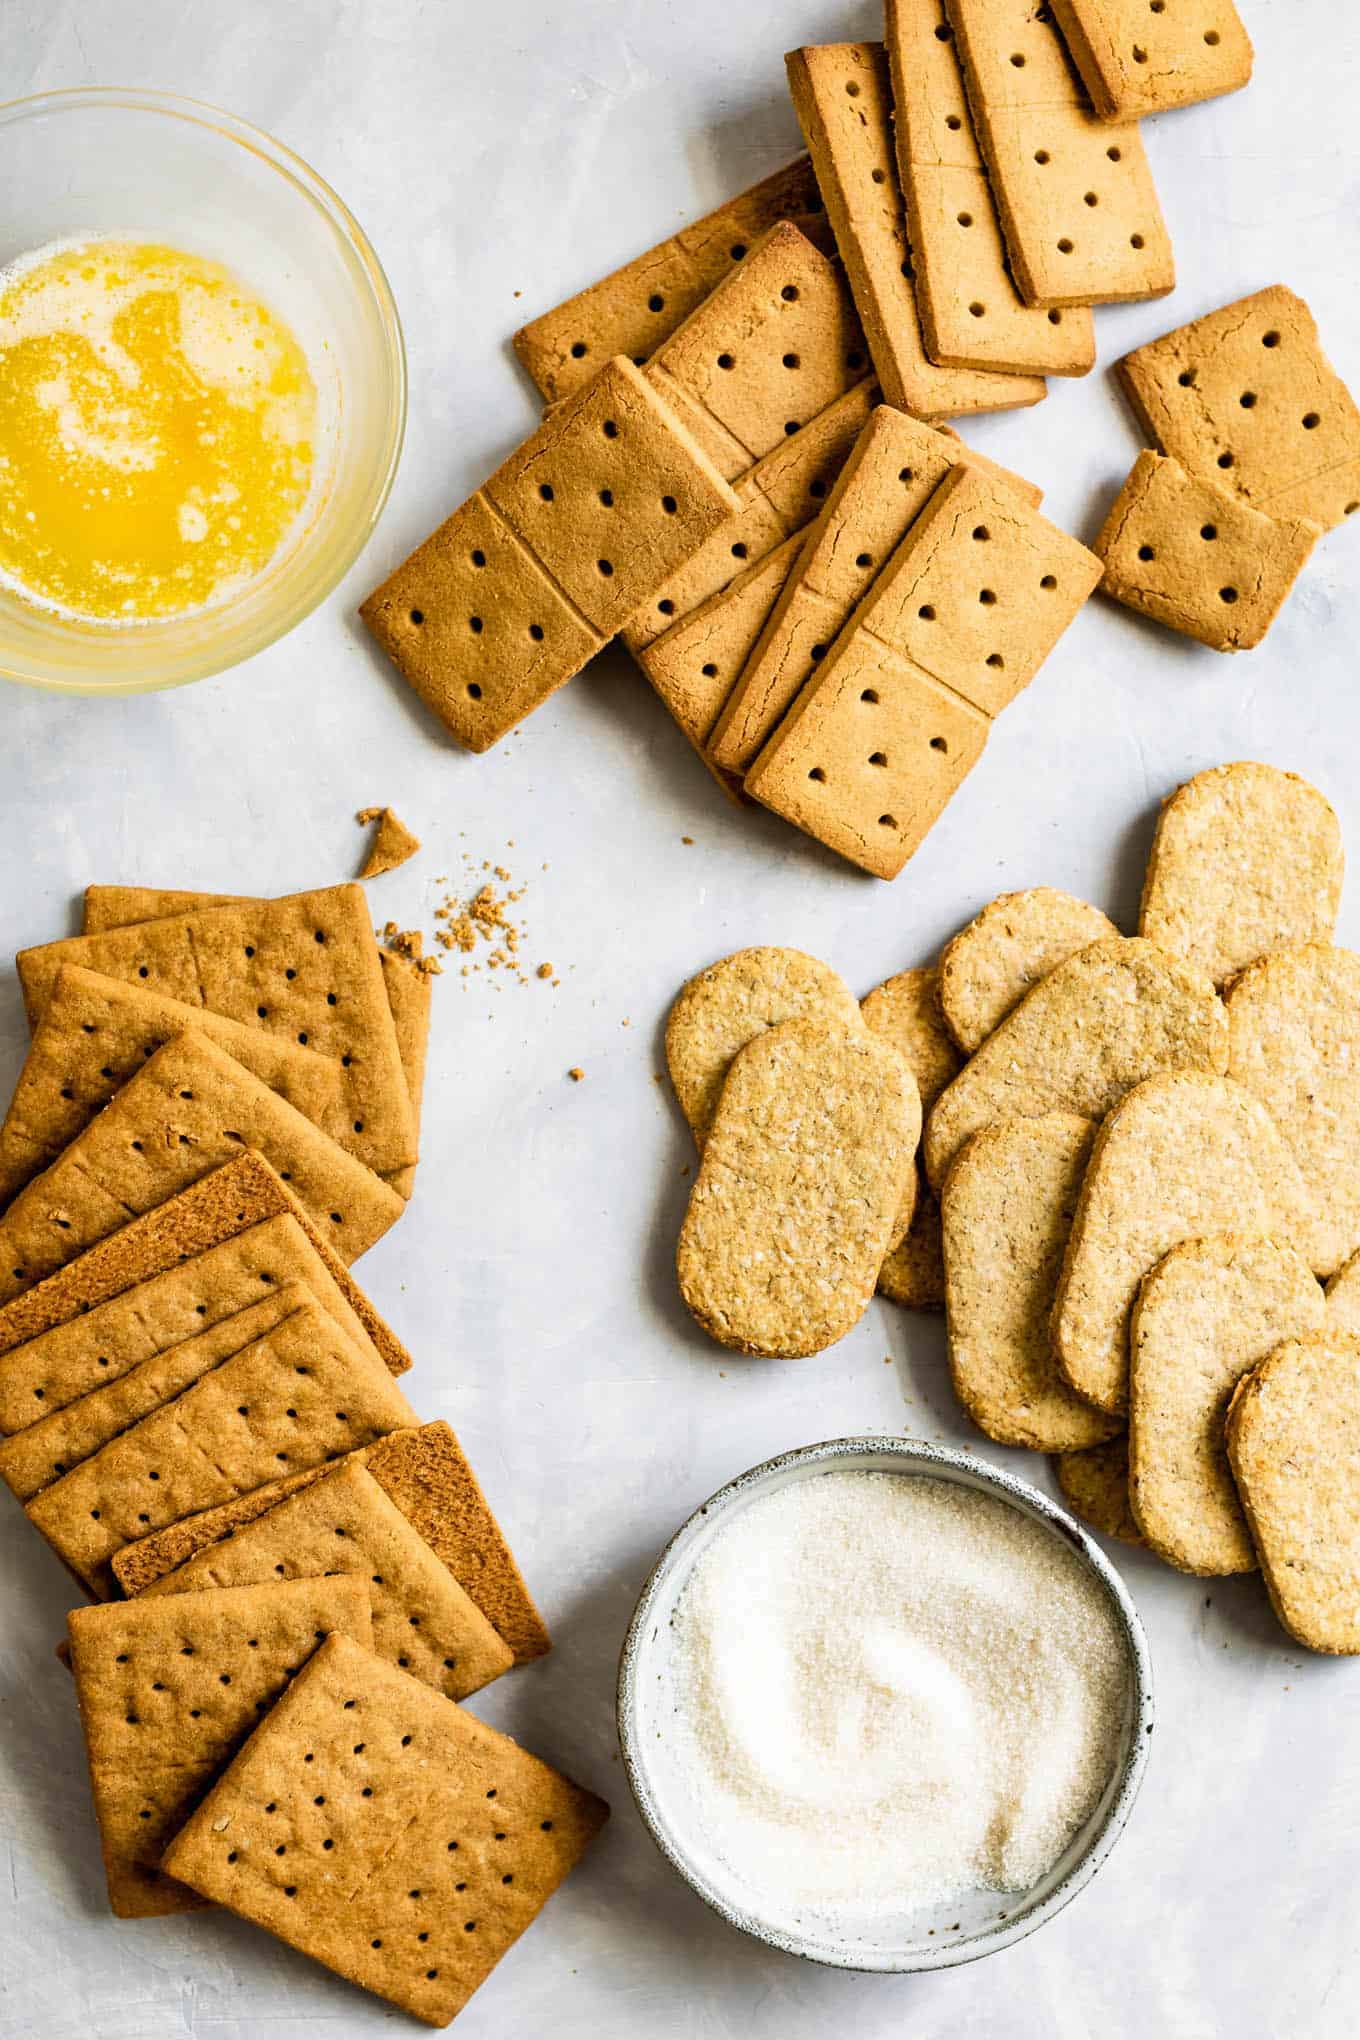
I've developed this recipe to work with any brand of gluten-free graham crackers, even homemade gluten-free graham crackers! Here I'm showing three different kinds of gluten-free graham crackers - Pamela's, Kinnikinnick, and Nairn's. Below you can see the homamde gluten-free graham crackers in action. Use whichever brand you can get your hands on or make your own gluten-free graham crackers. See my substitution options below.
Many recipes for traditional graham crackers will tell you how many graham cracker sheets to use, but in the case of gluten-free graham crackers, not all kinds are the same. For a fool-proof gluten-free graham cracker crust, measure the graham crackers by weight before crushing them up so you know exactly how many to use.
Tips to perfect gluten-free graham cracker crust
While this recipe is super easy, here are a few tricks to making it even easier.
Be patient
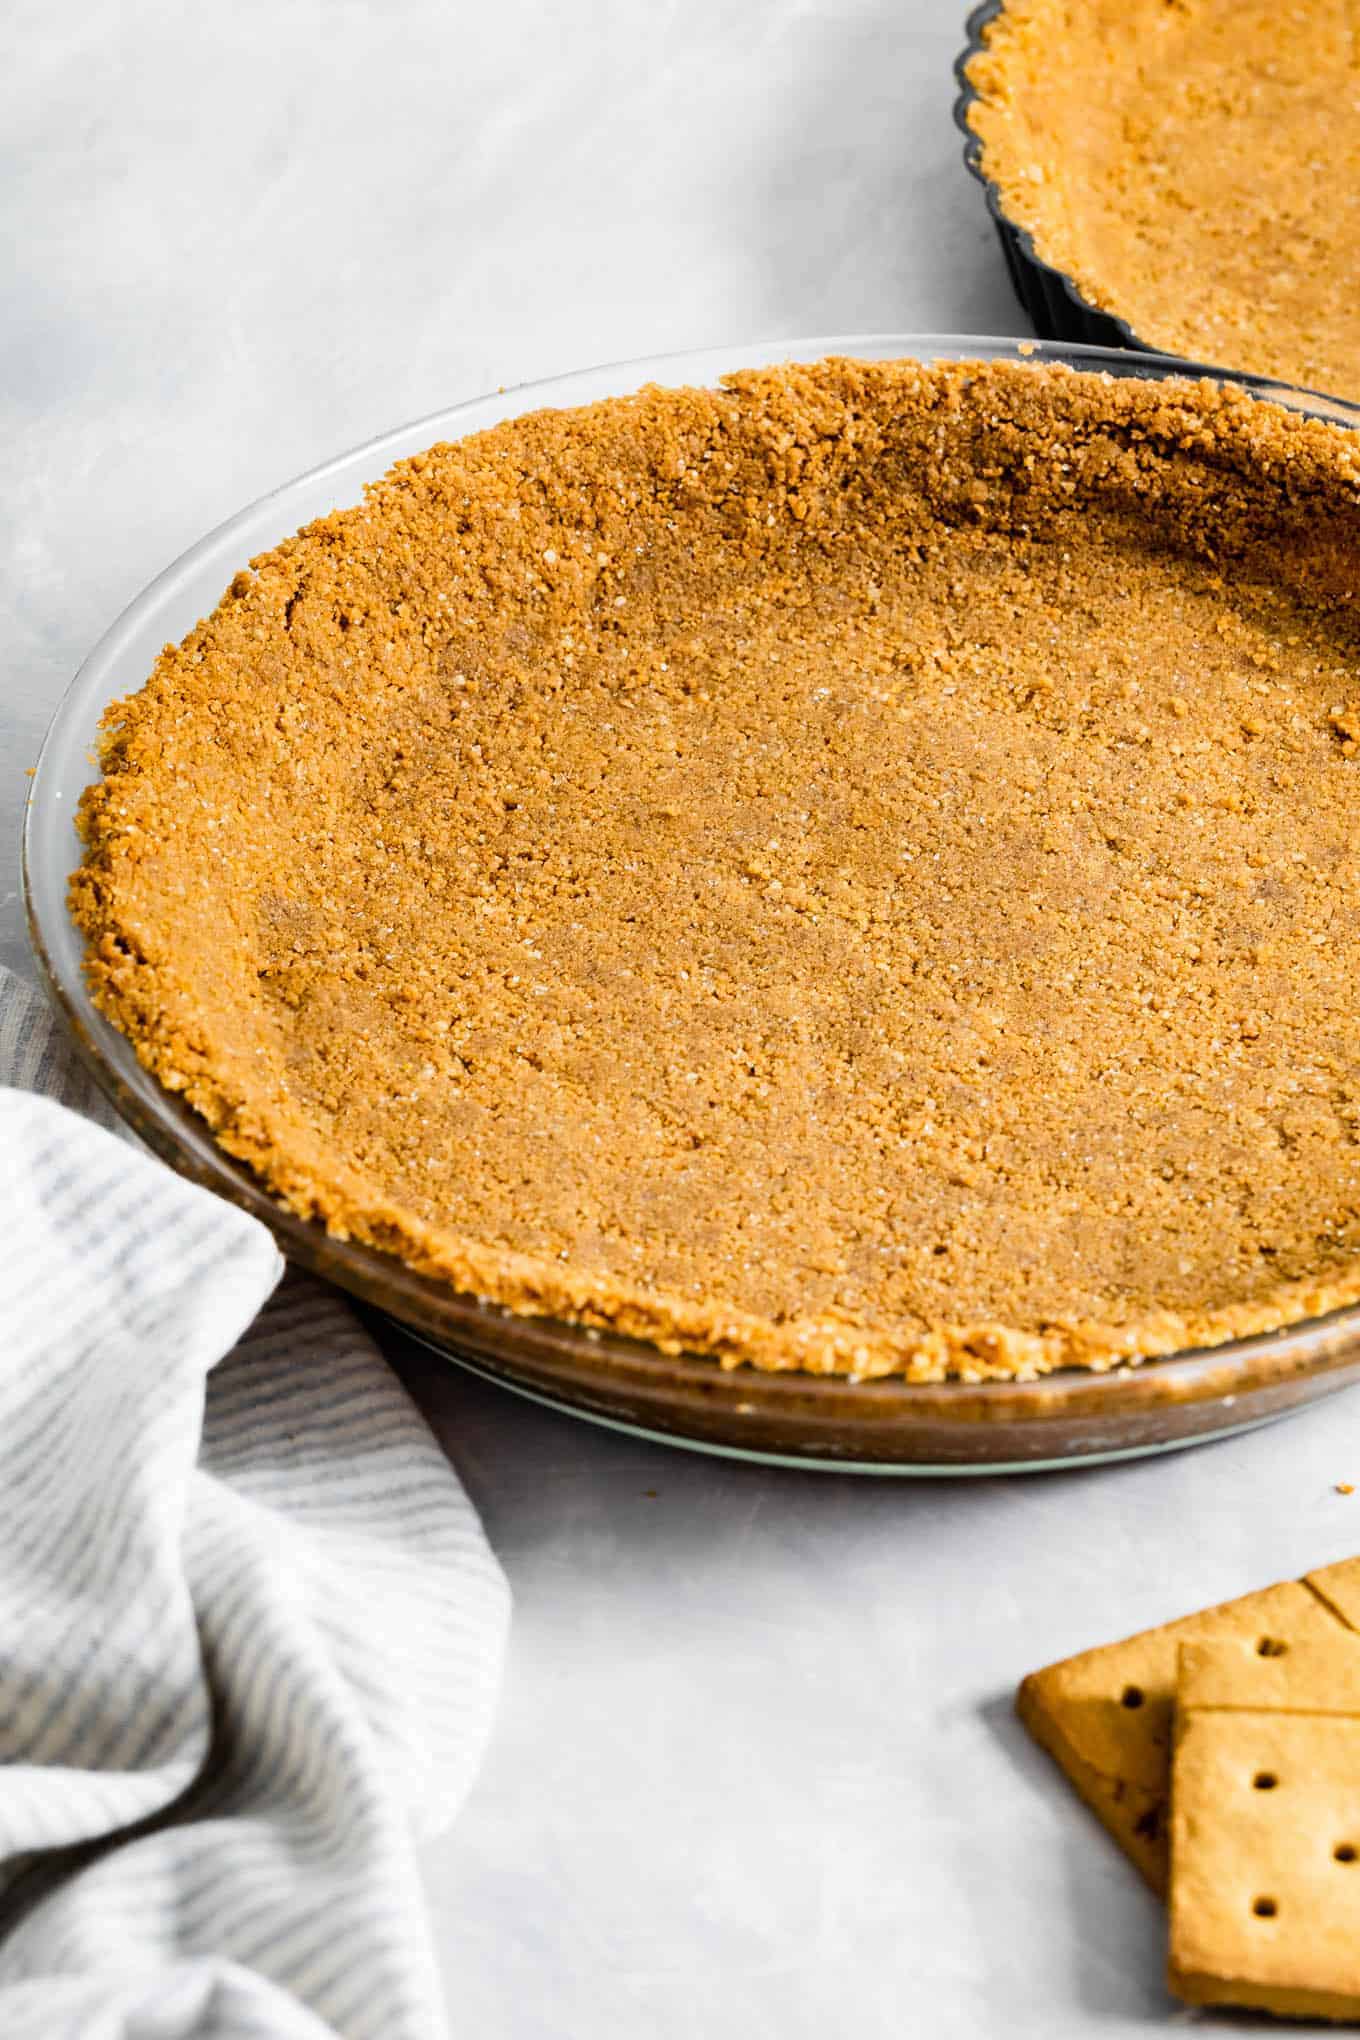
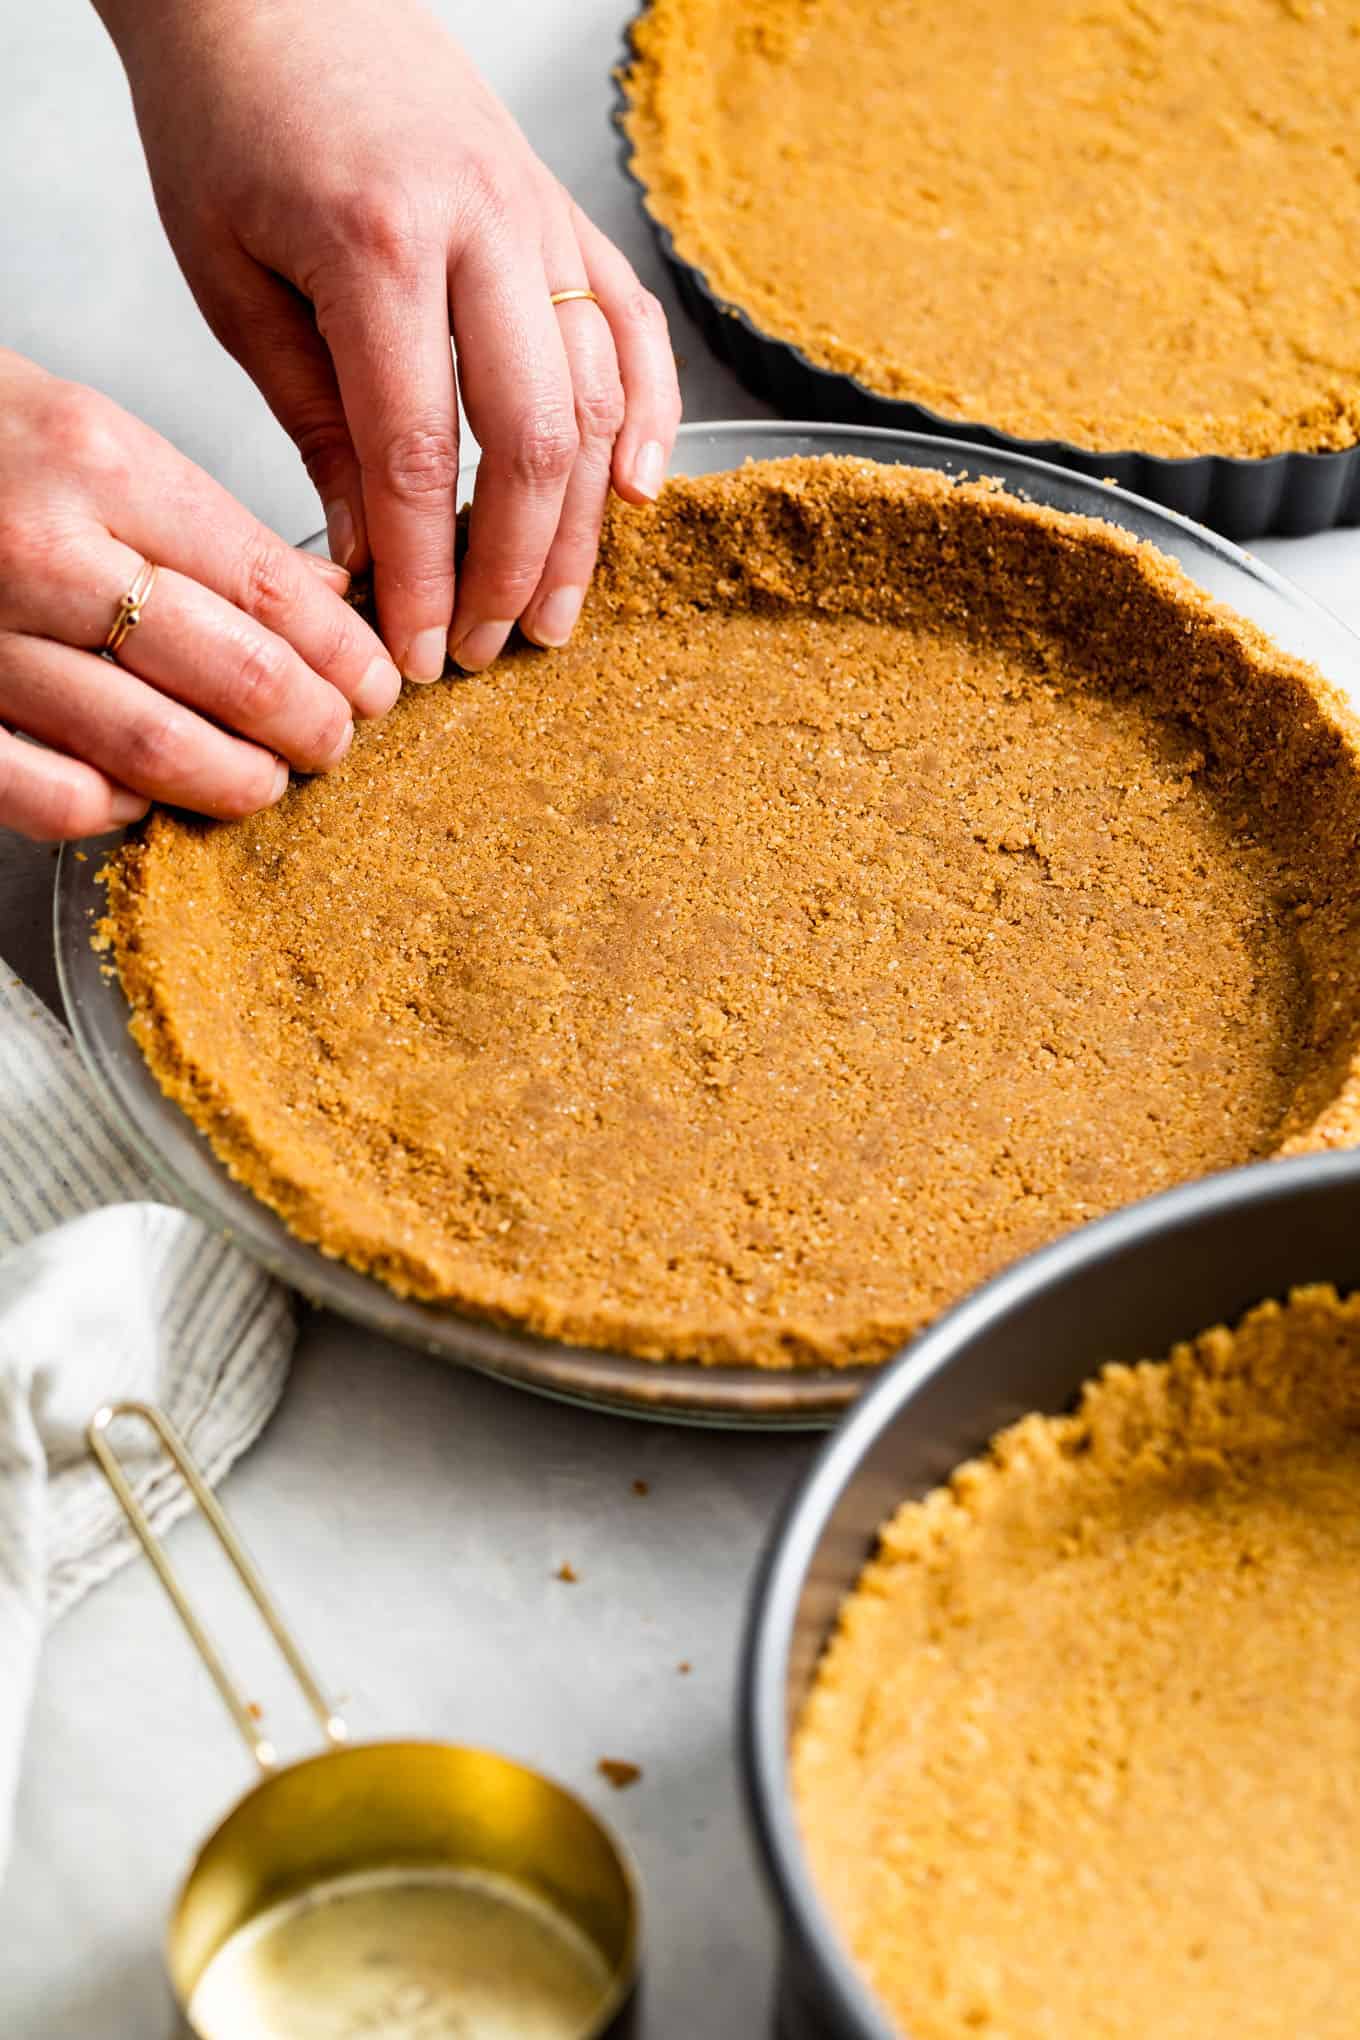
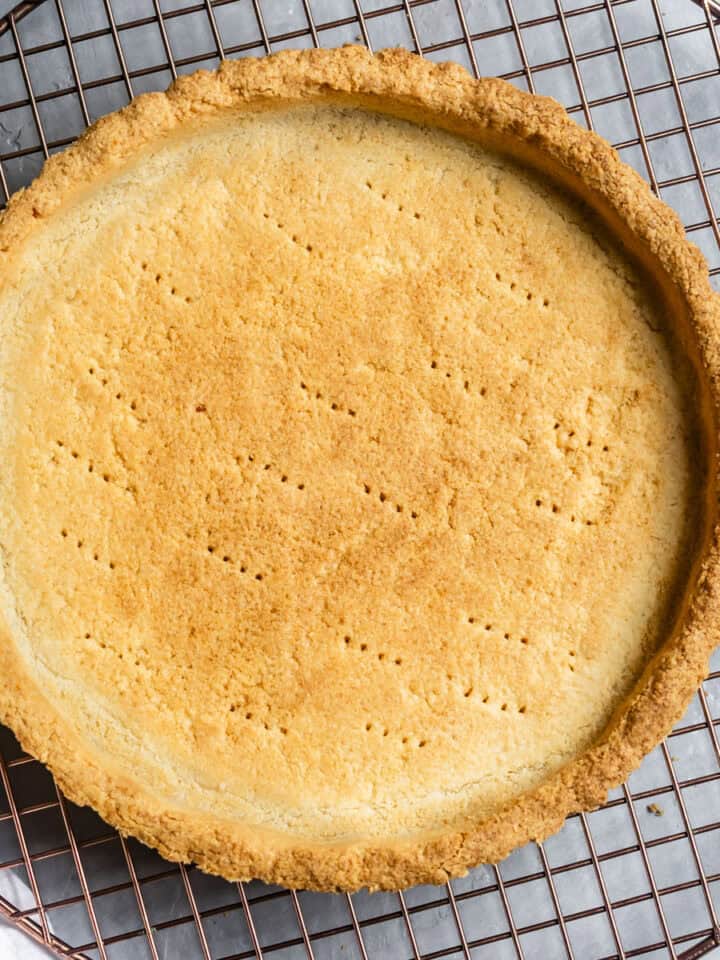
Unlike a traditional pie crust that holds together immediately, a graham cracker crust is crumbly and gets its structure from baking or chilling. It should not take you more than 5-10 minutes to press the crust into the pan, but if you try to do so hastily, you might get frustrated as the sandy crumbs shift. Instead, take your time when pressing the crust into the pie dish.
Pack down Crumbs with A measuring cup
Whether you're baking the crust or going the no-bake route, having a firmly packed crust will make it easier to make clean slices that don't crumble against the knife.
Use a flat-bottomed measuring cup to firmly pack the crumbs down into a layer on the bottom of the baking dish or pan, being sure to save some of the crumbs along the edges.
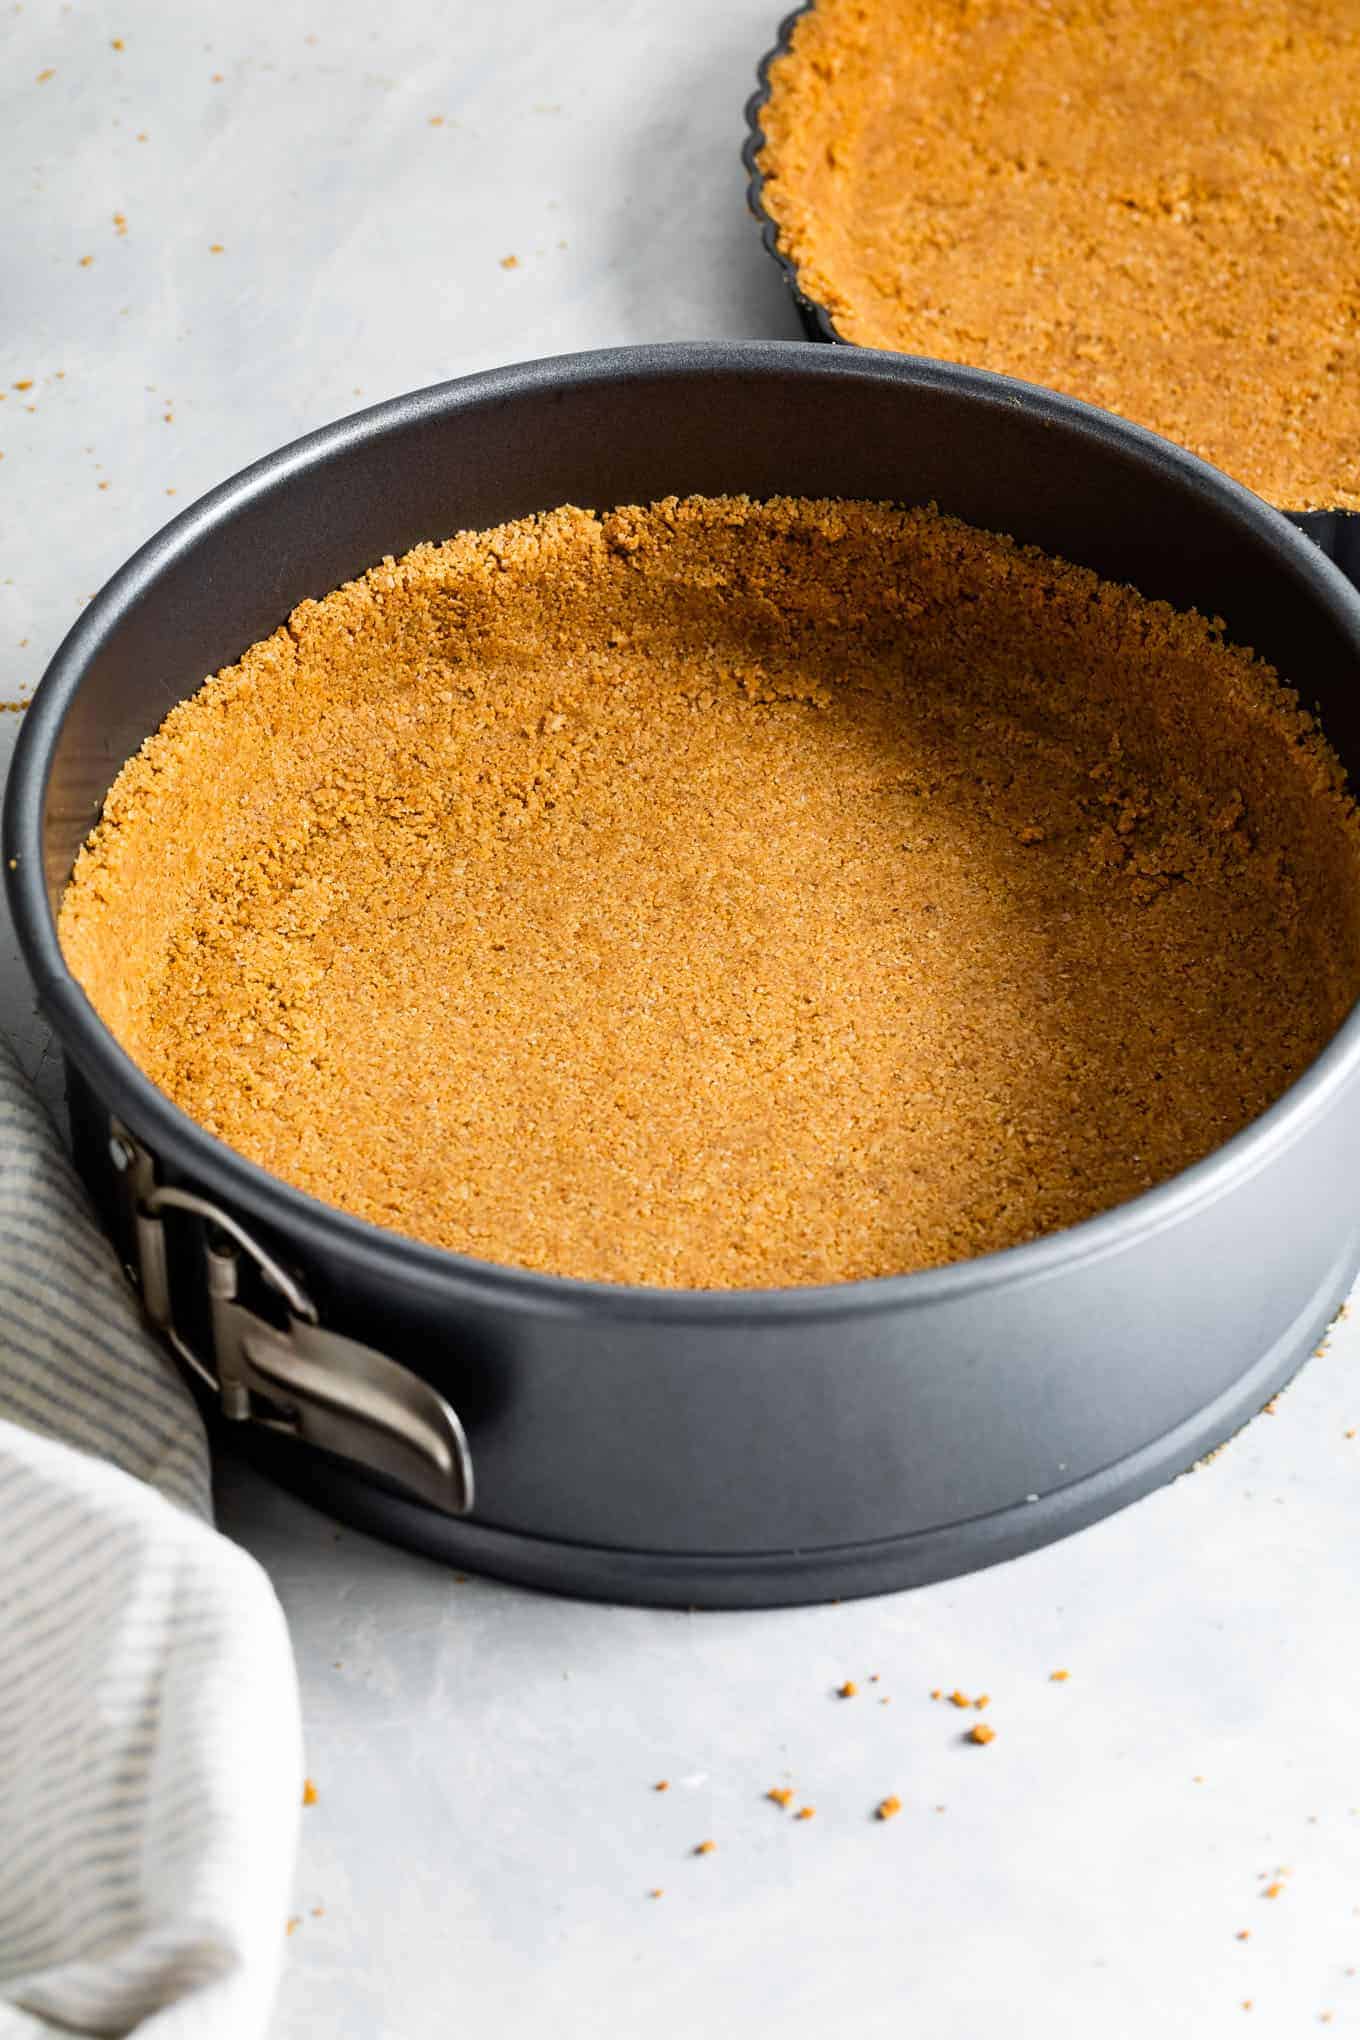
If you're making a graham cracker crust without sides, such as using an 8x8 baking dish for cheesecake bars, skip the sides and pack all the crumbs into the bottom.
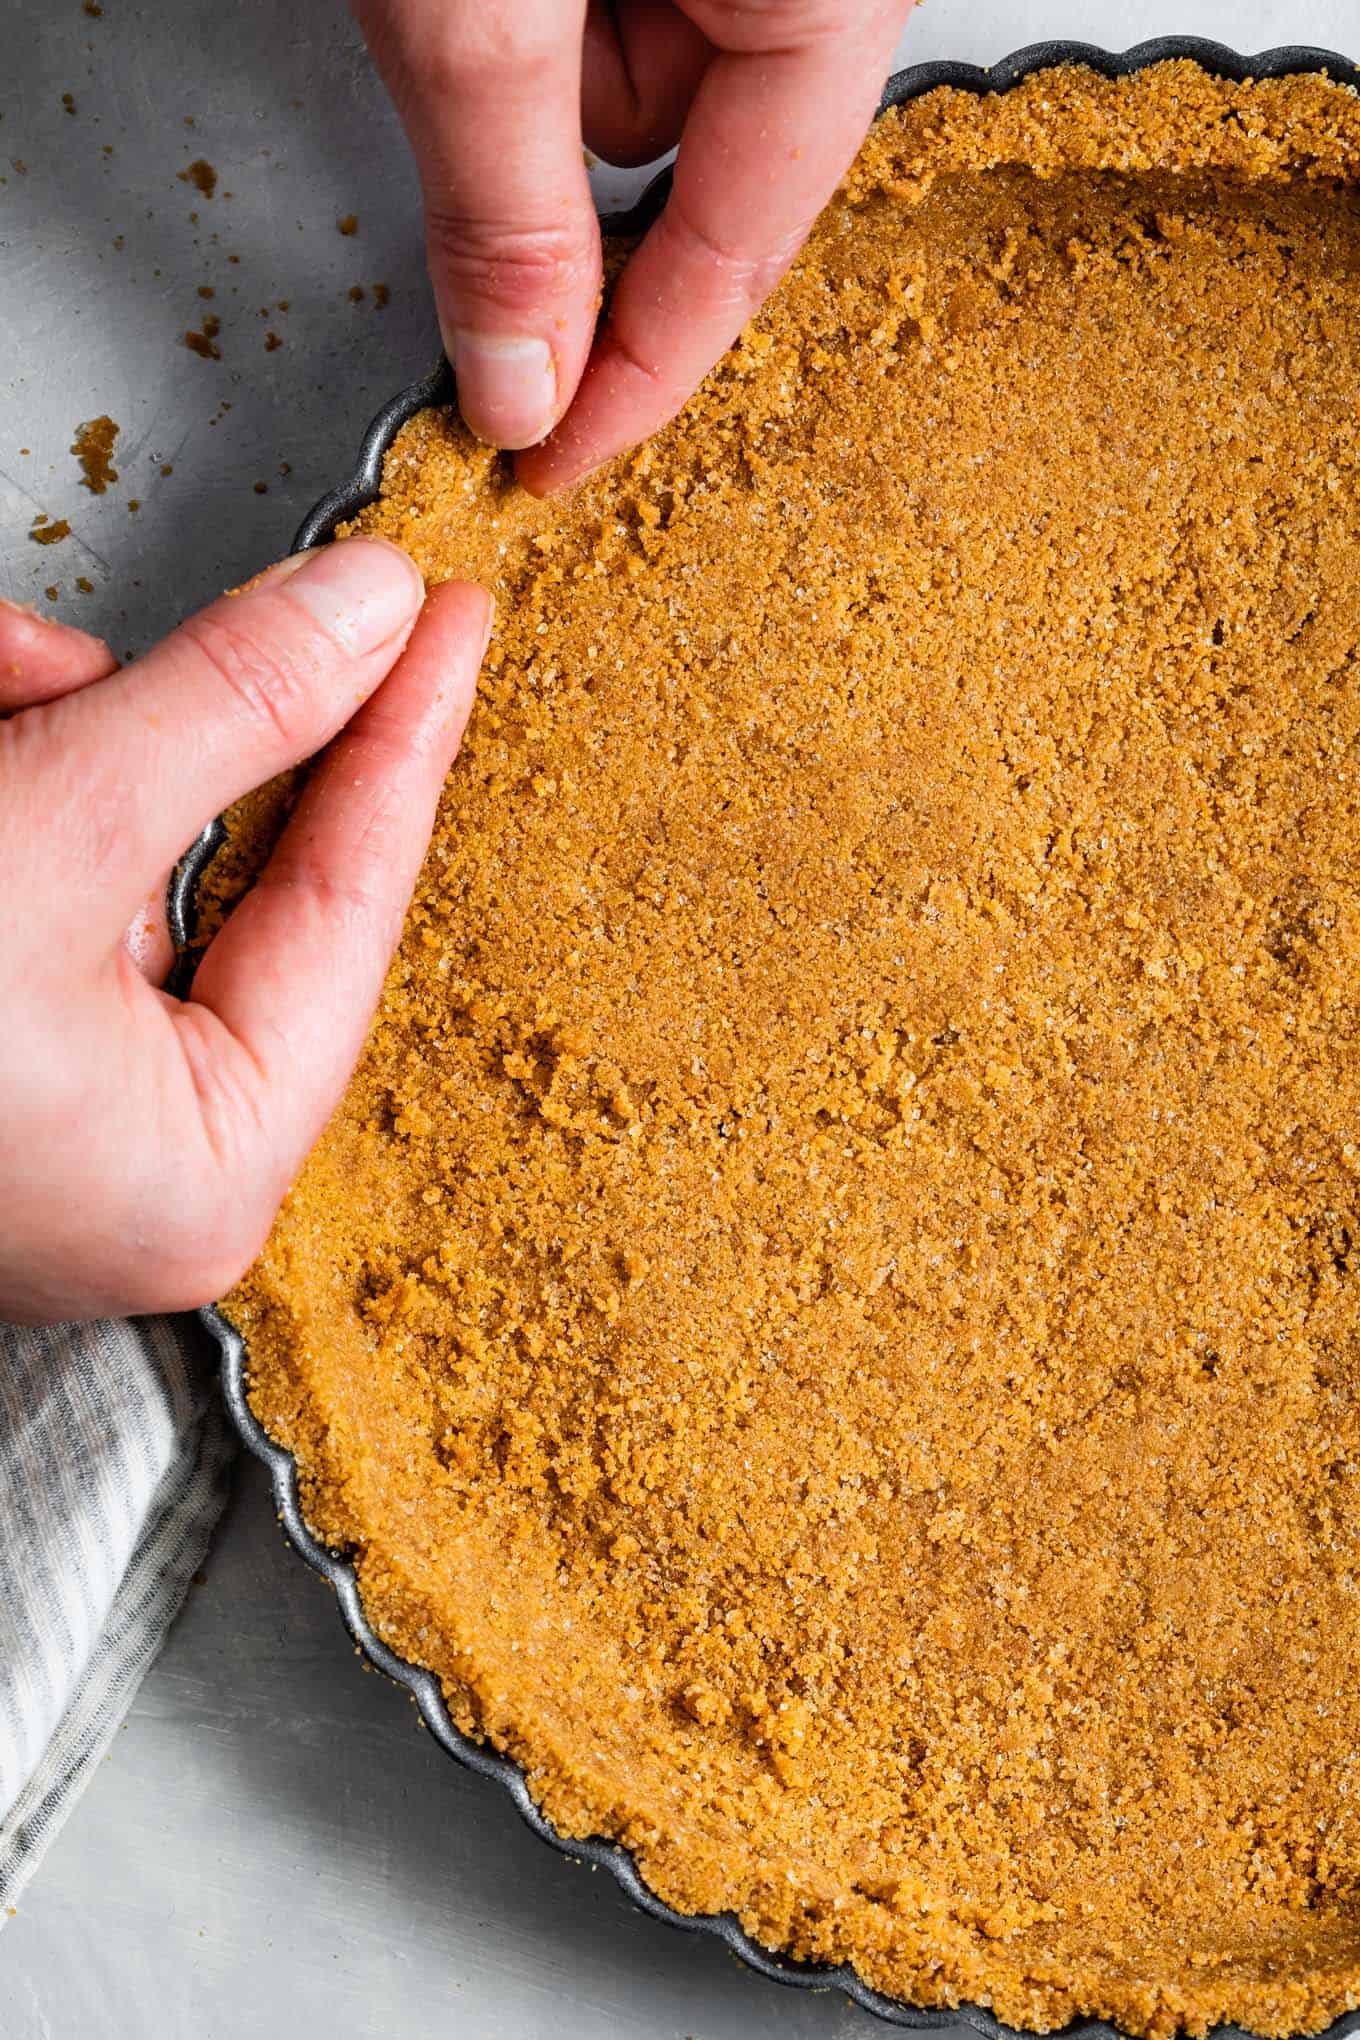
Pack down the sides with fingertips
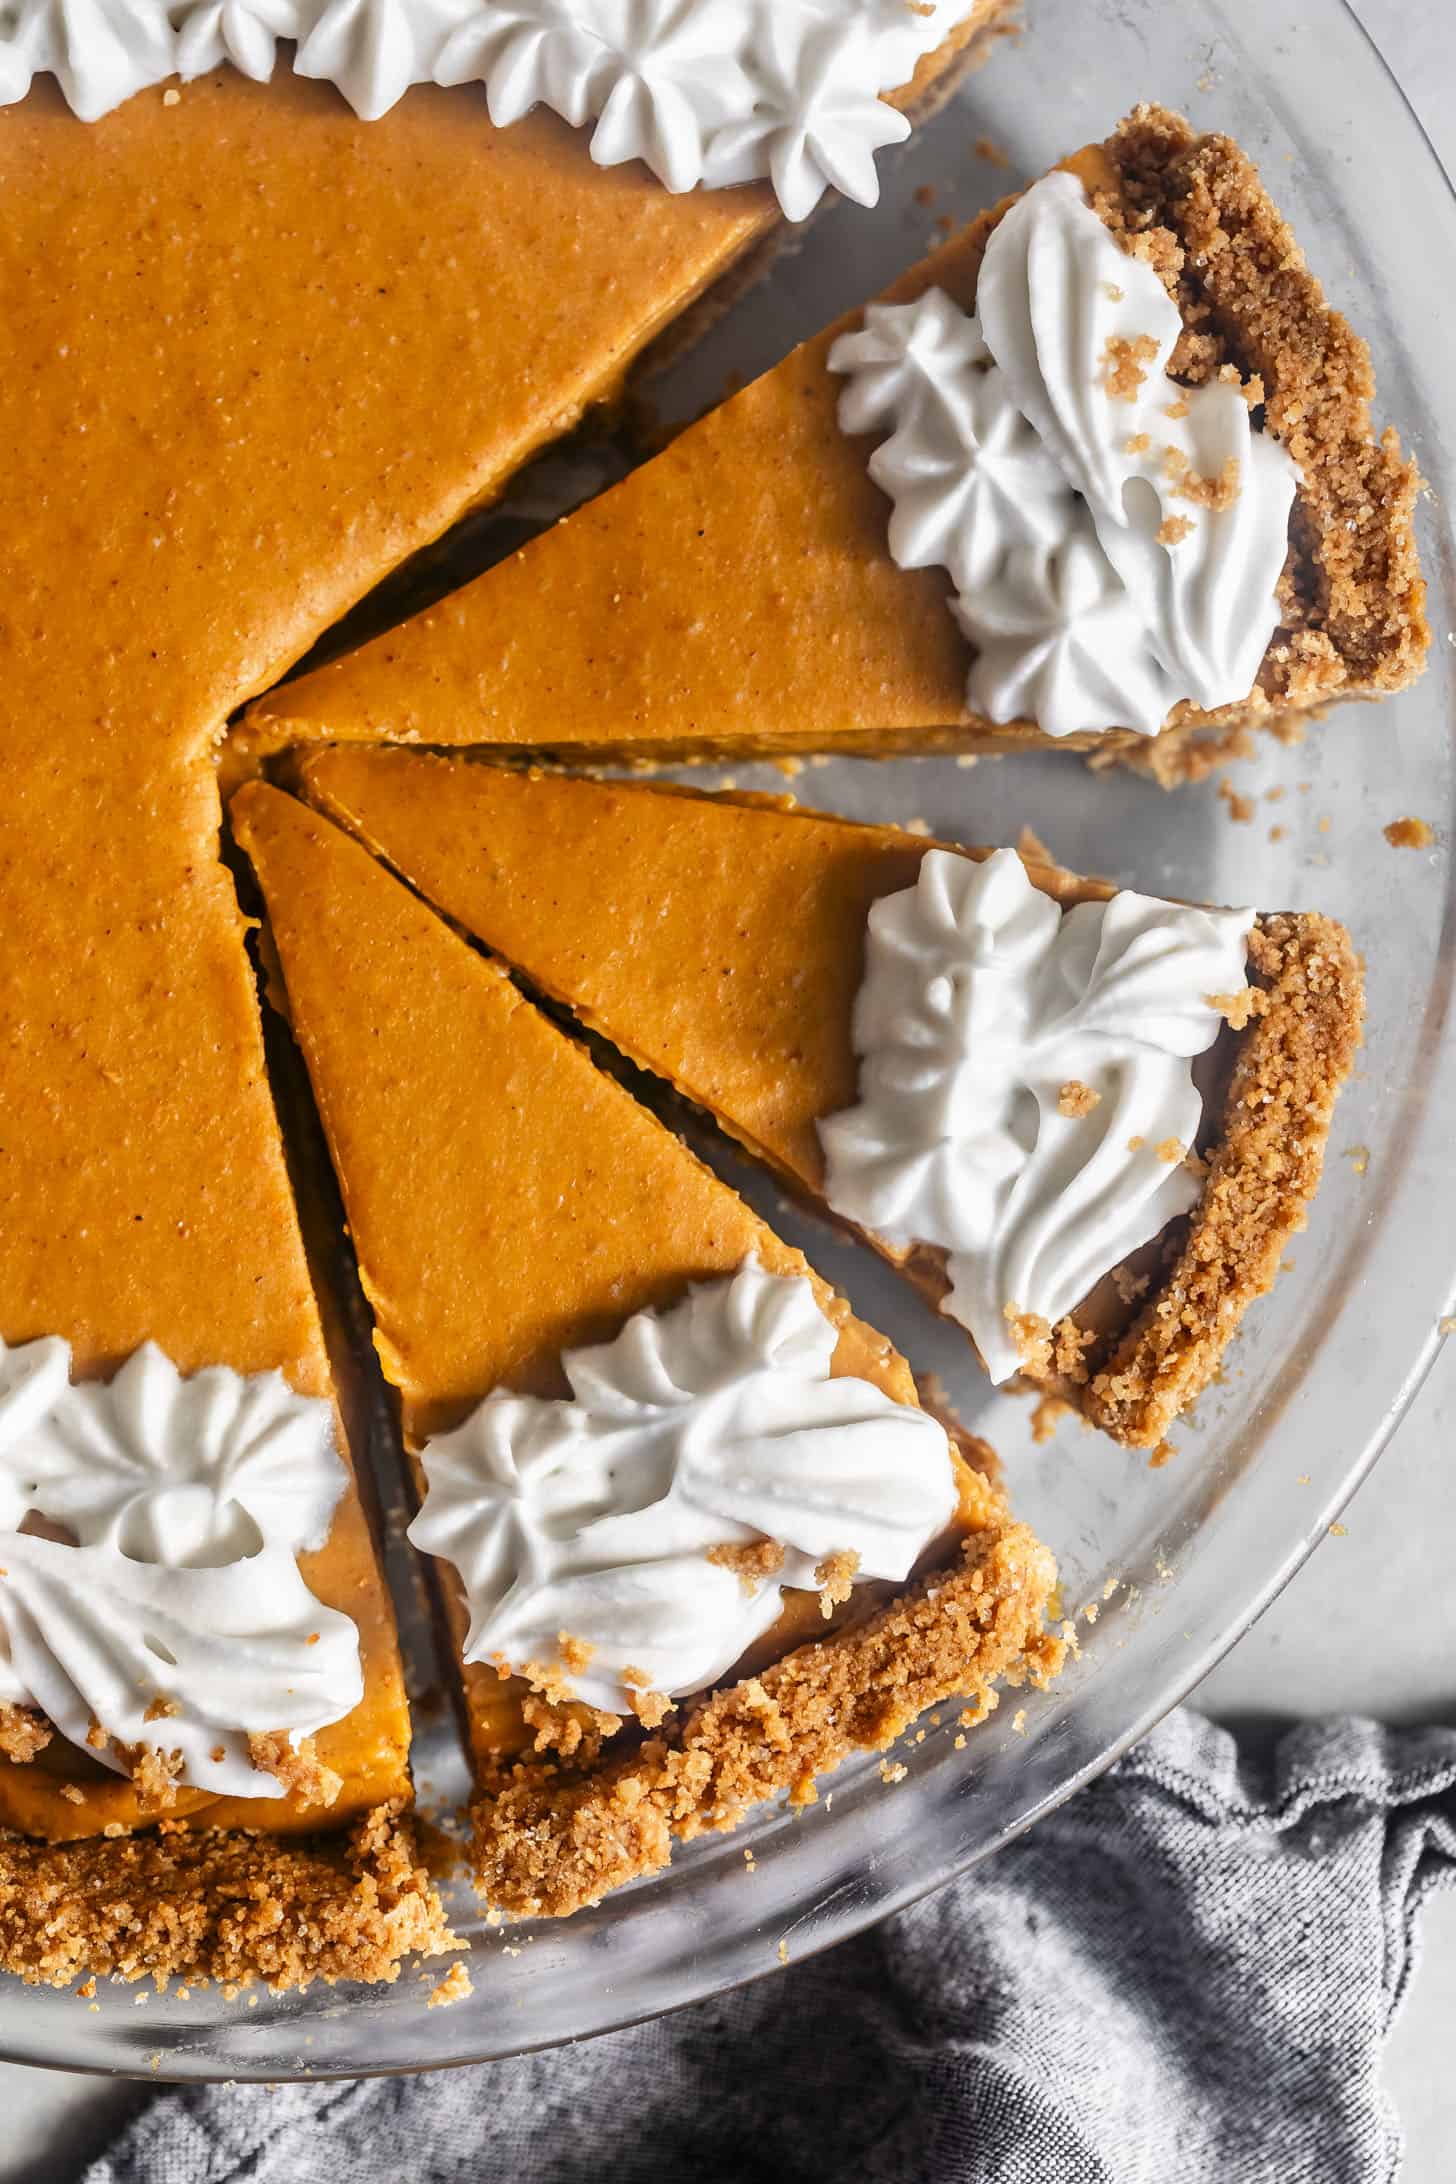
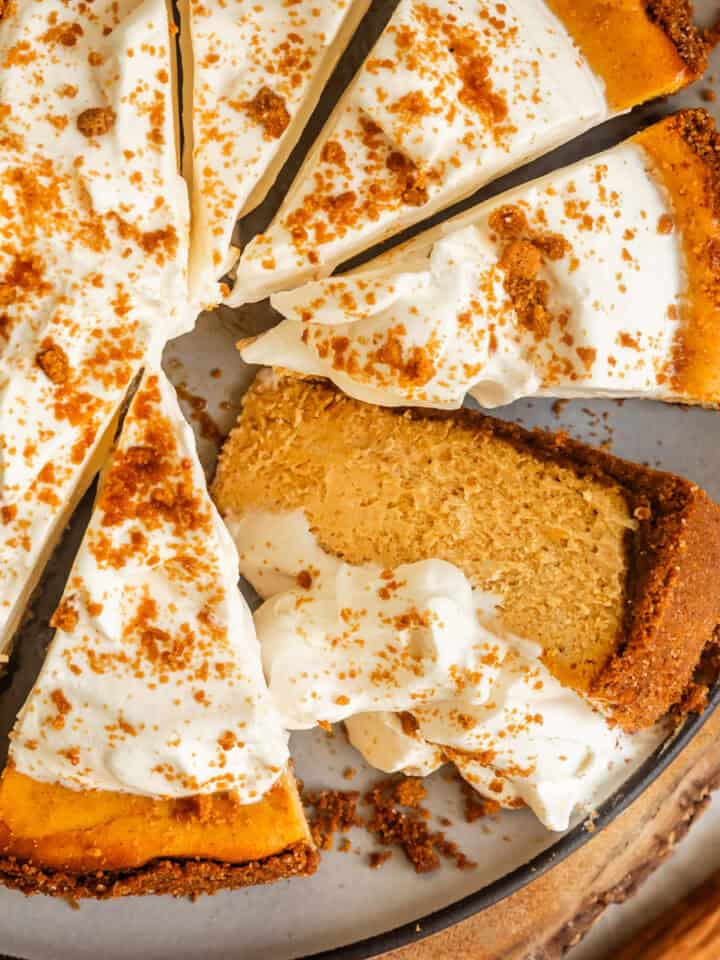
Use your fingers to carefully and firmly press the crust up the sides of the baking dish or pan. For a baked cheesecake, press only ¾ to 1-inch up the side of the springform pan. Aim for the filling to overflow the crust slightly to make it easier to slice.
Personally, I love the look of a shaggy edge for graham cracker crusts, but you can also use a thin knife along the top to create a more evenly straight edge.
If using a tart pan, square off the edges using your thumb and index finger.
After baking, pack it down again
When the pie or tart crust comes out of the oven, immediately use a clean dry measuring cup to gently press the crust down into the bottom and against the sides of the pie or baking dish or pan. This will help create a stable firm crust that doesn't crumble too easily.
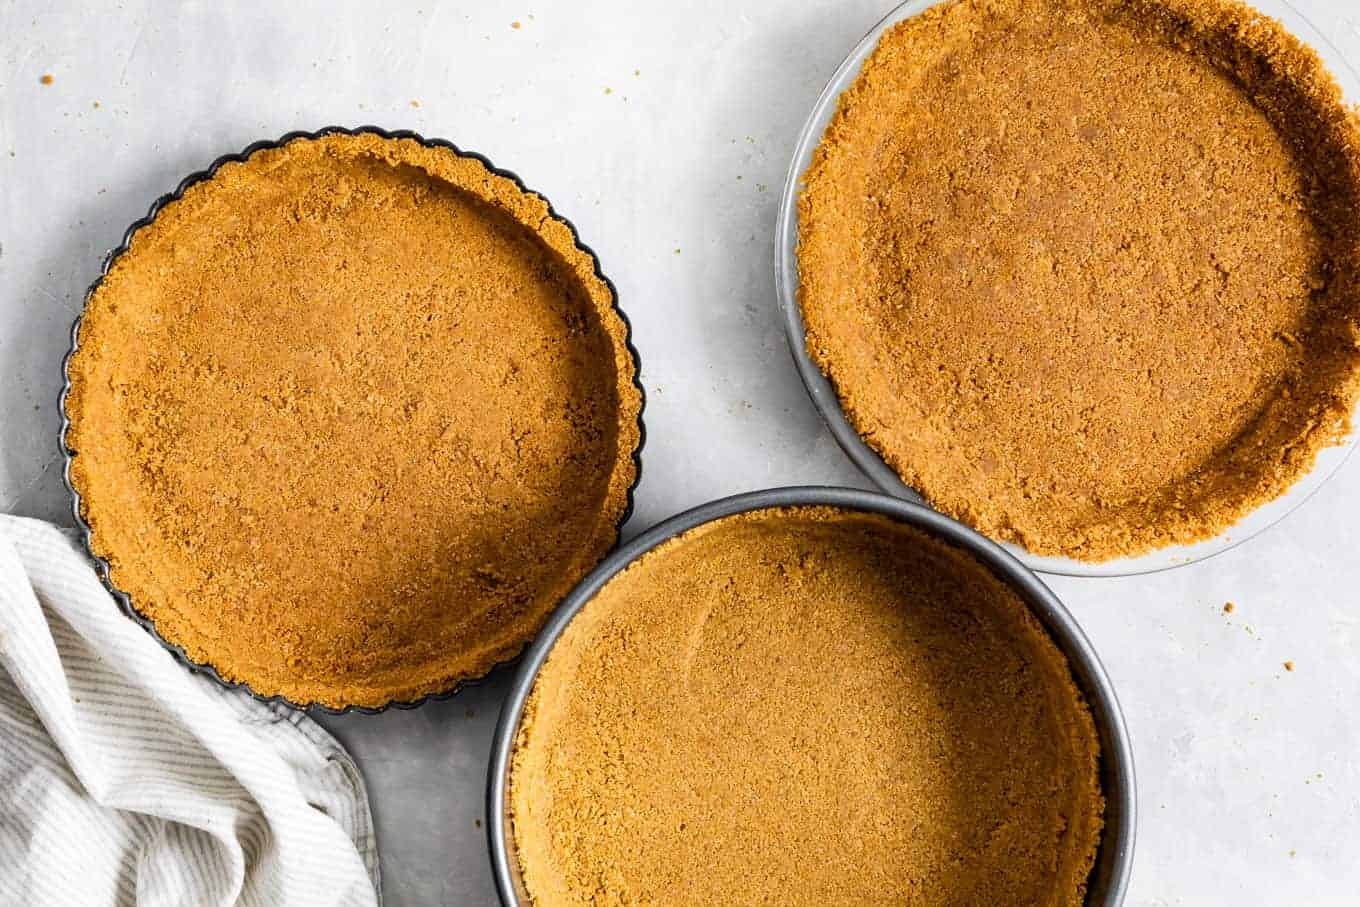
What kind of pan for a gluten-free graham cracker crust?
This gluten-free graham cracker crust is versatile. Make it in a 9-inch pie dish, 9-inch tart pan, 9 to 10-inch springform pan, or an 8x8 square baking pan.
If you want to make a big batch of cheesecake bars, double the recipe to press it into the bottom of a 9x13 baking pan.
No-Bake v. Baked Graham cracker crust
This recipe can work whether you are making a baked graham cracker crust or a no-bake chilled graham cracker crust.
No-bake graham cracker crust
For a no-bake crust, chill the crust for at least 2 hours or freeze for 20 minutes before filling. By chilling the crust, the butter solidifies to hold the crust together. No-bake crusts are a bit more delicate than baked crusts, so be sure to keep it chilled up until serving.
Baked graham cracker crust
Personally, even when I'm making a "no-bake pie" I usually still opt to blind bake the crust (bake it without the filling) and let it cool before filling. I find the crust more easily removes from the pan without leaving crumbs behind and makes a cleaner cut. For a baked cheesecake, opt to bake the crust before filling it, as this helps seal the crust keeping it crisp and not soggy.
Whether making a no-bake pie filling or a pie that bakes further in the crust like a cheesecake, blind bake the graham cracker crust at 350°F for 8 minutes before filling it. Let it cool completely before filling.
Baking the crust will melt the sugar, which, when cooled with the butter will hold the crust together tightly.
Make ahead and freezing instructions
Make your life easier and prepare the crust in advance. You can store it baked or unbaked, covered, in the fridge for up to 3 days before filling.
For longer storage, wrap it tightly and freeze it baked or unbaked for up to 3 months. Thaw the crust at room temperature before filling.
Graham Cracker Crust Substitutions?
Graham crackers: You can substitute flavored gluten-free graham crackers (such as ginger!) to jazz up your crust. If you don't have graham crackers or just want a different variation, substitute gluten-free vanilla wafers, gluten-free gingersnaps, or other gluten-free cookies.
Sugar: Swap out the sugar for brown sugar for a deeper flavor. Or, for refined sugar-free, use coconut sugar. Note: most gluten-free graham crackers use some form of sugar, so if you want your crust to be entirely refined sugar-free, you'll have to make your own.
Butter: You can replace the butter with dairy-free vegan butter by weight! For dairy-free graham crackers, I recommend Nairn's.
Recipe

Foolproof Gluten-Free Graham Cracker Crust
Ingredients
- 175 g (about 1.75 cups) gluten-free graham cracker crumbs*
- ¼ cup granulated sugar*
- 5 tablespoons unsalted butter*, melted
- ¼ teaspoon kosher salt
INSTRUCTIONS
- For a baked crust, preheat the oven to 350°F.
- In a medium mixing bowl, combine the graham cracker crumbs and sugar together with a fork. Pour in the melted butter and salt and mix well with a fork until the crumbs are evenly moistened. The crumbs should be sandy, but a clump will just hold together when pinched. Note: I've tested this recipe with three different brands of gluten-free graham crackers, but your graham crackers might be slightly different. If a clump will not hold together because your crumbs are too dry, add ½ tablespoon more melted butter. If your graham crackers are too wet, add ¼ cup more graham crackers crumbs.
- Dump the buttery graham crackers into a 9-inch pie dish, 9-inch tart pan, 9 or 10-inch springform pan, or 8x8 baking dish.
- Use a flat-bottomed measuring cup to firmly pack the crumbs down into a layer on the bottom of the baking dish or pan, being sure to save some of the crumbs along the sides. If you're making a graham cracker crust without sides, such as using an 8x8 baking dish for cheesecake bars, skip the sides and pack all the crumbs into the bottom.
- Use your fingers to carefully and firmly press the crust up the sides of the baking dish or pan. For a tart crust, use your thumb to square off the top of the crust. For a springform pan, press the edge about ¾-inch to 1-inch up the side of the pan. Leave the edge shaggy or use a thin knife along the top to create a more evenly straight edge.
- For a no-bake crust, chill the crust for at least 2 hours or freeze for 20 minutes before filling. Be sure to keep it chilled until serving.
- For a baked crust, blind bake (bake without filling) the graham cracker crust for 8 minutes before filling it. When the crust comes out of the oven, immediately use a clean dry measuring cup to gently press the crust down into the bottom and against the sides of the pie or baking dish or pan. Let it cool completely before filling. For cheesecake, bake the crust before filling it, which helps seal the crust keeping it crisp and not soggy.
Notes
Gluten-Free Graham Crackers
This recipe will work with any brand of gluten-free graham crackers, even homemade! However, not all brands are the same. For a fool-proof gluten-free graham cracker crust, measure the graham crackers by weight before crushing them up so you know exactly how many to use. Crush them in a food processor or place the graham crackers in a sealed bag and crush them with a rolling pin until they are the texture of sand.Refined-Sugar Free
You can replace the granulated sugar with coconut sugar.Dairy-Free
You can replace the unsalted butter with vegan or dairy-free butterNo-Bake V. Baked
This recipe works as a no-bake or a baked graham cracker crust. No-bake crusts are a bit more delicate than baked crusts, so if you're making the no-bake version, be sure to keep it chilled up until serving. Personally, even when I'm making a "no-bake pie" I usually still opt to blind bake the crust (bake it without the filling) and let it cool before filling. I find the crust more easily removes from the pan without leaving crumbs behind and makes a cleaner cut.Cheesecake crust
For a filling that gets baked, such as a cheesecake, blind-bake the crust and cool it as instructed before filling. The crust will not burn when it's in the oven again with the filling. Instead, blind baking the crust helps create a barrier between the moist filling and the crisp crust.Make ahead and freezing instructions
Make your life easier and prepare the crust in advance. You can store it baked or unbaked, covered, in the fridge for up to 3 days before filling. For longer storage, wrap it tightly and freeze it baked or unbaked for up to 3 months. Thaw the crust at room temperature before filling.Substitutions
For substitutions, see post above.

Kendra -
I made this for a pumpkin pie and it was AMAZING! Soooo good! And so simple! Thank you!
Giselle A -
I loved this crust! I used coconut sugar and Pamela’s graham crackers - about an entire packet, save one graham cracker. I don’t like my desserts too sweet so next time I might skip the sugar or only put in 1/8 c as it was slightly too sweet for me.
Tammy Heath -
My family loves my New York Cheesecake and this crust works perfectly for it. Super easy to do and fast.
Mama -
I used your crust recipe for my family's favorite pumpkin pie (I used my go-to filling). I was really happy with the texture and flavor but, oh my....grrrr.....
Thank you for your suggestion to weigh the graham crackers. To my dismay, the weight listed on the box was almost 2/3 more than what the actual crackers weighed—I think the box weight must have included the plastic packaging. In your experience, is this normal? I was furious. I bought two boxes just in case, and I still didn't have enough (luckily, I had a few leftover grahams in my basement). FWIW, I bought Pamela's GF Honey Grahams; the box said net weight 7.5 ounces (212.6 g). It was more like 4 ounces!!!
I'm wondering if I have to be more vigilant the next time I shop for Thanksgiving and buy extra.
Sarah @ Snixy Kitchen -
Wow! I’ve never had that happen with grahams before and I’ve bought Pamela’s often!! I would be so frustrated too. Next time I get them I’m going to compare the weight on the box to the weight of the graham crackers!
CINDY C. BOWDEN -
I can't wait to try this pie crust. I've had issues in the past of the graham cracker being too crumbly. It looks like your recipe will work. I've also heard of using egg white to bind the crust, too. Have you tried with egg white before? Thanks for sharing!
Sarah Menanix -
I haven't tried with egg white! I've never had issues with this crust being too crumbly.
Sean S George -
Made this crust today with Pamela's GF grahams. Came out almost perfect, just a touch too hard; difficult to cut with a fork.
I used a dark metal pan to bake it, should I try glass instead? Or try skipping the second packing?
Sarah Menanix -
I suspect because of your dark pan it just baked a little bit darker and thus more crisp. You can still use the same pan but I think skipping the second packing is a good solution for keeping it more tender!
MichelleC -
This was DELICIOUS Sarah!! Thank you for making this recipe. Easily our family’s new favorite go-to crust- this made our pie so much better! Do you by chance have cooking temp/time suggestion for this to be made into muffin tin cups? I’d like to make individual desserts for little ones school classroom, any advice would be appreciated. Thanks again!
Sarah Menanix -
I've baked these in muffin tins at 350°F for 7-8 minutes, pressing them down as soon as they come out of the oven!
DebS -
Perfect pie crust! It was a huge hit with everyone at the table. Your hints throughout the process were very helpful too. Definitely going to be using this crust in the future!
Lisa -
I made the no-bake version of this recipe in a 8x8 pan, along with Sarah's pumpkin pie recipe, and it was GREAT. Love how it was so easy to prepare. I made sure to line all surface areas of the square pan with parchment paper so that the pumpkin pie could be easily released. Will definitely make this crust for other pies in the future!
Megan Howard -
Hi, I'm very excited to have found your site. I have been cooking/baking GF for about 15 years now, with a lot of learning along the way. I also use all kinds of flours, especially lately as new options are introduced.
My two biggest issues with cookie crumb crusts have been:
1: edges burning quickly when baking.
I have tried to circumvent this by making a more uniform edge; any thoughts?
2: Can't get it out of the pan.
For whatever reason, I have had a really difficult time with these crusts sticking. I generally will make my own GF cookie and then crumb it and press it in.It seems the harder I compact it, the harder it becomes later to release it. So I was interested to see that you are recommending a lot of compacting. Have you had release issues? Sometimes I am using coconut oil, and I wonder if that might be an issue, but I have also used butter and still sometimes end up with crust that needs to be broken out of the pan. What do you recommend?
I have just purchased some special jams and am excited to make your thumbprint(measuring spoon) cookies today.
Sarah Menanix -
These are great questions! I'll answer a few ideas, but also, since you're an experienced baker, you may already know these things, so forgive me if you do!
1. When you mention the edges burning too quickly, do you mean when you're doing the initial 8-minute bake? If so, I've not had this happen before, but my instinct is that your oven temperature is too high (you've possibly already calibrated your oven temp, but if not, check with a thermometer to make sure it's accurate and if so, try baking at a lower temperature). You really only need to bake the crust for a few minutes to melt the sugar to help hold it all together, so as soon as you see it turning color, pull it from the oven. Whether you square off the edges or leave them raggedy, you shouldn't need to bake long enough that the edges will get dark.
Or are you meaning after you've filled it? If making a baked cheesecake crust, try pressing the crust only 3/4 - 1 inch up the sides so the filling "overflows" the crust a bit. The filling will pull away from the sides once baked and this will keep the crust edge from getting too dark.
You could also try using a pie shield to keep the edge from getting darker as you bake the center of the crust.
2. Ahh, the frustrating crust stick! A couple of things I've learned: when I use coconut oil, the crust sticks very easily. Here's an excerpt from a post where I wrote about this: "Vegan tart crusts are more prone to sticking to your pan, even a non-stick tart pan, because it doesn't have the butter to help lift it away from the pan. To prevent that, brush a THICK layer of coconut oil in the crevices and bottom of the tart pan - the coconut oil for brushing should be soft like mayonnaise, but not melted. Then pop the tart pan in the freezer to harden up the coconut oil while you prepare the crust. This will ensure there's a well-greased barrier between the crust and the pan!"
You mention it also happens sometimes with butter and this makes me wonder a few things things. First, based on your first question. I wonder if, in the past, you've baked the graham cracker crust too long. I recently shot a video for someone else's recipe that called for baking the graham cracker crust for 18 minutes (!!!) and that crust stuck to the pan and was soooo crumbly when cut. I would try reducing the oven time. Second, what kind of pan are you using when this happens? Glass or non-stick will stick less than a pie dish or tart pan that isn't non-stick. Third, I also wonder if the recipes you've made in the past didn't have enough butter, which is what sort of seeps out to "unstick" it from the pan.
These are all hypotheses since I'm not in your kitchen with you, but let me know if any of them sound likely/helpful!
mercmakesfood -
Saving this for a rainy day (aka Sunday)