
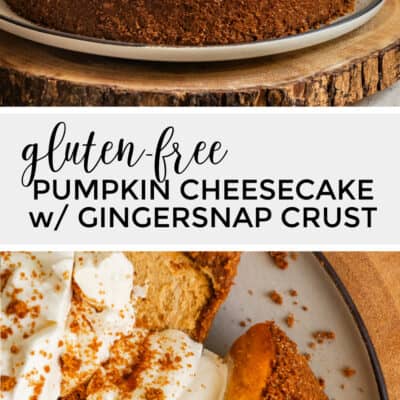
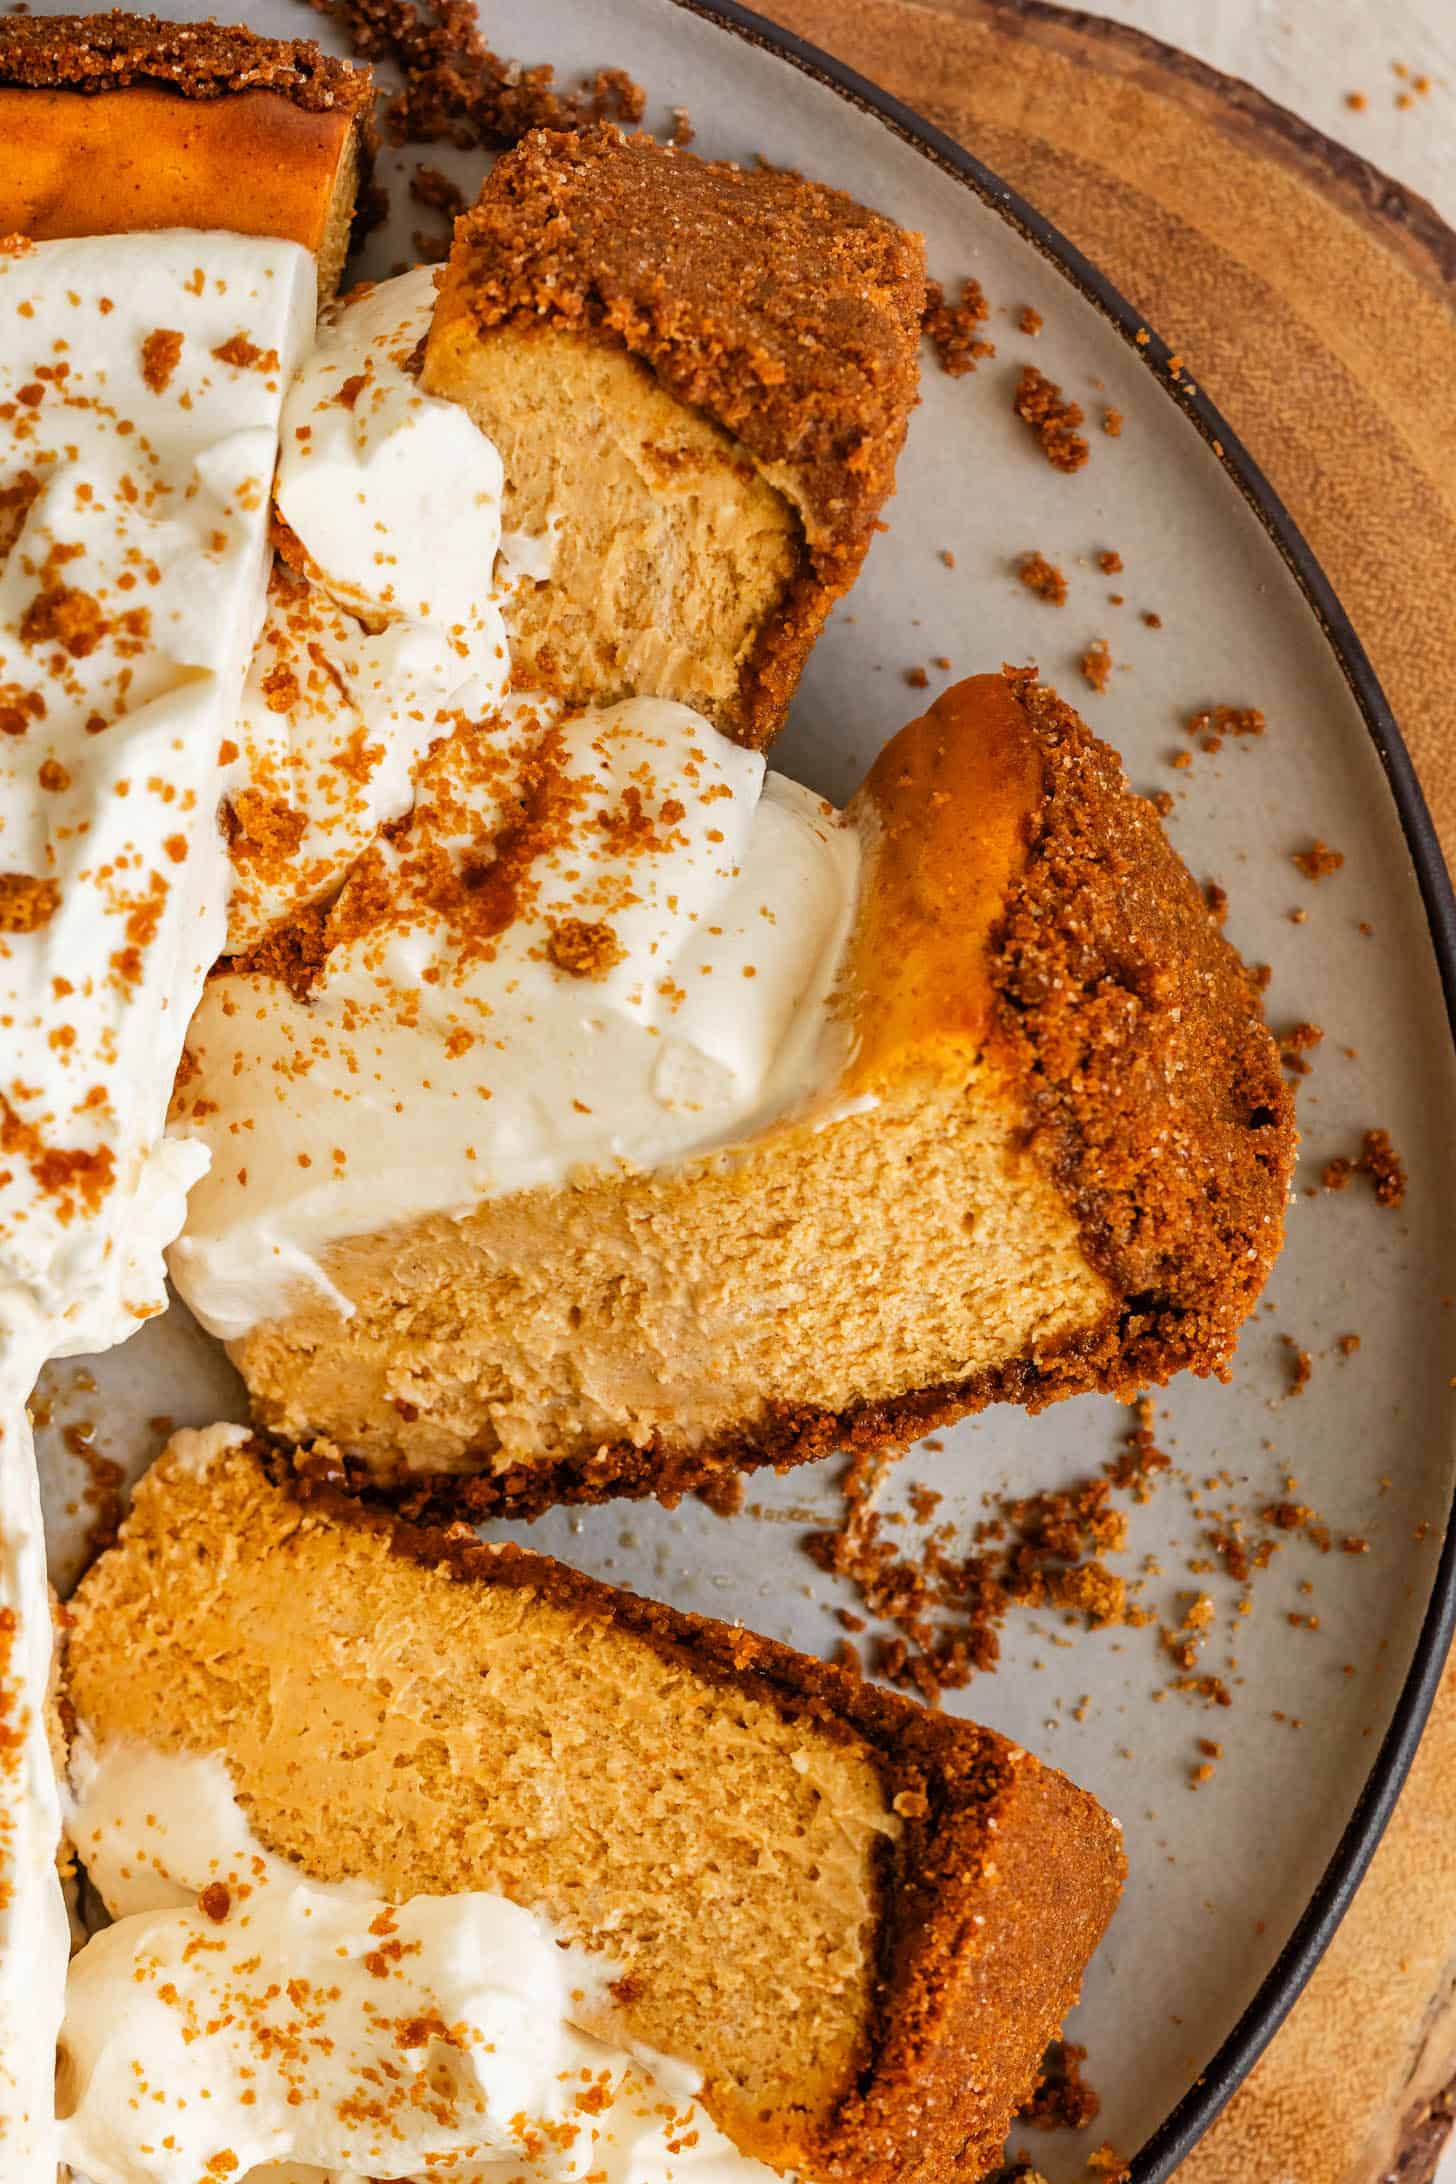
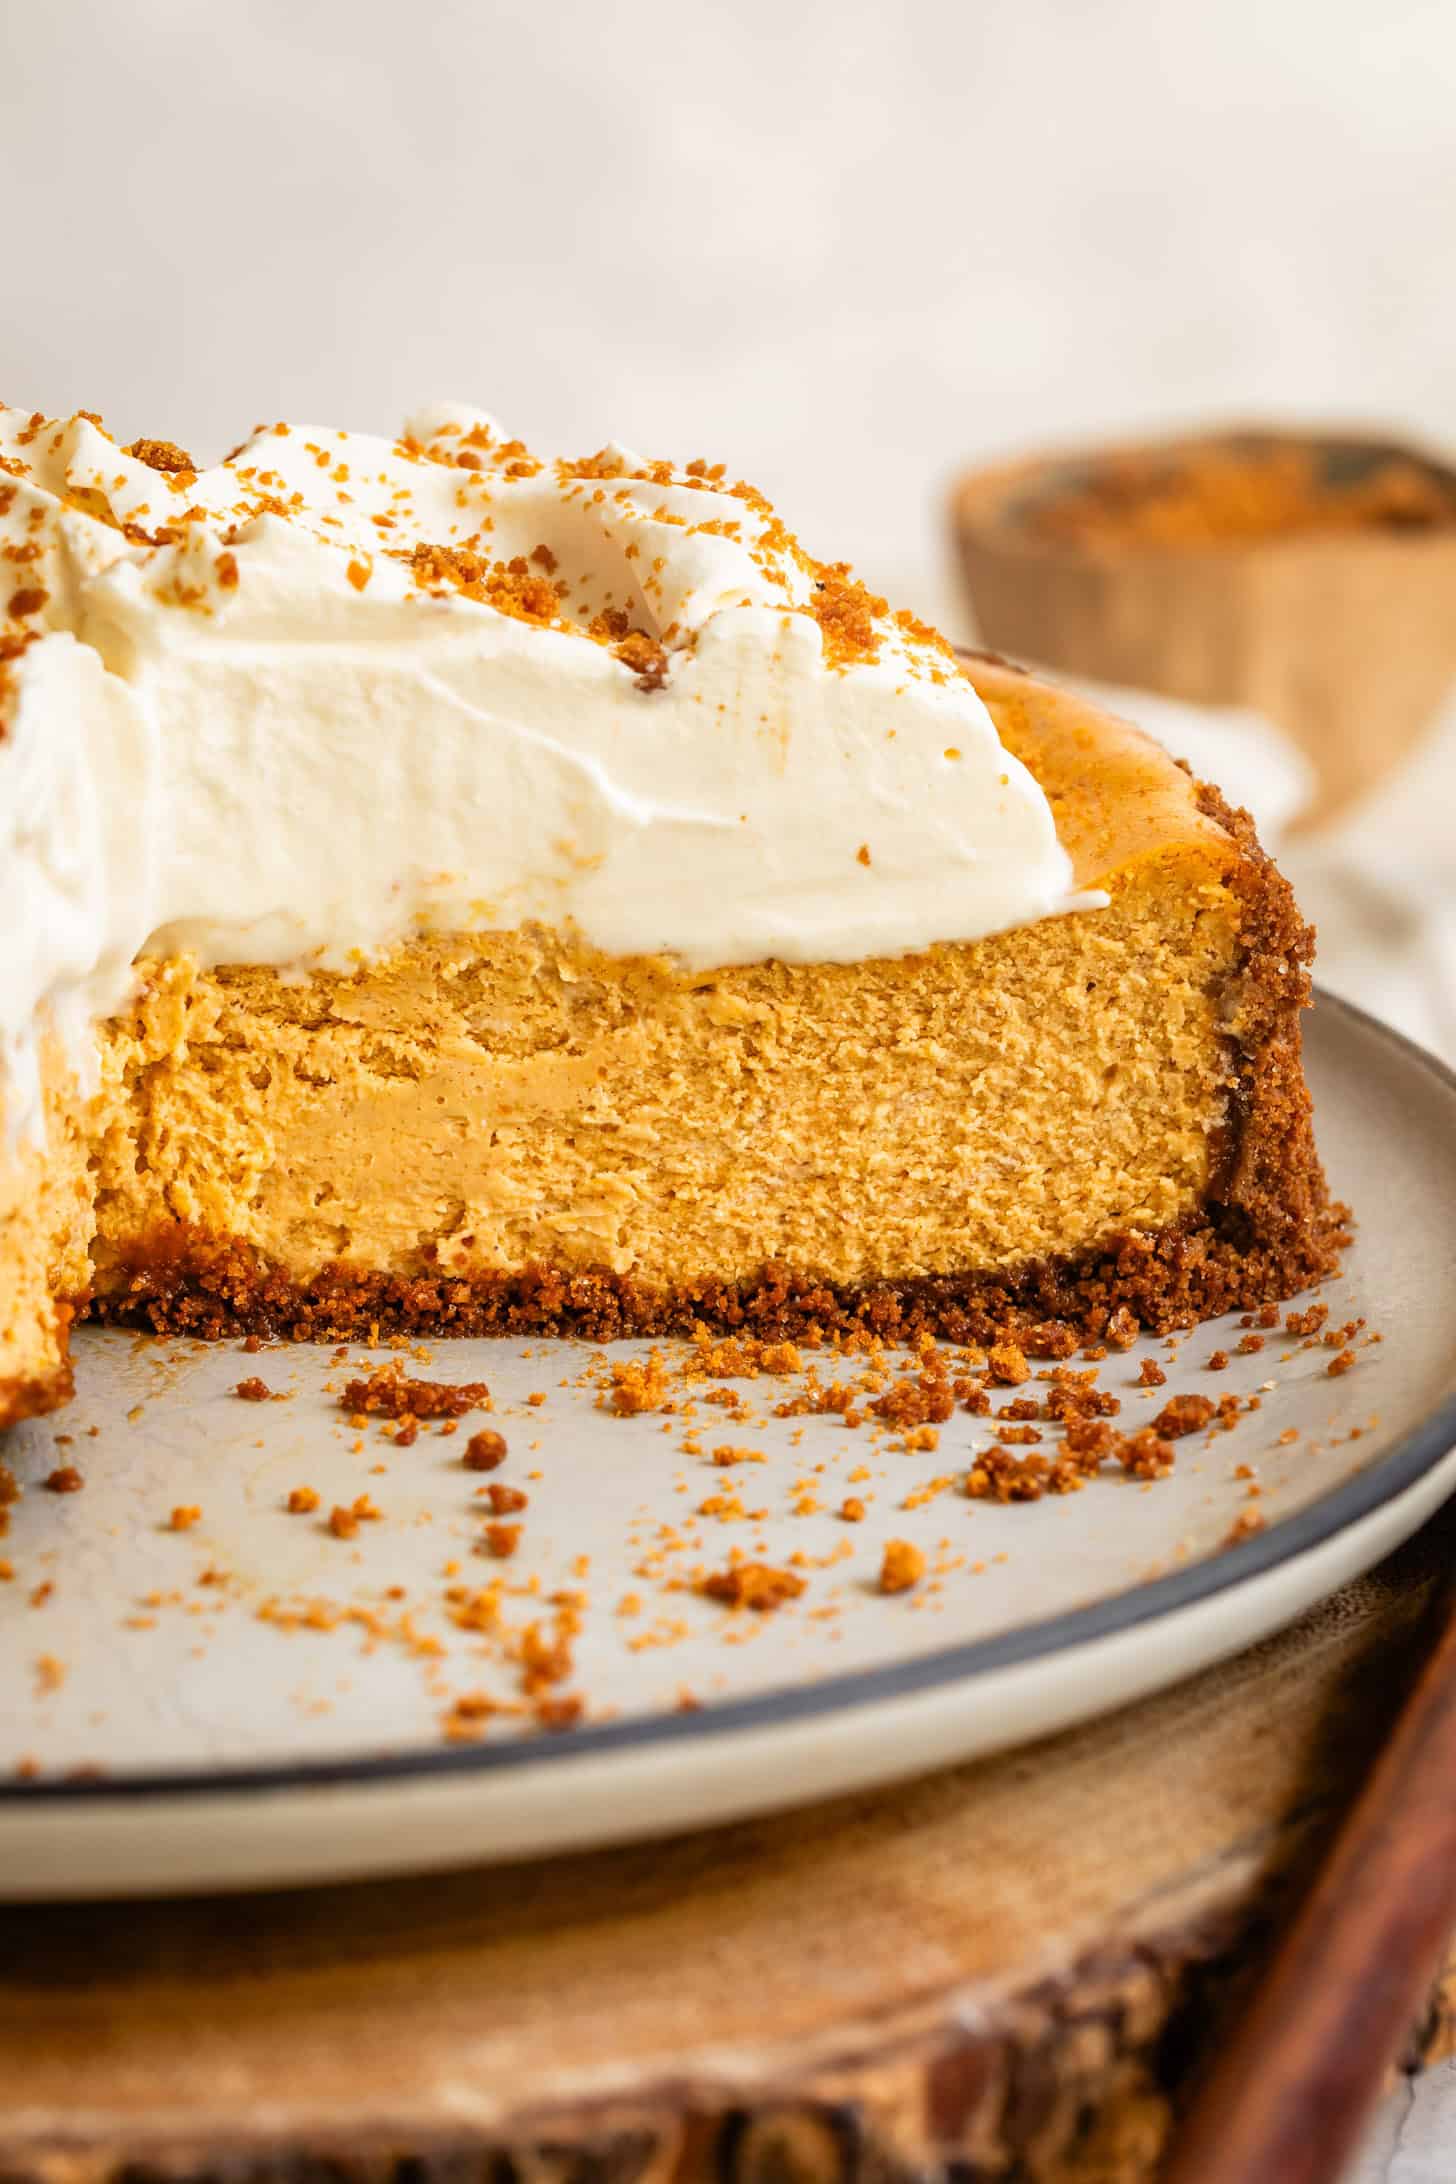
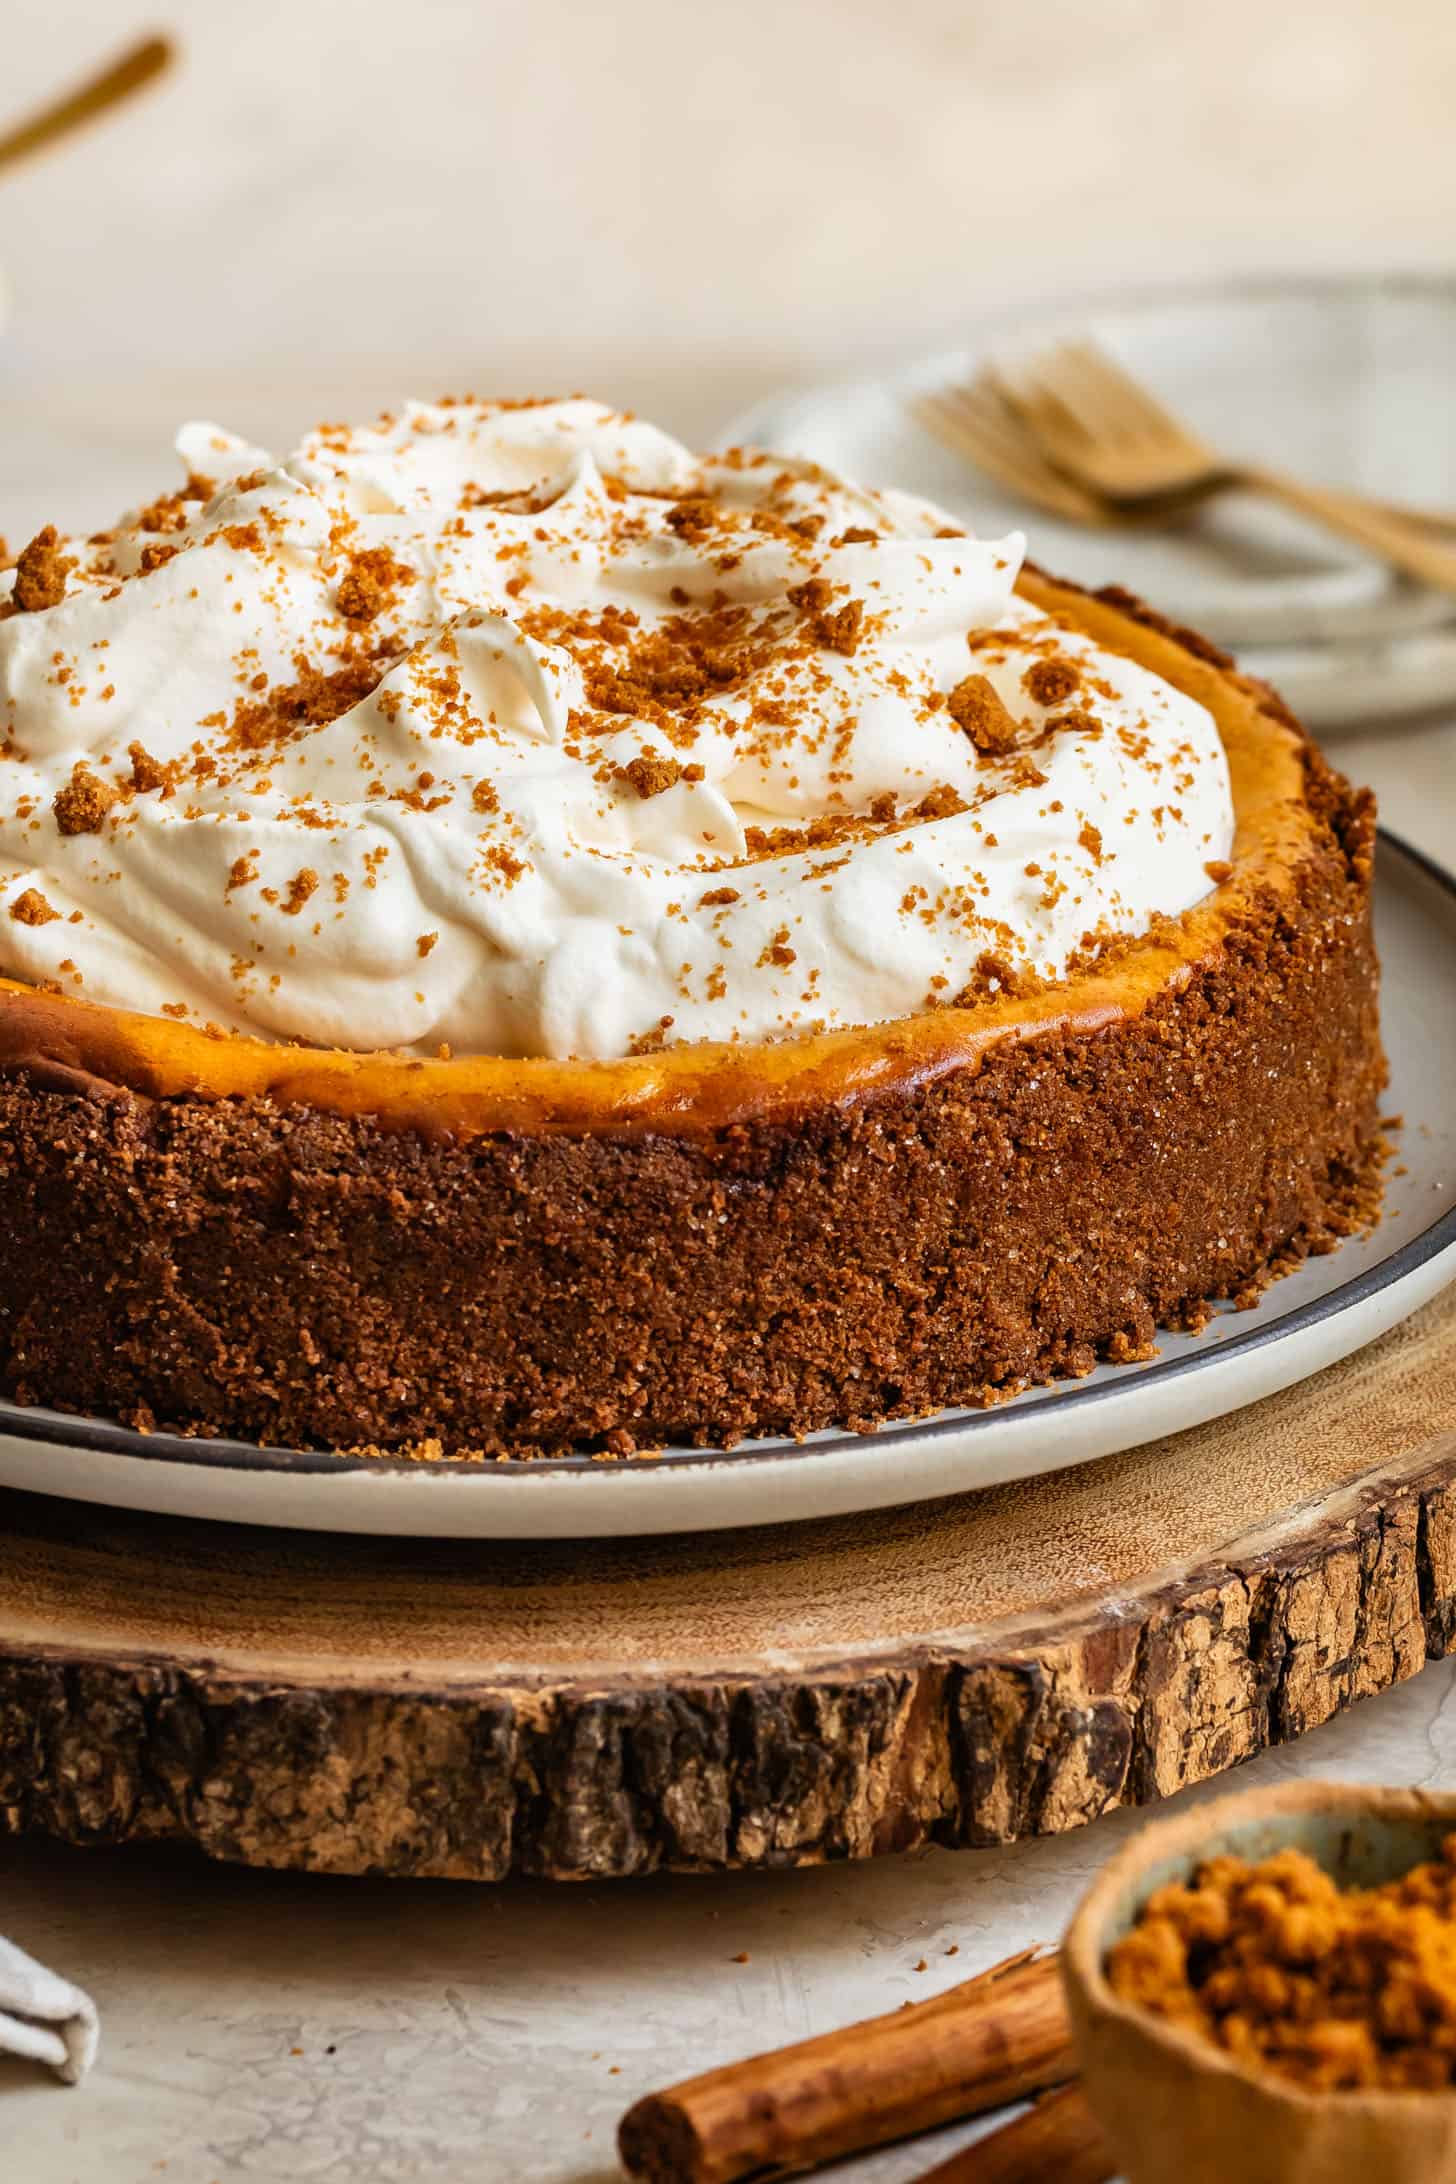
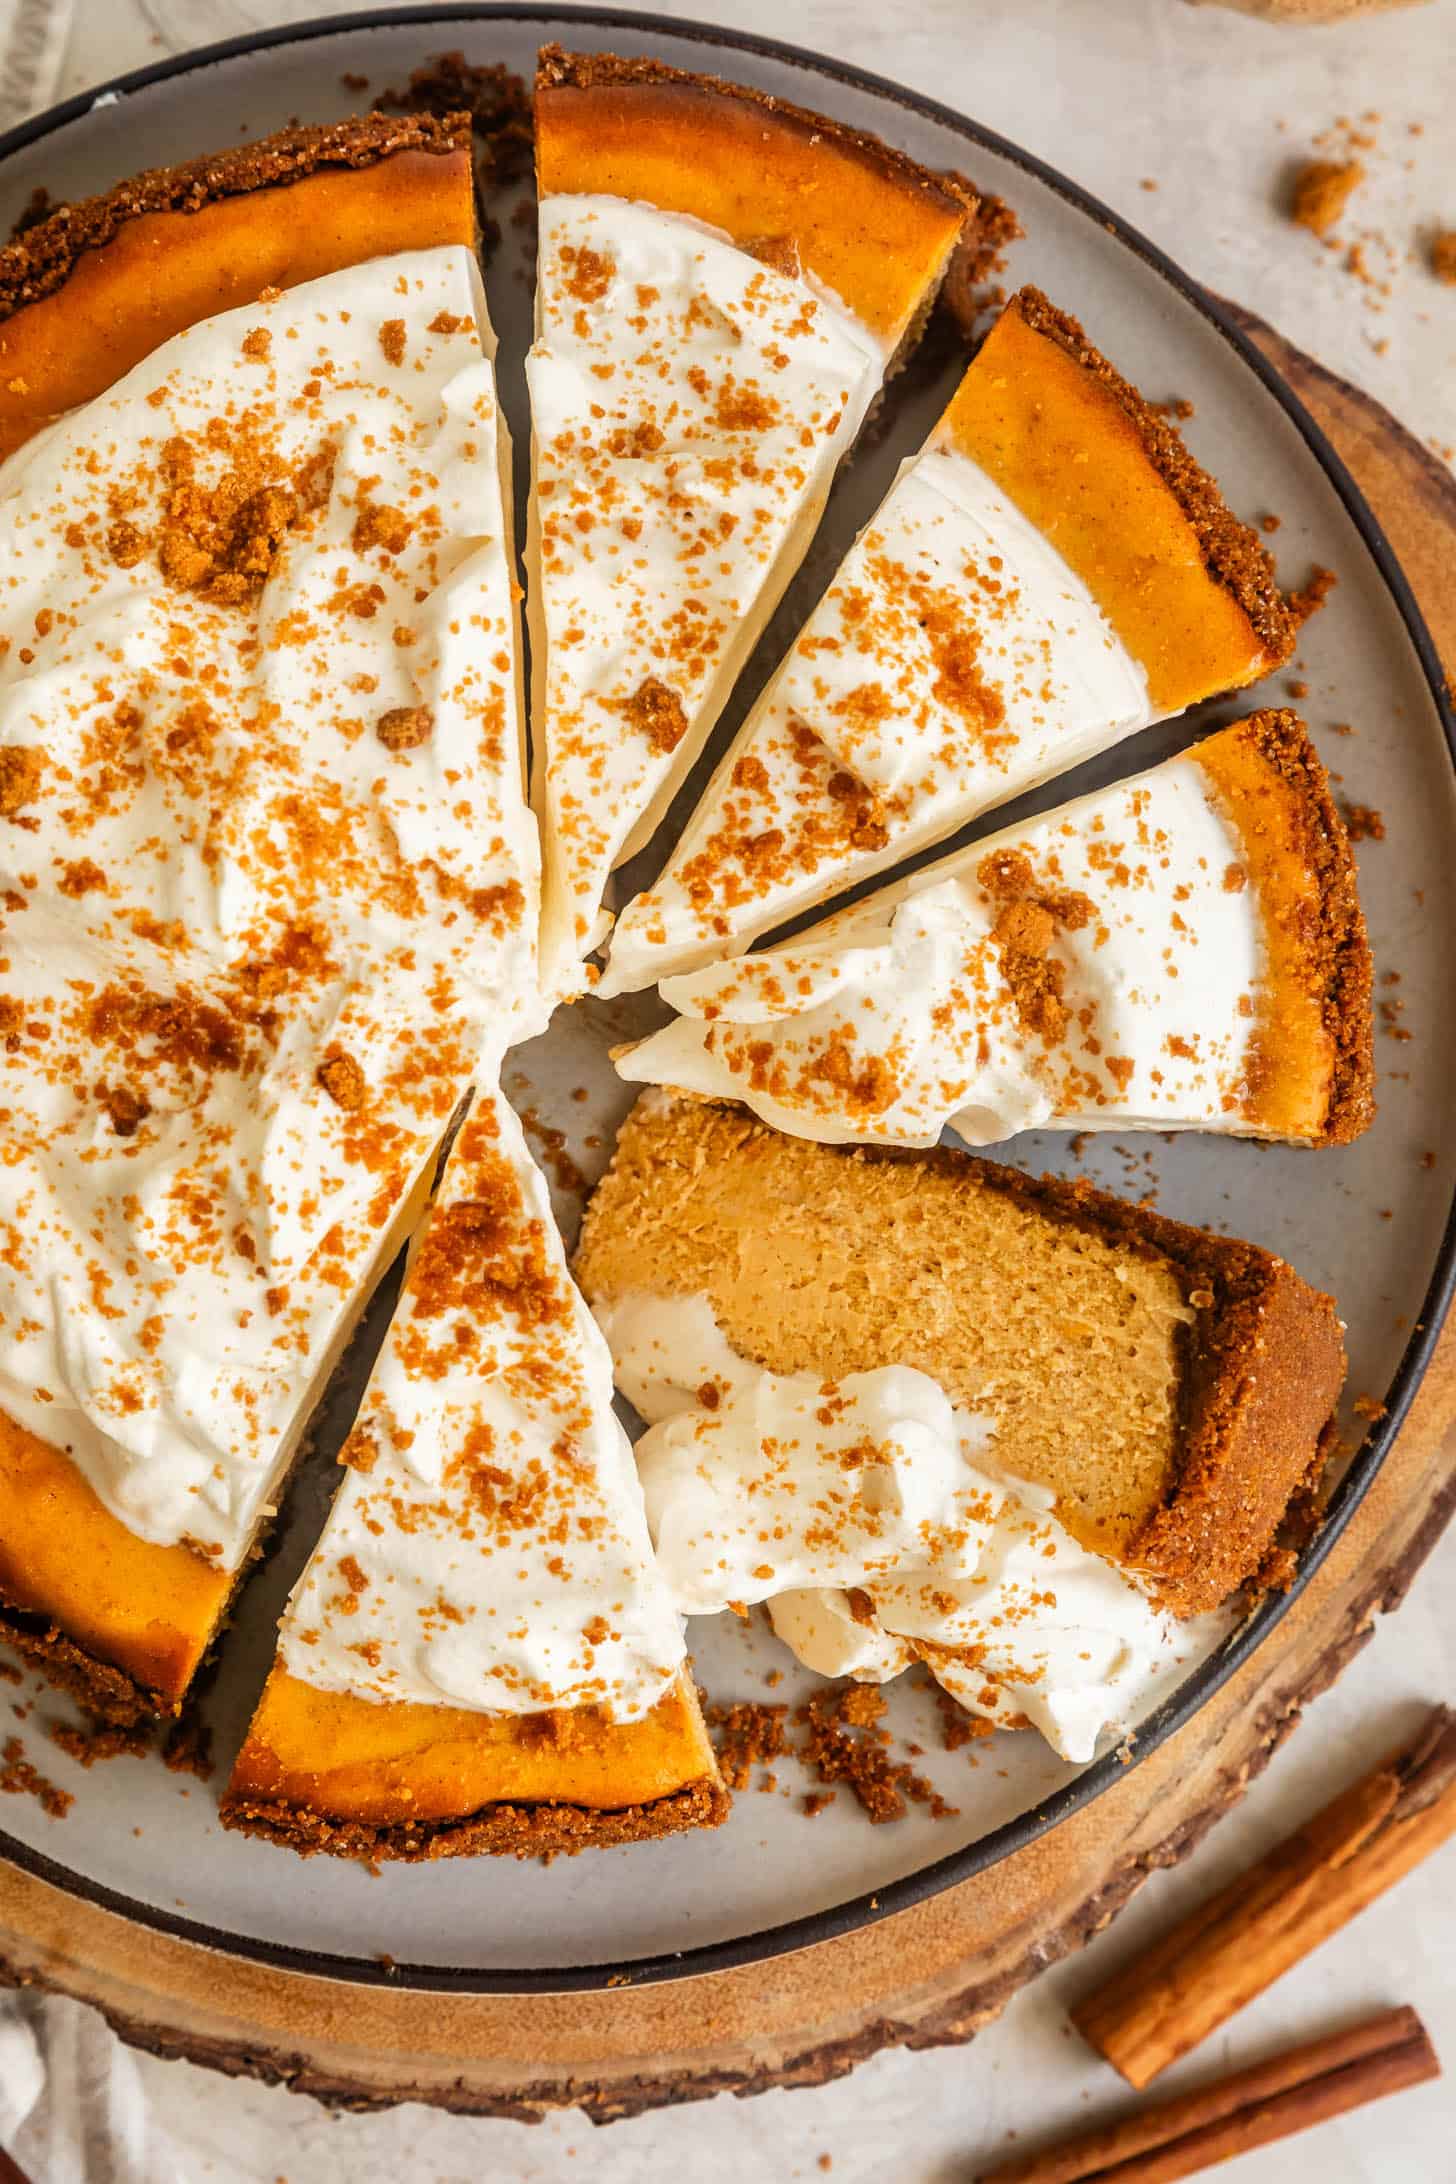
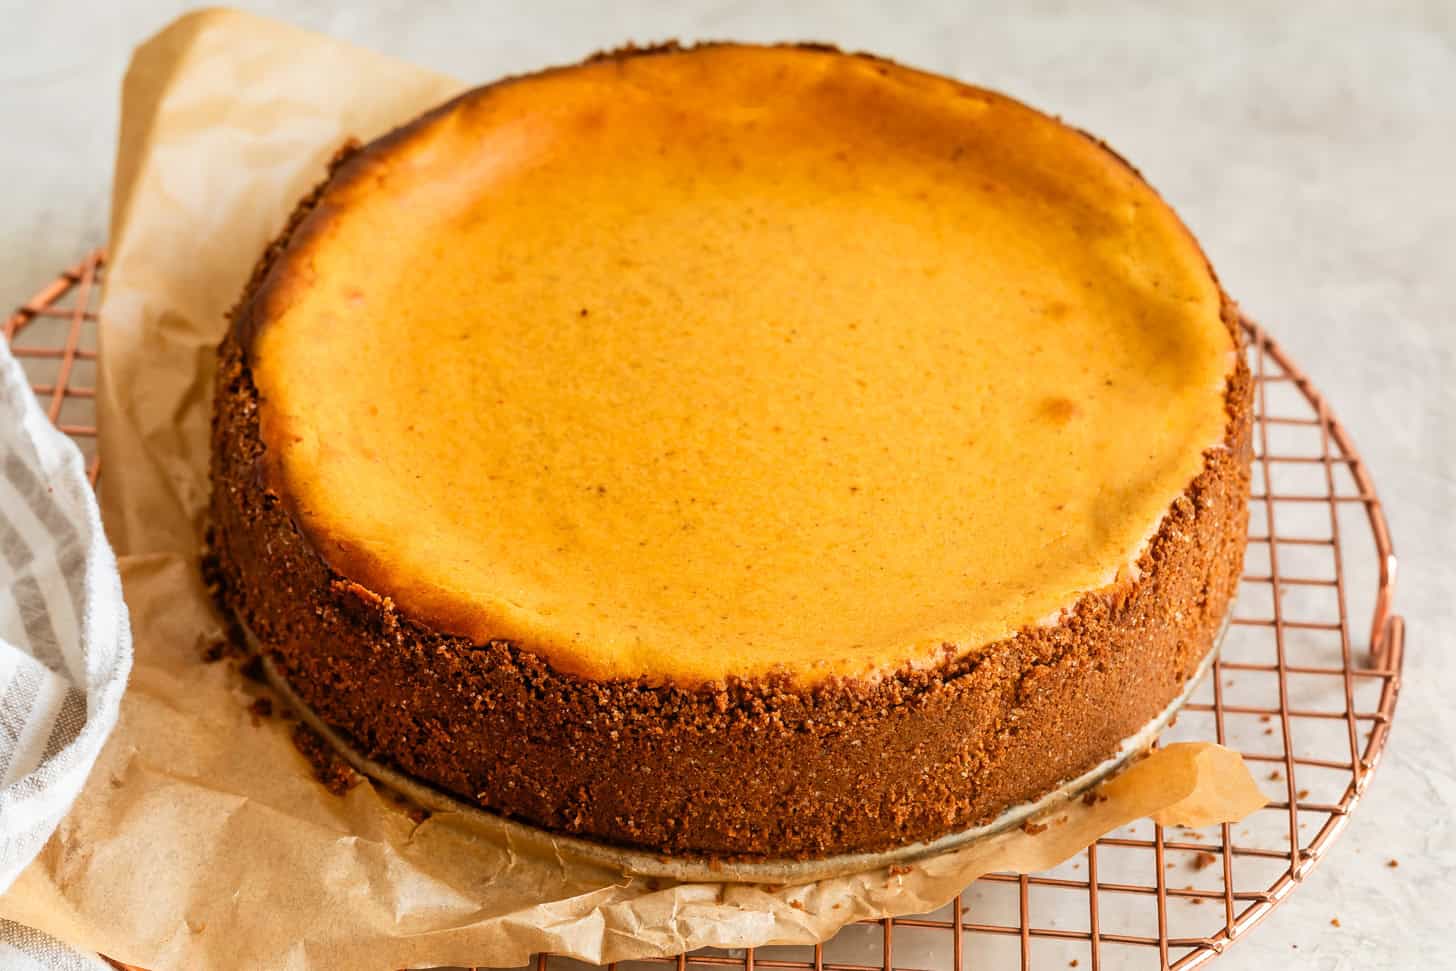
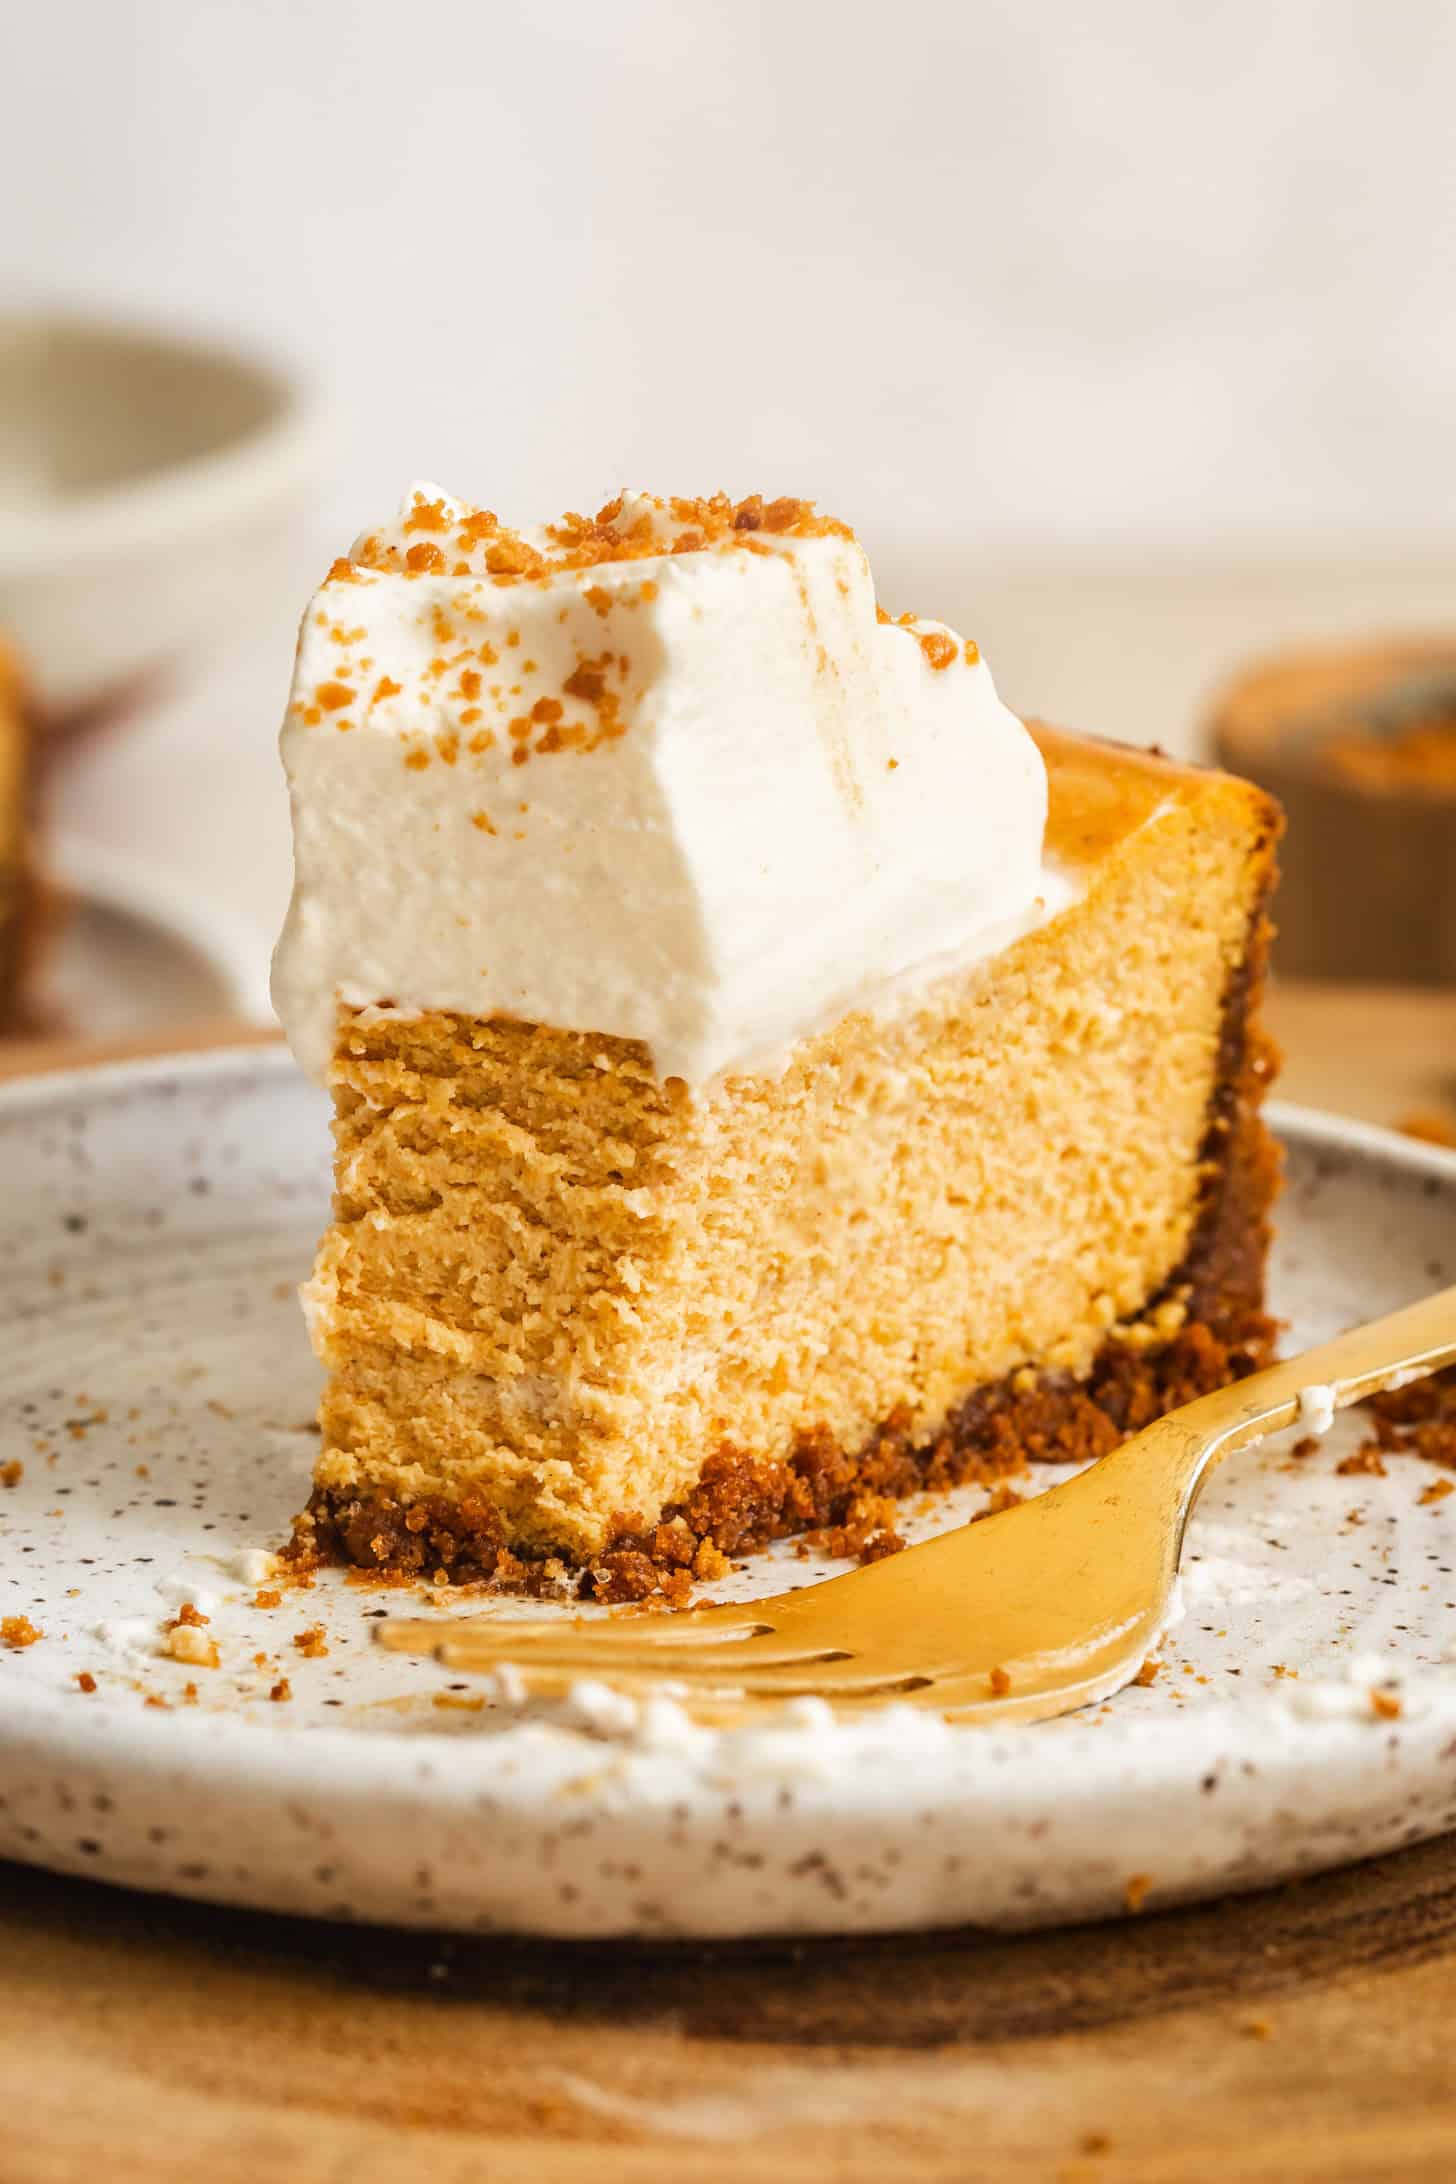
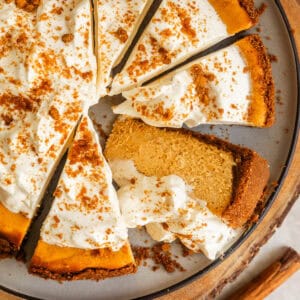
This silky gluten-free pumpkin cheesecake features a creamy, spiced filling atop a crunchy gingersnap crust. Can be made ahead which makes it a winner when yo're hosting! Finished with pillows of fluffy whipped cream, it's the ultimate fall treat.
This post is sponsored by Andronico's Community Markets, a long-term partner of Snixy Kitchen, but the opinions are all my own.
My role at Thanksgiving is always pie! My dad wants a classic pecan pie (and he'll get it because it's his birthday too), my husband begs for my pear persimmon pie, and I'm a sucker for my ridiculously good gluten-free pecan-pumpkin pie.
If I run out of time I'm going to make my gluten-free pumpkin pie bars because they're quick and easy, but I promised to bring this creamy, lush gluten-free pumpkin cheesecake too. It's the ultimate dessert, with spicy, aromatic gingersnap crust that perfectly complements the silky, spiced pumpkin filling. Topped with a mound of whipped cream and crumbled gingernaps, every bite is full of warmth and comfort.
Why this is the best gluten-free pumpkin cheesecake?
- Spiced Gingersnap Crust: Crunchy gluten-free gingersnap cookies create a flavorful spiced base that elevates the pumpkin cheesecake, perfectly balancing the silky, spiced filled.
- Silky Creamy Filling: The pumpkin cheesecake filling is silky, lusciously smooth, and delicately spiced, with just the right blend of spices to create a warm and inviting fall flavor.
- Fluffy Whipped Topping: Lightly sweetened whipped cream adds a creamy light textural contrast against the dense cheesecake.
- Gluten-Free Crowd-Pleaser: Whether you're gluten-free or not, this dessert is sure to be a hit with everyone. There are no compromises in flavor or texture with this gluten-free dessert.
- Make-Ahead Friendly: You can bake and chill this cheesecake ahead of time, making it great for stress-free holiday entertaining.
The most important step in making a cheesecake is to properly cool and chill it.
This ensures that your cheesecake stays smooth, creamy, and crack-free!
Cooling: Once the cheesecake has baked and the center is just slightly jiggly, turn off the oven and crack the door open several inches. Let the cheesecake cool in the oven for 1 hour. This gradual cooling helps prevent cracks by reducing temperature shock. Then remove the cheesecake from the oven to cool at room temperature for another hour.
Chilling: After the cheesecake has cooled to room temperature, refrigerate it for at least 4 hours or, ideally, overnight. Chilling allows the flavors to develop and the texture to fully set, resulting in a firm, creamy cheesecake that slices cleanly.

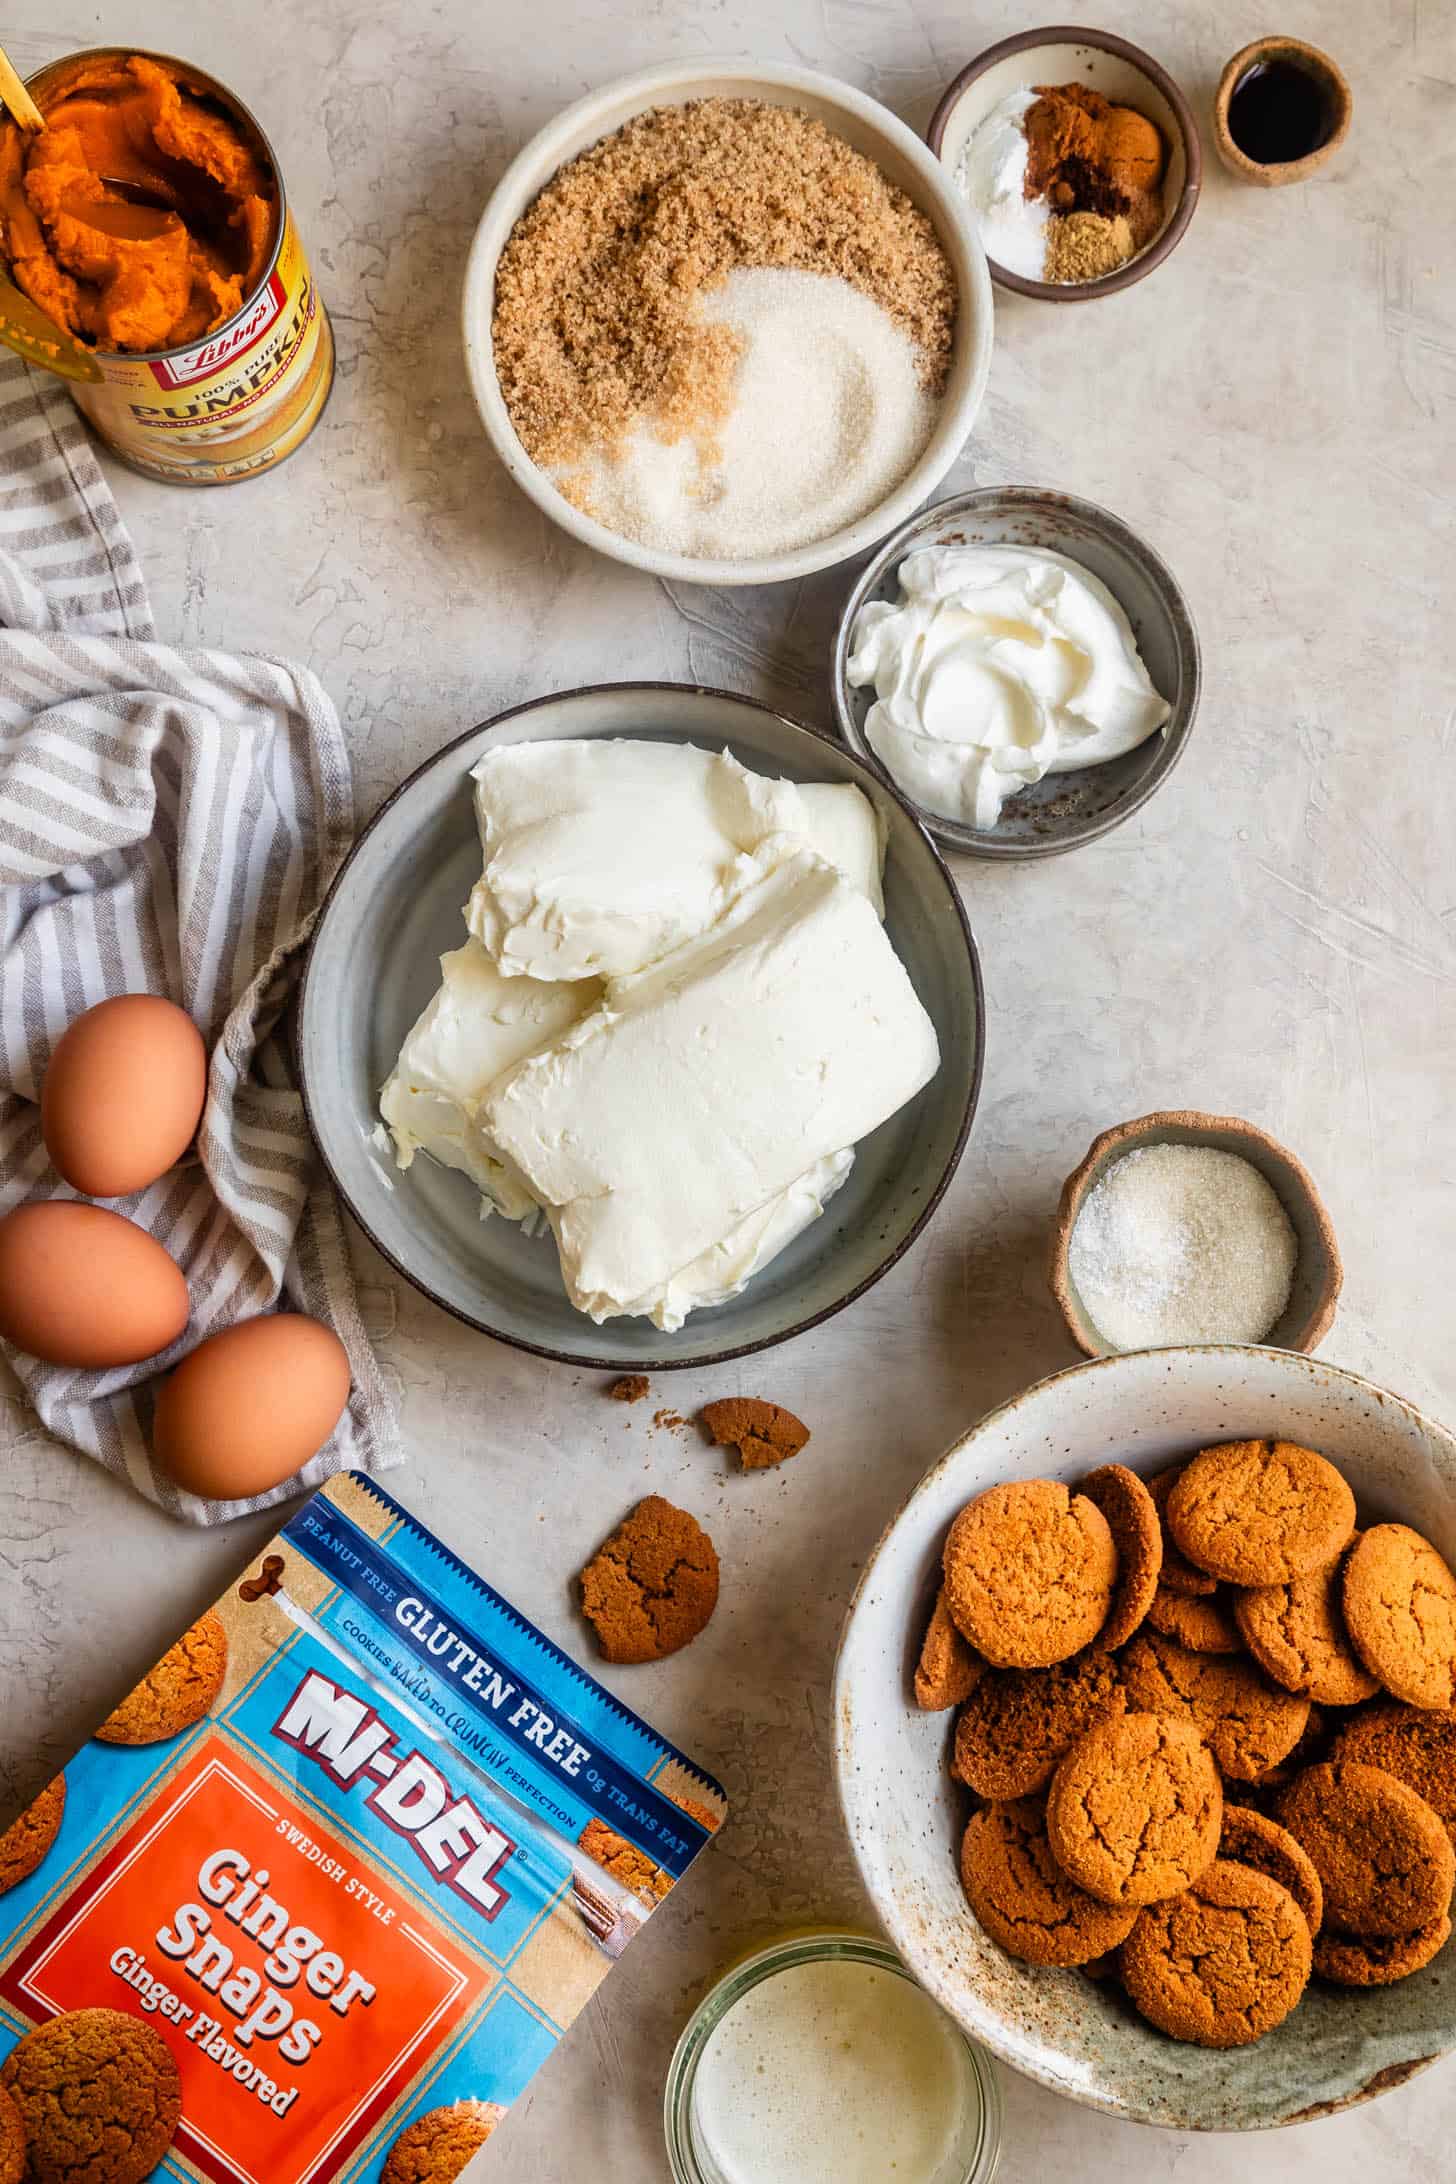
Andronico's Ingredients for Gluten-Free Pumpkin Cheesecake
The only unique ingredient you'll need to source for this cheesecake is gluten-free gingersnaps, which I get at my local Andronico's Community Market. If you're in the Bay Area, Andronico's is a great go-to for everything from everyday essentials to specialty ingredients for gluten-free baking.
How to Make Gluten-Free Pumpkin Cheesecake
Cheesecake feels daunting, but it's shockingly easy to make. With this steam method, you don't even need a water bath. Just mix, pour, bake, cool, and chill! Here are some step-by-step pictures to getting the creamiest gluten-free pumpkin cheesecake. Start by preheating the oven to 350°F.
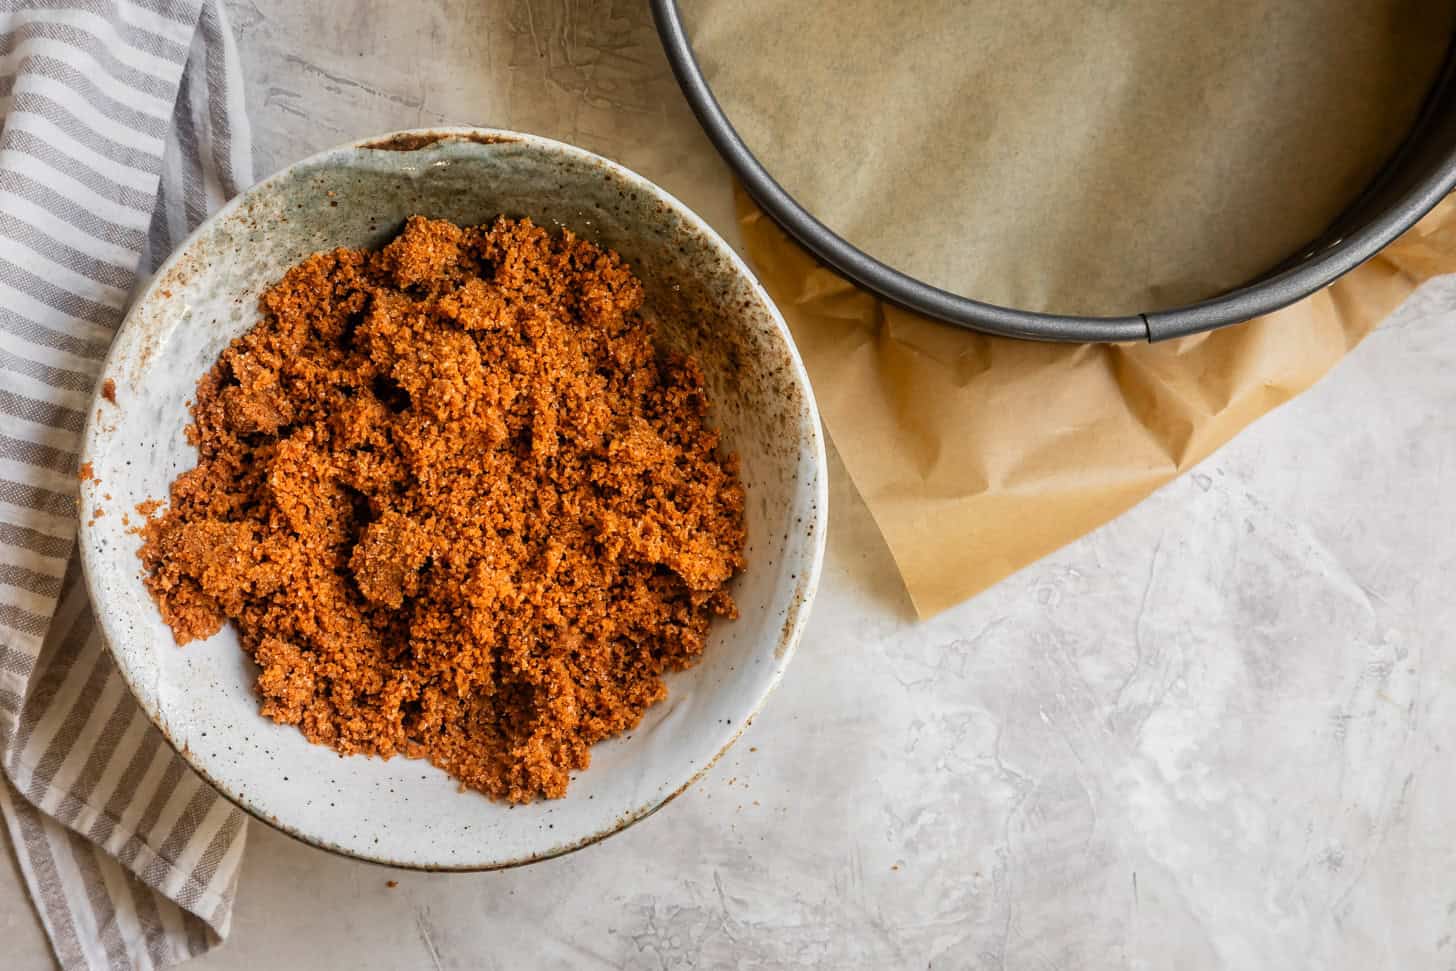
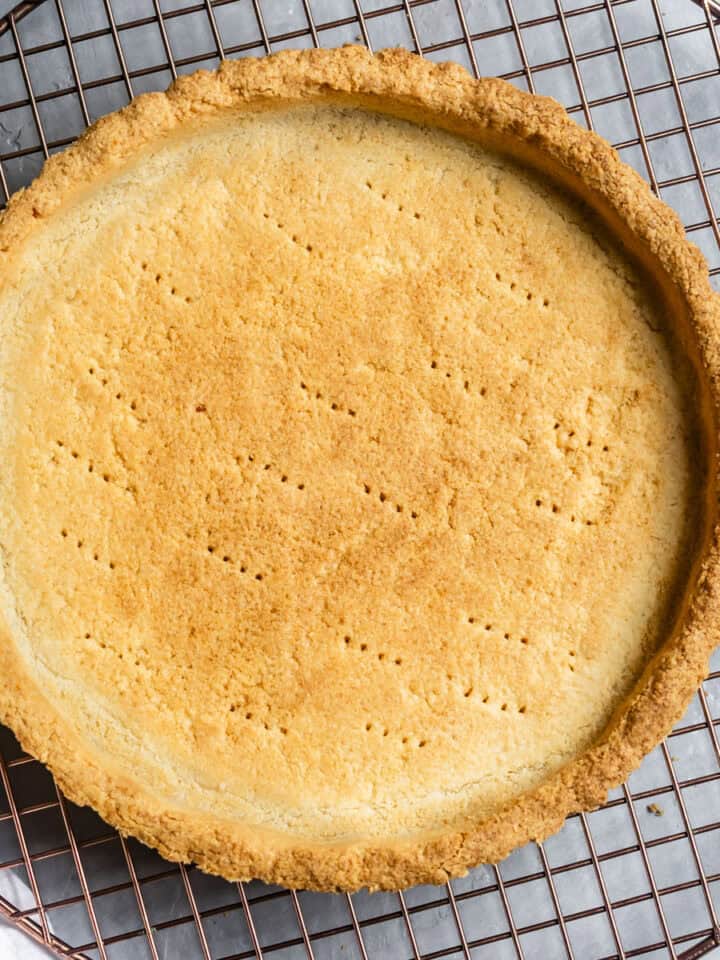
Mix all the crust ingredients until the crumbs are evenly and lightly moistened. It should be sandy and not wet or greasy, but a clump will just hold together when pinched.

Press into a 9-inch springform pan and bake for 8-10 minutes, pressing it down again with the bottom of a measuring cup when it comes out of the oven. Let cool completely.
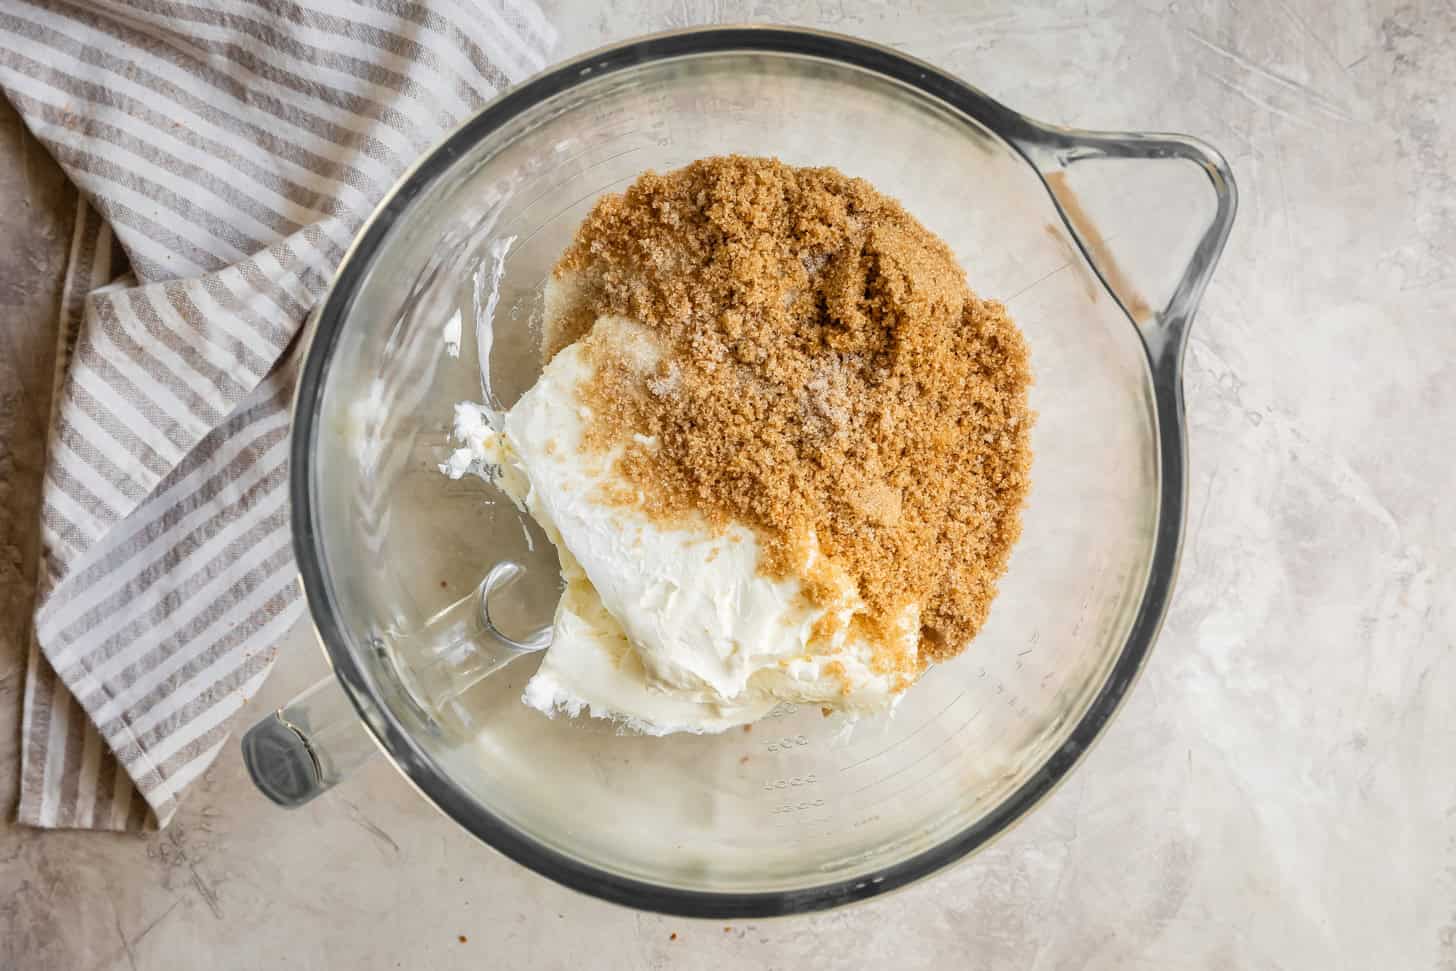
Beat together the cream cheese and sugars until completely smooth. A stand mixer or a mixing bowl with a hand mixer will both work! Be sure the scrape down the sides as you go.
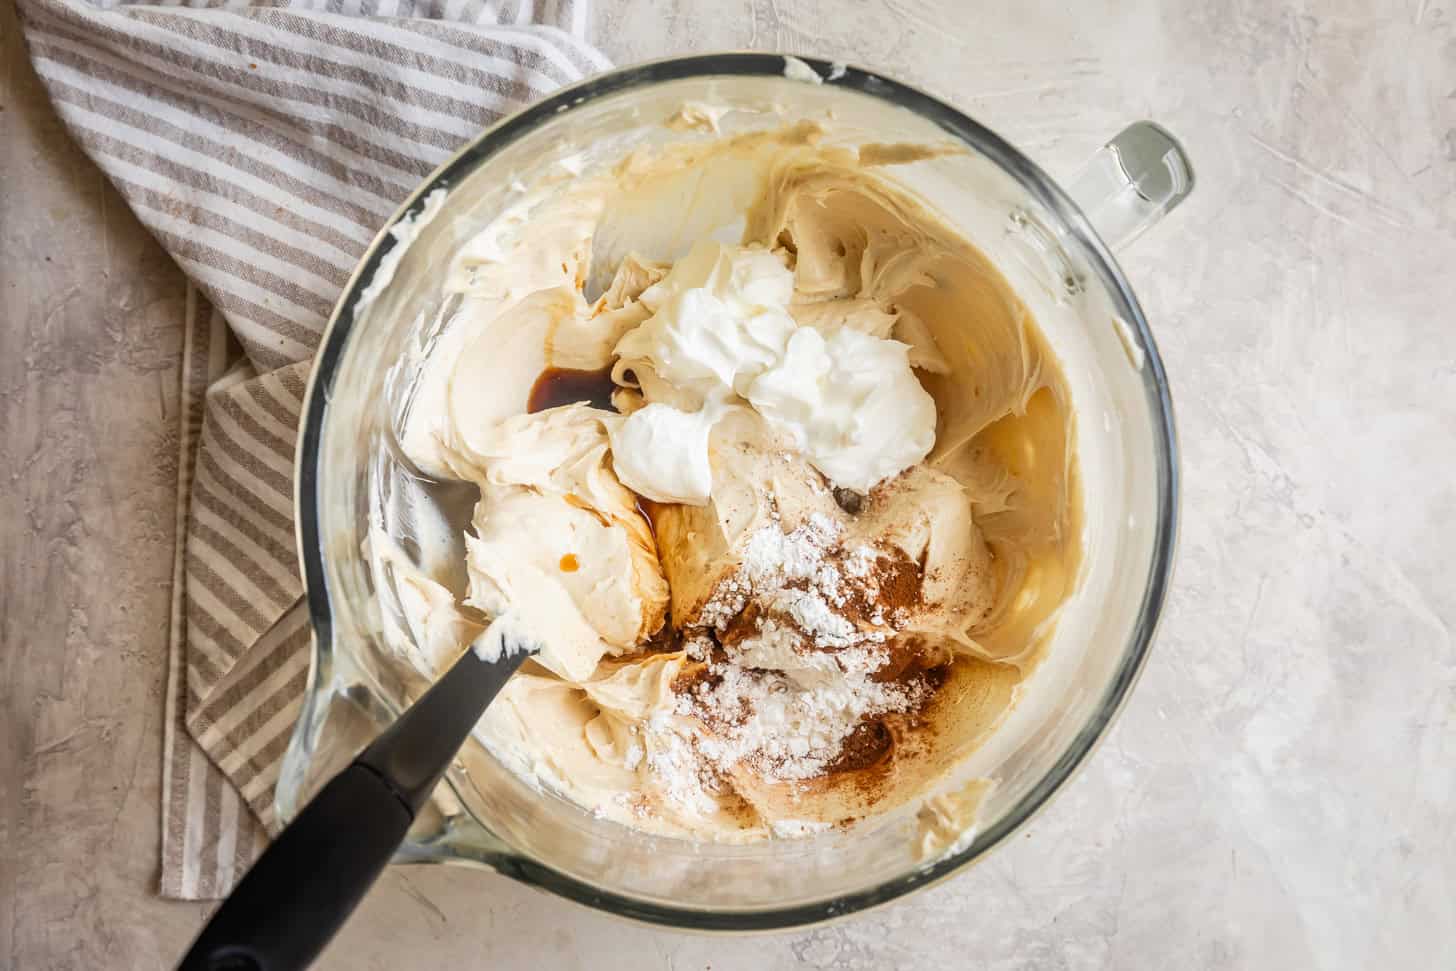
Add the sour cream, spices, vanilla and mix again until smooth.
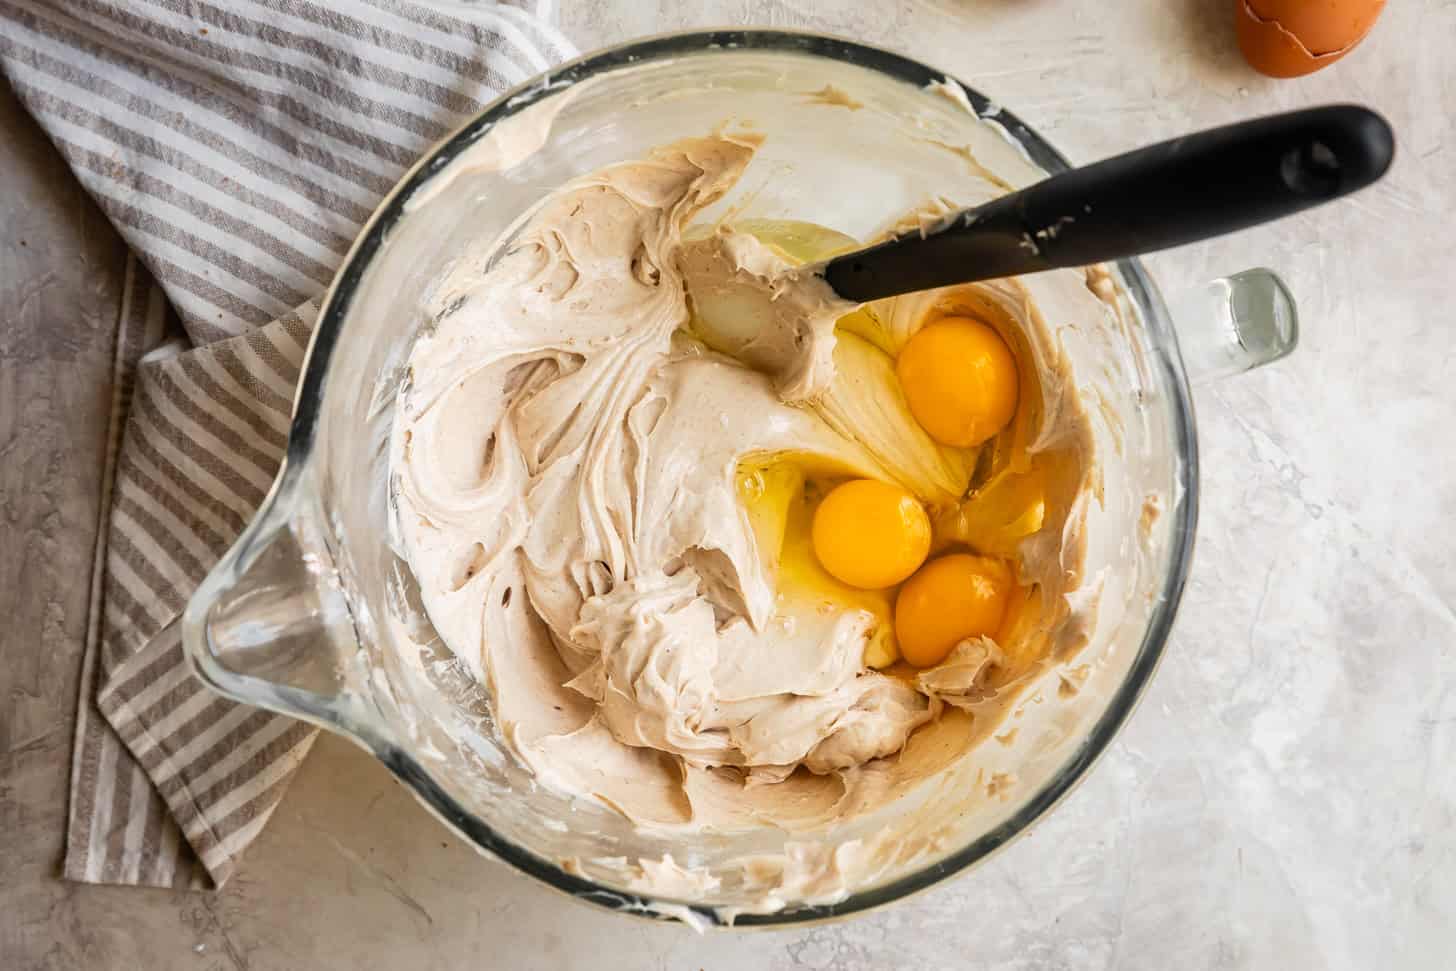
Add the eggs and mix until JUST combined. Take care not to overmix the filling after you've added the eggs.
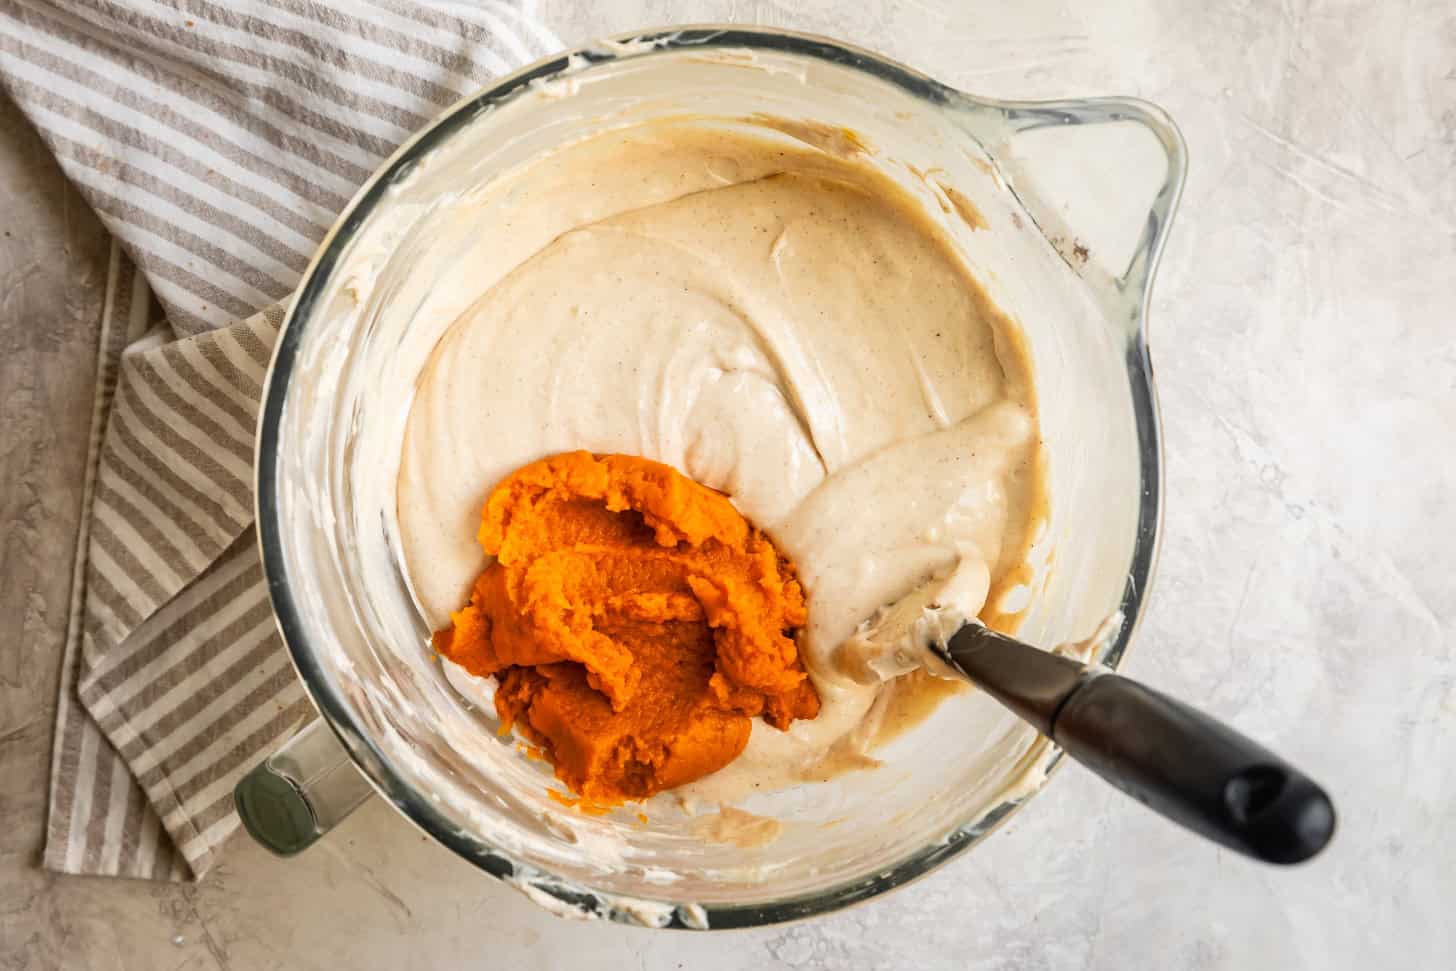
Add the pumpkin purée and mix until nearly combined.
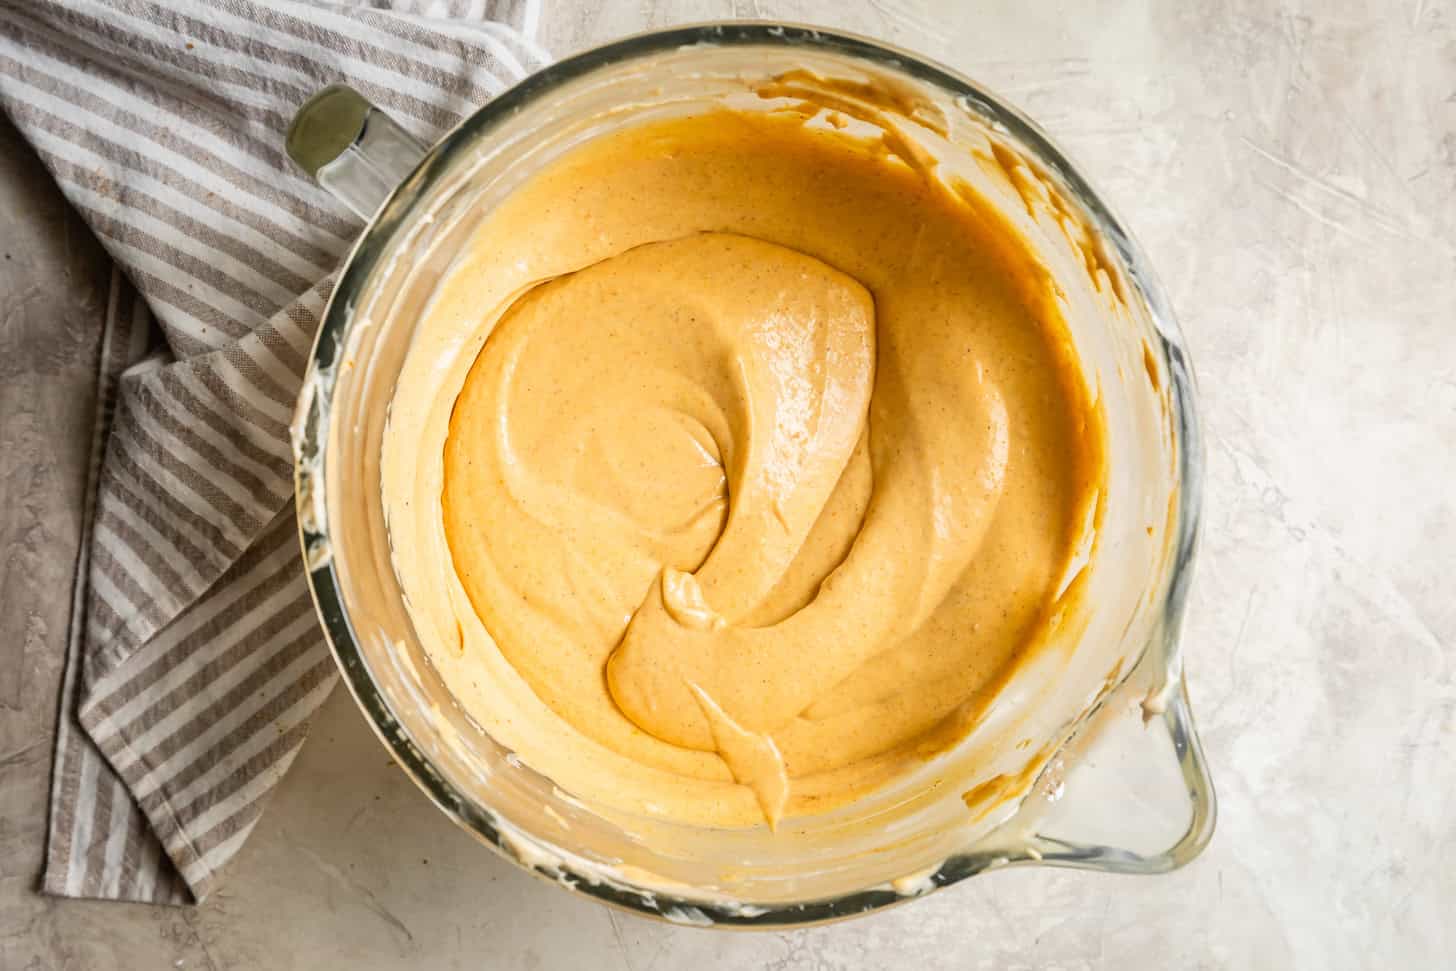
Finish mixing in the pumpkin until completely smooth with a silicone spatula.
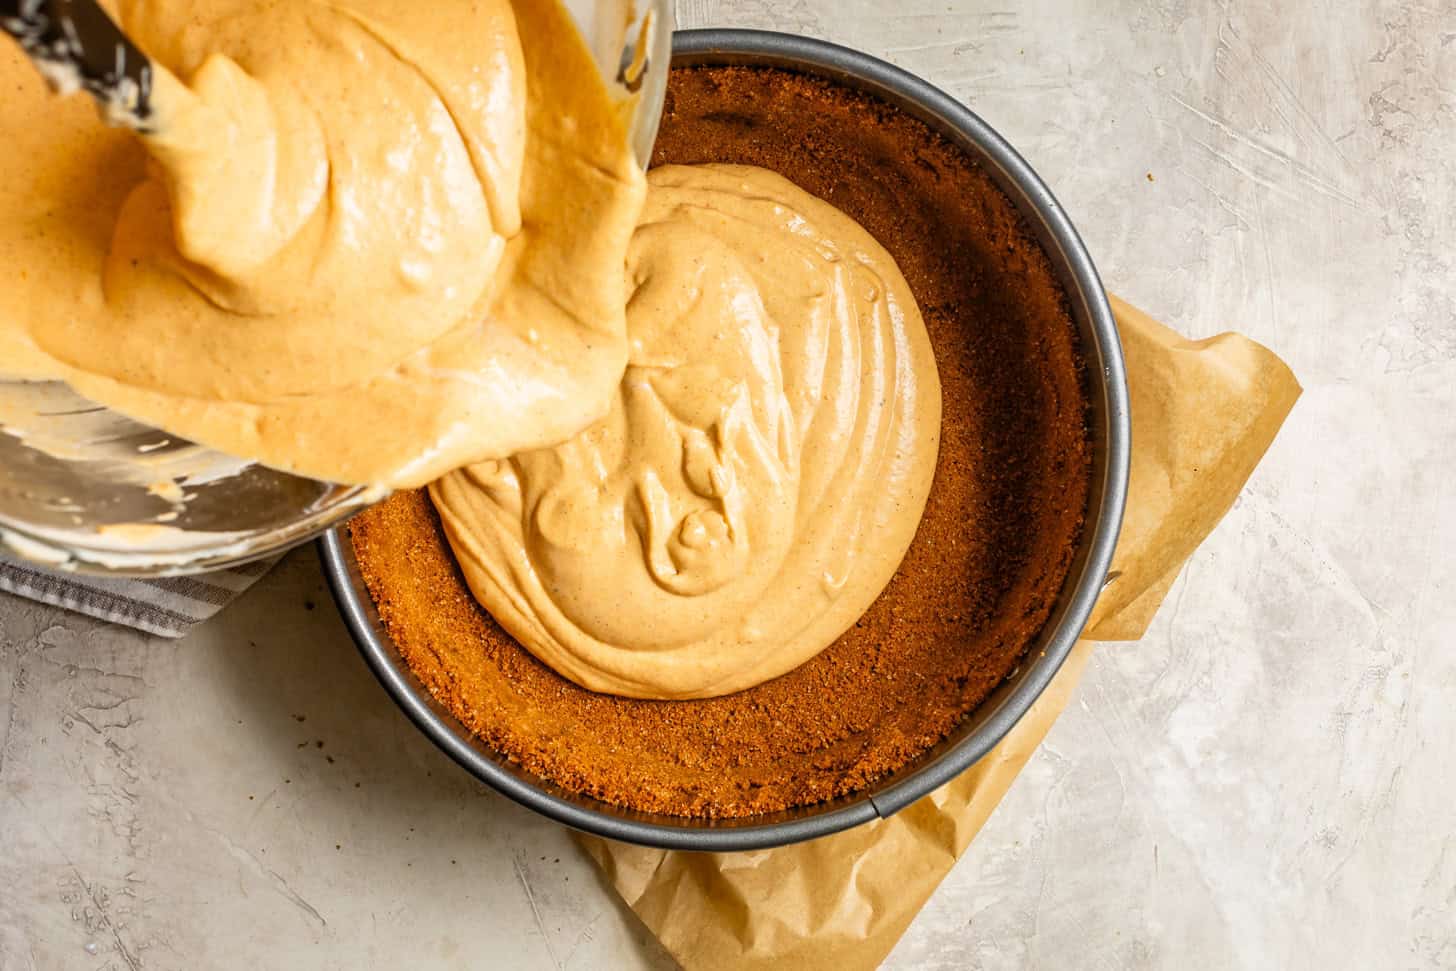
Pour filling into cooled crust.
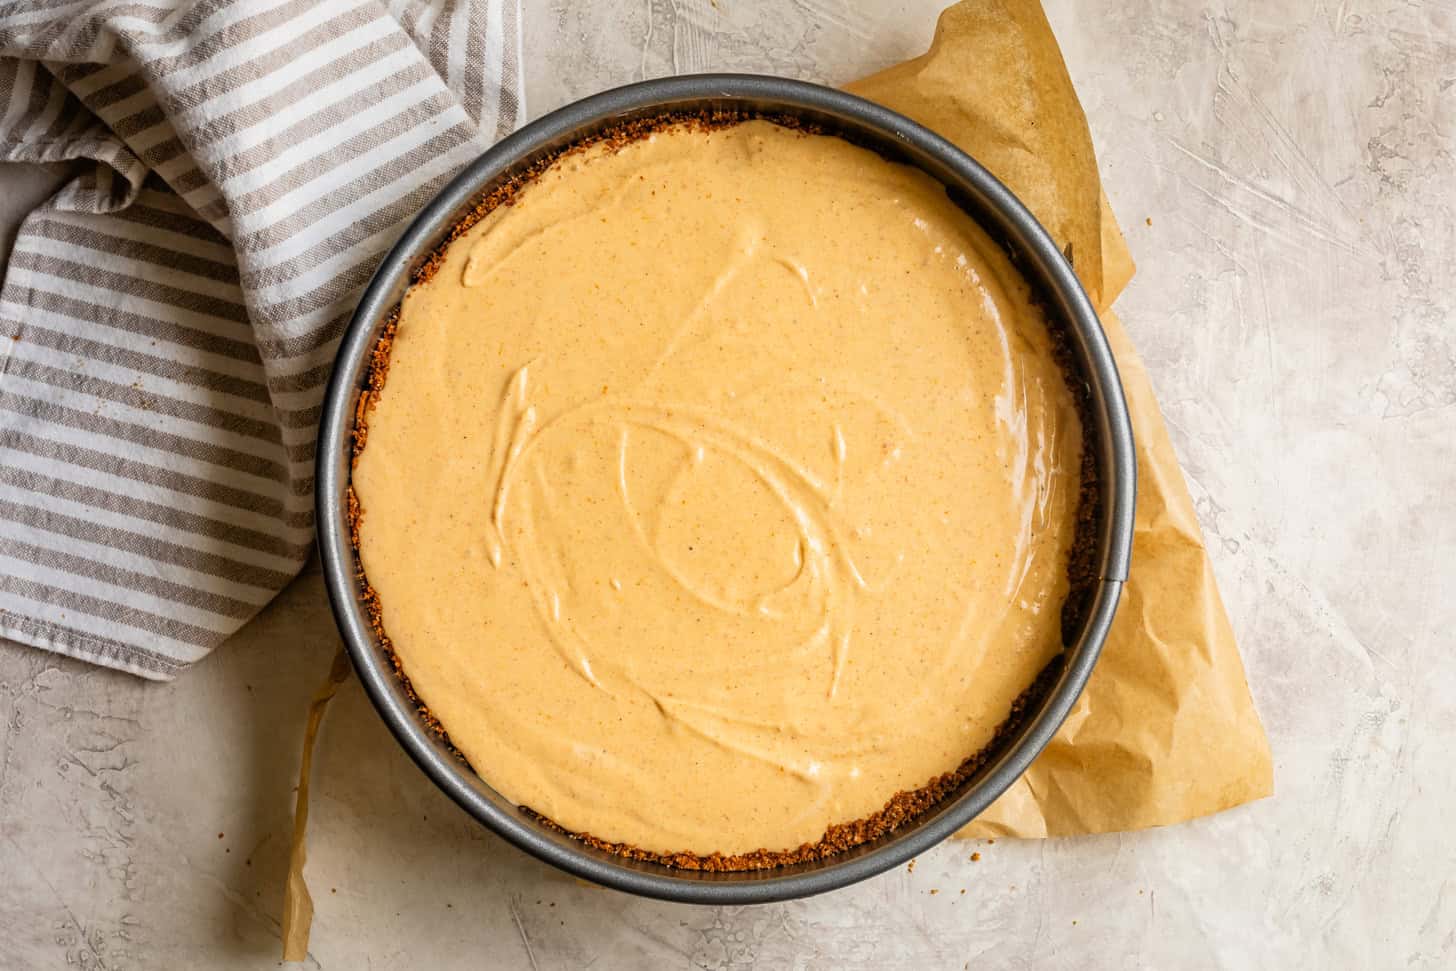
Smooth the top and tap gently on the counter to remove any air bubbles.
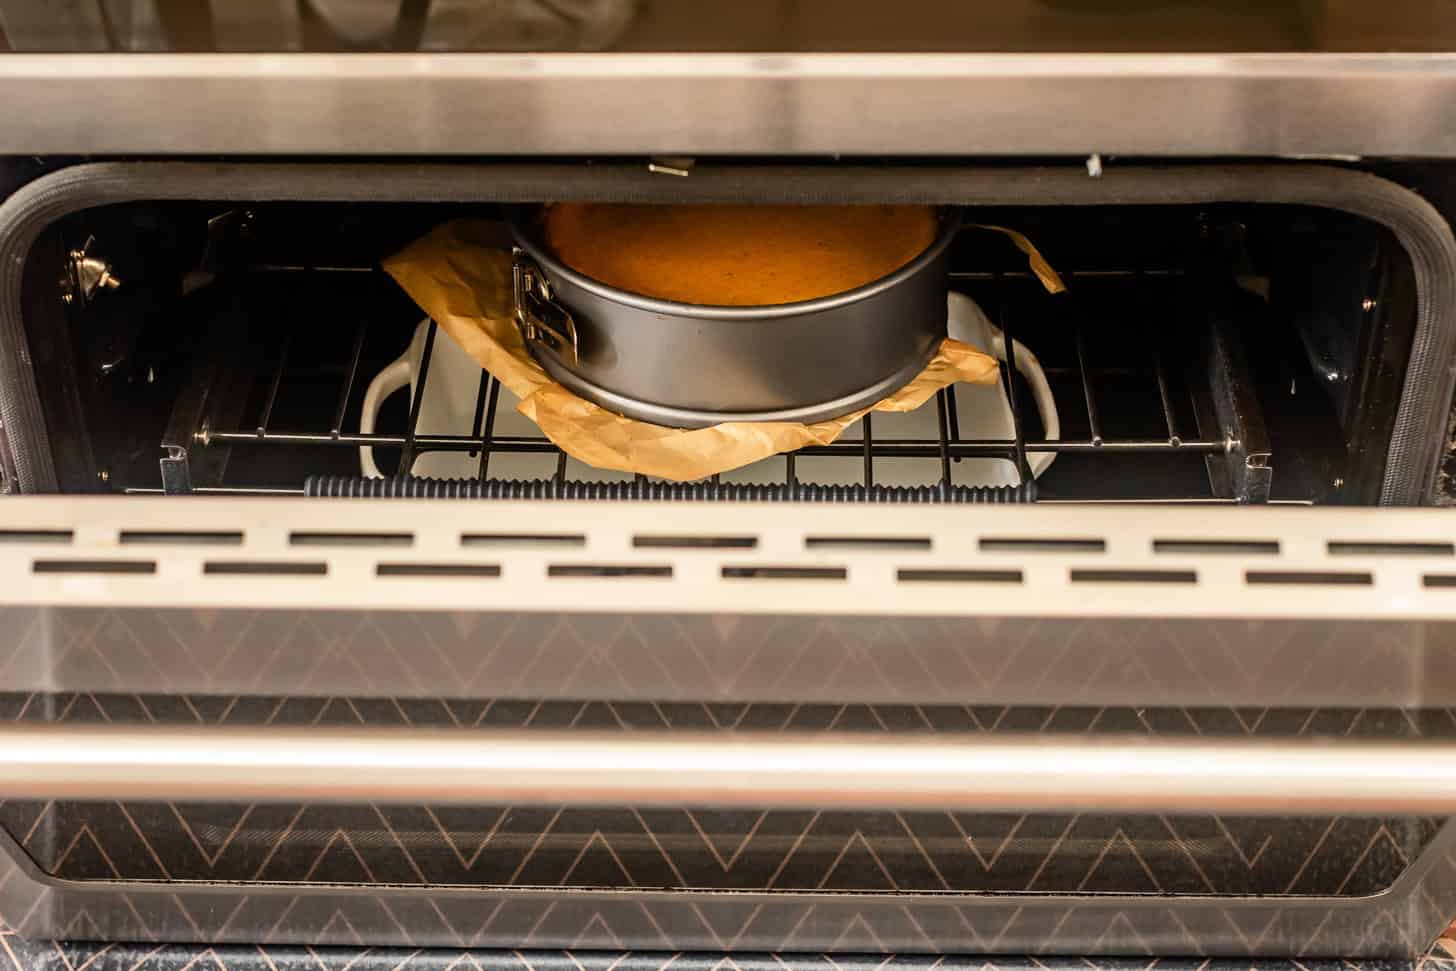
Bake for 50-60 minutes, with a 2-quart pan full of boiling water on the rack beneath. If you tap the pan and the cheesecake ripples or sloshes, bake it longer. The cheesecake is done when the entire thing jiggles as one piece almost like Jell-O, with an outer ring that is just ever so slightly more set, while the center wobbles more. If the center sloshes, continue baking. When it's done baking, turn off the oven and open the door several inches. Let the cheesecake cool in the oven for an hour.
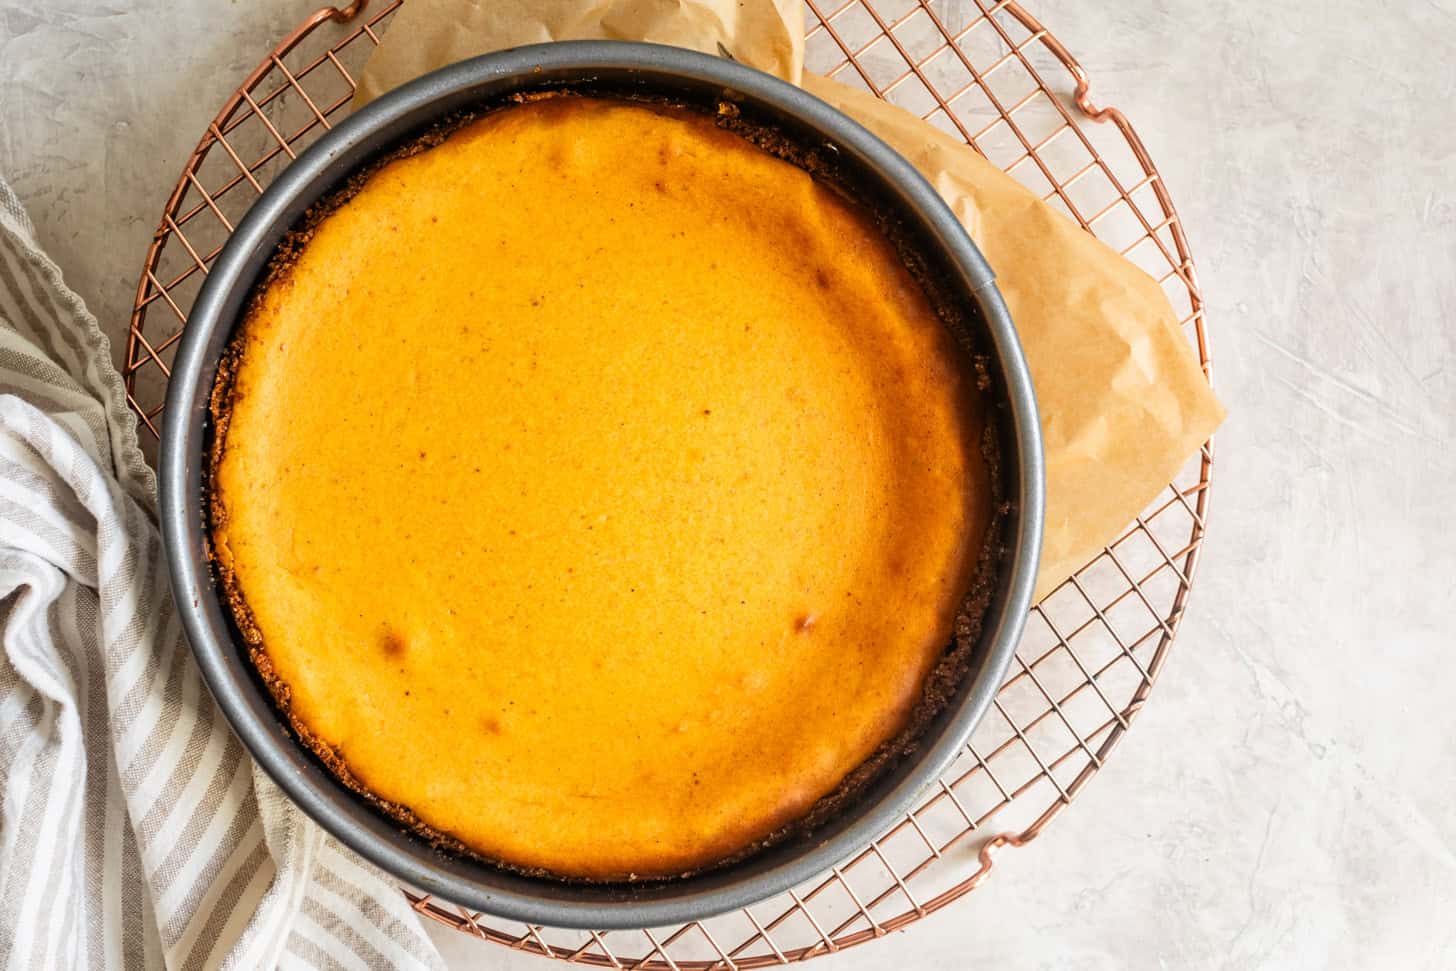
Transfer to the counter to cool for another hour. After cooling, run a knife around the outside to ensure the crust is removed from the pan, then remove the outer ring of the springform.
Transfer to the fridge to chill for at least 4 hours or preferably overnight.
Hint: Avoid Overmixing the Filling. When adding the eggs and pumpkin purée, mix just until smooth. Overmixing can add too much air to the batter, which could lead to cracks as the cheesecake bakes and cools. Stir gently and thoroughly, but be careful not to overdo it!

Recipe
Creamiest Gluten-Free Pumpkin Cheesecake
Equipment
Ingredients
- 10 oz gluten-free gingersnap cookies, ground into fine crumbs
- ¼ cup granulated sugar, or coconut sugar
- 3 tablespoons unsalted butter, melted
- ¼ teaspoon kosher salt
- 1 9-inch gluten-free gingersnap crust , baked and cooled in a springform pan (see notes for graham cracker crust option)
- 24 ounces (3 8-ounce blocks) full-fat cream cheese (blocked), room temperature
- 150 g (¾ cup) light brown sugar
- 75 g (¼ cup + 2 tablespoons) granulated sugar
- 9 g (1 tablespoon) cornstarch
- 1½ teaspoons pure vanilla extract
- 1½ teaspoons ground cinnamon
- ½ teaspoon ground nutmeg
- ¼ teaspoon ground ginger
- Pinch ground cloves
- ¼ teaspoon kosher salt
- ⅓ cup (⅓ cup) sour cream, room temperature
- 3 large eggs, room temperature
- 300 g (1⅓ cups) canned pumpkin puree, NOT pumpkin pie filling
- 1 cup heavy cream
- ¼ cup powdered sugar, sifted
- ½ teaspoon pure vanilla extract
INSTRUCTIONS
Gluten-Free Gingersnap Crust
- Preheat the oven to 350°F.
- In a medium mixing bowl, combine the gingersnap cracker crumbs, sugar, and salt together with a fork. Pour in the melted butter and mix well the crumbs are evenly and lightly moistened. The crumbs should be sandy and not WET or greasy, but a clump will just hold together when pinched. Note: If a clump will not hold together because your crumbs are too dry, add up to ½ tablespoon more melted butter. If your crumbs are too wet, add up to ½ cup more gingersnap crumbs.
- Dump the buttery gingersnaps into a 9-inch springform pan. Use your fingers to carefully and firmly press the crust about 1-inch up the sides of the pan. Leave the edge shaggy or use a thin knife along the top to create a more evenly straight edge. Use a flat-bottomed measuring cup to firmly pack the crumbs down into a layer on the bottom of the baking dish or pan.
- Bake the crust for 8-10 minutes before filling it, until dry, but not burned. When the crust comes out of the oven, immediately use a clean dry measuring cup to gently press the crust down into the bottom and against the sides of the pan. Let it cool completely before filling.
Pumpkin Cheesecake Filling
- Beat the cream cheese and sugars over medium-high speed in the bowl of a stand mixer or a large bowl with a hand mixer, until smooth and creamy, scraping down the sides a few times. Add the corn starch, spices, sour cream, vanilla, and salt, and beat on medium speed combined, scraping down the sides again.
- Add the eggs mixing on medium speed until just combined, scraping down the sides as you go. Be careful not to overmix the filling after you've added the eggs or you will incorporate too much air into the cheesecake, leading to potential cracks. Add the pumpkin puree and mix until almost combined. Use a silicone spatula to mix until completely smooth.
- Pour the filling into the cooled crust, give it a couple of taps on the counter to release any air bubbles, then use an offset spatula to smooth the top.
- Prepare a steaming pan by boiling about 2-quarts of water. Place 9x13 baking dish on the bottom rack of the preheated oven. Place the cheesecake on the middle rack of the oven and pour the boiling water into the 9x13 pan on the bottom rack. Quickly close the oven and bake for 50-60 minutes, checking for doneness around 45 minutes, to account for oven variation. If you tap the pan and the cheesecake ripples or sloshes, bake it longer. The entire cheesecake should jiggle as one piece almost like Jell-O, with an outer ring that is just ever so slightly more set, while the center wobbles more. For a creamier cheesecake, bake it for closer to 50 minutes, and for a more baked cheesecake, bake it closer to 60 minutes.
- When it's done baking, turn off the oven and open the door several inches. Let the cheesecake cool in the oven for an hour. Then transfer the cheesecake to the counter to cool for another hour.
- Once completely cool, use a thin knife around the outside edge to ensure the cheesecake is loosened from the pan, then release it from the springform pan. Then transfer the cheesecake to the fridge to chill for at least 4 hours or preferably overnight.
Whipped Cream Topping
- When ready to serve, prepare the whipped cream topping if desired. Whip the heavy cream, powdered sugar, and vanilla in the bowl of a stand mixer or a medium bowl with an hand mixer just until soft peaks form, being careful not to over-whisk. Dollop or pipe the whipped cream over the entire cheesecake or serve individual slices with whipped cream.
- Serve chilled. To make clean slices, I recommend wiping off the knife, then placing it in warm water, and wiping dry before each cut.
Video
Notes
Graham Cracker Crust:
If you're unable to find gluten-free gingersnaps or you prefer a more classic flavor, you can use my gluten-free graham cracker crust for your pumpkin cheesecake! Pre-bake the crust in a 9-inch springform pan as instructed in the recipe. Once cool, prepare the pumpkin cheesecake filling.Cream Cheese:
Tub cream cheese will not work for this recipe. Instead, it's best to use block cream cheese for a thicker texture. Tub cream cheese tends to be softer and has more moisture, which makes cheesecake too runny.Avoiding cracks in your cheesecake
To minimize cracks, avoid overmixing the filling and be sure to cool the cheesecake slowly in the oven after baking.Help! Why is my gingersnap crust soggy?
Oh no! There are a few reasons why your gingersnap crust became soggy. Pumpkin cheesecake has moist moisture from the canned pumpkin. Therefore, it's important to always pre-bake the crust until it’s set to help it hold up against the higher moisture. It's also important to allow your crust to cool entirely before pouring in the filling. When the filling is poured onto a hot crust without allowing the crust to cool first, steam can build up, leading to a soggy texture. Finally, if there is too much butter in your crust mixture, it can become greasy and fail to firm up properly, resulting in a soggy texture. Every brand of gingersnap is a bit different, so be sure to use just enough butter to bind the crust ingredients together. Refrigerator: Before adding the whipped cream topping, cheesecake will keep well in the refrigerator for up to a week. If storing longer than the initial overnight chill, cover the cheesecake loosely with plastic wrap or foil to keep it from drying out. Wait to add the whipped cream topping until you're ready to serve to keep it from melting. Leftover slices can be kept in an airtight container in the fridge for up to a week. Note: After a couple of days, you may notice the crust begin to get softer from the moisture of the filling. Freezer: To freeze, place the cooled cheesecake (whole or sliced) on a baking sheet and freeze until firm. Once frozen, wrap it tightly in plastic wrap followed by aluminum foil, or store it in a freezer-safe container. It can be frozen for up to 2 months. When ready to serve, thaw overnight in the refrigerator. Add the whipped cream topping when ready to serve.Did you make this recipe? Please leave a review and rating to let me and others know how you liked it!

Ella Merrill -
I made it for Thanksgiving for my family and we all loved it so much!! It was my first time making cheesecake and the process was straight forward. The texture was silky smooth and melted in your mouth and the flavor of the pumpkin was perfect. As a cheesecake connoisseur, it was wonderful. Would definitely recommend.
Juliette -
Hi! Making this for the first time! Do I need to grease the spring form pan first? Or use parchment? Thank you!
Sarah Menanix -
No need to grease or line the pan at all! Before releasing it from the pan, you’ll run a thin knife or offset spatula around the inner edge of the pan to loosen the sides before unlatching the ring. I hope you love it!