
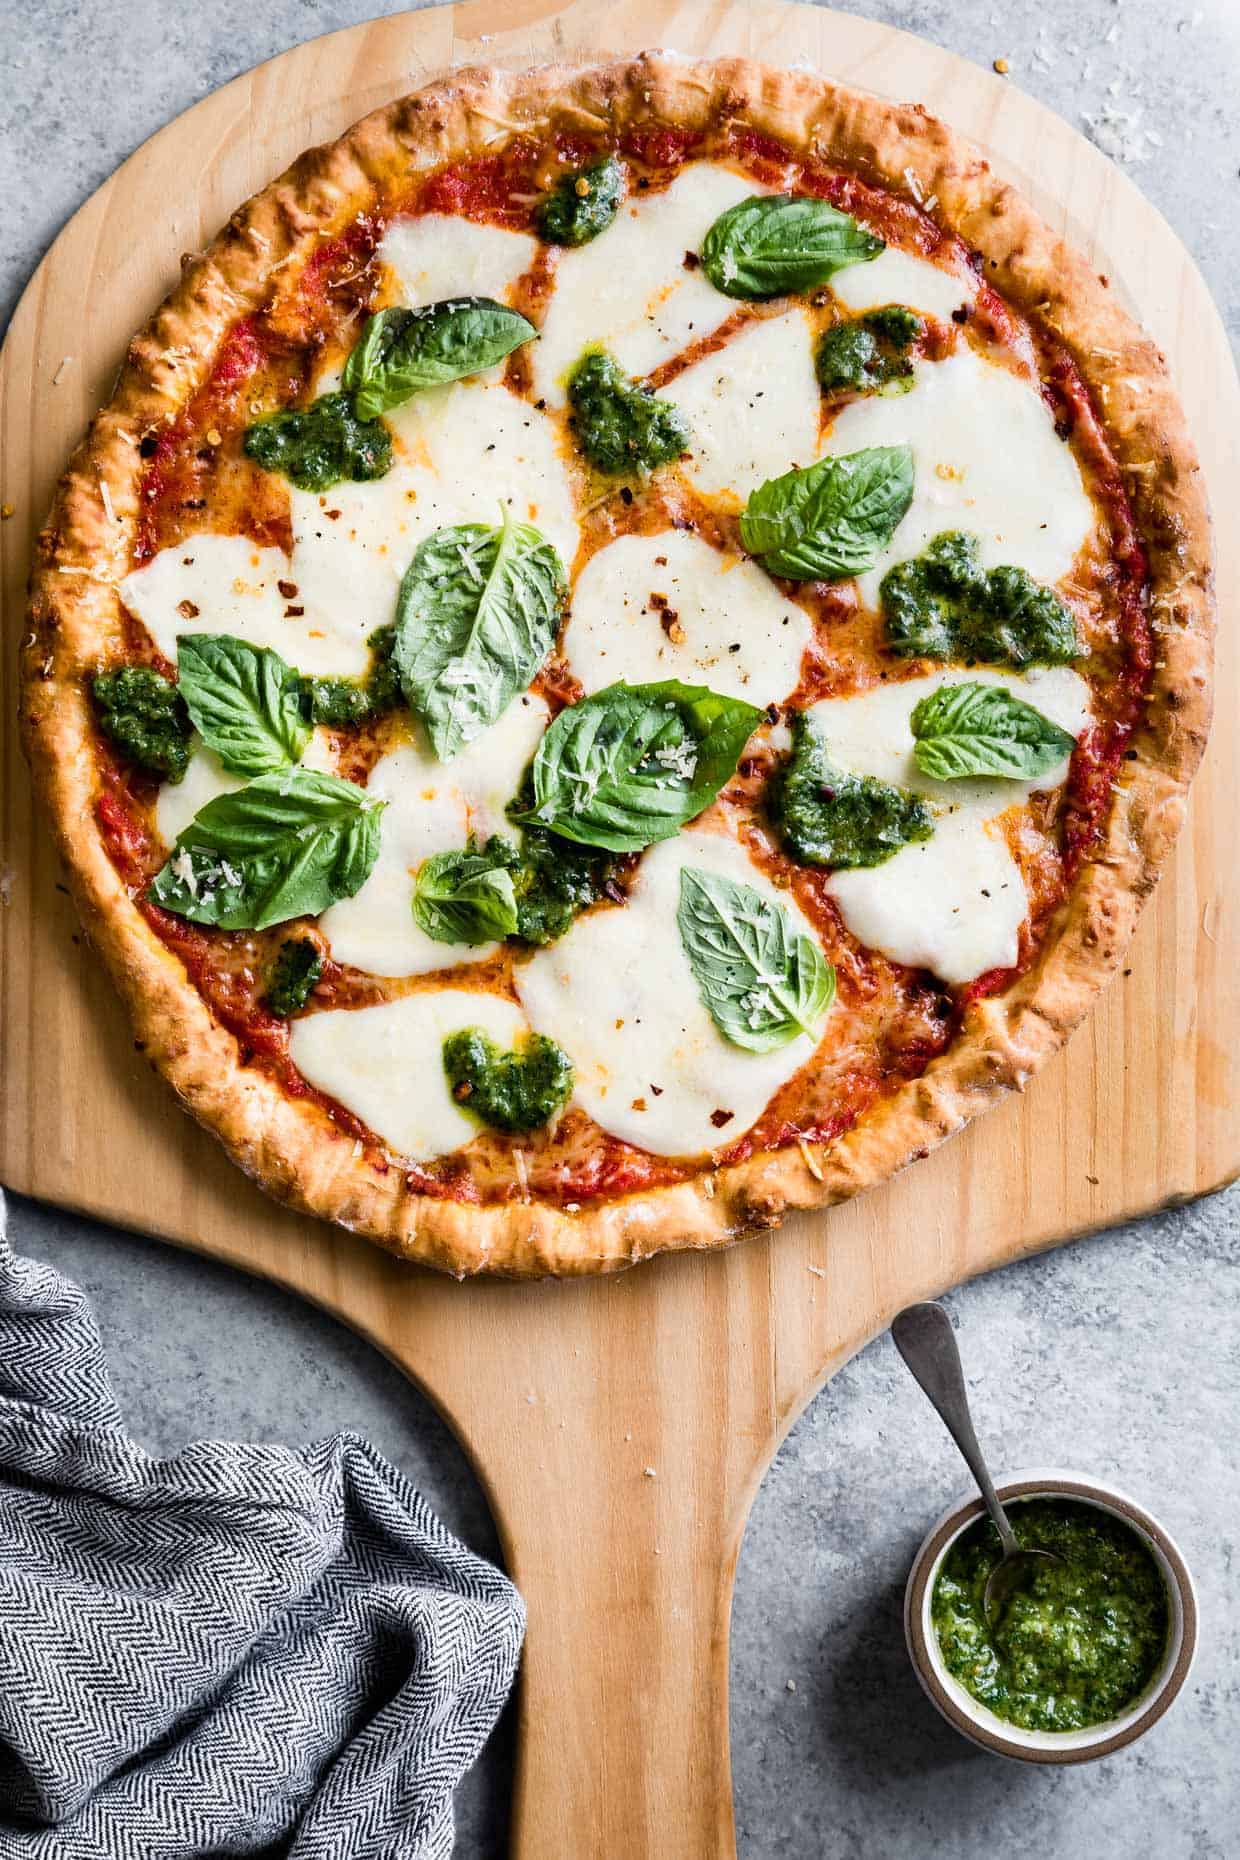
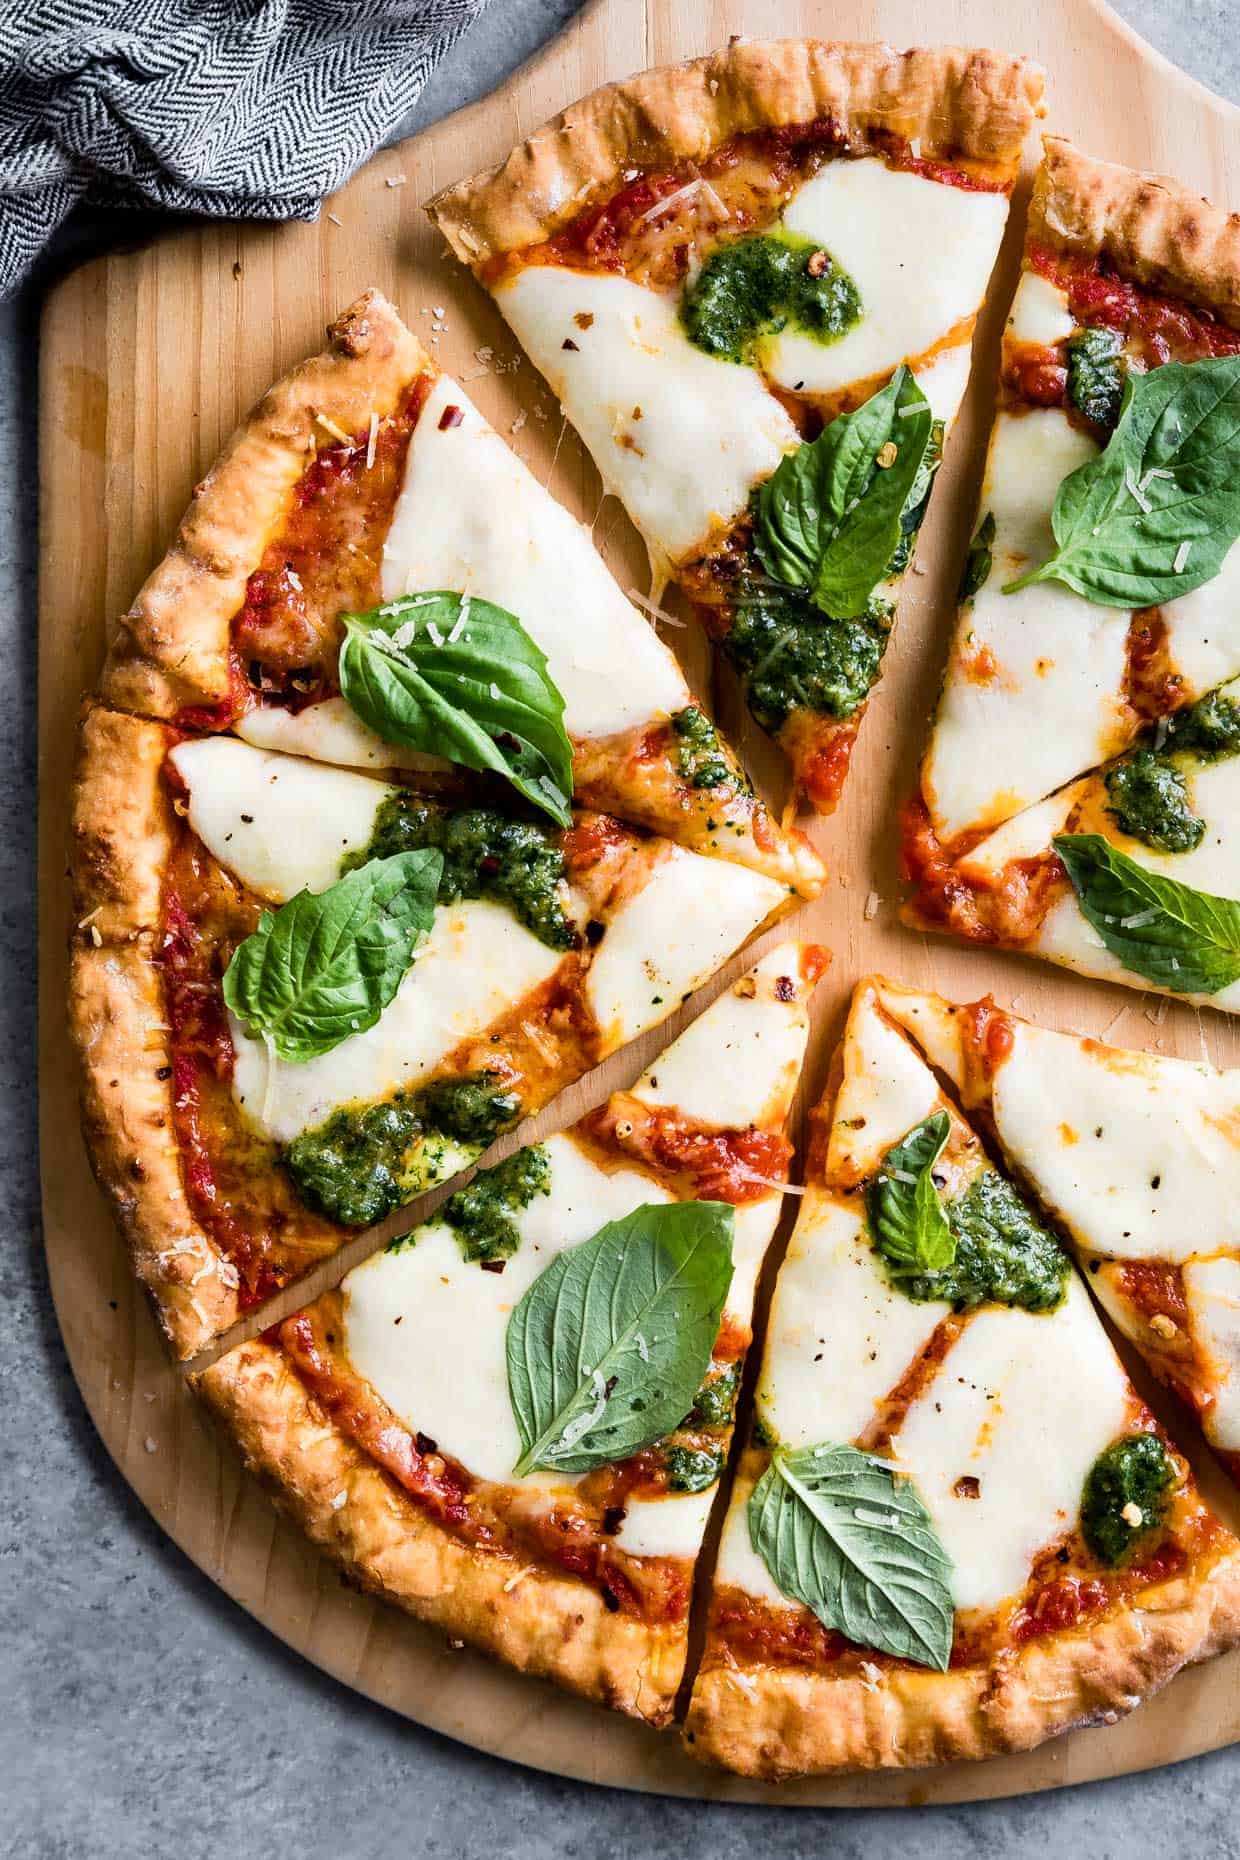
This no yeast gluten-free pizza crust recipe has crispy edges with an amazing chewy pizza texture inside. Made from an easy, cheesy tapioca flour dough inspired by Brazilian cheese bread, this recipe is fast and easy for pizza night at home!

Our two-year-old is on the extreme end of stubborn and persistent. Even still, we've managed to guide a toddler with a very limited diet into becoming one who eats vegetables for dinner every night and only has a few foods she actively hates (looking at you, avocado). We were on top of our parenting game...until I almost ruined pizza for her last week.
I served a chickpea socca flatbread covered with cheese and veggies for dinner one night and called it pizza. It's all about optics with toddlers; she'll eat blistered green beans if I call them "bean fries" and offer ketchup. She took one bite of that chickpea (not-pizza) pizza and spit it right out with tears about how she doesn't like pizza anymore.
Oops.
Why you'll love this cheesy tapioca flour gluten-free pizza crust
While there are definitely vast and varied opinions on what makes a great pizza, there are a few things most of us can agree on, right? Namely, cheese. That's what gives this crust its wow factor - it's loaded with cheese. I mean, that's why this Pepperoni Pizza Quesadilla is so good too!
The inspiration for this recipe comes from pão de queijo or Brazilian cheese bread. I've made a take on Brazilian cheese bread but after a life-changing gluten-free pizza experience in Boston, I knew I had to recreate it. While the restaurant did not confirm it, their gluten-free pizza crust tasted remarkably similar to Brazilian cheese bread and from there I immediately went back to testing.
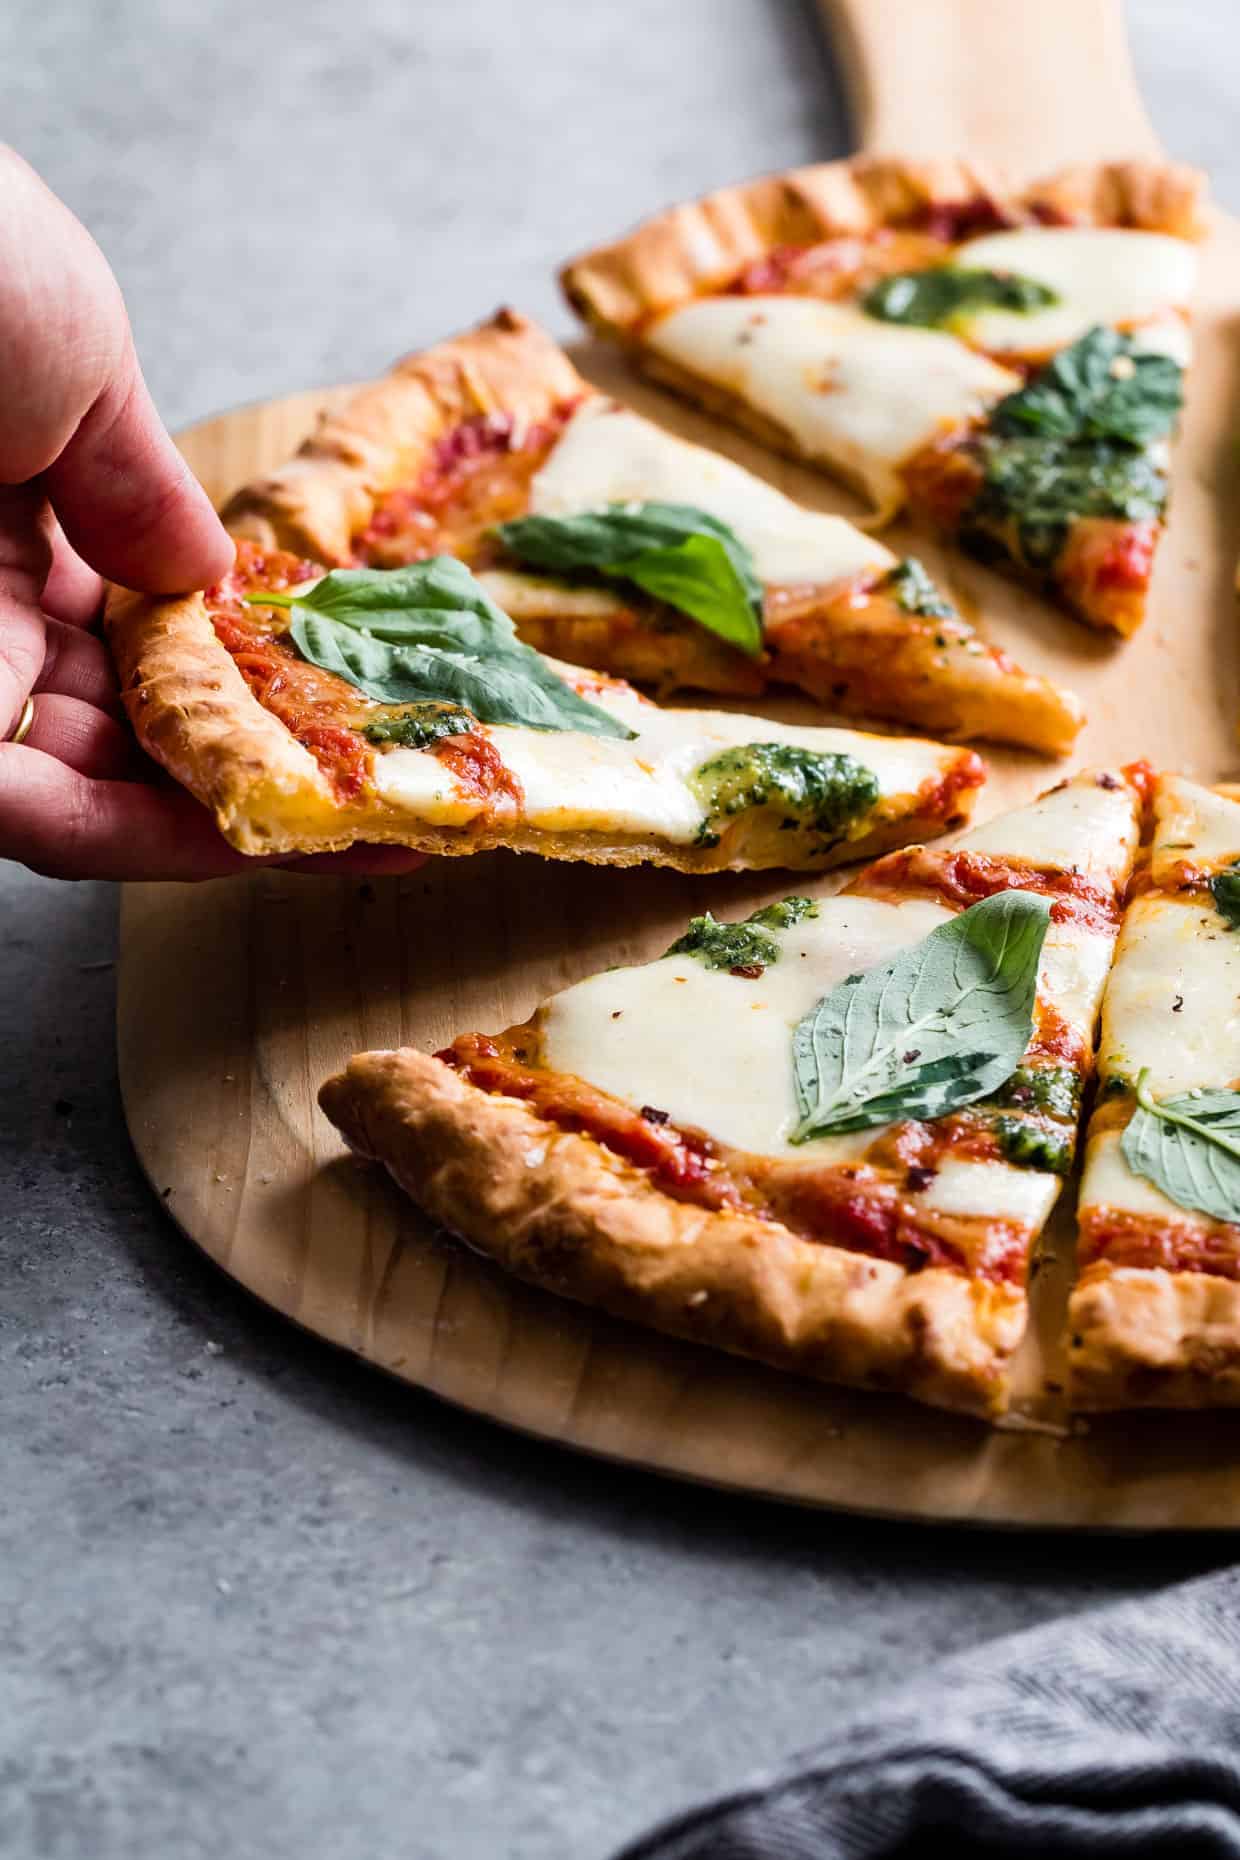
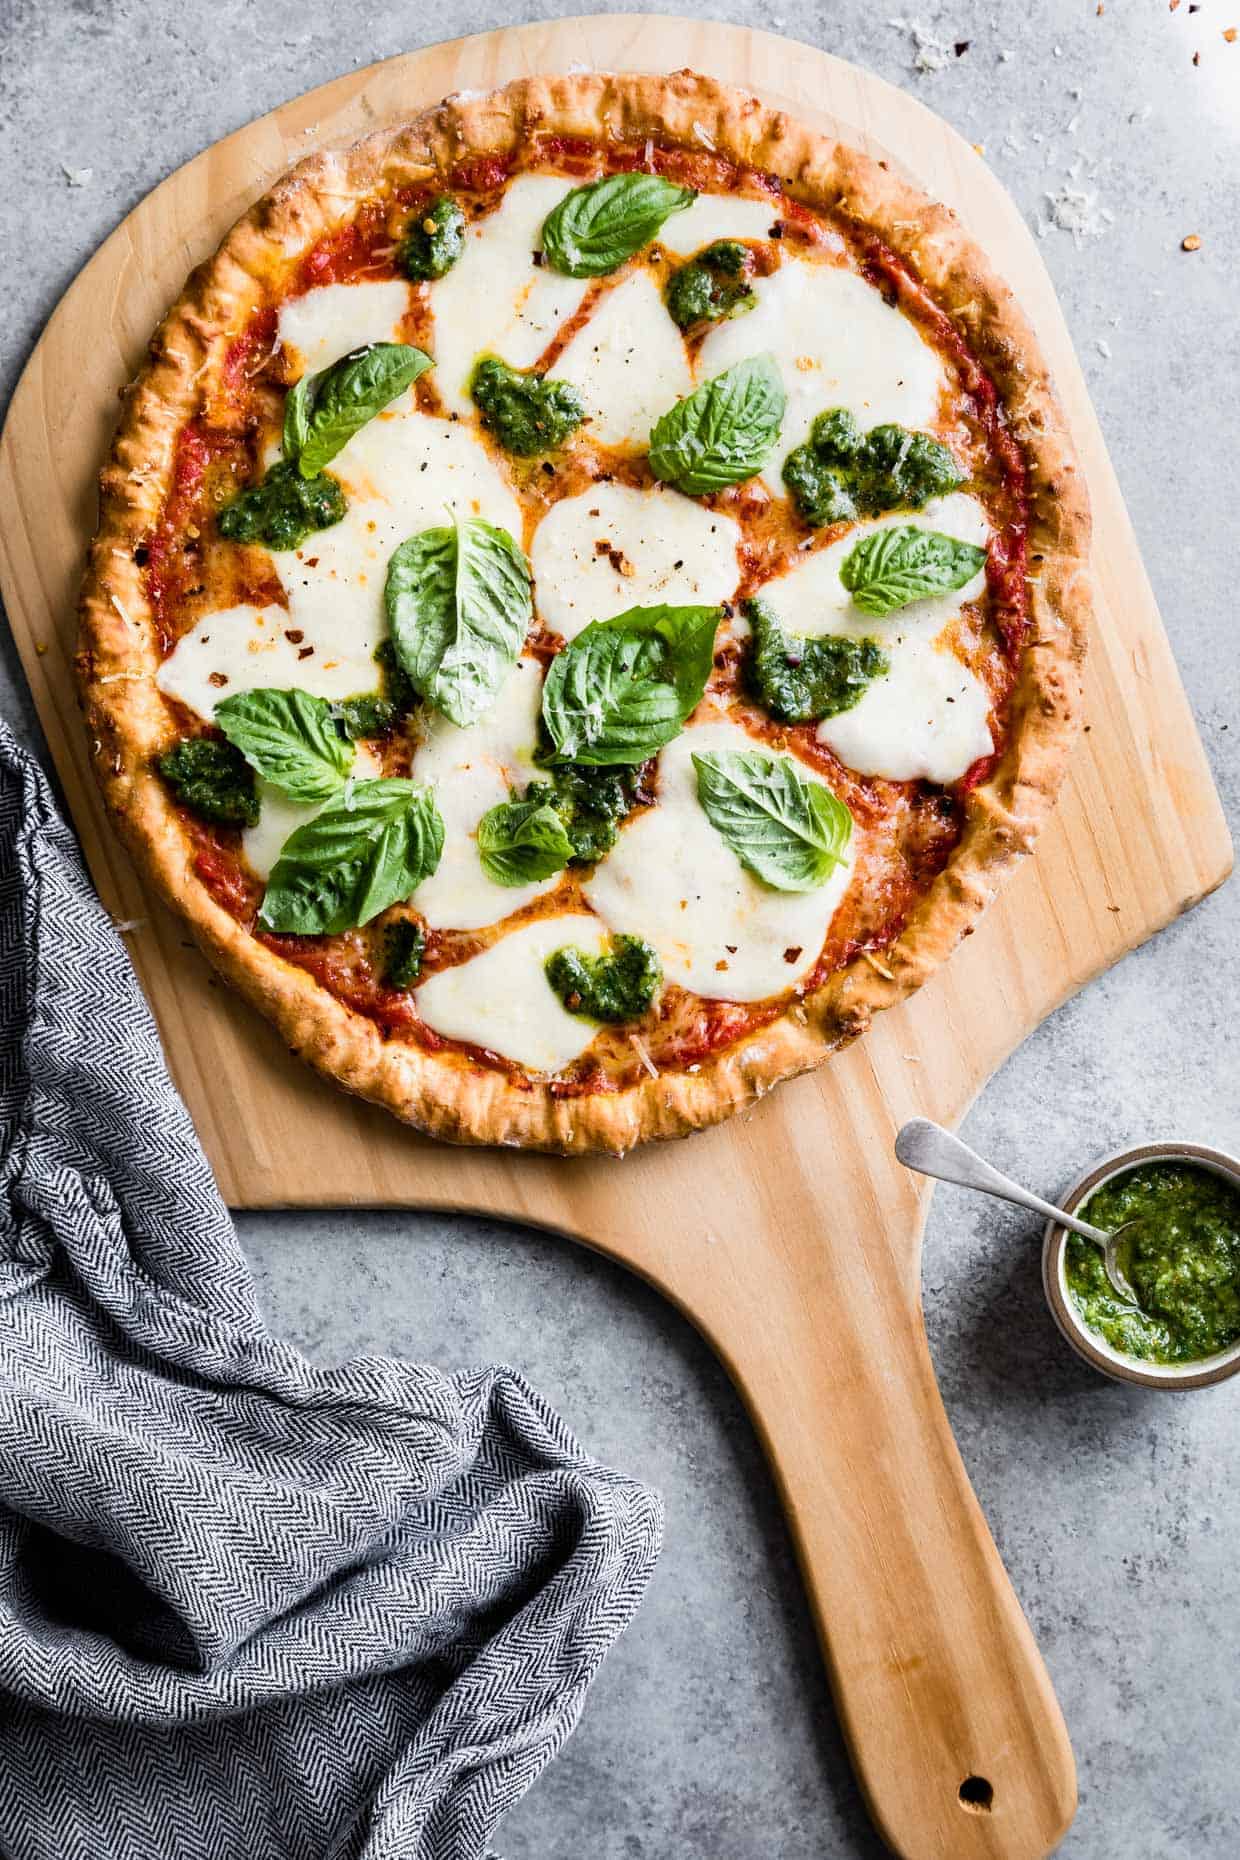
Brazilian cheese bread has all the characteristics that make it perfectly suited for pizza crust. It bakes up with a crispy exterior that browns up with a chewy, cheesy, bready interior that stretches and pulls like traditional yeasted pizza crust except you don't have to mess with any yeast!
Another pizza crust non-negotiable for me is that the bottom must be crispy. This is where I find that many gluten-free pizza crusts are lacking. Or if they are crispy, they aren't also chewy inside. Not this crust though! The cheese-y gluten-free pizza dough browns and crisps on the bottom while still having the classic pizza crust chew.
A few days later, I told Zoella we were having pizza for dinner in the most excited voice I could muster, she threw a tantrum about how she doesn't LIKE pizza. She finally clarified that she doesn't like "the other pizza" (aka the chickpea pizza she's apparently still traumatized from). So I taught her the word socca and we all happily ate this cheesy gluten-free pizza crust with our favorite toppings for dinner.
When she requested pizza again last night, she added with sass, "but not socca. I don't like socca." She's only 2.5 years old, but pizza now has stipulations.
Tips for Making Gluten-Free Pizza Dough
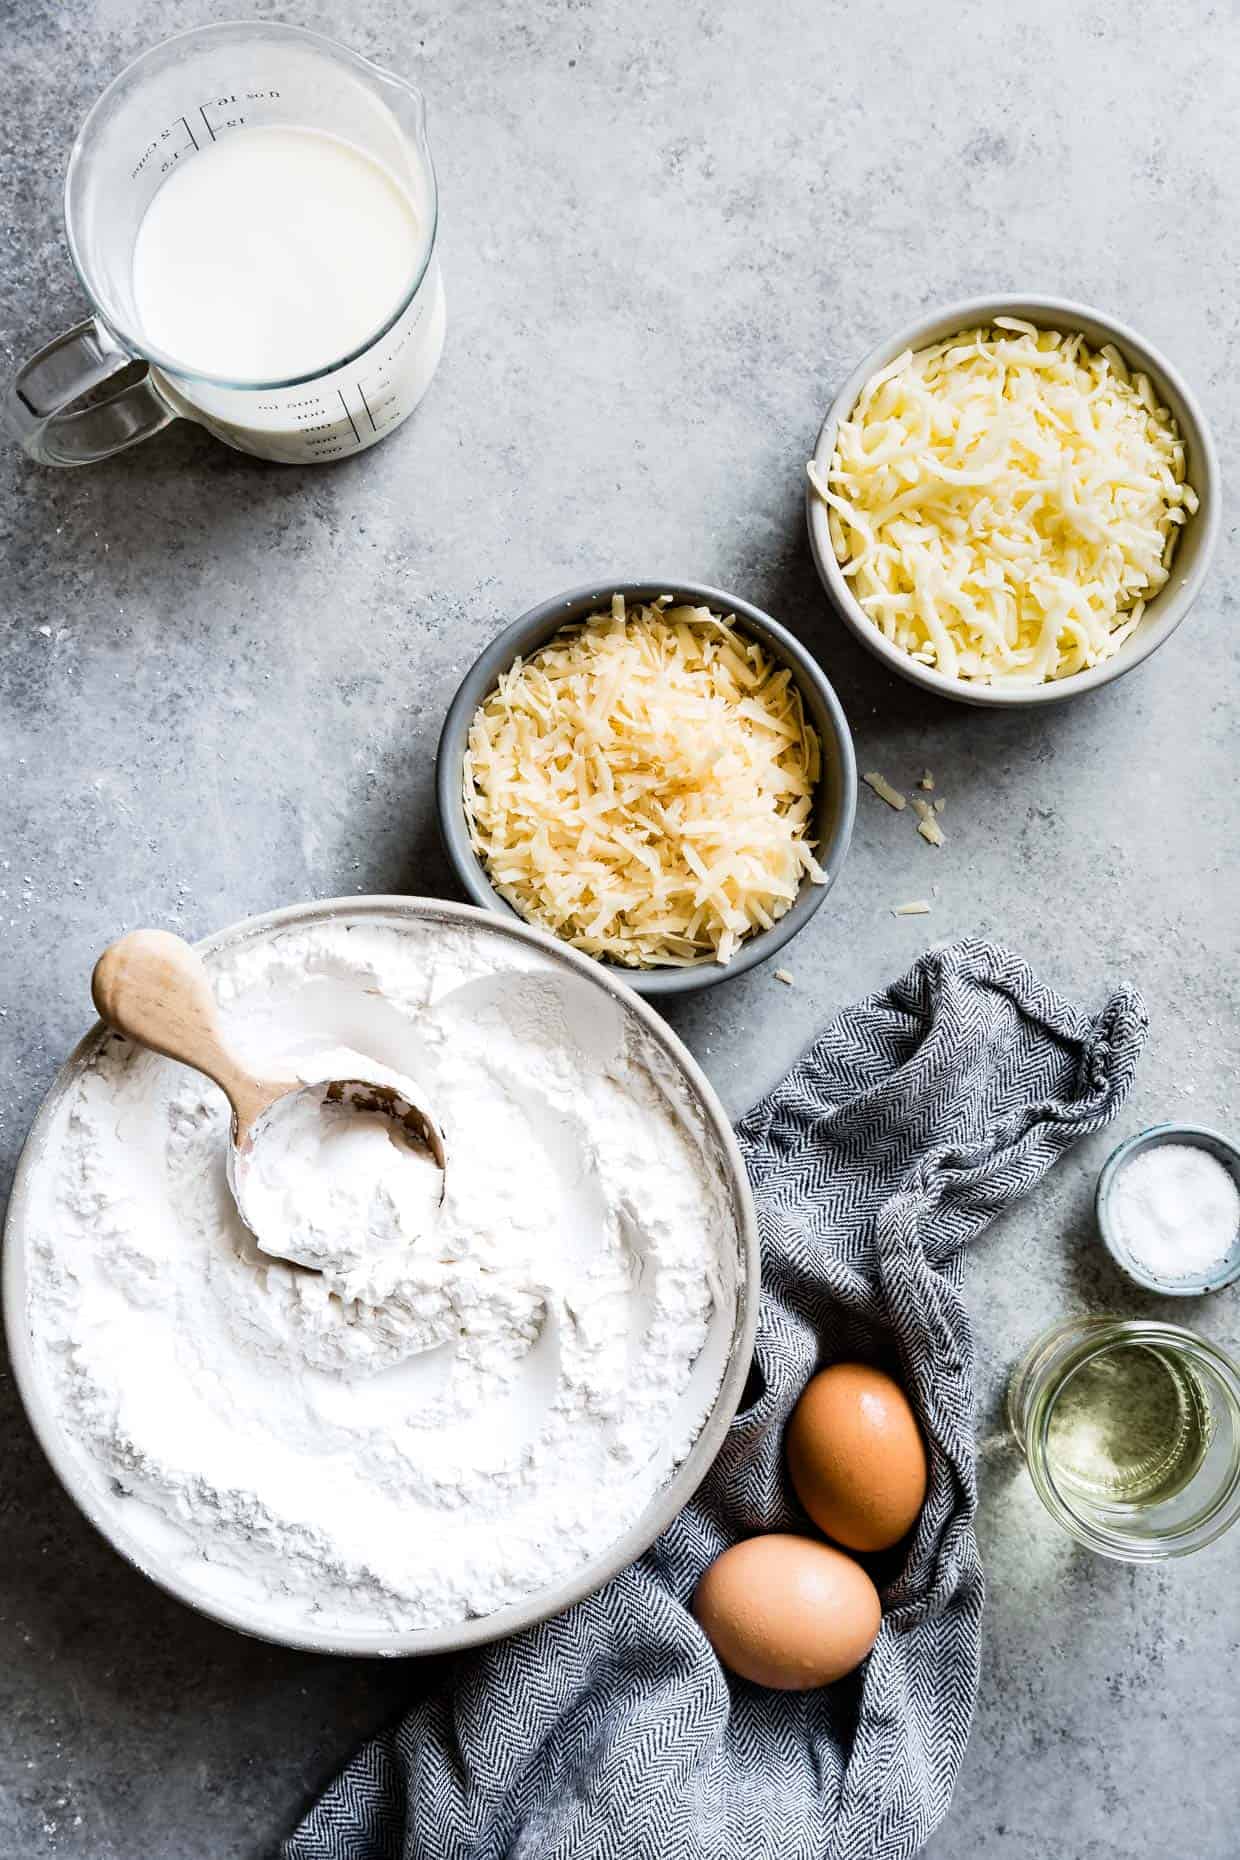
Possibly the best part? This pizza crust doesn't require much fuss - even less fuss than a yeasted traditional pizza crust. In the bowl of a stand mixer, add tapioca flour to hot milk and oil. Then mix in eggs followed by cheese. Press it out and bake. That's it. This is now my favorite go-to gluten-free pizza recipe for weeknight dinners. No gums needed!
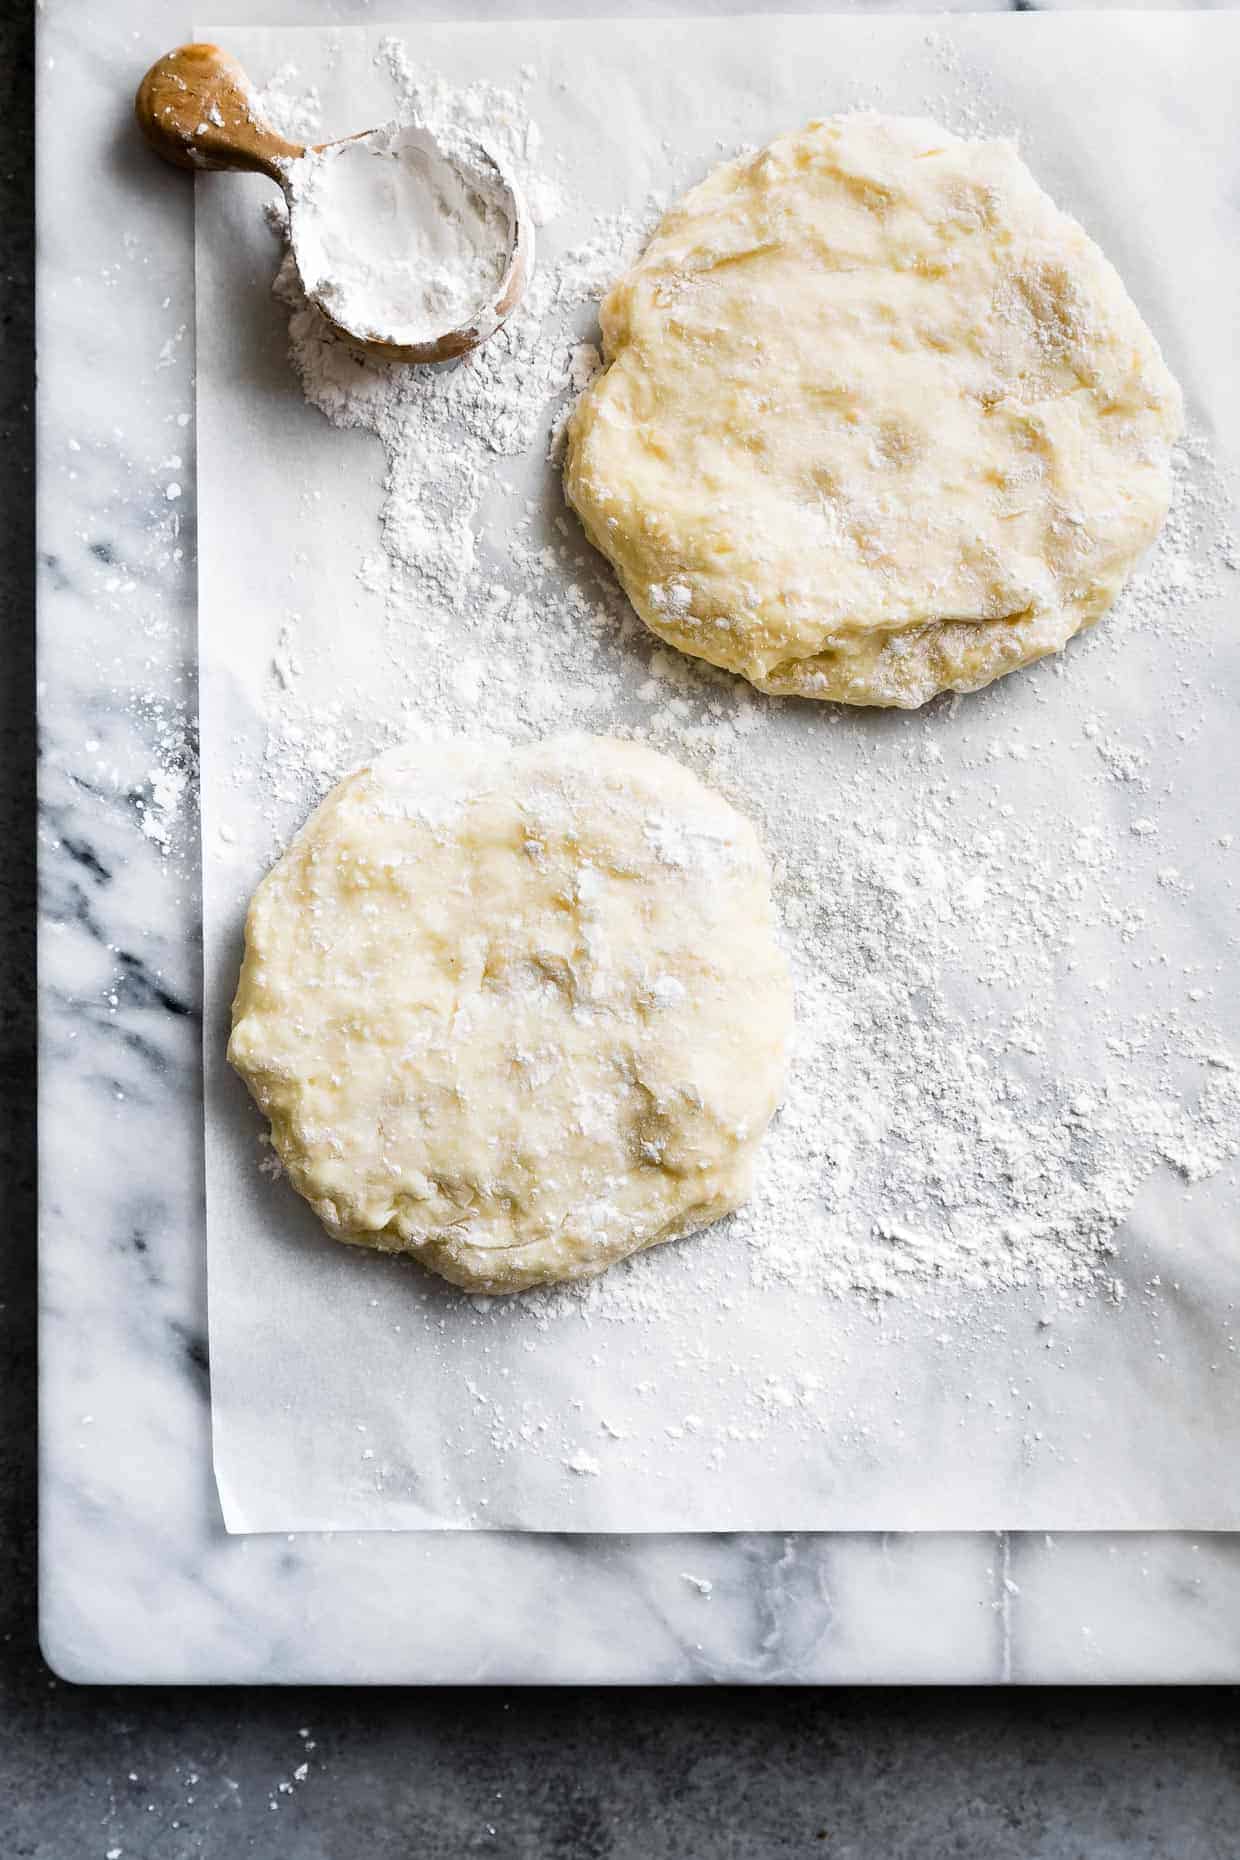
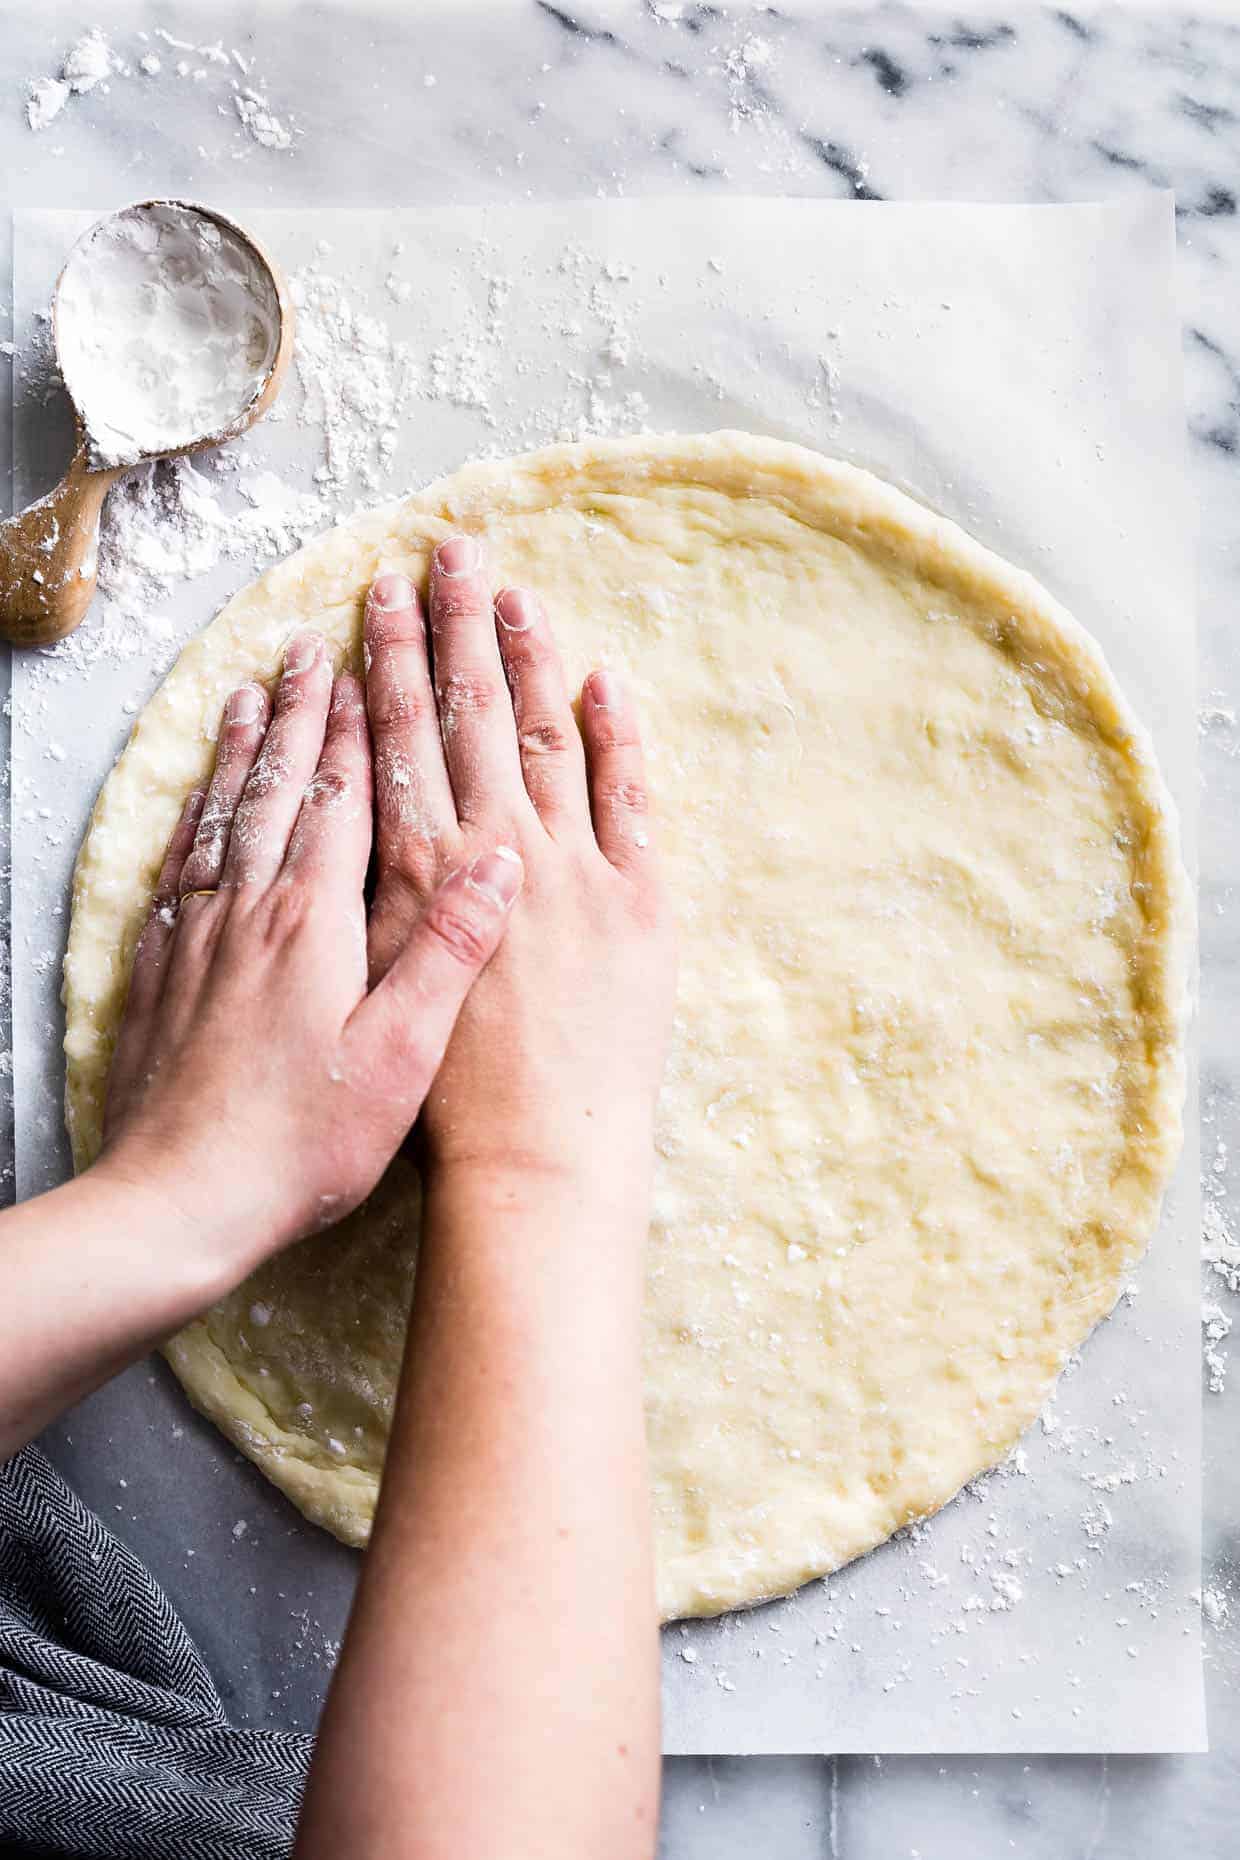
Know that dough is sticky, but all you have to do is coat your hands in plenty of tapioca starch/flour before handling the crust. Once coated in a thin layer of tapioca flour, the dough acts like a traditional yeasted pizza dough with stretch and pull.
Recipe
Cheesy Tapioca Flour Gluten-Free Pizza Crust
Ingredients
- 1¼ cups whole milk
- ¼ cup + 2 tablespoons vegetable oil, such as sunflower or canola oil
- 1 teaspoon kosher salt
- 300 g Bob’s Red Mill tapioca flour, plus about 15g more for dusting (see note)
- 2 large eggs, room temperature
- 4 oz (1 cup, packed) shredded low moisture mozzarella
- 2.7 oz (¾ cup, packed) finely grated parmesan cheese
- ½ cup pizza sauce
- 6 oz fresh mozzarella, sliced
- 1 oz finely grated parmesan cheese
- ¼ cup pesto
- Basil and red pepper flakes, for garnish
- Other toppings of your choice!
INSTRUCTIONS
- Preheat oven to 500°F with a , 12-inch cast-iron skillet, or thick large baking sheet on the bottom rack. To prepare, you can find full behind-the-scenes videos of each step here!
- In a small saucepan, bring the milk, oil, and 1 teaspoon of salt to boil over medium heat, stirring occasionally. Just when the milk begins to boil by puffing up with large bubbles, remove pan from heat. Updated note: don't undercook the milk because it needs to be hot enough to cook the tapioca. It should be a rapid boil, but keep an eye on it because as soon as it begins to rapidly boils, it will puff up quickly and threaten to overflow the pot.
- Stirring constantly with a silicone spatula, slowly add the tapioca flour to the pan. Continue stirring to combine as much as possible (the mixture will be very sticky and the flour probably won't incorporate completely yet).
- Use the spatula to transfer the sticky dough to the bowl of a stand mixer fitted with a paddle attachment or a food processor with the basic blade, using the spatula to get as much out of the pan as possible. Beat on medium speed until the dough is smooth and not hot and is cool enough to touch, about 5 minutes. Your dough may seem very thick at this point and stick to the beater in a lump. If using the food processor, making sure the dough is cool enough to touch before mixing is essential, as it's easy for the food processor to overheat.
- One at a time, lightly whisk one of the eggs in a small bowl. With mixer on low speed, add the egg into the dough and beat until combined. This might take several minutes and might at first look like it won't incorporate into the thick dough with the egg sloshing around, but keep at it for several minutes and it will incorporate (it took me 5 minutes per egg). As the egg incorporates, slowly increase the speed on the mixer, keeping an eye on it that it doesn't slosh around too much and threaten to fly out. Mix until it's completely smooth. If the dough is stuck to the beaters in a thick clump, use the spatula to remove it and then repeat with the remaining egg.
- With the mixer on low, slowly add cheese and beat on medium speed until fully incorporated, using the spatula to remove the dough from the beater once, if needed. If needed, knead the dough with tapioca flour-covered hands until fully incorporated. (Note: If you skip or minimize the cheese, your dough will be way too sticky/wet to press into a crust.)
- Divide the dough into equal halves, covering your hands and the dough lightly in tapioca flour to keep it from sticking to your hands and the surface. The dough will be more sticky than traditional pizza dough, but dusting it with tapioca flour will do the trick.
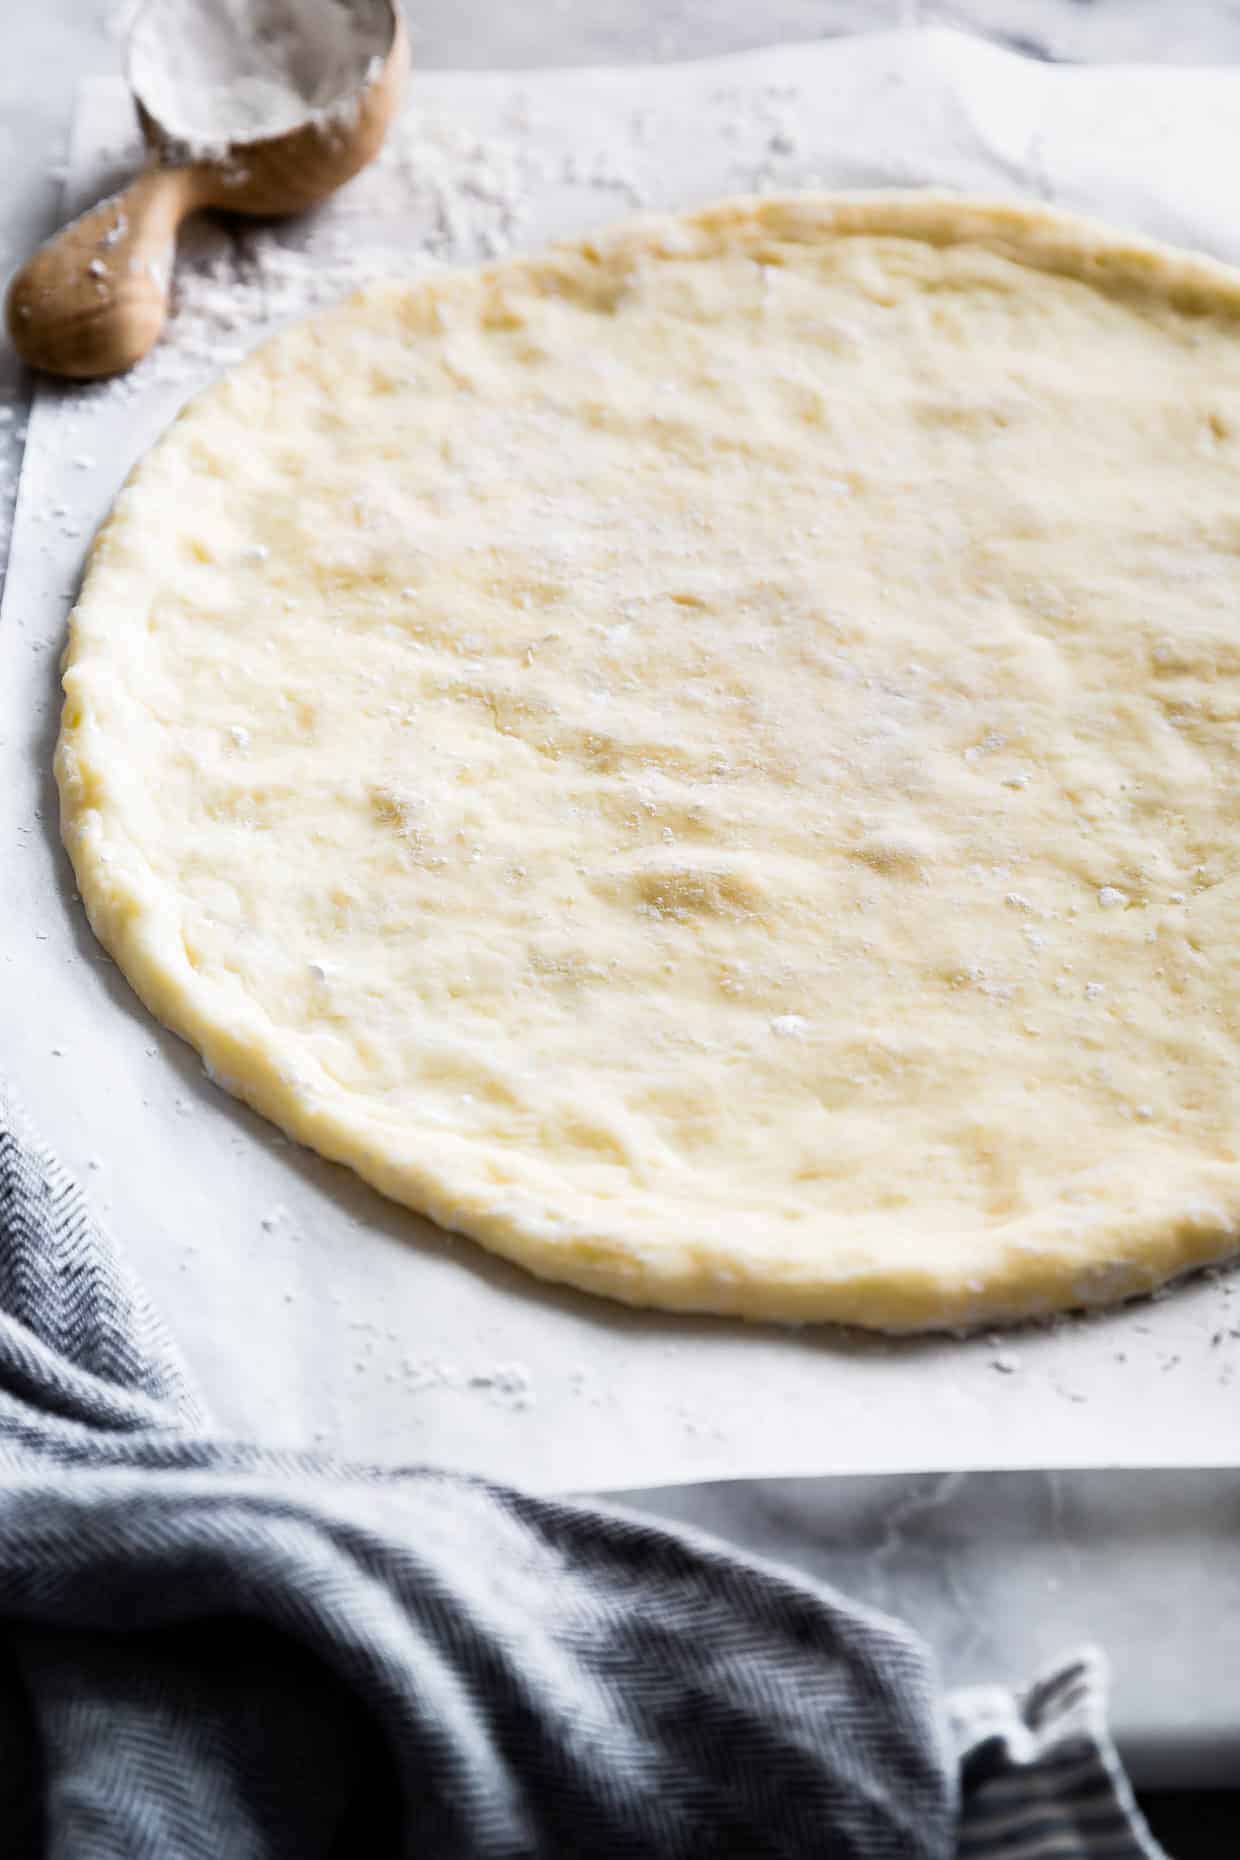
- Lay a piece of parchment paper down and dust it lightly with tapioca flour. Dusting the dough with more tapioca flour as you go, press half of the dough into a 12-inch round on the parchment paper, creating a thicker crust around the outside. Prick holes in the bottom of the crust with a fork. Repeat with the second half on a second sheet of parchment paper.
- One at a time, place one pizza dough round on the baking stone or baking sheet on the bottom rack of the oven and bake for 10-13 minutes *(See note).
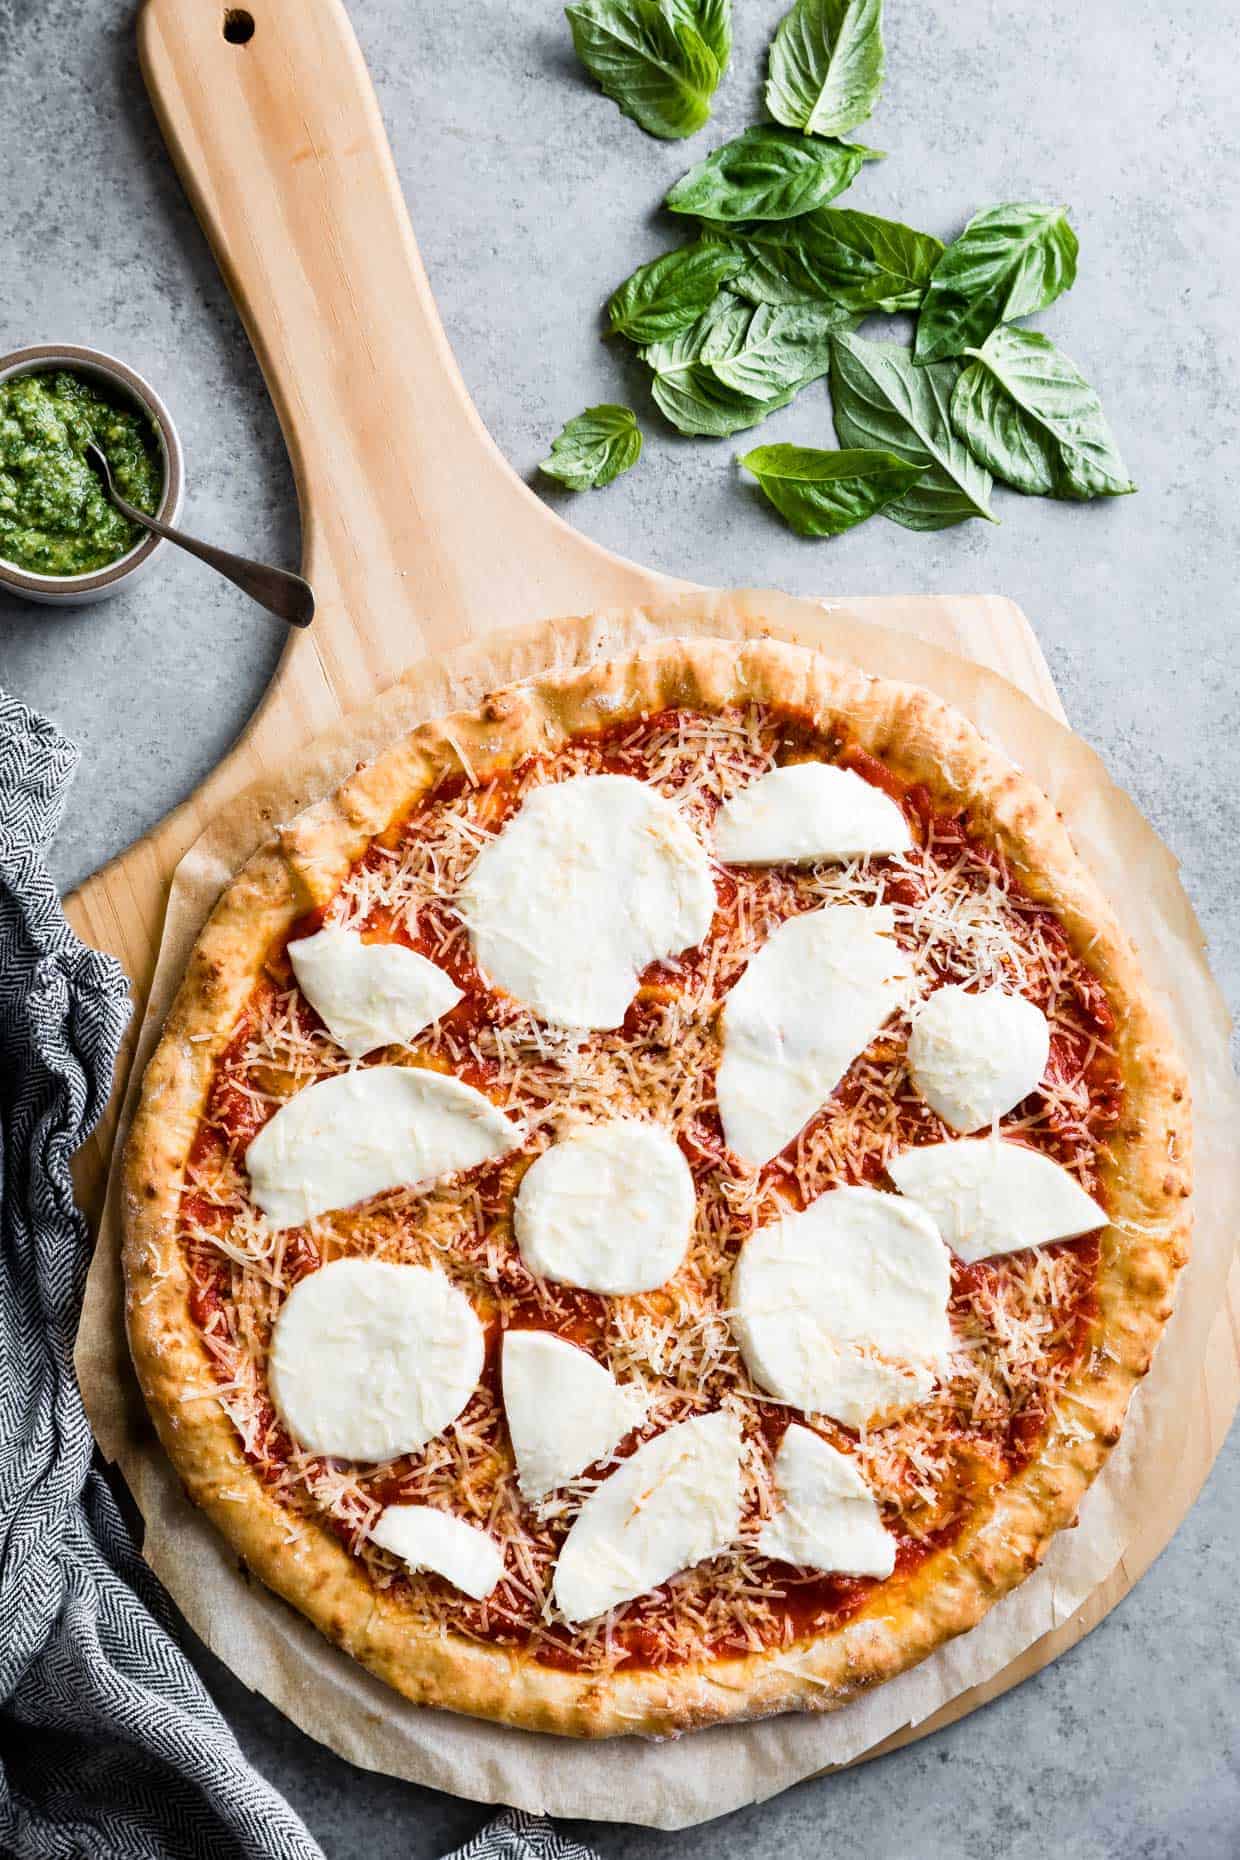
- Cover with toppings of your choice.
- Bake for 7-10 more minutes.


Lou -
The was awesome! A new pizza crust favorite.🙂😋
P -
Halved this for a personal pizza. Microwaved milk (incrementally to avoid explosions) and poured over measured flour in a metal mixing bowl. Mixed the rest by hand (oiled my hand and a silicone spatula instead of using my mixer). Worked fantastic, even with goat Gouda and almond milk and a countertop oven that only reaches 480, not 500. Having worked with many variations of tapioca flour cheese bites, trust the process.
Sarah Menanix -
I'd love to help you troubleshoot what went wrong - can you tell me what part did not work for you?
rachel -
Is there a way to make this dairy free?
Melinda -
I know it has been a while since this was posted but I just found this last night and made it right away! The only changes I did was using gf oatmilk (not even the really good quality kind) instead of whole milk and I added dried parsley right into the dough to help me kinda visually track if it is fully mixed. I did it in a cast iron skillet that I preheated in the oven. This was THE best pizza I've had in YEARS. I started to get bitter about not being able to have non-cardboard pizza over the past few years so this was just beautiful. I think that b/c I used the skillet and was able to push the dough up the sides, I was able to get a crispier, crunchier crust at the very edge which really reminded me of a traditional slice. The IG post on what things should look like probably helped immensely bc I knew to do the poke test but I had literally no issues with this recipe, the dough wasn't even that sticky for me but that could be b/c I was able to heat the non-dairy milk mixture more thoroughly without fear of it bubbling over. Nearly cried when I realized I could fold the slice over like a smaller Brooklyn style pizza - I only wish I had a bigger cast iron pan now. Happily on my way to share this on the GF subreddit!
THANK YOU for bringing good pizza back into my life!
Mads -
My fiance is gluten sensitive and fell in love with Brazi Bites, which are a tapioca flour based pizza bite. We ran out and she was having a bad night, so I wanted to try making a home-made version.
I was intimidated by the idea of this recipe because I'd never made anything like it, but I was determined! So I used this dough for the crust of the bites (instead of making a pizza shape I just rolled it into flat rectangles and cut the bites out with a pizza cutter).
Oh my god... they were /perfect/. I could not believe how tender, chewy, flavorful and perfectly puffy this dough turned out when baked.
It's a bit off from what this recipe is for, but I cannot recommend this dough enough for pizza bites! Easy to make and perfect!
Melanie B. -
Made this last night for celiac daughter and she was very happy with it! I weighed out the tapioca flour and my dough came together beautifully. I'm sure it helped that I have a sturdy Kitchenaid mixer. Dough was so nice I hardly needed any flour to handle or shape it. What a pleasure! Thanks for this lovely recipe.
Sue Kingsley -
Delicious! The best gluten free crust I have had. I measured everything perfectly and followed all your instructions. The dough was easy to work with and formed a perfect crust. We did ours in the grill and it was a success. I would cook it a little less next time as the bottom was almost burned. I will certainly try it again with my gluten free friends. Thanks so o much for sharing your work and recipe.
Jonathan -
Here’s some tips that worked for me.
Freezing batches of this dough works great. Simply make into a ball and put in a freezer baggie. When it came time to bake, I let it defrost enough and started working it into the pizza circle. I found this easier when cold!
Because I find it hard to transfer to the pizza stone, I didn’t roll it out fully. I made it big enough so I could transfer it to my pizza stone. Even though it was hot, I was able to finish getting it to the right size. I thought I was mushing it into the stone, but when it par-cooked it came out great.
Ryan Miller -
This recipe was pure magic! I used the bread hook on our stand mixer and your directions were great. The dough was very sticky after everything was incorporated but with enough tapioca to dust my hands and the surface it worked great. I used too little initially so make sure you keep dusting until you can work with it. This is better than any homemade pizza crust we've made and since I'm allergic to wheat (and oats and soy and potatoes) this is such a wonderful find. The slight crispy outside with soft, cheesy inside was wonderful - an reminiscent of Brazilian cheese bread for sure. Thank you!
Amanda Shultz -
When you say the dough should be sticky, how sticky? Mine was so sticky that even when coating my hands in tapioca flour, I could not work with it and ended up just adding more tapioca flour until it was more like a traditional pizza dough (after several intermediate attempts). It was so sticky that iy just coated my fingers and I could not manipulate it at all. You mention several times above tha you have to let the eggs incorporate fully, but I believe I did that. It took like 15-20 minutes to get the first egg incorporated. I thought perhaps it could use a little more time, but my mixer was really heating up, so I wanted to give it a little break. Any advice (or videos) would be helpful!
Sarah Menanix -
Hi! I'm sorry you had trouble with the dough being too sticky. It should be very sticky, but with the dough and your hands coated in tapioca starch, it should be pliable and manageable. You should not have to add a lot more tapioca flour. A couple of questions: did you measure the tapioca flour by weight? And did you use bob's red mill tapioca flour? I've noticed other brands are not as finely ground and don't soak up moisture the same and results will vary significantly. Did you use large eggs?
This is one of my favorite crusts and I want you to have success too - I have everything I need to make this crust, including leftover pizza sauce, so I'll shoot a behind-the-scenes IG story in the next few days and link it in the post!
Amanda Shultz -
Thanks so much for the quick response! I measured the flour by weight, and I did use Bob's Red Mill. I may have used large eggs. I'm not sure. Should I weigh out the eggs once I whisk them? I also saw that someone commented above about one potential problem being not heating up the milk/oil/salt enough. I removed from heat as soon as it started to roll, but I hadn't seen actual larger bubbles yet. Would that be a problem? I also used olive oil, which I didn't think would make a difference. But maybe it did?
I look forward to seeing the video. Thanks so much!!
Sarah Menanix -
Ooo - I remove it from the heat when it starts to have larger bubbles - that's would likely make a difference because it's the heat from the milk that cooks the tapioca and makes it sticky and dough-like. I'll update that to make it more clear! When you added in the tapioca after that point, did it mix into a thick stretchy lump before you let it cool and added eggs? I use safflower oil and have not used olive oil but I can't imagine that would make a difference!
I'm very invested in making this recipe clear enough because it's a favorite - stay tuned! I've also got another friend who has tested it once before who will test it againas well.
Amanda Shultz -
Ok, that's good to know. I think I was a bit jumpy about over-boiling it. It sort of mixed in like that. There was a bit of flour I didn't get mixed in at first. But by the time I finished incorporating the flour with the stand mixer (before I added the eggs), it was definitely thick, though I didn't really try to stretch it much. Also, by the time the dough had smoothed out in the stand mixer, it was cool enough to touch, so I went ahead and added the eggs then.
Sarah Menanix -
My kids decided they wanted pizza for lunch so we made the crust today and I took full behind-the-scenes videos to show everything start to finish! Here's a link to the IG story highlight of making the crust to show the texture and steps. Hope this is helpful!
Amanda Shultz -
Thanks so much! I just watched it and now I know what to look for next time I make it!
Amanda Shultz -
I made the crust again last night, and it went SO MUCH better! I boild the milk/oil/salt until it was almost ready to bubble over the side of the pot, and it looked like yours at every step until after I added the cheese. For some reason, it got a bit stickier/wetter after that step. I measured the cheese by weight and used low-moisture shredded mozzarella, but maybe my parmesan had too much moisture? Or maybe I over-mixed it? Anyway, I ended up incorporating a little more tapioca flour in the kneading/shaping process, but only enough as was necessary to keep it from sticking to my hands. All in all, I think it was a success! Hopefully next time it will come out even better!
Tori -
I had that same idea yesterday! I'm so glad there was something out there to let me know I was right!
Rachel -
I love the Against the Grain pizza crust which reminds me of Brazilian cheese bread. It is getting harder to find so I look forward to trying your recipe!
Jonathan -
Hi. Thanks for the reply. I do use Bob's Red Mill tapioca flour, but I measure by volume. The dough balls up when I first start mixing (moving from the pan to the Kitchenaid mixer). It does loosen up a tiny bit when incorporating the eggs, but for the most part spins as one big lump on the paddles. I guess I can try letting the ball spin and see if it mixes without pulling it off the paddles.
Sarah Menanix -
Ah ha - yes, this is totally normal! Next time, don't worry about scraping it off the paddle. As it mixes, the egg will incorporate - that's what I'm referring to with: "This might take several minutes and might at first look like it won't incorporate, but keep at it for several minutes until it's smooth." I'll update the recipe in a bit so it's more clear. Also, I would try measuring by weight next time just to make sure yours isn't a bit more firm by way of too much flour. Next time I make this, I'll shoot some IG stories behind-the-scenes and save it as a highlight.
Sarah Menanix -
Just wanted to update you: I made the crust today and I took full behind-the-scenes videos to show everything start to finish to show what it looks like on the paddlesI Here's a link to the IG story highlight of making the crust to show the texture and steps. Hope this is helpful!
Jonathan -
I’ve tried this recipe twice. While I really enjoyed the final product, it was quite a messy and sticky path to get there. There are a lot of comments about it being too wet and fluid. I have the opposite experience. By the time, it’s in the mixer, It’s just one semi hard ball stuck to the paddles spinning. I find it difficult to mix because it’s stays balled up. I have to constantly, pull it off the paddles so it can have some semblance of mixing.
Does anyone else experience this?
Sarah Menanix -
Thanks for your comment! I'd love to help you troubleshoot. Though, I will note that it is a firm, but sticky dough, so I think you're on the right track! I've not had the problem of the dough staying balled up in the mixer without incorporating ingredients though, but that could even just be a difference in the size of our mixers. When it remains balled up is this before you add the eggs? What happens if you just leave the mixer going for several minutes? My dough does stay connected to the bottom of the bowl and paddle, but while mixing, it incorporates the eggs and cheese over time without intervention. Also, I'm curious if you used Bob's Red Mill tapioca flour and measured by weight? I've recently tried other tapioca flours in different recipes and find the grind is much different and produces a much different outcome.
Judy Barnes Baker -
Are some of you confusing tapioca flour with cassava flour? Tapioca if 100% starch. It needs to have some fiber added. Cassava is the flour usually used for Brazilian bread.
Sarah Menanix -
Great question - for this recipe, I use tapioca flour/starch. Sometimes I've seen Brazilian cheese bread made with cassava flour as well, but I haven't tested that here so I can't say for certain if it would work in this recipe.
Patricia -
I was excited to try this, but I think parmesan and mozzarella are not gluten free cheeses. Am I wrong?
Sarah Menanix -
You're in luck - fresh parmesan and mozzarella are both naturally gluten-free cheeses. If you're buying pre-grated or highly processed cheeses, you may want to check your packaging to make sure they don't contain wheat starches, but even still, most use potato starch.
Rebecca -
This recipe is AMAZING. Hands down best GF pizza crust I've ever had. Texture and flavor are all there!!
Made this with my vitamix blender but it still worked! (cleaning was not great though but the pizza is worth it) I was a little worried about the crust being slightly goopy, but once baked it was totally fine! I don't have a baking stone or a pizza palette so I just heated my regular baking sheet in the oven and then took it out when I was ready and quickly plopped the pizza with the parchment paper on top.
Also another note, based on other comments, I used tapioca starch from the asian grocery store and I think it may be finer than Bob's. My dough was quite wet so I added a little extra tapioca and cheese. I ended up just coating the parchment and my hands generously with the starch to spread it out but it worked just fine after baking!
Sarah Menanix -
I know it's been a while since you made the crust, but I just wanted to update you: I know you had success, but since you described it as still being quite wet, I just wanted to show you what it should look like for pressing it out. My guess is that the milk didn't get hot enough to "cook" the tapioca flour so it was more liquidy. I made the crust today and I took full behind-the-scenes videos to show everything start to finish! Here's a link to the IG story highlight of making the crust to show the texture and steps. Hope this is helpful!
Trudy -
Best gluten free pizza ever - and we’ve tried a lot!
Aimee Royal -
Hi. I haven’t tried this yet, but I’m very interested. Can I use Oat Milk instead of Whole Milk? My daughter can’t tolerate cows milk.
Sarah Menanix -
Hmm - for many recipes I would say yes, but for this one, I'm honestly not sure! I haven't tried it. My GUESS is that if you're still using the cheese, then oat milk should work, but I can't say for certain - sorry!
DORA -
Hi, I made the crust, and it turned out amazing! I think the main point is you can't expect it to be like a normal pizza dough, it was more like a half-liquid mixture, which I poured on the parchment paper, and tried to shape it with a spatula and with my hands. I didn't think it was possible to make such a great gluten free pizza at home! It only took me 17 minutes (12+5) to bake it.
Sarah Menanix -
I know it's been a while since you made the crust, but I just wanted to update you: I know you had success, but ince you described it as still being half-liquid, I just wanted to show you what it should look like for pressing it out. My guess is that the milk didn't get hot enough to "cook" the tapioca flour so it was more liquidy. I made the crust today and I took full behind-the-scenes videos to show everything start to finish! Here's a link to the IG story highlight of making the crust to show the texture and steps. Hope this is helpful!
camille -
I should have read the comments before trying out the recipe... lost a lot of time and ingredients...
The dough was wet and unmanageable... impossible to do anything with it :(
Sarah Menanix -
I'm so sorry your crust turned out wet! My guess is that if it's too wet, the eggs needed to be mixed in longer. When you first add the eggs, it will seem like they won't incorporate, but then they eventually do. Then you really need to coat your hands well in tapioca starch to handle the dough - unlike traditional pizza dough, it's a very sticky dough. I make this recipe regularly for my family though, so next time I'll do an Instagram Story to show people the texture in video form - hope this helps!
Sarah Menanix -
I know it's been a while since you made the crust, but I just wanted to update you: I made the crust today and I took full behind-the-scenes videos to show everything start to finish! Here's a link to the IG story highlight of making the crust to show the texture and steps. Hope this is helpful!
Amy -
Hi! I made this crust after reading all the comments so I made sure that I followed the recipe to a T. It came out the way you said it would! You really really have to let it mix fully. I even froze 2 extra shaped circles between parchment paper then wrapped in plastic wrap. I let it thaw briefly before putting it in my pizza maker and it cooked up just as fine as if it wasn’t pre-frozen. Honestly wasn’t crazy about the taste because I am missing being able to have wheat flour. However I accidentally over cooked the last one I made and found it tasted way better. Maybe I wasn’t letting it cook enough in the first place? Either way I’m going to be making and freezing them again. Maybe I’ll add some dried herbs into the batter next time and give that a try!
Sarah Menanix -
I'm so glad it worked for you! Yes, it's definitely best if you use a very hot oven with a pizza stone to get the bottom nice and crispy. I've never cooked it in a pizza maker, so I'm not sure if the timing would need to be different for that, but I'm glad you liked it better when cooked for longer!
Amy -
I have a breville pizza maker - it’s like a big clamshelll that gets up to 600 degrees. Awesome for making pizzas. Takes about 6-10 minutes to cook. I’m actually making more of the crusts right now :)
Josephine -
I made this crust last night exactly as the recipe called for. Mine was also way too wet. I ended up putting in way more tapioca and more cheese to try to make it a dough. It was still very wet, so I dumped half of it onto parchment and used a wooden spoon to spread the dough to a 12 in. round. I put it on the pizza stone and it cooked up very nicely. It tasted delicious too. So far, it is the best gluten free pizza crust I've ever made. I topped it with carmelized onions, sausage, and gorgonzola.
Sarah Menanix -
Hi! This dough is definitely VERY sticky and not going to be the same texture as "dough" texture as gluten-full pizza crust, but should not be wet at all, so it sounds as though something didn’t go right for you! I make this crust regularly and have had many people make it with success, so it's been tested many times. I’d love to help you troubleshoot what may have gone wrong. Did you measure by weight or volume? What brand of tapioca starch did you use? I'm wondering if this is a factor as some brands are more finely ground than others - I recommend using only Bob's Red Mill, as that is what I test with. When mixing the eggs, you really have to mix it in well. At first, it will seem very wet like the eggs will not combine, but if you keep mixing, I promise they will! When you pull the dough out of the bowl, be sure to dust it and your hands well with tapioca starch as well. Hope this helps!
Sarah Menanix -
I know it's been a while since you made the crust, but I just wanted to update you: I made the crust today and I took full behind-the-scenes videos to show everything start to finish! Here's a link to the IG story highlight of making the crust to show the texture and steps. Hope this is helpful!
Janine -
I meant to say eco parchment paper, not waxed paper in my comment above.
Janine -
I made this today. Got about 2/3 of the flour mixed into the saucepan but there was really no way that I was going to incorporate the last 1/3 of the flour so I dumped it all into the stand mixer to incorporate the rest. My advice is to start slowly in the stand mixer then build up to medium speed for best results after all the additions. And mix, mix, mix. I did not have parmesan so I substituted the same amount of shredded mozzarella. I divided the super sticky dough and put half of the recipe onto a silpat. I floured it liberally and used a marble rolling pin to basically make it into a free form thin crust that spanned the entire silpat. I par-baked the crust longer than stated, about 15 mins at 425F, because neither my silpats or eco waxed paper would withstand 500F heat. When it was a beautiful golden brown I took it out but noticed the bottom was pretty pale. I attempted to transfer the crust to an oiled baking sheet to crisp it up - do NOT try, the bottom started to stick. I transferred it back to the silpat, put Rao's tomato sauce, mozzarella, fresh garlic, and oregano and baked for about 8-10 mins more until bubbly. Very good results, my husband actually did the "pizza fold" with one of his slices, which is unheard of with a GF crust!
Angela -
Was super tasty but INSANELY stciky. I think it's because we have huge eggs in NZ supermarkets, think one egg would have been the perfect consistency. I also made mine into 3 pizzas as the first one puffed up a lot so I made the second and third half the thickness and that even puffed up a lot! I left mine to sit in tapioca flour for a bit then spread it with a spoon and knife until it was a nice thin layer. I would say the consistency is more like a thick batter. Good though, have some improvements and learning for next time! Hope thia helps someone ????
Sarah Menanix -
I know it's been a while since you made the crust, but I just wanted to update you: I made the crust today and I took full behind-the-scenes videos to show everything start to finish! Here's a link to the IG story highlight of making the crust to show the texture and steps. Hope this is helpful!
monica le -
5 star recipe
Audrey -
I love this recipe so much! Brought me some happiness after having to make a life-change with celiac. My question for you is will this freeze well after the parbake? I'd love to keep some in my freezer for busy nights!
Sarah Menanix -
I've not yet tried to freeze it, but I'm also very curious! I did some research and since the recipe is based off Brazilian Cheese Bread, I looked at how people recommend freezing those. It seems that most people recommend freezing before bake. I think if you pressed out the crust, then froze it on parchment paper on baking sheet for an hour then transferred it to an air-tight bag for longer freezing, then you could pop it into the oven straight from the freezer! (BTW I'm working on another GF pizza crust right now as we speak!:)
Audrey -
Thank you! I will give it a try.
Rachel -
I don't have a pizza stone and usually use a cast iron skillet instead when I make things that need a good crust like GF sourdough bread. Do you think that would work?
Rachel -
To follow up... it worked perfectly with the use of parchment as well.
Ria -
Used a blender recipe Brazilian cheesebread ( all ingredients are added to warm milk in the blender, then add the tapioca starch slowly to blender to incorporate until it gives you attitude. Add the contents to the rest of the flour and follow the rest of snixy’s recipe. I have also added a bit of cornbread mix to the parchment for a more NY style crisp. (The idea came from Colombian cheesebread.)
Shanna -
My daughter and her cousin made this today. They did not hear the stone in the oven first, and the bottom of the pizza was basically uncooked. Am I correct in guessing it’s because they didn’t hear the Stone first?
Sarah Menanix -
What a bummer - I'm sure that's the reason! The best way to get crispy-bottomed pizza crust at home (without a pizza oven), is to have your oven as hot as it goes, with a pizza stone preheated on the bottom rack. I hope they aren't too discouraged and try it again with preheating the pizza stone to make sure the bottom cooks just as fast as the top!
Jennifer Carta -
This crust is really tricky to make as it's super sticky and it takes a lot of time to mix together. I've made it twice now, and I always get tapioca starch all over myself and my kitchen so there's a lot of clean up involved. BUT it's totally worth it!
My family loves Brazilian cheese rolls, and I make them almost every week so of course I gave this recipe a try. 2 of us cannot eat wheat/gluten, and we're tired of thin crispy bland crusts. This is one of my two all time favorite GF crust recipes. The 11 year old who hates eating crust (without honey) ate everything on his plate. He usually leaves behind all his crust and pulls off the toppings. This recipe is bookmarked and saved for when we're craving chewy cheesy pizza! Thank you!
Jessica -
So I don't know if I did something wrong, but the dough was ridiculously wet, closer to soup than dough. I know from experience that gluten free cooking requires precision so I was very careful with my measurements, I used US cups and weighed the tapioca starch to exactly 300g. I didn't have any parmesan, thought I'd be fine leaving it out. After adding the second egg, it was completely liquid. I mixed it in a food processor for about 8-10 minutes and it seemed like it was getting more and more liquid. There was absolutely no way to knead it so I added an extra 150g tapioca and mixed for another 5 min... I let it sit for a few minutes to see if it would 'set' (it didn't) then poured it into the pan, spread it around with a spatula and hoped for the best. It came out okay, so pizza night wasn't ruined, but what could have gone wrong?! It didn't look at all like your pictures.
Sarah Menanix -
Thanks for your comment - I'm so sorry you had trouble with the dough! First, I will say that, for this dough, the cheese is absolutely necessary because it's based on Brazilian cheese bread, so I would recommend replacing it with more mozzarella in the case where you don't have any parm. I always make the dough using my stand mixer, but I included the food processor option because I know many people make Brazilian cheese bread in a food processor. That being said, it makes me wonder if the power of your food processor made it soupy instead of dough-like. Did you use a dough blade for the food processor? When you added the warm milk + tapioca starch to the food processor was it thick and very sticky at that stage before you added the egg? (It should be - almost so sticky and thick that it doesn't want to come out of the pan). If not, what brand of tapioca starch did you use? Sometimes differences in brand can make a big impact because of how fine they are ground. I will remove the food processor instructions until I can test it that way to see if this could be the issue and will update you! If that seems to be like the only difference based on my questions above, then I would recommend using a bowl with a hand mixer (if you don't have a stand mixer) next time! Again, so sorry you had difficulty but I'm glad pizza night wasn't totally ruined!
Sarah Menanix -
Just wanted to let you know that I just re-tested the pizza crust using the food processor and it turned out great - the dough was soft and stretchy just like in the picture above. I wonder if possibly your milk/oil was not heated to boiling? This is what "cooks" the tapioca starch, making it into a dough-like texture. I urge you to give it another go!
Jessica -
Thank you! It might have been the milk, I always worry I'll curdle it so I very well might not have heated it enough. I was going to try it again yesterday (Friday is pizza night), I had the dough all weighed out and realised I was out of eggs! But I'm definitely coming back to this recipe, because even when it didn't turn out exactly right, it was still really good. Thanks again!!
Sarah Menanix -
I know it's been a while since you made the crust, but I just wanted to update you: I made the crust today and I took full behind-the-scenes videos to show everything start to finish! Here's a link to the IG story highlight of making the crust to show the texture and steps. Hope this is helpful!
Danna Farabee -
It was toooooo wet to place on a parchment. I added more AP flour just because that's what I had.
Sarah Menanix -
Hmm - my guess is that the eggs didn't get mixed enough with the dough. The dough definitely shouldn't be wet at all, but it takes awhile to get the eggs to mix in completely! It will be really sticky at first right out of the bowl (but not wet!), but covering the outside in tapioca starch will make it so you can stretch and press it like regular pizza dough. Hope it still turned out fo you! Next time I'd mix the eggs in longer until the dough completely comes together.
Amanda Shultz -
How long would you expect it to take the eggs to fully incorporate? I had the same thing happen. The eggs already took like 15-20 minutes to mix in, and then after adding all the cheese, I still I had to add probably 1.5 - 2 cups or so of tapioca starch in using my dough hook just to get it so that I could work with it at all (I used tapioca starch on my hands and the surface I was spreading it out on). With all the trial and error it ended up taking me over an hour just to prep the dough. I think it will be faster next time because I will probably just add in more tapioca flour until it's dough-like before I even attempt to pull it out of the bowl. But I would love to have some more tips to improve my process.
Sarah Menanix -
I know it's been a while since you made the crust, but I just wanted to update you: I made the crust today and I took full behind-the-scenes videos to show everything start to finish! Here's a link to the IG story highlight of making the crust to show the texture and steps. Hope this is helpful!
todd w. -
Thanks for teaching me something new today!!
Dolphia Nandi -
Sarah,
You talked about a Boston Pizzeria - do you mean Otto? Because their crust is very delicious!
Sarah Menanix -
Oh - I haven't been there! The place we went to was called Dirty Water Dough and the gf crust was sooo good!
Karen @ The Food Charlatan -
Why would you ever go out for pizza when the homemade version looks like this?? Yes please. JUST NO SOCCA. lol. I love the crust idea! Genius!
Nancy -
Wow, great idea from a pão de queijo fan!
Jenn -
Looking forward to trying this!!! However...I live on a sailboat and don't have access to a stand mixer or food processor. I have a KitchenAid immersion blender, aka stick blender. Or, I can mix and knead the dough by hand. Which method do you recommend?
Sarah Menanix -
I think you'll have a hard time mixing this by hand as it's very sticky and the force of the mixer and/or food processor is what helps incorporate the eggs and cheese.
Mimi -
Fascinating bread dough! I must try this, even though i’m not an anti-gluten person. It just really sounds wonderful as a pizza crust!
bella -
I love the idea of this pizza crust! I must try next time I have access to these ingredients...and a real oven that is!
Georgina -
I absolutely love this idea!! Trying it out immediately - thanks for the inspiration Sarah!