
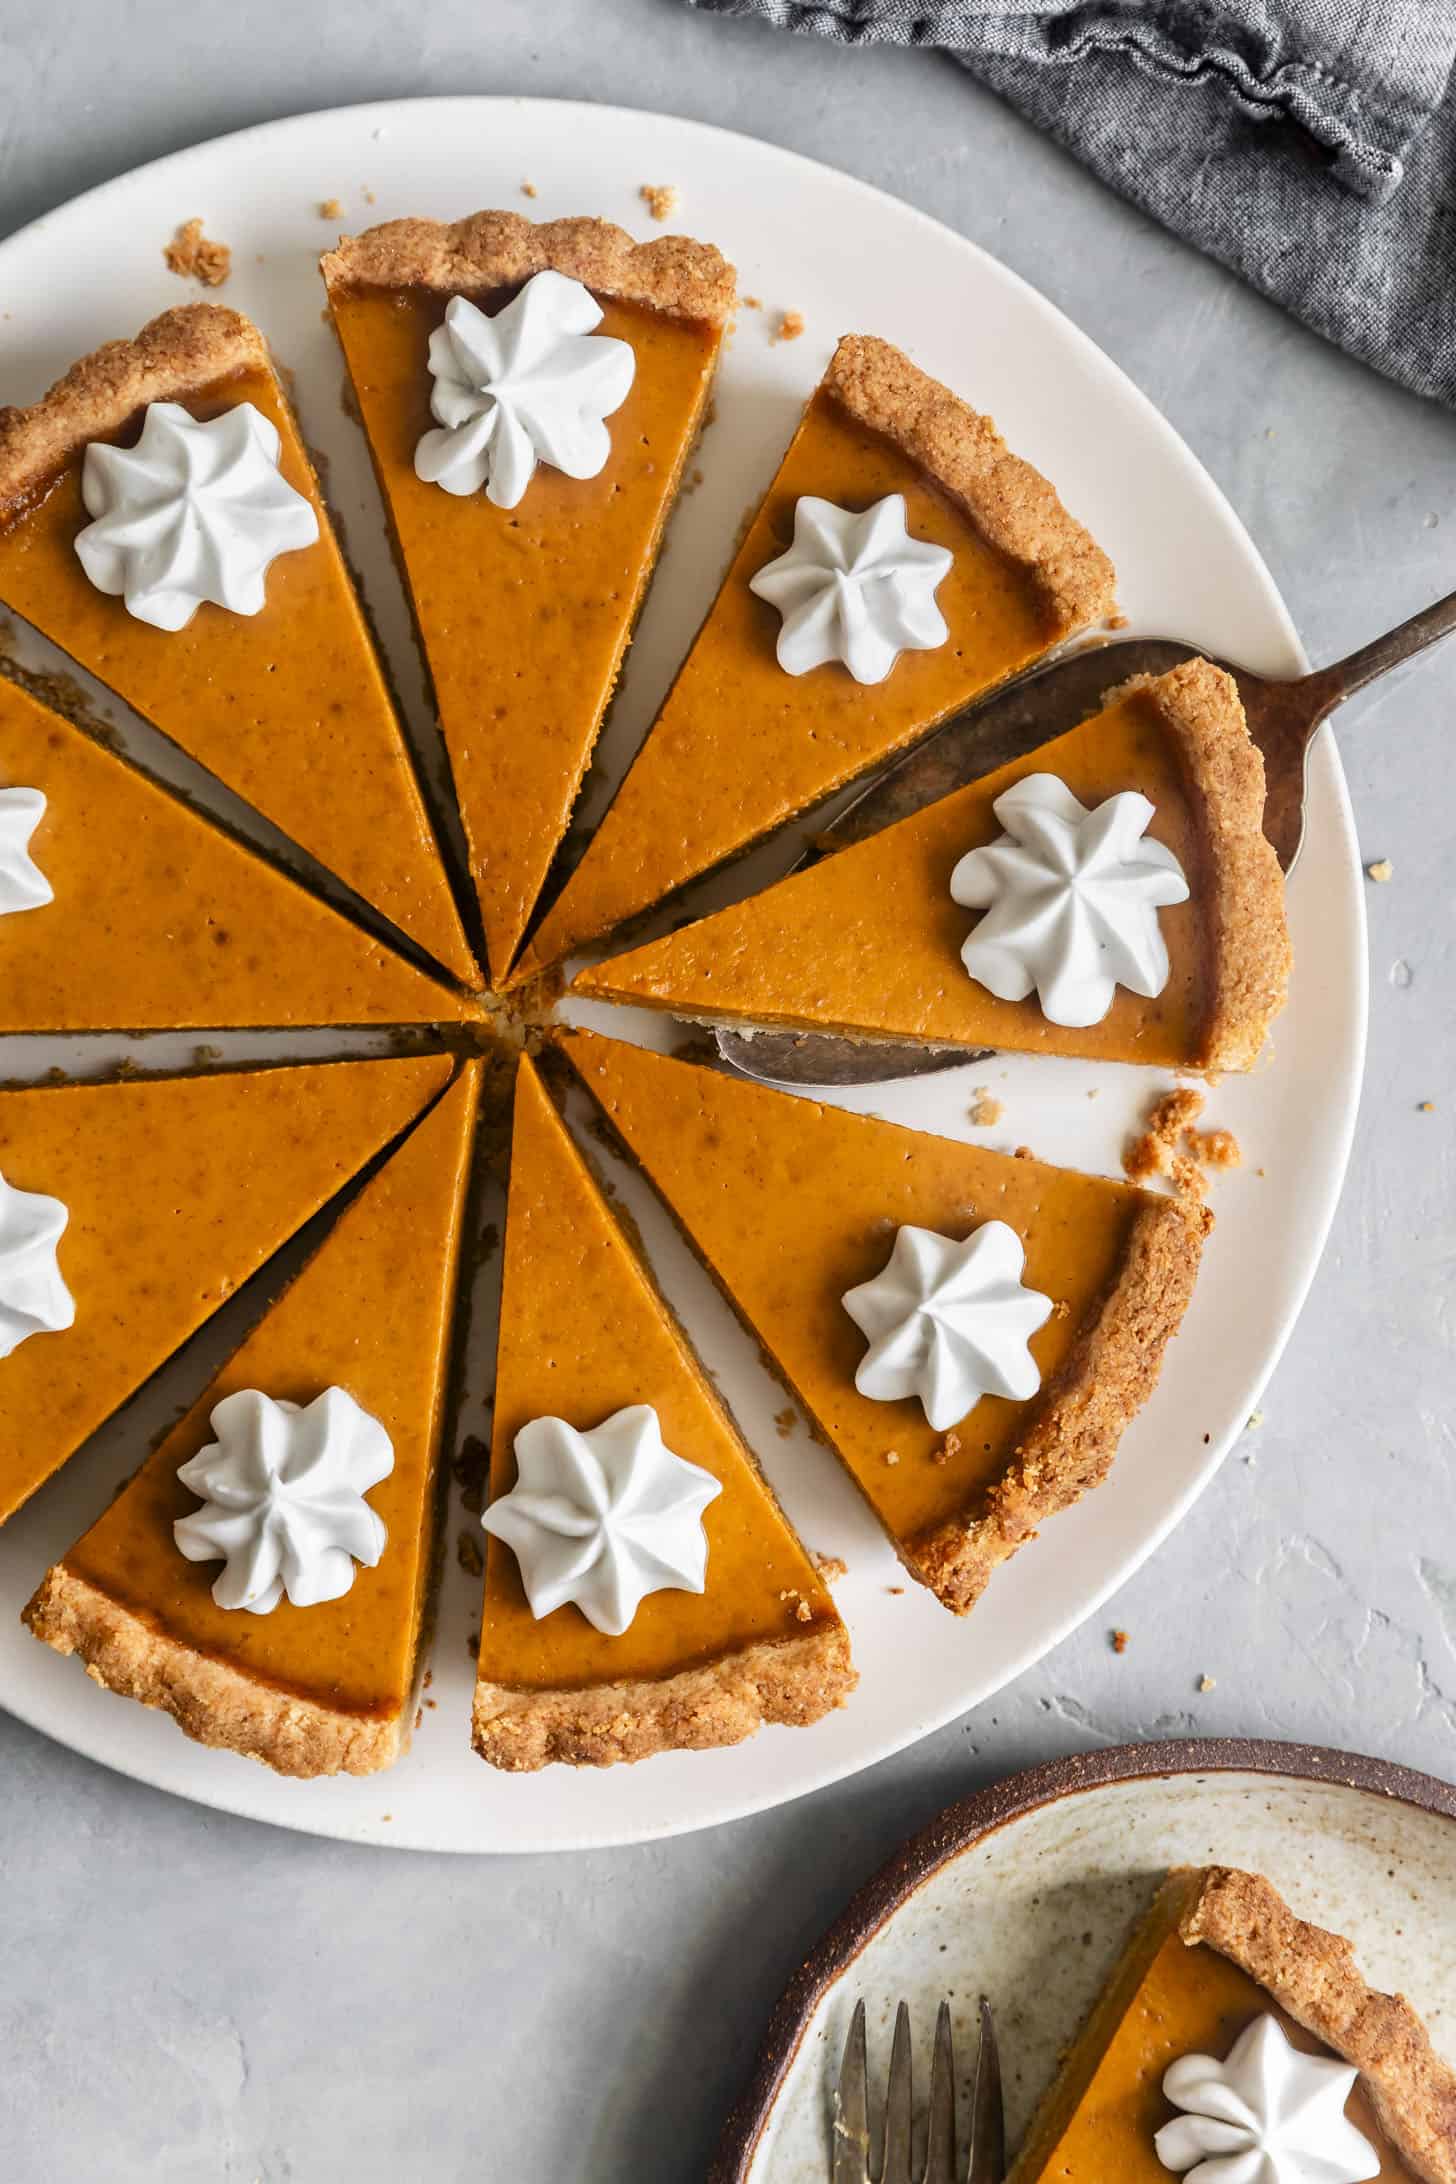
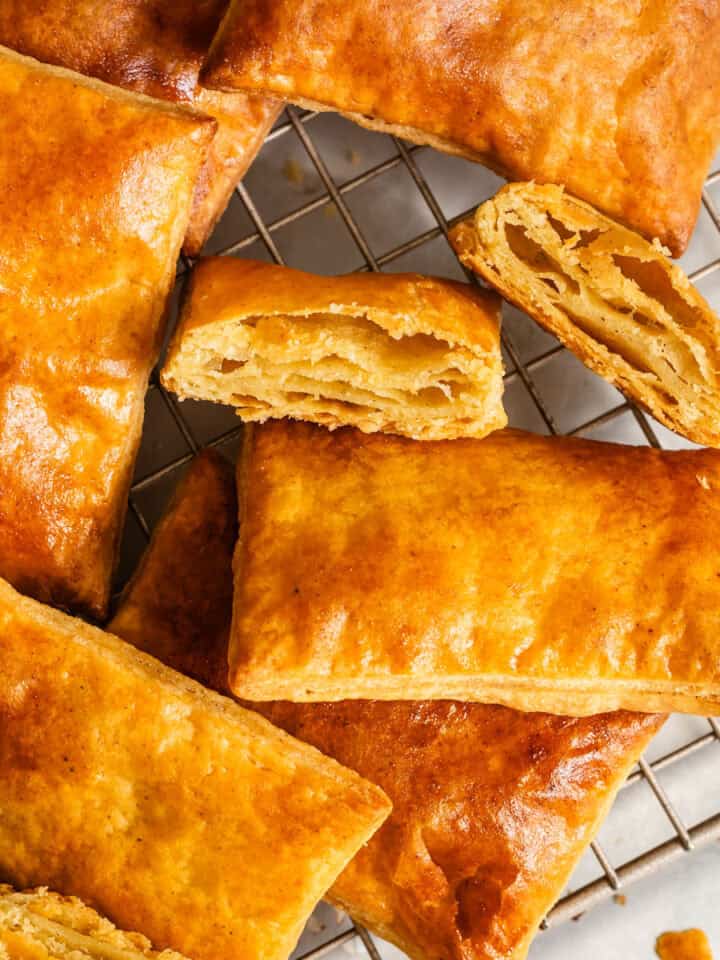
This buttery gluten-free tart crust is inspired by classic pâte sablée and enriched with egg yolk for a crisp, tender, shortbread-style texture. Made with almond and coconut flour, this grain-free crust is sturdy enough for any filling but still melts in your mouth. You can fully bake or par-bake it, make it ahead, and keep it dairy-free with a simple swap.
More often than not, when I'm deciding between making pie crust and making tart crust, I choose tart. Don't get me wrong: I love eating pie dough, but it asks for a whole lot of attention and commitment to make. Tart crust gets me to dessert faster. That's where this gluten-free tart crust comes in. Mix, press, quick chill, and bake. It streamlines the whole process. It's a low-commitment, high-reward crust that bakes up both crisp and tender at the same time.
My gluten-free tart crust recipe is based on a classic pâte sablée enriched with egg yolk. Meaning "sandy dough," pâte sablée has a crisp shortbread-like texture, in contrast to flaky pie dough. This gluten-free version is exactly that. It's sturdy enough to hold a filling, but crumbles and melts in your mouth.
Made with almond, coconut, and tapioca flours, it's naturally grain-free and bakes up slightly nutty and lightly sweetened. It's so flavorful, I now prefer my gluten-free pumpkin pie and my gluten-free pecan pie in this gluten-free tart crust.

The Science of Testing This Crust
- Super-fine Blanched Almond Flour adds protein that helps hold the dough together, while also browning and crisping up when baked, for a shortbread texture.
- Coconut Flour absorbs moisture when it bakes, creating the melt-in-your-mouth softness and subtle sweetness. Because it is so absorbent, you can use less flour, keeping the texture tender.
- Tapioca flour acts as the glue. It puffs slightly as it bakes, thickening the crust walls. It also binds with the butter and sugar to create a sturdy structure that holds together when cooled.
- Cold unsalted butter beaten into the flours helps create a light, tender crumb. For dairy-free version, use a stick-style plant butter such as Miyoko's.
- Vanilla extract enhances the cookie flavor.
- Egg yolk enriches the dough with fat and proteins that add structure and create a more tender, melt-in-your-mouth texture. I tested the crust both ways, and the yolk was the clear winner.
What kind of pan for a tart?
For this almond flour tart crust, you'll need a 9-inch tart pan. I recommend using a non-stick tart pan with a removable bottom to make it easy to remove the tart from the pan.
The crust contains plenty of butter, so you usually don't need to grease the pan. If your tart pan tends to stick, or it isn't nonstick, line the bottom with a round of parchment or lightly butter the pan just to be safe.
If you don't have a tart pan, a 9-inch springform pan works too. Press the crust about 1 inch up the sides.
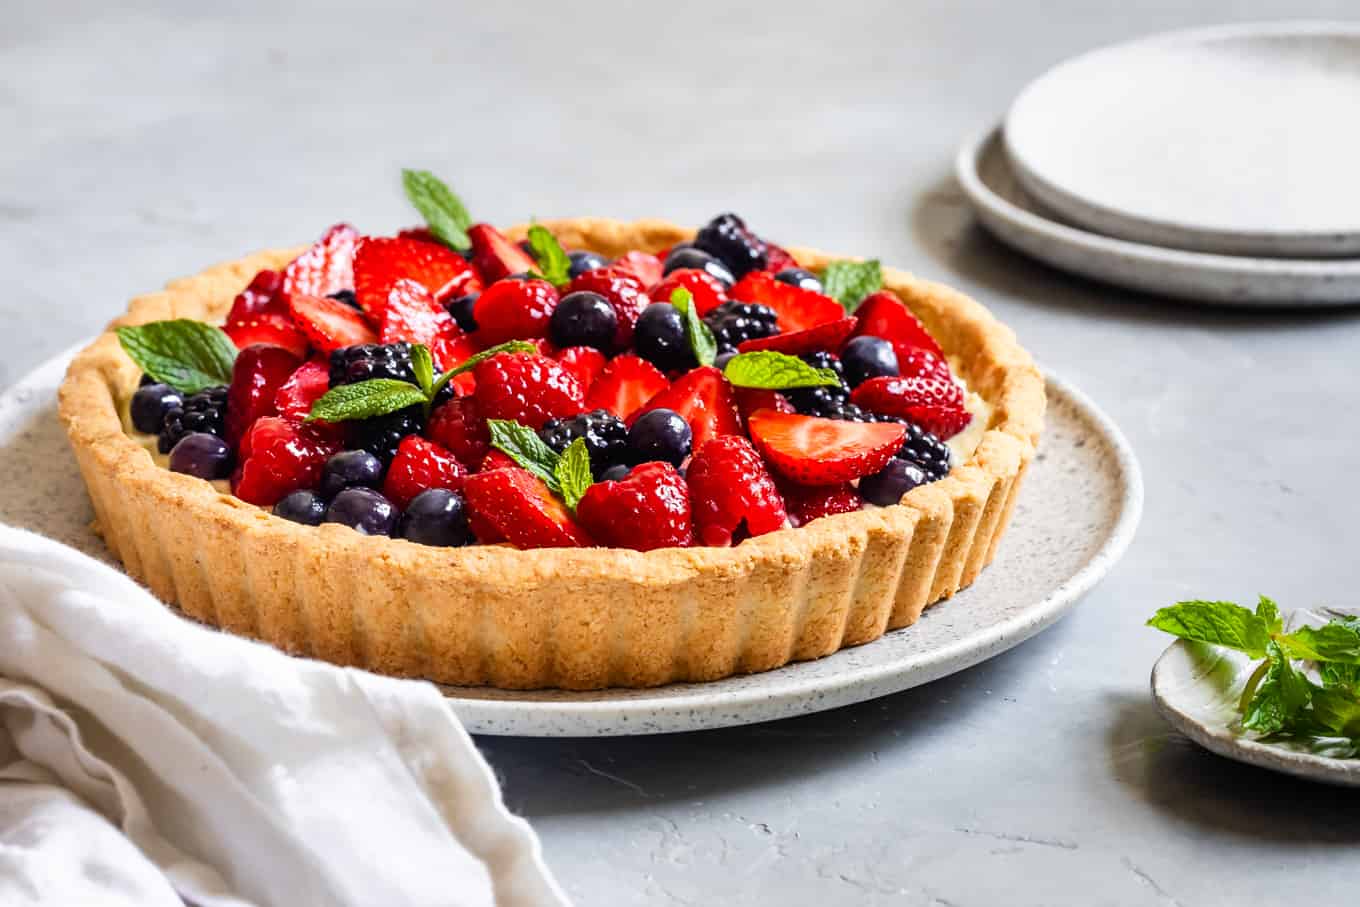
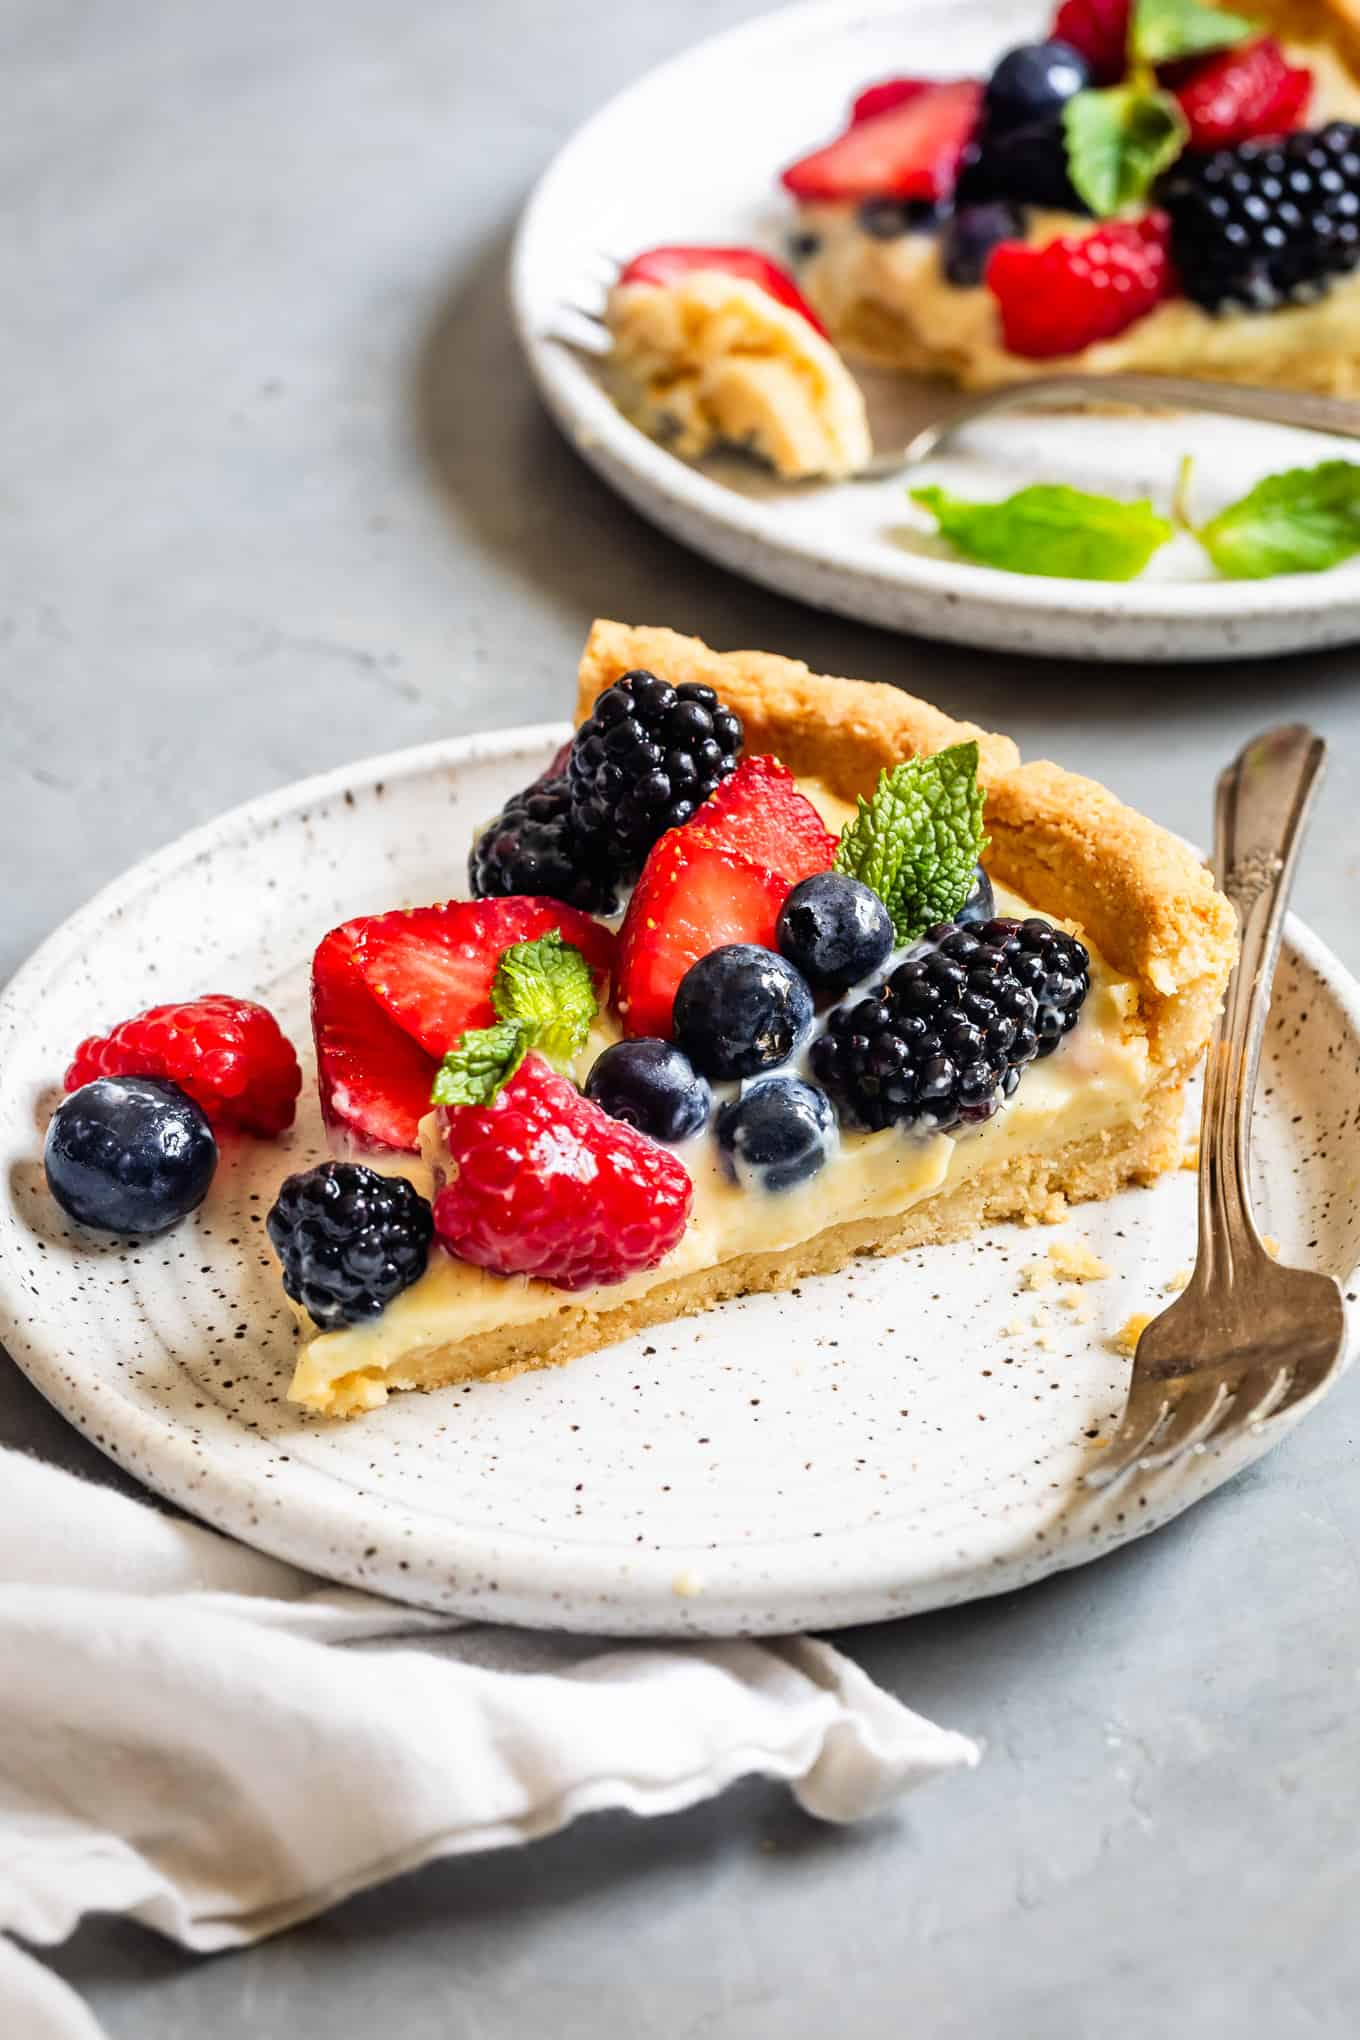
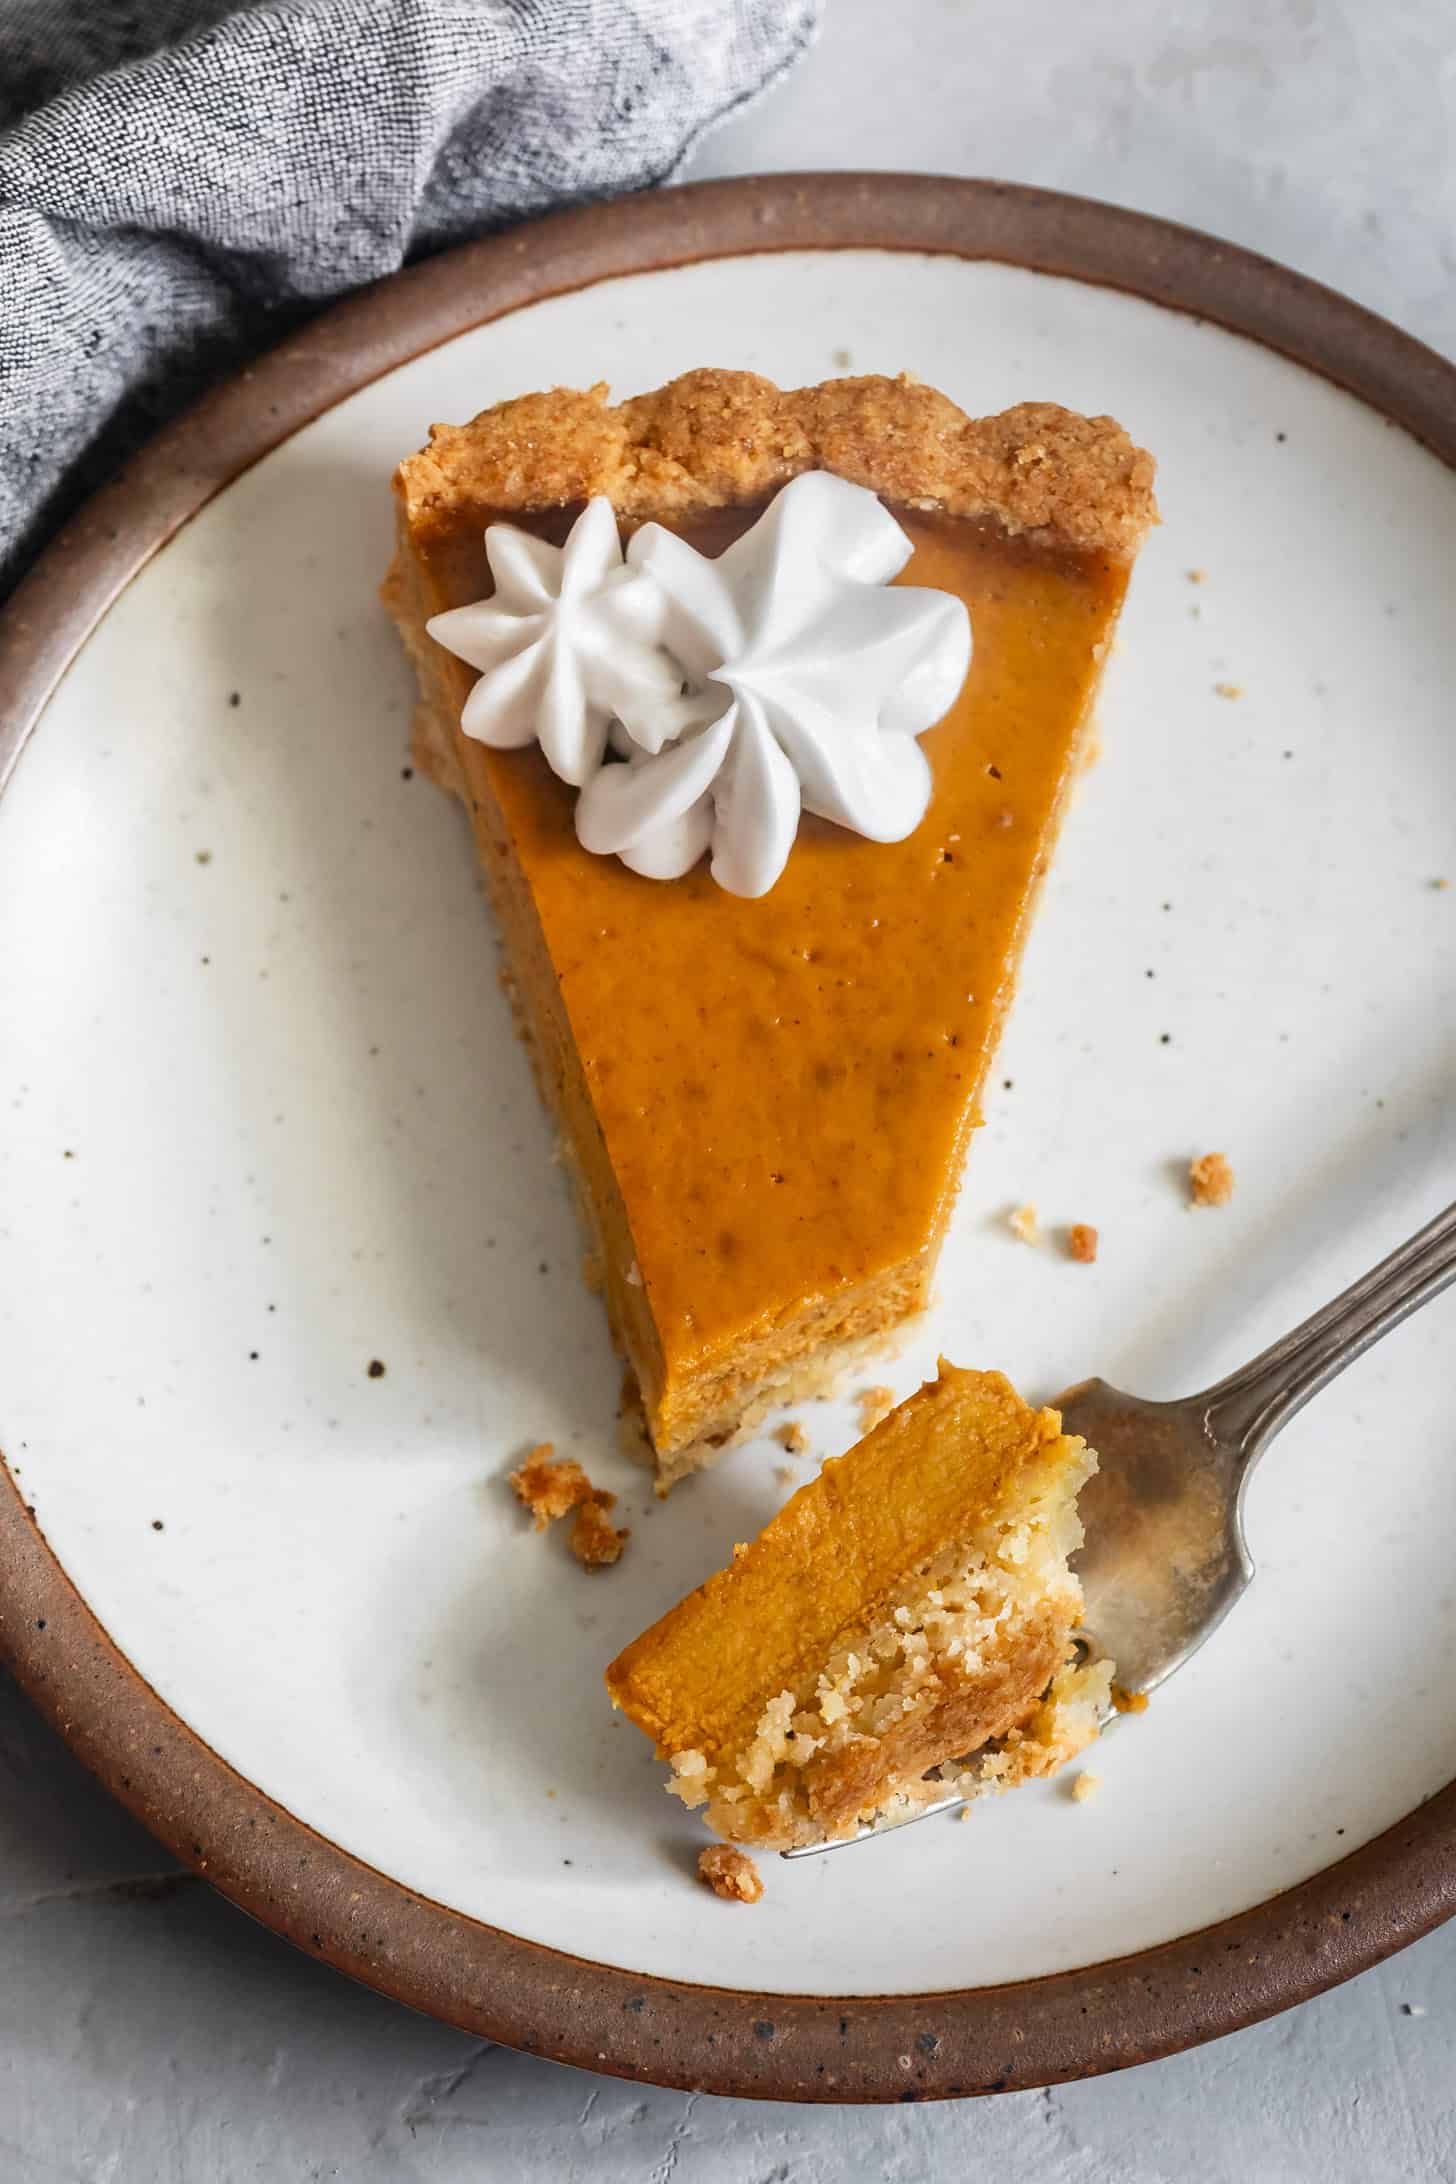
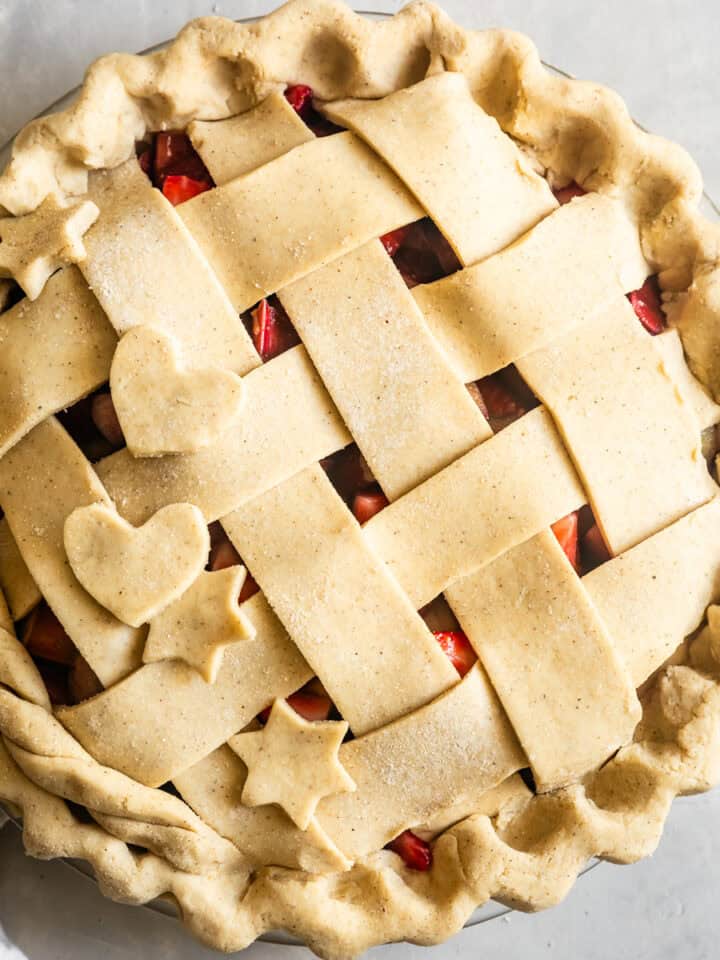
Favorite Ways to Fill This Tart
Recipe

Shortbread Gluten-Free Tart Crust
Equipment
- 1 9-inch tart pan with a removable bottom or a 9-inch springform pan
Ingredients
- ¾ cup (84 g) super-fine blanched almond flour
- ¼ cup + 2 tablespoons (36 g) coconut flour
- ½ cup + 3 tablespoons (77 g) Bob's Red Mill tapioca flour
- 5 tablespoons (63 g) granulated sugar
- ½ teaspoon kosher salt
- ½ cup (8 tablespoons) cold unsalted butter, cut into tablespoons (stick-style vegan butter also works)
- 1 teaspoon pure vanilla extract
- 1 large egg yolk
INSTRUCTIONS
- In the bowl of a stand mixer fitted with the paddle attachment or in a food processor, mix the almond flour, coconut flour, tapioca starch, sugar, and salt.
- Mix in the cubed butter and vanilla extract, beginning on low and gradually increasing the speed to medium-high until the filling begins to clump together and butter is fully incorporated. This might take a few minutes - it will appear dry and sandy at first, but it will eventually clump!
- Add the egg yolk and mix just until evenly incorporated and the dough is clumping together.
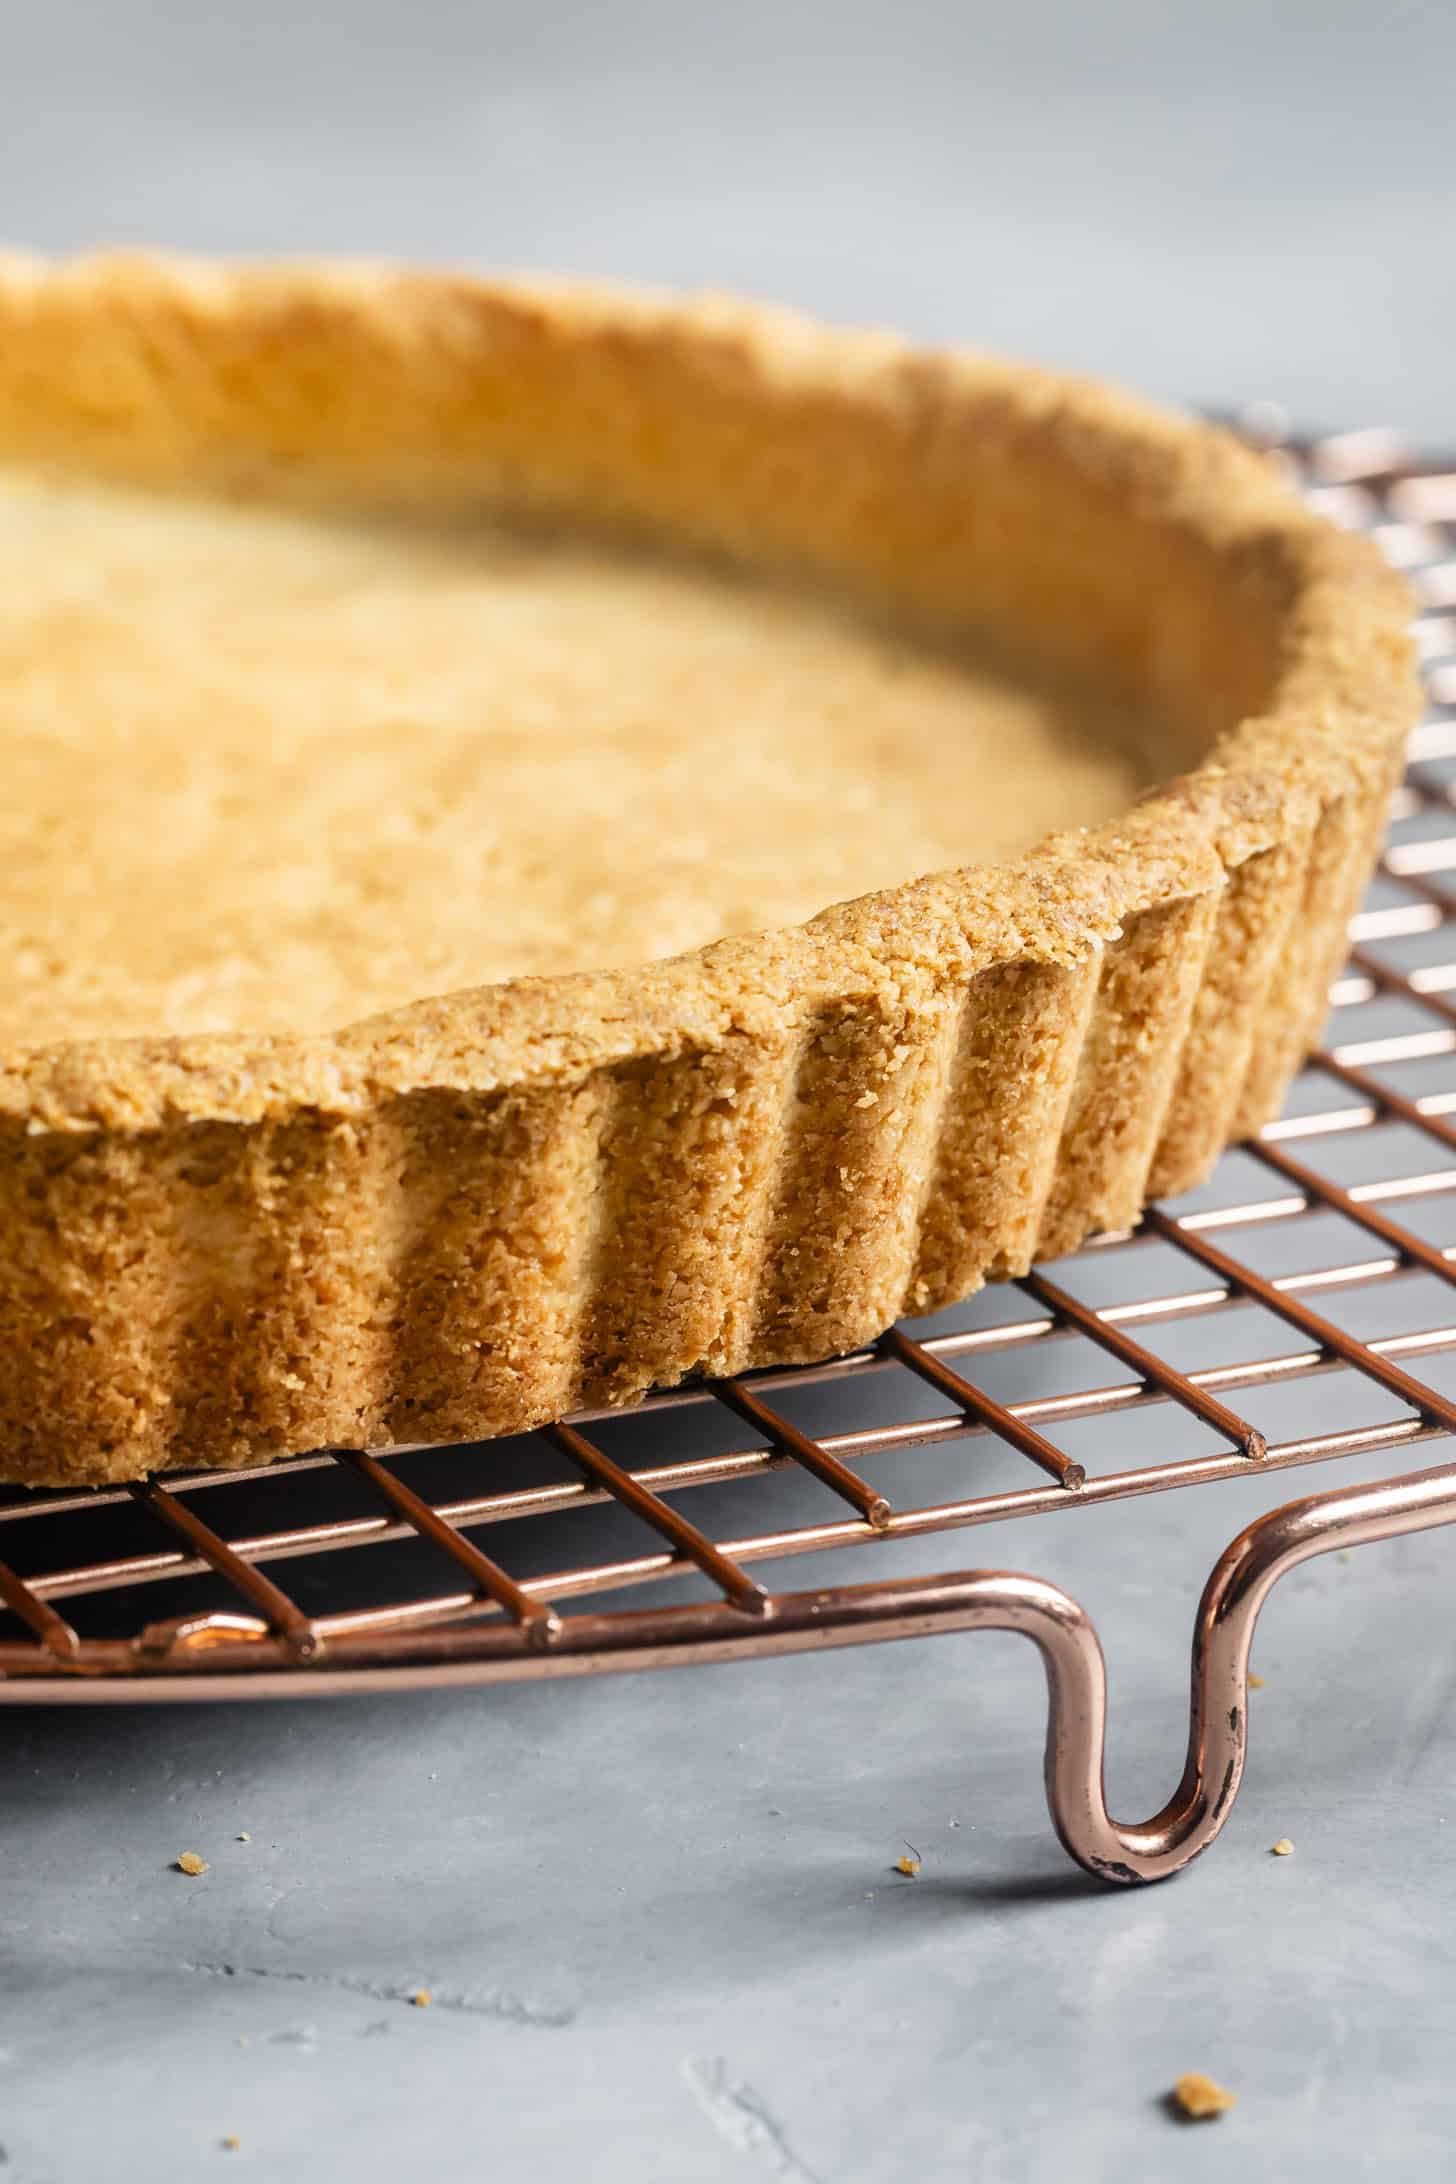
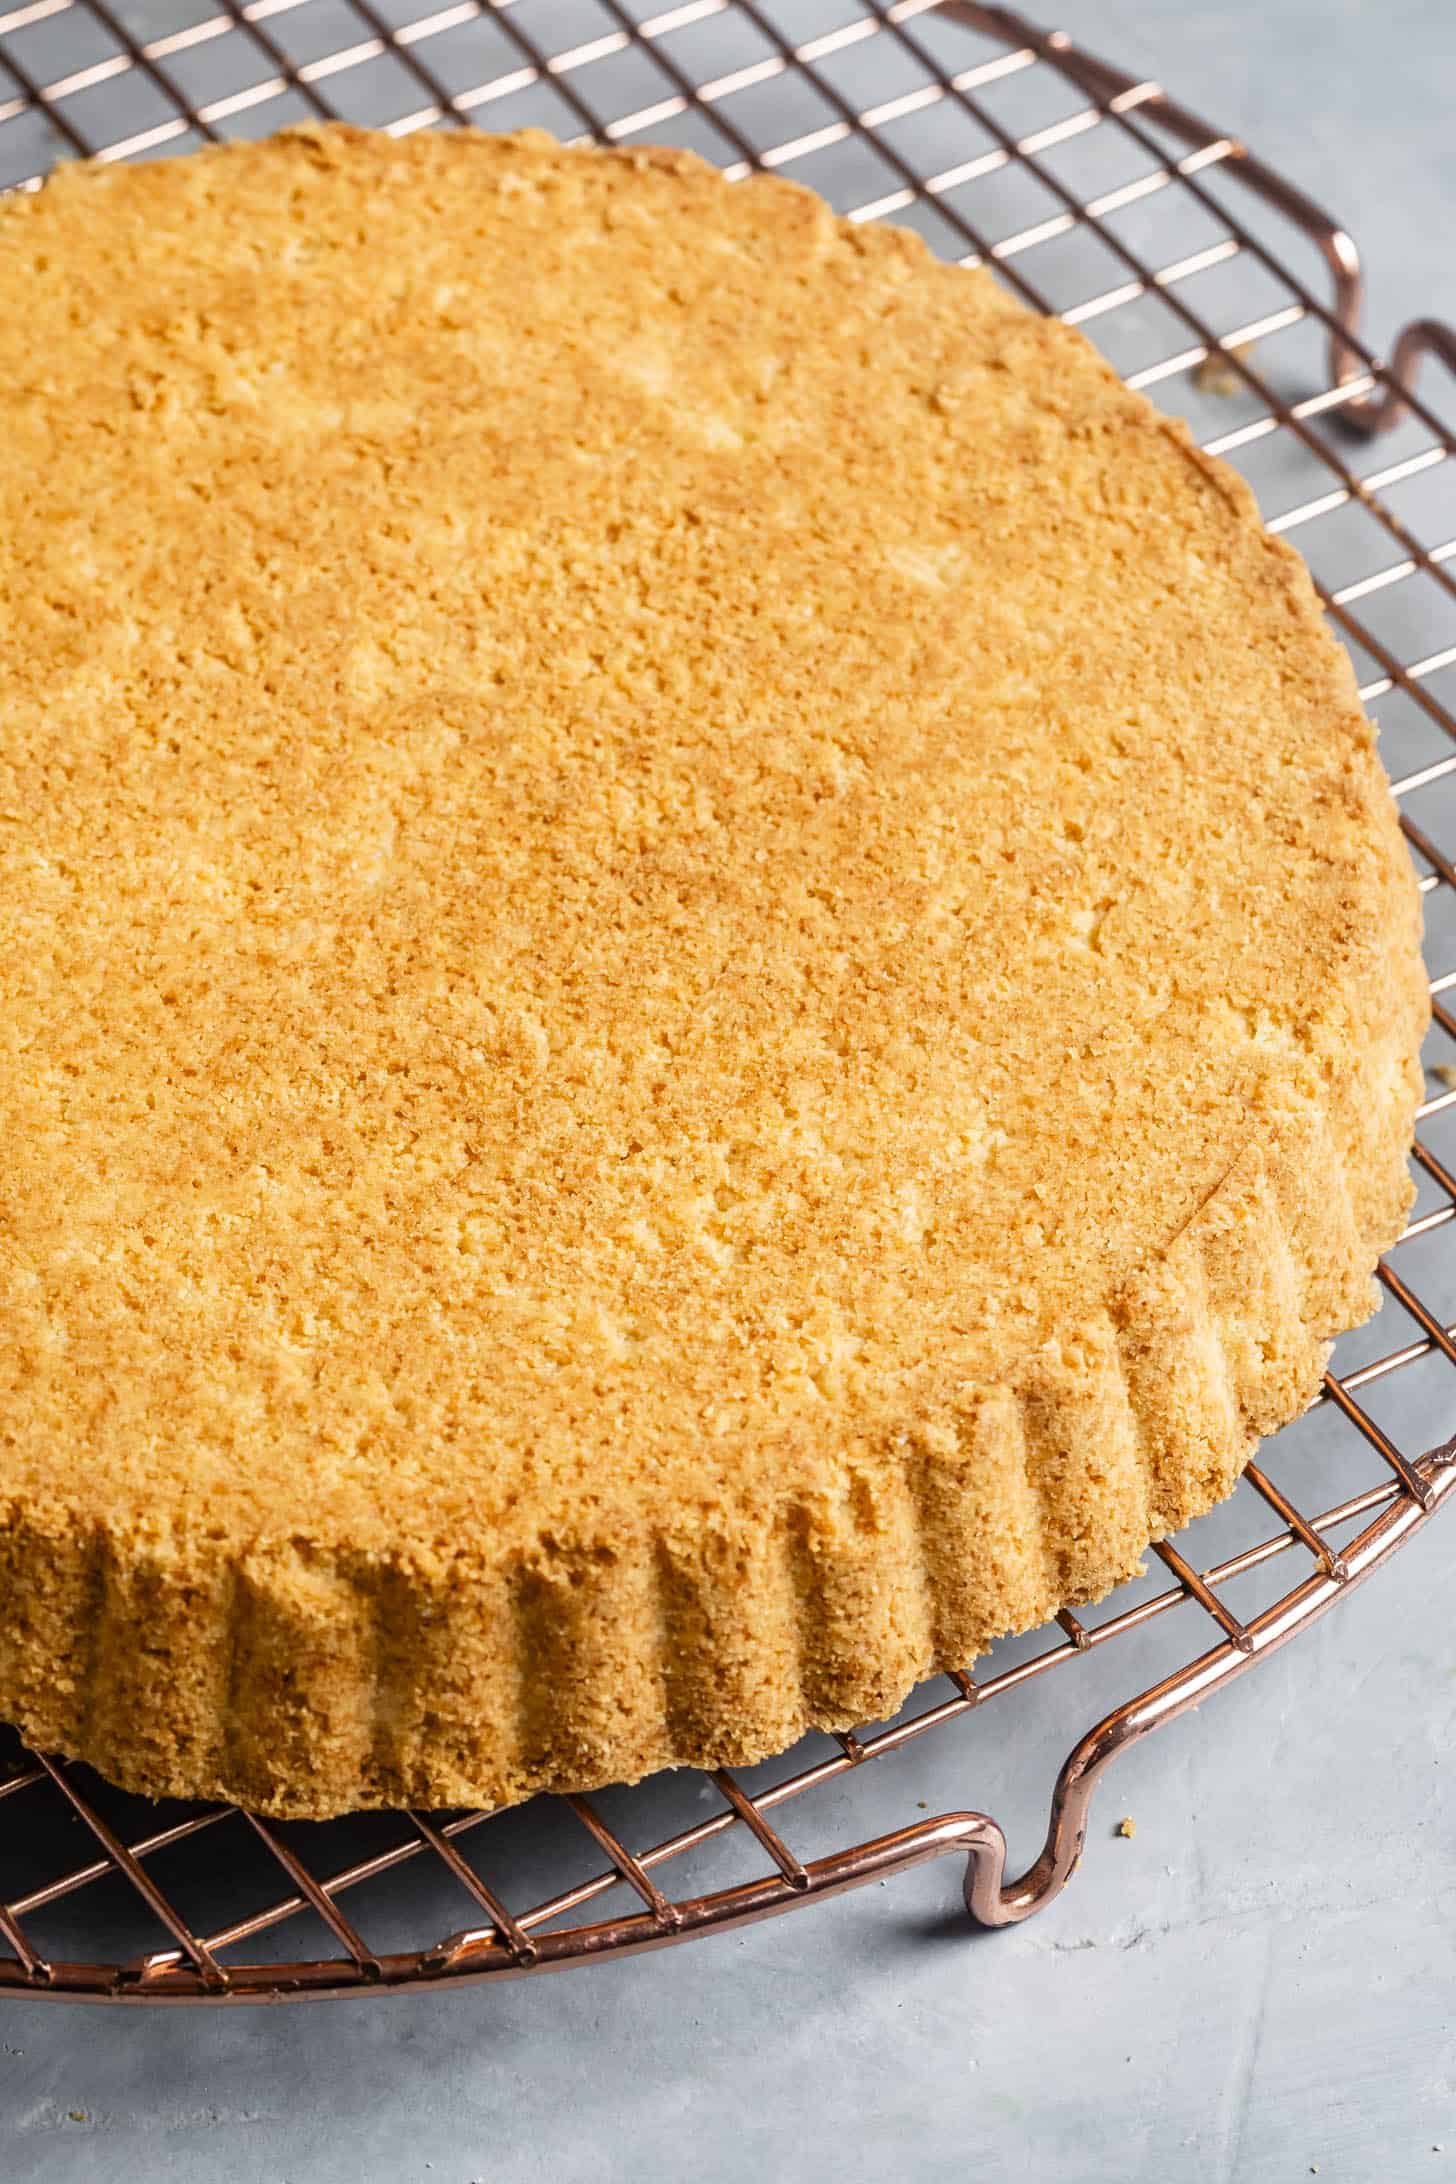
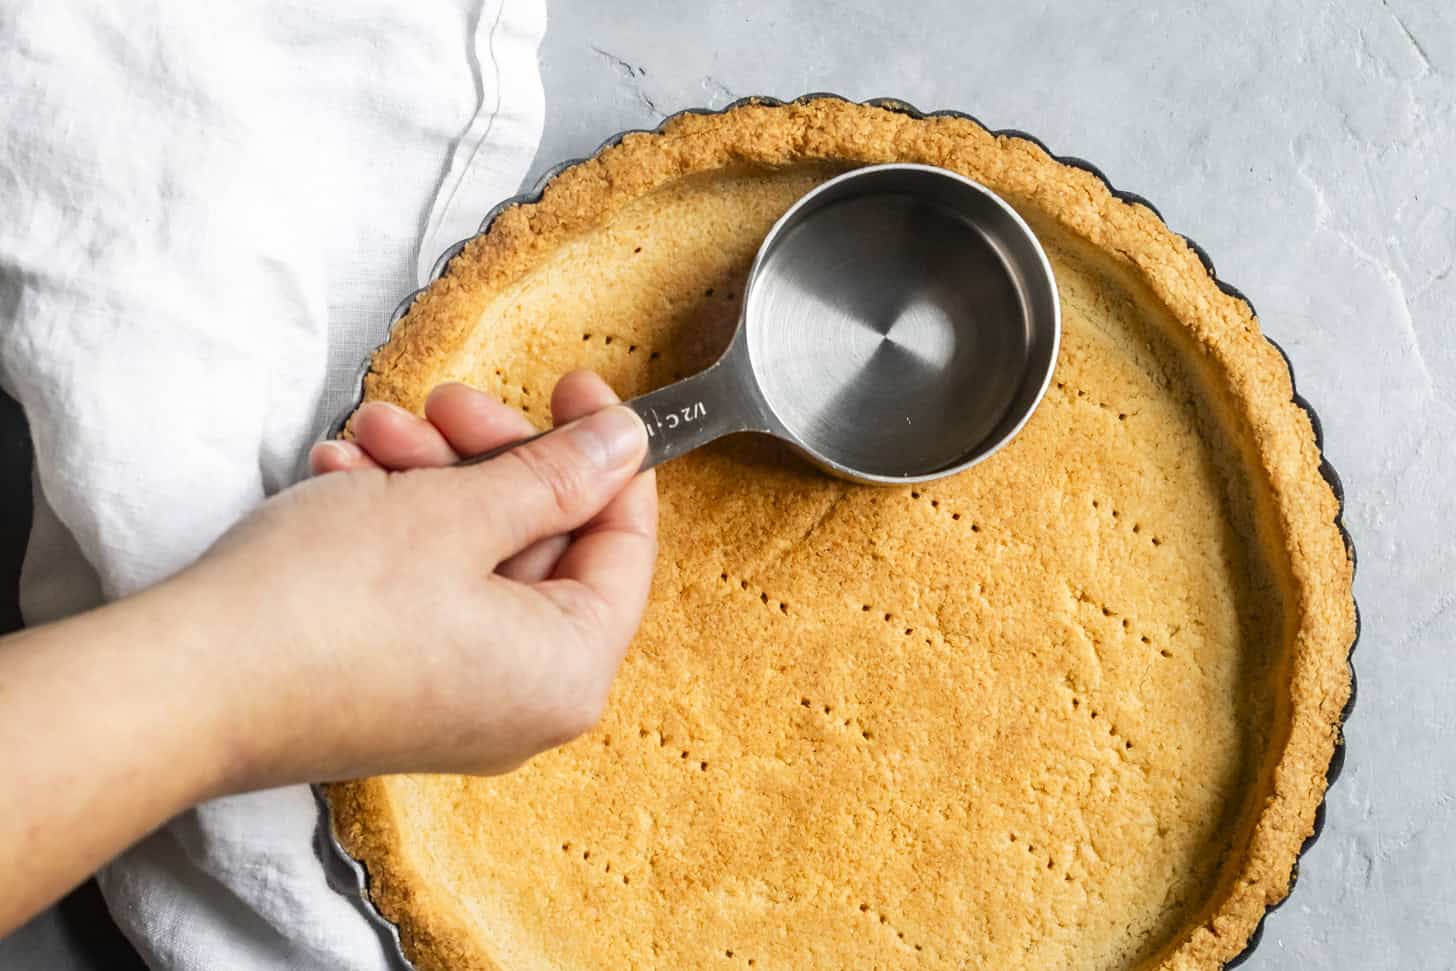
- Dump the dough into the bottom of a 9-inch non-stick tart pan with a removable bottom. Press ½ the dough up the sides of the pan about ⅛ - ¼-inch thick, squaring off the top edges. Press the remaining dough into an even layer on the bottom of the pan, flattening the dough with the bottom of a flat cup. Prick the bottom all over with a fork, place on a baking sheet, and chill in the freezer or fridge until firm, 15-30 minutes.
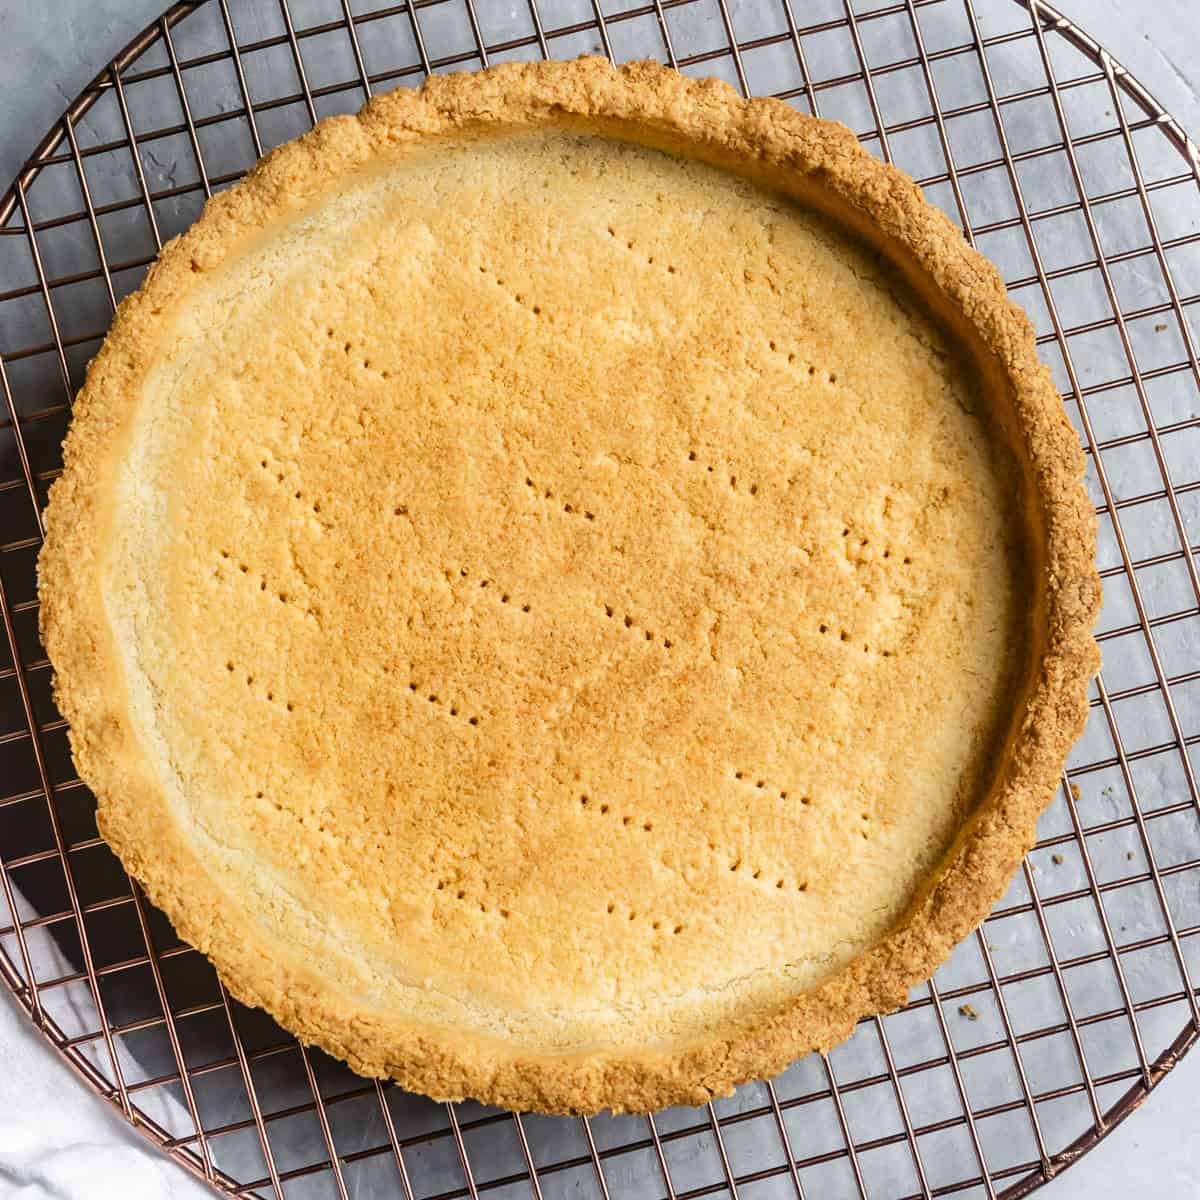
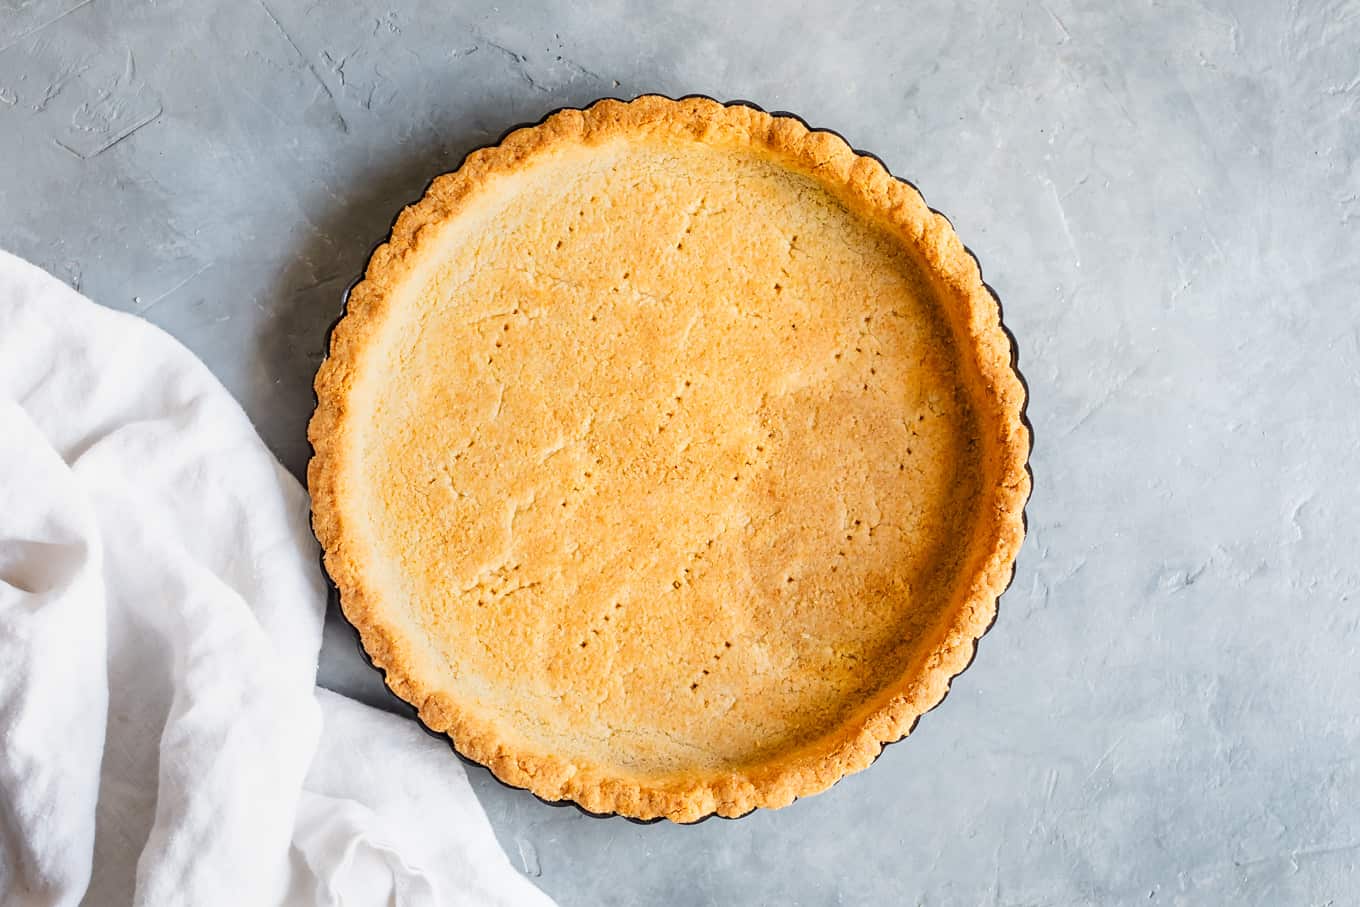
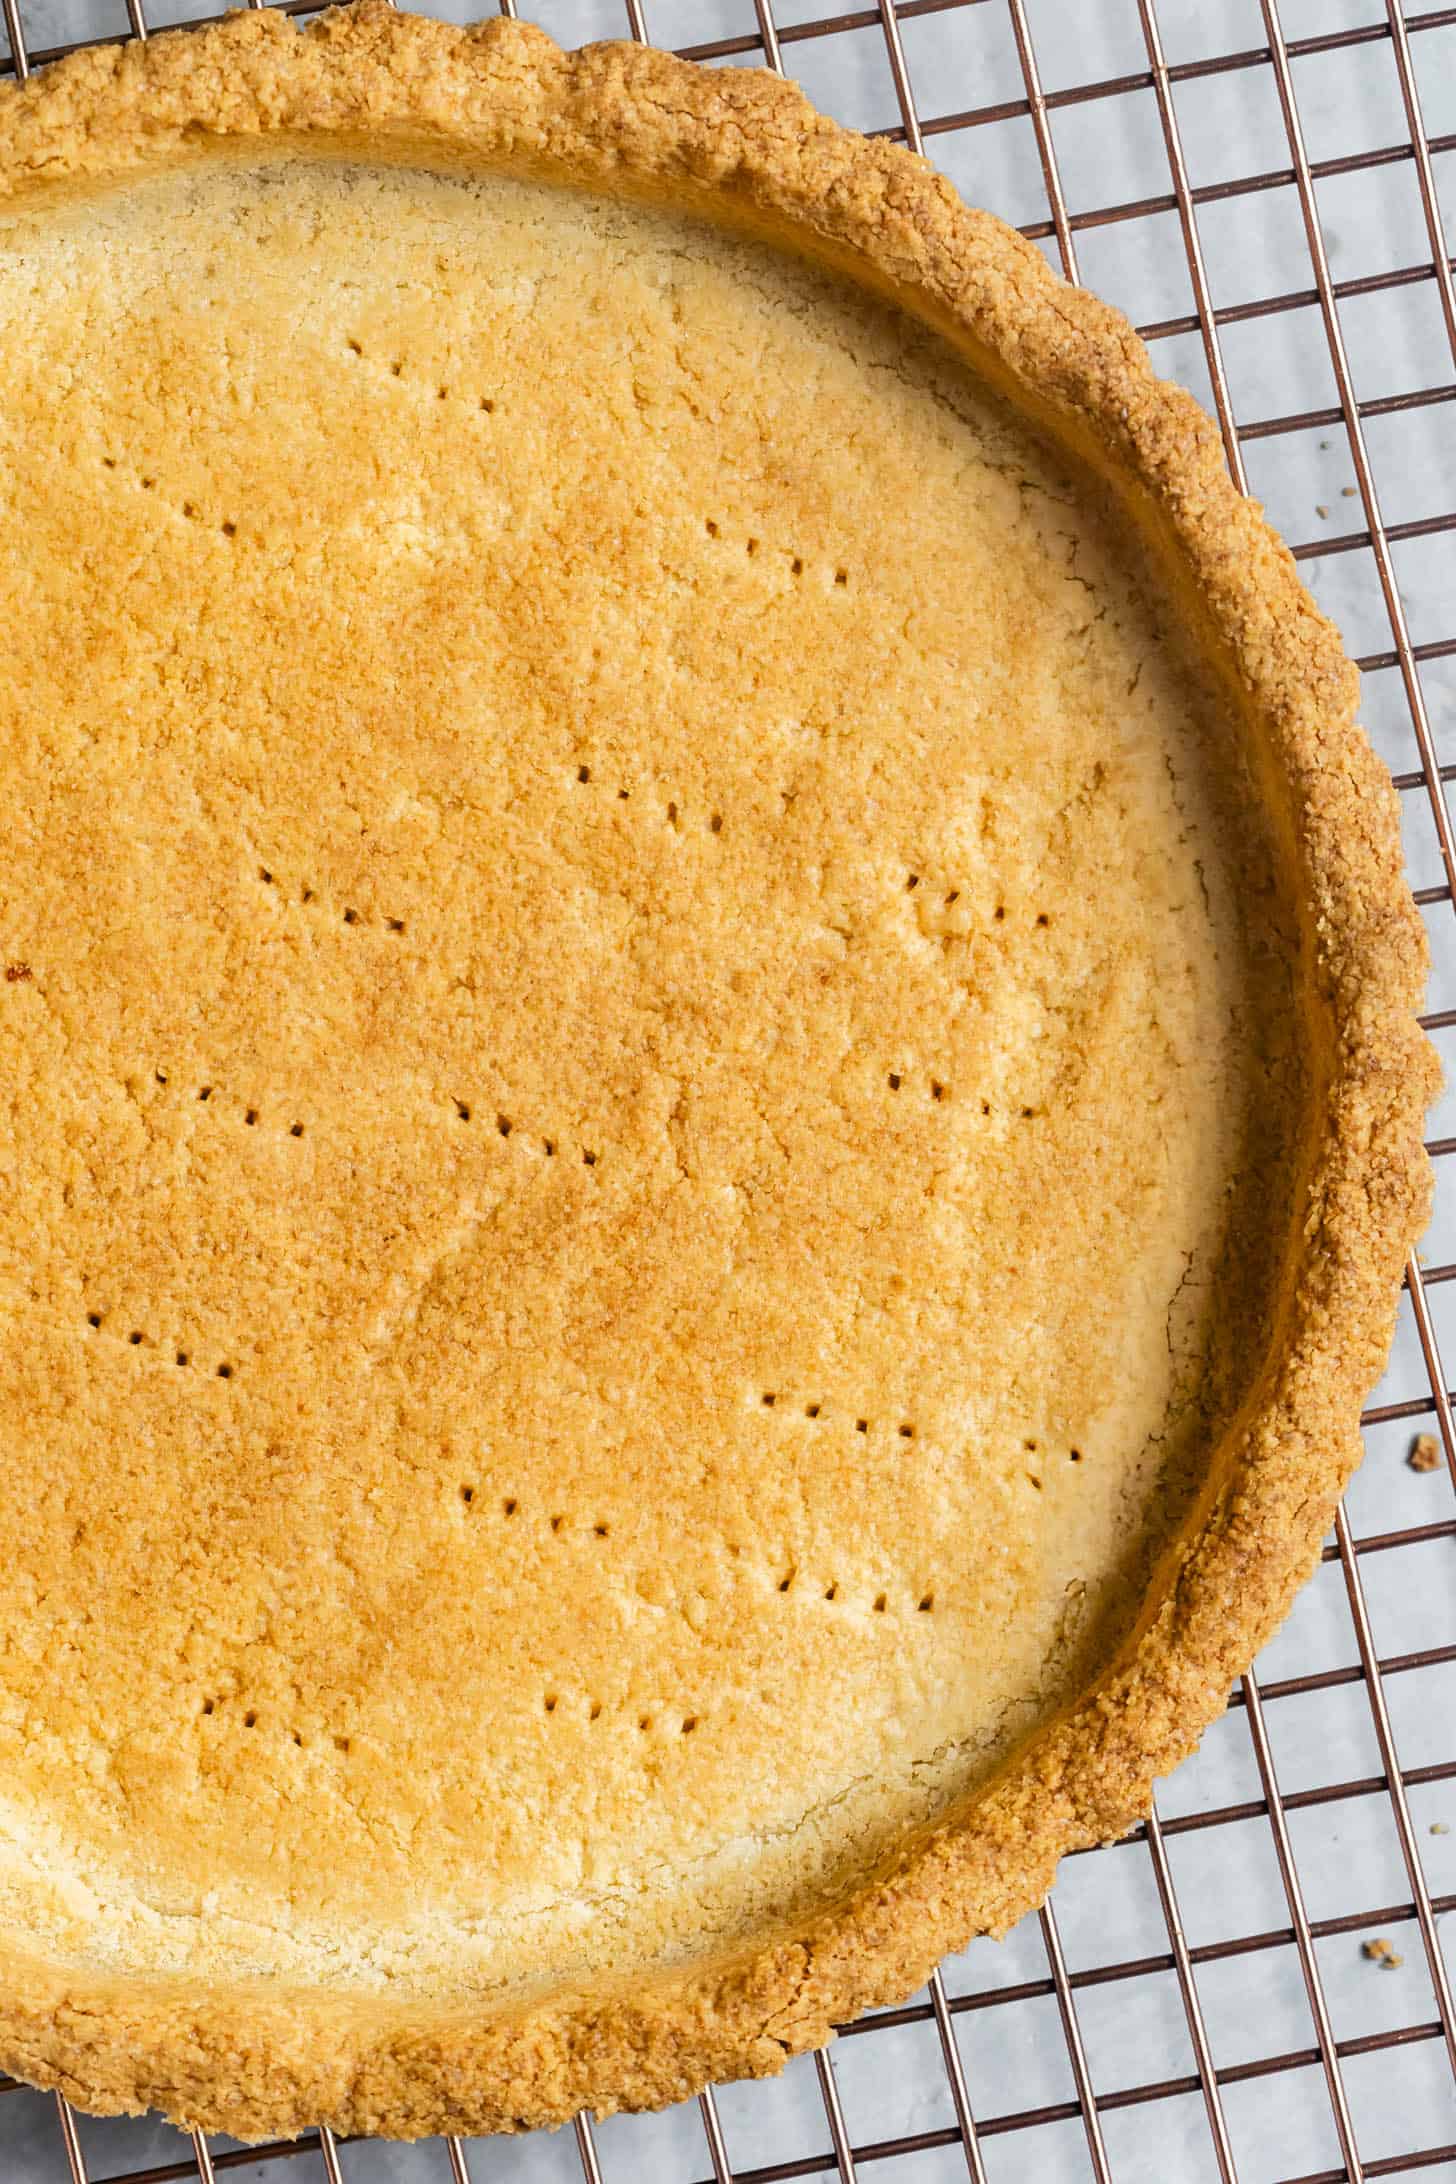
- Preheat the oven to 375°F. When the tart crust is chilled until firm, bake on the baking sheet on the middle rack:Par-bake: Bake 14-18 minutes, until just firm to the touch in the center, with lightly golden brown edges. Fully Baked: Bake 20-24 minutes, until lightly golden brown all over. Check the crust at around the 14-minute mark. If you notice the top edge getting too dark, cover it with a pie shield or create your own with a round of crumbled foil to cover the edge. Take care not to underbake, as an underbaked crust will not hold together well. Note: every oven is different (ex. gas v electric conduct heat differently). For example, you may find you need to rotate the pan if you notice a hot spot.
- Remove from the oven, and while the crust is still hot, use a flat cup bottom or the back of a spoon to gently press down on the sides and bottom to help hold it together when it cools.Follow your recipe as instructed or see storage instructions below.
Notes
Make-ahead crust:
- Prepare and chill the tart dough: Prepare the tart crust up to the step where you prick it with a fork. Wrap the unbaked tart crust well with plastic wrap and then freeze it for up to 2 weeks. Bake it straight from the freezer, as directed. This is the best method if you're making the crust more than a day ahead.
- Store fully baked tart crust: You can bake the tart crust up to 2 days in advance. Once cooled, cover it and store it in the fridge for up to two days.
- Chocolate Moisture Layer: If you're using a no-bake filling and want to assemble the tart several hours or a full day ahead, add a thin moisture barrier with chocolate to keep the crust crisp. While the crust is still warm, sprinkle 1.5 ounces of finely chopped white chocolate over the bottom. Let it sit for a few minutes to melt, then spread into a thin layer with an offset spatula or spoon.
Removing Tart From Pan:
You can remove the tart from the pan as soon as it is completely cool. However, if you're new to tart making, I recommend filling the tart before removing it from the pan to reduce your risk of cracking the crust, using the filling to help hold it all together. Remove the tart from the pan before chilling or the chilled butter will make it more difficult to remove it from the pan. Slide a thin knife along the bottom edge of the completely cooled tart crust pan where the removable bottom meets the side ring and gently tilt the knife to pop the tart out of the pan. Then slide a thin knife or long offset spatula under the tart to pop it off the base.Mini tarts:
This tart can also be baked in mini tart pans for individual servings. The same recipe will make four 4-inch mini tarts. You'll follow the recipe exactly using 4-inch tart pans, but bake the crusts for about 5 minutes less.Did you make this recipe? Please leave a review and rating to let me and others know how you liked it!
Your Guide to No-Fuss Gluten-Free Tart Crust
Start by mixing the dry ingredients with the cold cubed butter and vanilla. At first, it'll look sandy like it will never turn into a dough, but carry on and it will begin to clump together. Add the egg yolk and mix until it evenly incorporates and the dough clumps together.
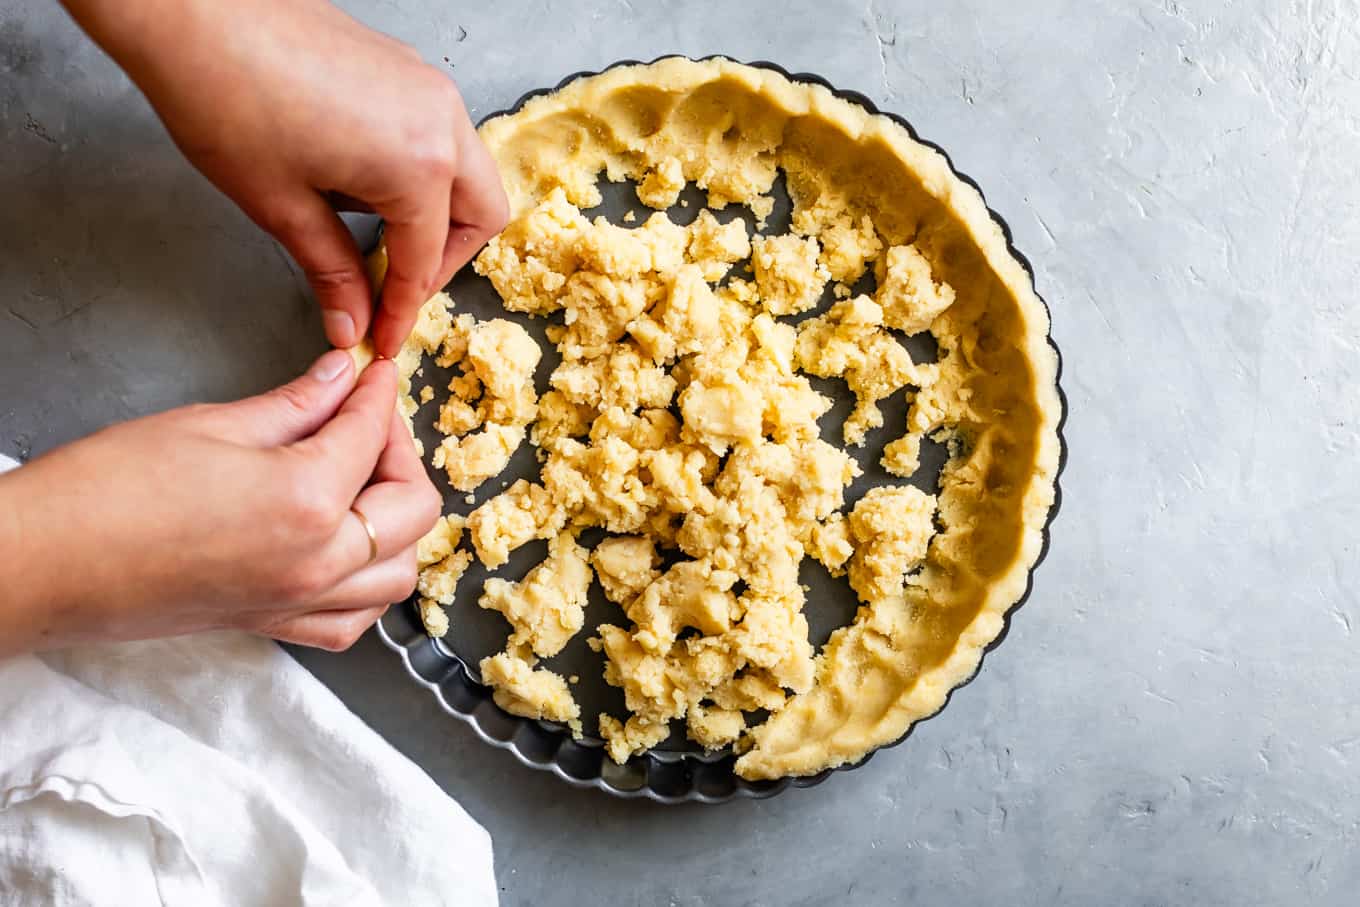
Press ½ the dough up the sides of the pan about ⅛ - ¼-inch thick, squaring off the top edges.
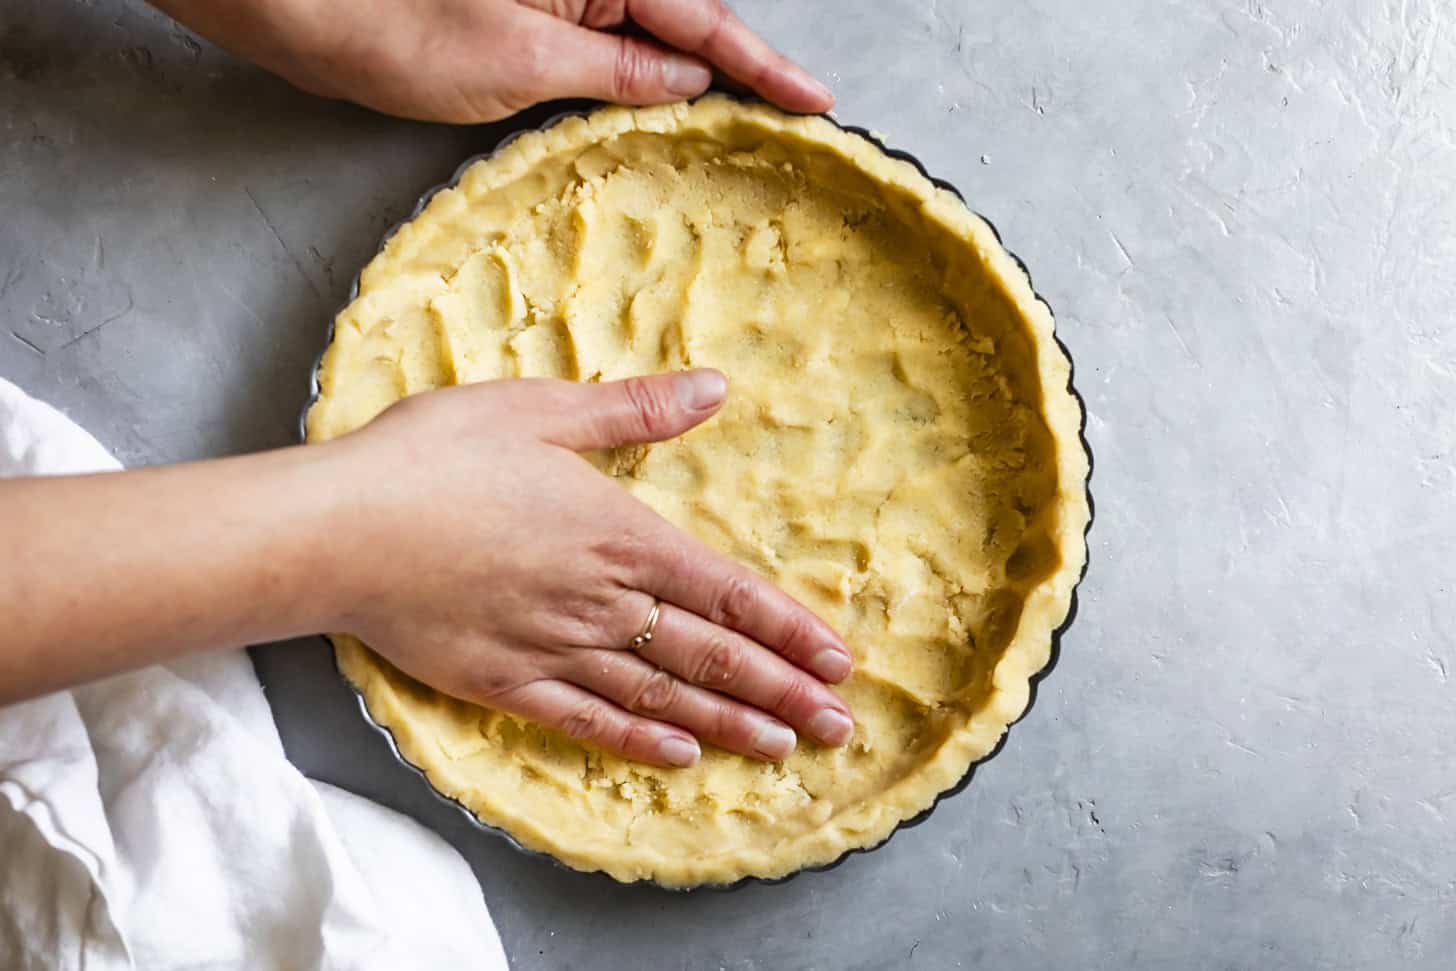
Press the remaining dough into an even layer on the bottom of the pan.
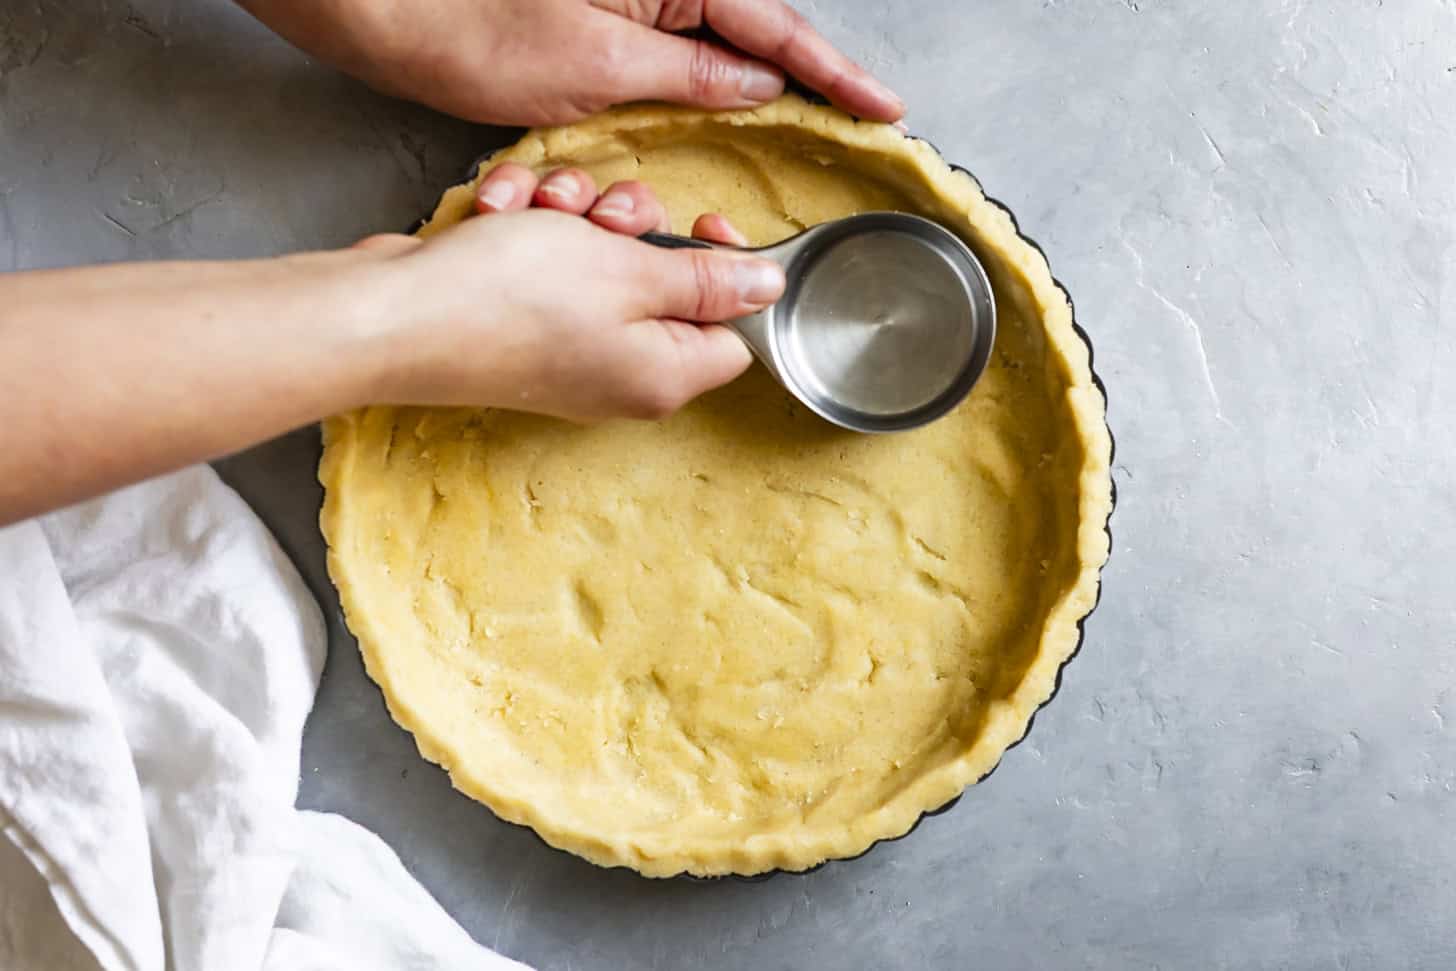
Then flatten the dough with the bottom of a flat cup. Dock the crust with the tines of a fork.
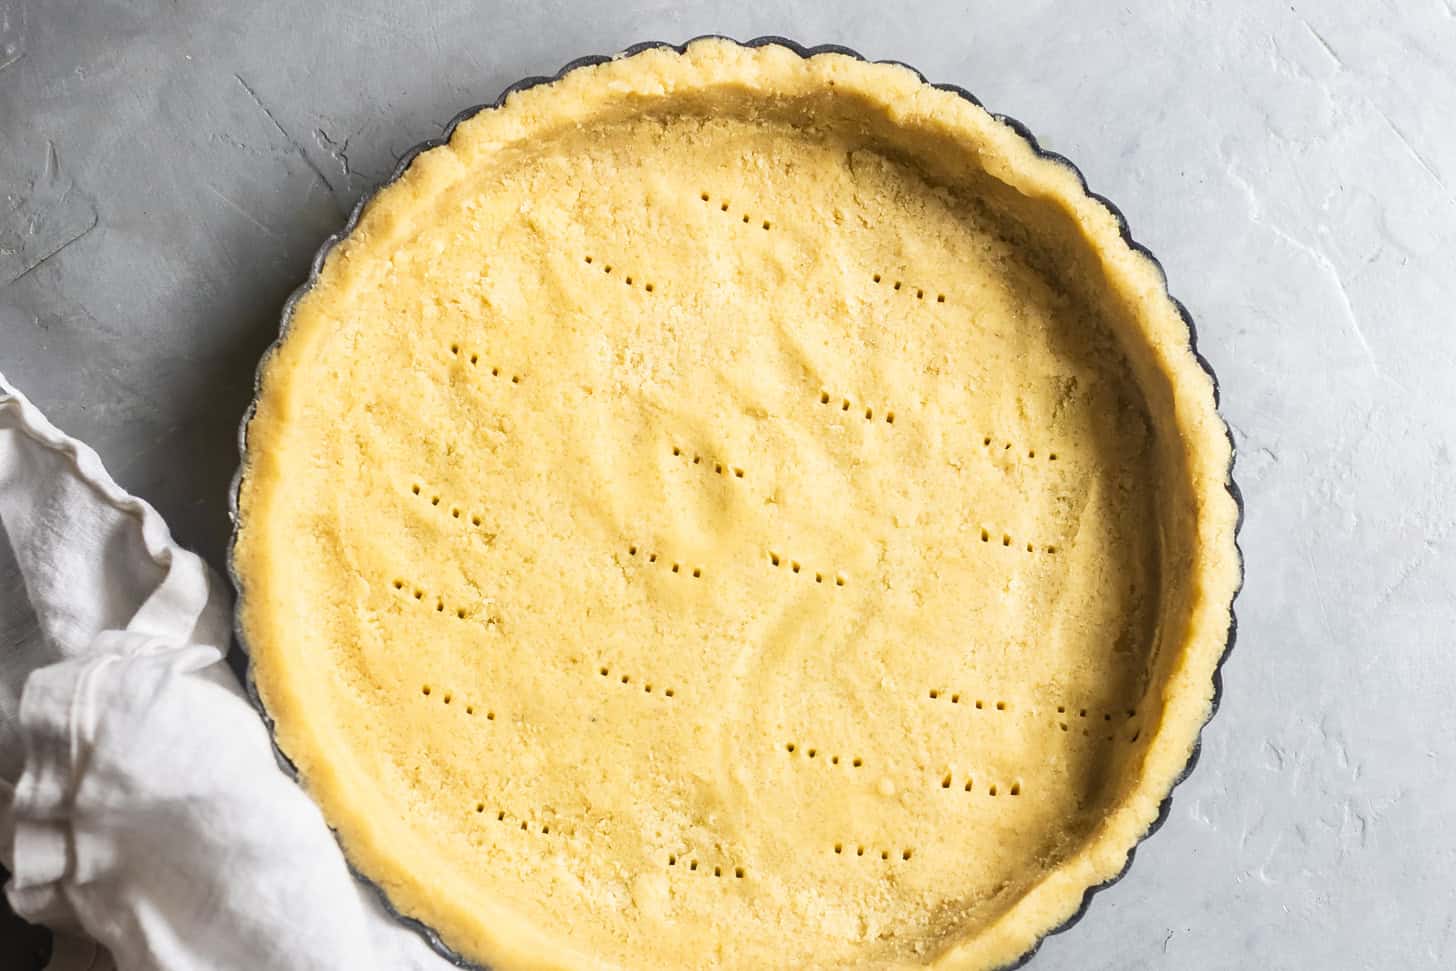
Dock the crust with the tines of a fork, and bake on the middle rack (either par-bake or fully bake).
As soon as it comes out of the oven, immediately use the bottom of a flat cup or the back of a spoon to press the crust against the edges and down in the center. This will help create structure as it cools, so do not skip this step.
Hint: If you notice the edge of the tart crust getting too dark, cover it with a pie shield or create your own with a round of crumbled foil.

Granny Nate -
It came out really great! Great shortbread flavor. For me the baking time was about 4 minutes less. Maybe it was because I used a 9inch pie plate.
Jane Yerow -
I’m about to make this but I only have a 10” tart pan. How to adjust quantities?
Sarah Menanix -
I would increase all measurements by 25% (multiply the weights by 1.25) - except the egg yolk - keeping it at 1 should be fine bc the butter will eventually moisten the dough.