
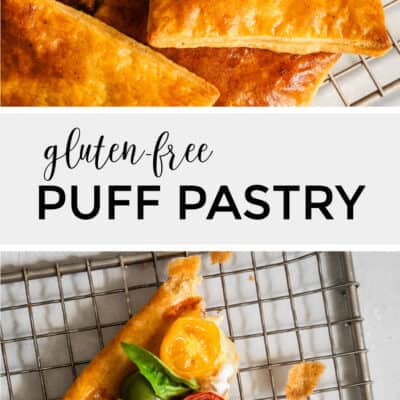
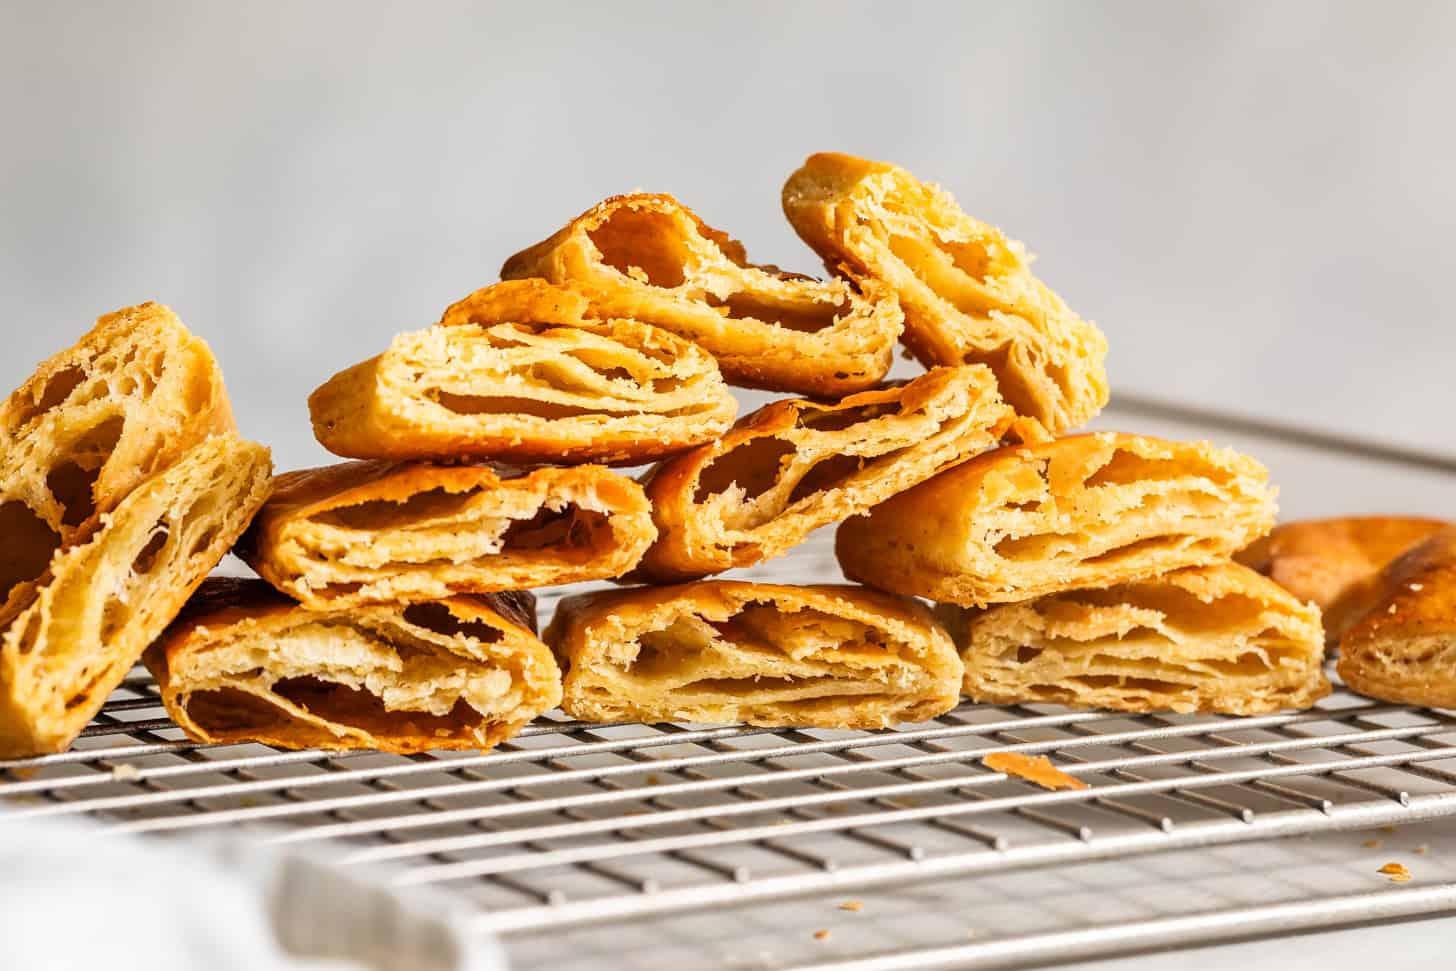
Classic puff pastry sheets made with just gluten-free flours and high-quality butter. This quick and easy cheater method rough bakes up puffy with plenty of crisp golden brown flakes. Use it for your favorite savory or sweet puff pastry recipes!
Homemade puff pastry is one of those recipes that feels much too daunting, gluten-free or not. So naturally I spent years avoiding it out of fear of failure. Except when I finally did go for it and discovered how easy it is to make at home, I'm kicking myself for all those years of missed gluten-free puff pastry bites and tarts!
I use the quick "cheater" rough puff method
This means you can have from-scratch bakery-style gluten-free puff pastry in no time at all. Using the rough puff pastry method is a much quicker "cheater" method than the classic puff pastry, which requires laminating with sheets of butter, precision, and hours of chilling. The best part? With this at-home method, you won't sacrifice any of puff pastry's hallmark crisp puffy golden brown layers.
This method involves simply folding lots and lots of butter into flour, hydrating it with ice water, and laminating it by simply folding it into thirds several times.
My recipes uses a blend of gluten-free flours and starches (the same blend I use for my super flaky gluten-free pie crust), along with xanthan gum to help mimic traditional flour.
The key to this gluten-free puff pastry is ensuring not to over knead the dough.
Or else the butter will melt into the dough. Rather you still want some bigger pieces of butter to create those puffy flaky layers once it's baked!
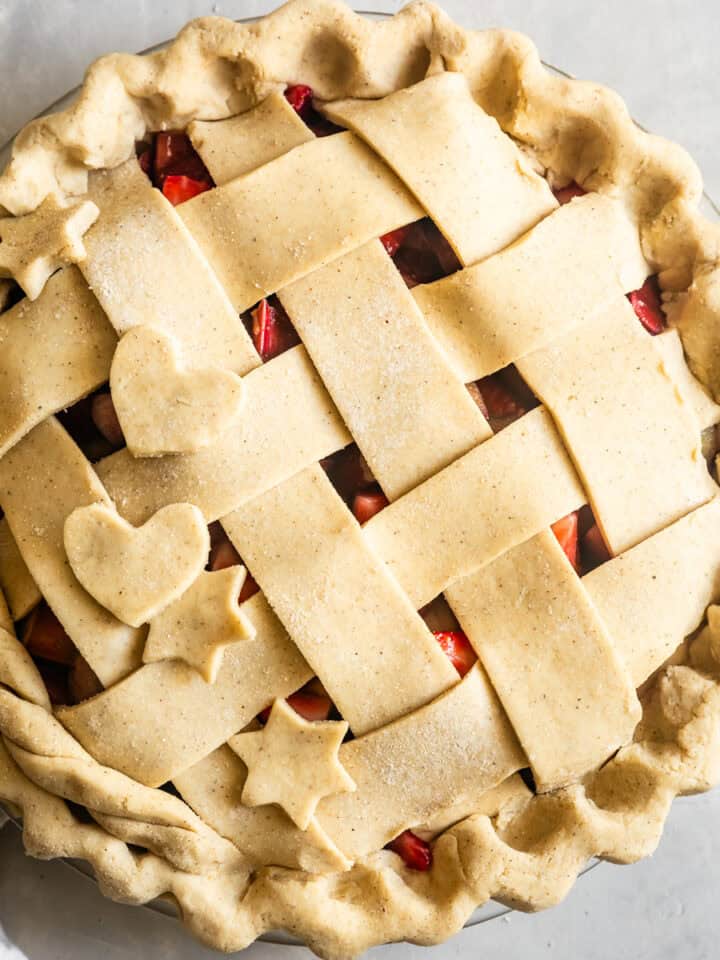
Use this gluten-free puff pastry in any recipe that calls for puff pastry, or use it as the crust for your favorite pie or galette, like this pear persimmon pie or these strawberry galettes!
My Top Tips:
- Ensure your butter is cold. Freeze the butter for at least an hour before working with it.
- Grate and slice butter. This recipe uses a combination of grating butter and working in whole "flakes" (or thin slices). The former distributes the cold butter without having to overwork the dough, while the latter ensures there are still plenty of sheets of butter to create the flakiness in the oven.
- Work the butter in by hand. You don't want to overwork the dough so the butter completely disappears into it, so it's best to avoid using a food processor for the butter. Instead bring the dough together by hand, working quickly!
Here's How I Use Gluten-Free Puff Pastry
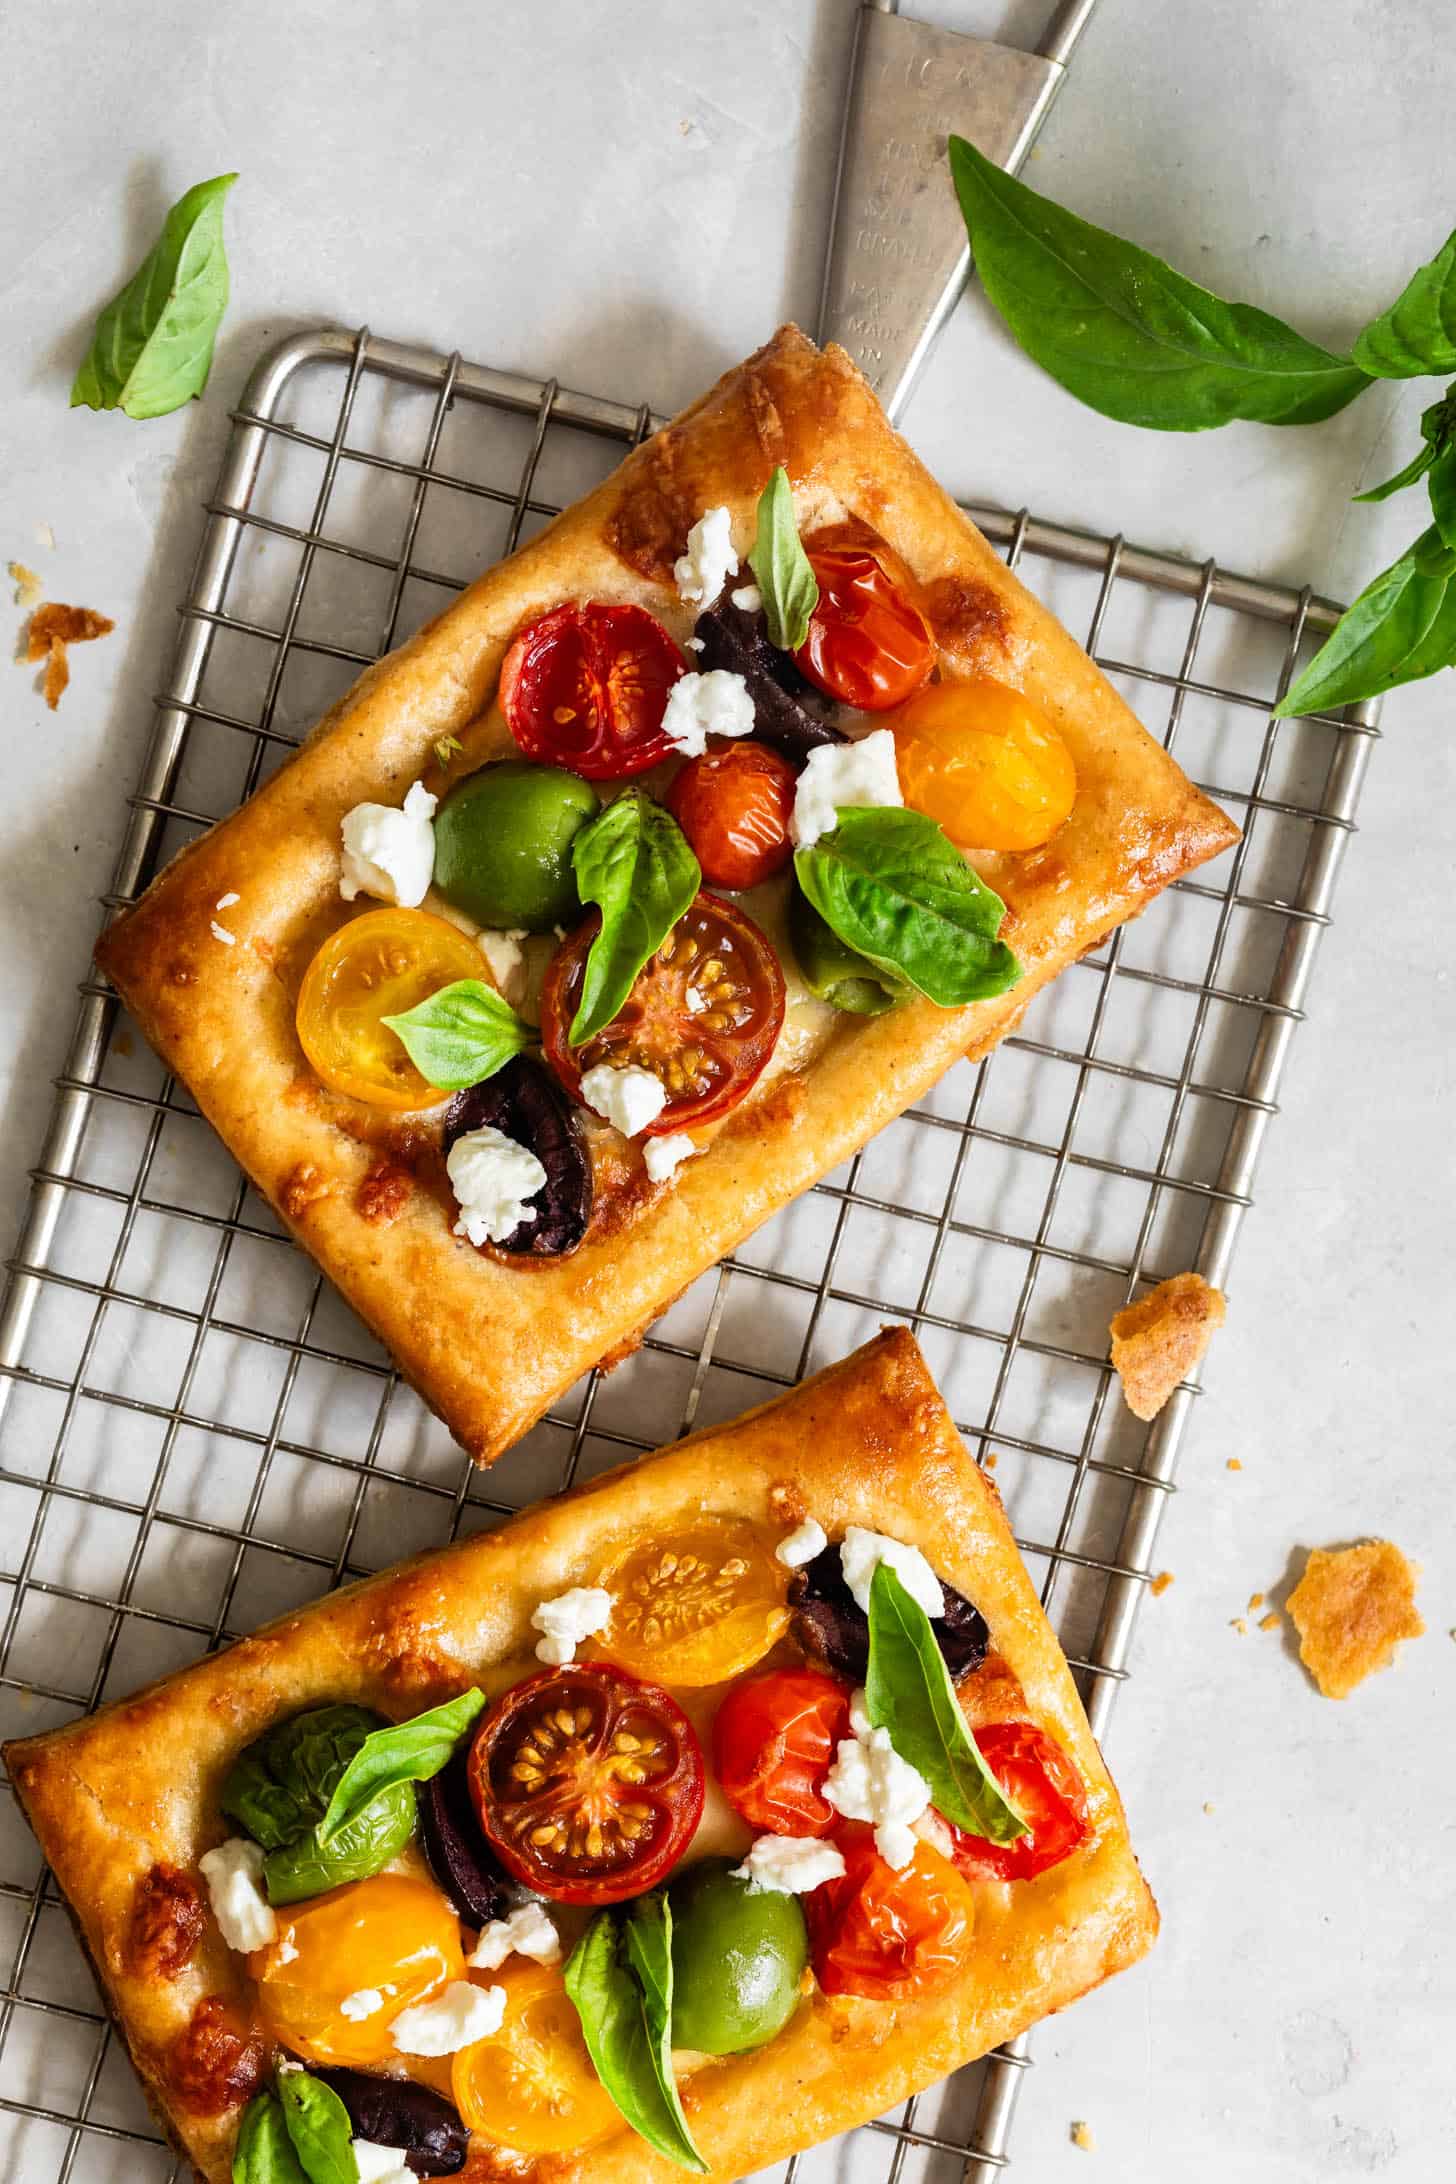
- Tarts: Lightly score the outside, creating a 1-inch border. Top with your favorite toppings and bake!
- Tomato & olive: Sprinkle with your favorite dry cheeses (mozzarella, parm, gruyere, etc) and top with halved cherry tomatoes, olives, and feta crumbles, with fresh basil to serve
- Mushroom & thyme: Sprinkle with your favorite dry cheeses, then topped with pan-fried mushrooms (I love using maitake and shitake) with shallots, olives, and fresh thyme.
- Fruit tarts: Either layer sliced fruit (apples, peaches, blueberries, etc.) directly on the puff pastry and bake, or bake the puff pastry plain without toppings and use a spoon to press the center of the puff pastry down after it comes out of the oven, and top with pastry cream and fresh berries or fruit.
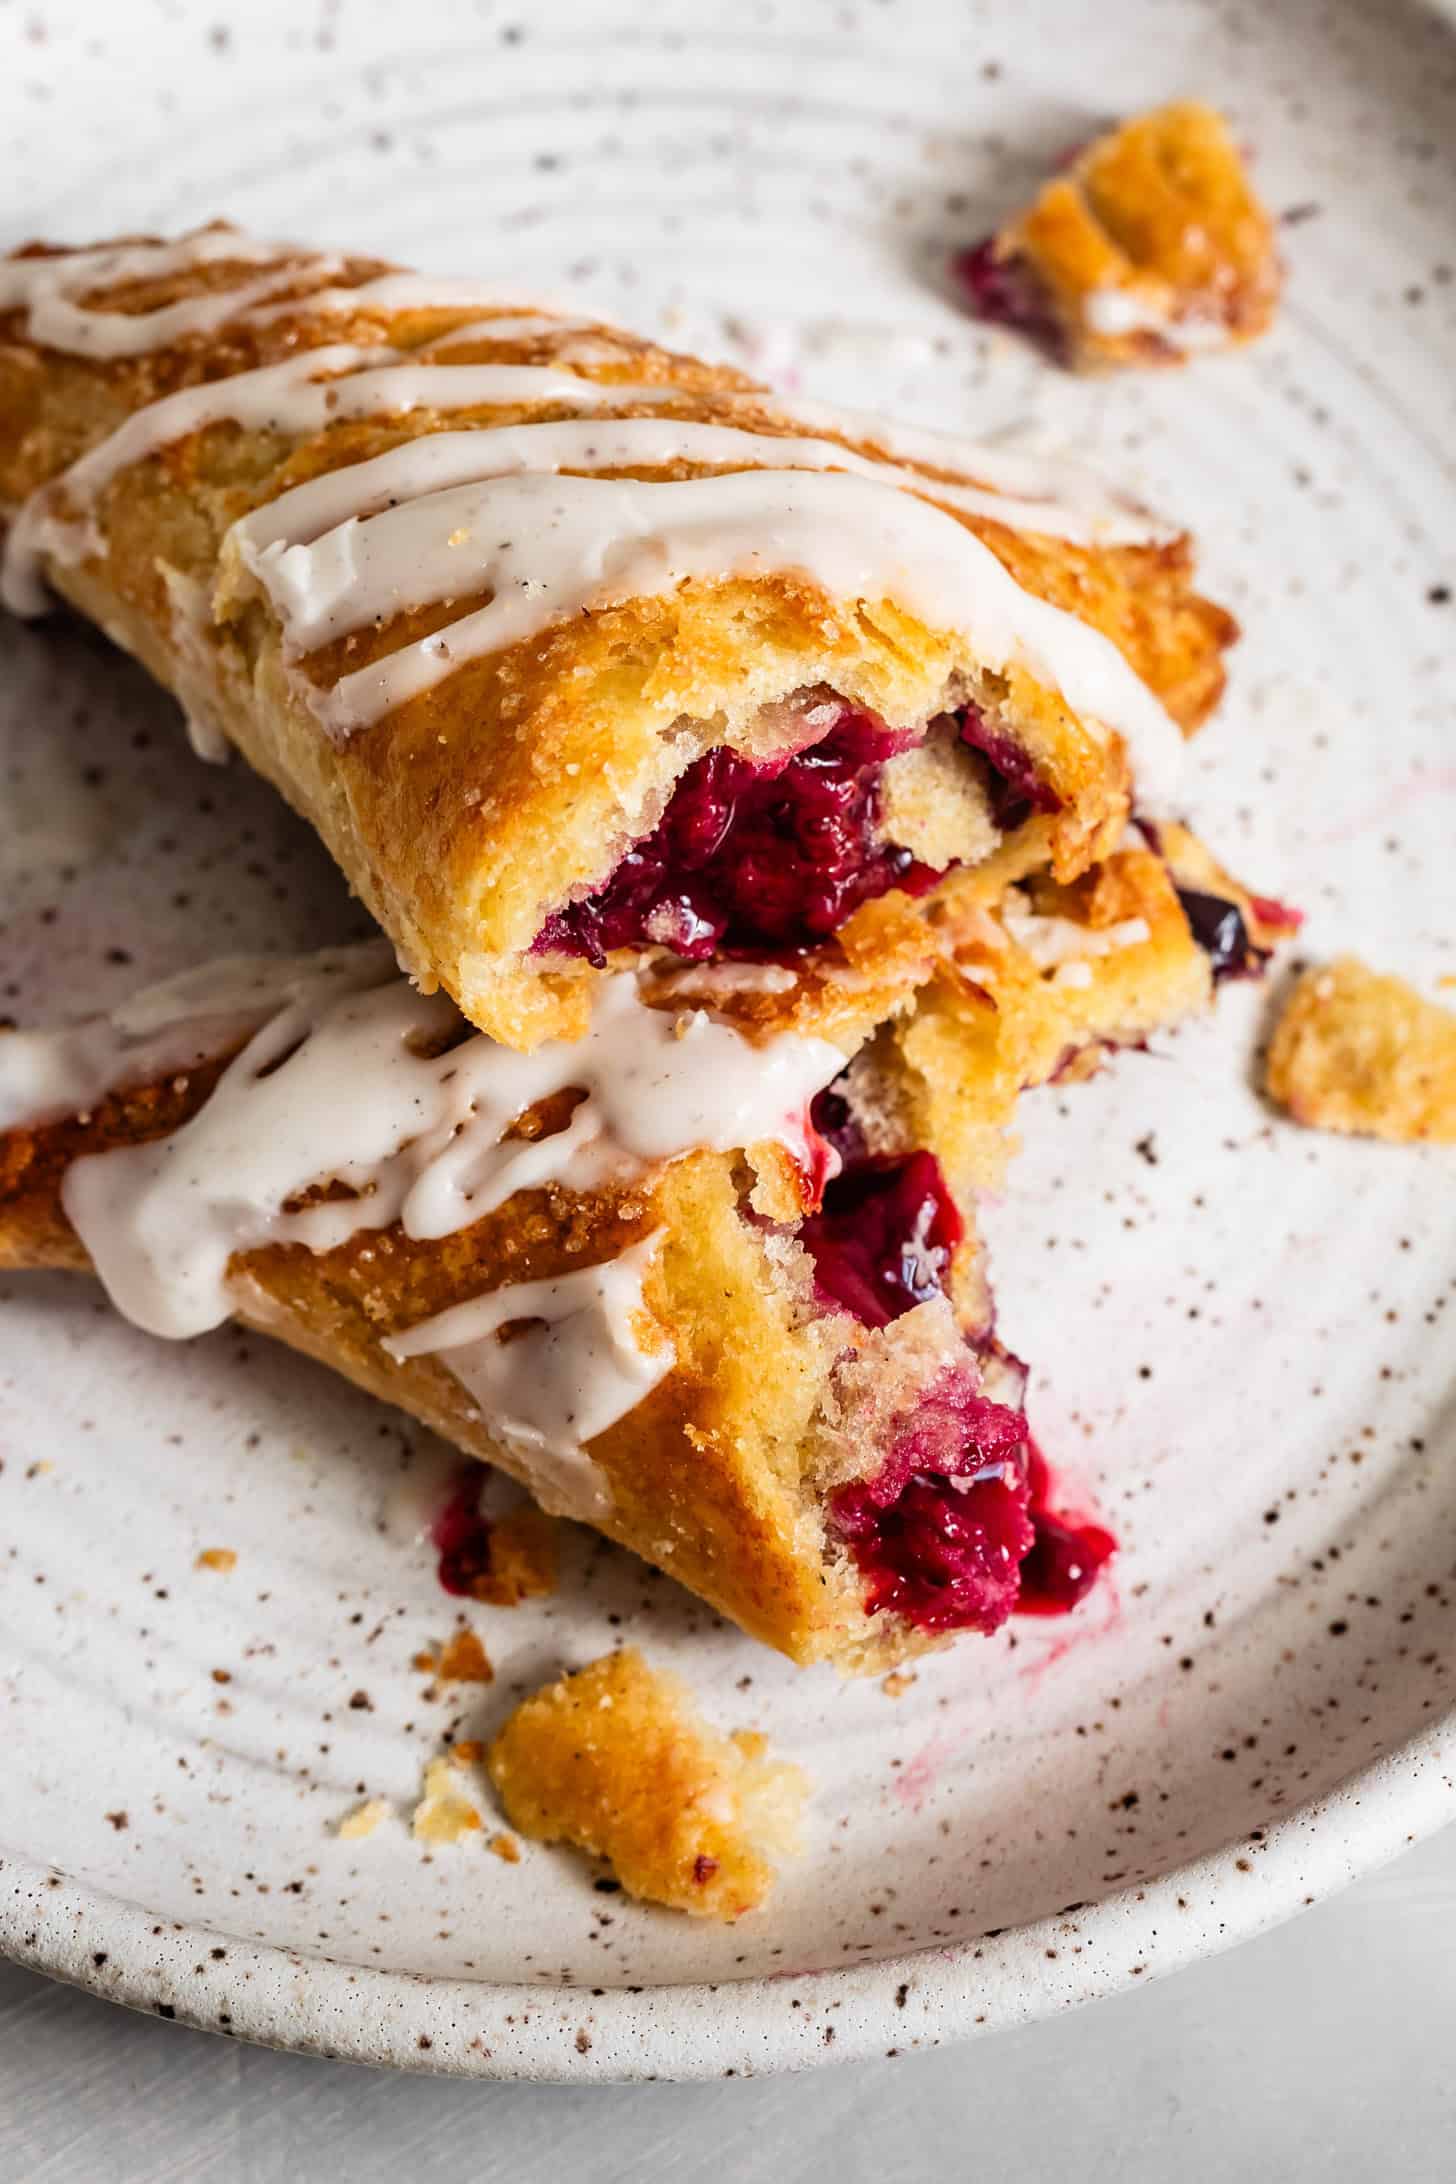
- Fruit Turnovers: Fill 4-inch squares with a couple tablespoons of homemade or store-bought fruit pie filling (apple pie filling, berry filling, peach pie filling), fold corner to corner, seal with a fork, and bake. Drizzle with homemade icing, cream cheese frosting, or caramel sauce!
- Palmiers
- Appetizers:
- Pizza Bites
- Cheese Twists
- Brie Puff Pastry
- Pinwheels - savory or sweet!
- Topping for pot pie: Replace any topping with puff pastry on a homemade pot pie.
Recipe

Extra Flaky Gluten-Free Puff Pastry
Ingredients
- 80 g (½ cup + 2 tablespoons) Bob's Red Mill sorghum flour
- 56 g (¼ cup + 2 tablespoons) millet flour
- 42 g (¼ cup + 2 tablespoons) Bob's Red Mill tapioca flour
- 59 g (¼ cup + 2 tablespoons) Bob's Red Mill potato starch
- ¾ teaspoon xanthan gum
- 1 tablespoon sugar
- ½ teaspoon kosher
- 16 tablespoons (226 g) unsalted butter*, preferrably European-style, frozen for at least 30 minutes
- 7-9 tablespoons ice water
INSTRUCTIONS
- Sift together all the dry ingredients into a medium bowl. Note: if your kitchen is warm, you may want to freeze the bown with the flour for an hour before continuing.
- Working quickly, grate 4 tablespoons of the frozen butter into the flour. Gently toss the grated butter so all the small pieces are covered in flour.
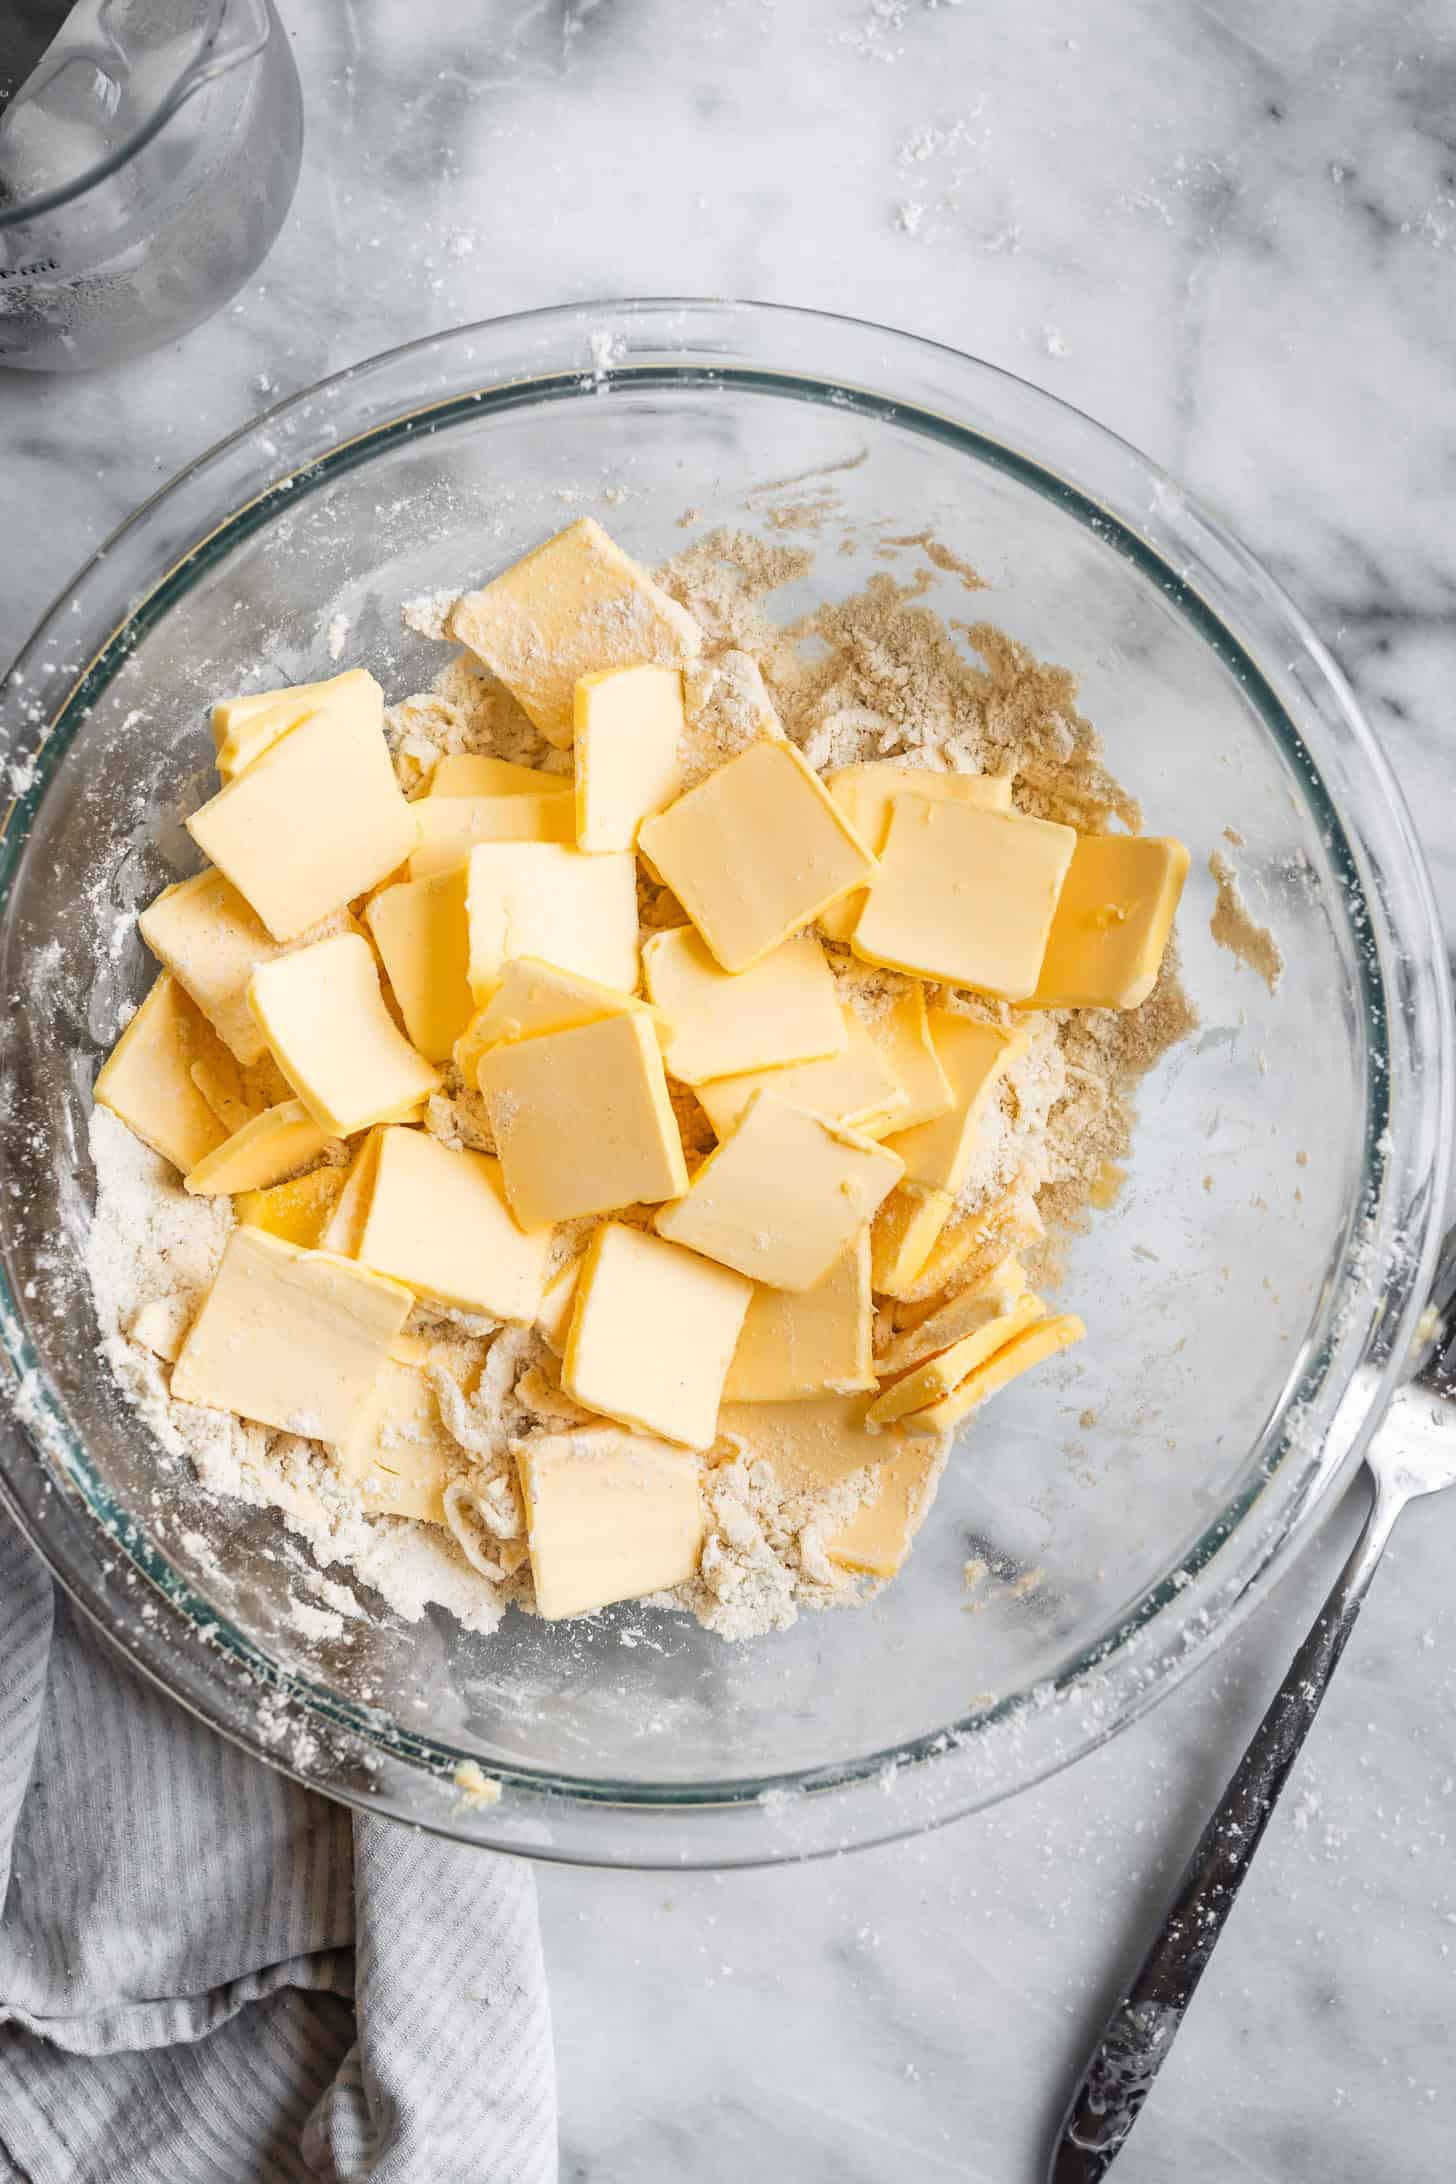
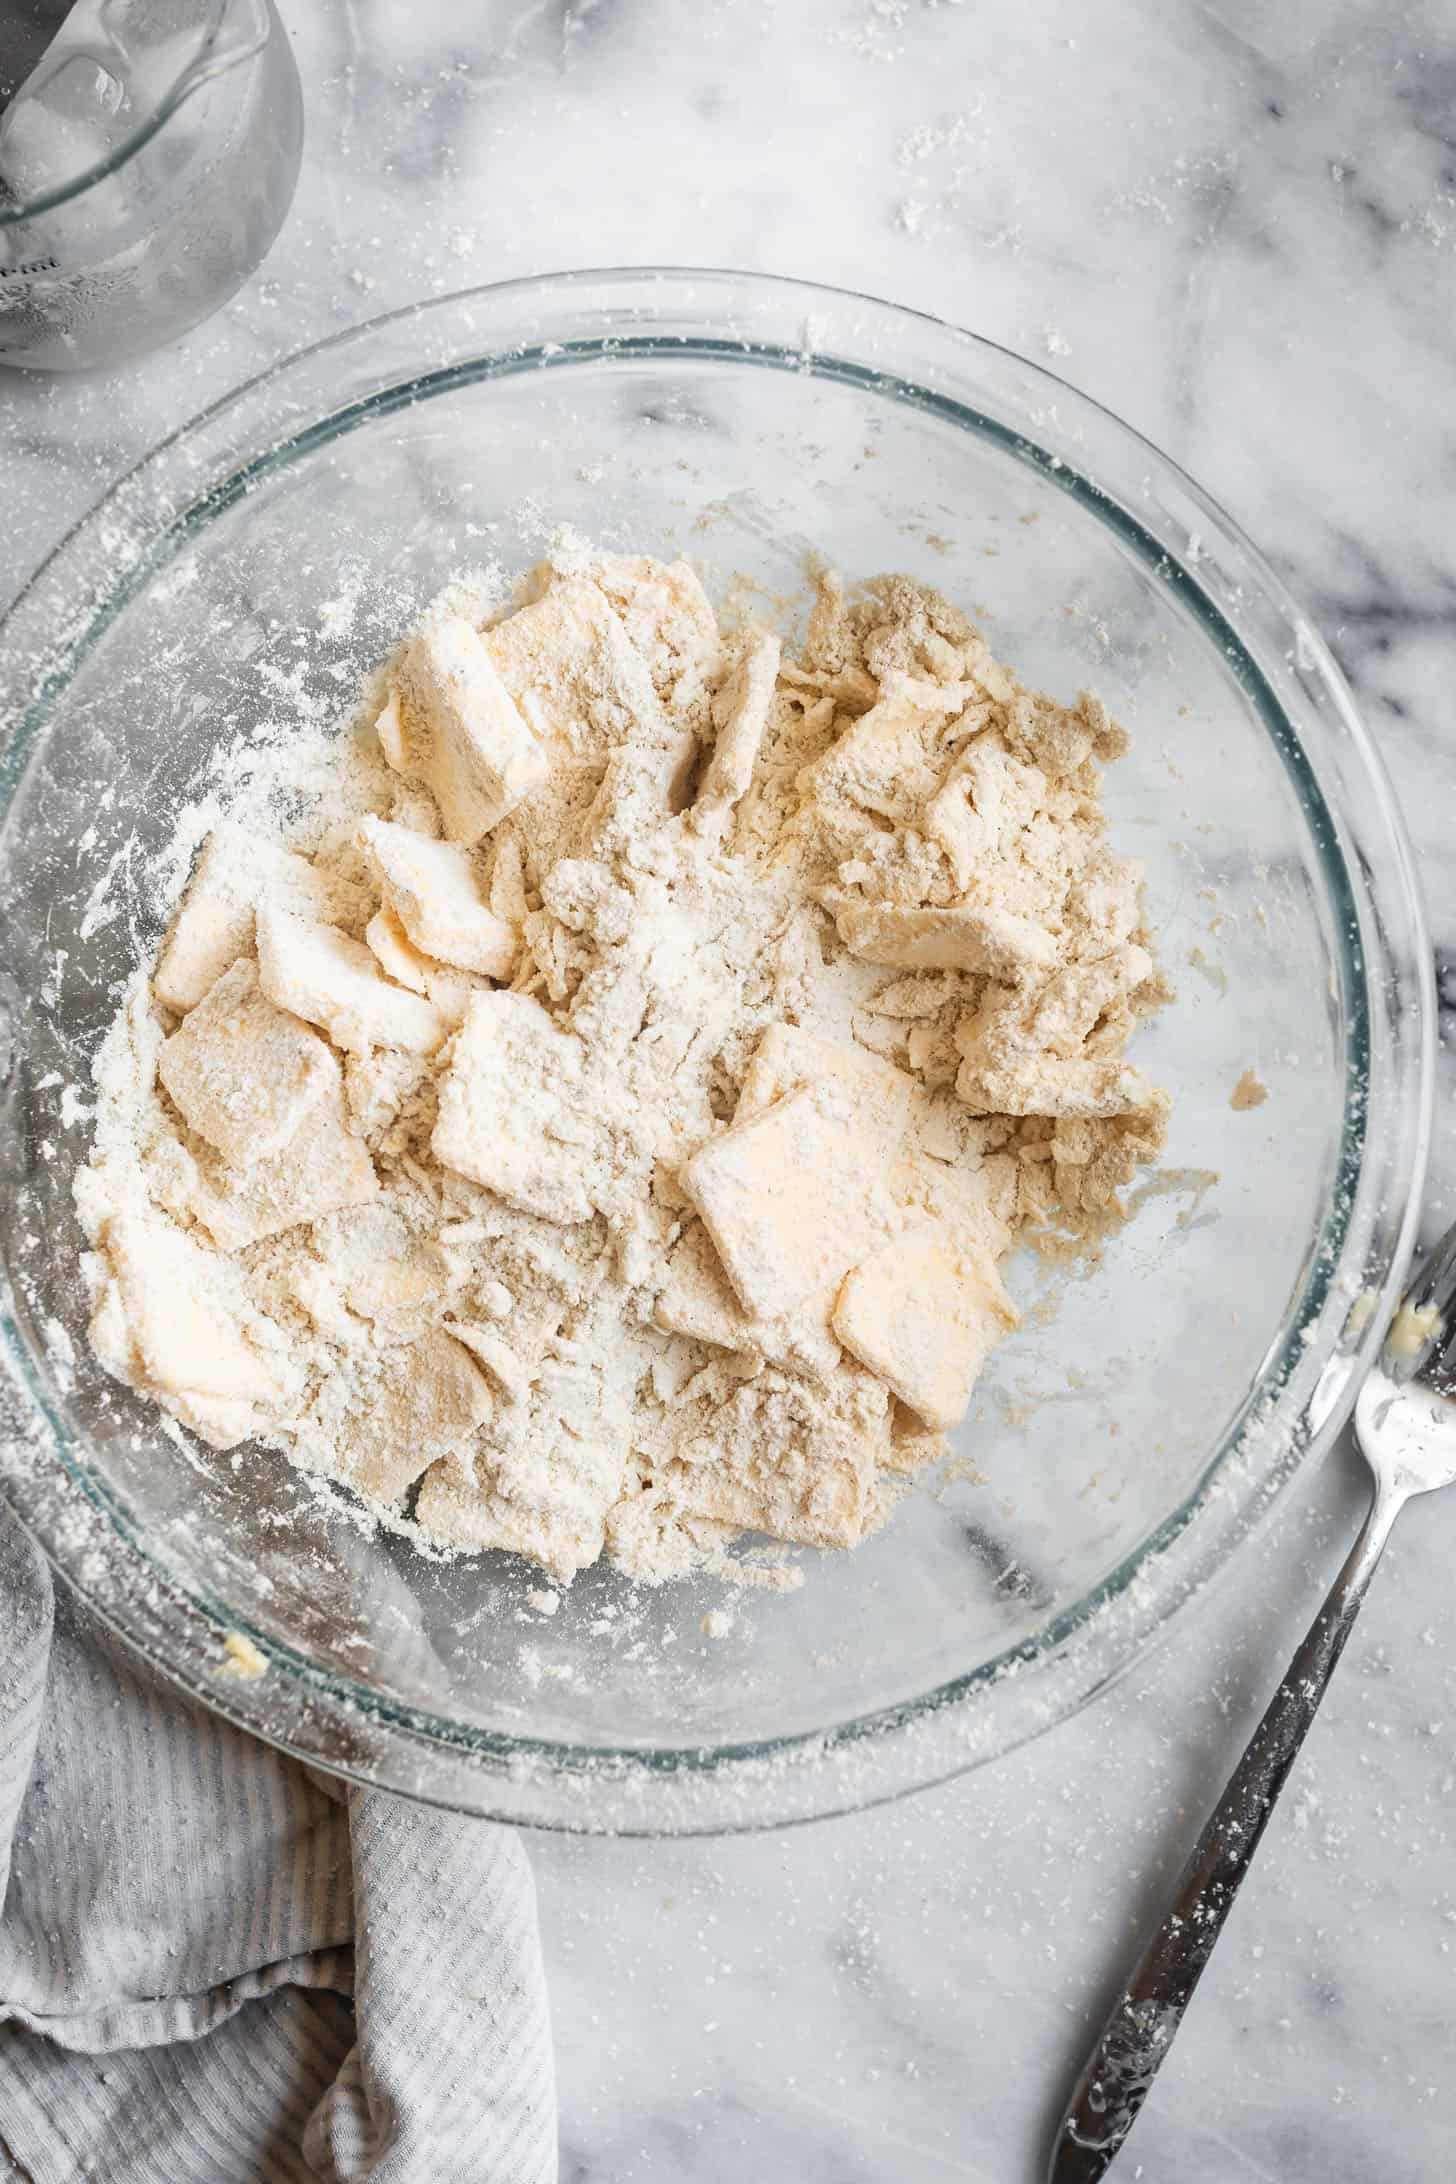
- Very thinly slice the remaining frozen butter into 1/16 - ⅛-inch thick slices and add them to the bowl. Gently toss the butter slices in the flour, separating all of the pieces, until each piece is covered in flour.
- Drizzle 6 tablespoons of ice water over the top, and use a fork to mix the dough as much as you're able, until it is no longer super sticky. Working quickly, very gently work the dough with your hands until it just comes together into a shaggy dough when pinched, adding up to 3 tablespoons more ice water as needed. Take care not to overmix here or the butter will melt and incorporate, eliminating the puffy flaky rise. There will still be several dry spots in the dough, but that's okay because the dough will hydrate in the fridge.
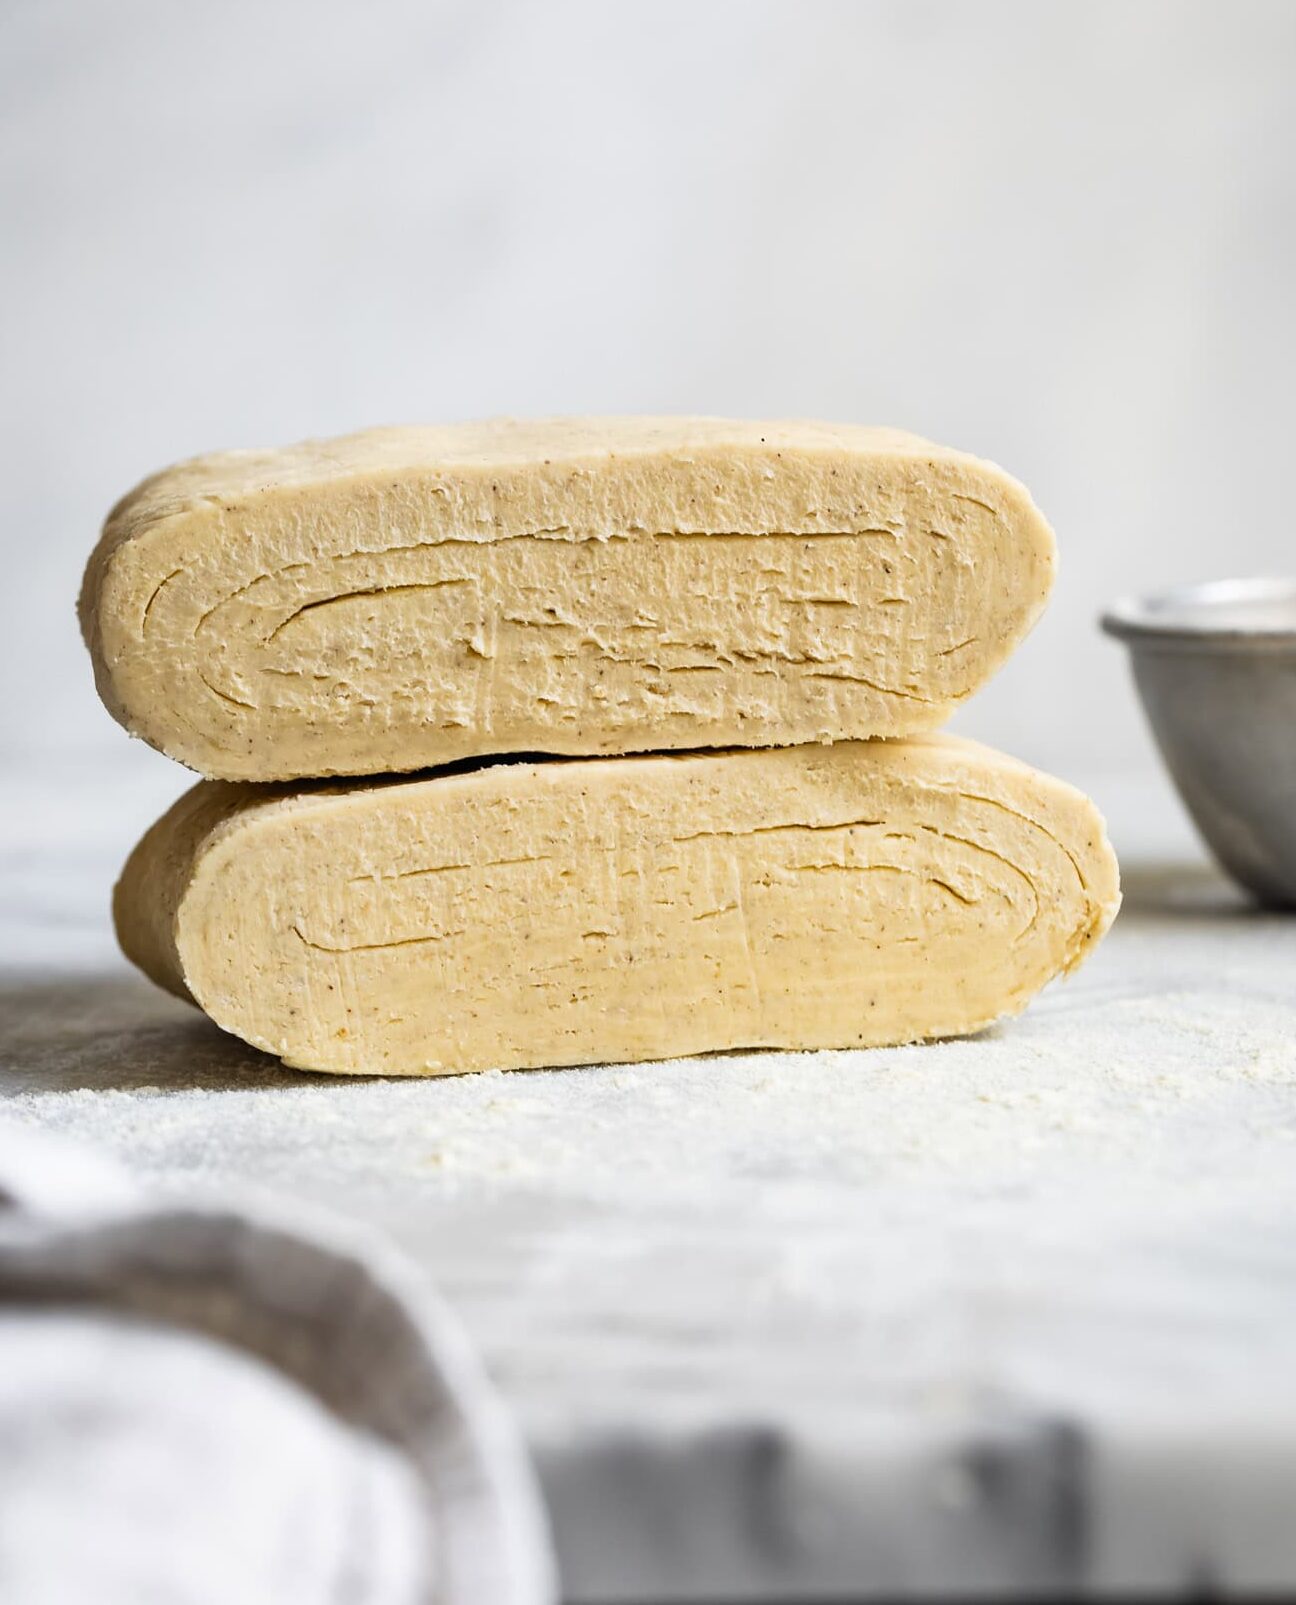
- Dump the shaggy dough onto your work surface, knead it until it just forms a disc, and wrap it loosely in plastic. Use your hands or a rolling pin to flatten the dough roughly into the shape of a rectangle, about ½-inch to 1-inch thick. Chill for 30 minutes in the fridge or up to overnight. Once chilled, you'll laminate the dough using the double letter fold method.
- Lightly flour your work surface with sorghum flour. Place the chilled dough on your work surface and brush all over with sorghum flour to prevent the rolling pin from sticking.
- Roll the dough into a rectangle, about ¼-inch thick, lifting and flipping as you roll, and lightly dusting with more flour as need to prevent the dough from sticking. Fold it as you would a letter: First, fold ⅓ of the length of the dough over the top, using a bench scraper or knife to help remove the dough from the surface, as needed. Repeat by folding the other ⅓ of the length of dough over the top as you would a letter. Repeat the tri-fold one more time in the other direction, this time folding ⅓ of the width of the dough over top, then folding the remaining ⅓ of the width of dough over the top.
- Dust the dough lightly with sorghum flour and roll it out again into another rectangle about ¼-inch thick. Repeat the whole double letter fold process you just did once more. Wrap the dough in plastic again and chill for at least 30 minutes or up to a week in the fridge before rolling out to use for your recipe.
- When ready to use, roll the dough about ⅛-inch thick on a sheet of parchment paper dusted with sorghum flour and use as instructed in your recipe.
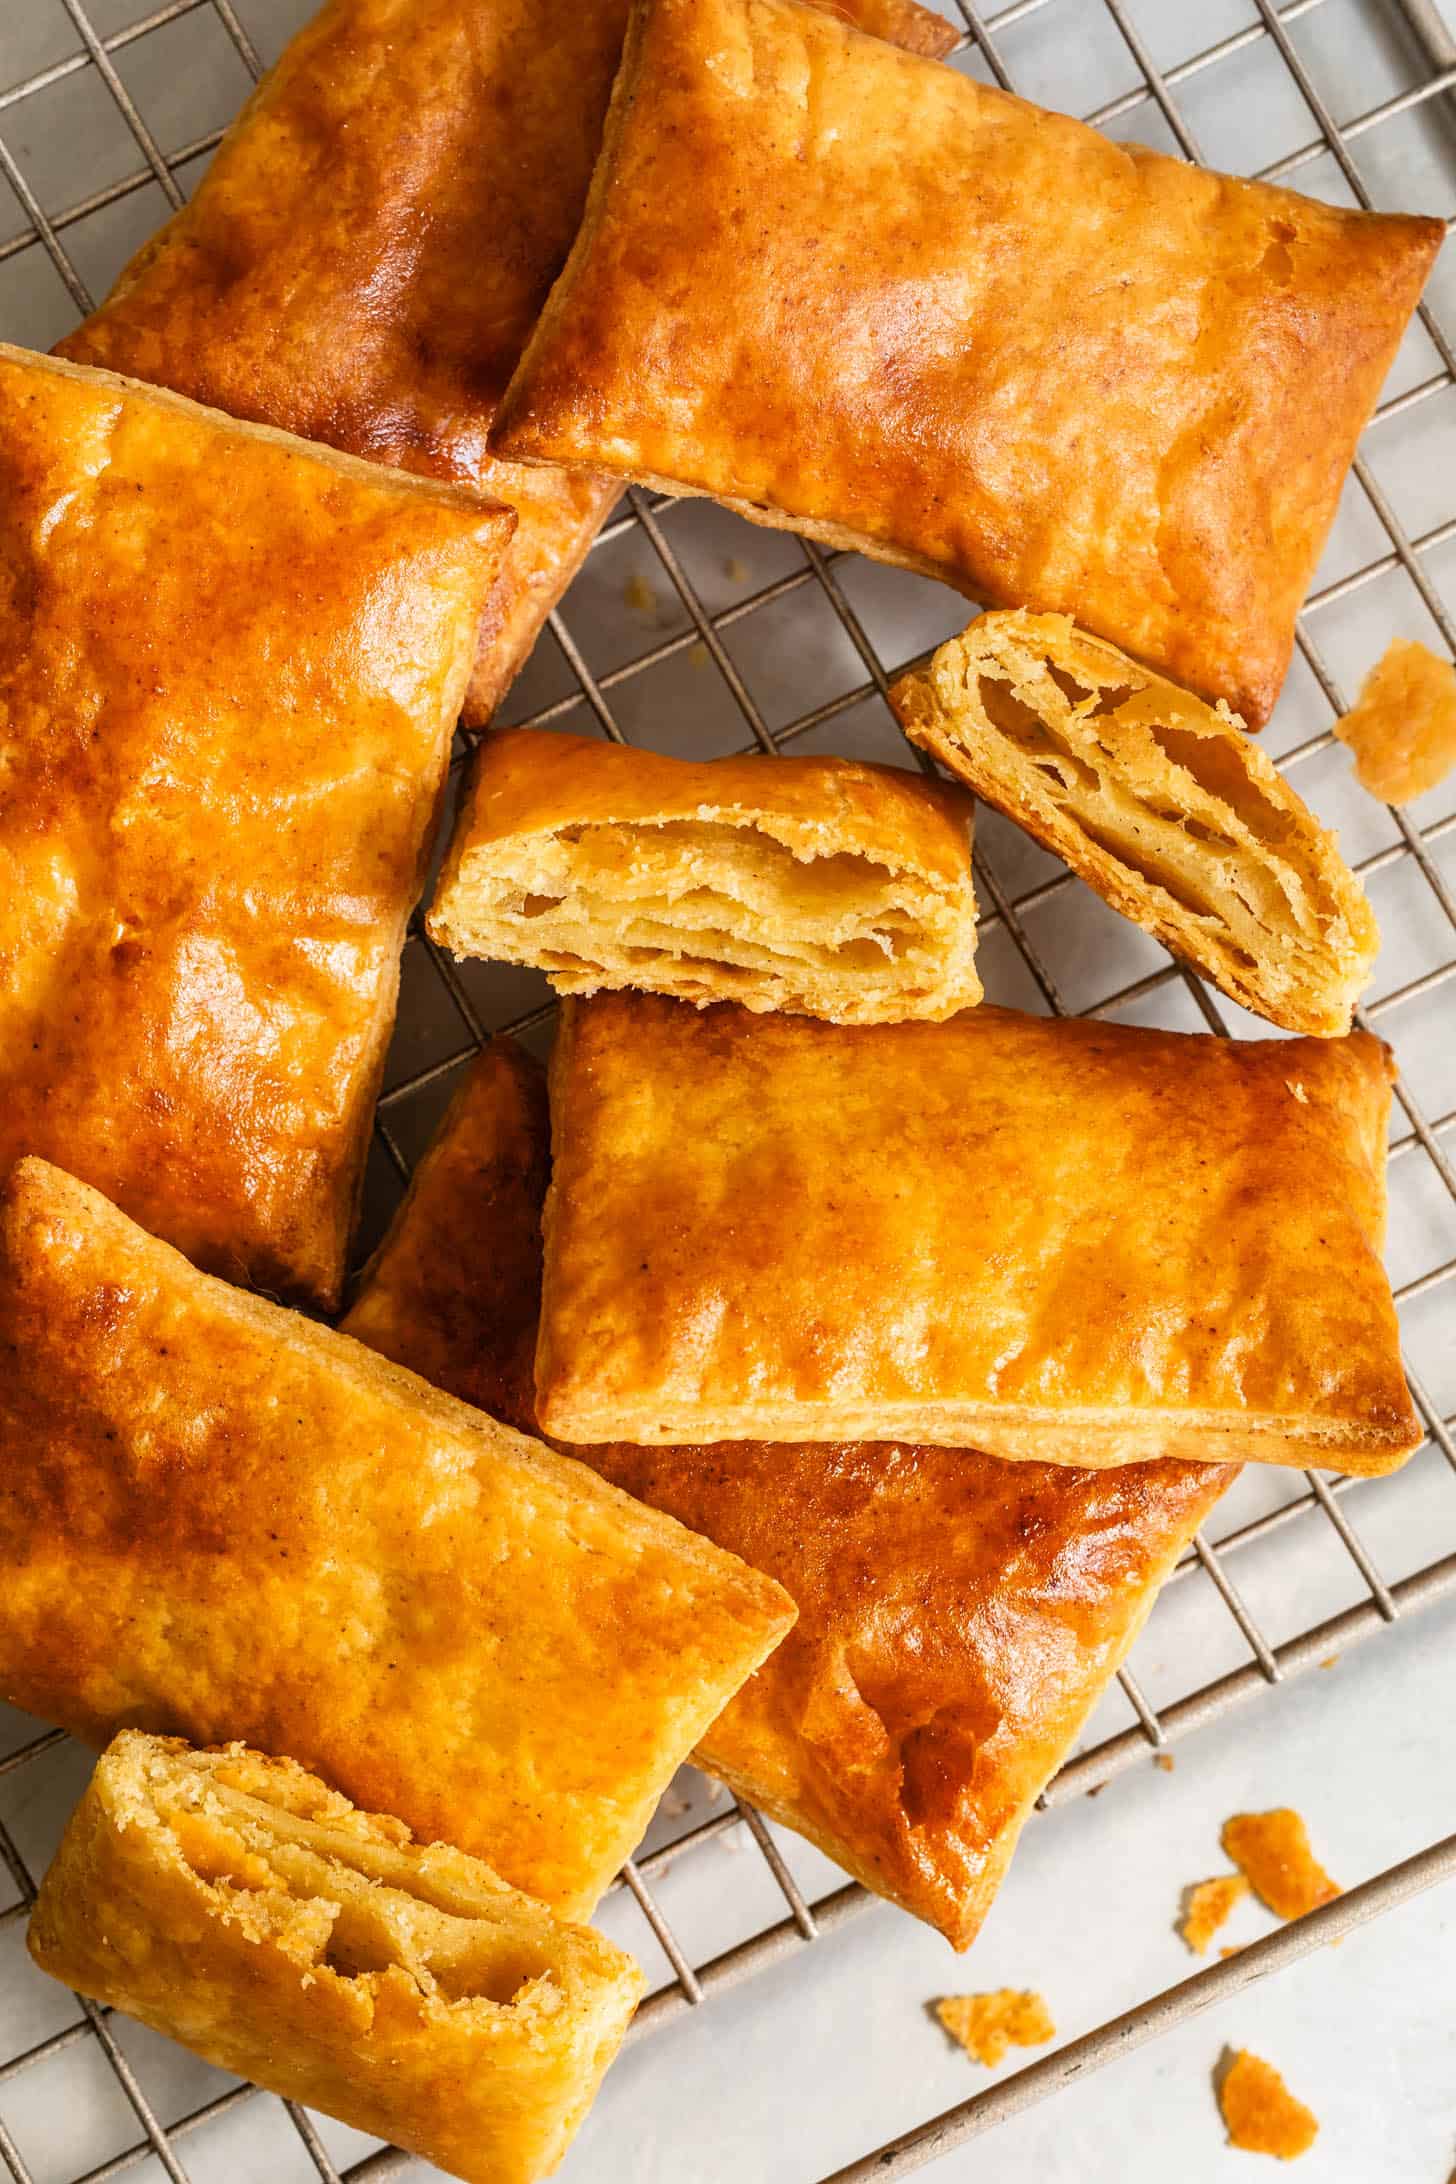
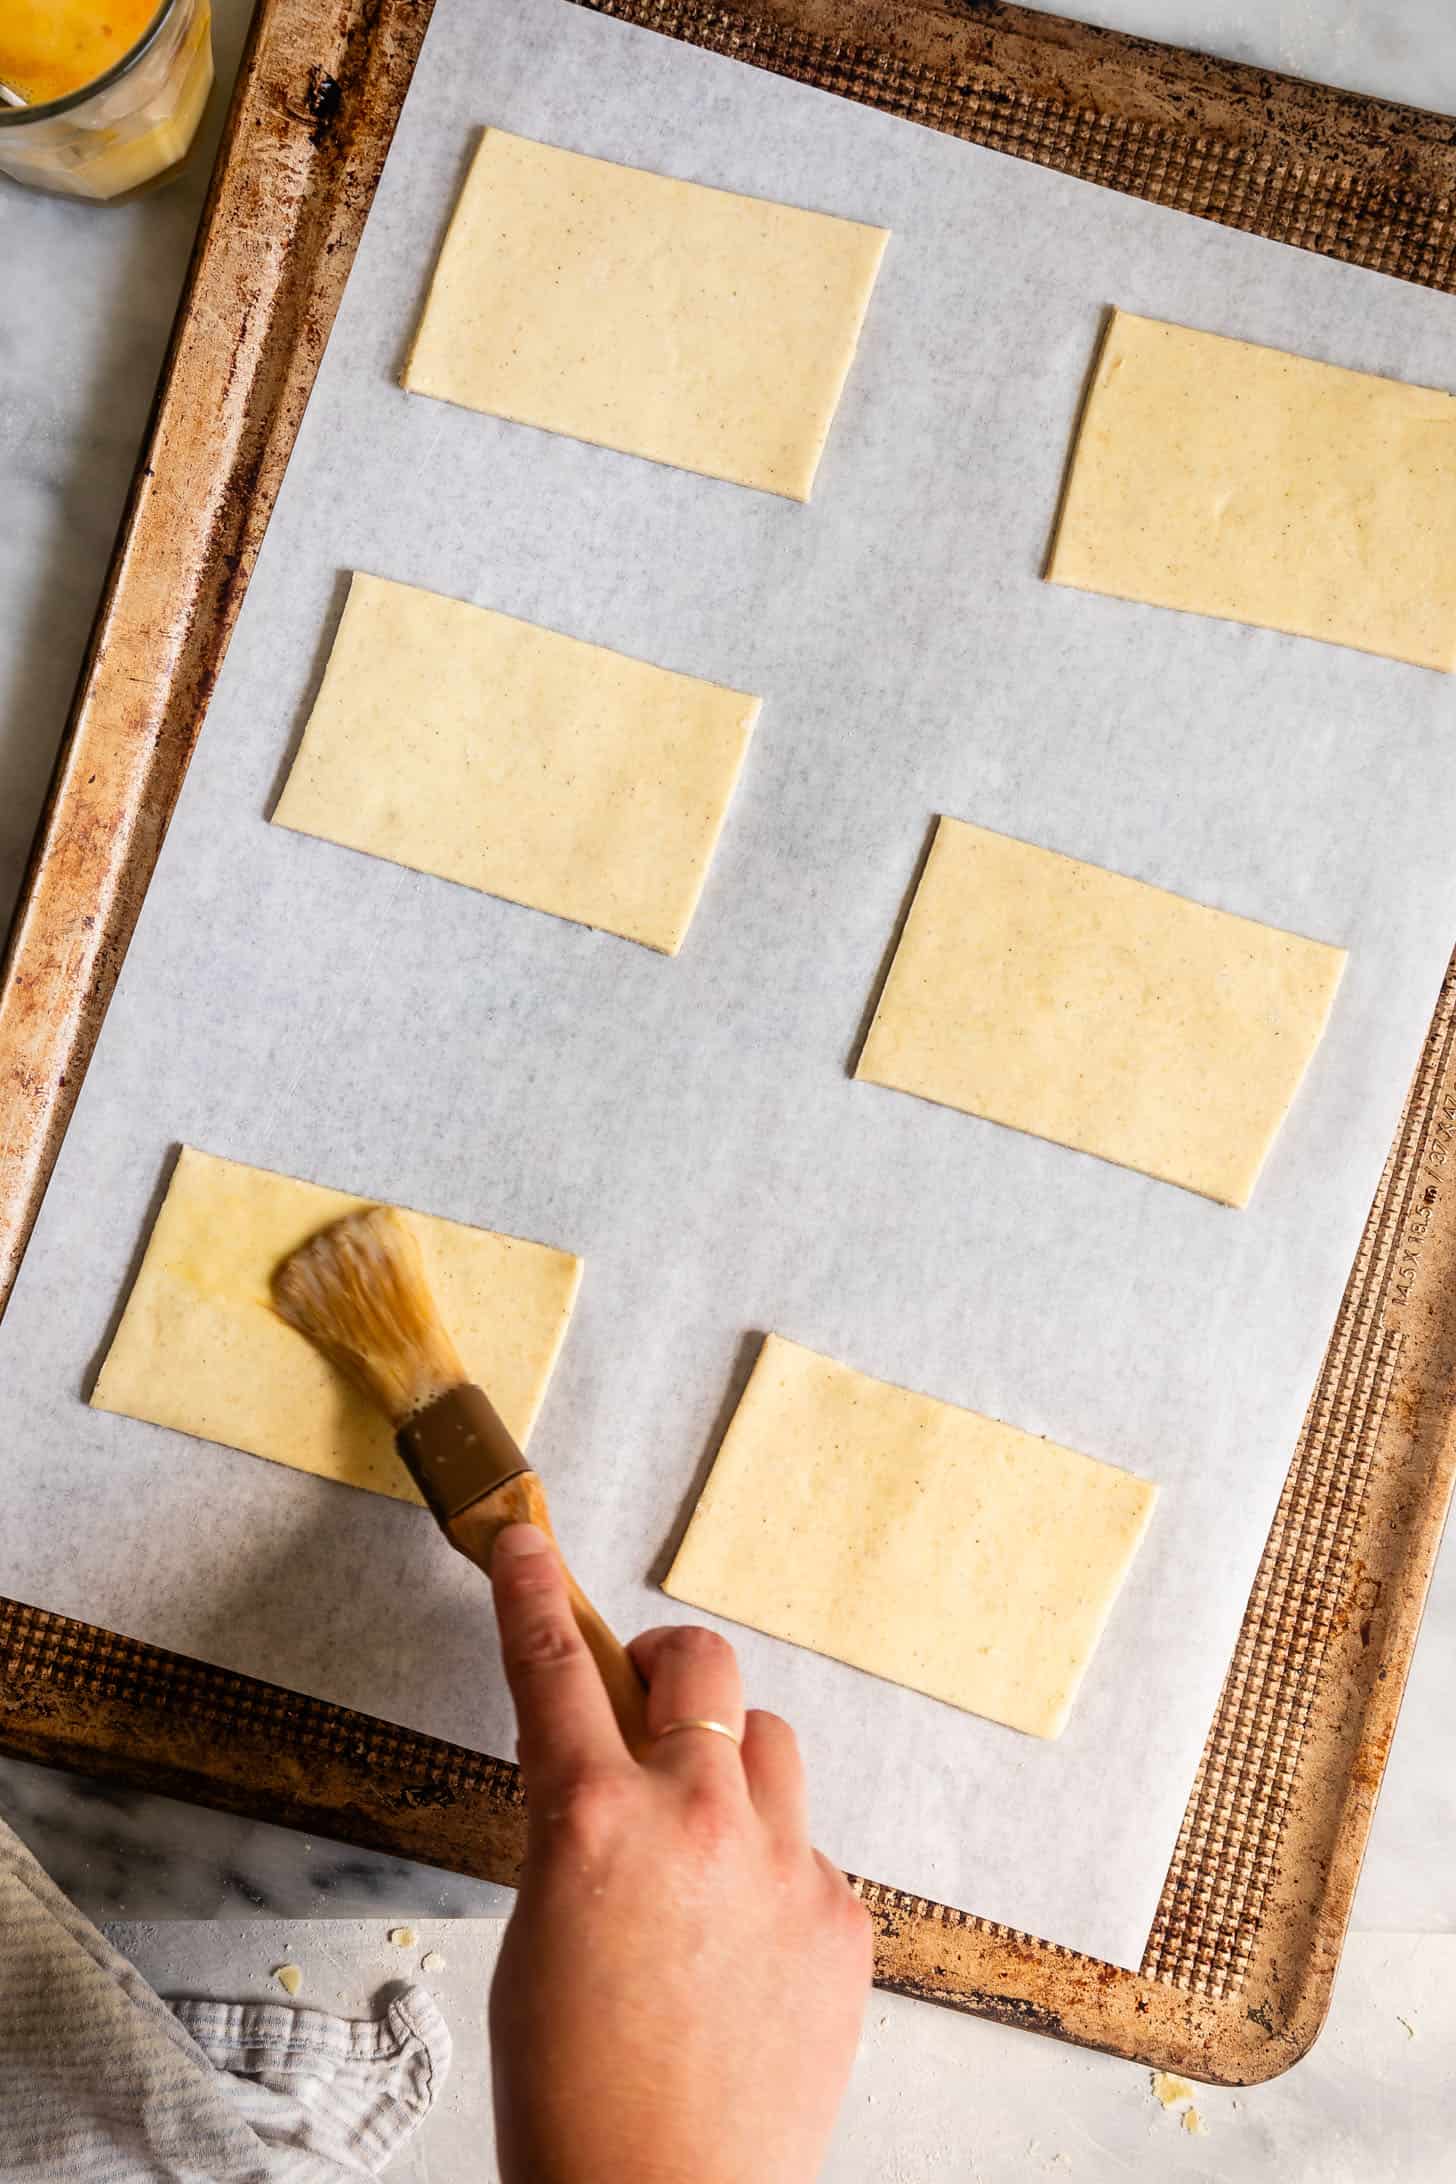
- For the puff pastry bites shown here, roll the puff pastry ⅛-inch thick and cut into 2x4 inch rectangles and place on a parchment-lined baking sheet. Chill while you preheat the oven to 425°F. Brush with an egg wash and optionally sprinkle with coarse sugar, if desired. Bake for 10 minutes, then reduce heat to 375°F and bake for an additional 8-10 minutes until the tops are golden brown and crisp, rotating the pan halfway through to avoid any hot spots.
Notes
My preferred butter to use:
While any butter will work, I highly recommend using an unsalted European-style butter that has a higher butterfat content and less water. Not only does it have more pronounced flavor, it creates more rise with flakier layers than American butter. However, due to the higher fat content, it is also softer and melts faster, so it's extra important to pop it in the freezer to firm up before using.
Gluten-Free Flour Substitutions
While it may seem overwhelming and expensive to purchase multiple gluten-free flours for one recipe, you can search my recipe filter for recipes that use the same flours to use up to whole bag. Tip: keep your flours in the freezer for longer storage. They'll last for years in the freezer. While the flours in this recipe produce the best gluten-free puff pastry, below you'll find my recommended substitutions if you can't find or can't have one of the flours in the recipe.- Sorghum Flour: Sorghum flour adds flavor to the dough. Sorghum is wholesome and whole grain that has slightly sweet notes that add flavor depth.
- Substitute by weight with gluten-free oat flour, brown rice flour, or white rice flour.
- Millet Flour: Millet flour is a neutral flour in texture and flavor that's used almost as the mediator between the sorghum and the starches.
- Substitute by weight with brown rice flour, or white rice flour.
- Tapioca Flour: Tapioca starch is one of my go-to flours for gluten-free baking. It's a fluffy starch that holds the dough together, while also helping the flaky layers puff up.
- Substitute by weight with sweet rice flour (mochiko), arrowroot starch or corn starch.
- Potato Starch: Potato starch works in combination with tapioca starch by helping the flaky layers bake up ultra crisp, and adding more flavor to the dough.
- Substitute by weight with sweet rice flour (mochiko), arrowroot starch or corn starch.
Your Step-By-Step Visual Guide
Working quickly, follow the steps below to make the flakiest gluten-free puff pastry dough! Start by preparing your ice water so it's super cold when you're ready for it.
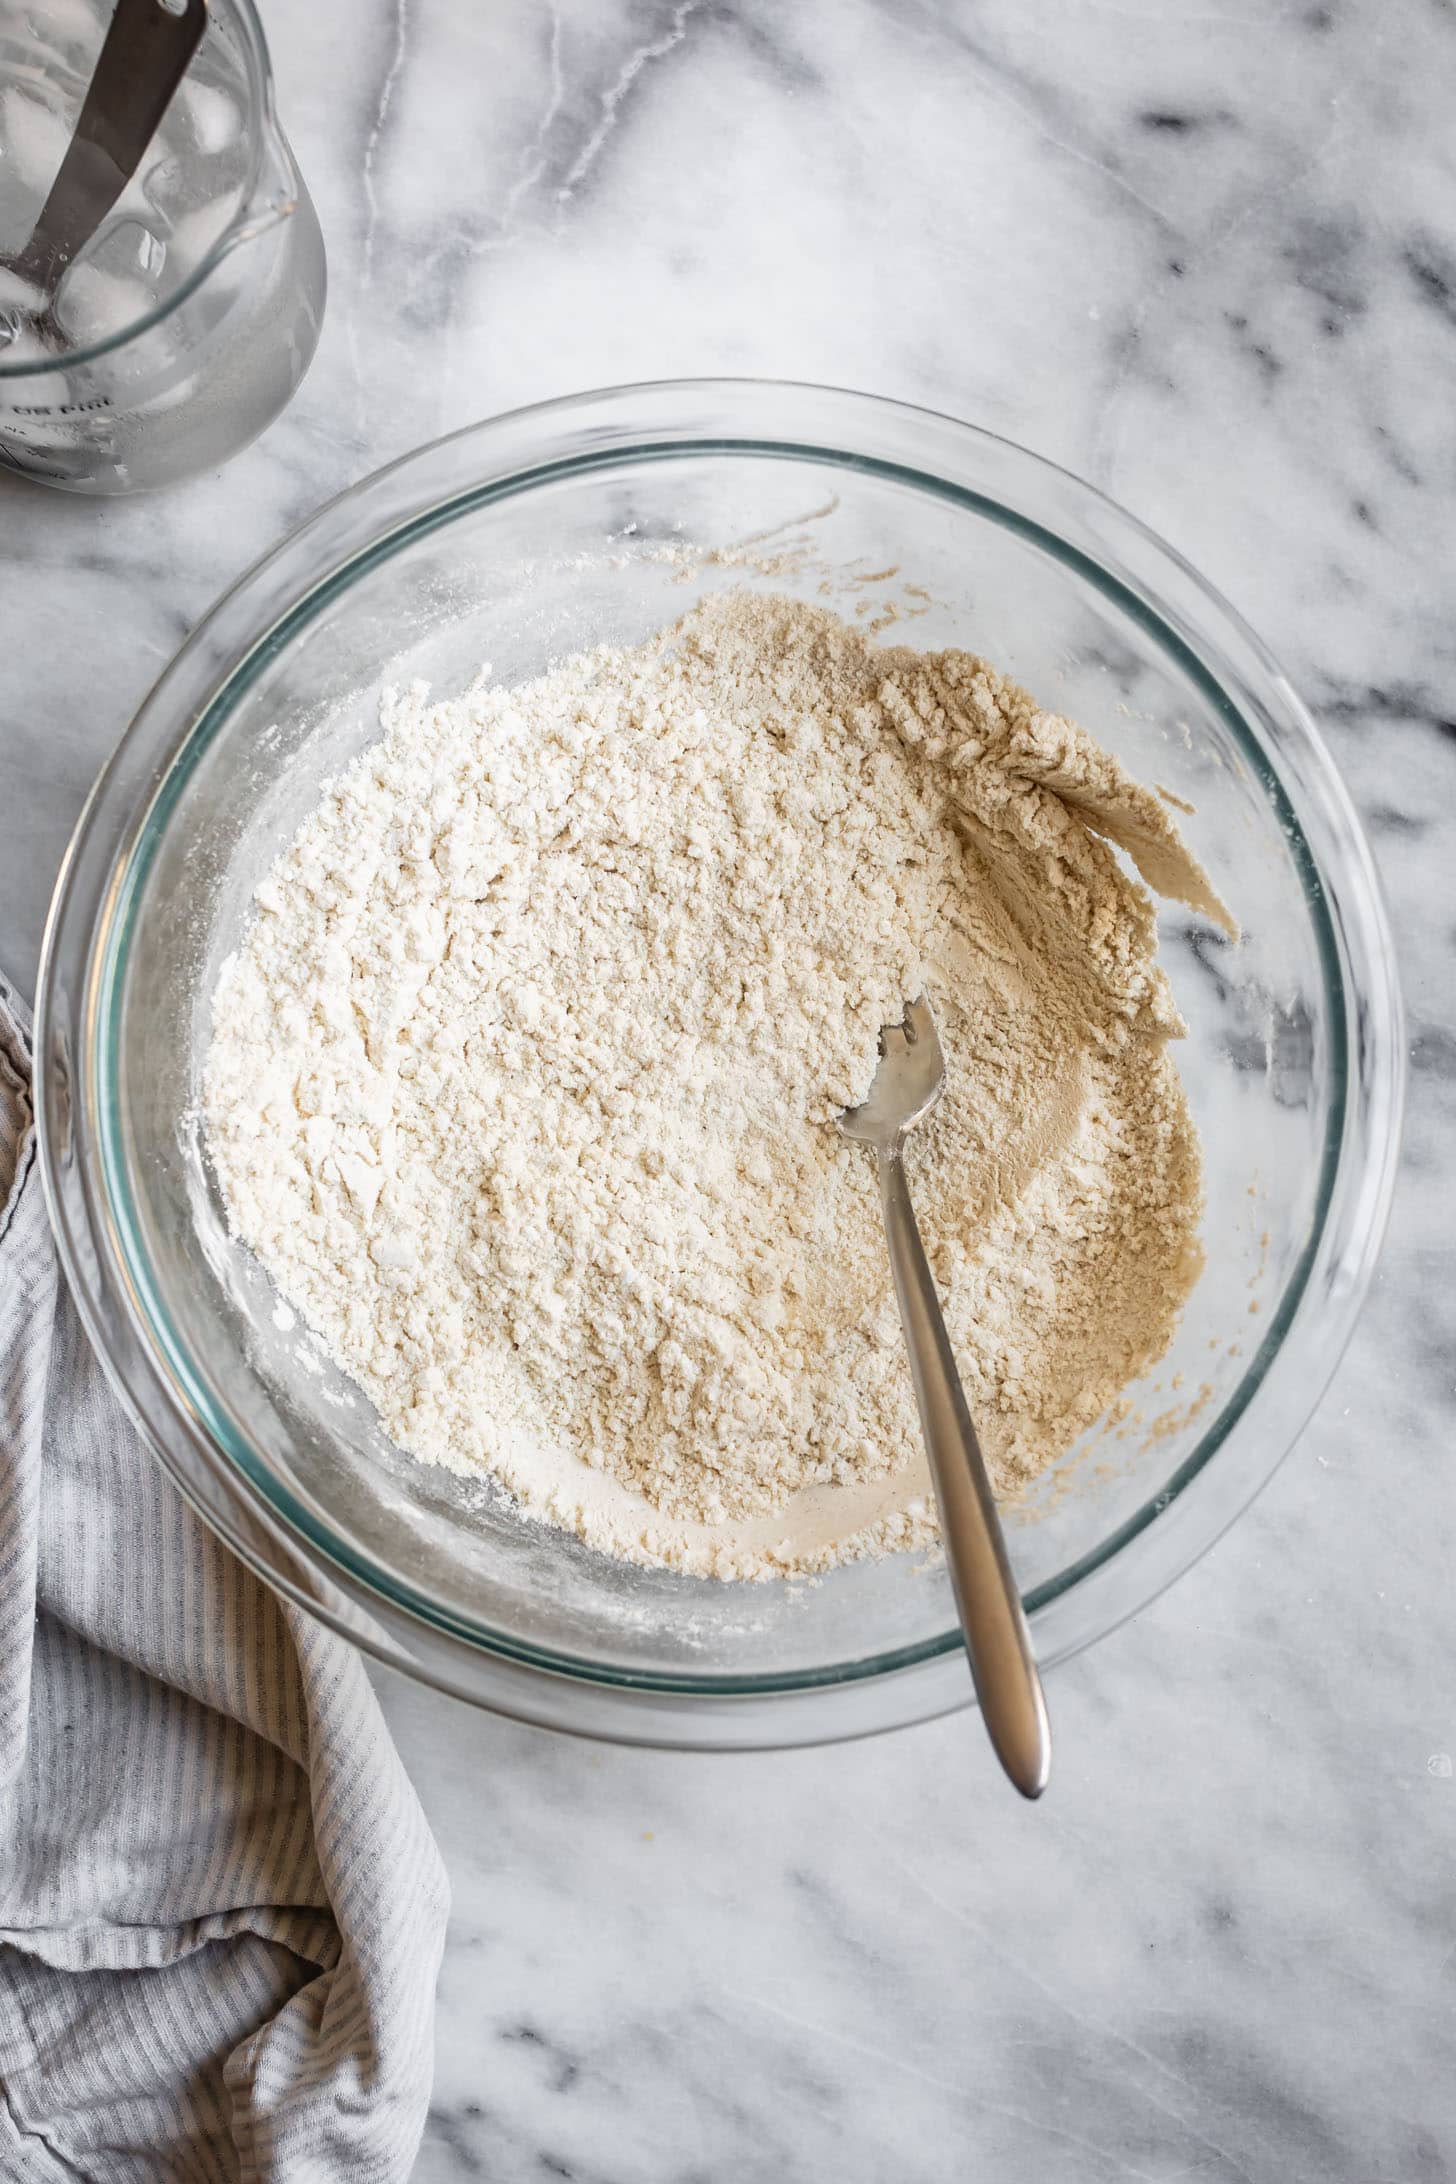
Sift together all the dry ingredients into a medium bowl.
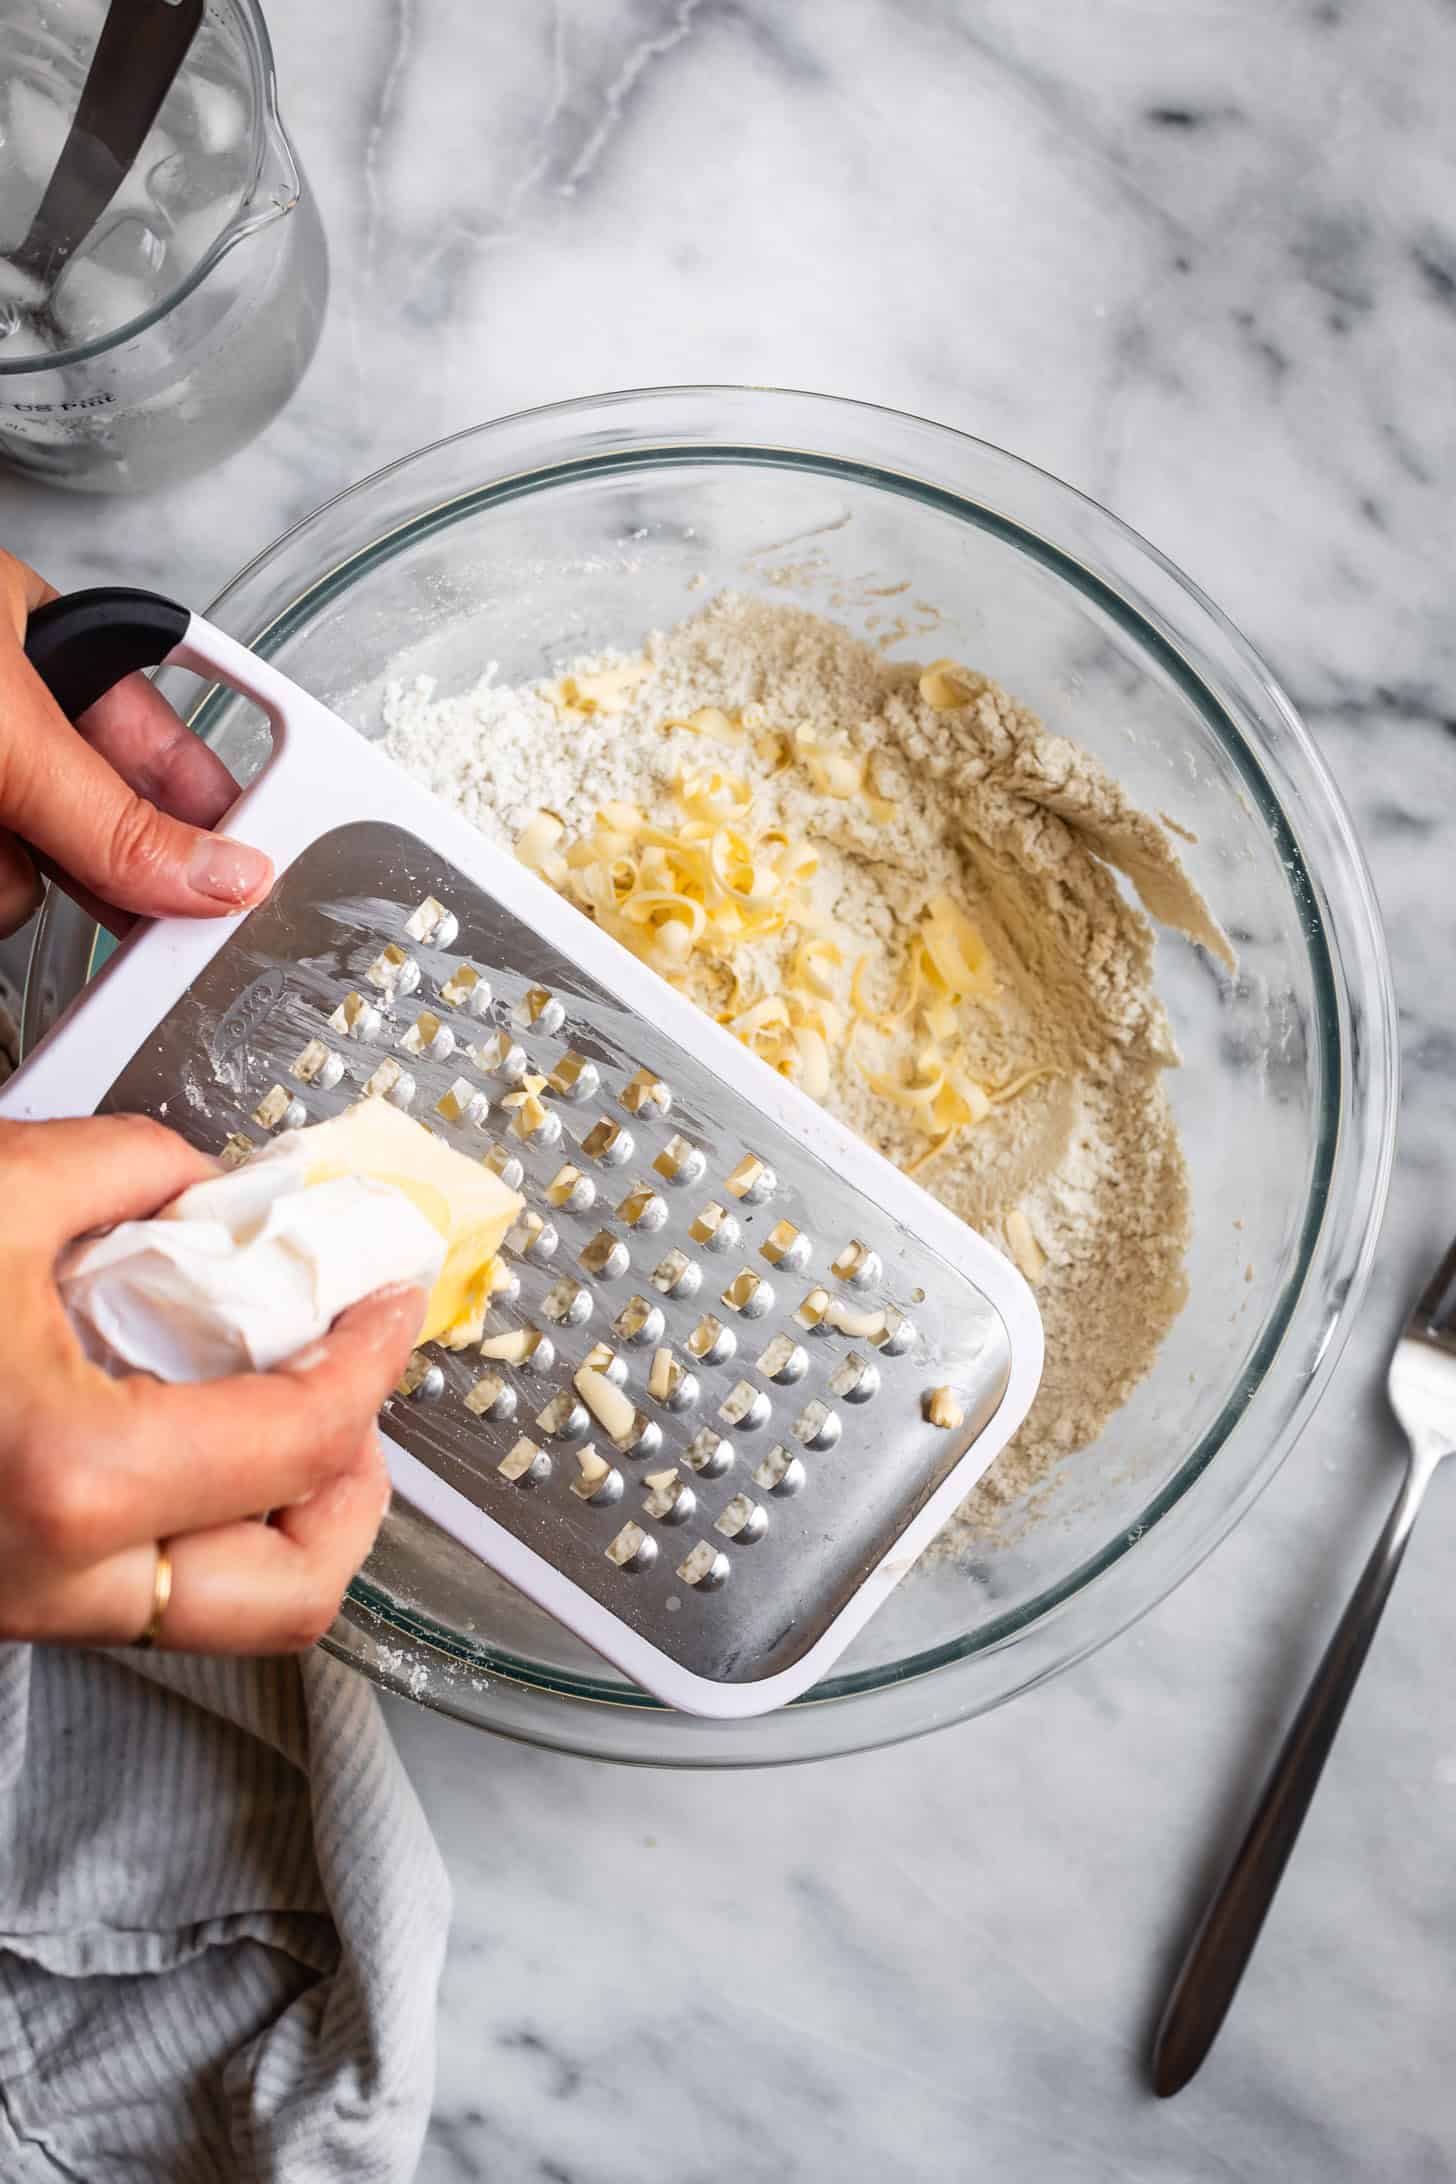
Grate 4 tablespoons of the frozen butter into the flour.
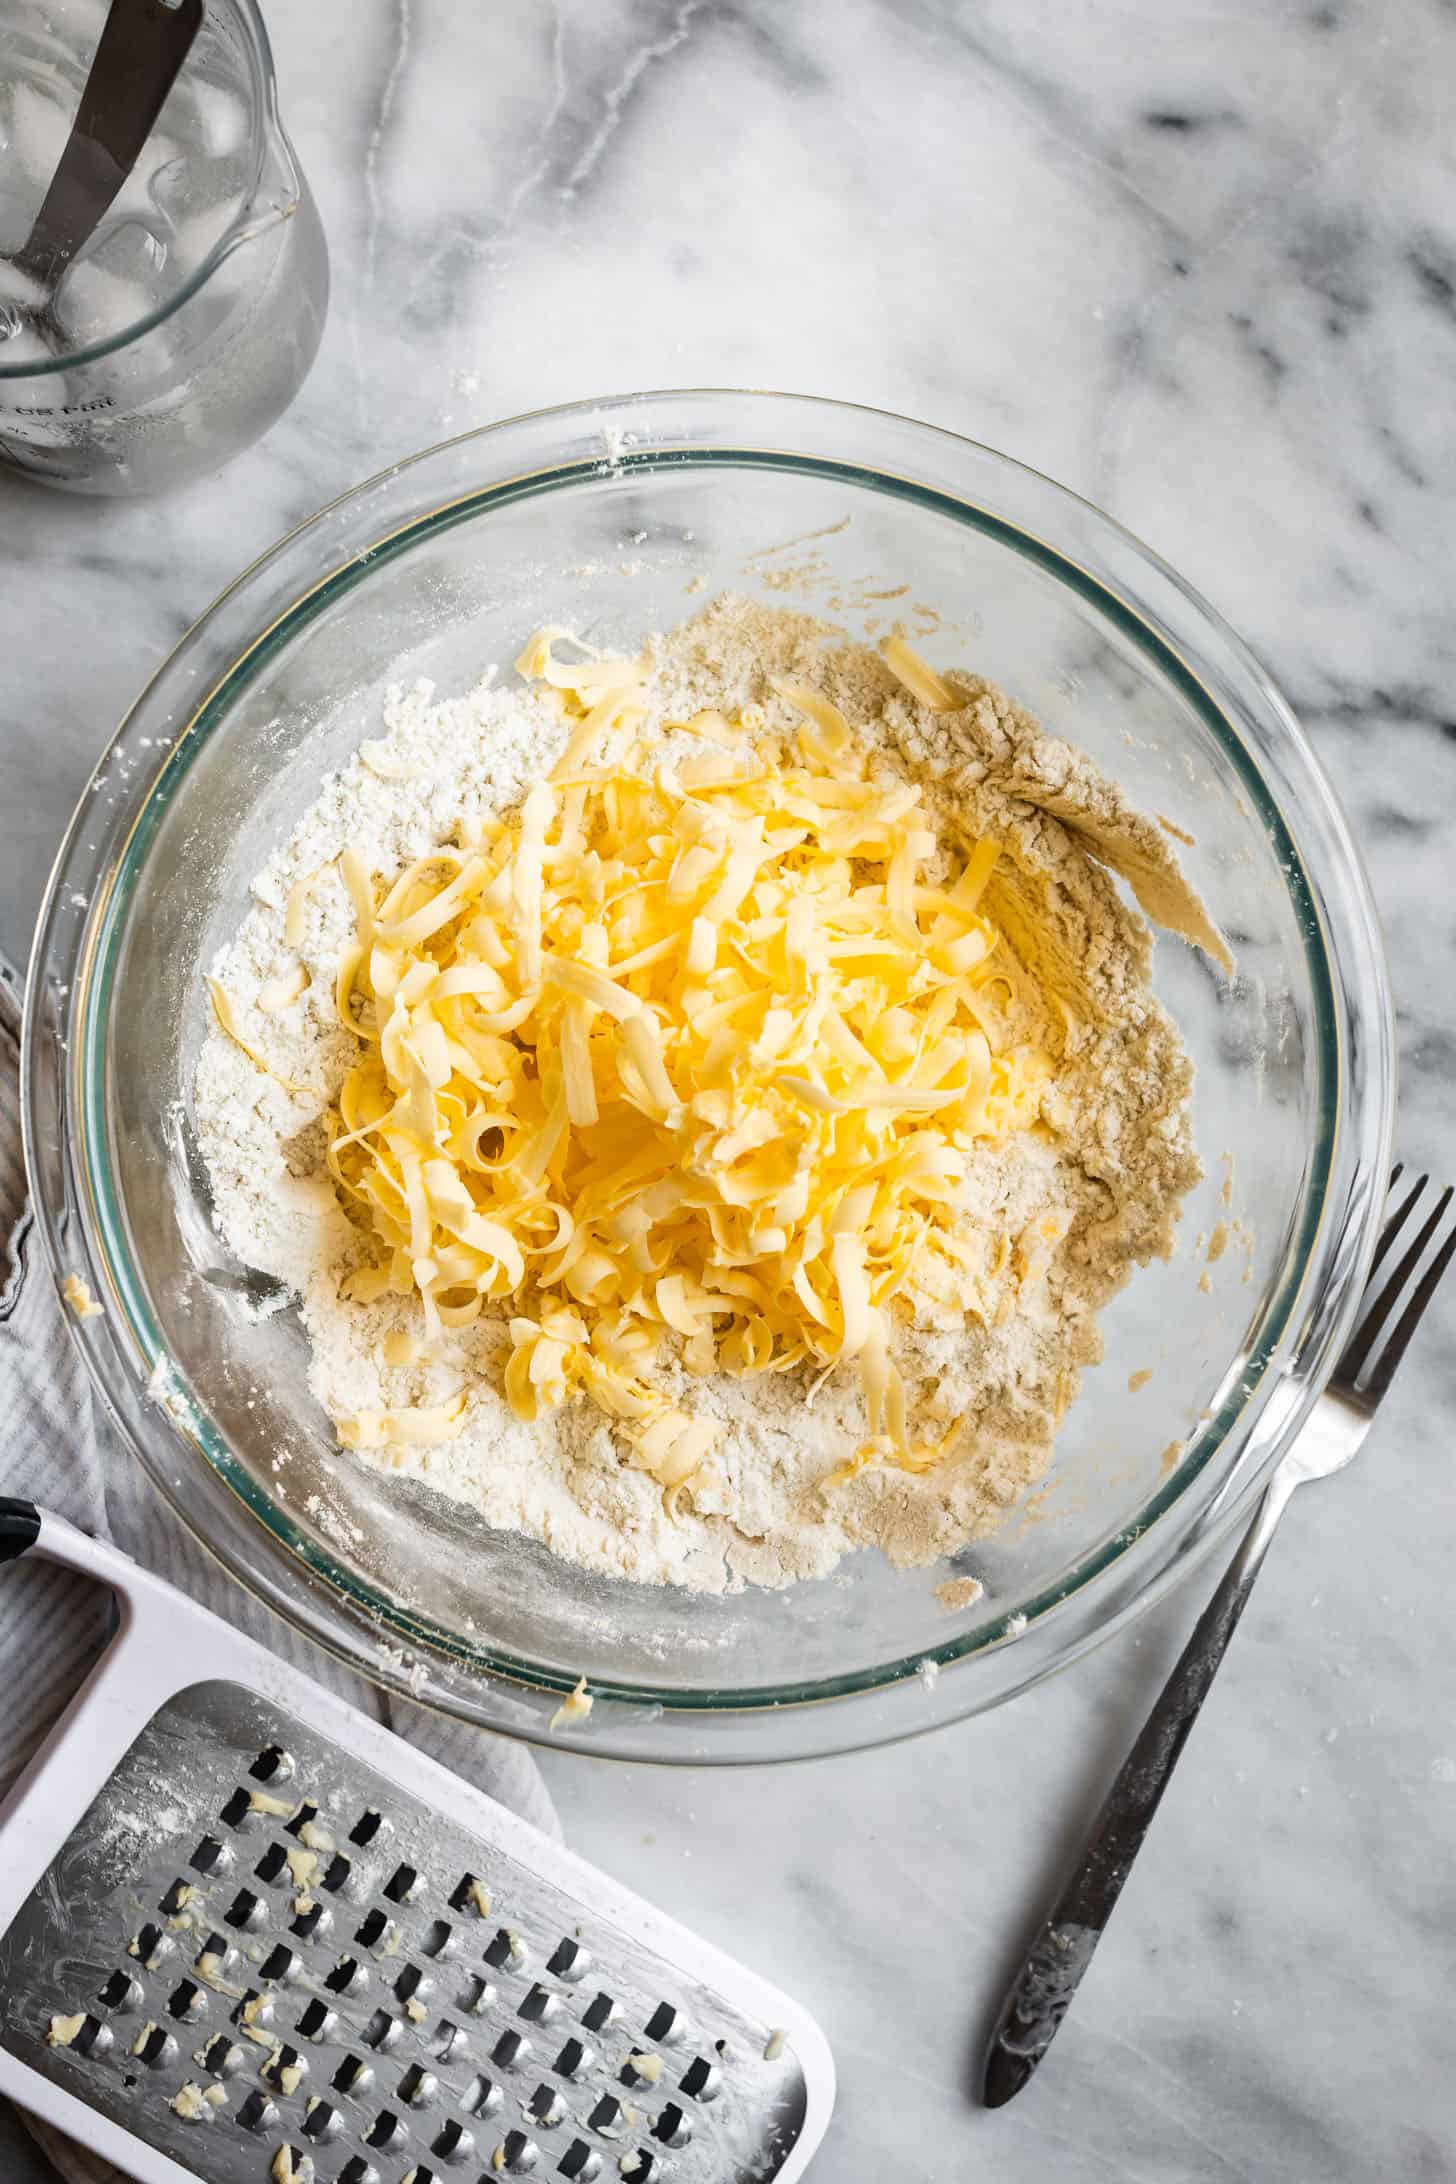
Work quickly to ensure the butter doesn't melt.
Quickly and gently toss the grated butter so all the small pieces are covered in flour.
Very thinly slice the remaining frozen butter into 1/16 - ⅛-inch thick slices and add them to the bowl.
Gently toss the butter slices in the flour, separating all the pieces.
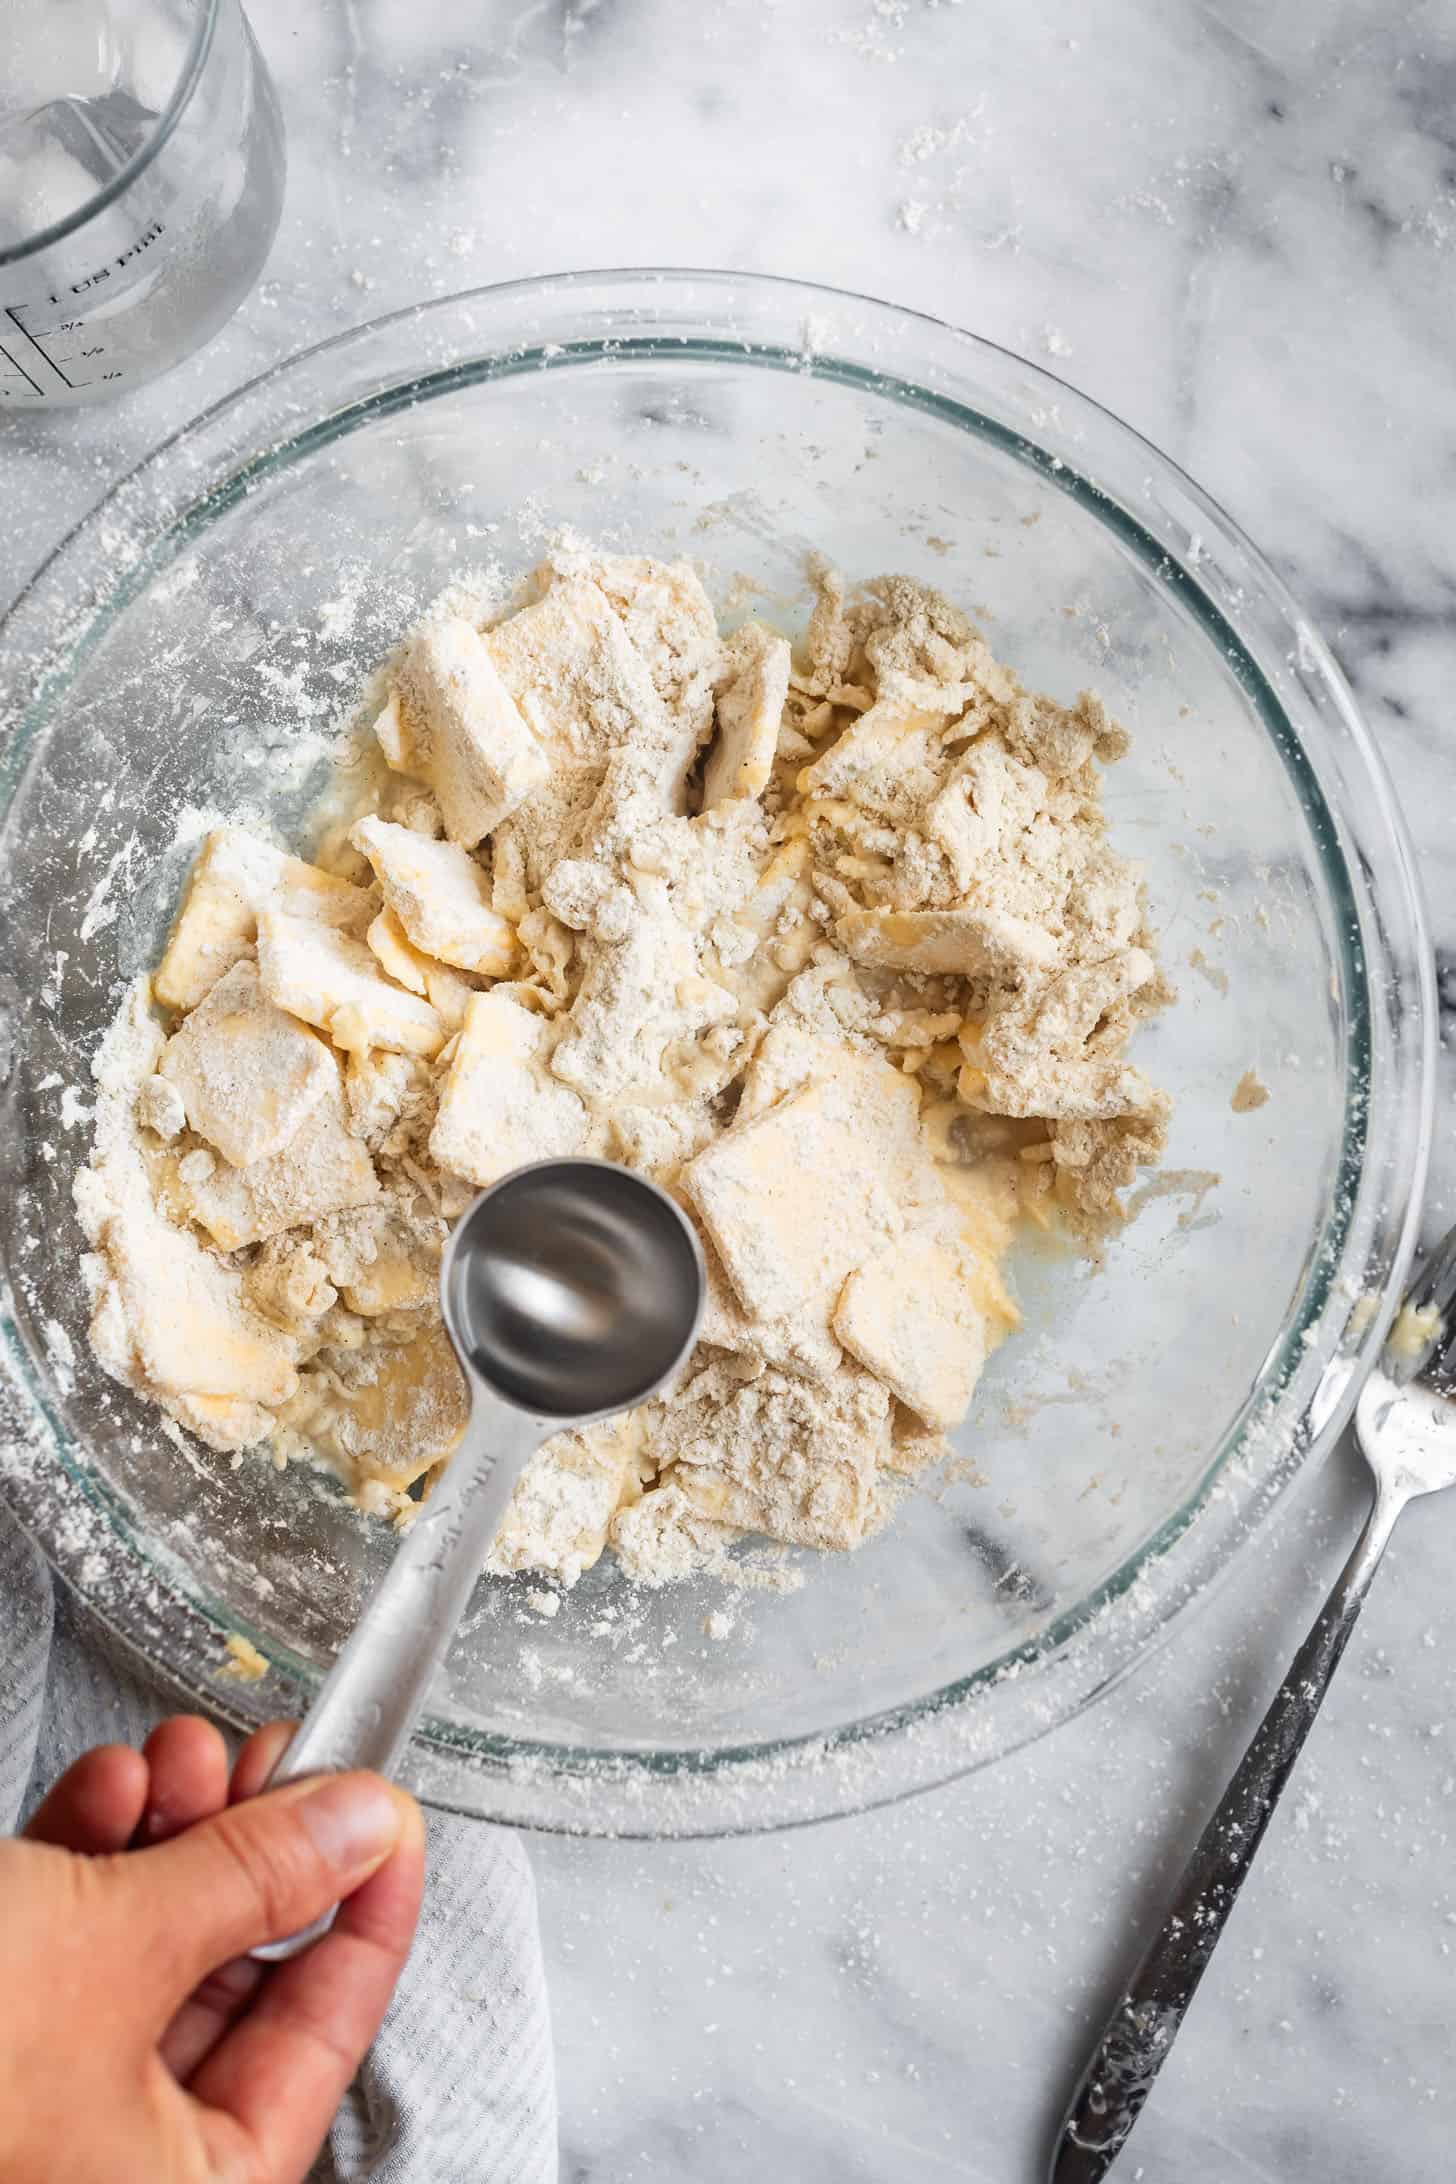
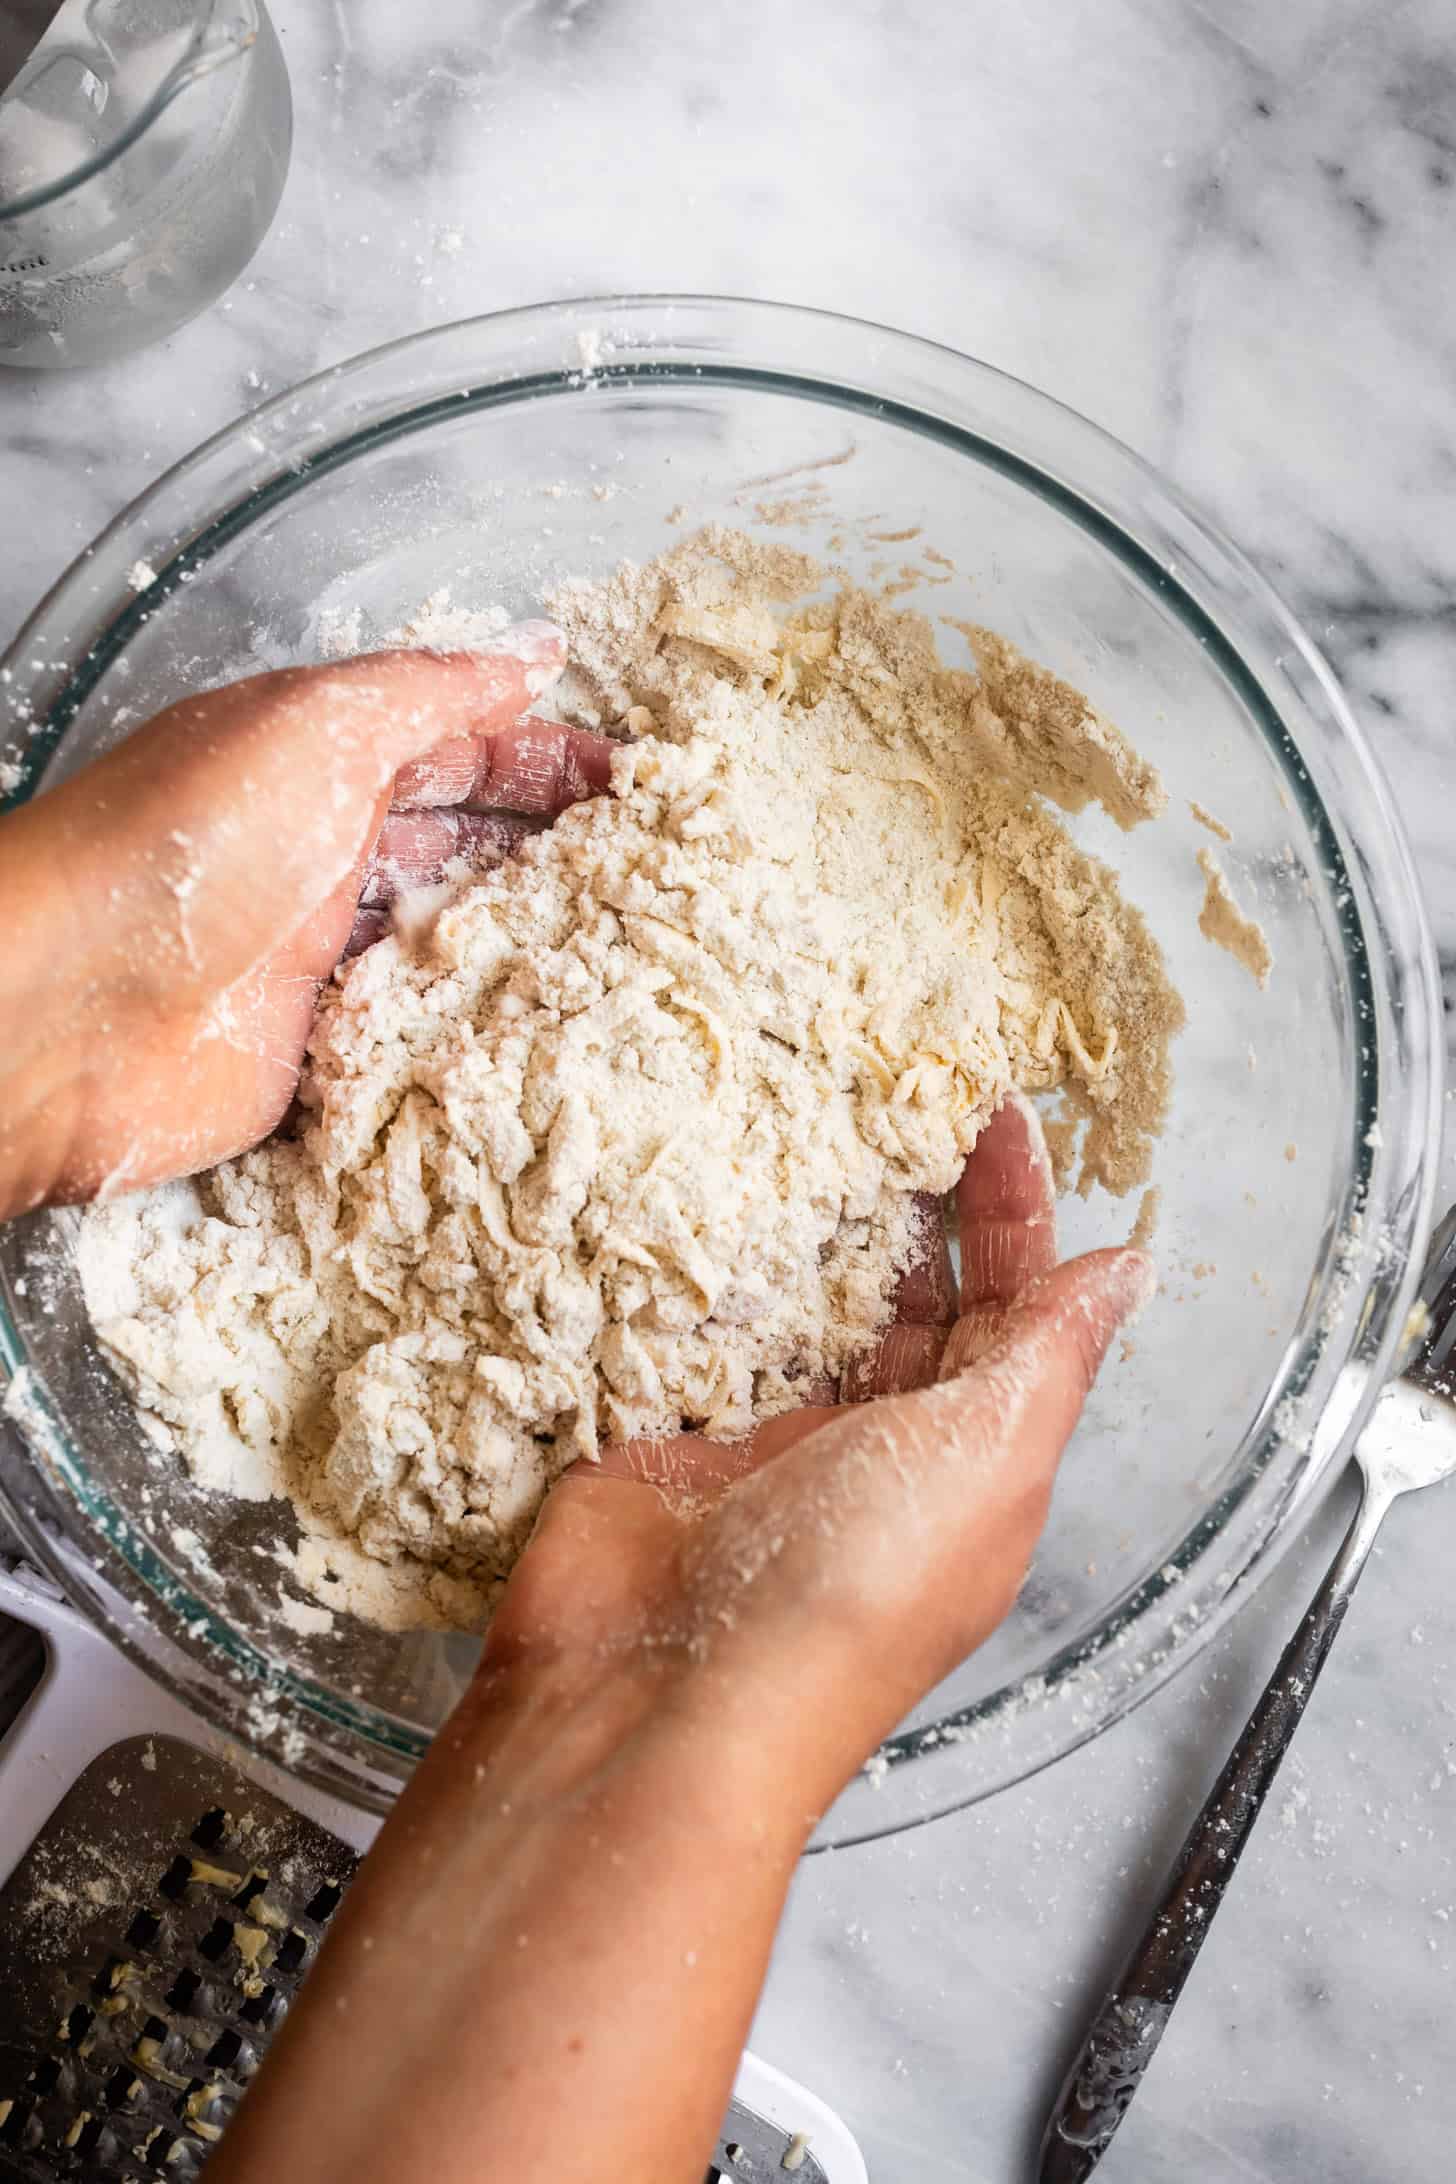
Drizzle 6 tablespoons of ice water over the top.
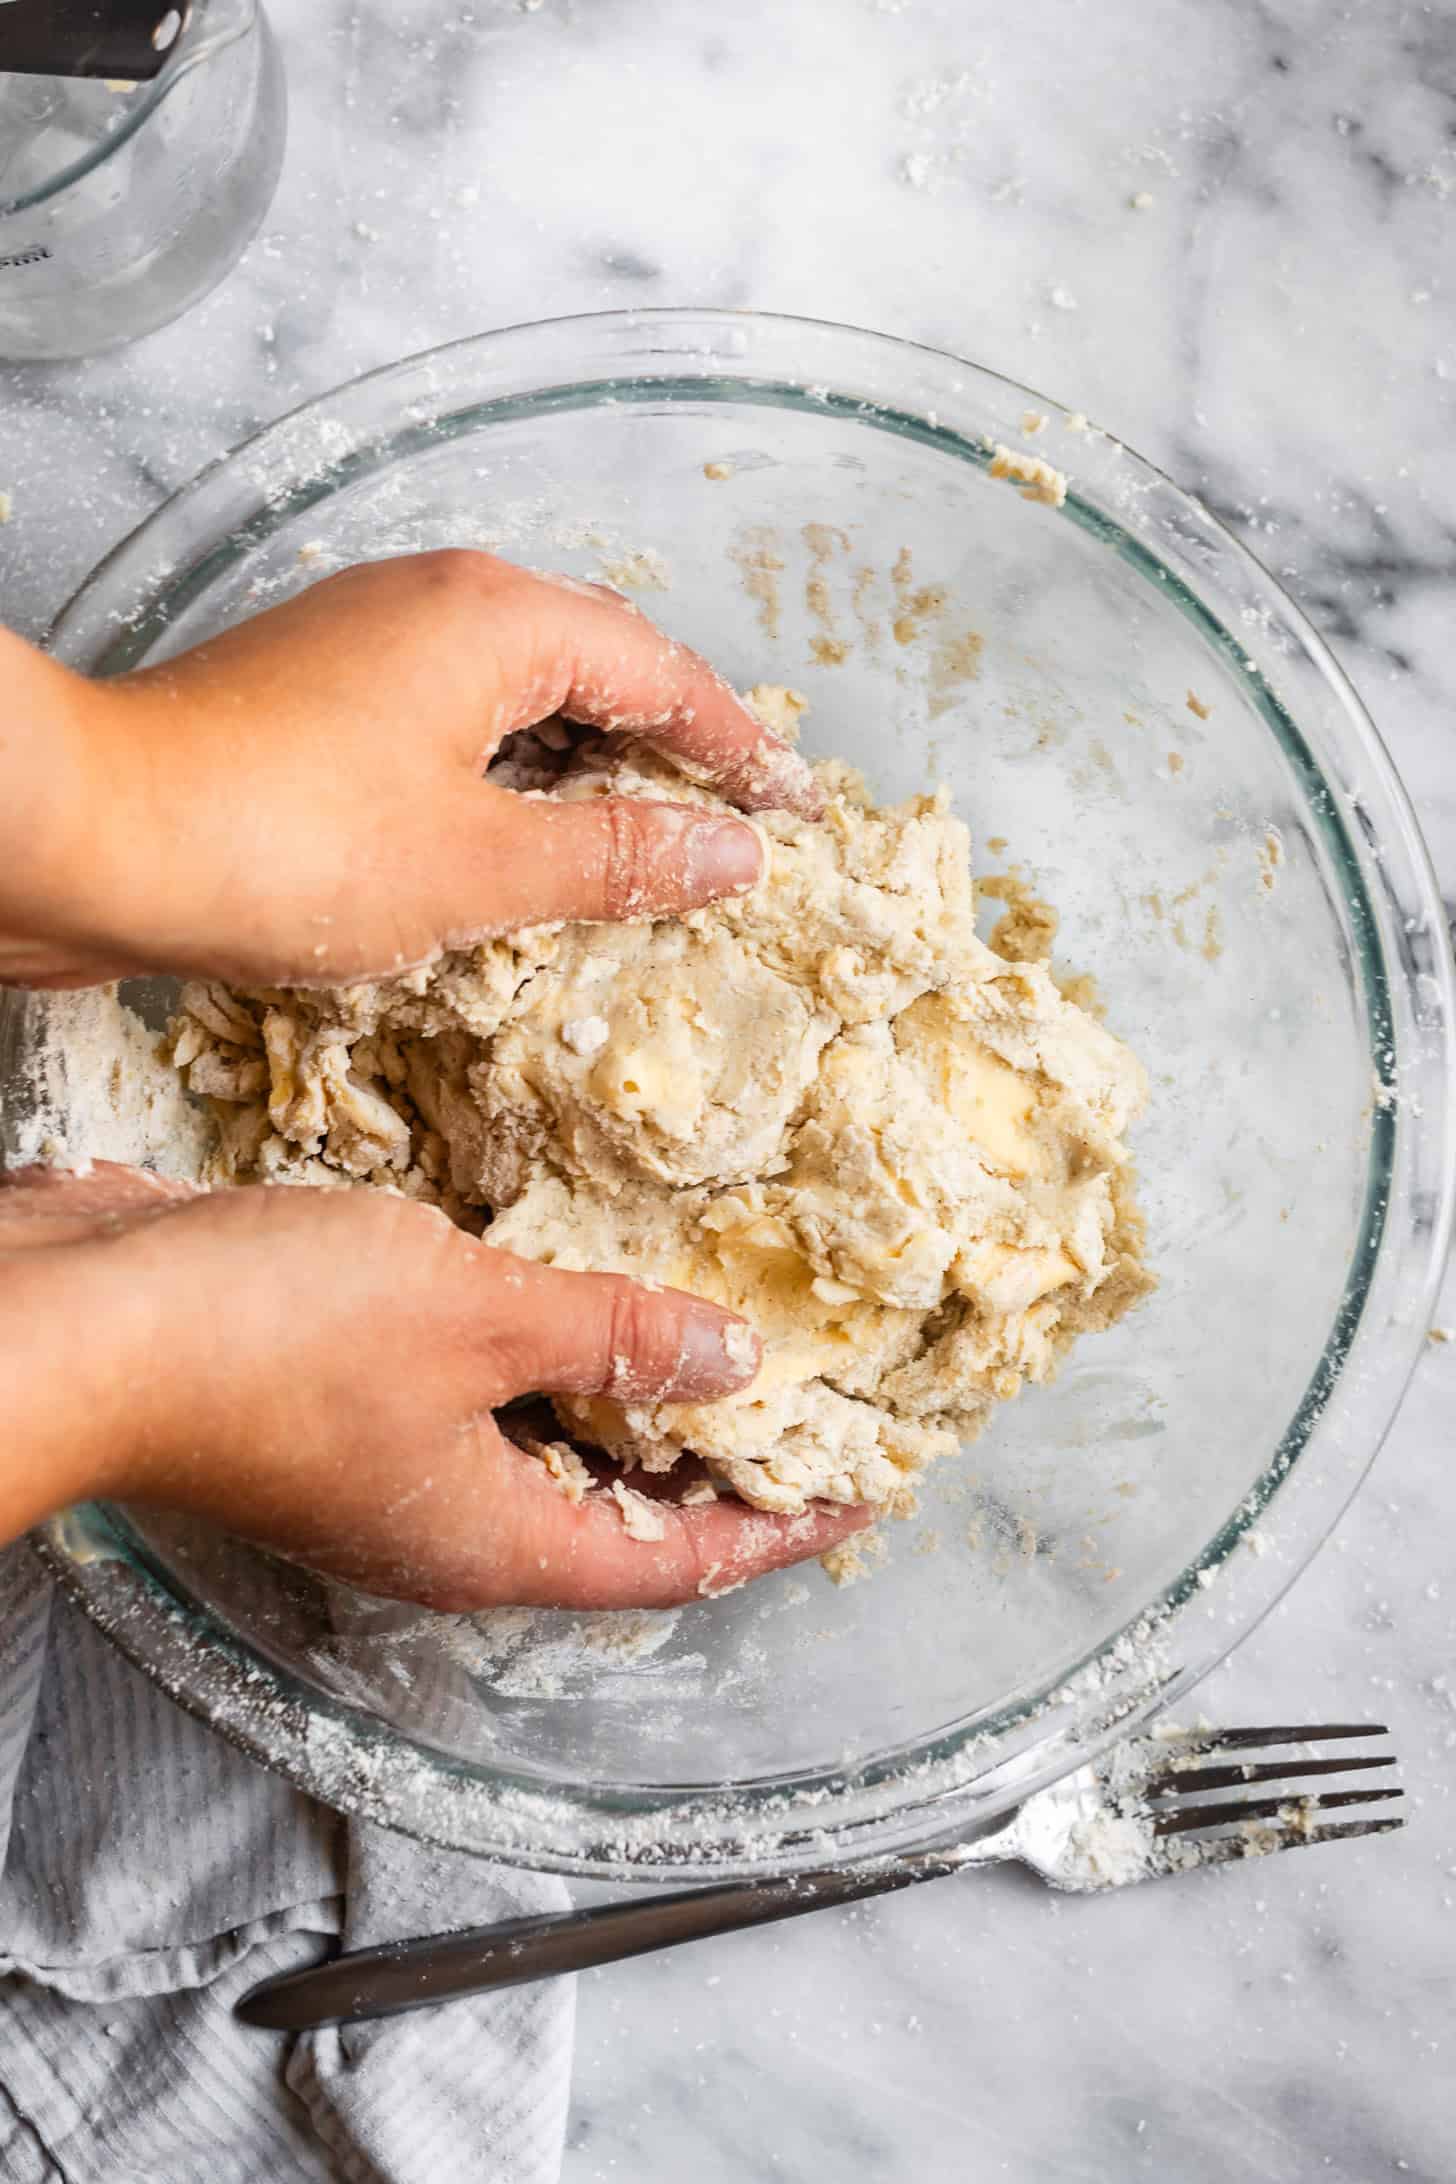
Use a fork to mix the dough, then working quickly, very gently work the dough with your hands until it just comes together into a shaggy dough when pinched, adding up to 3 tablespoons more ice water, as needed. Do not overmix here.
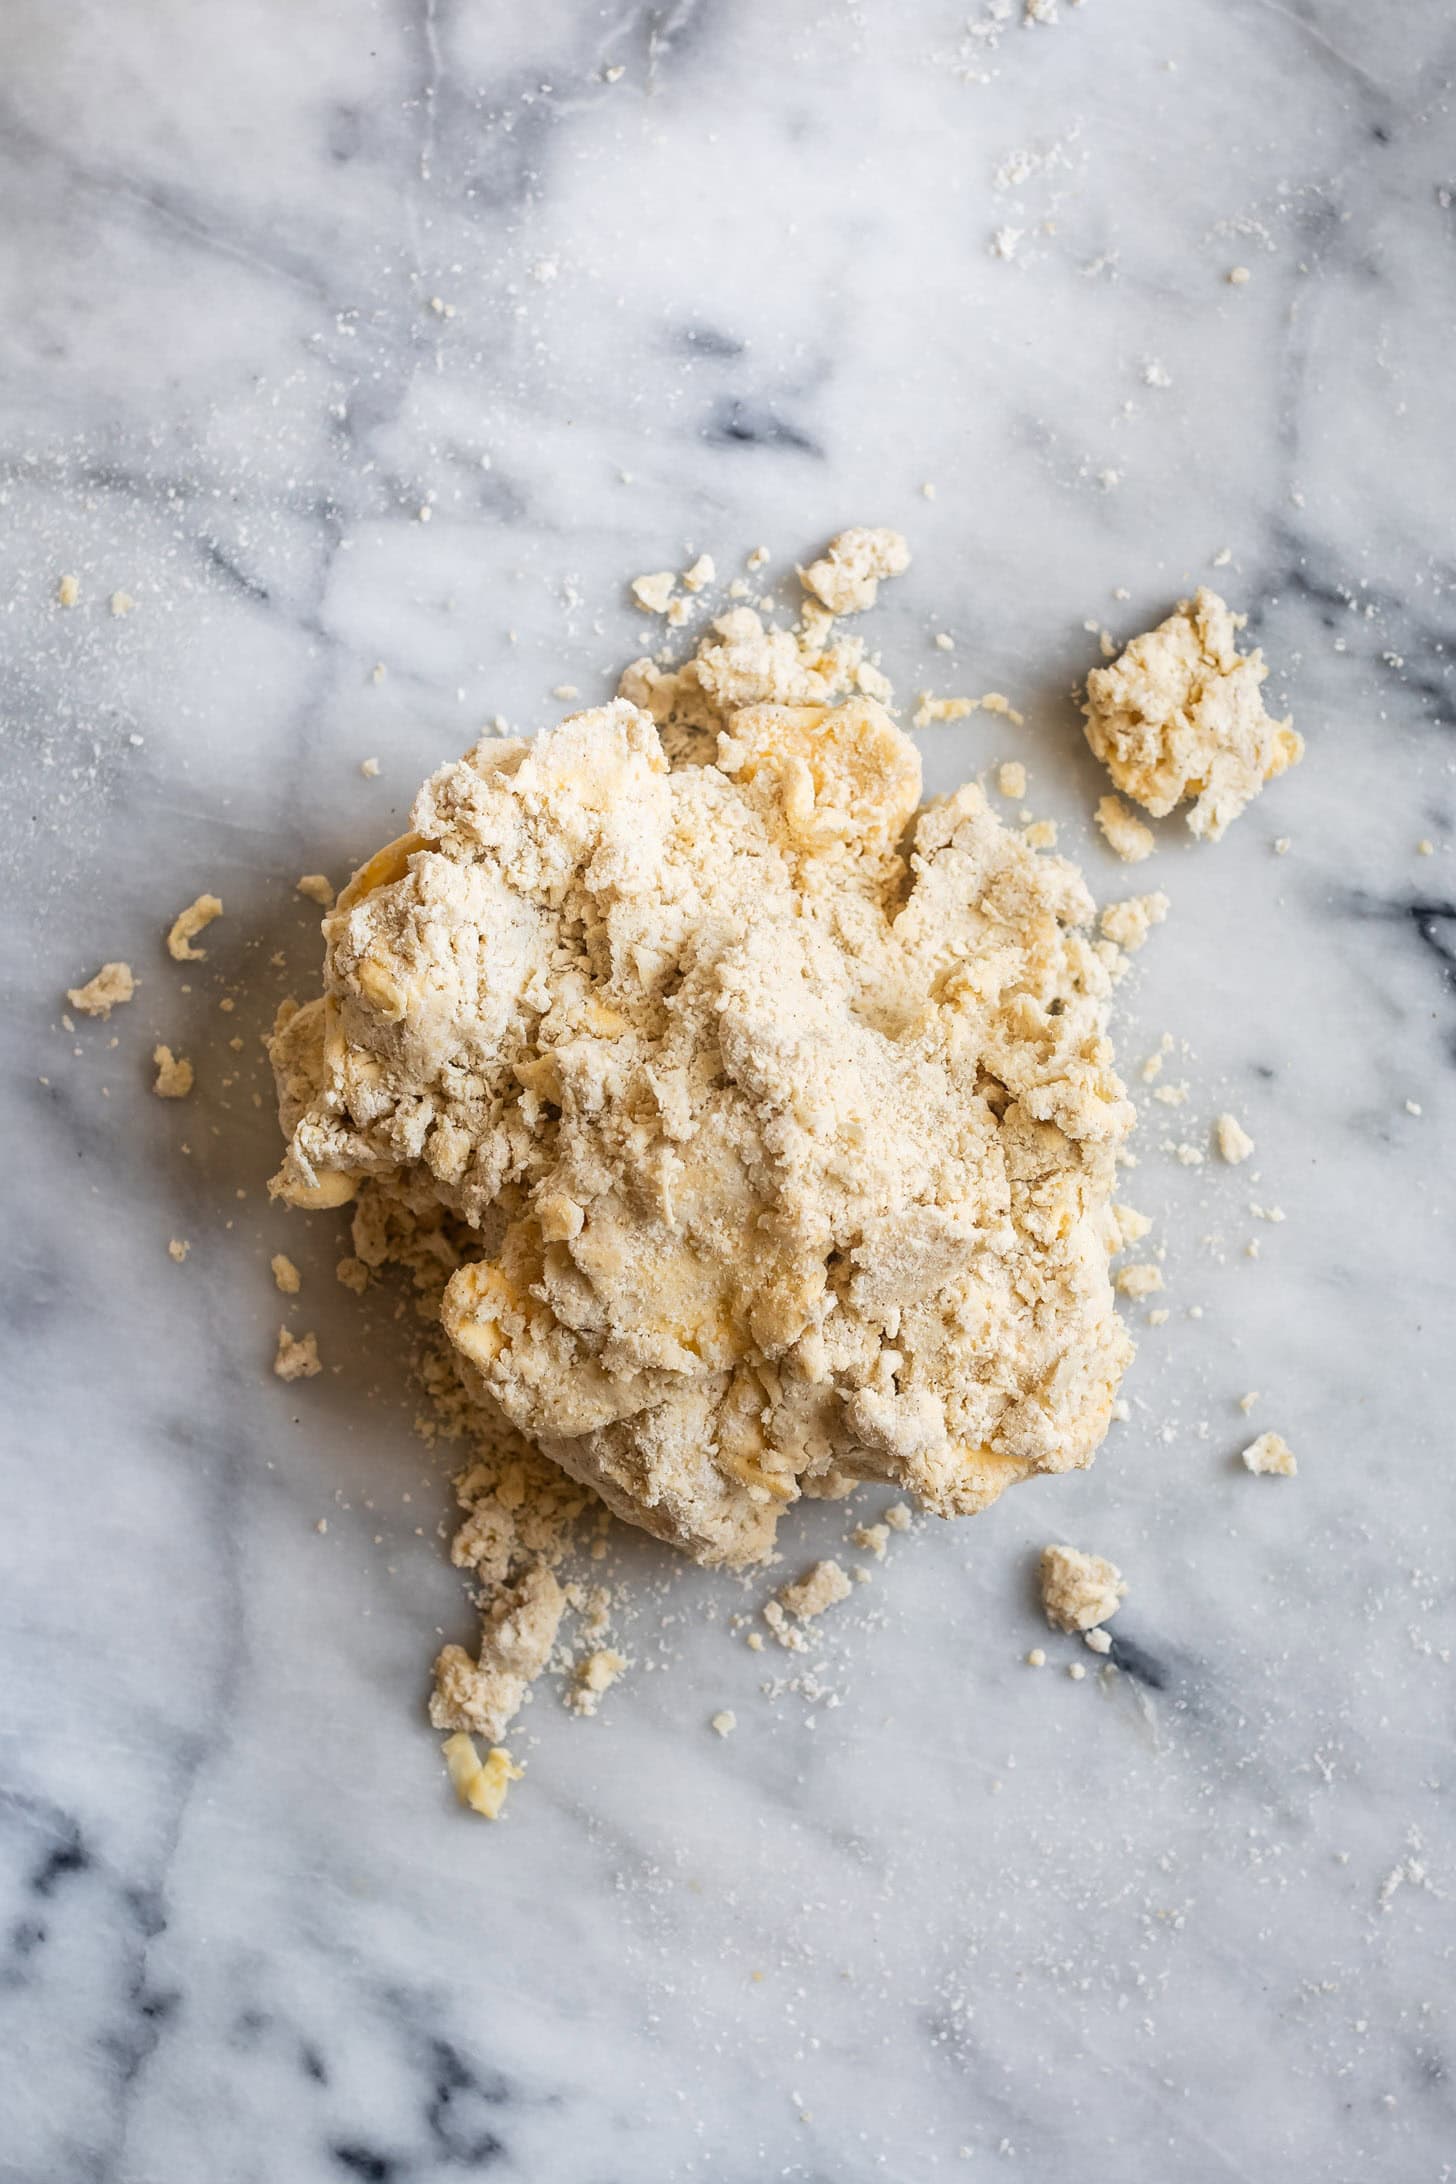
Dump the shaggy dough onto your work surface. Notice there are still several dry spots in the dough.
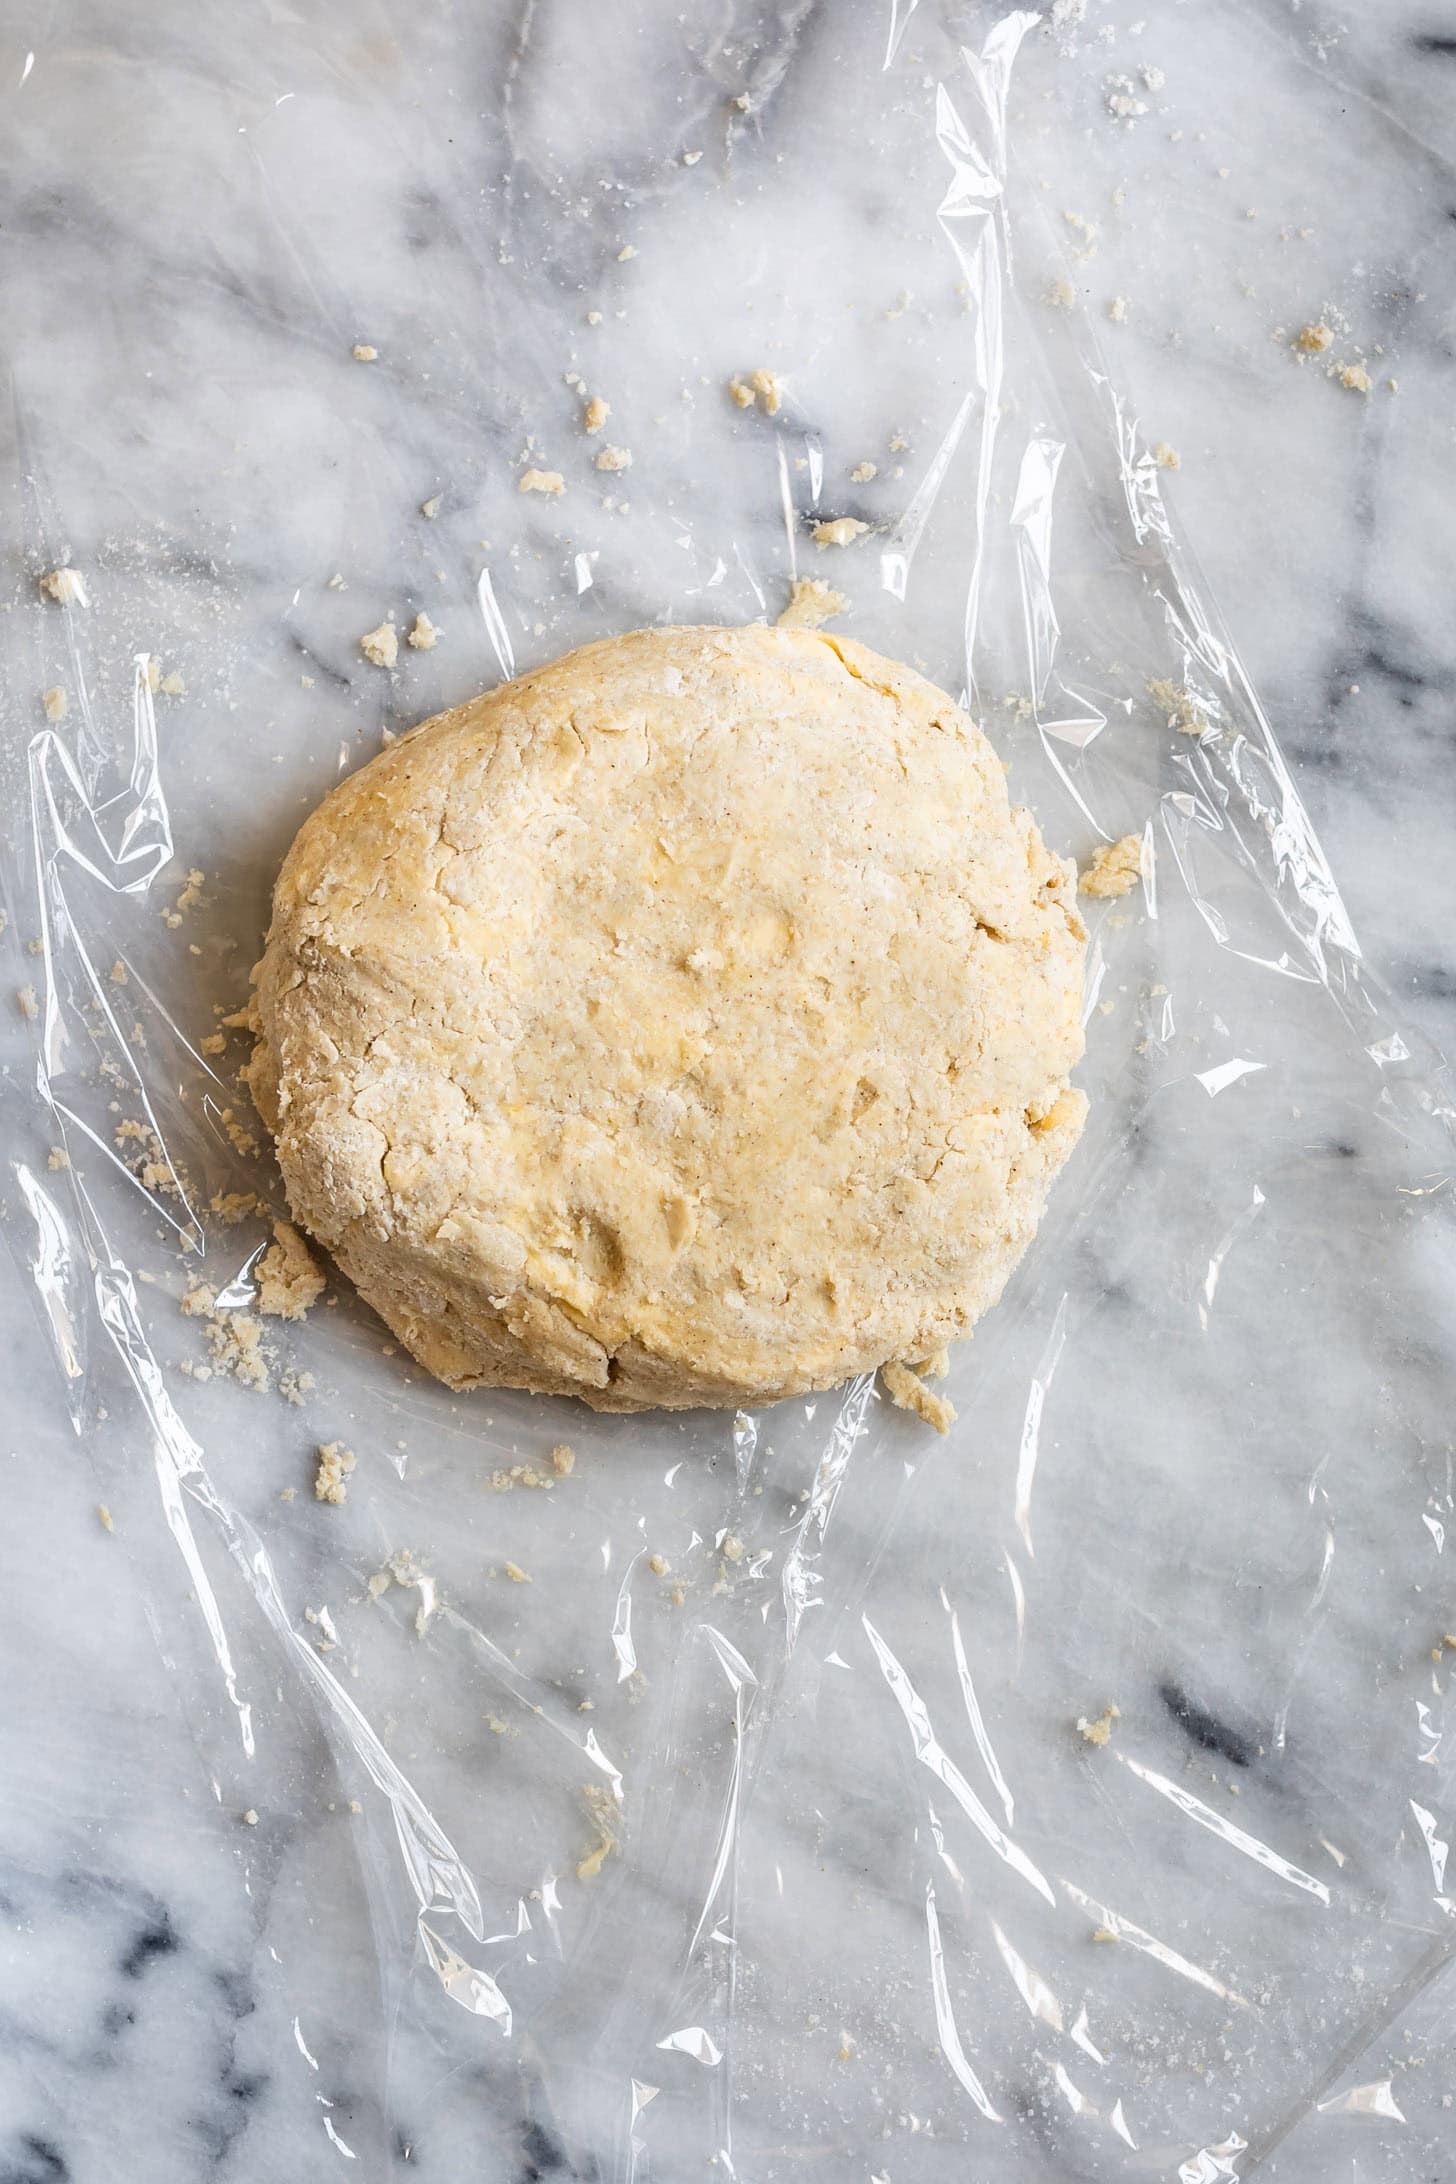
Form the dough into a disc and wrap it loosely in plastic.
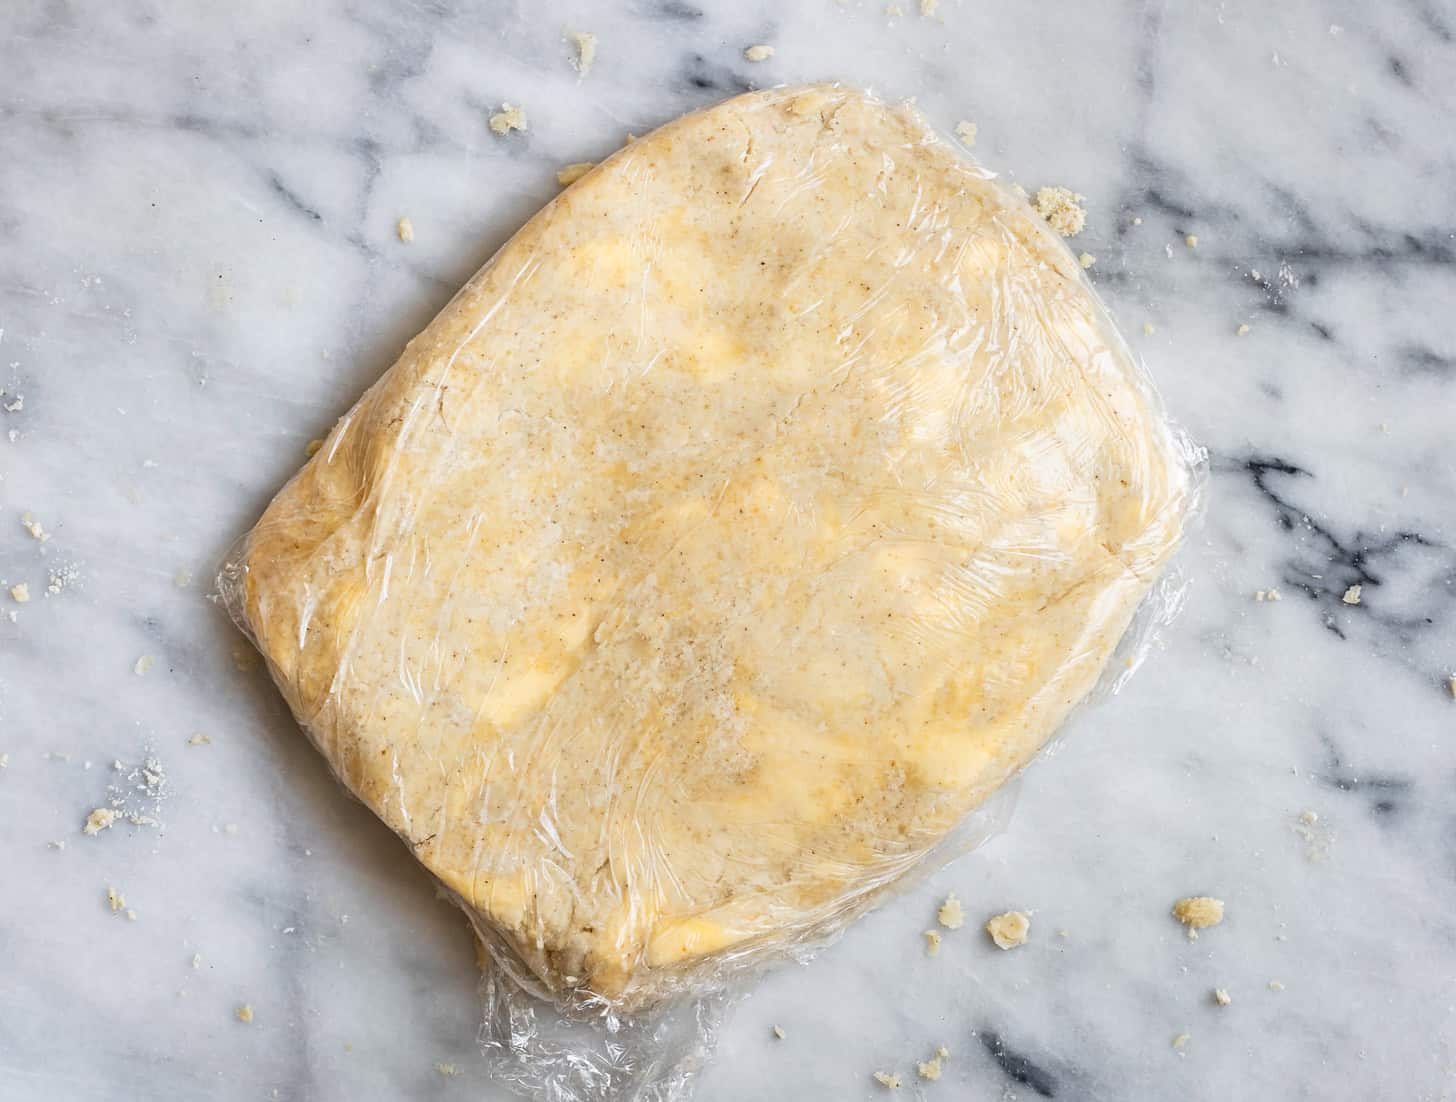
Use your hands or a rolling pin to flatten the dough roughly into the shape of a rectangle, about ½ to 1 inch thick. Chill for 30 minutes in the fridge.
Hint: It's important to keep your ingredients cold so the butter doesn't completely melt and work into the dough. If it's warm in your kitchen (and you don't have AC), you can give your ingredients help in staying cold by placing your bowl with dry ingredients in the freezer for an hour before starting.
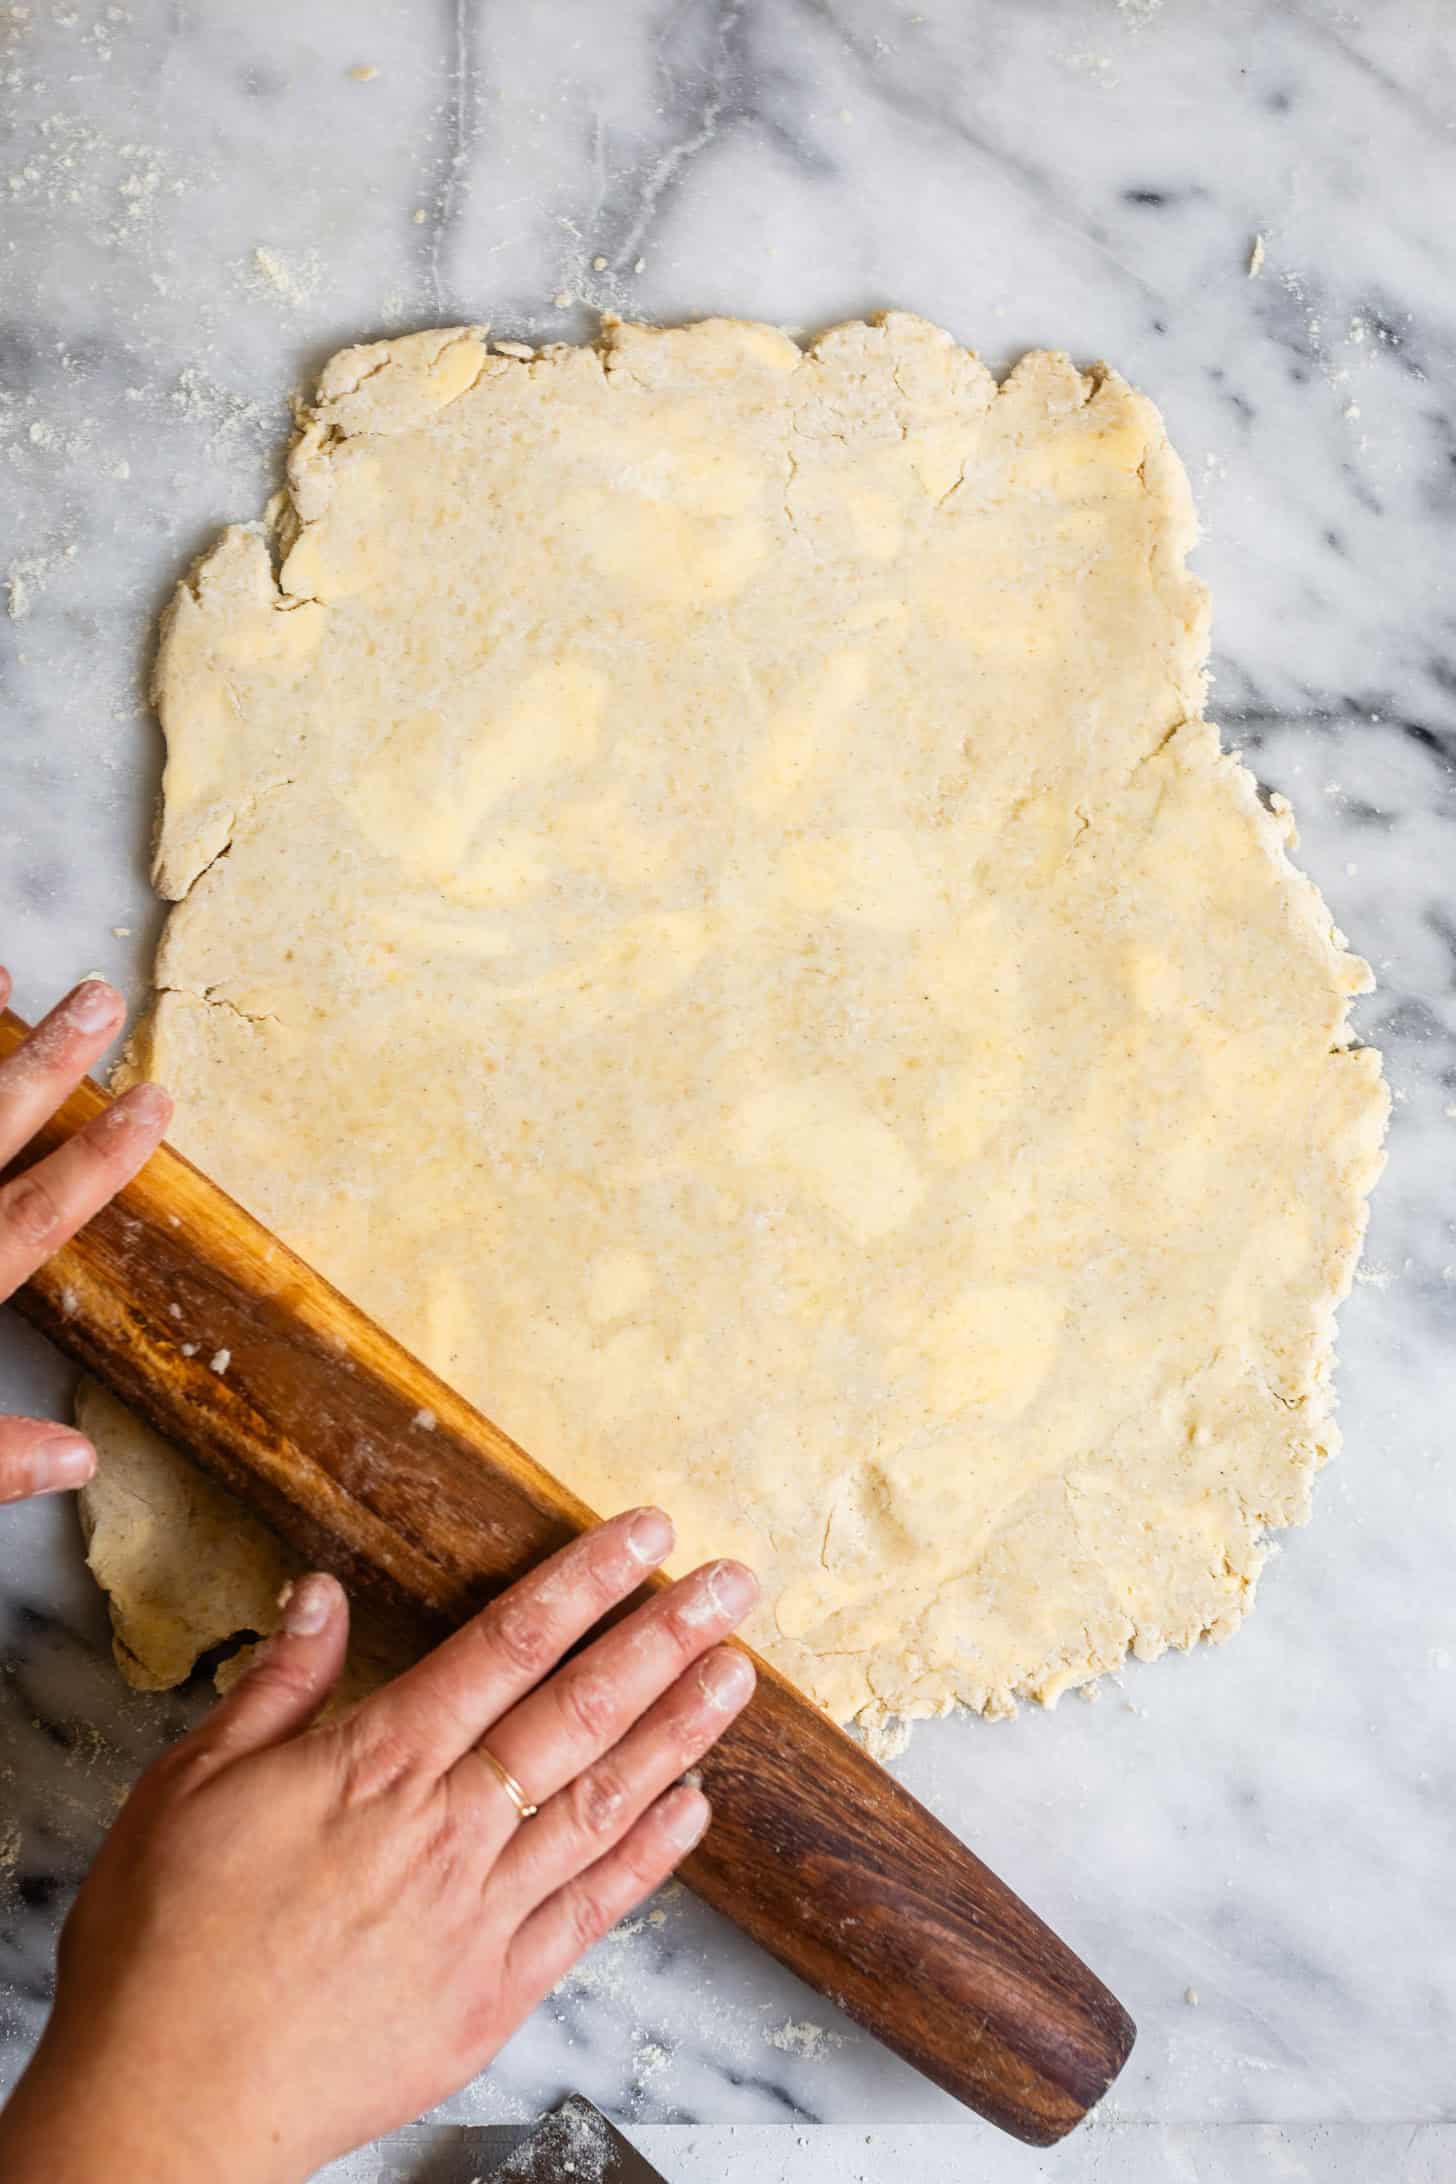
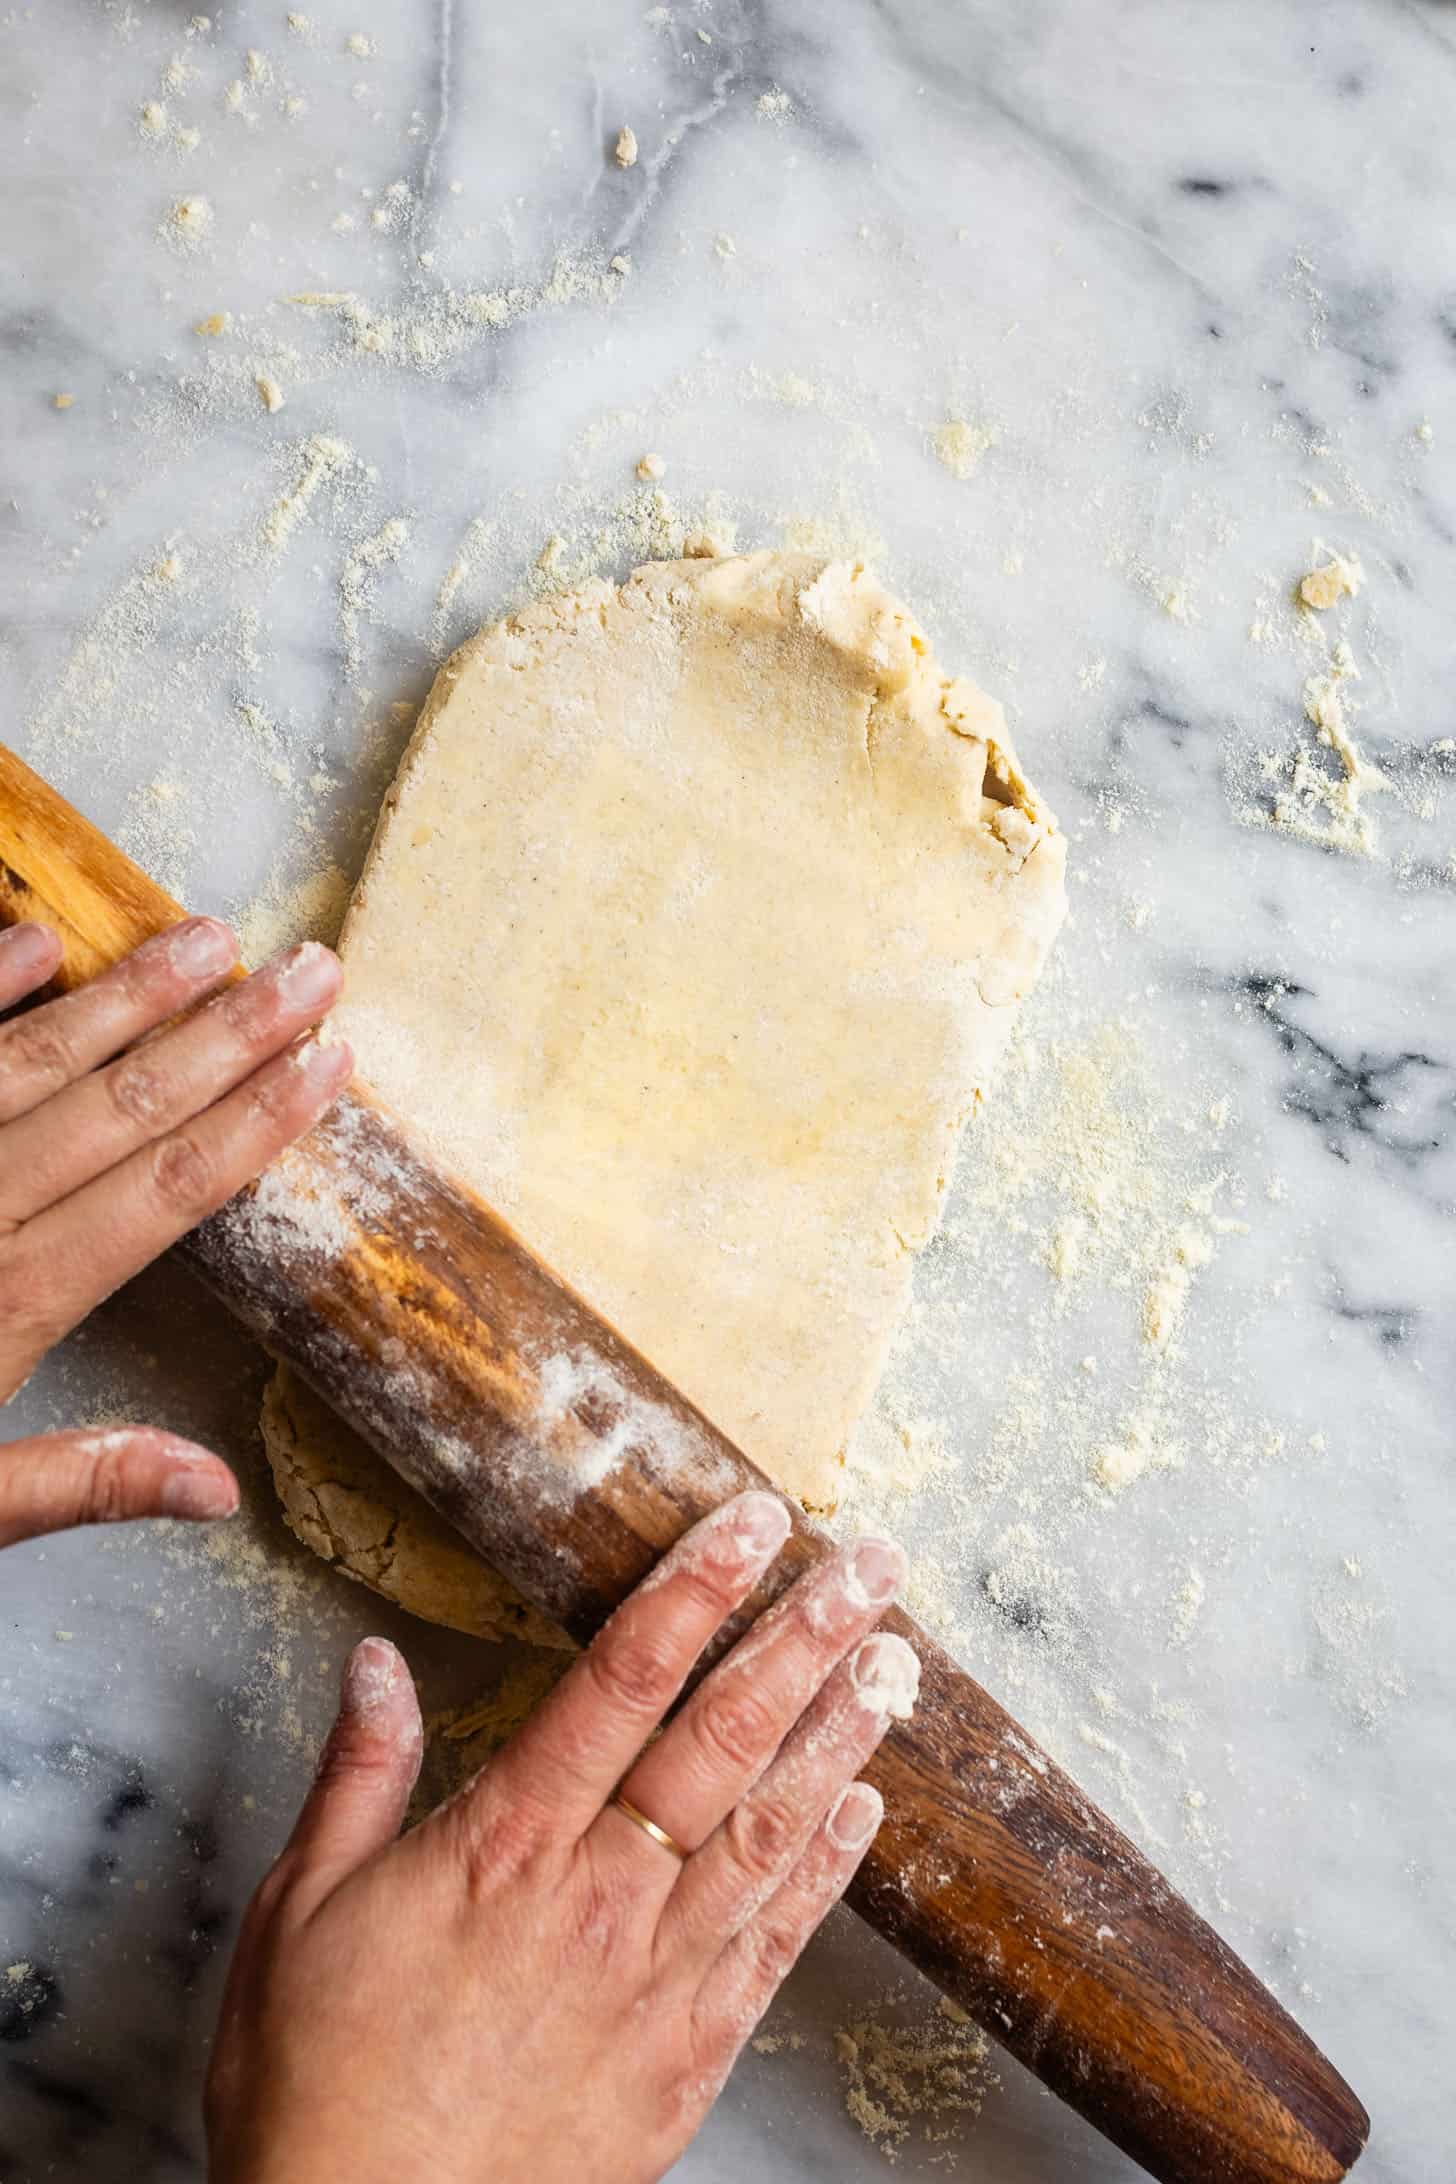
Roll the dough into a rectangle, about ¼-inch thick, lifting and flipping as you roll, and lightly dusting with more flour as need to prevent the dough from sticking.
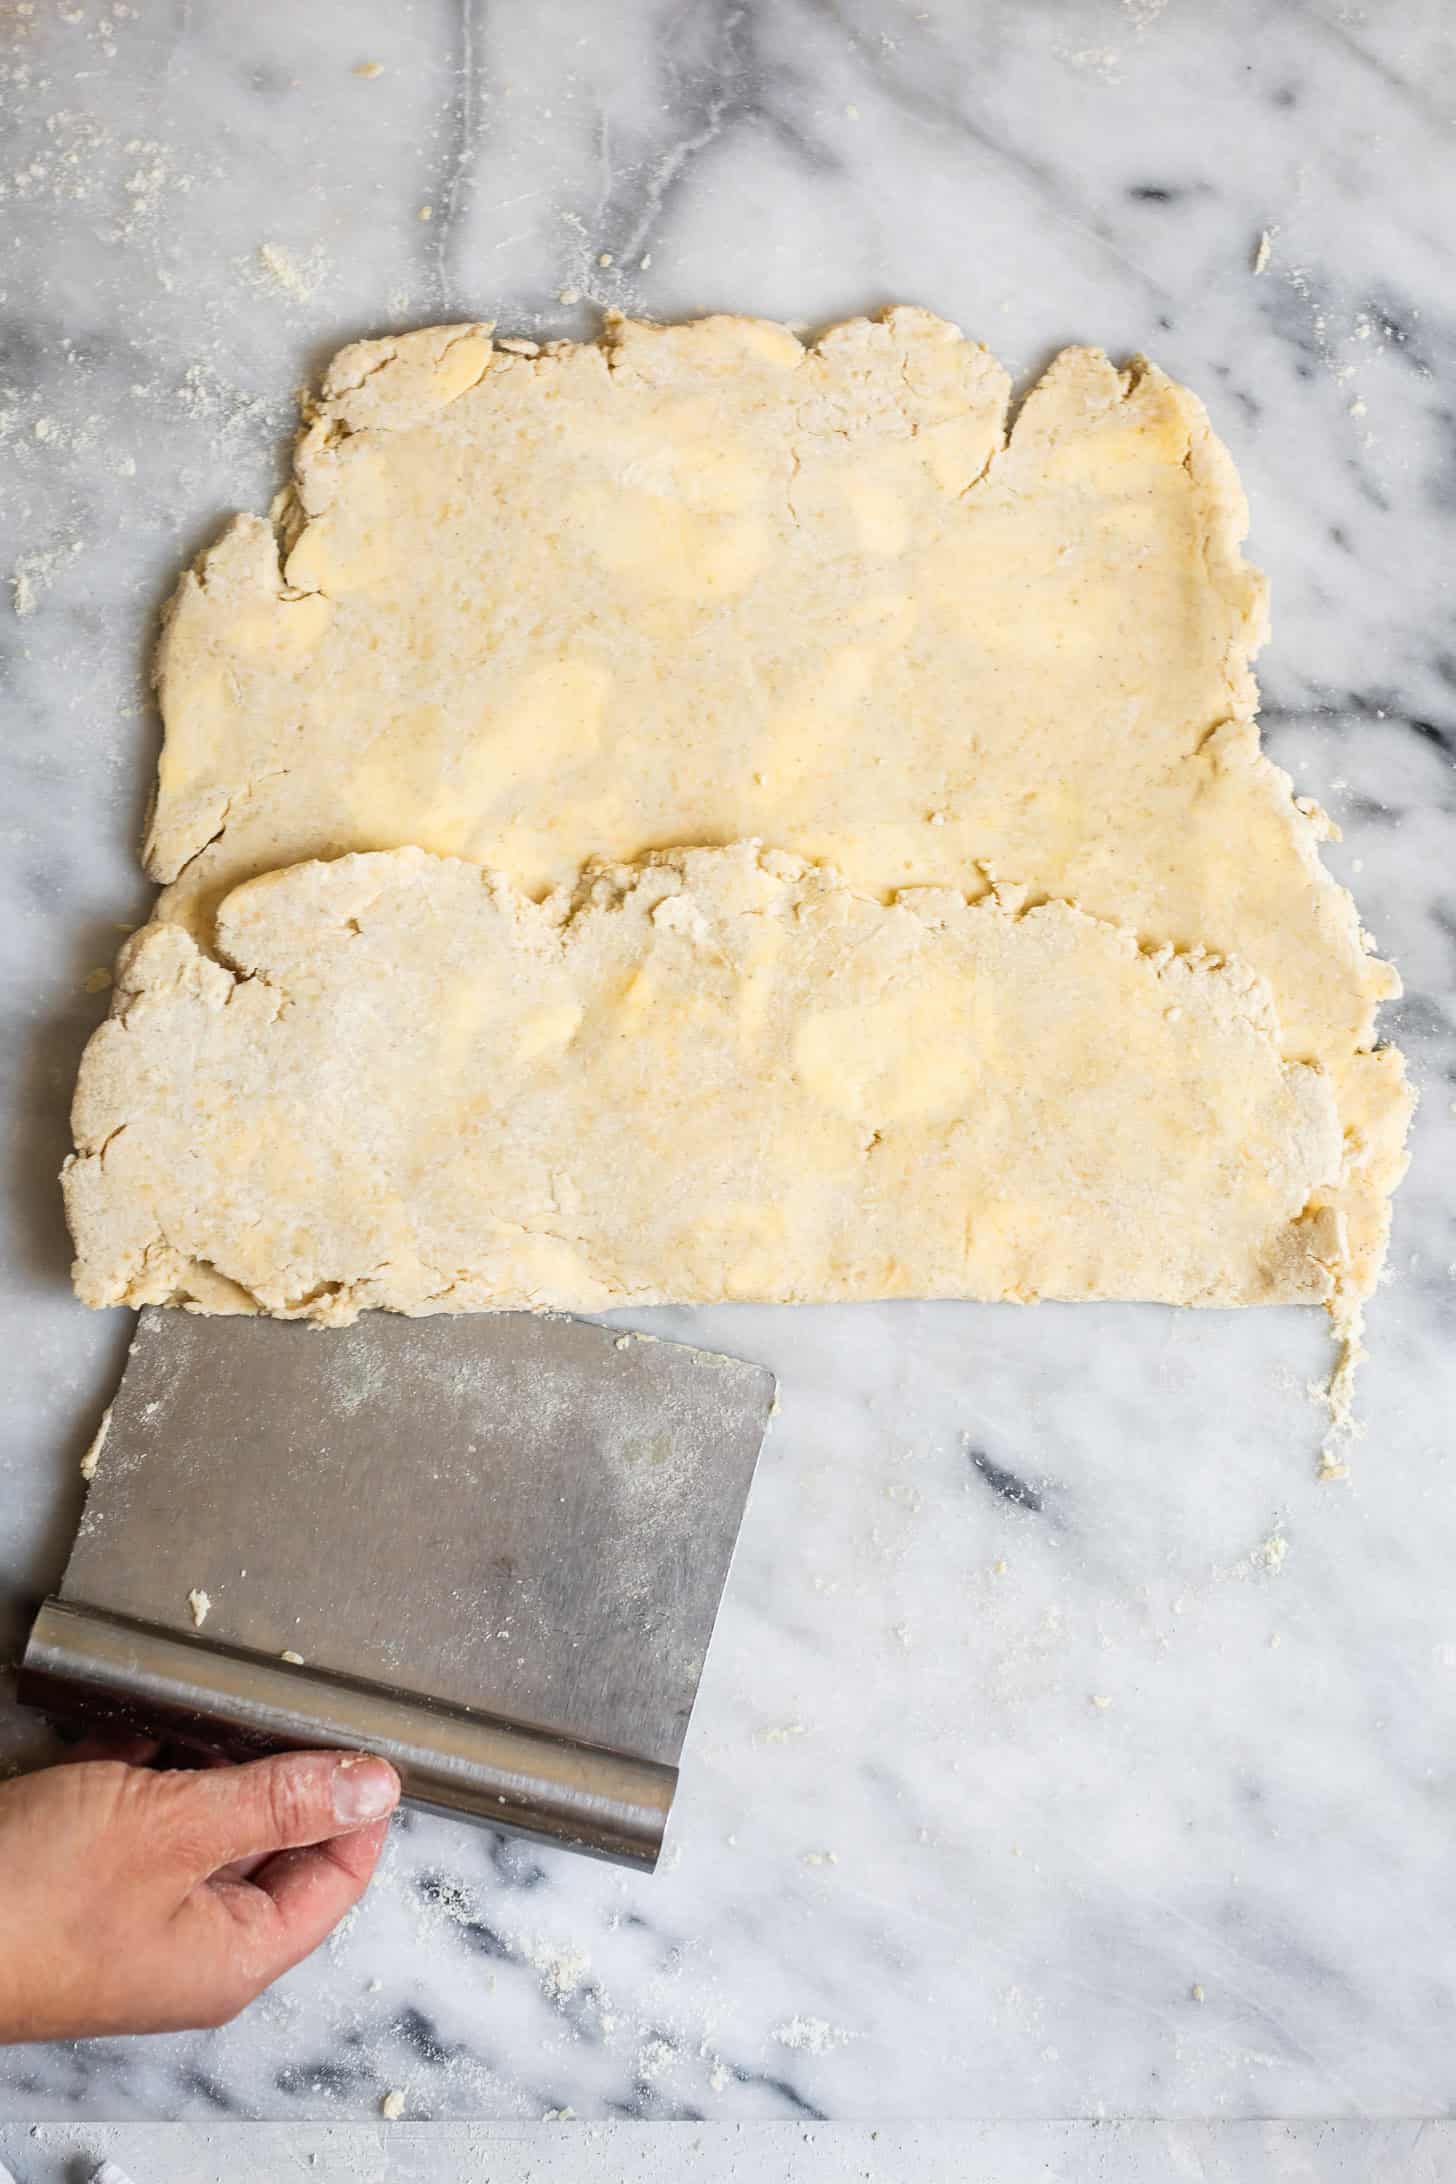
Fold it as you would a letter. First, fold ⅓ of the length of the dough over the top, using a bench scraper or knife to help remove the dough from the surface, as needed.
Repeat by folding the other ⅓ of the length of dough over the top as you would a letter.
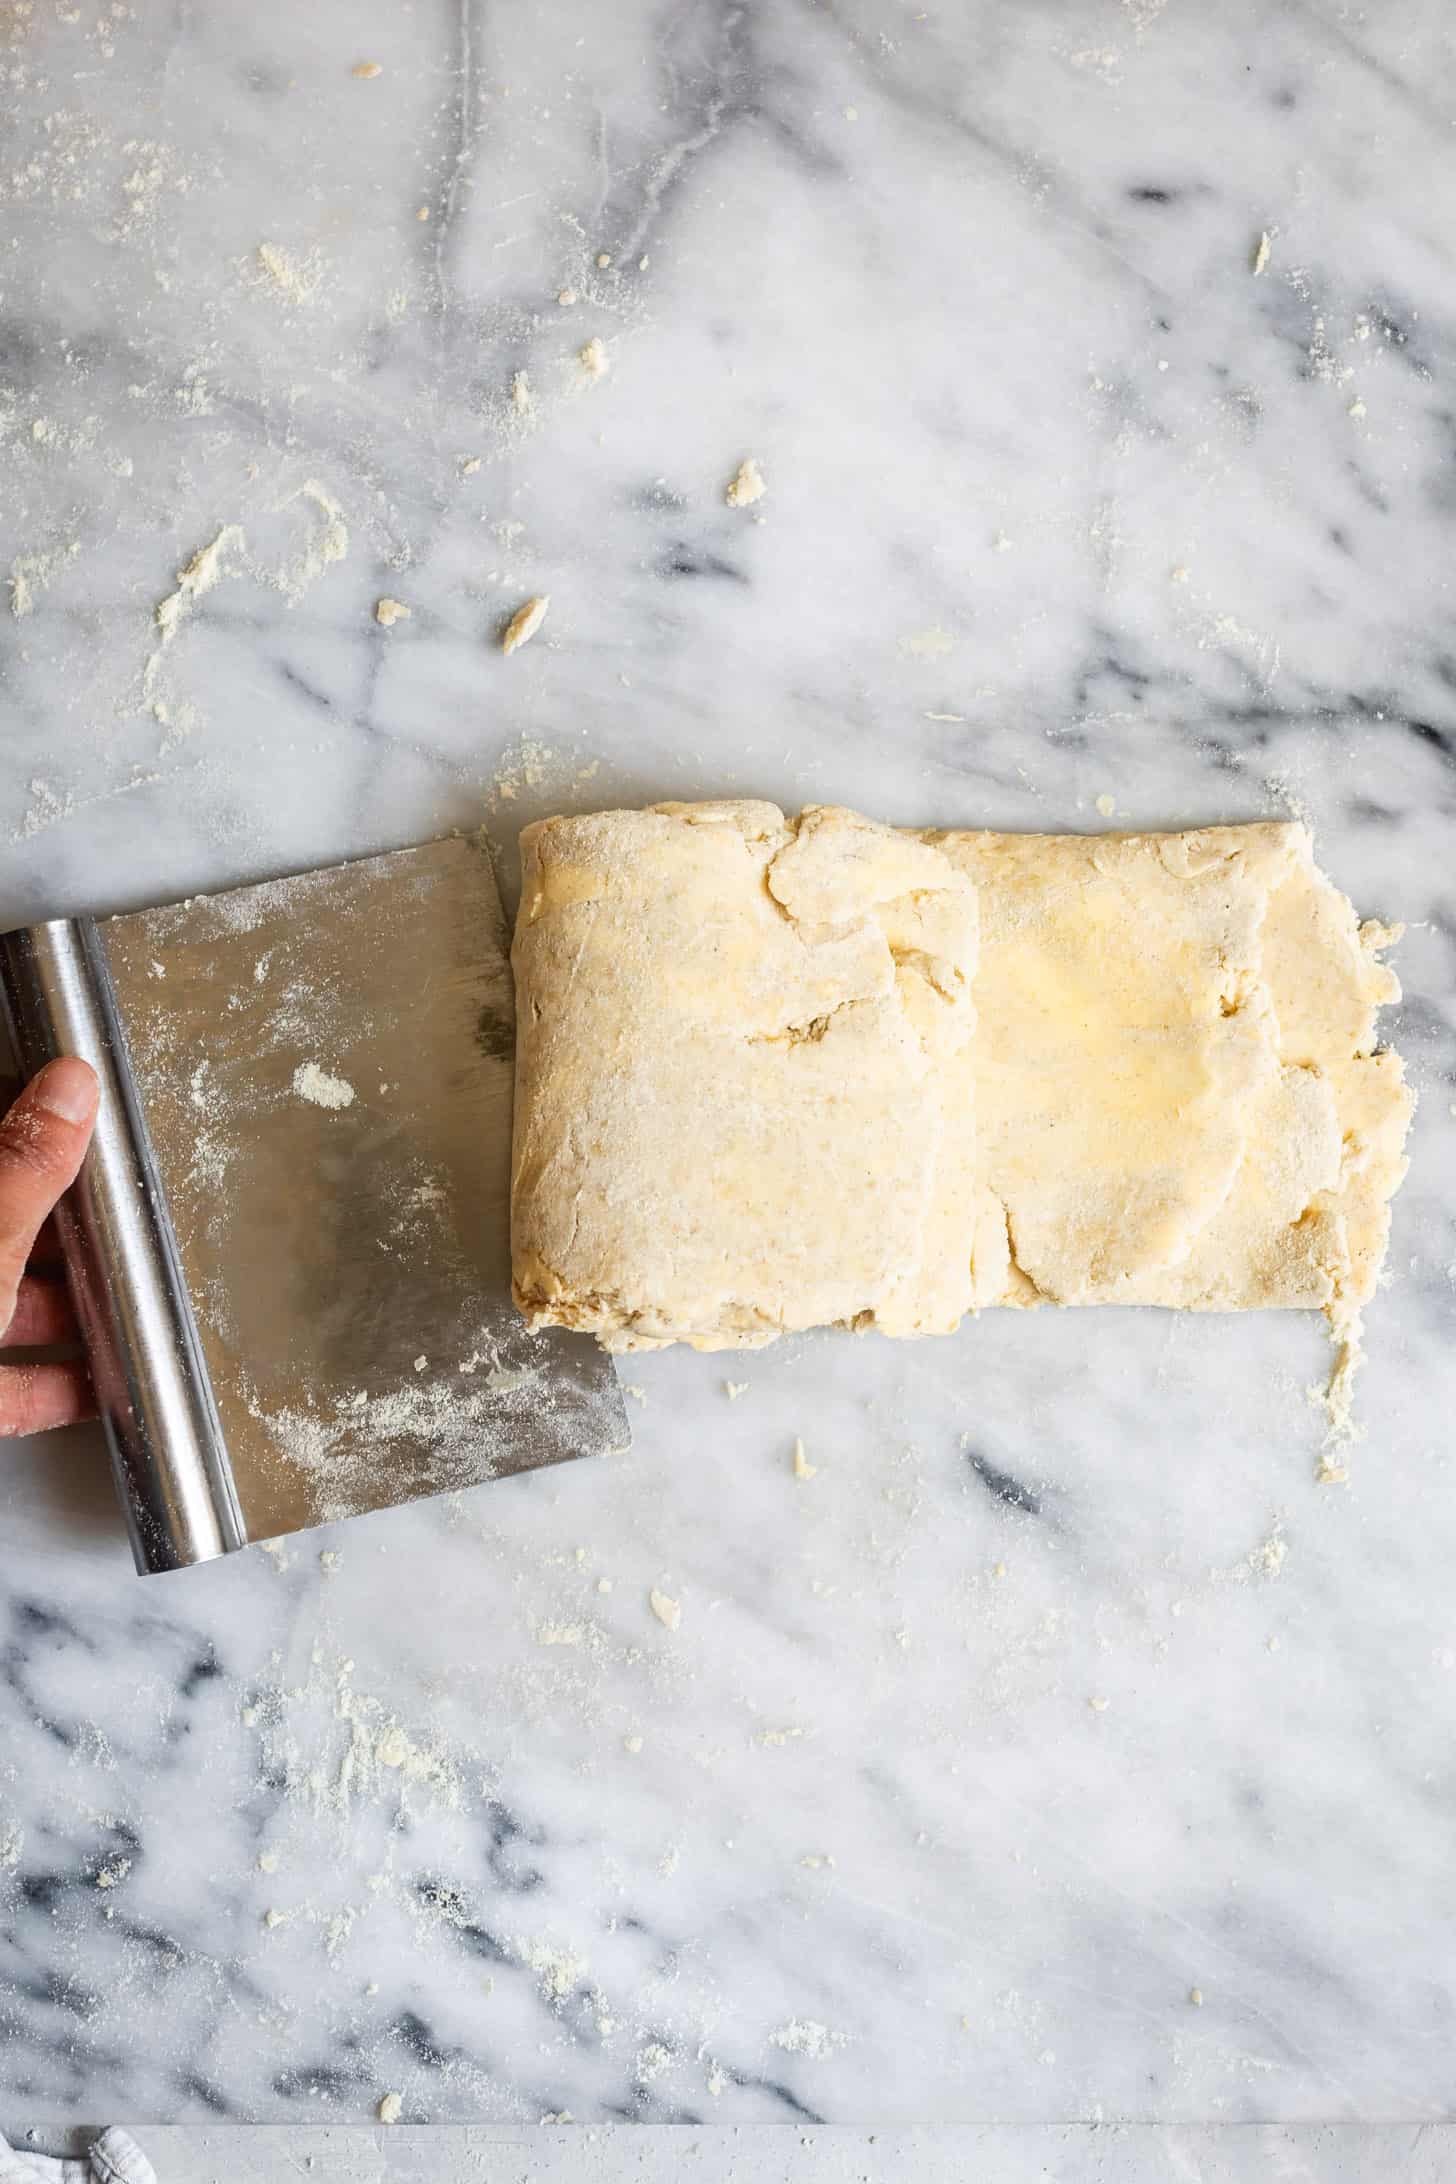
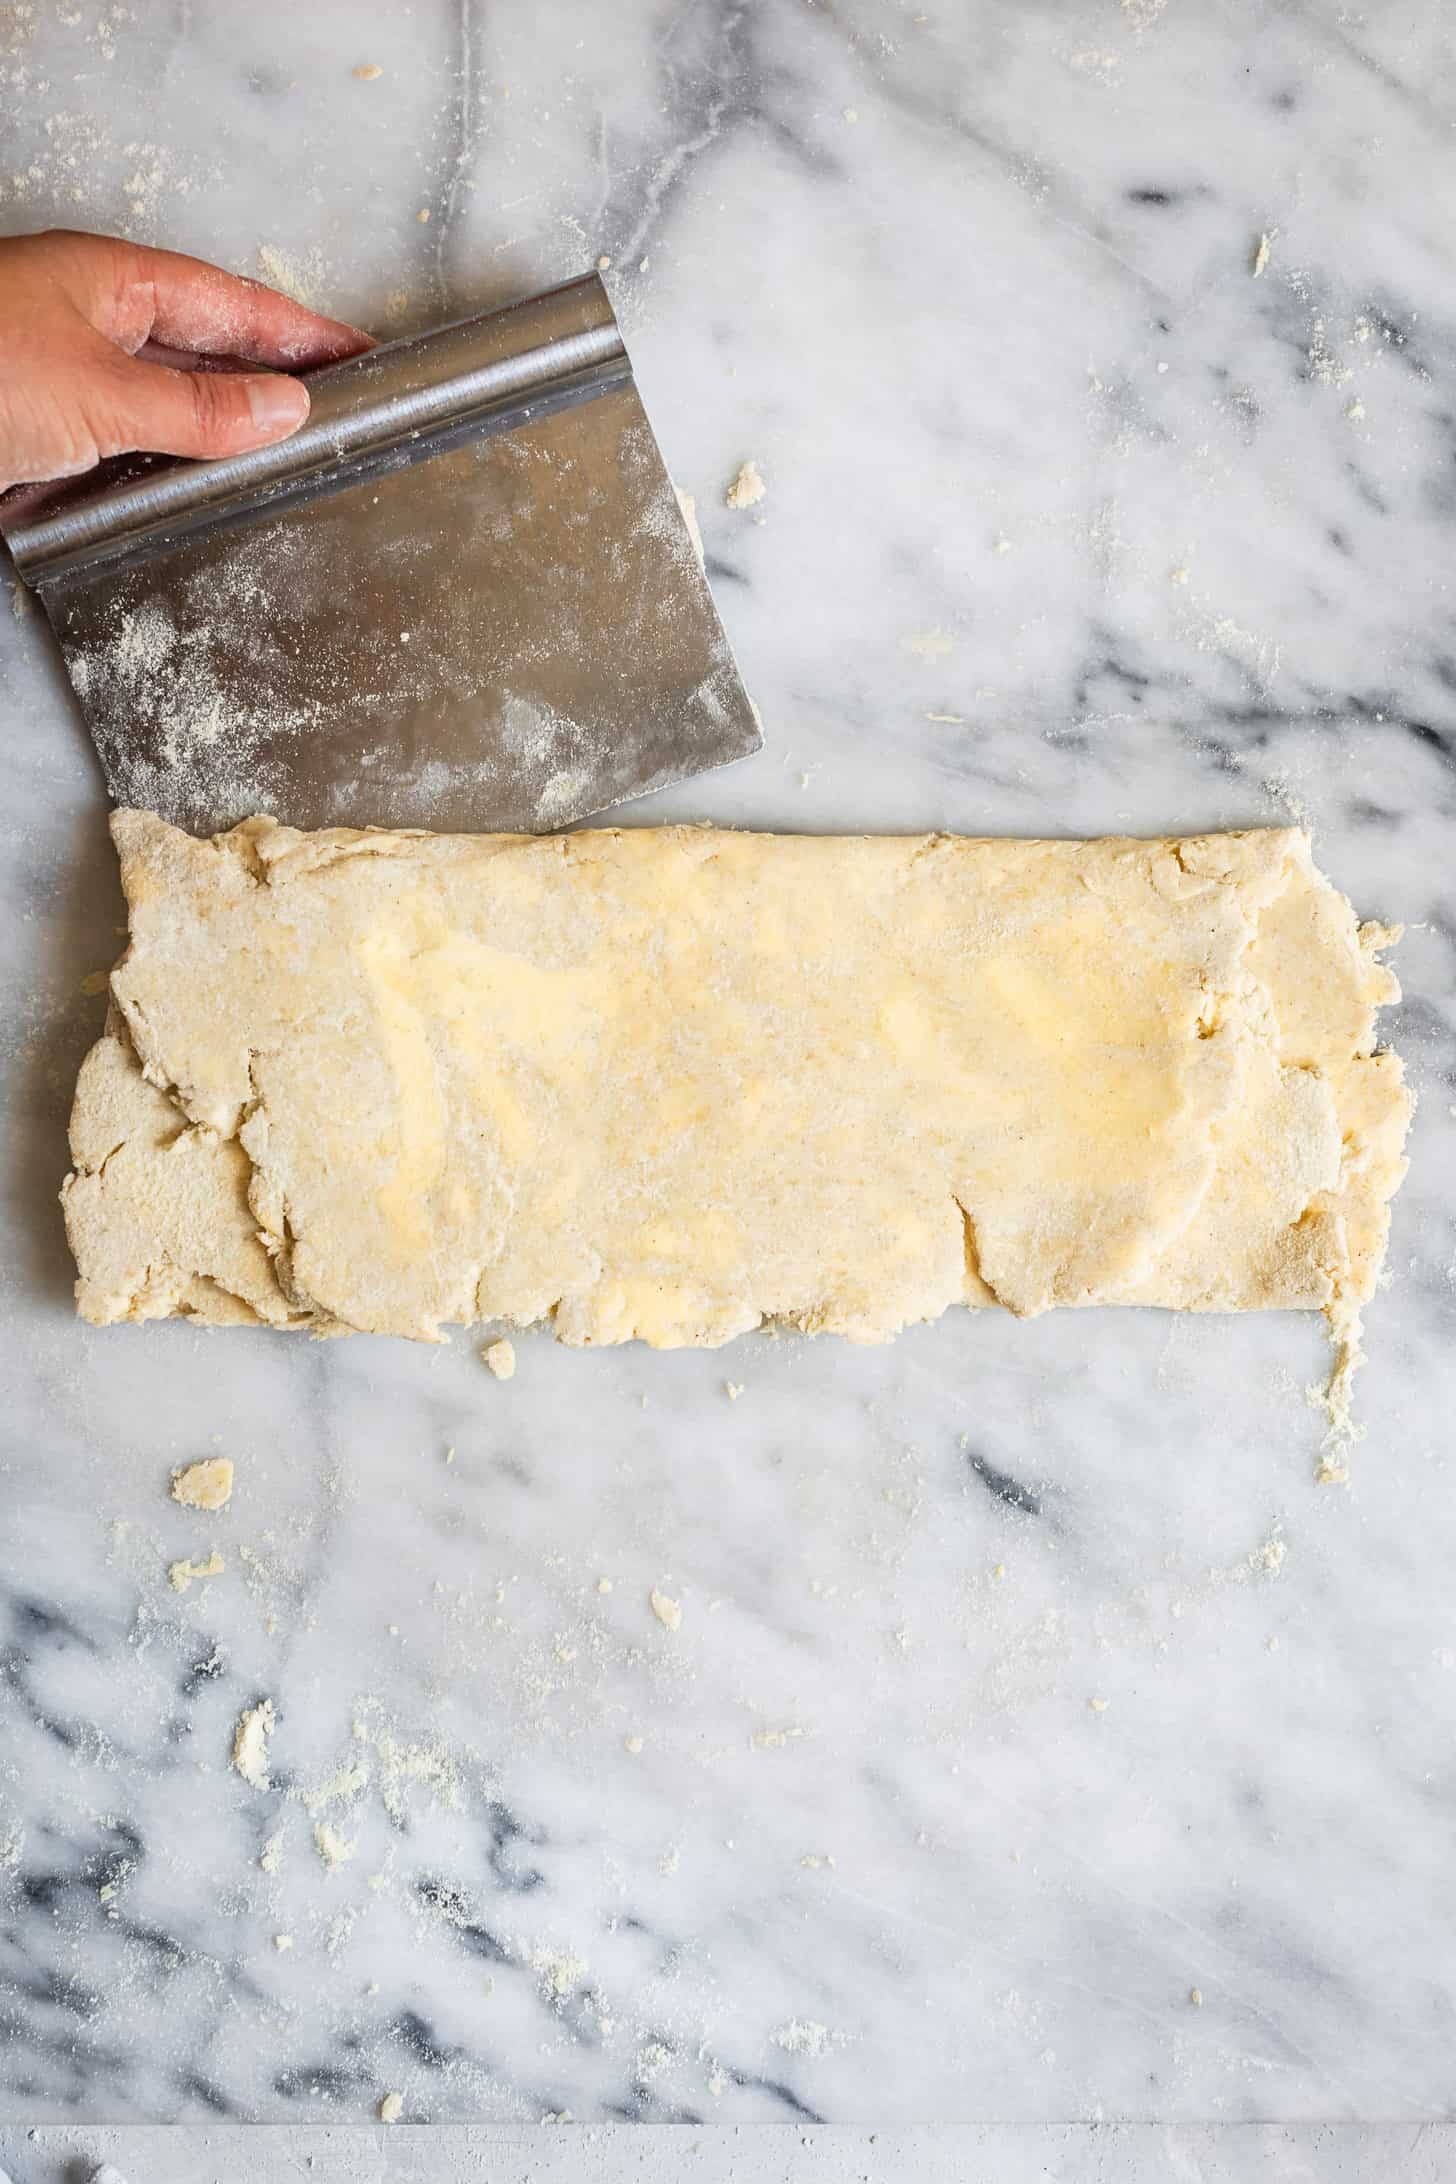
Repeat the tri-fold one more time in the other direction, this time folding ⅓ of the width of the dough over top.
Repeat by folding the remaining ⅓ of the width of dough over the top.
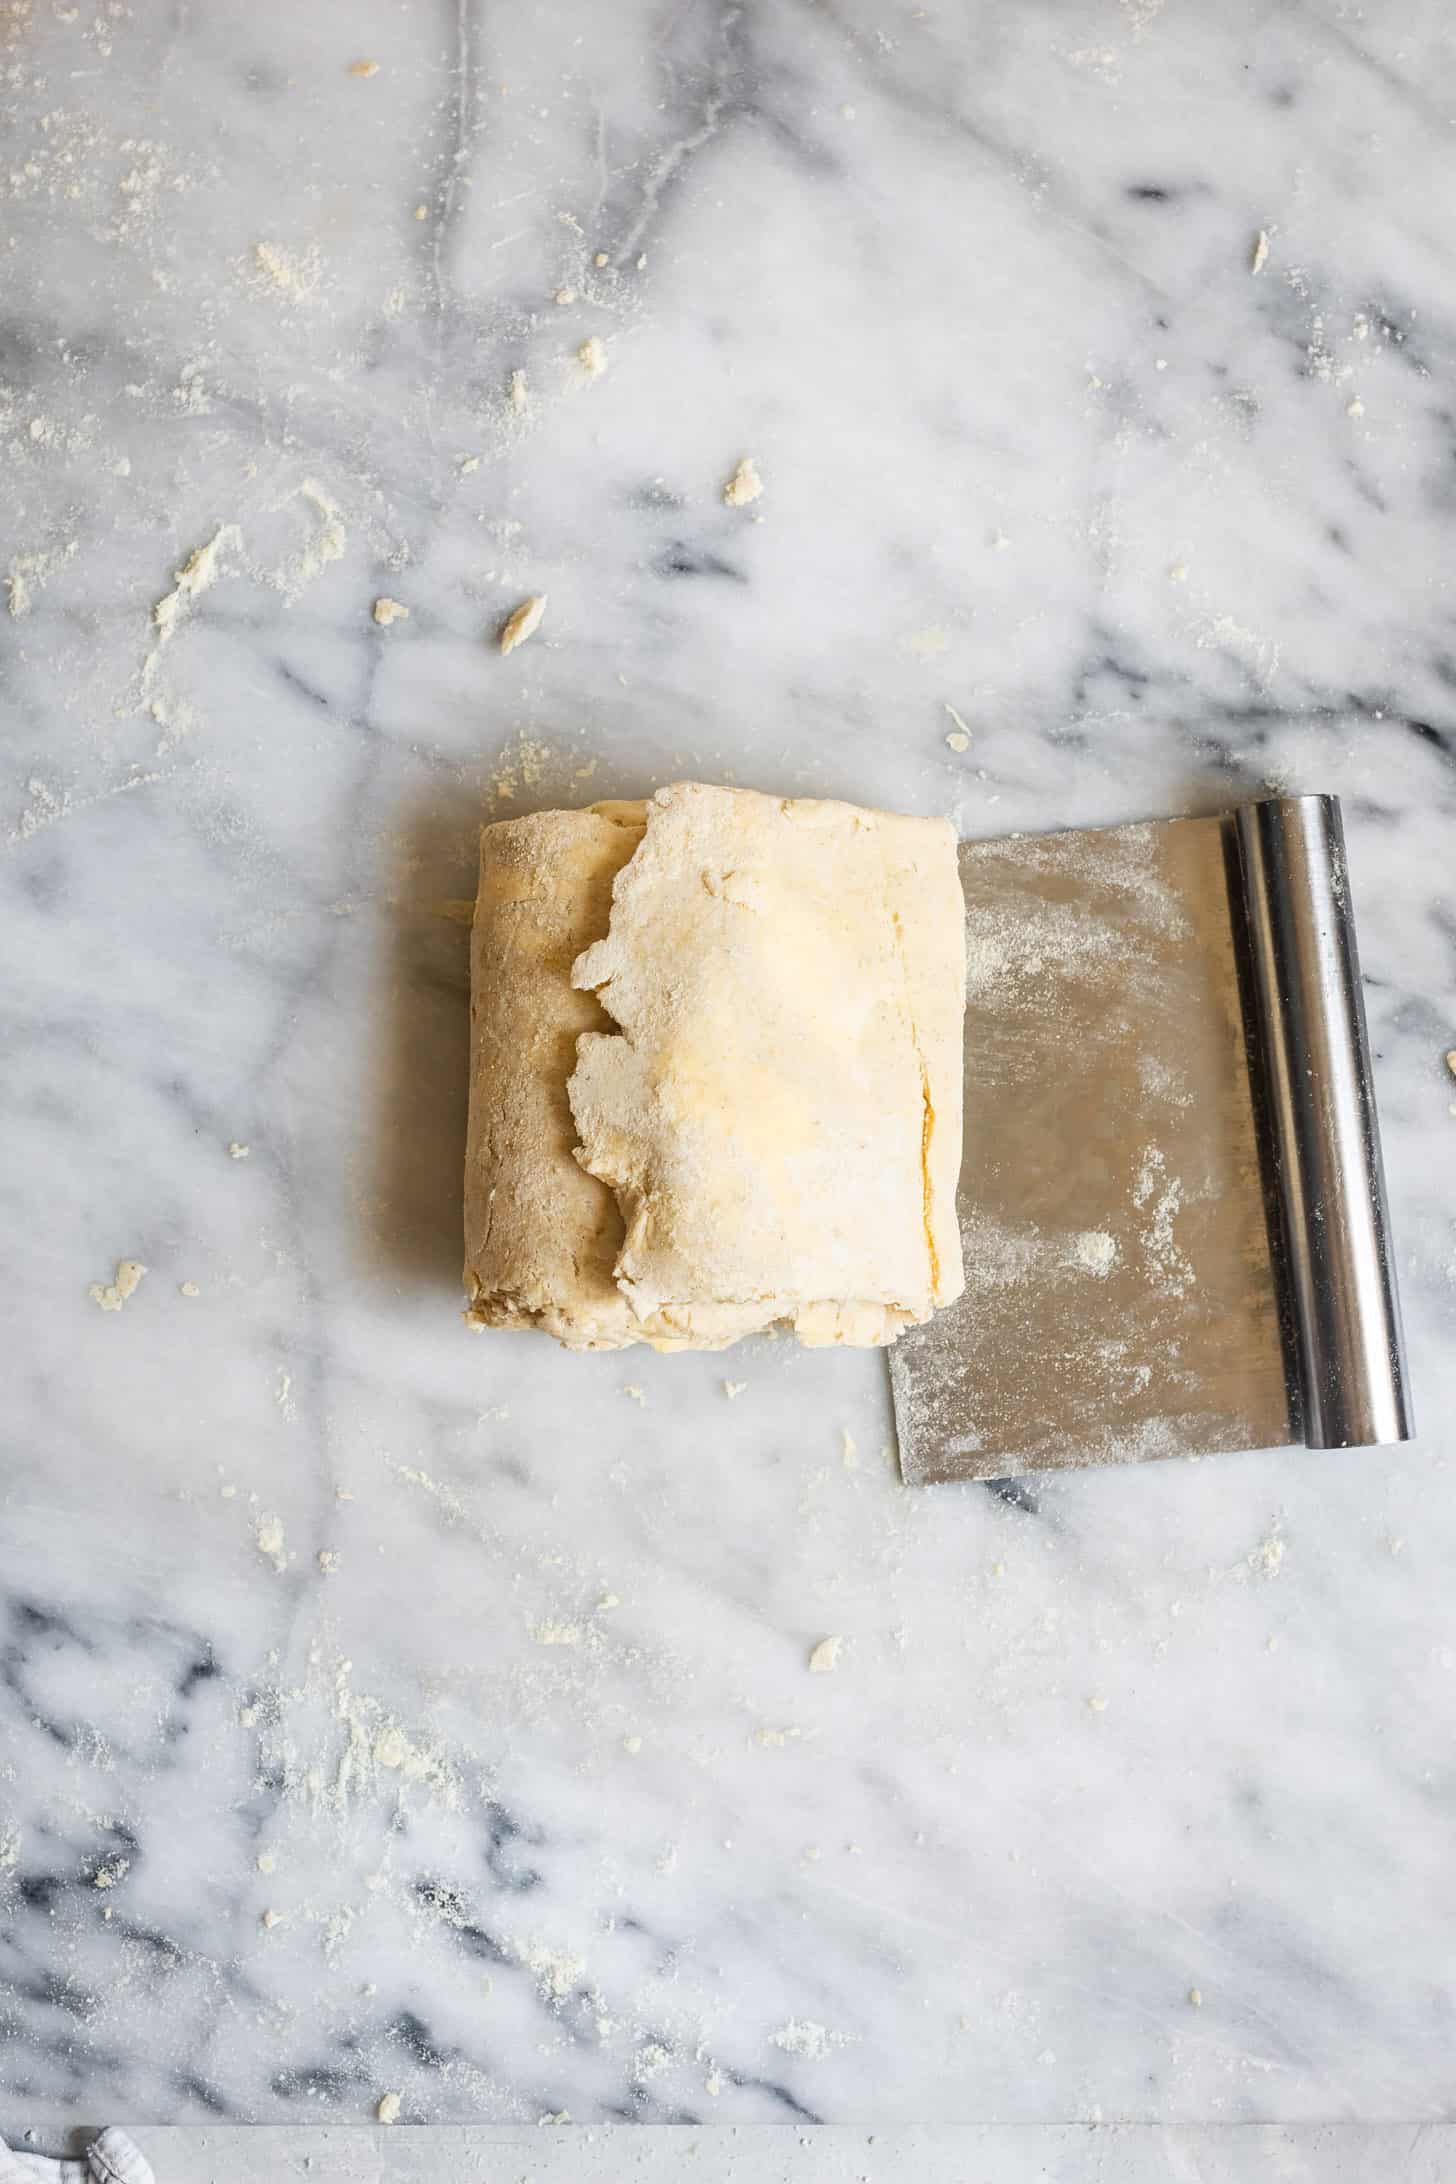
Dust the dough lightly with sorghum flour and roll it out again into another rectangle about ¼-inch thick. Repeat the whole double letter fold process you just did once more.
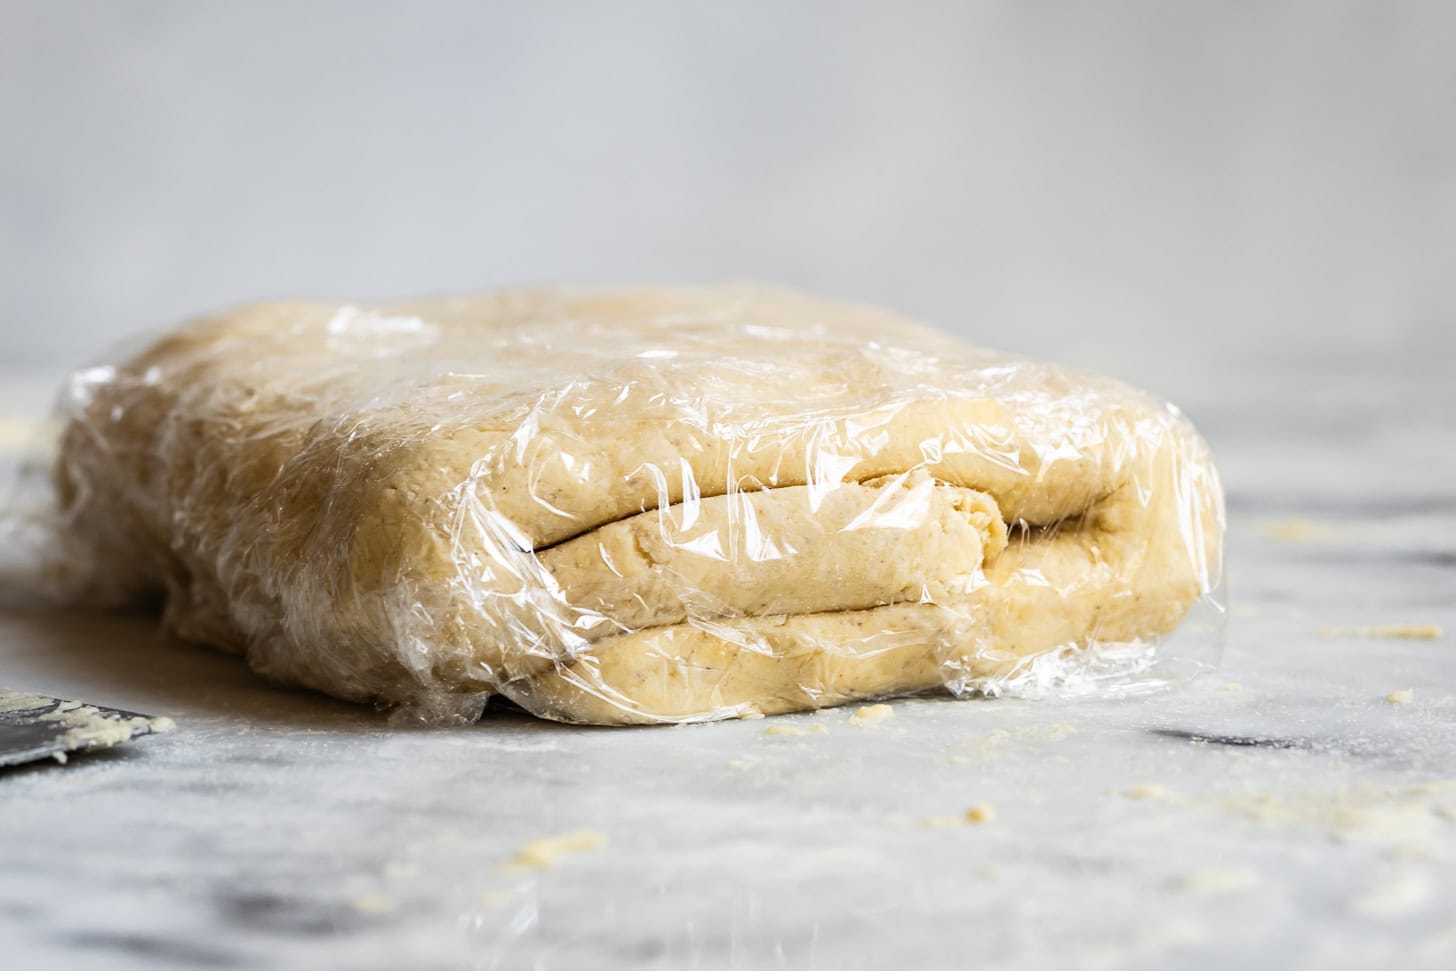
Wrap in plastic after the third complete double letter fold and chill for at least 30 minutes before rolling the dough out to use for your recipe.
When ready to use, roll the dough about ⅛-inch thick on a sheet of parchment paper dusted with sorghum flour and use as instructed in your recipe.
For the puff pastry bites shown here, roll the puff pastry ⅛-inch thick and cut into 2x4 inch rectangles. Chill while you preheat the oven to 425°F. Brush with an egg wash and optionally sprinkle with sugar, if desired. Bake for 10 minutes, then reduce heat to 375°F and bake for an additional 8-10 minutes until the tops are golden brown and crisp, rotating the pan halfway through to avoid any hot spots.
Storing and Freezing Homemade Puff Pastry
Once baked, puff pastry is best eaten the day it is made, but you can store it in an airtight container in the fridge and reheat it in the airfryer at 400°F for 4 minutes to bring back some of the crispiness.
You can easily store the puff pastry dough after you've finished rolling and folding. Wrap it tightly in plastic in the fridge for up to a week, or place it in a freezer bag for up to 6 months.
To use it from the fridge, let it sit out for 5 minutes to soften just enough that you can easily roll it out without it tearing. To use it from the freezer, let it thaw overnight in the fridge before using.

Cici -
This recipe works really well. I've tried other GF puff pastry recipes and they all had all sorts of issues (e.g. too gummy after baking). This one, however, turned out exactly what I expected puff would be. Definitely five stars!
Cora B -
I never thought I'd make puff pastry but it was surprisingly easy
HappyTiredMama -
Looooved these - worked with savory the night I made them, and fantastic with sweet the next day when I revitalized them