

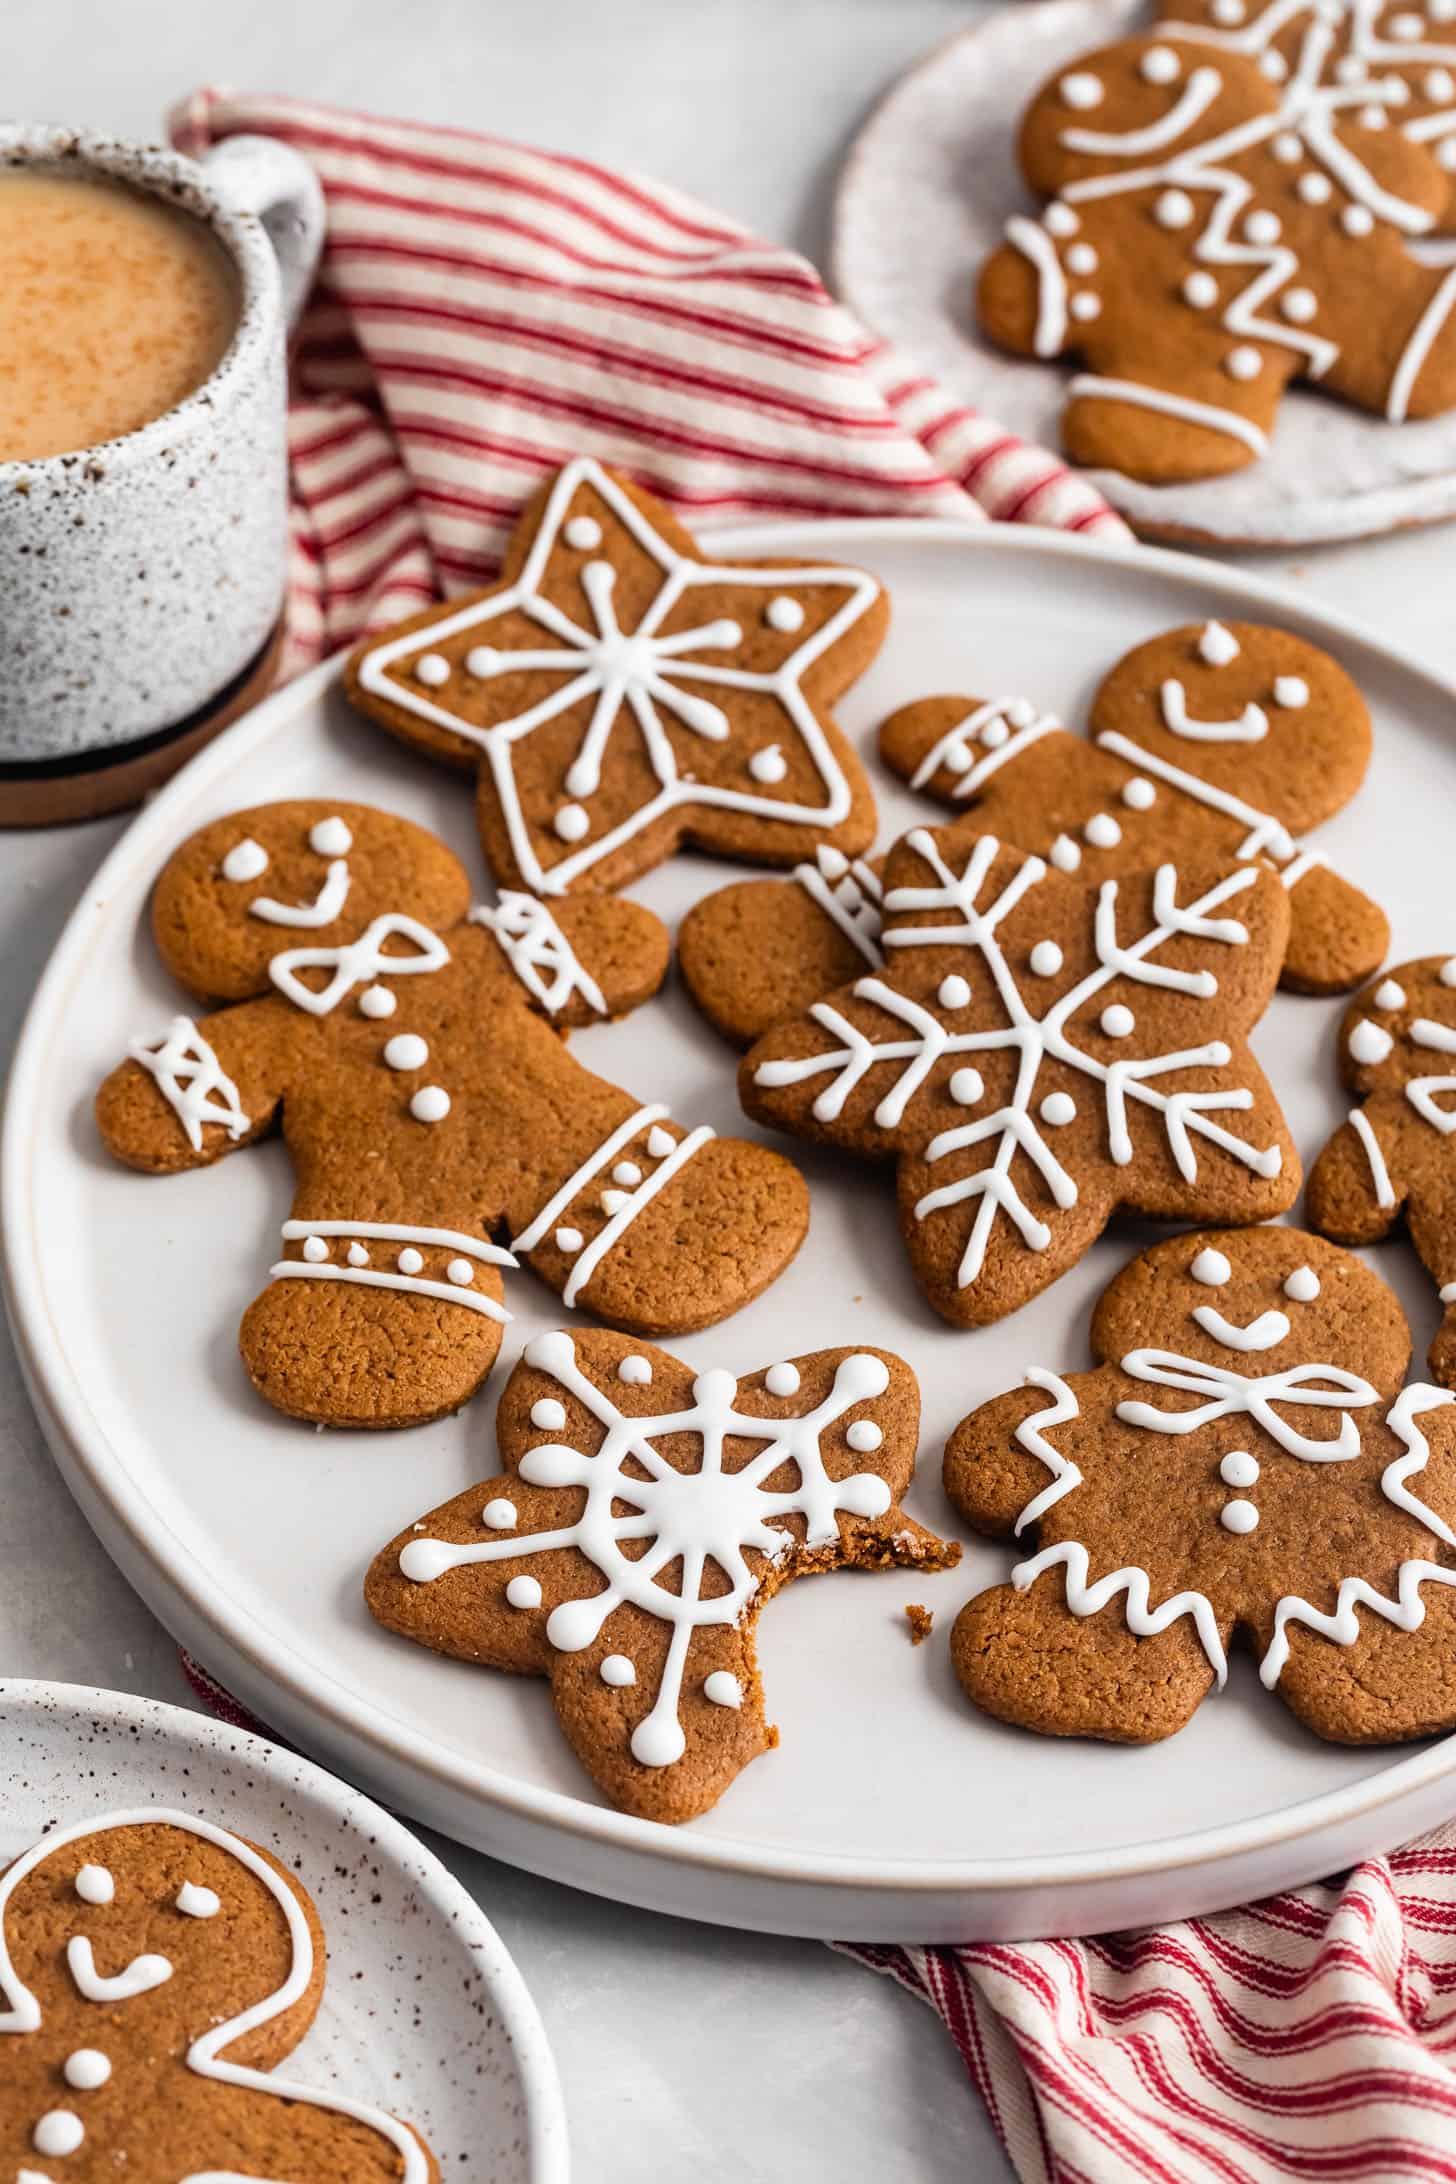
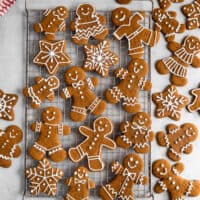
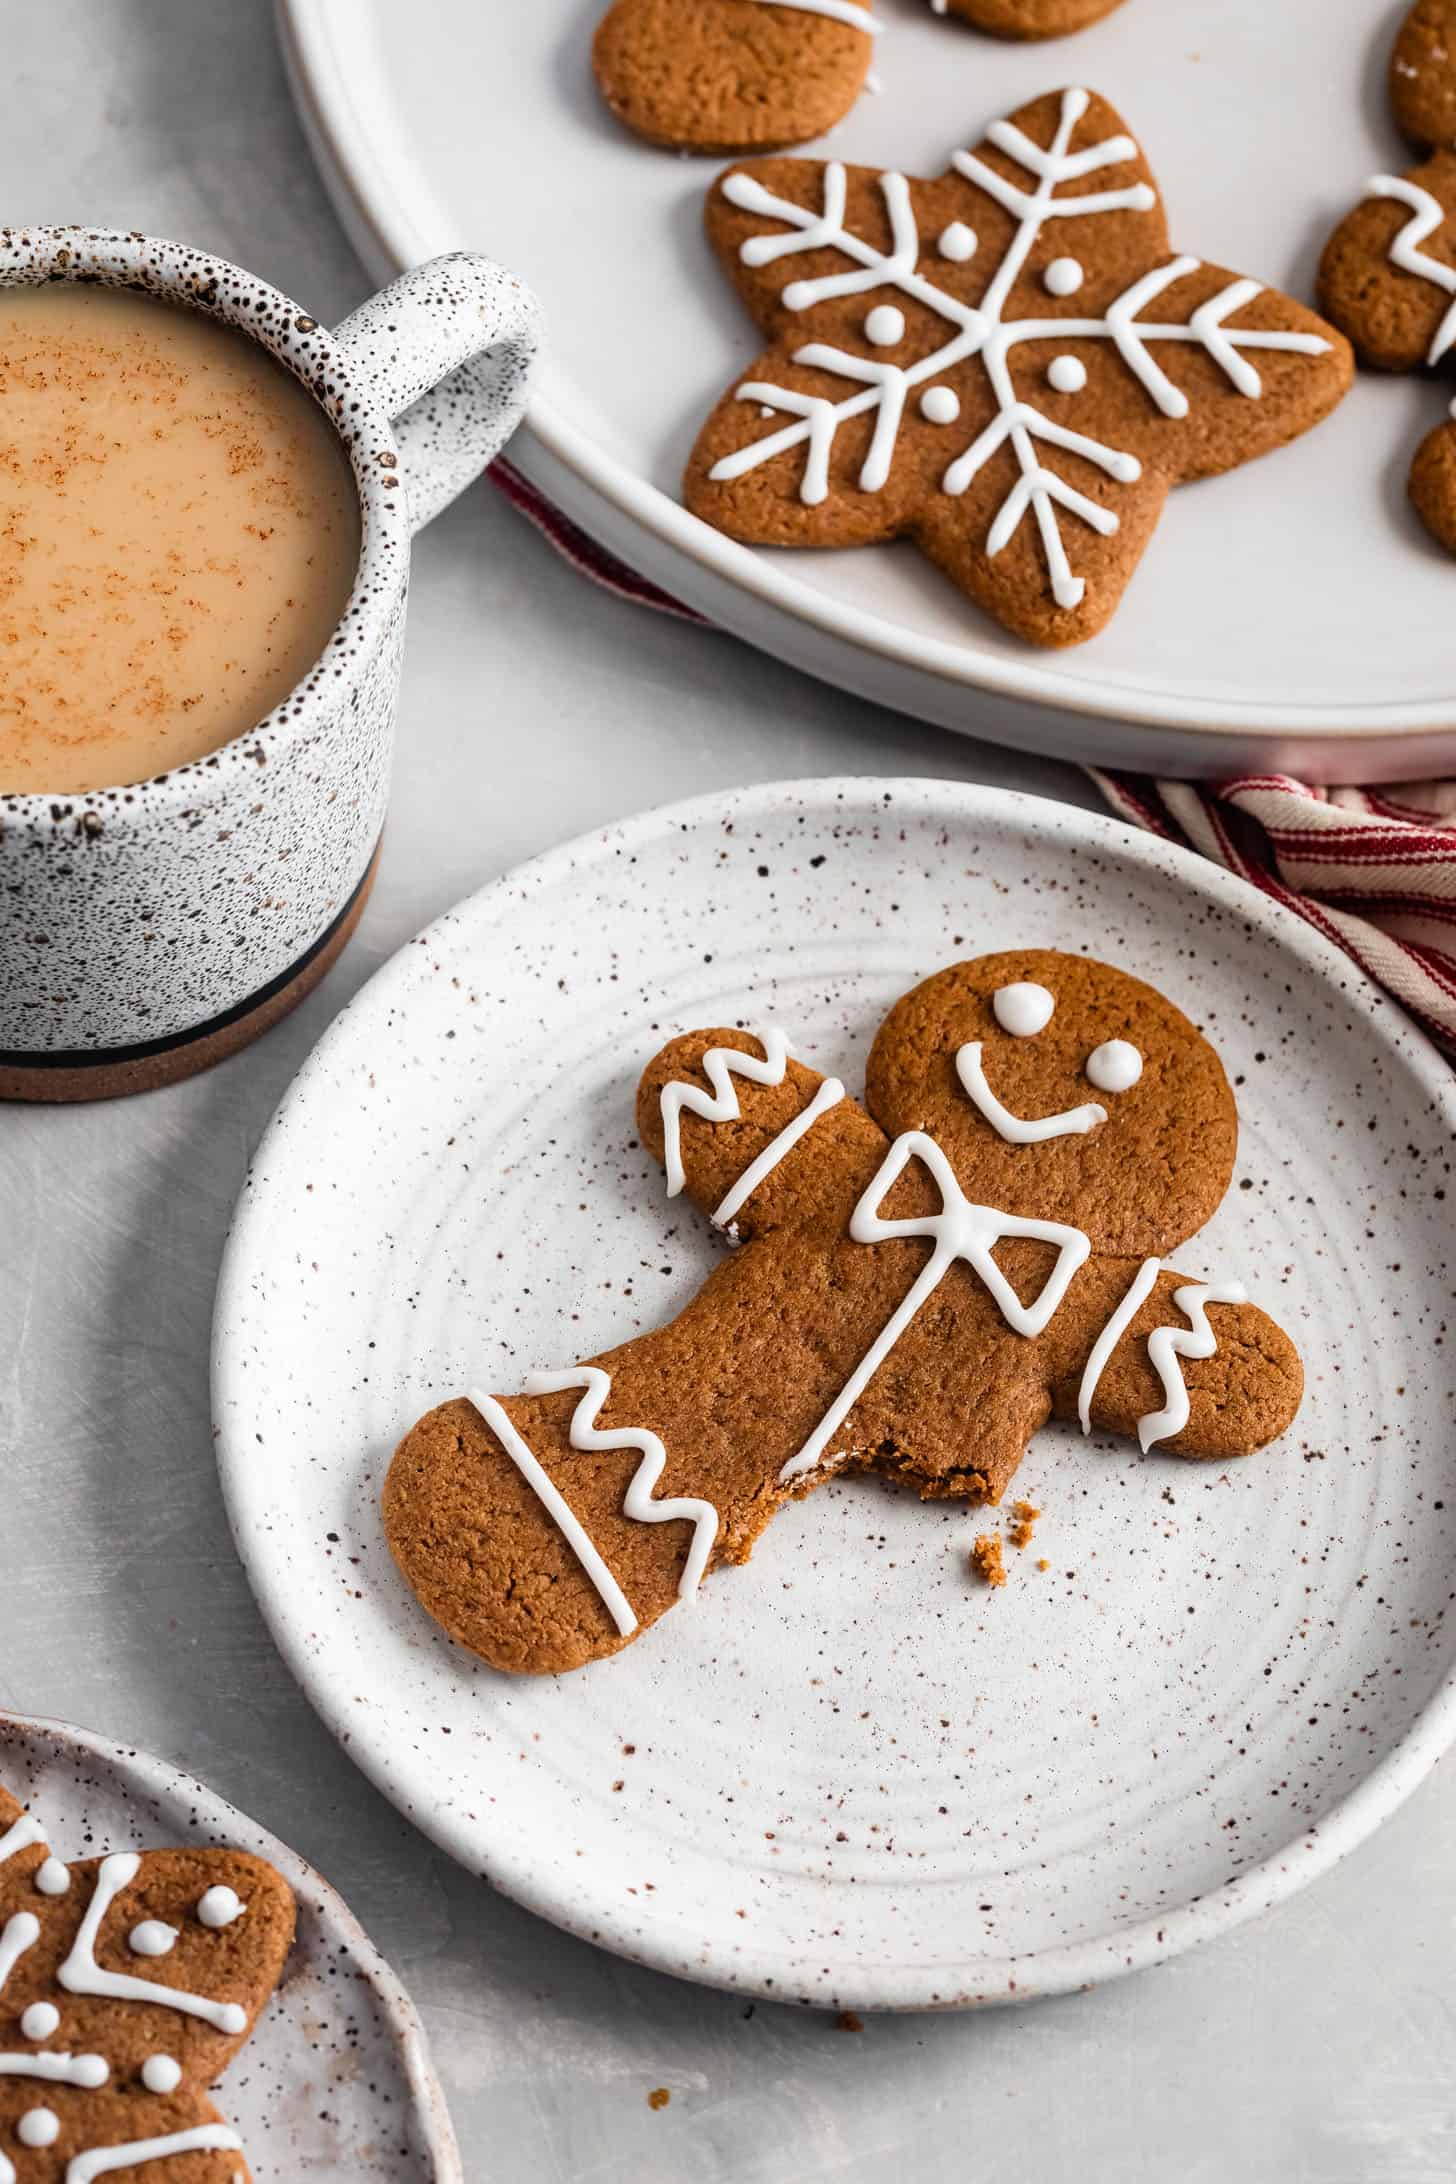
The perfect soft gluten-free gingerbread cookies with crisp edges and chewy centers. Filled with a balance of sweetness, gingerbread spices, and deep molasses flavor, these cookies are sure to become a classic staple of your Christmas cookie platter!
When it comes to cut-out gingerbread cookies, there's a strong debate over the ideal cookie texture. Some prefer crisp and snappy, while others prefer soft and chewy, and it seems like everyone firmly stands on one side of the divide or the other. I've been on a mission to unlock the perfect soft and chewy gluten-free gingerbread cookie for years. This recipe is just that. But, bake them a few minutes longer, and they'll satisfy even the snappiest of gingerbread lovers.
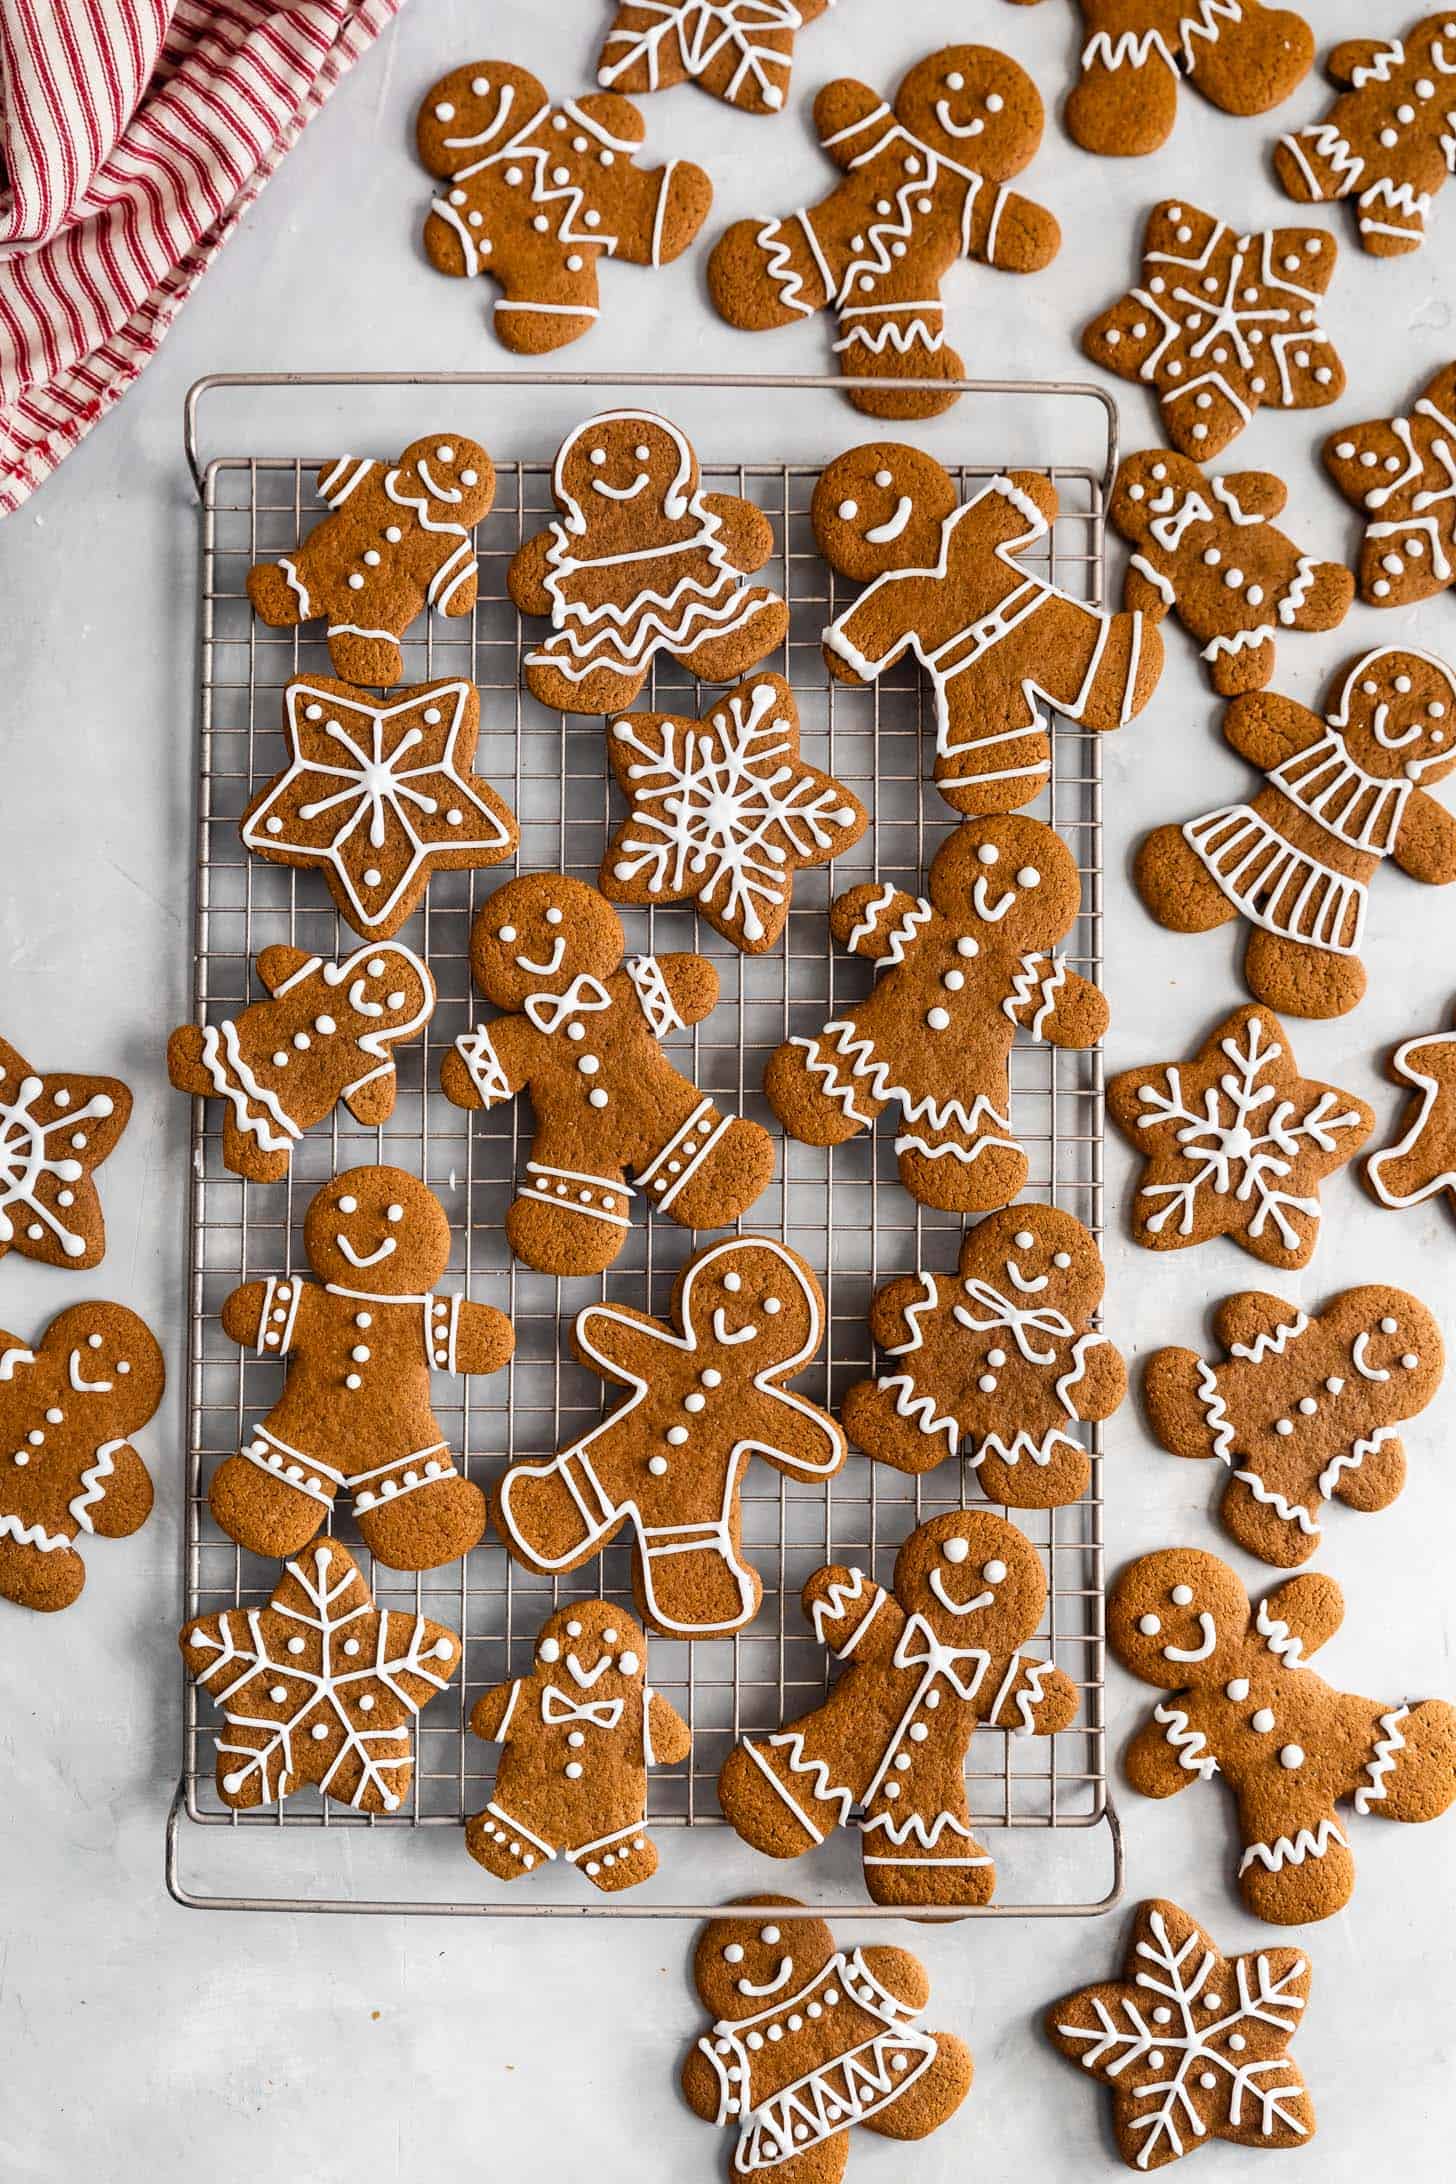
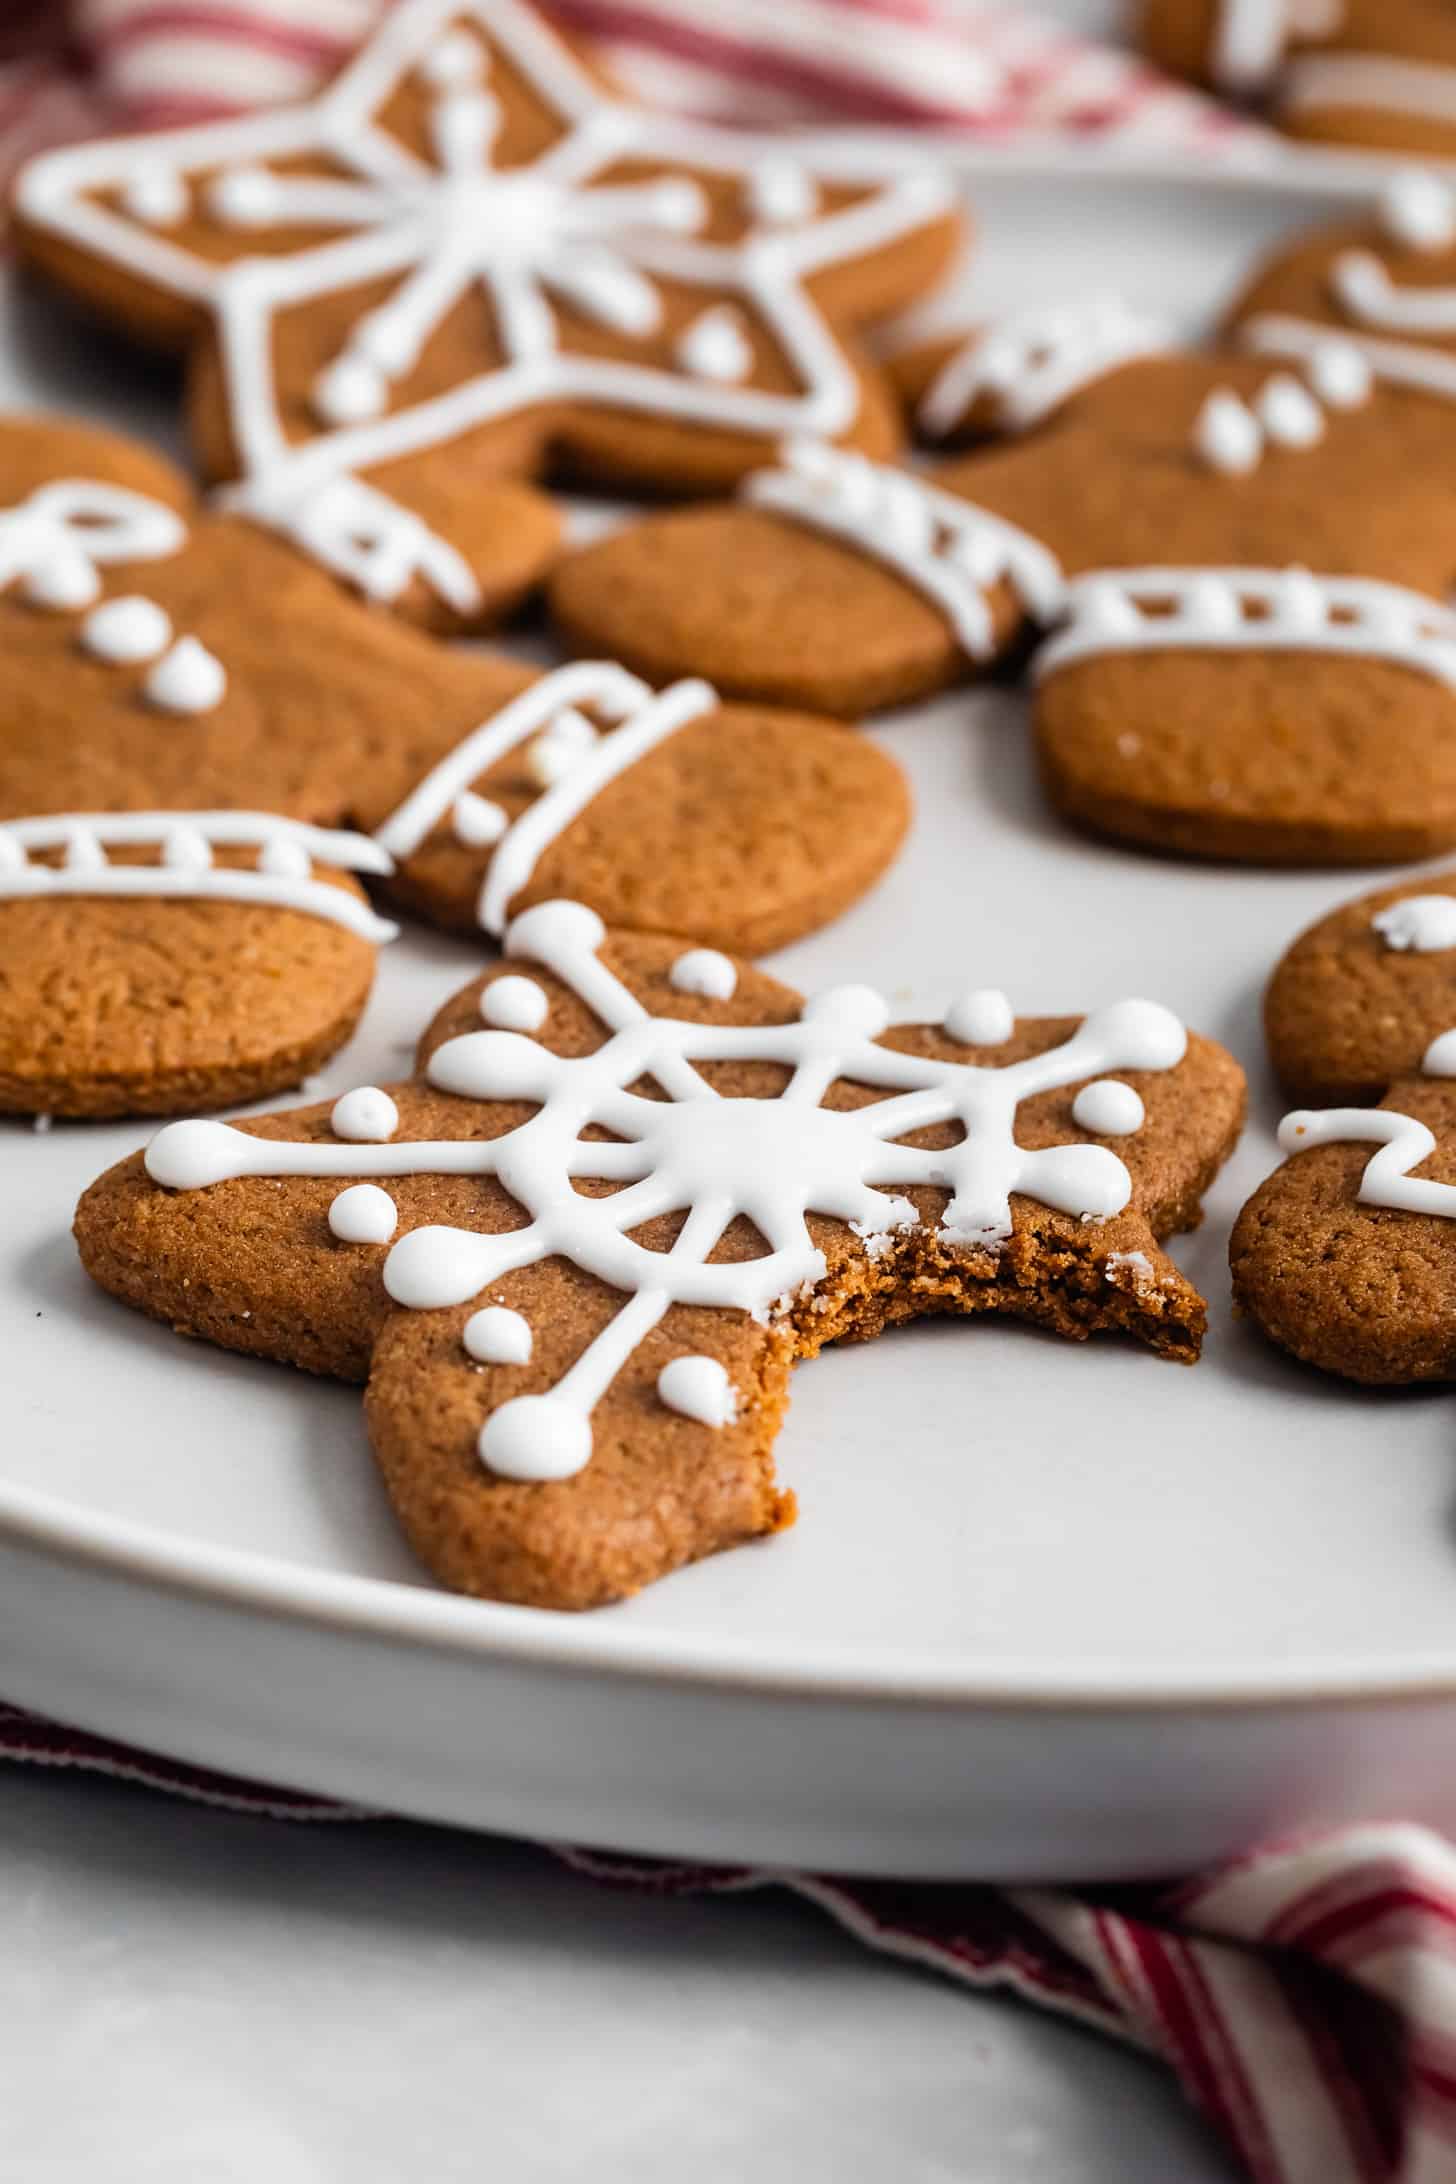
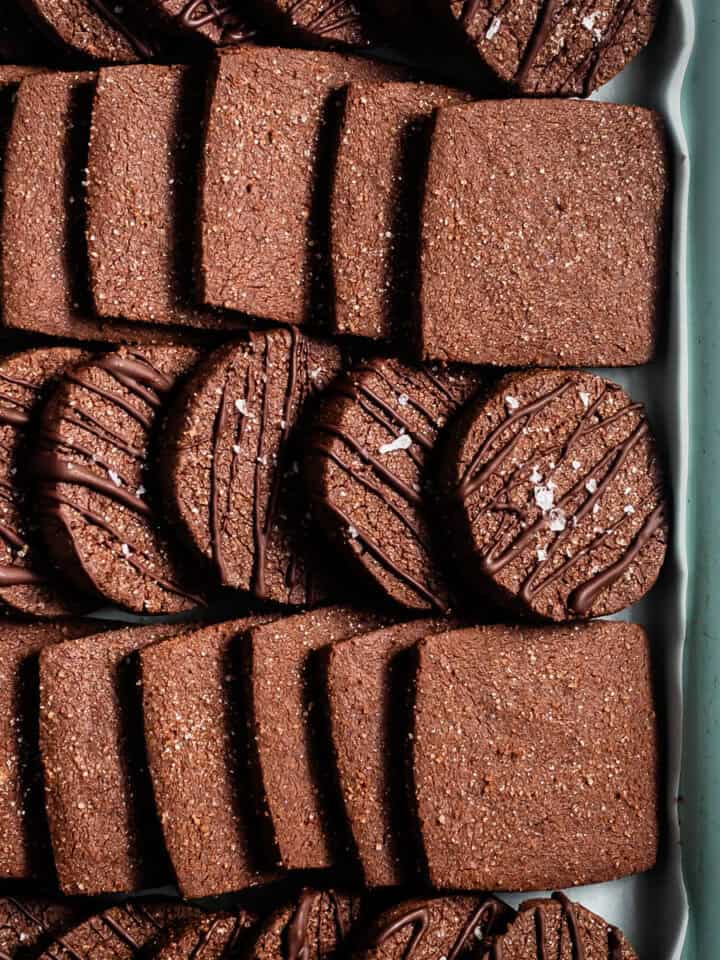
These gluten-free gingerbread cookies are soft and sturdy with crisp edges, without being neither cakey nor dry. Each bite is chewy and moist, with a perfect balance between molasses and gingerbread spices.
Tips for Cutting out the Best Gluten-free Gingerbread Man Cookies
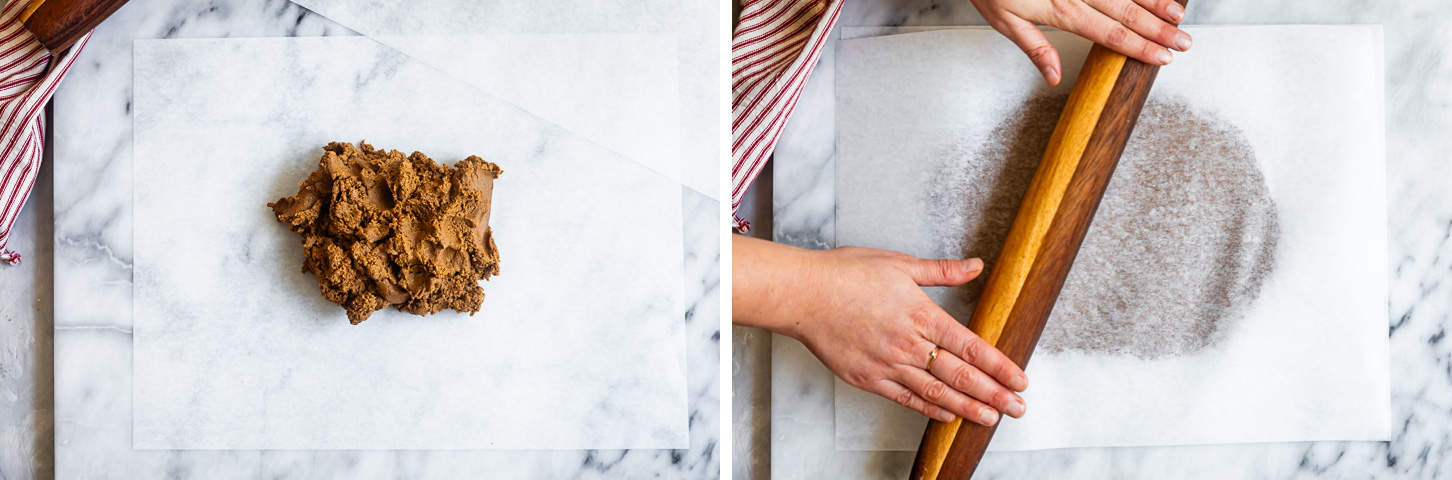
- Quick chill each half of the dough: Rather than chilling the entire dough in a disc for 3+ hours, split the dough in half and roll each half until ⅛ to ¼-inch thick between two sheets of parchment paper. Chill both sheets stacked flat on a baking sheet in the freezer for just 15 minutes.
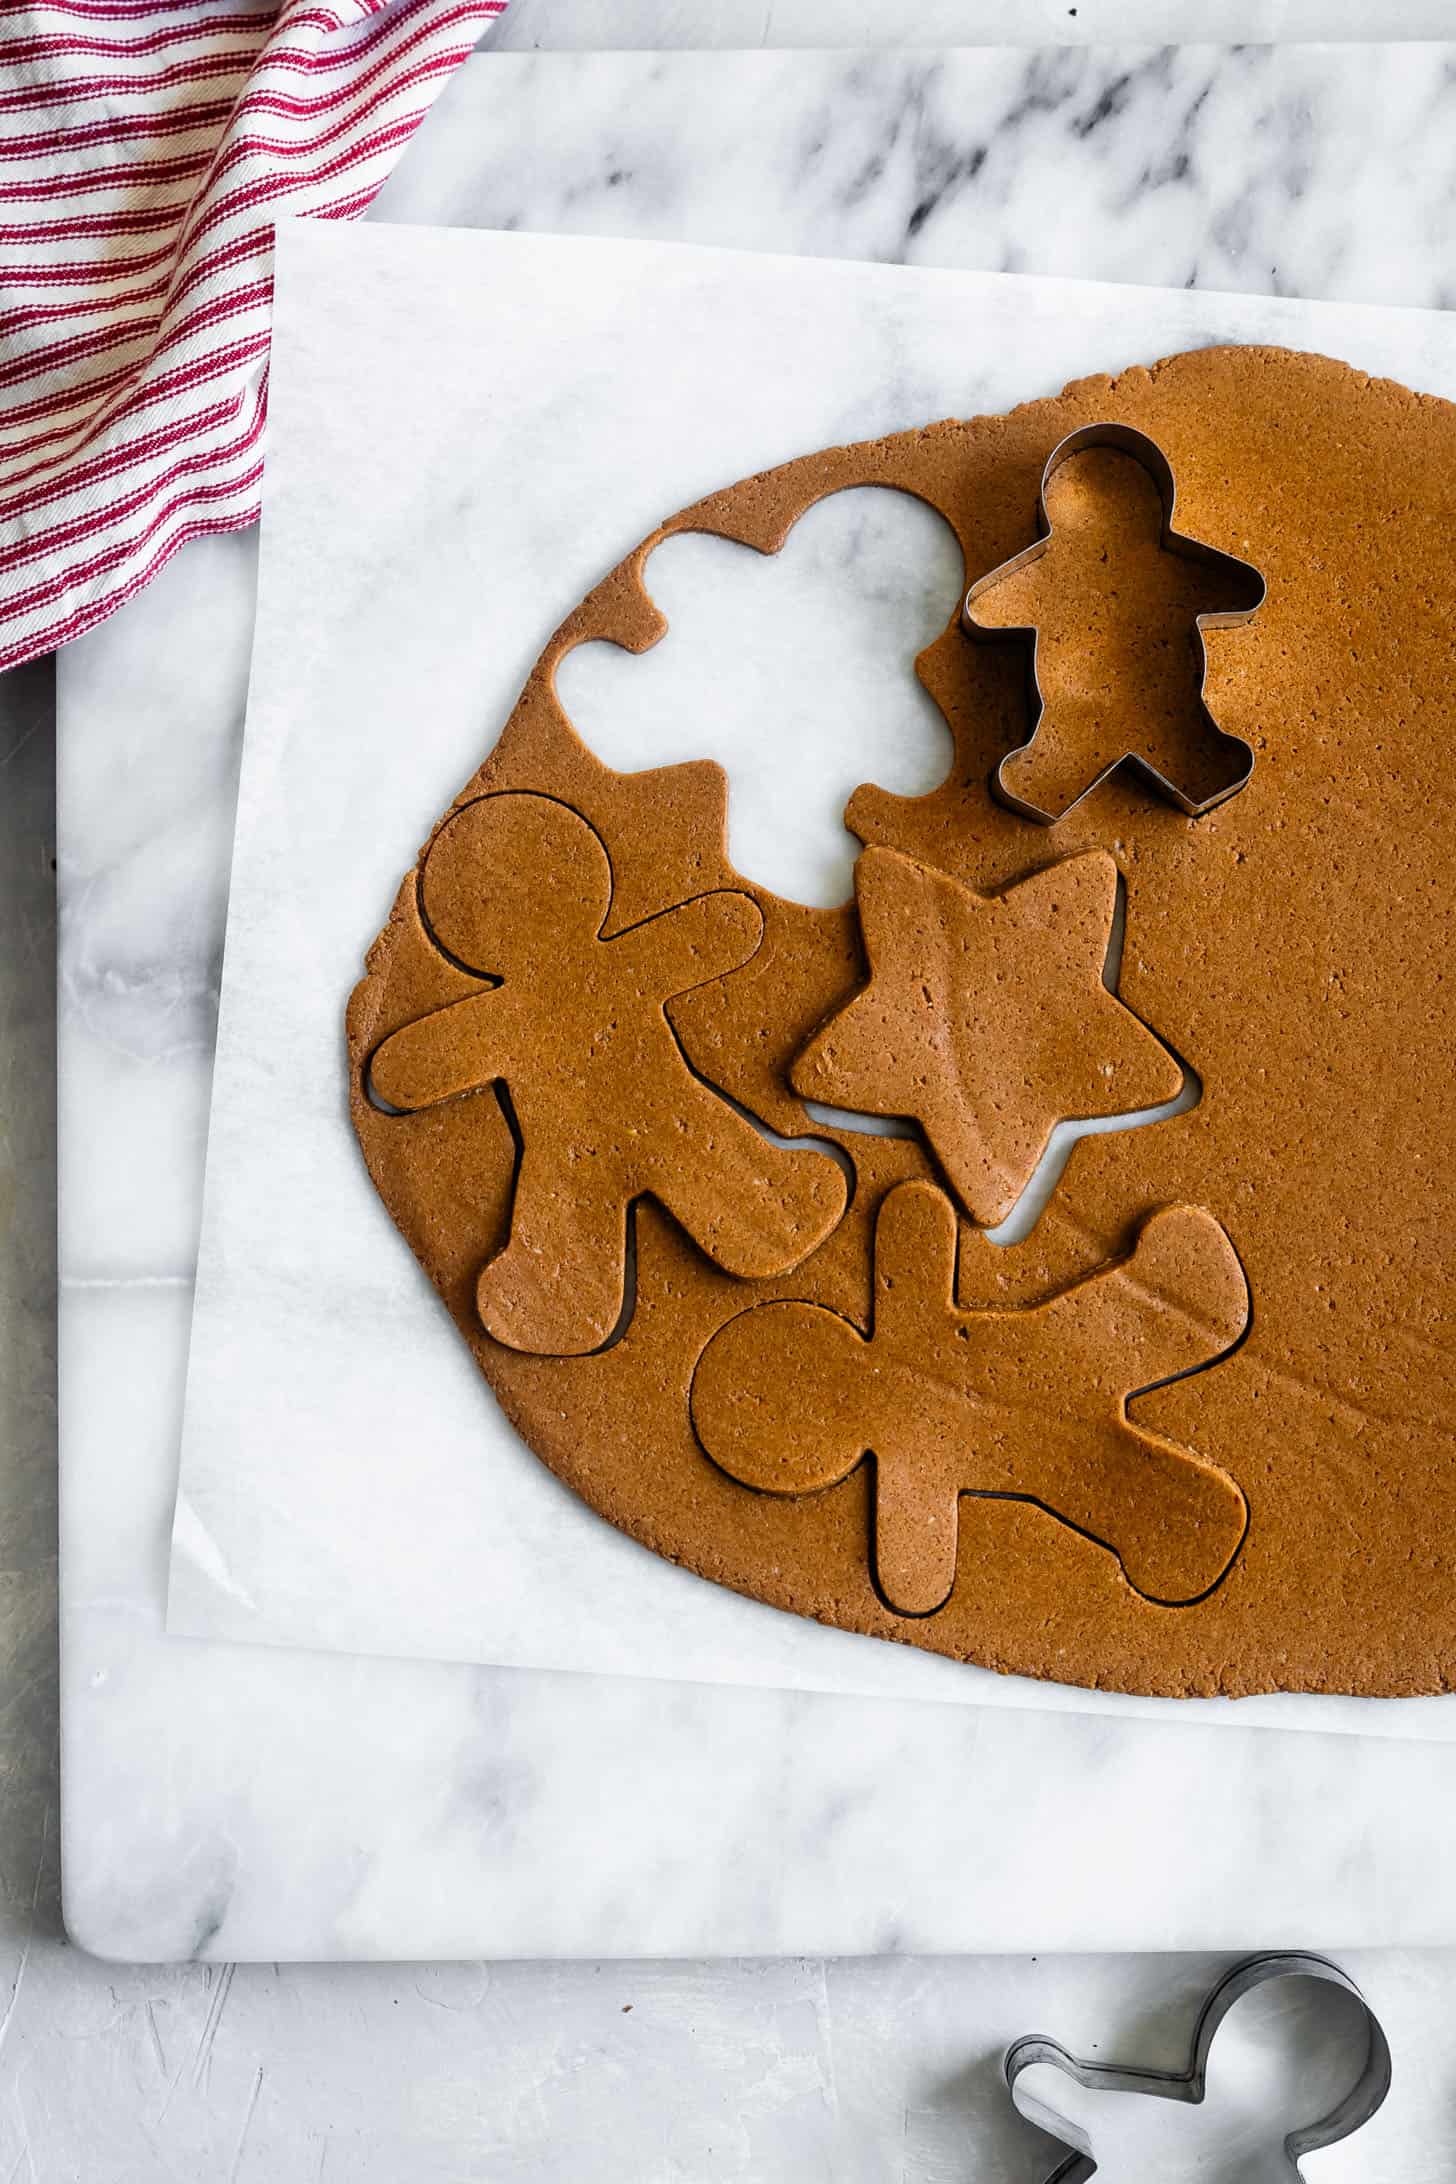
- Peel off parchment paper from both sides: First peel off one sheet of parchment paper, leaving it on top of the dough, then flip it over and peel off the other half. You'll end up with a sheet of parchment paper underneath the dough, but it has been peeled away so it is not sticking to the frozen dough. This will make it a breeze to transfer the cut cookies to a baking sheet.
- Cut one sheet at a time and place them close together on a baking sheet: Place the cut cookies all on one baking sheet, close together (note: a cutting board works well for this too, if you're short on baking sheets!). Reroll any scraps between the sheets of parchment paper and repeat, pausing only if you need to re-chill the rolled-out dough because it gets too soft. Chill the entire sheet of cut cookies in the freezer for 15 minutes.
- While the first cut cookies chill, repeat above by cutting the second half.
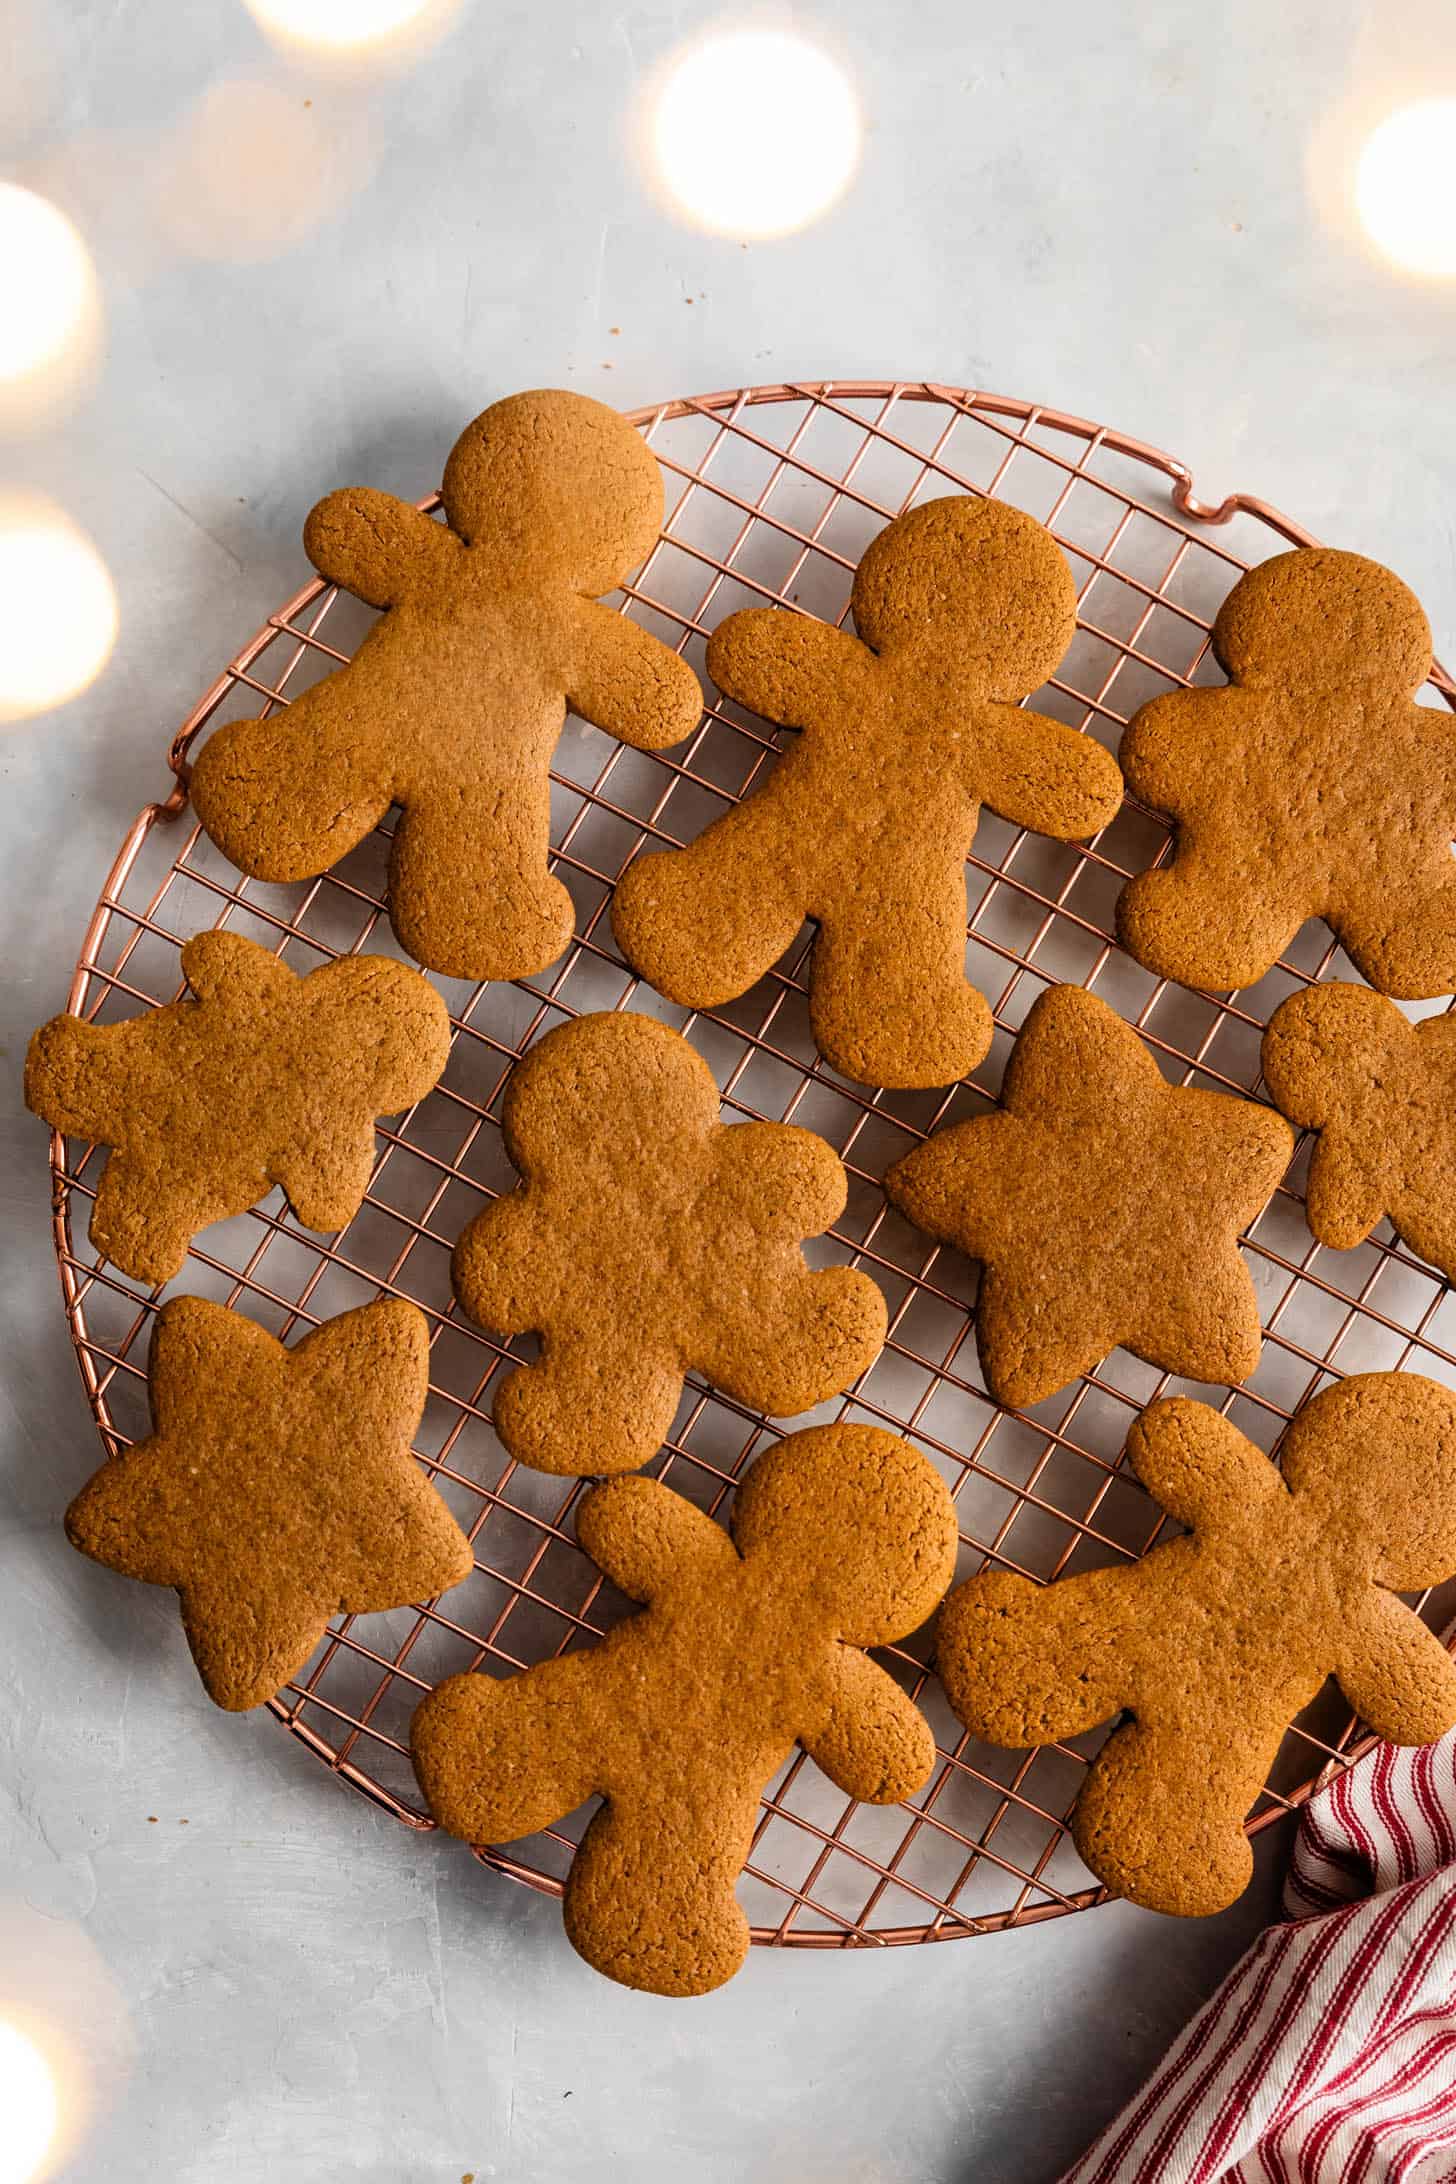
- While the second batch of cut cookies chill, begin baking the first batch. Working in batches, transfer the frozen cookies, by size, to a parchment-lined baking sheet 1.5 inches apart and bake for 5-7 minutes. Note: Smaller shapes take less time to bake, so separating by size will keep the little ones from getting too crispy while the larger shapes bake through. Repeat until all the cookies are baked!
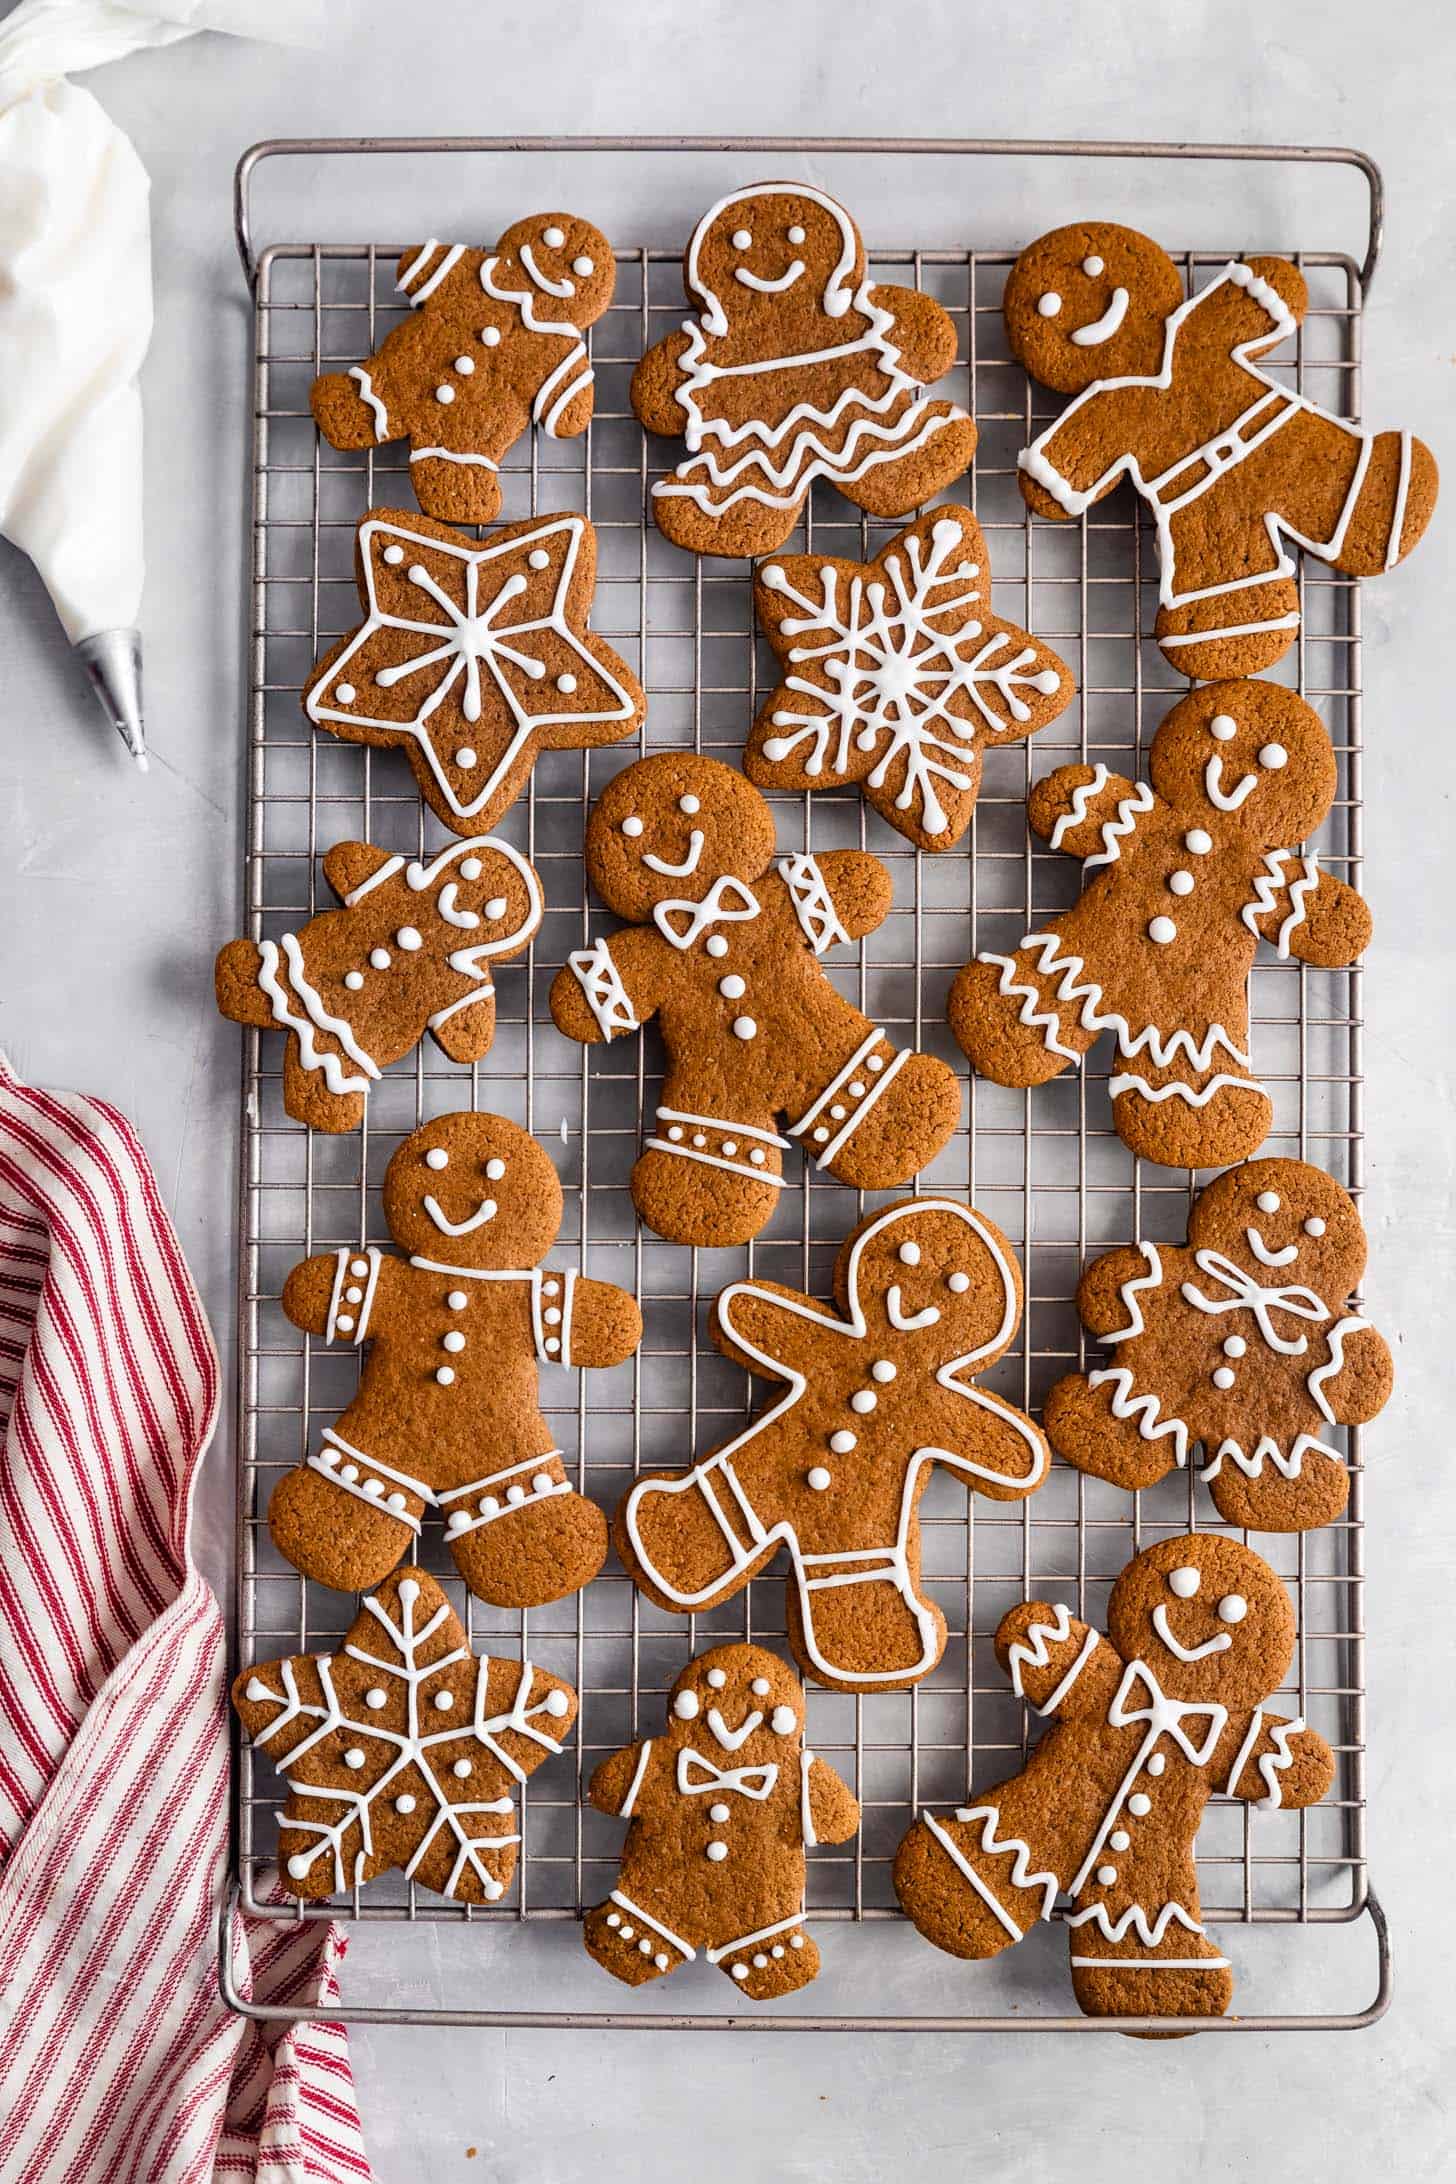
Icing for Gingerbread Cookies
This powdered sugar icing is my go-to for cut cookies, as I don't have to mess with egg whites or meringue powder as with royal icing. To get an icing that hardens and glistens, the trick is just a bit of corn syrup, honey, or brown rice syrup. Mix sifted powdered sugar, milk, corn syrup, vanilla, and a pinch of salt until smooth.
For pipable designs, as seen here, the icing should be very thick, but still able to be piped. When you lift the whisk up and drizzle icing back into the bowl, the stream should just barely sit on top, before every so slowly incorporating back in.
The icing will firm up in about 10-15 minutes, making the cookies stackable without messing with your beautiful artwork!
Recipe
Soft & Chewy Gluten-Free Gingerbread Cookies
Ingredients
- 224 g (2 cups) Super-fine blanched almond flour
- 209 g (1¾ cups + 3 tablespoons) Bob's Red Mill gluten-free oat flour
- 170 g (1 cup + 1 tablespoon) sweet rice flour, also called mochiko; do not substitute white or brown rice flour
- 1 teaspoon baking soda
- ½ teaspoon kosher salt
- 1 tablespoon ground ginger
- 1 tablespoon ground cinnamon
- ½ teaspoon ground allspice
- ¼ teaspoon ground cloves
- ¼ teaspoon nutmeg
- 10 tablespoons (145 g) unsalted butter, softened to room temperature
- ¾ cup (150 g) packed dark brown sugar, preferably organic
- ½ cup (150 g) unsulphured molasses
- 1 large egg, room temperature
- 1 teaspoon pure vanilla extract
- 1½ cups (173 g) powdered sugar, sifted
- 1½ - 2 tablespoons milk
- 1 teaspoon light corn syrup, honey, or brown rice syrup , optional, but it will ensure the icing sets up firm
- Pinch kosher salt
INSTRUCTIONS
- In a medium bowl, sift together the almond flour, oat flour, sweet rice flour, baking soda, salt, and spices. Set aside.
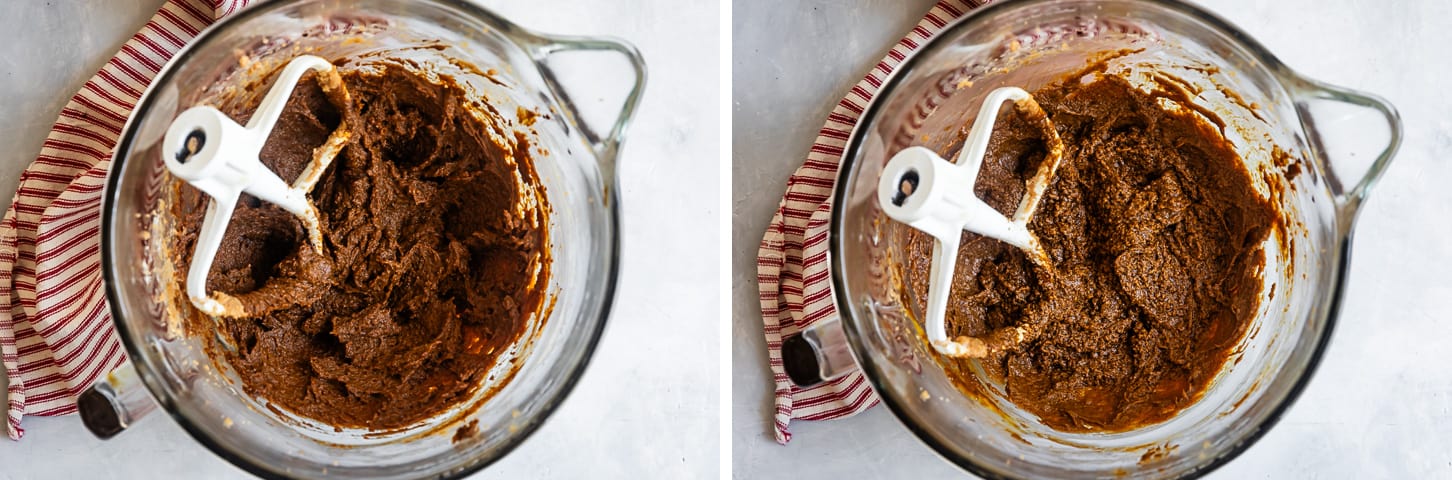
- In the bowl of a stand mixer fitted with the paddle attachment or a large mixing bowl with a hand mixer, cream the butter and dark brown sugar until fluffy and light in color, 2-3 minutes, scraping down the sides as needed.
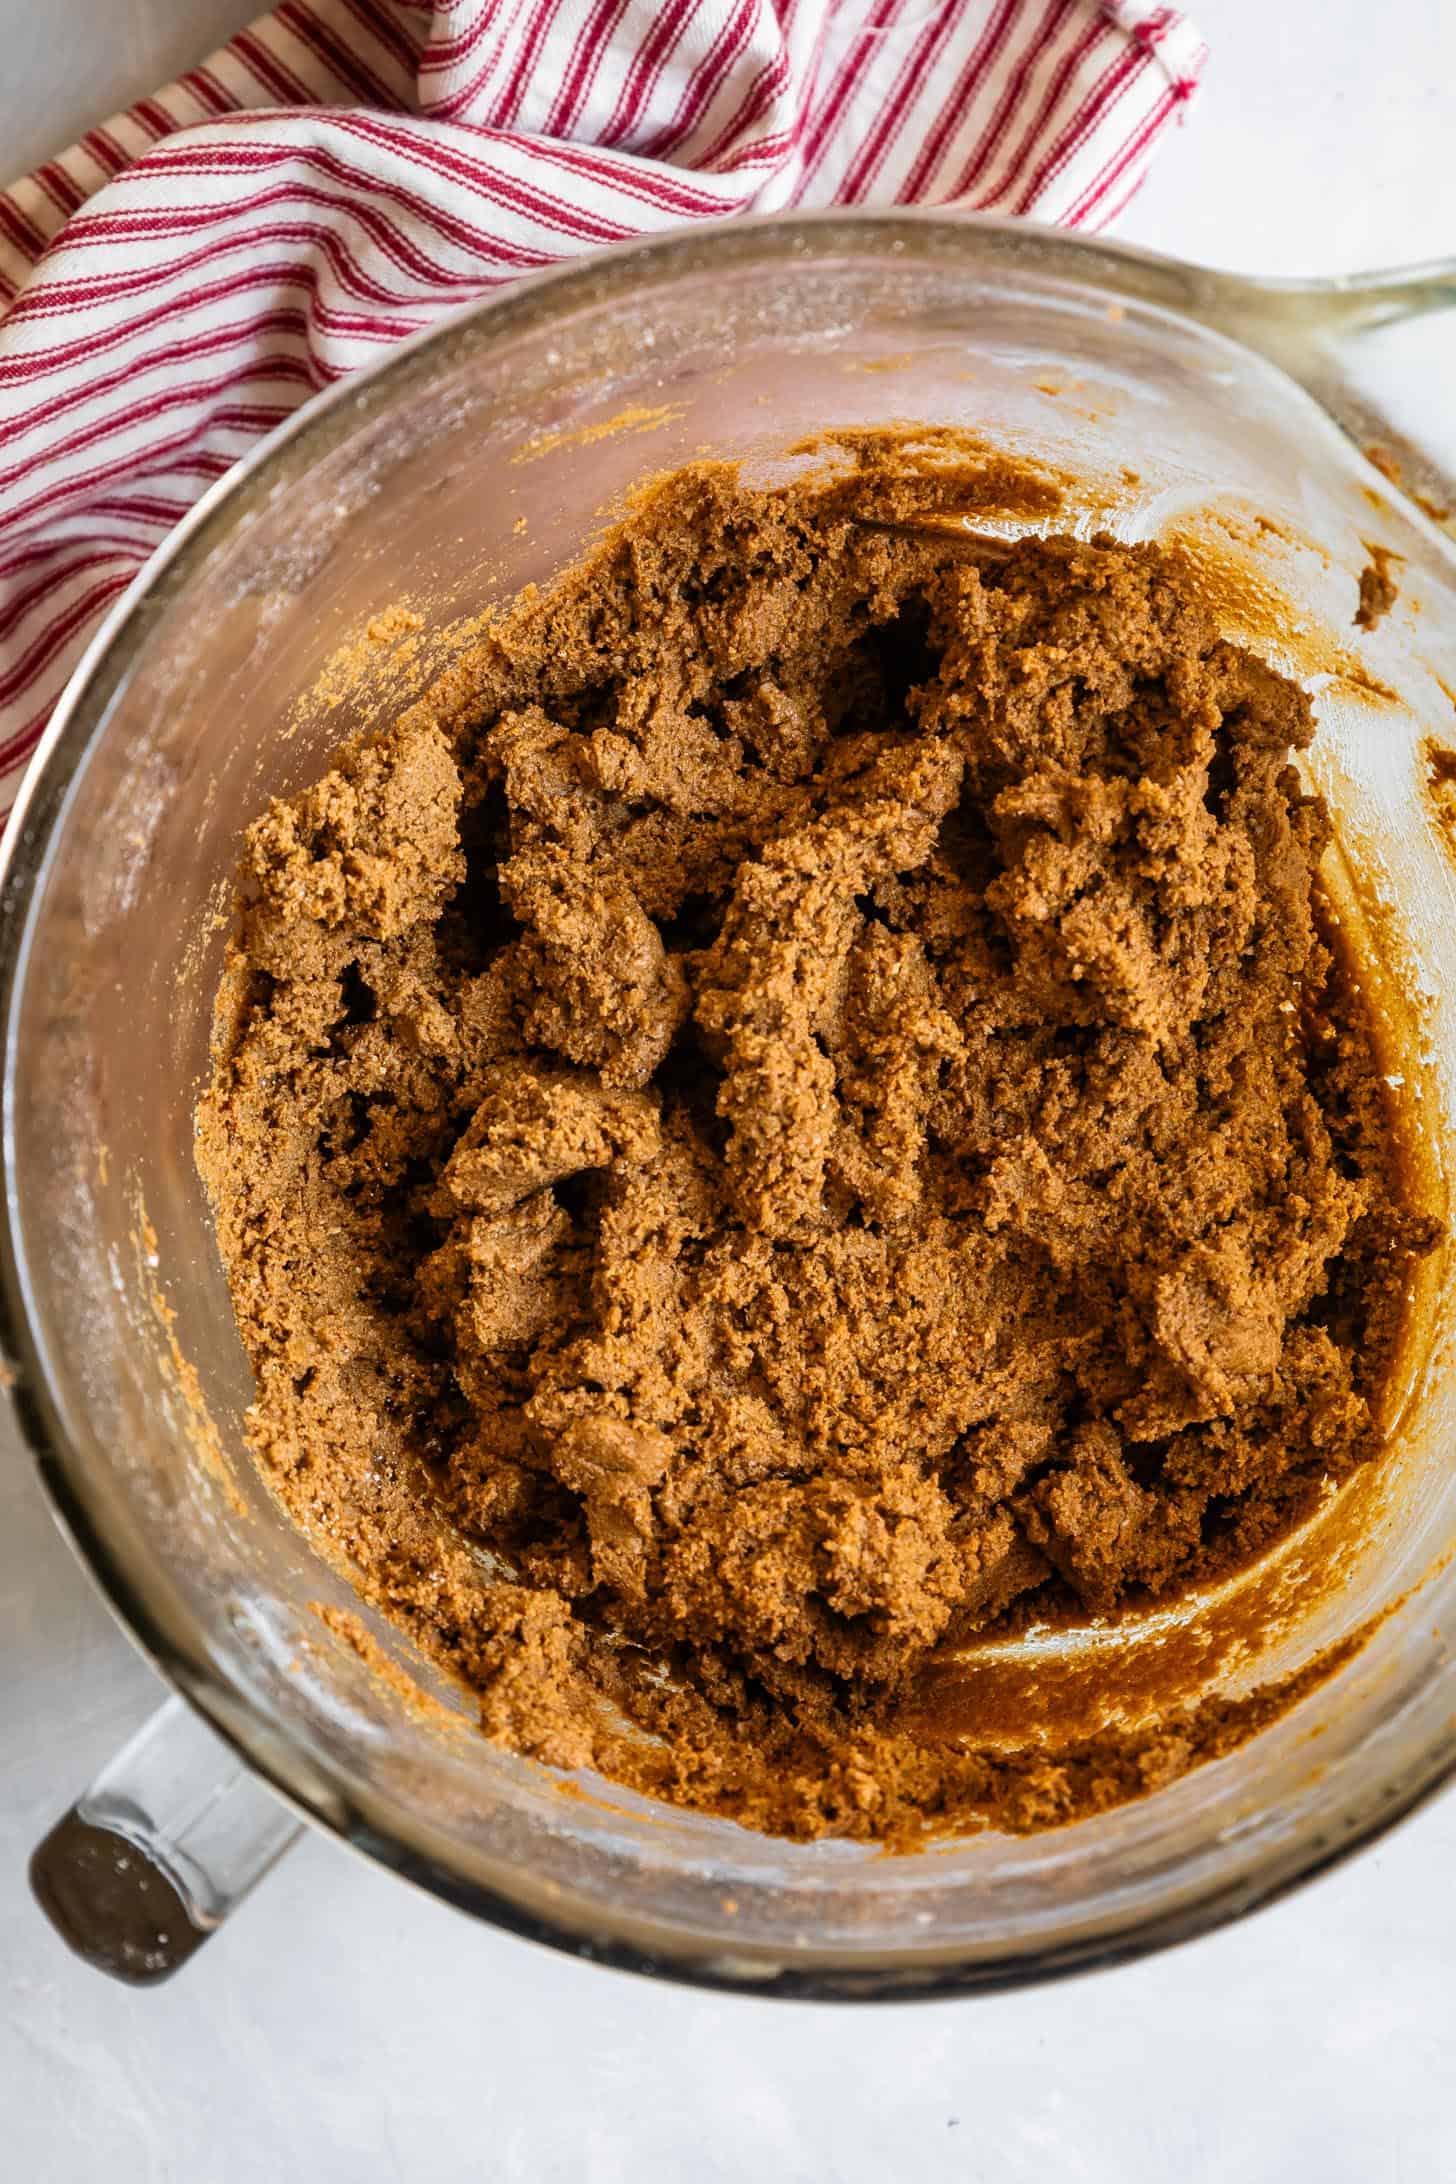
- Mix in the molasses until well combined, followed by the egg and vanilla extract, scraping down the sides as needed, mixing until well combined. Don't be alarmed if the mixture seems to separate after you add the egg. It will come back together with the dry ingredients.
- With the mixer on low, slowly add the dry ingredients, scraping down the sides and bottom of the bowl as you go, mixing, until completely incorporated.
- Divide the dough into two equal pieces. Roll out half of the dough between two pieces of parchment paper, until ⅛ to ¼-inch thick. Keeping the dough sandwiched between the sheets of parchment paper, place it on a baking sheet and freeze flat for 15 minutes (or refrigerate for an hour). Repeat with the second half, stacking it on top of the first in the freezer.
- Preheat oven to 350°F and line a large baking sheet or two with parchment paper.
- Working with one half at a time, peel off one sheet of parchment paper, leaving it on top of the dough, then flip it over and peel off the other half (so you still have a sheet of parchment paper underneath, but it has been peeled off the frozen dough already). Use cookie cutters to cut out your shapes. Transfer your cut cookies to a parchment-lined baking sheet as close together as possible. Roll the scraps up between the two sheets of parchment paper and cut out more cookies, pausing only to rechill any rolled-out dough sheets for 5-10 minutes that get too soft to work with, as needed. Chill the cut cookies on a parchment-lined baking sheet in the fridge for 30 minutes or in the freezer for 15 minutes. While the first half of the cut cookies chill, repeat above by cutting out the second half. While the second batch of cut cookies chill, begin baking the first batch.
- Working in batches, transfer the frozen cookies to a parchment-lined baking sheet 1.5 inches apart. Note: Divvy them on baking sheets based on the size of the shape. Smaller shapes take less time to bake, so separating by size will keep the little ones from overbaking while the larger shapes bake through. One sheet at a time, bake the cookies for 5-7 minutes, until just set and puffy, but the center still looks ever-so-slightly underbaked. Smaller cookies, 2-3 inches, will take just 5-5.5 minutes and larger 4-inch cookies will take 6.5-7 minutes. For cakier cookies add 1 minute to the bake time, and for crispy cookies add 2-3 minutes to the bake time.
- Let the cookies cool on the baking sheet for 2-3 minutes before using a thin metal spatula to transfer them to a wire rack to cool completely before icing. Repeat until all the cookies are baked!
- While the cookies cool, make the icing. In a medium bowl, whisk the powdered sugar with just 1 tablespoon of milk, corn syrup, vanilla, and salt until smooth. Add another few drops of milk at a time until the icing is the proper consistency. To pipe decorations that don't pool on your cookies, the icing should be very thick, but still able to be piped. When you lift the whisk up and drizzle icing back into the bowl, the stream should just barely sit on top, before every so slowly incorporating back in. Fill a small pastry bag fitted with a small round tip with icing and decorate the cooled cookies to your heart's content. Let sit for 10 minutes until the icing sets.
Notes
Nut-Free:
For nut-free gluten-free gingerbread cookies, replace all three flours with the following blend of gluten-free oat flour, sweet rice flour, and tapioca flour:- 216g (2 cups) gluten-free oat flour
- 120g (¾ cup) sweet rice flour
- 126g (1 cup + 2 tablespoons) tapioca flour
Storing Gluten-Free Gingerbread Cookies
Longer storage in a disc. To store the dough for longer than a couple of days, roll each half of the dough into a ball, gently flattening it into a disc. Wrap it in plastic wrap and store it in the fridge for up to a week or freezer for up to 6 months. When you're ready to roll and cut out the dough, just pull out one half at a time and let it sit for a few minutes (5 minutes from fridge, or 30 minutes if it's been frozen) before rolling it between two sheets of parchment paper and continuing with the recipe as written.
Already rolled out. Alternatively, you can store the dough once it is rolled out between two sheets of parchment paper stacked flat in the fridge or freezer for up to 3 days.
Cut cookie dough. Finally, you can store the cut cookies in an airtight container or bag in the freezer for up to 6 months. First, freeze the cut cookie dough in a single layer on a baking sheet for 10 minutes before stacking and transferring to an airtight container or bag.
Storing baked cookies: Plain or iced
Room temperature for 3 days. Store baked cookies, either iced or plain, in an airtight container for up to 3 days. Any longer and the cookies will begin to lose their chewy texture, but will still be quite soft and delicious.
Frozen for longer storage. You can freeze baked cookies for up to 6 months until you're ready to decorate and serve them. I always bake my gingerbread cookies a week before Christmas and freeze them for the kids to decorate closer to the big day. You can also store them fully decorated using this same method. First, freeze the completely cooled cookies in a single layer on a baking sheet for 15 minutes, before stacking and transferring to an airtight container or bag. When ready to ice and/or serve, let them return to room temperature on the counter for about 30 minutes.

Troubleshooting
Why did my gingerbread cookies spread too much?
If your gingerbread spread too much, there are a couple of potential culprits.
- Too little flour: For this recipe, I strongly recommend measuring the flour by weight, not volume. The way you scoop a cup of flour can make a big difference in the amount of flour you get in a single cup. When using three specific gluten-free flours, just 10g too little will make a huge difference in your final baked good.
- Too much molasses or sugar: Just as above, I also recommend measuring the molasses and sugar by weight, as you'll ensure you get the exact amount specified in the recipe.
- Dough too warm: If your cut cookies were not chilled before baking, the dough will spread too quickly before the shape has a chance to set up.
Why are my gingerbread too soft & delicate, cakey, or crunchy?
When trying a new recipe, I always bake off a test sheet of just 2-3 cookies to dial in the bake time before charging ahead with the rest of the cookies.
Dialing in the just-right soft and chewy texture of cut-out cookies can require some precision. Underbaked cookies will be too soft and delicate, and overbaked cookies can become cakey or even crunchy. If you find the texture to be off one way or the other, here are the potential reasons.
- Oven temperature and/or bake time: Every oven can vary a bit in temperature, which can affect the bake time. If your gingerbread cookies baked up too soft, your oven temperature might be slightly cooler than mine and the cookies need a bit longer in the oven. If your cookies are cakey or even crisp and crunchy, your oven may run hot, so you'll need to reduce the bake time.
- Thickness: How thick you roll your dough can affect how long the cookies need in the oven. Thicker cookies need longer in the oven while thinner cookies need less. If your gingerbread cookies baked up too soft and delicate, your dough may have been rolled slightly thicker than mine and the cookies need a bit longer in the oven. If your cookies are cakey or even crisp and crunchy, your cookies may be slightly thinner, so you'll need to reduce the bake time.
- Too much flour: Just as too little flour can cause your cookies to spread too much, too much flour will prevent you from achieving that soft chewy texture. Instead, the cookies will bake up cakey no matter how long they're in the oven. For that reason, you should always measure your gluten-free flours by weight.


Rachael -
Until these! My son really wanted to try some and I figured Snixy hasn’t steered me wrong yet. Not only did I love these, my incredibly picky child gave them an enthusiastic thumbs up. After biting the head off of course.