
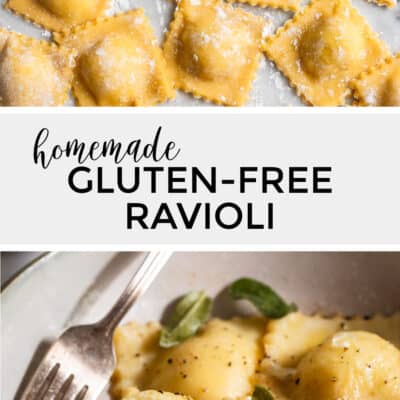
Learn how to make homemade gluten-free ravioli from scratch with an easy almond flour pasta dough. This step-by-step guide shows you three different ways to roll and cut ravioli using whatever tools you have in your kitchen - no special tools required! With a three-cheese filling option, these ravioli cook up silky and flavorful.
This recipe for homemade gluten-free ravioli has been a long time in the making, with years of history behind it. When I first launched Snixy Kitchen to share the recipes coming out of my then pint-sized kitchen, homemade pasta-especially ravioli-was one of my favorite things to make. Picture this familiar scene: I'm rolling out pasta sheets on my coffee table, with baking sheets of ravioli sprawled across the couch. Homemade ravioli holds a special spot in my story as a home cook.
After more than a decade of ravioli making, I'm thrilled to finally share my go-to classic gluten-free homemade ravioli recipe with you. This guide features step-by-step photos, taking you through the process of making the dough, rolling out the pasta sheets, and filling and cutting the ravioli.
This dough is based on my gluten-free almond flour pasta recipe with a three-cheese filling option, but you can use any ravioli filling!
Why you'll love homemade gluten-free ravioli
- Easy to make: Homemade pasta is so easy to make and there are no special tools required to make homemade ravioli!
- Versatile: This almond flour pasta base has a neutral flavor that pairs well with any filling or sauce.
- Silky texture: the pasta cooks up silky and tender, just like traditional homemade pasta.
Ingredients for Homemade Gluten-free Pasta
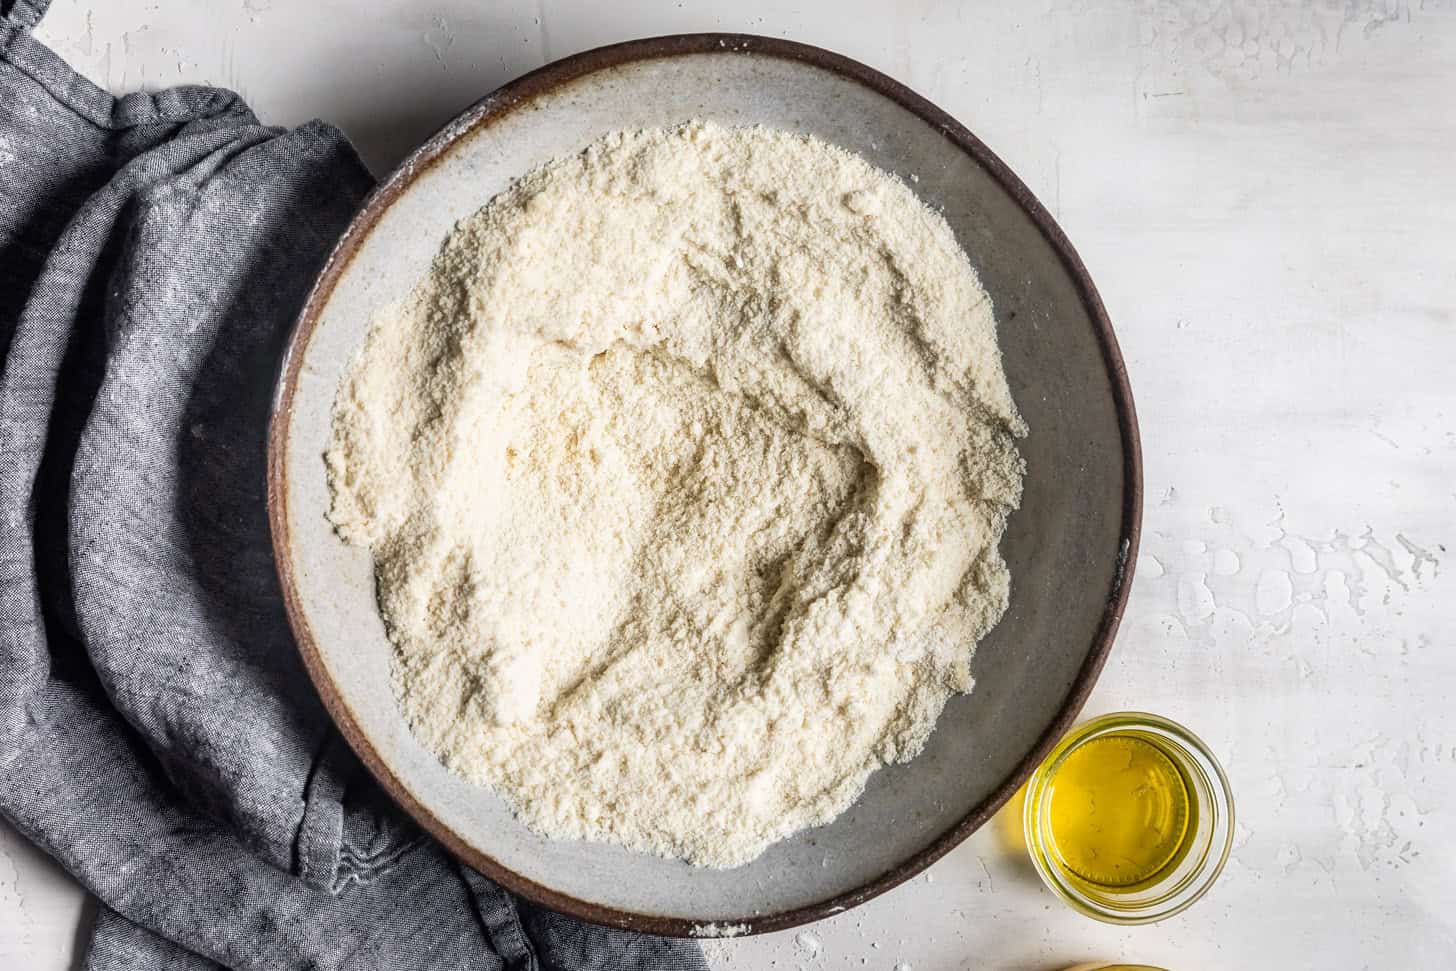
Homemade gluten-free pasta is so simple with just a few ingredients. The flour base is a combination of almond flour, tapioca flour, and sweet rice flour, with some xanthan gum added for elasticity. Knead in eggs and oil and you've got homemade pasta!
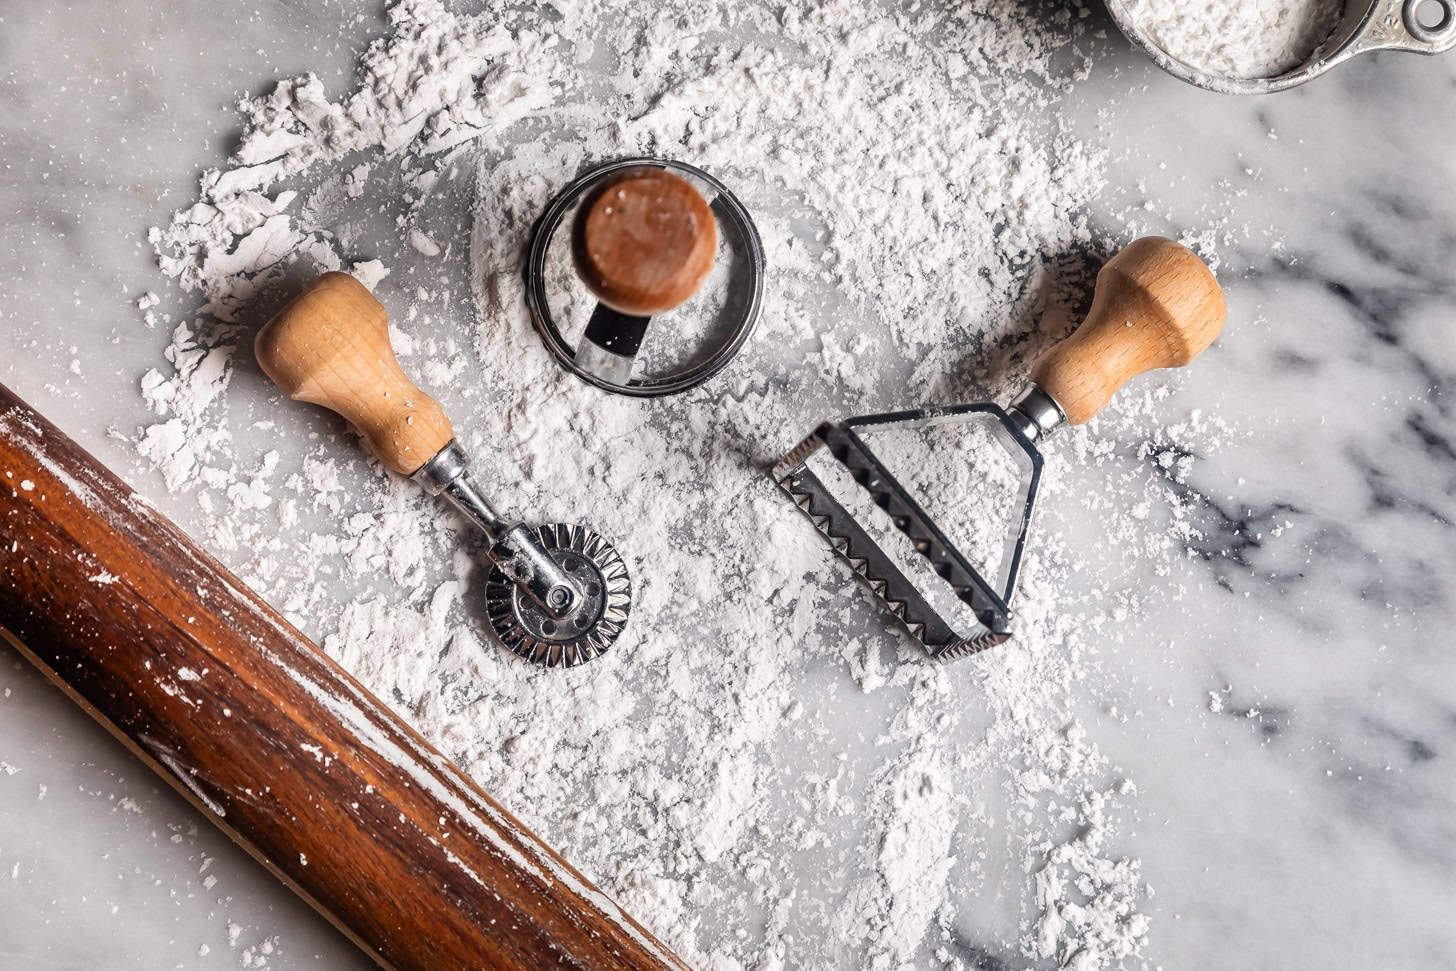
Equipment for Homemade Ravioli
The only thing you must have to make homemade ravioli is a rolling pin, a knife, and a fork. In this guide, I've included instructions for different tools you can use to help with rolling and cutting the pasta.
Pasta Rolling Tool Options:
- Rolling Pin: No need for an extra tool, you can roll out the pasta sheets by hand with a rolling pin.
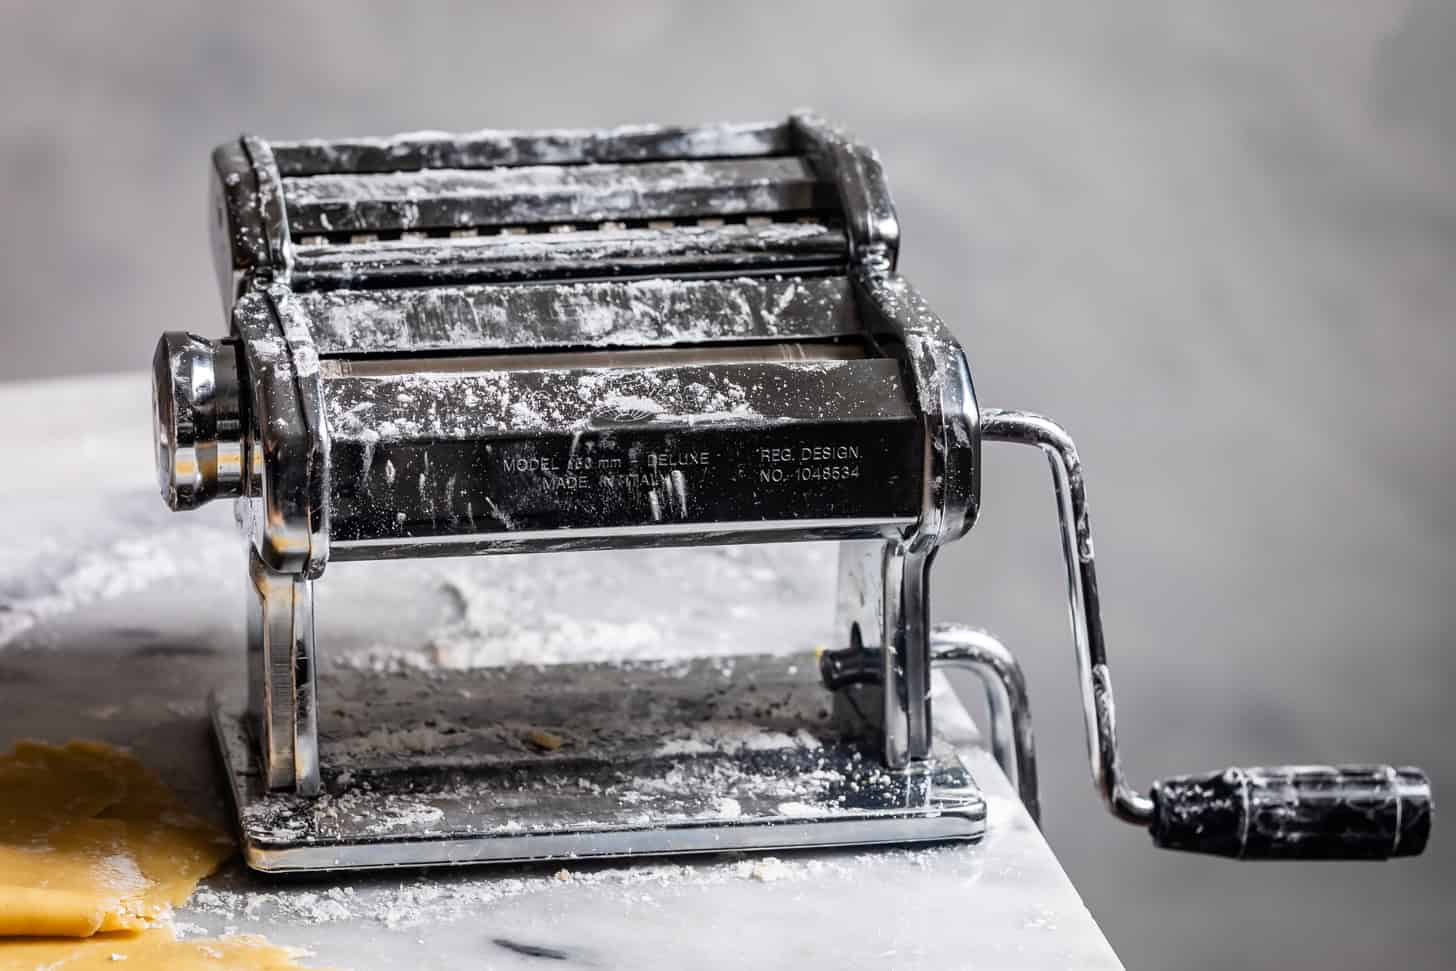
- Pasta Maker Manual Hand Press: To help you get thin pasta sheets quickly, this hand press is useful for ensuring your pasta sheets are always the same thickness. And it's a great low-cost option, especially if you'd also like to cut homemade pasta into strips like fettuccine or spaghetti.
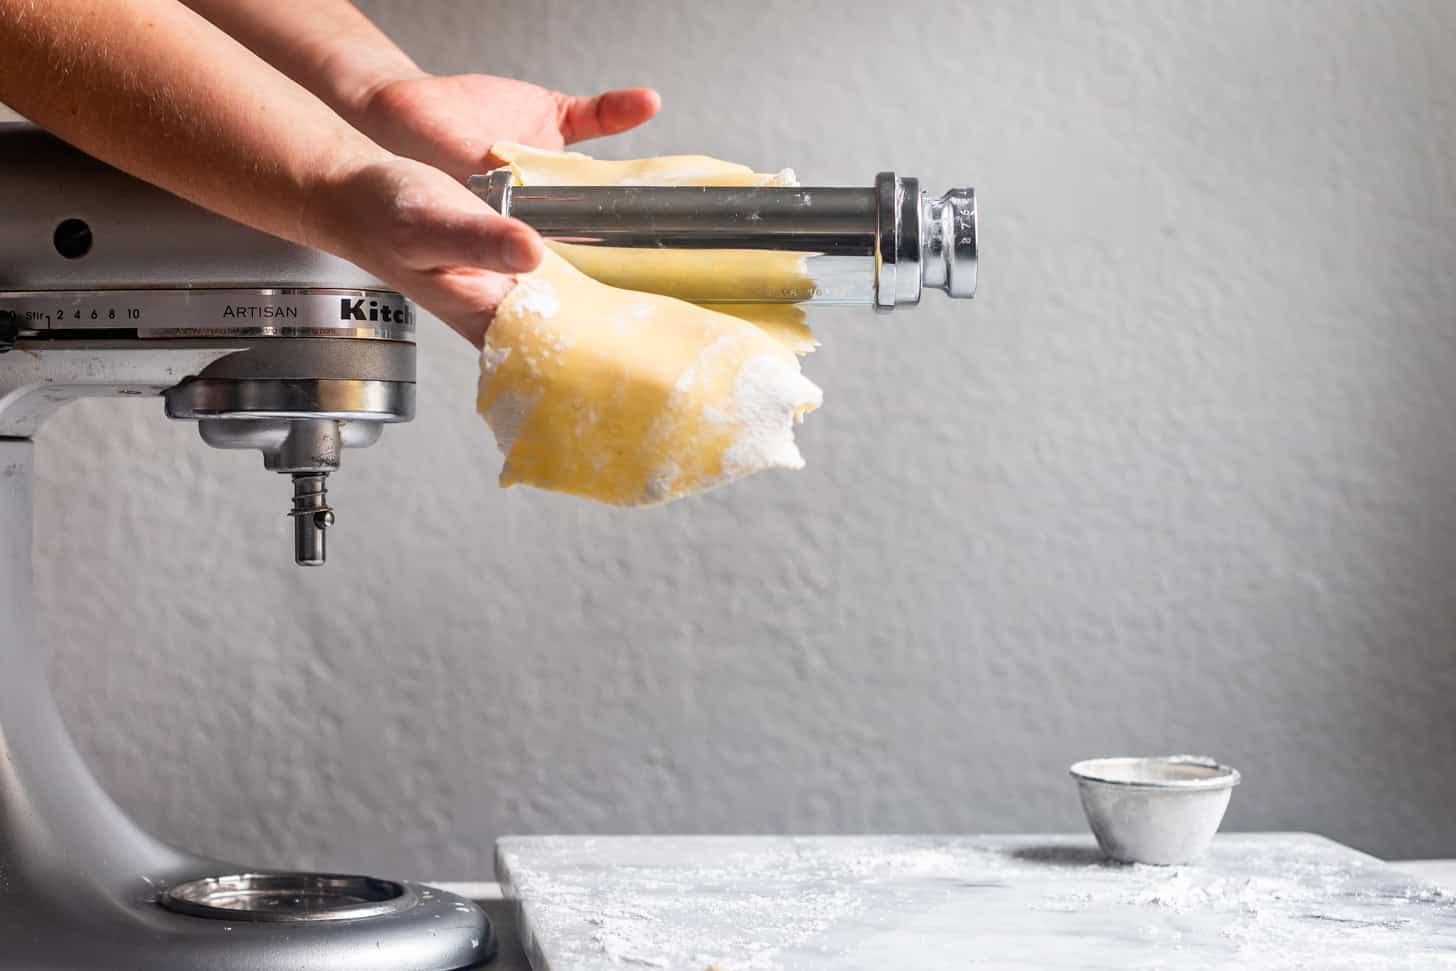
- KitchenAid Pasta Roller Attachment: If you make pasta often, like I do, the KitchenAid attachment makes it really quick and easy to roll out thin sheets of pasta.
Ravioli Cutting Tools:
- Knife and fork: No special tools are needed! You can use a knife to cut out ravioli squares and a fork to crimp the edges. This method produces more rustic-looking homemade ravioli, that still taste delicious.
- Pastry Wheel Cutter: This wheel makes it easy to get the fluted edge on your homemade gluten-free ravioli, while simultaneously crimping the dough sealed.
- Ravioli Stamp: A ravioli stamp creates perfectly shaped ravioli with fluted edges every time!
How to make gluten-free ravioli from scratch
There are three main parts to making ravioli: first making the dough, then rolling it out into pasta sheets, and finally filling and sealing your ravioli for cooking. While it may seem intimidating, gluten-free ravioli is surprisingly easy to make at home, following this step-by-step guide!
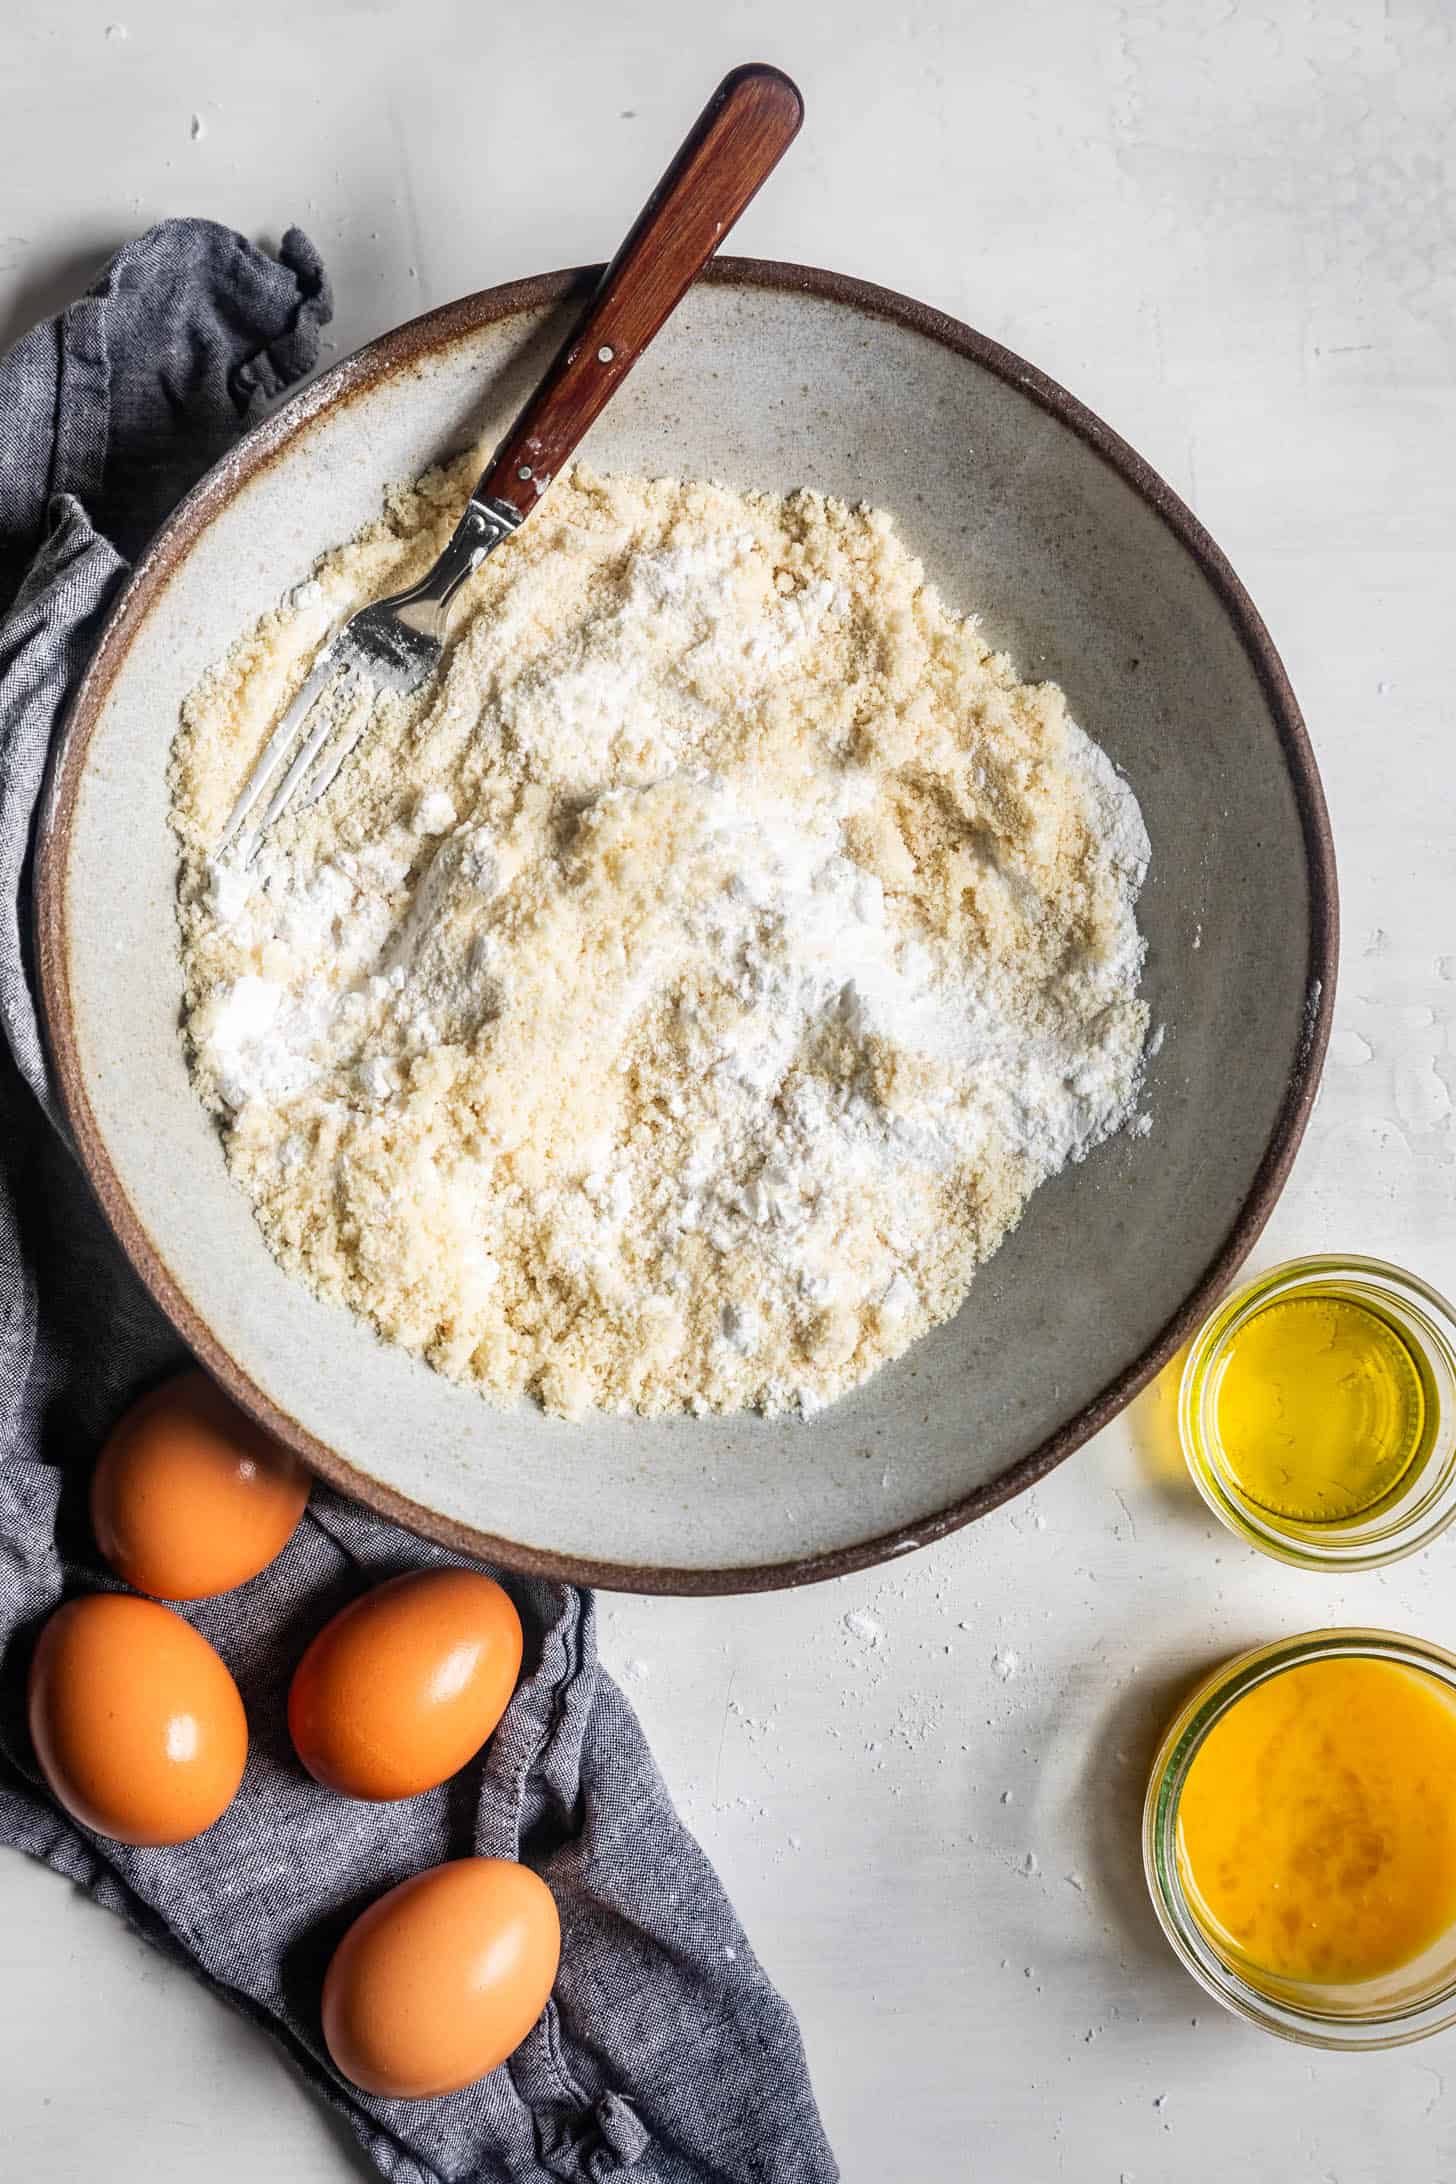
Sift all the dry ingredients together in a large bowl, creating a well in the middle for cracking the eggs.
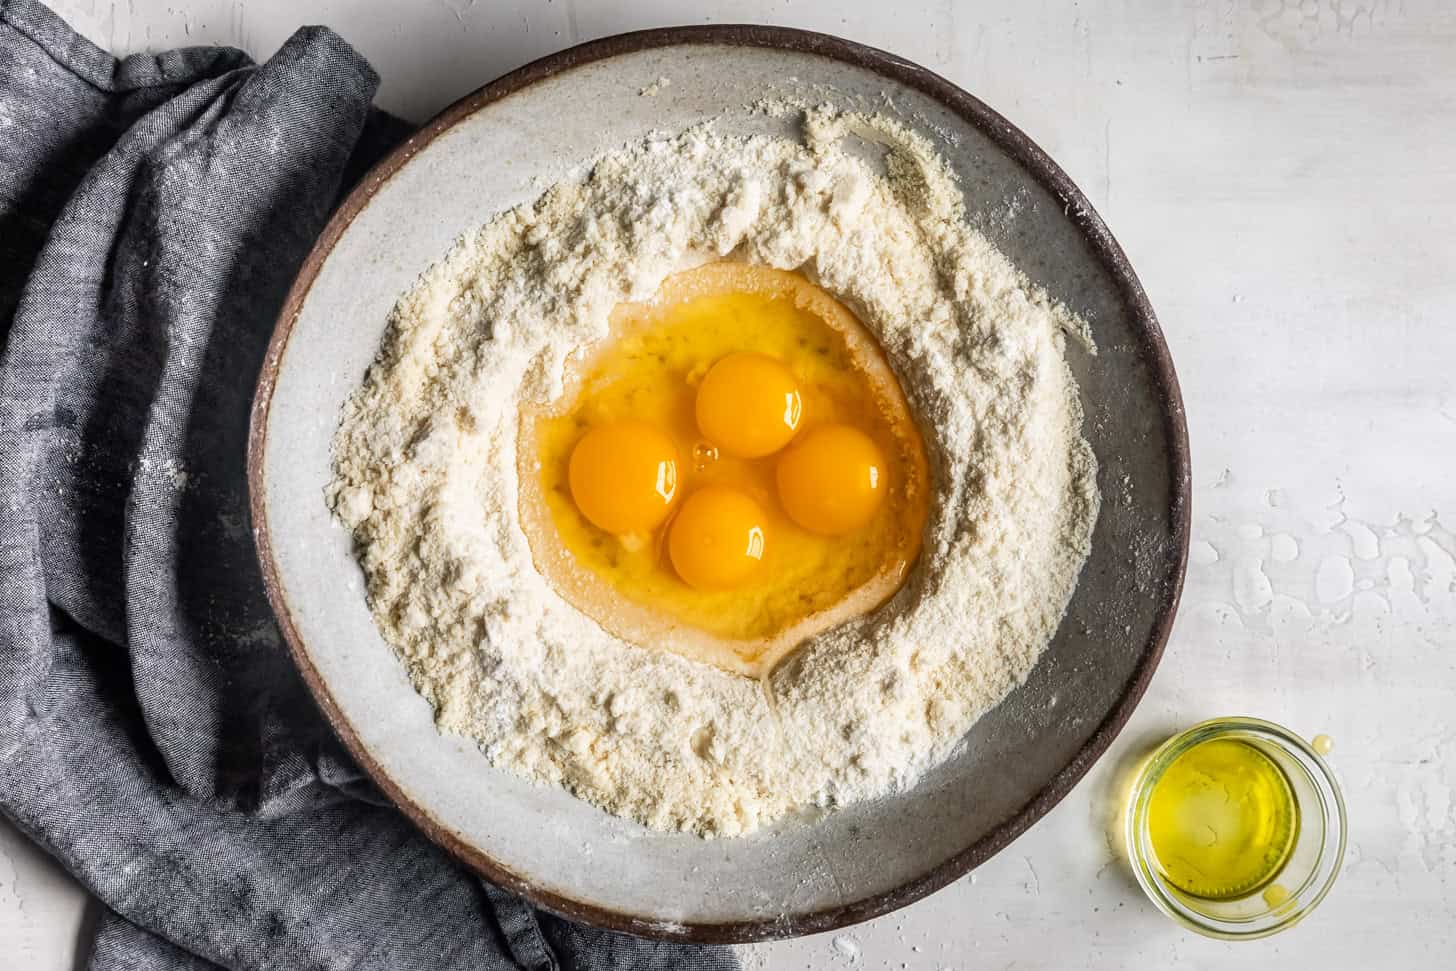
Crack the eggs into the well.
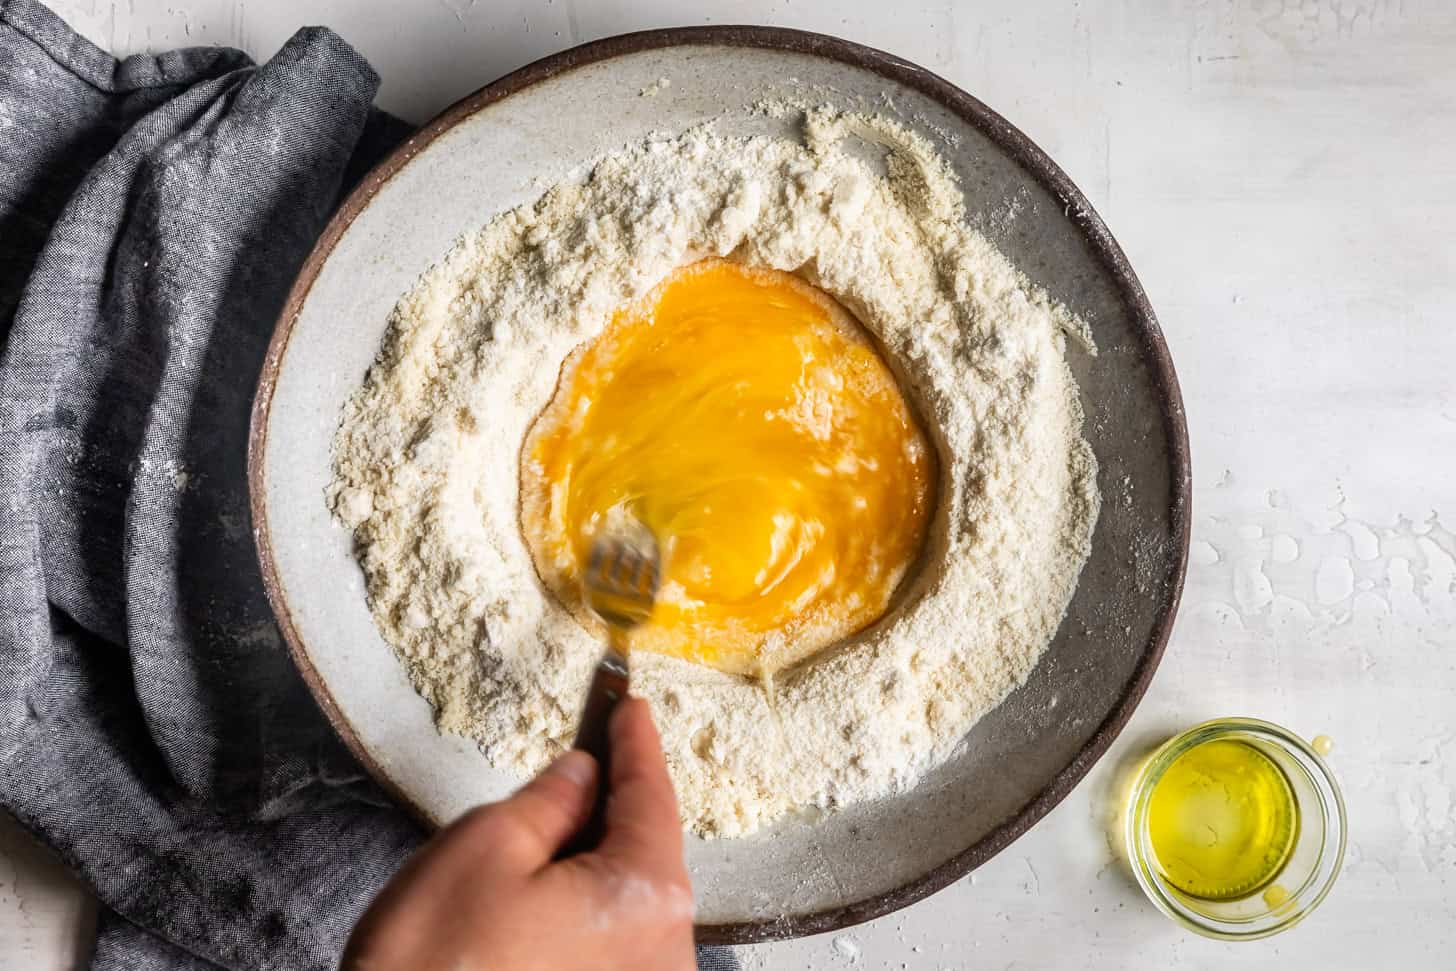
Give the eggs a quick whisk with a fork.
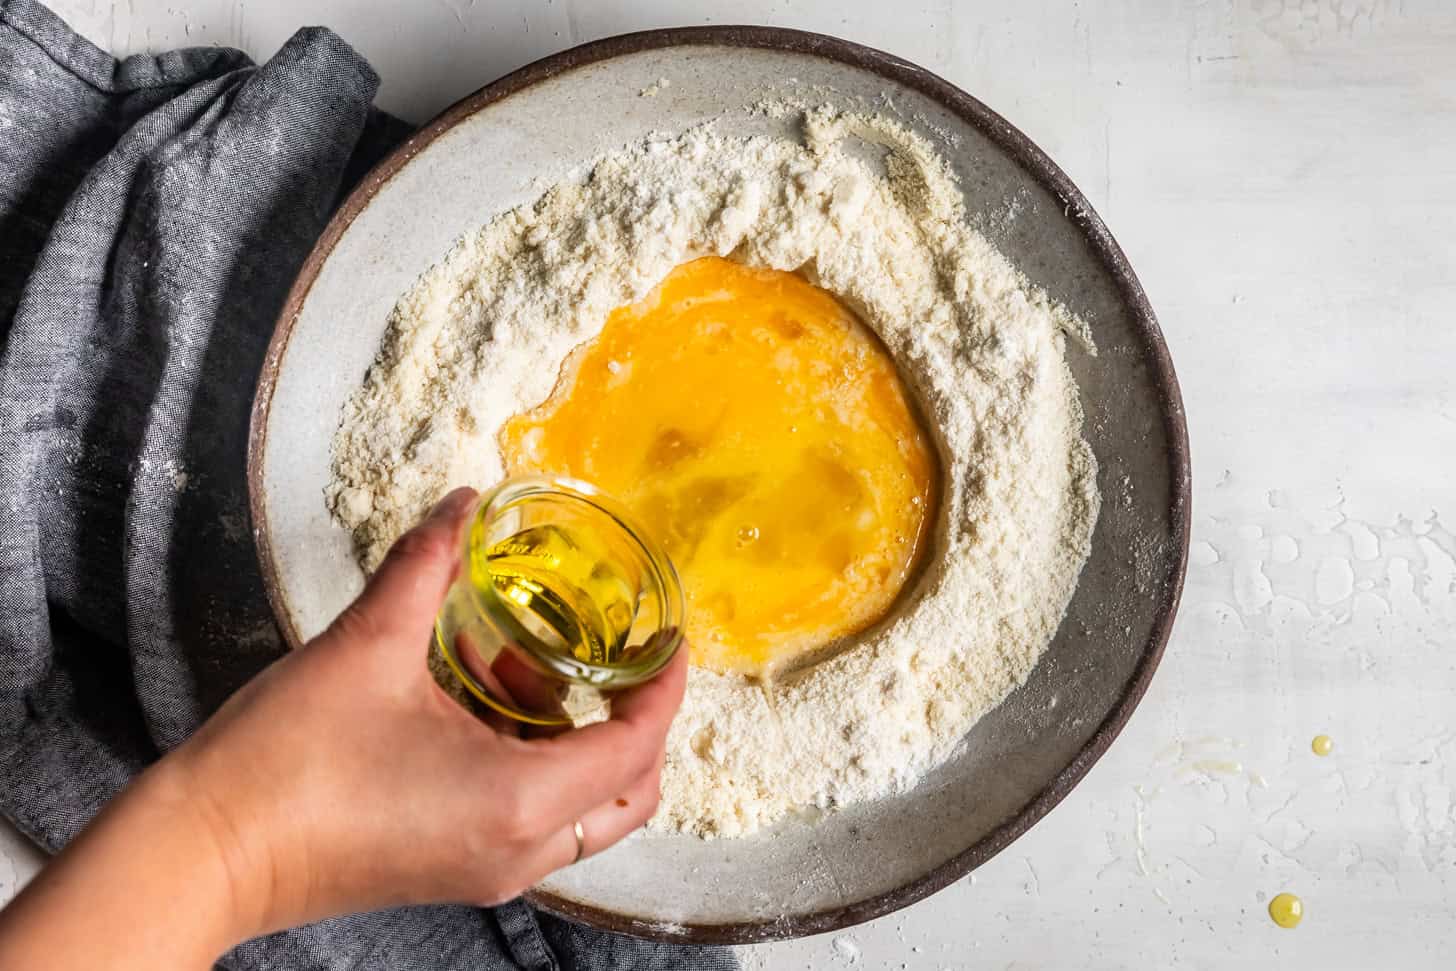
Then pour in the oil.
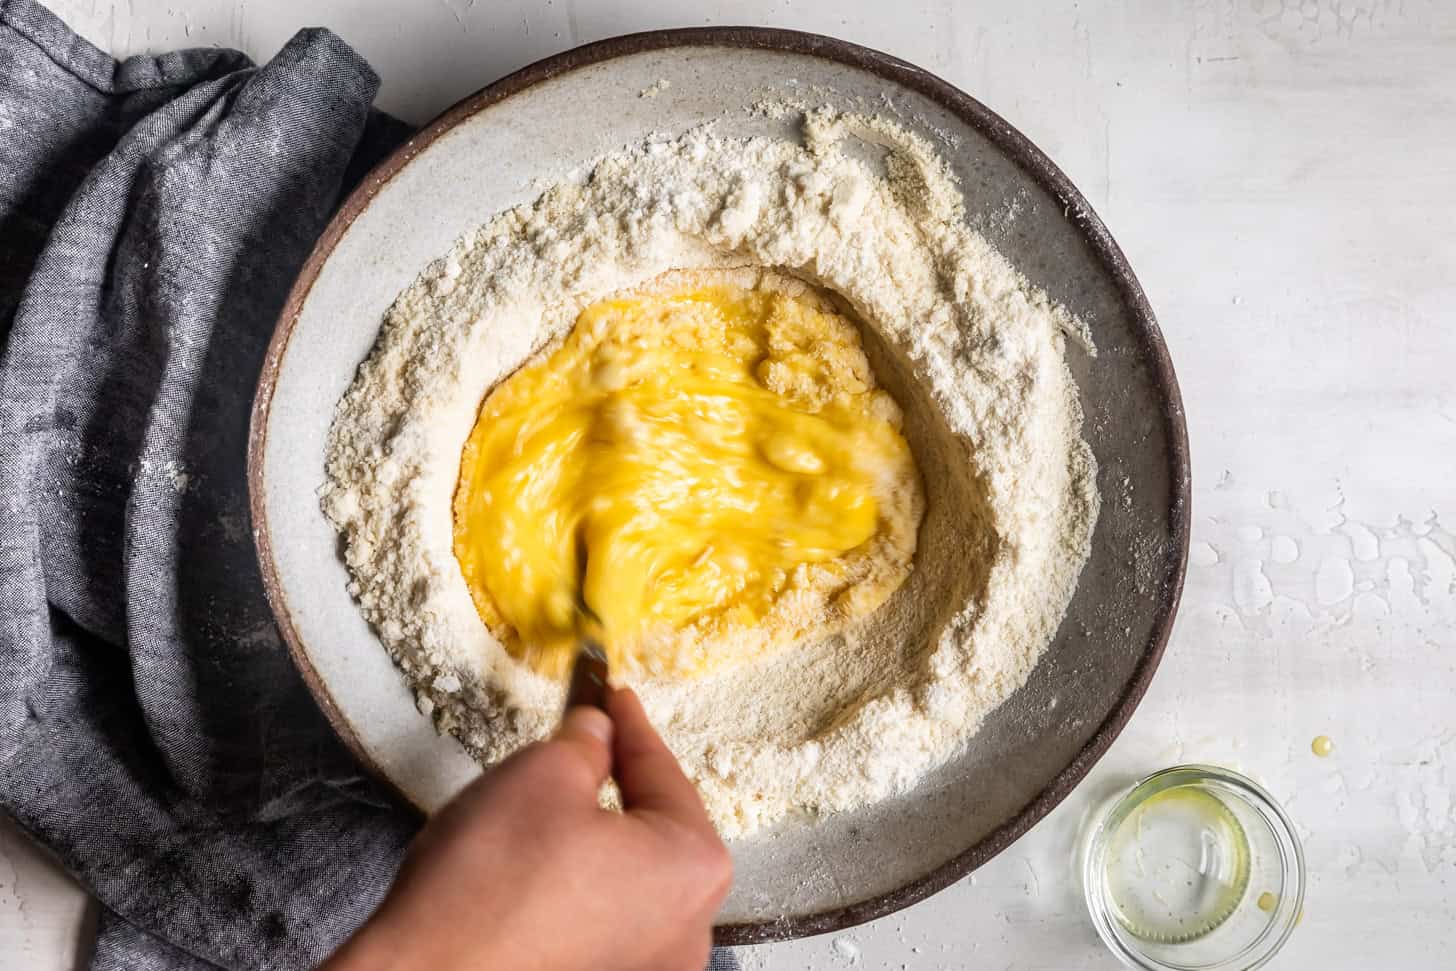
Begin whisking the eggs and oil, slowly incorporating more and more of the flour.
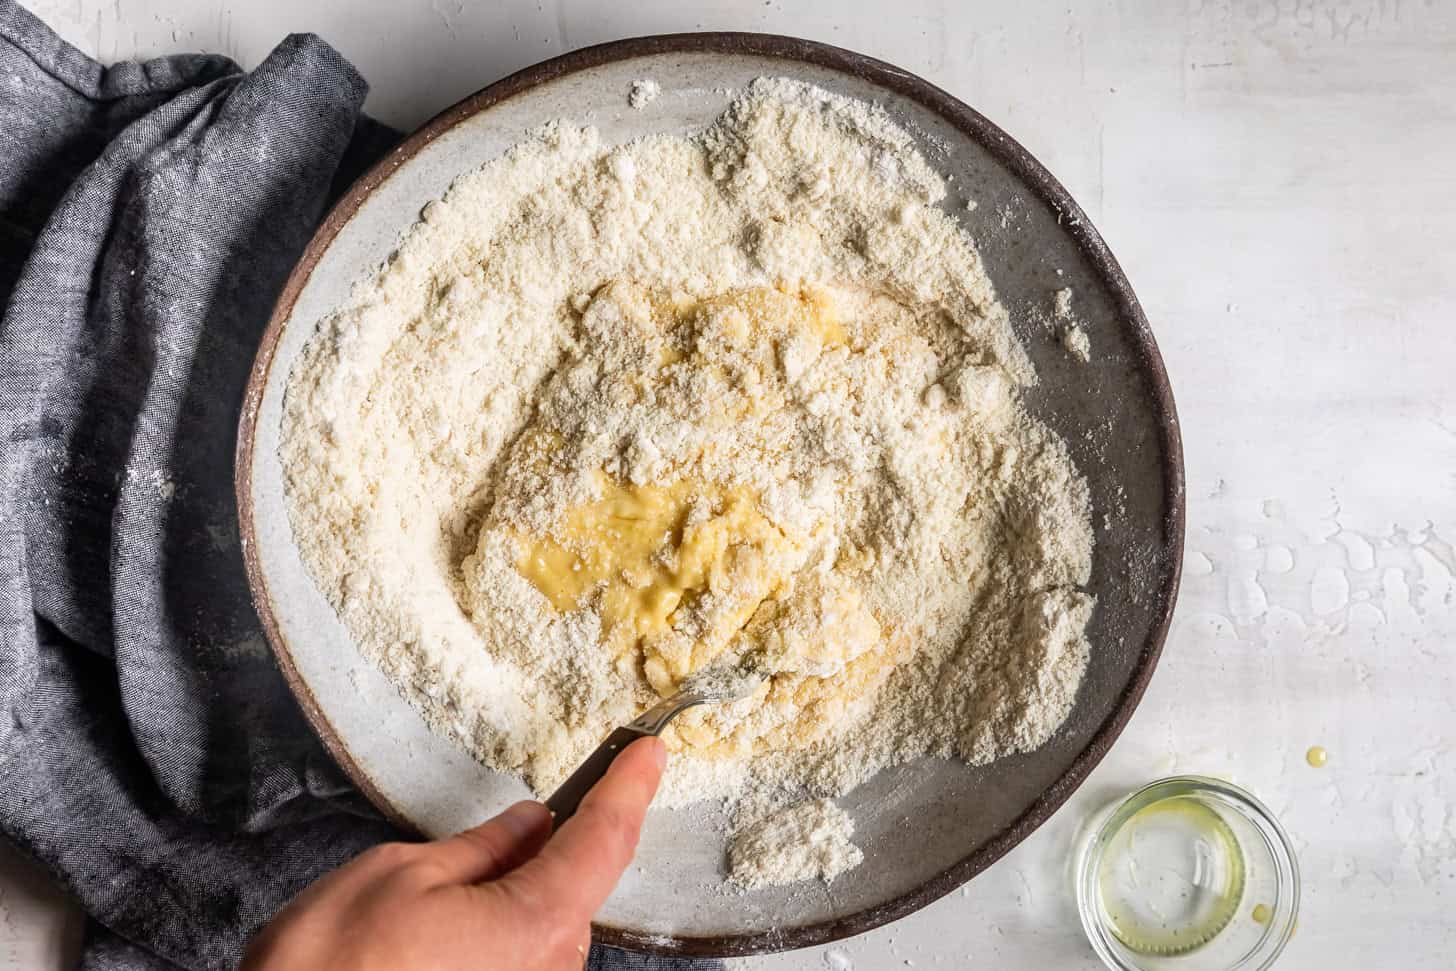
Continue incorporating the flour as you whisk.
Whisk until the dough is too thick to whisk and starts clumping to a ball.
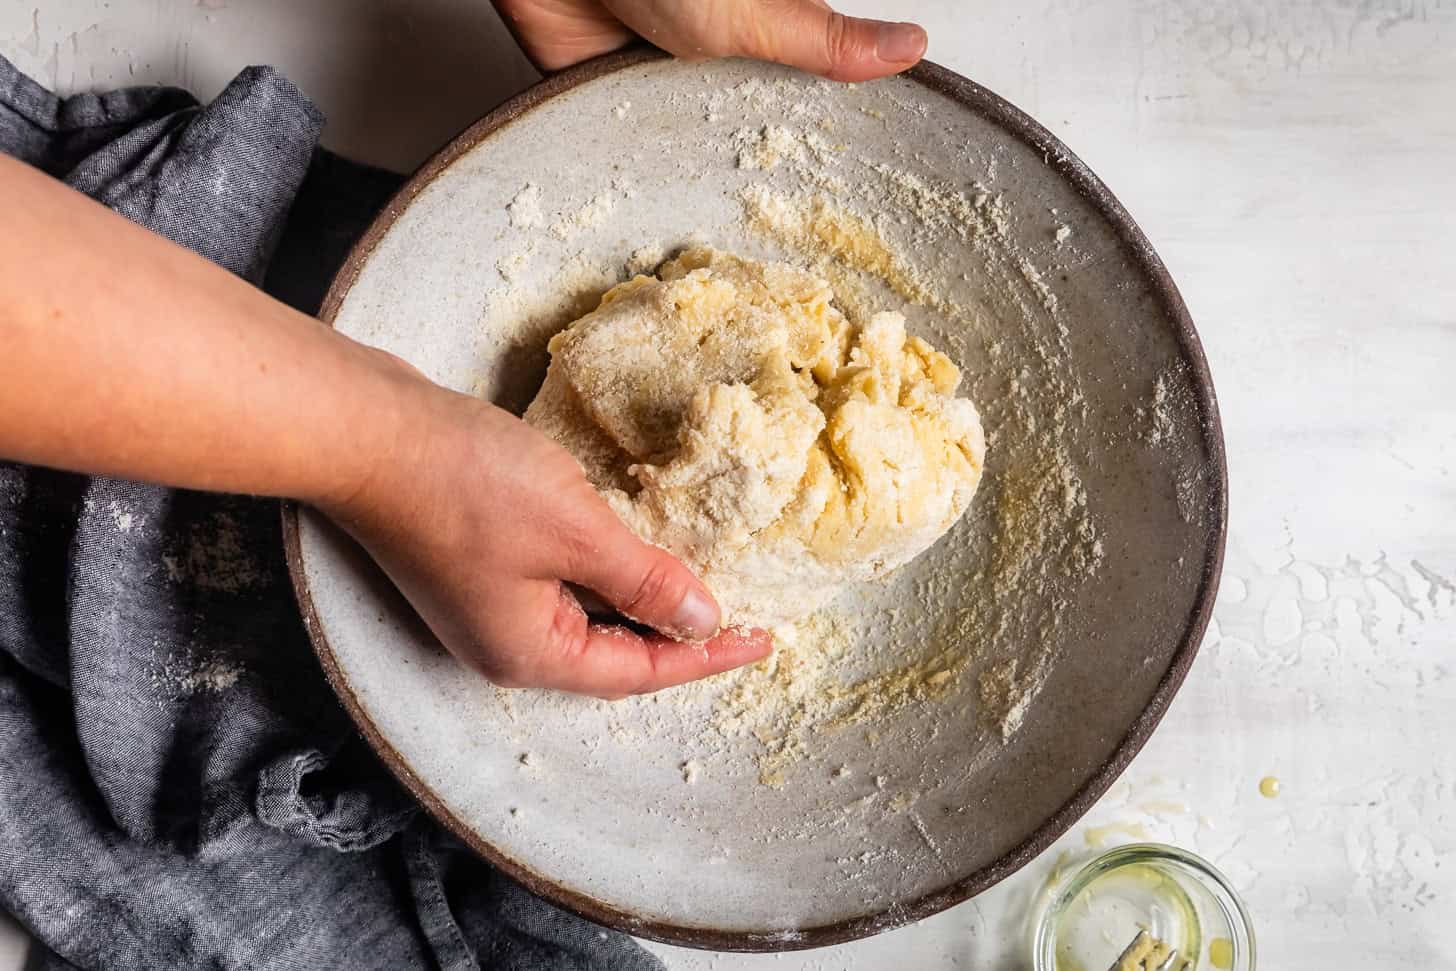
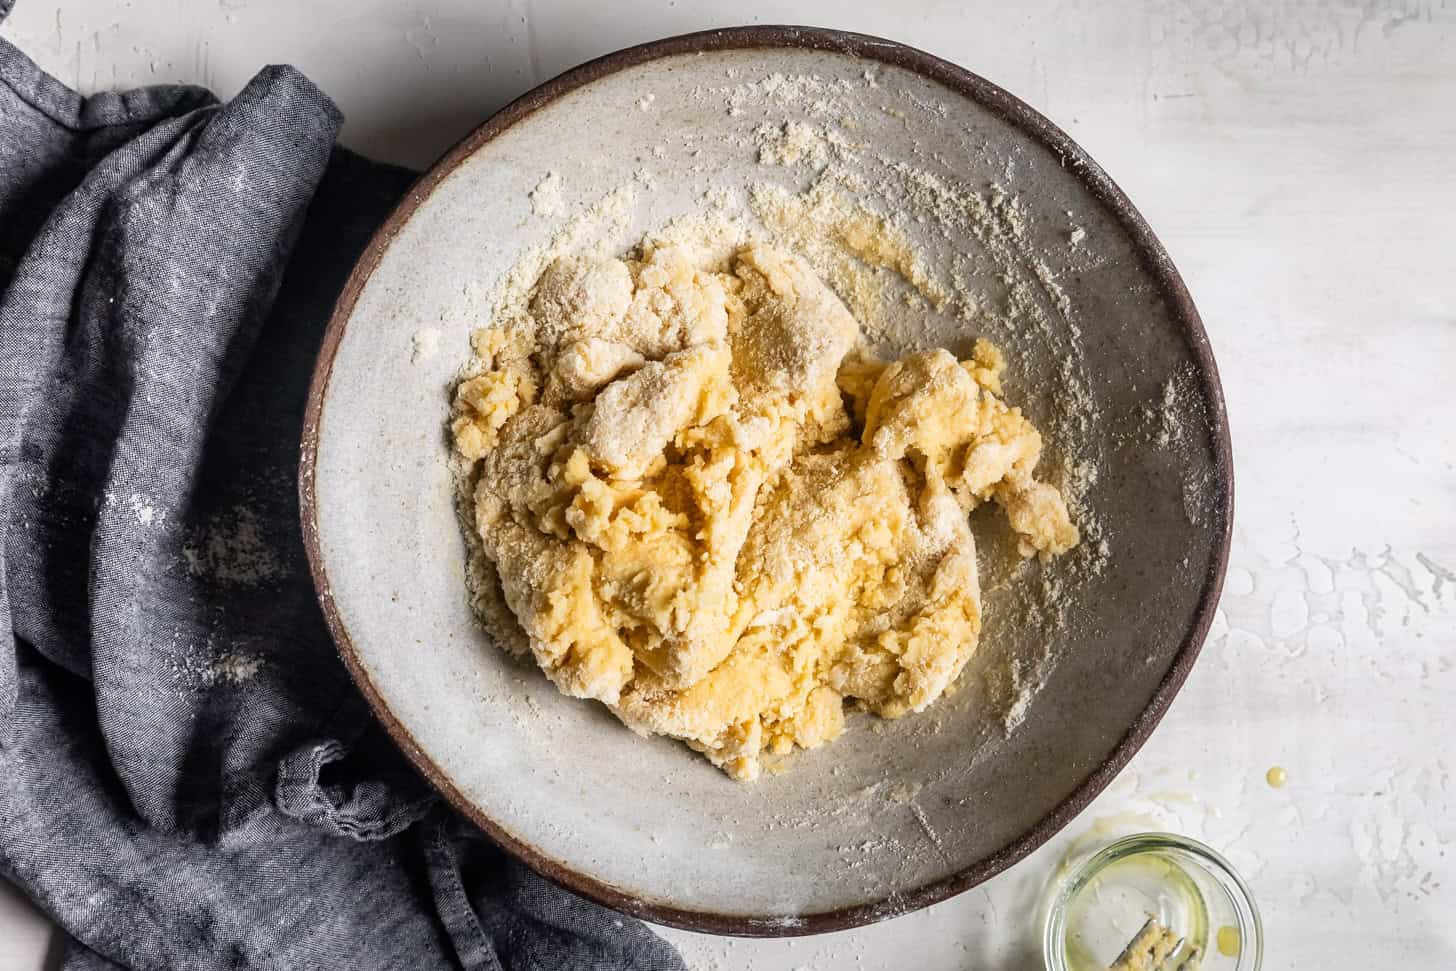
Knead the dough to incorporate all of the flour.
Continue kneading, using your palm, until all the flour is incorporated.
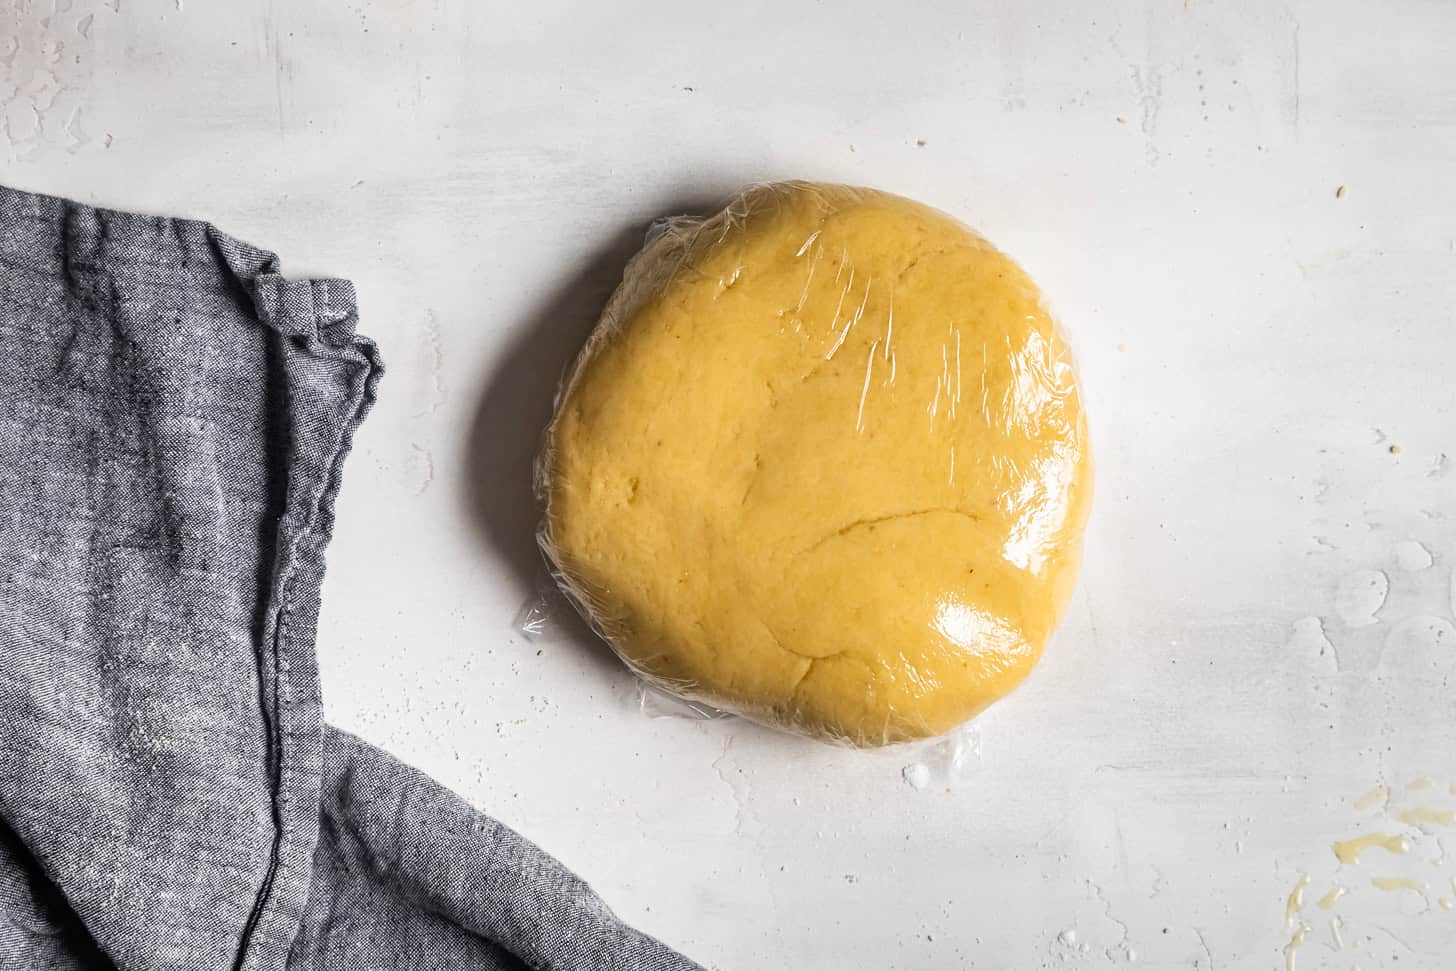
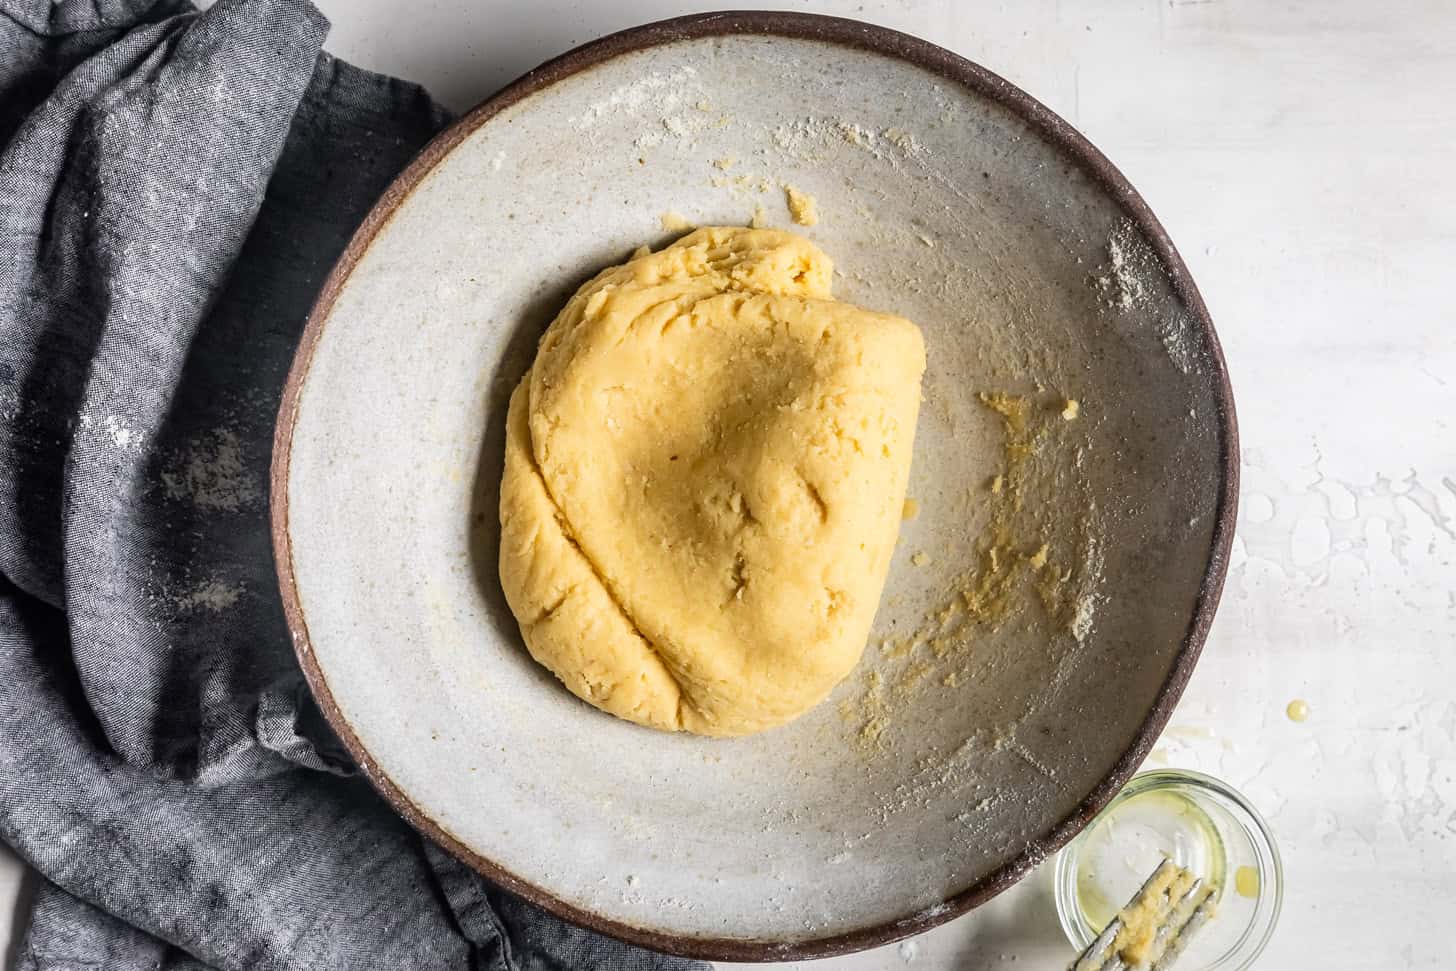
Wrap the dough in plastic wrap and let it rest for 30 minutes while you prepare the filling.
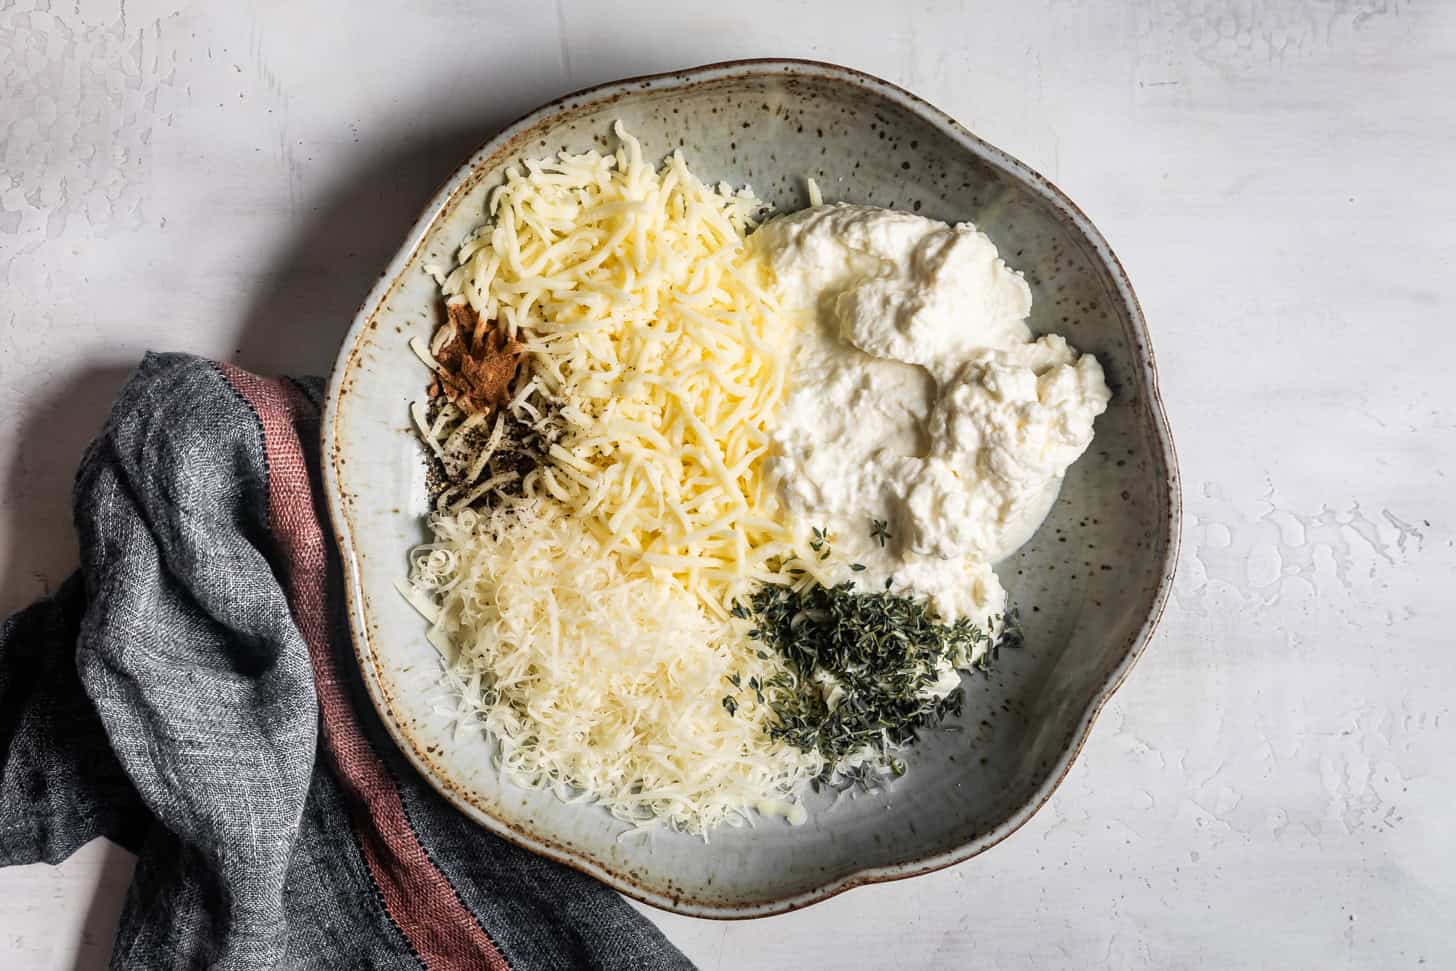
Meanwhile, prepare your filling. Here I use a three-cheese filling, but you can use any filling!
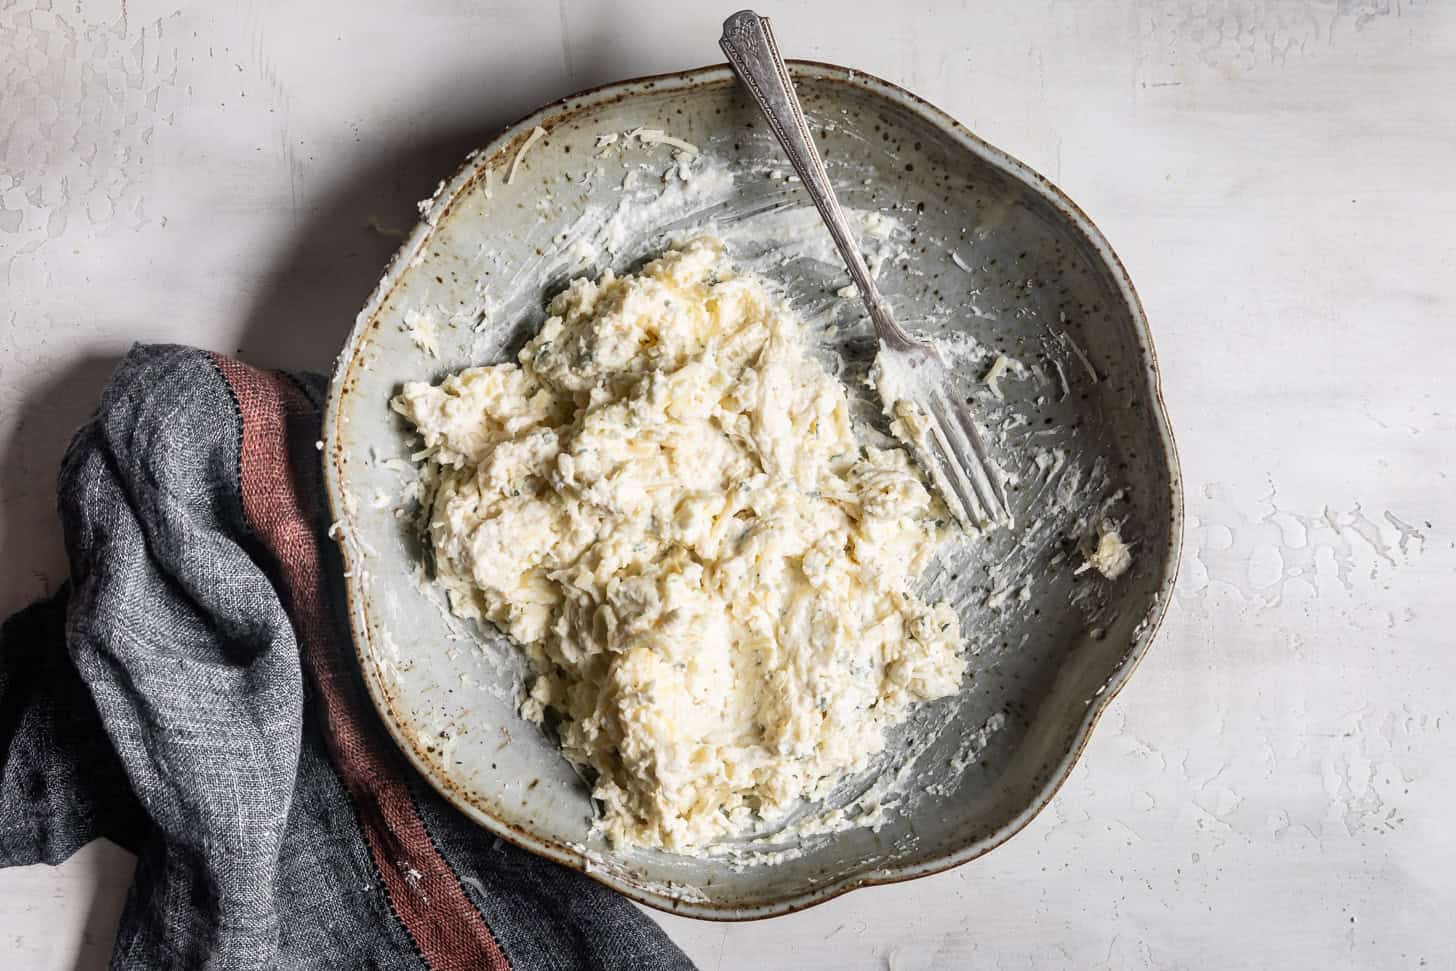
Mix all the filling ingredients in a bowl until well combined.
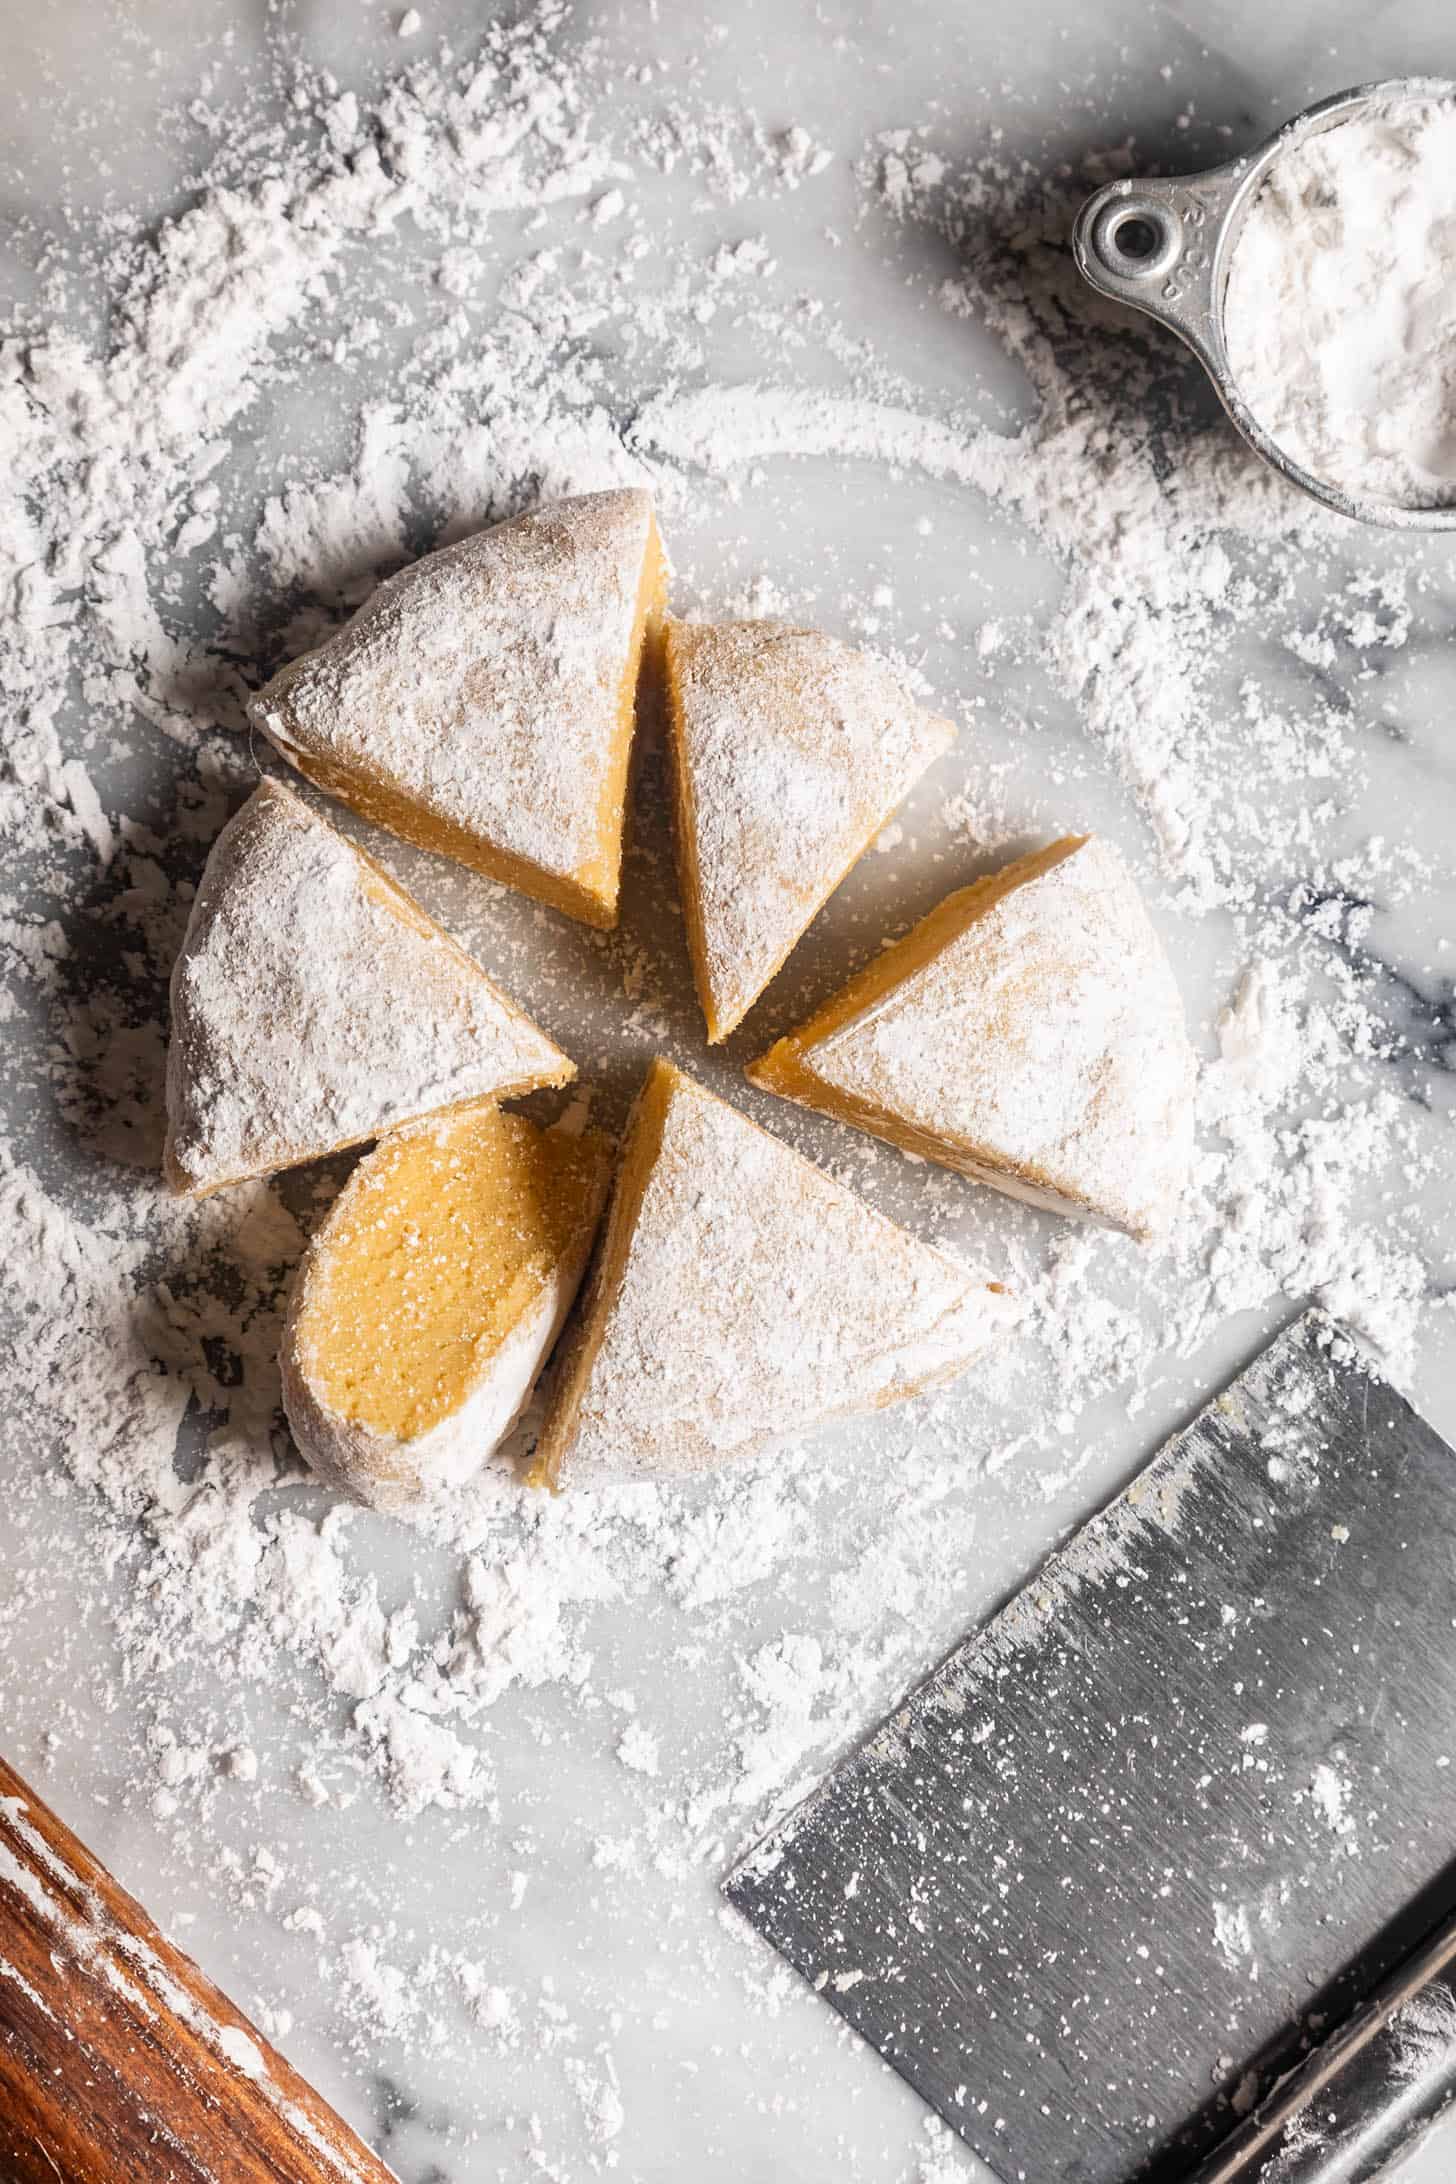
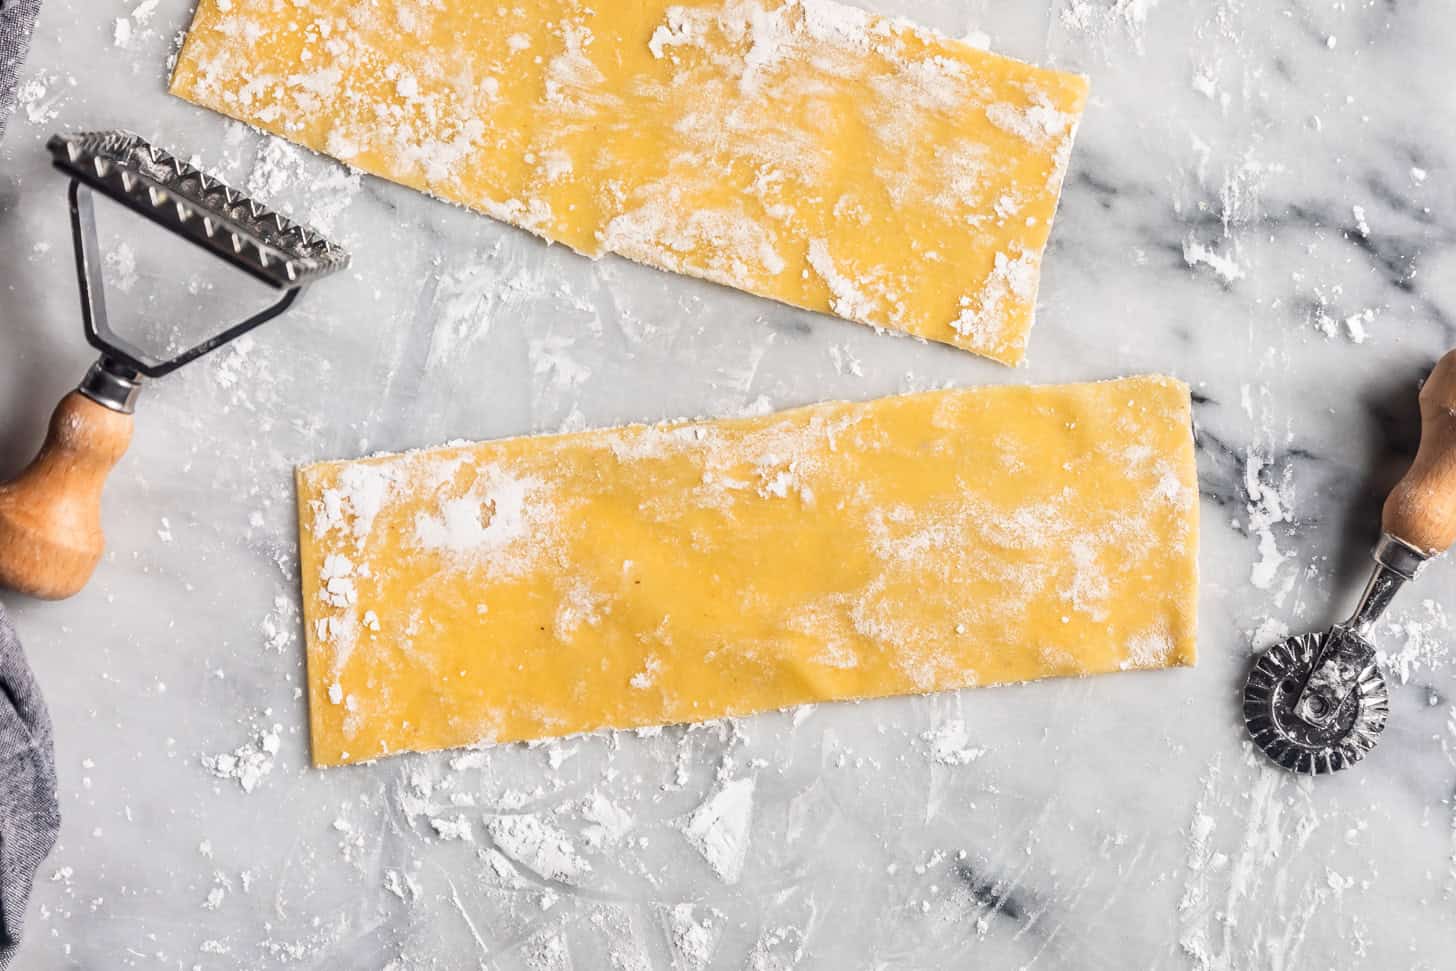
Transfer the dough onto a surface dusted generously with tapioca flour. Dust the dough well with tapioca flour on all sides and cut into 6 pieces. Working one at a time, flatten a dough piece with your hand until it is about ¼ to ½-inch thick.
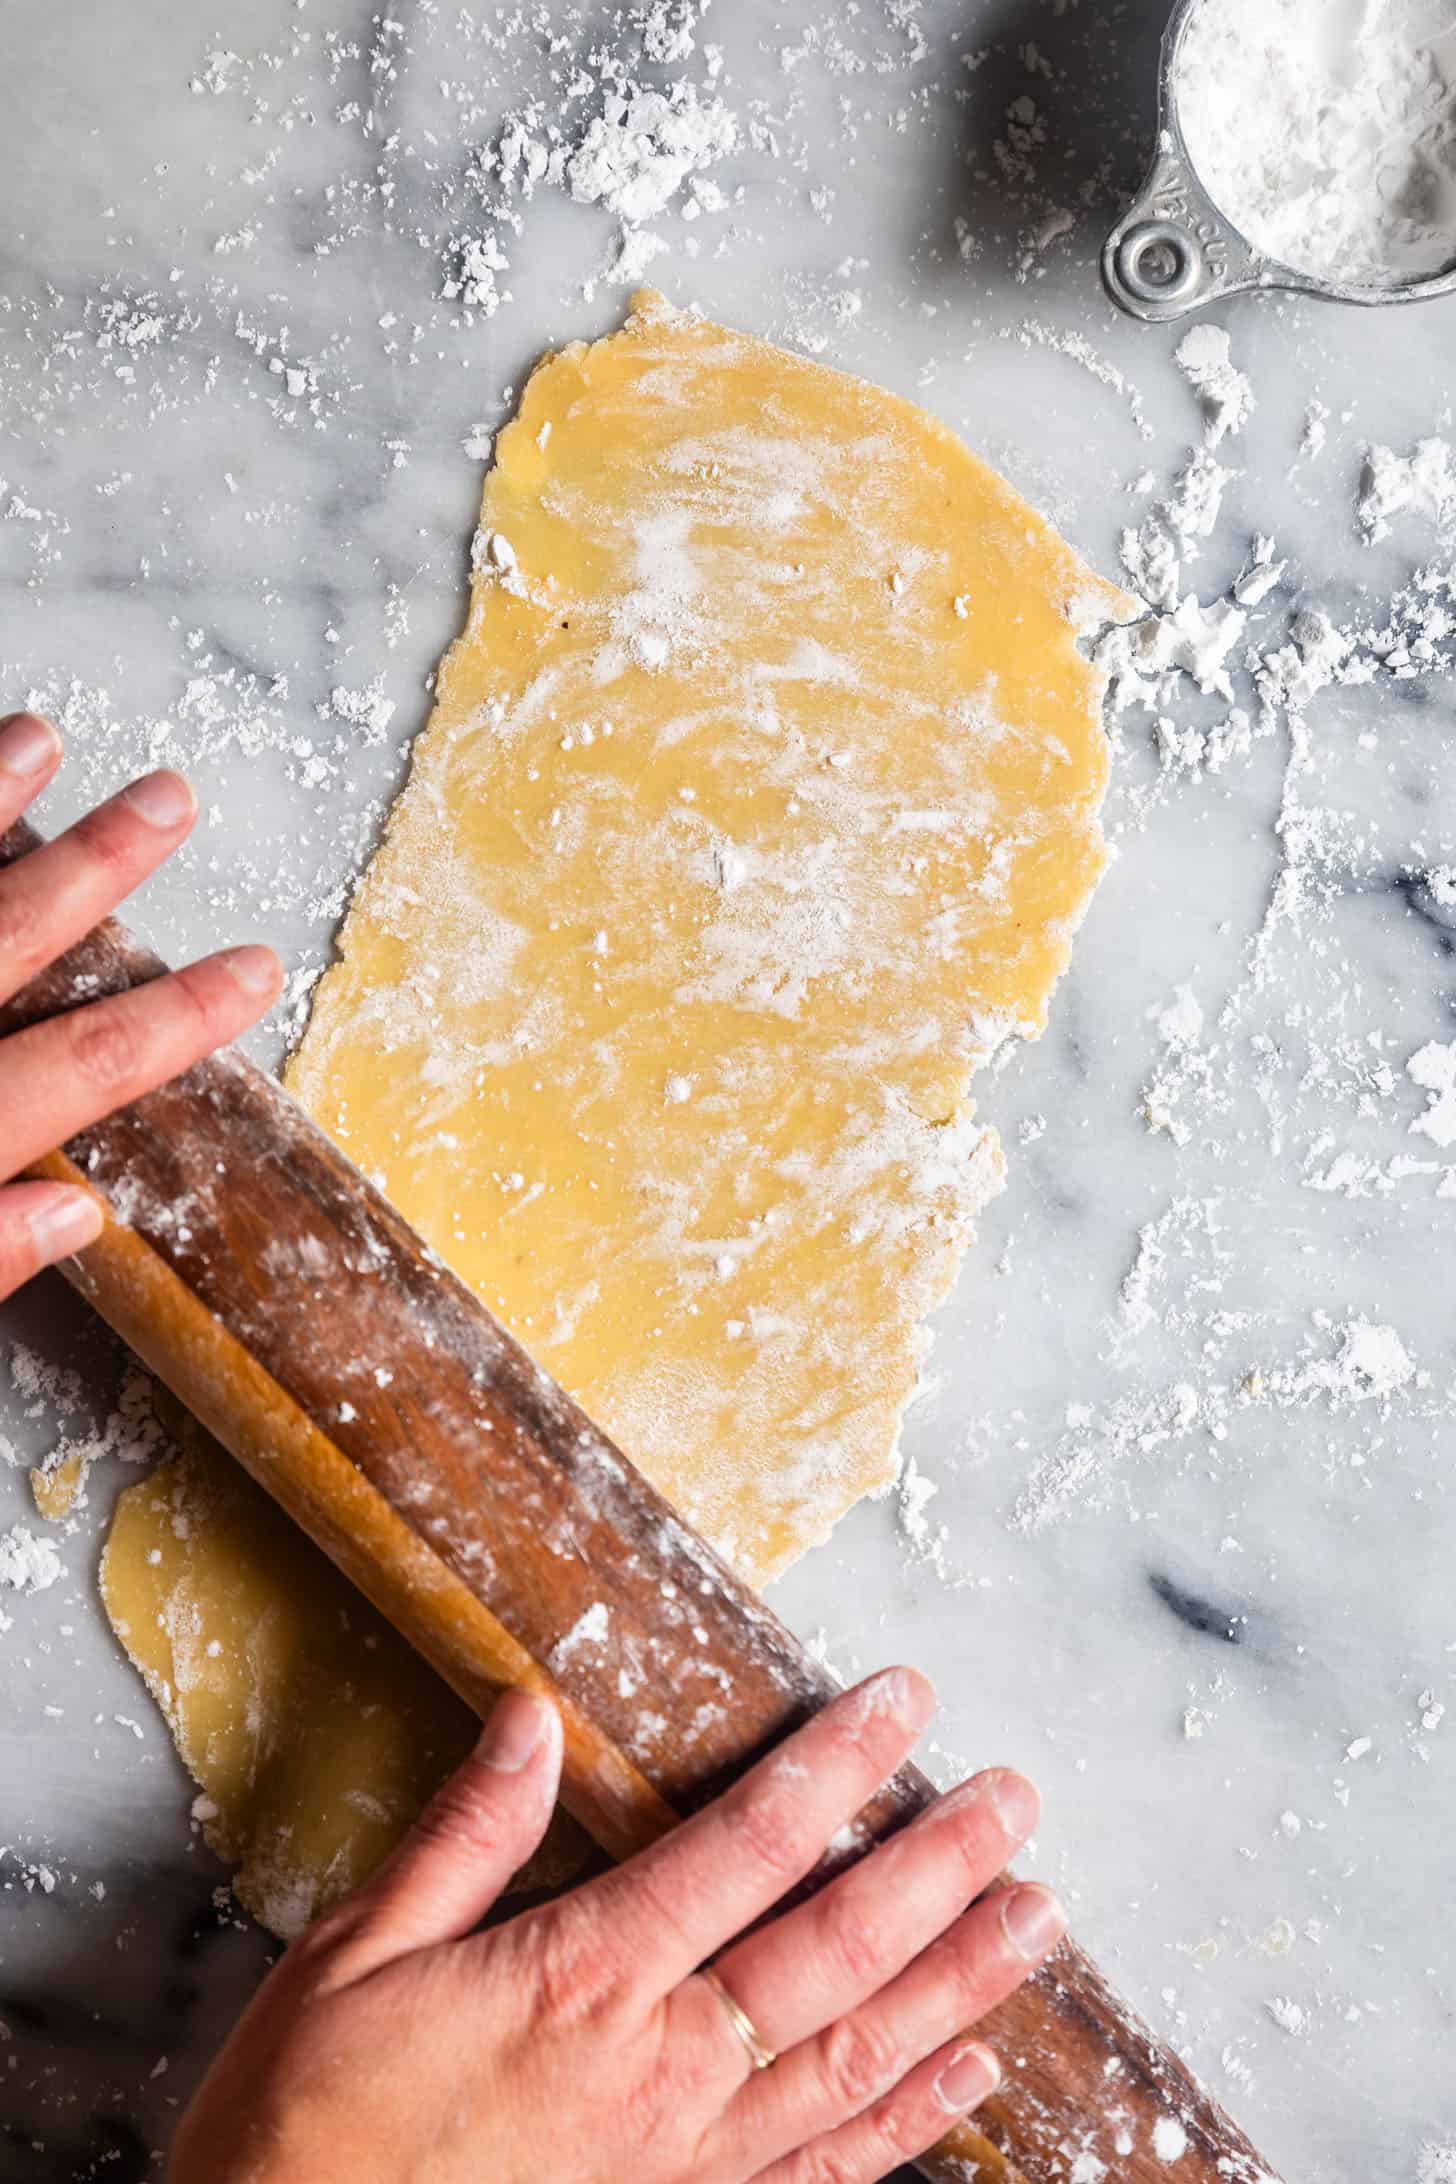
If using a rolling pin: Roll out the dough until it is 1/16-1/32-inch thick, dusting well on each side as you go.
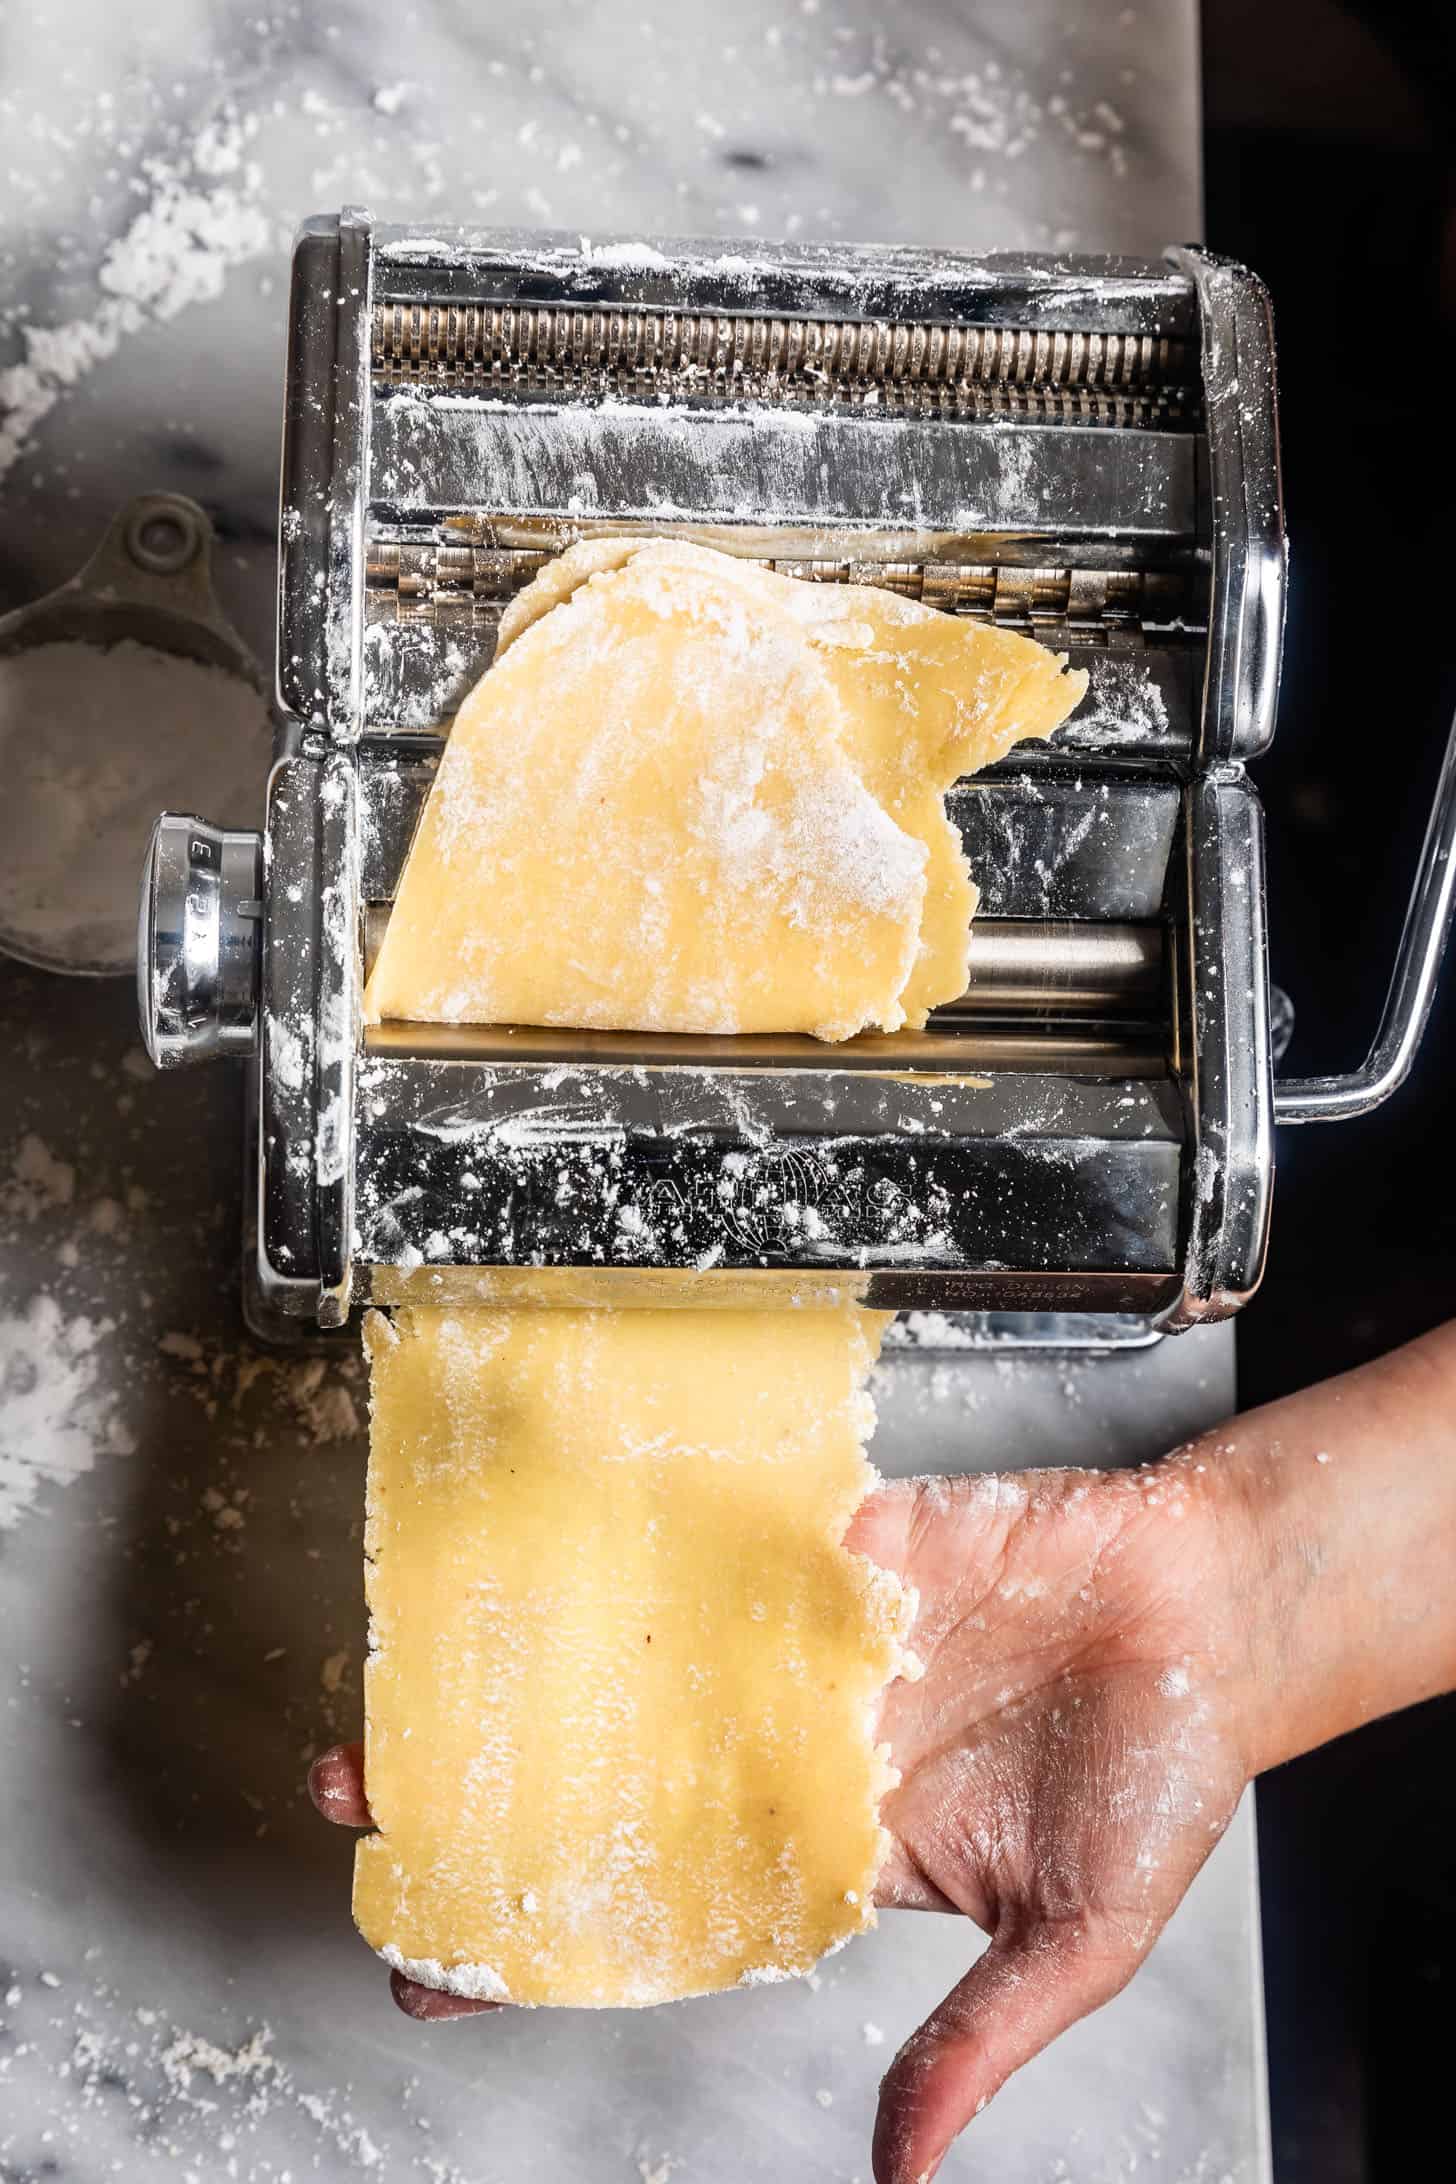
If using a pasta maker manual hand press: Roll the dough into sheets to "2" thickness on the pasta press, dusting both sides well with tapioca flour after each turn through the press.
If using the KitchenAid pasta roller attachment: Similarly, roll the dough into sheets to "2" thickness on the pasta roller, dusting both sides well with tapioca flour after each turn through the roller.
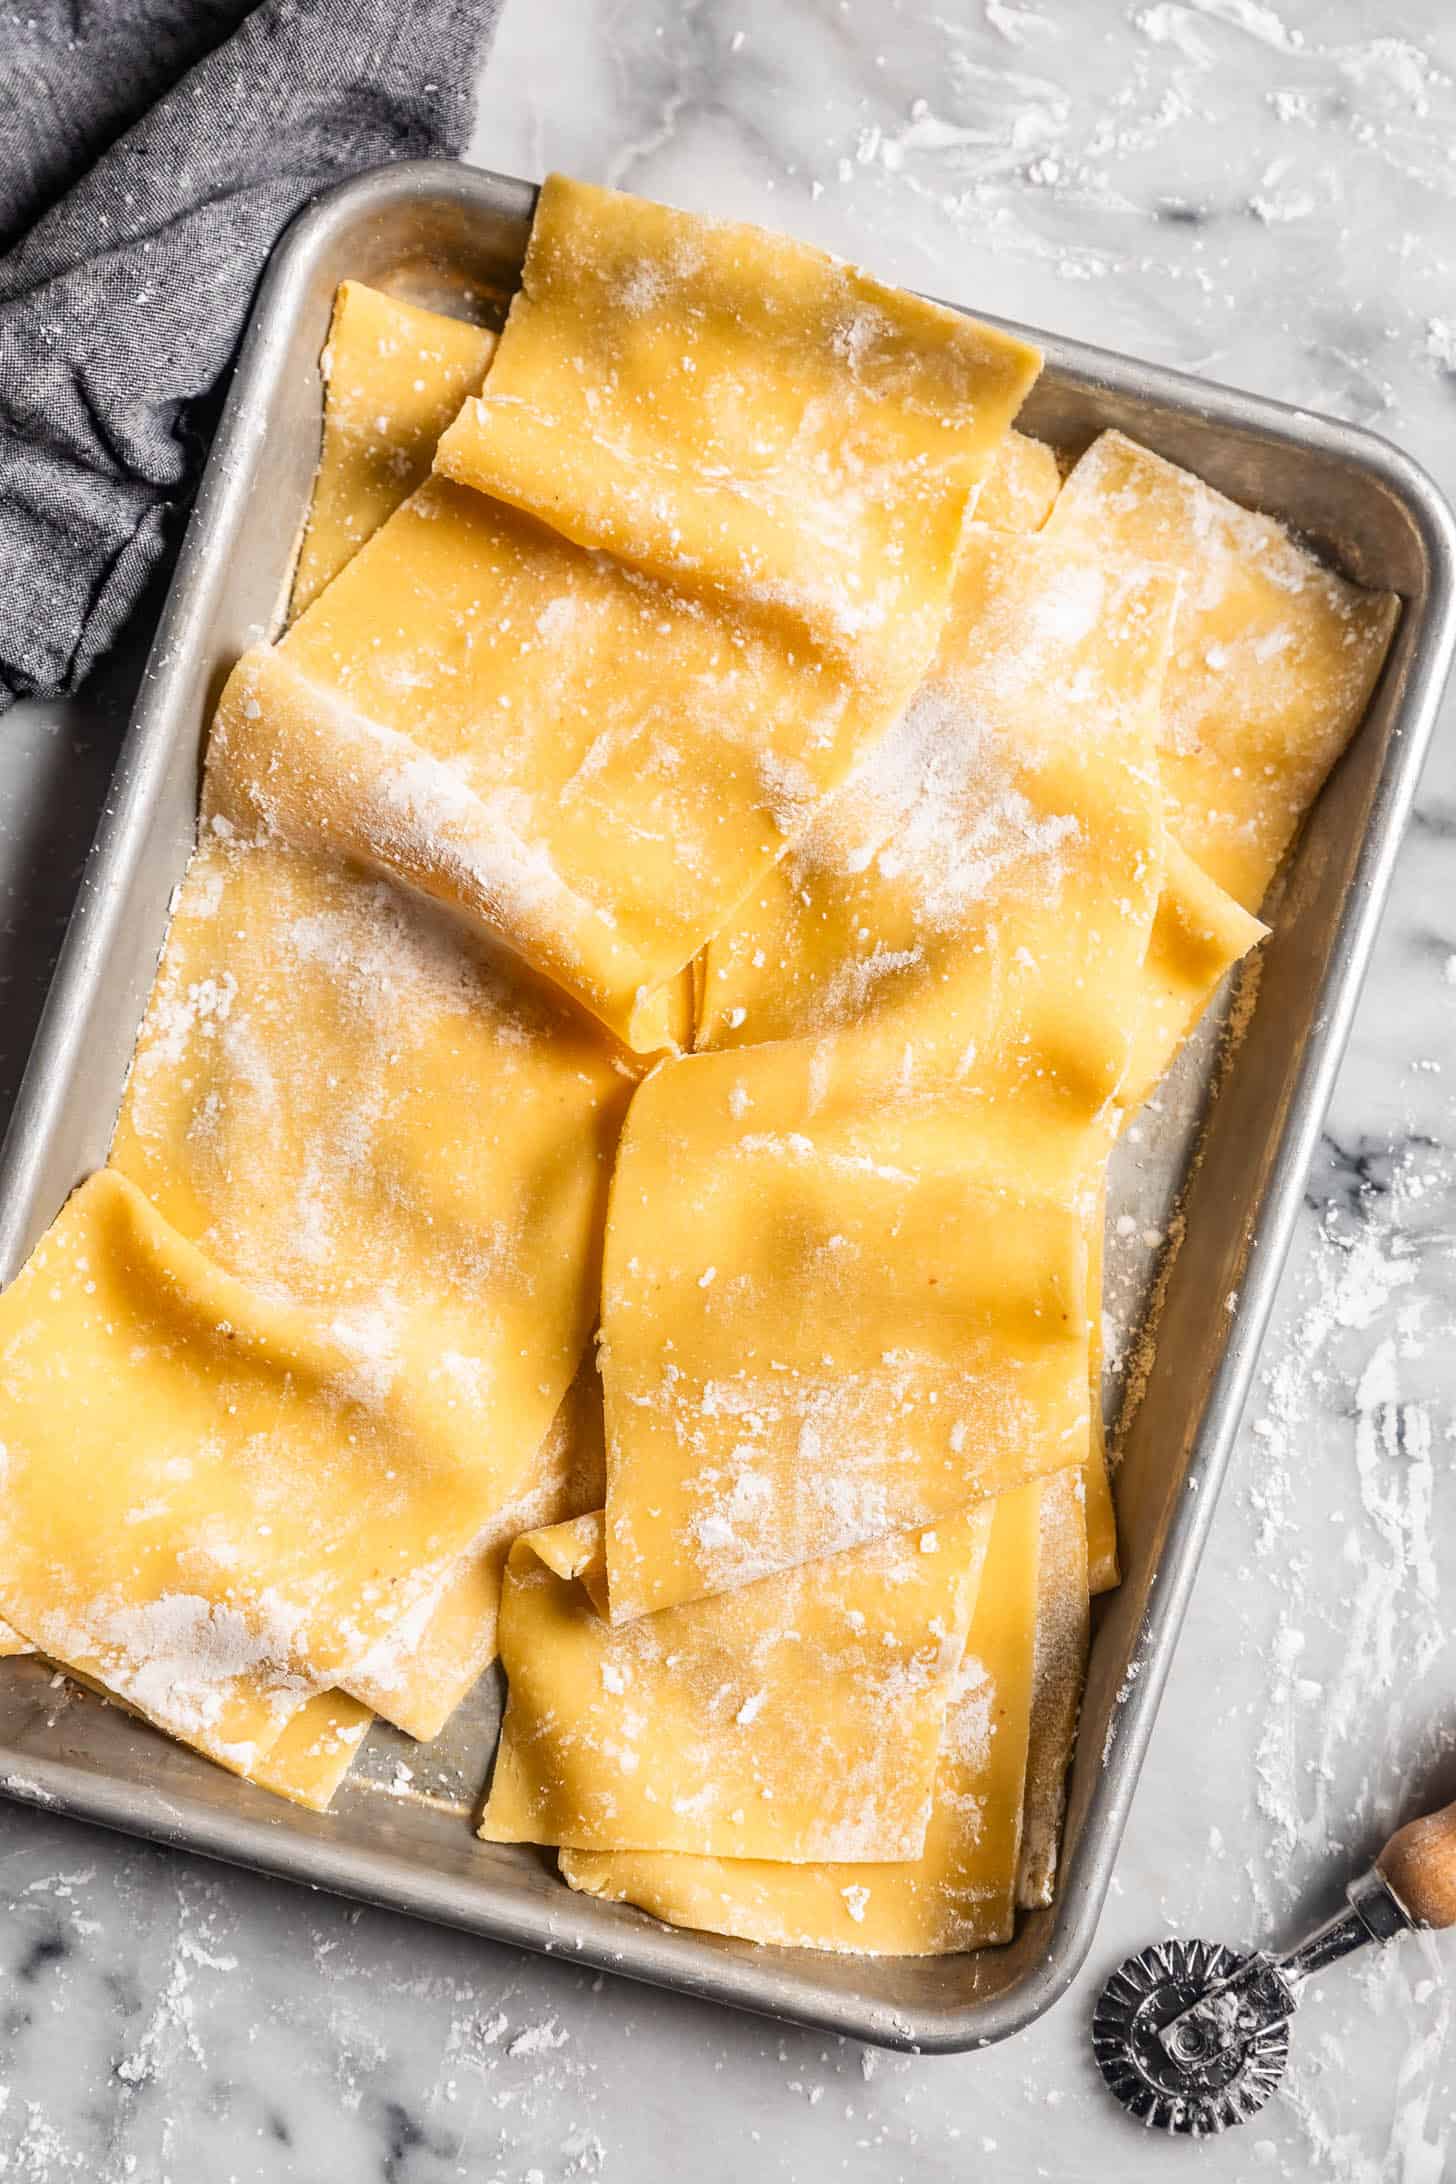
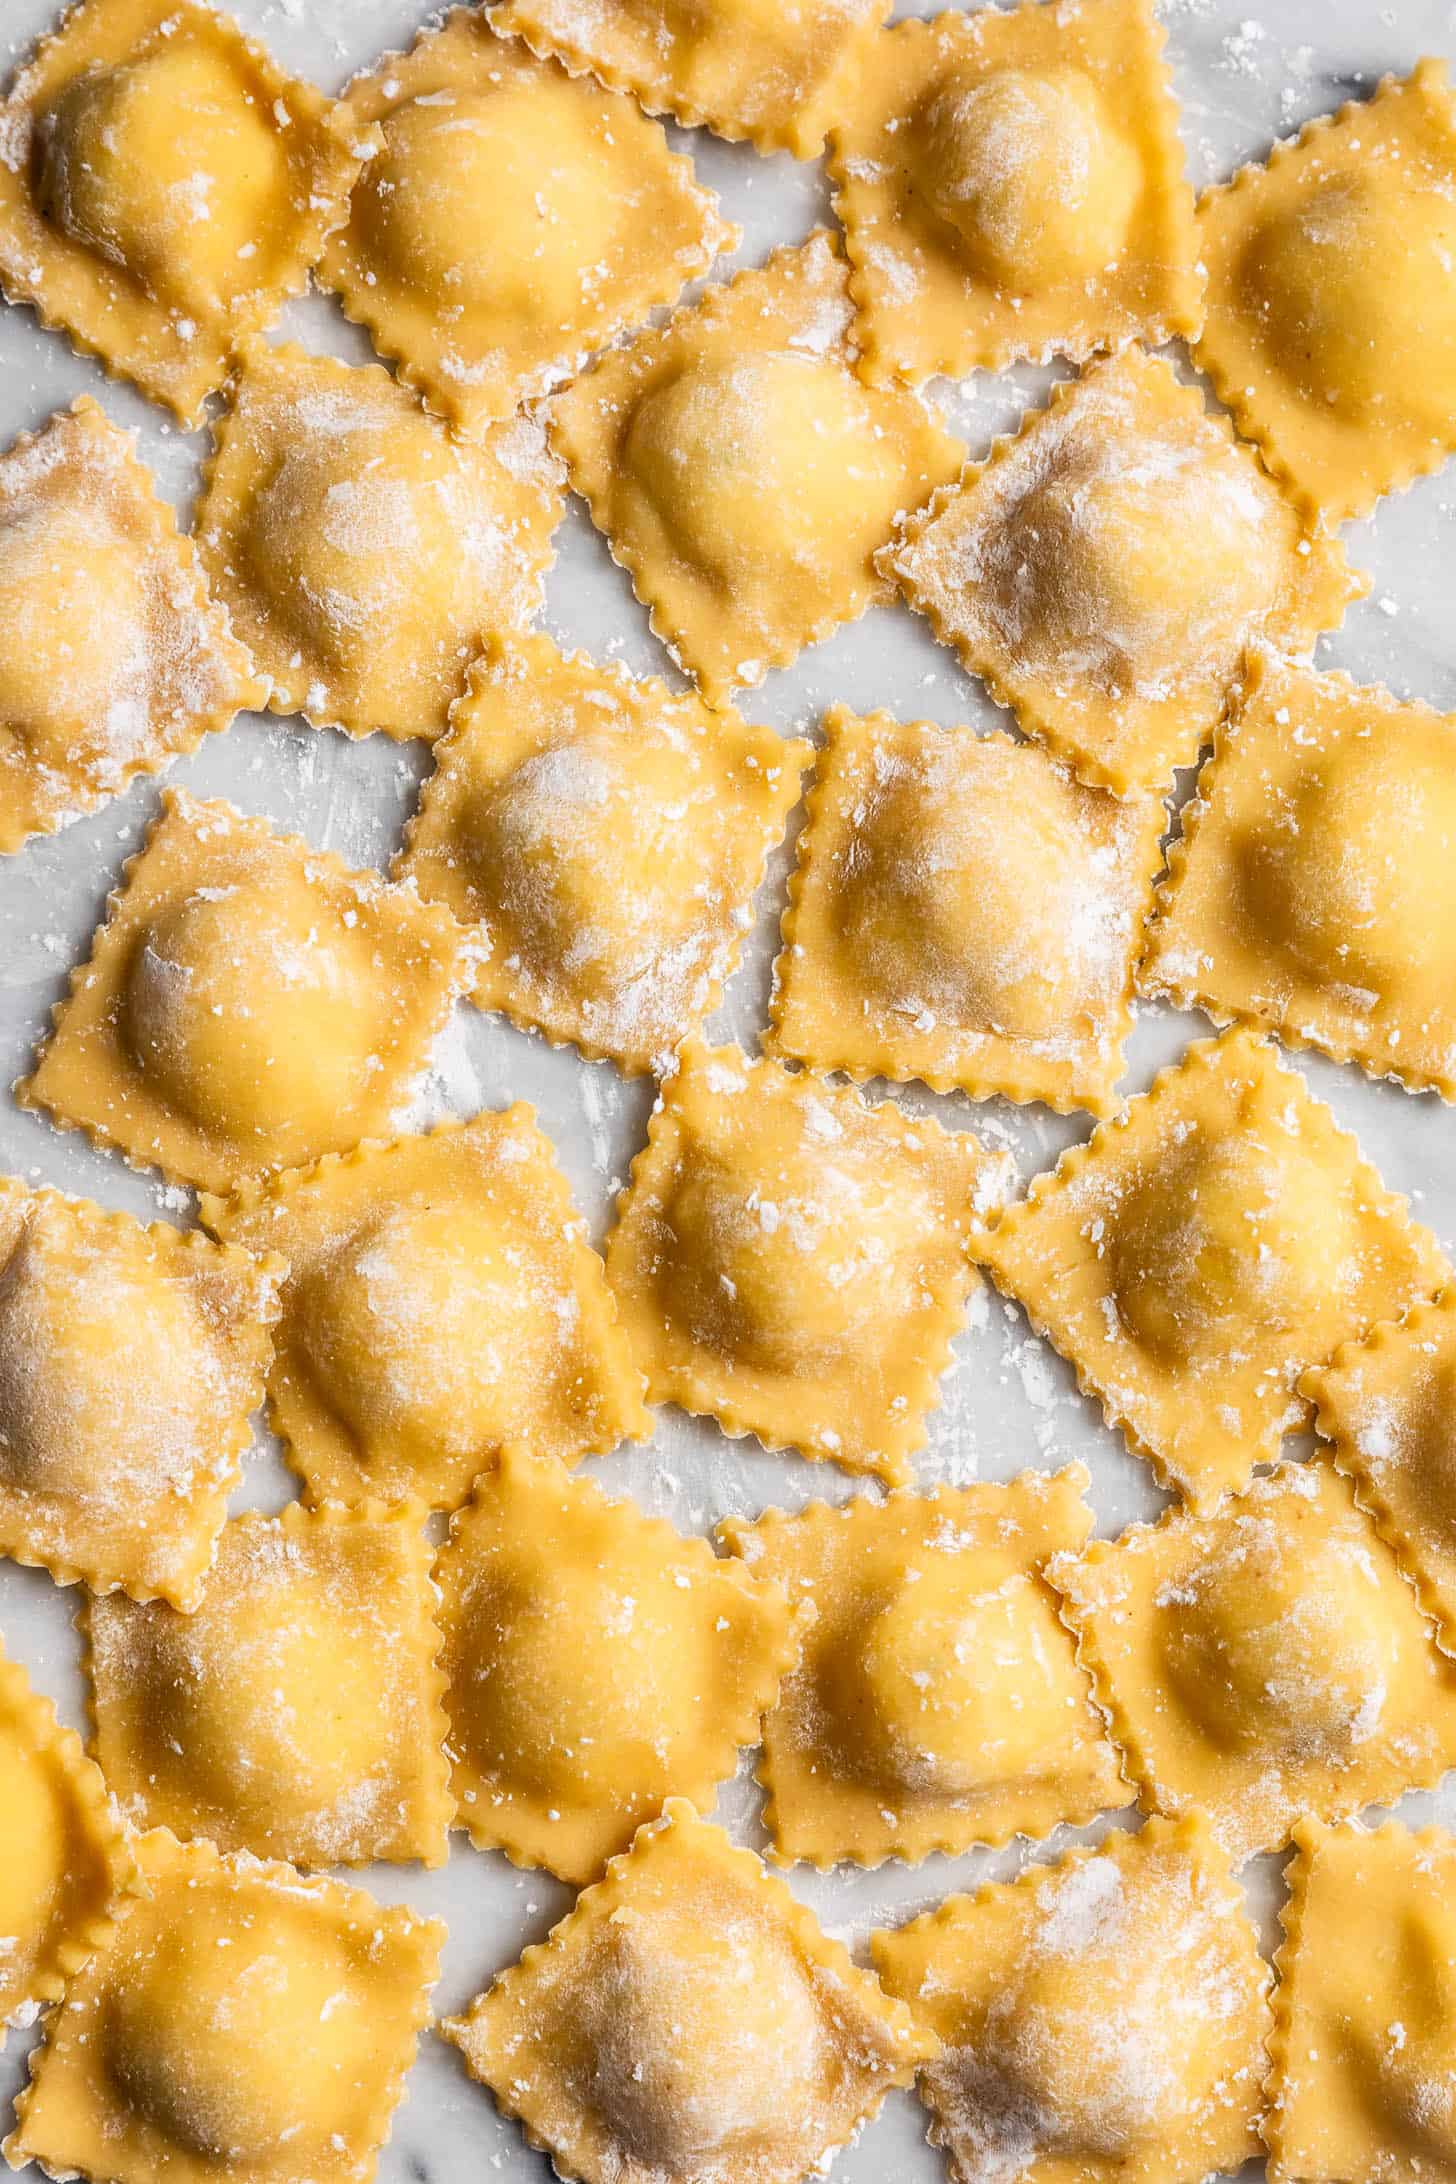
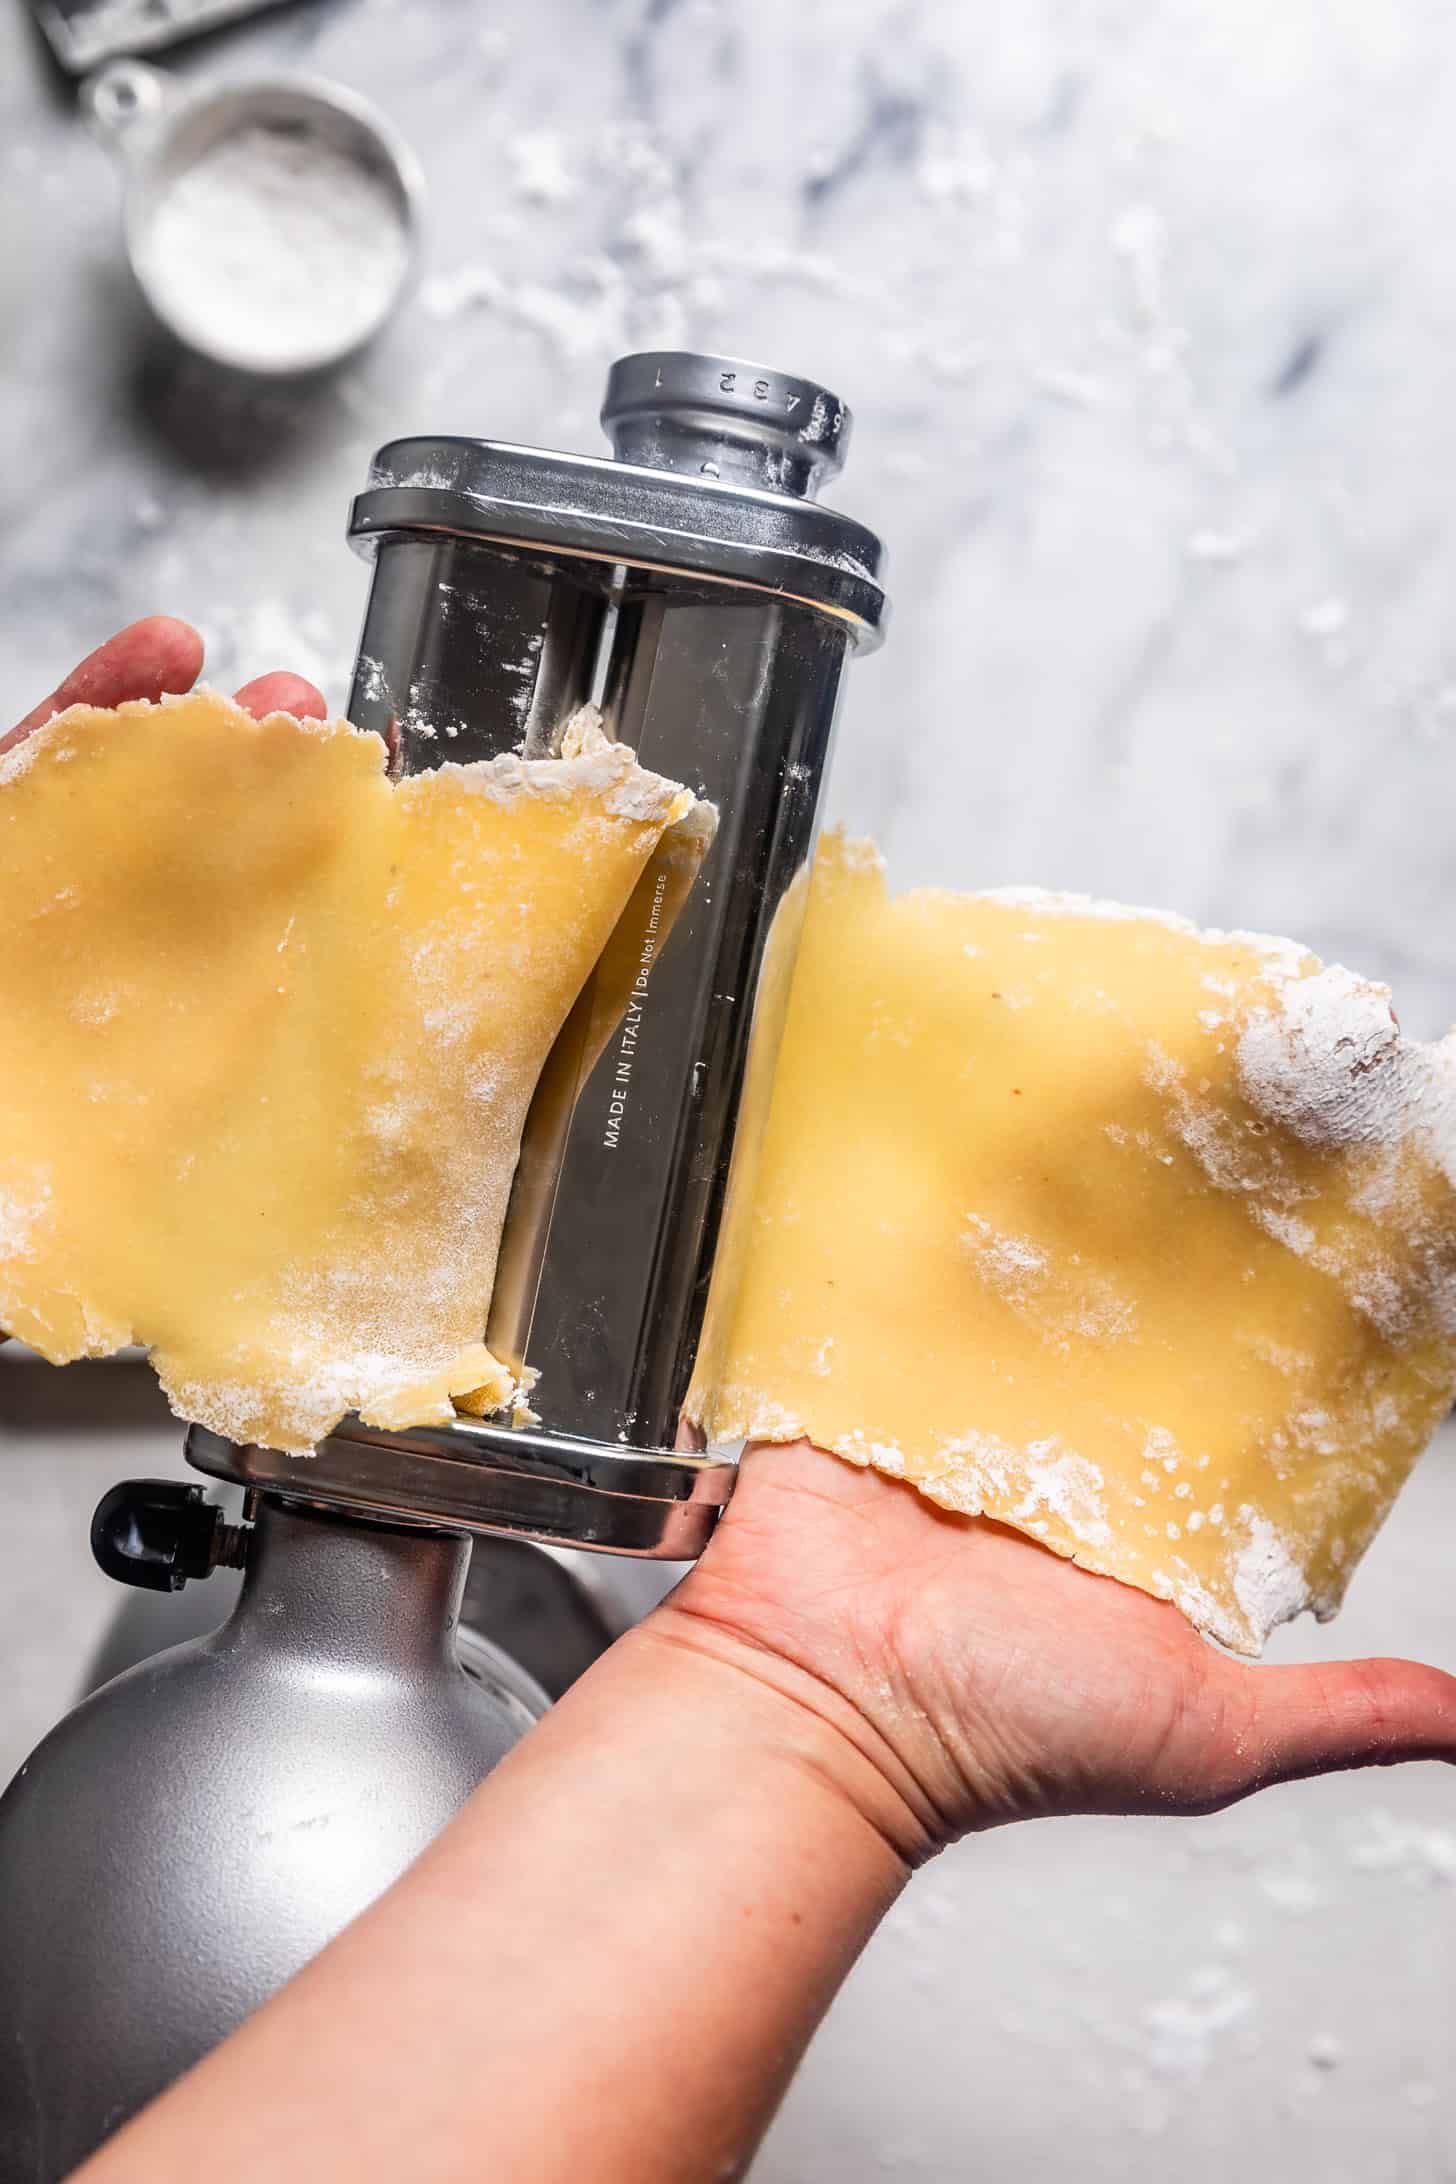
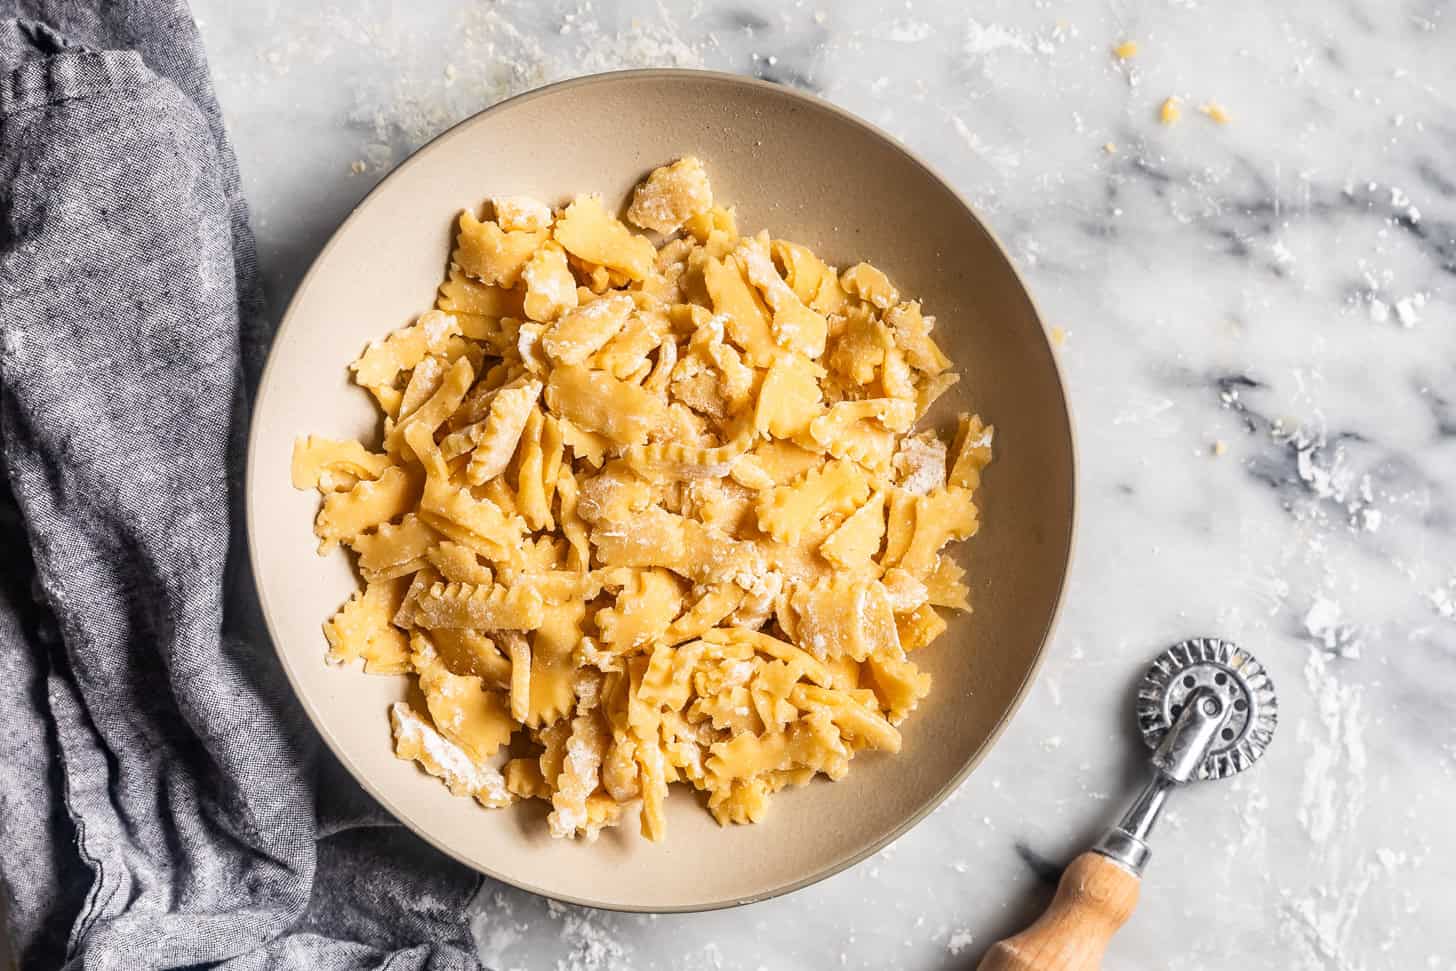
Repeat with each piece of dough, trimming the edges and ends so they are smooth and each piece is 3 inches wide. Gather all the cut scraps and repeat the rolling process.
Prepare two sheets of pasta that are the same length on a flour-lined surface or cut a single pasta sheet in half cross-wise so you have two wide sheets that are the same length.
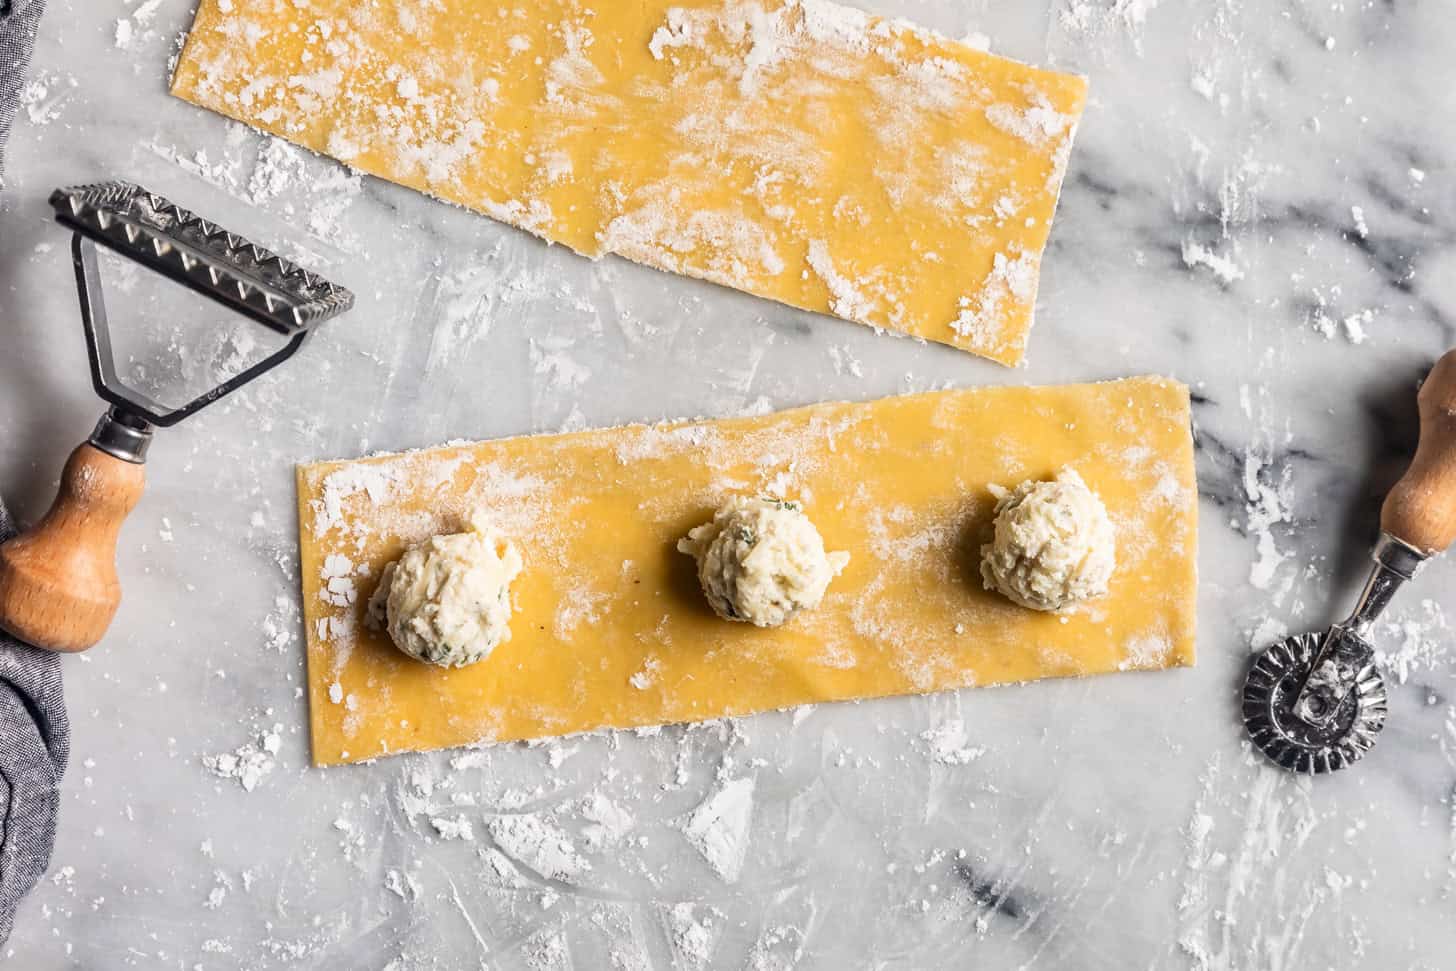
Dollop 1 tablespoon balls of filling 1.5 inches apart on one pasta sheet.
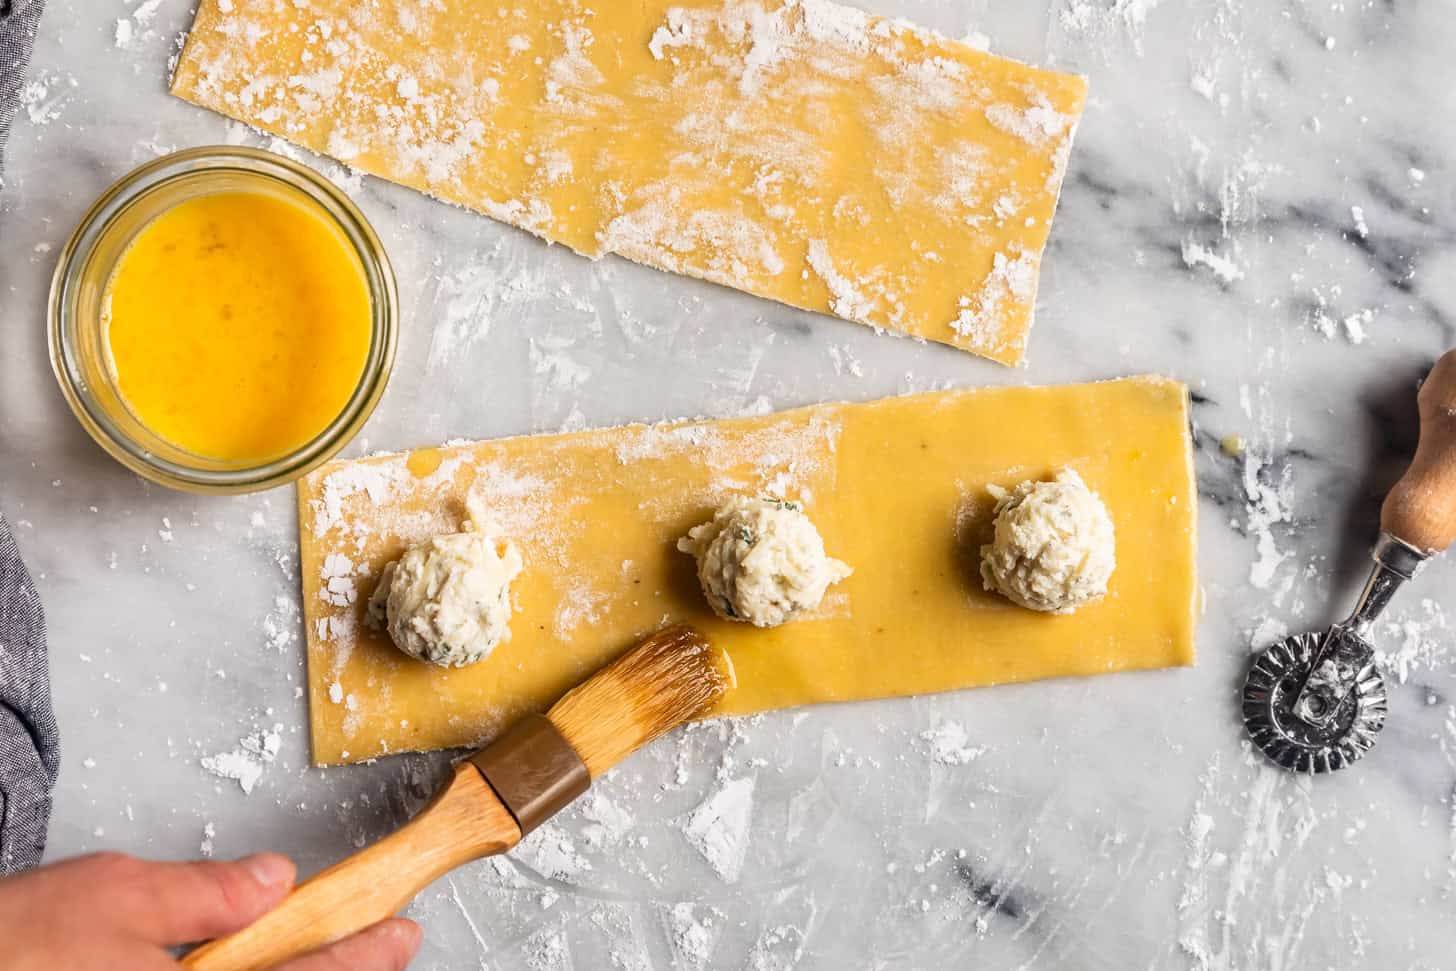
Brush the edges and between each filling ball with an egg wash.
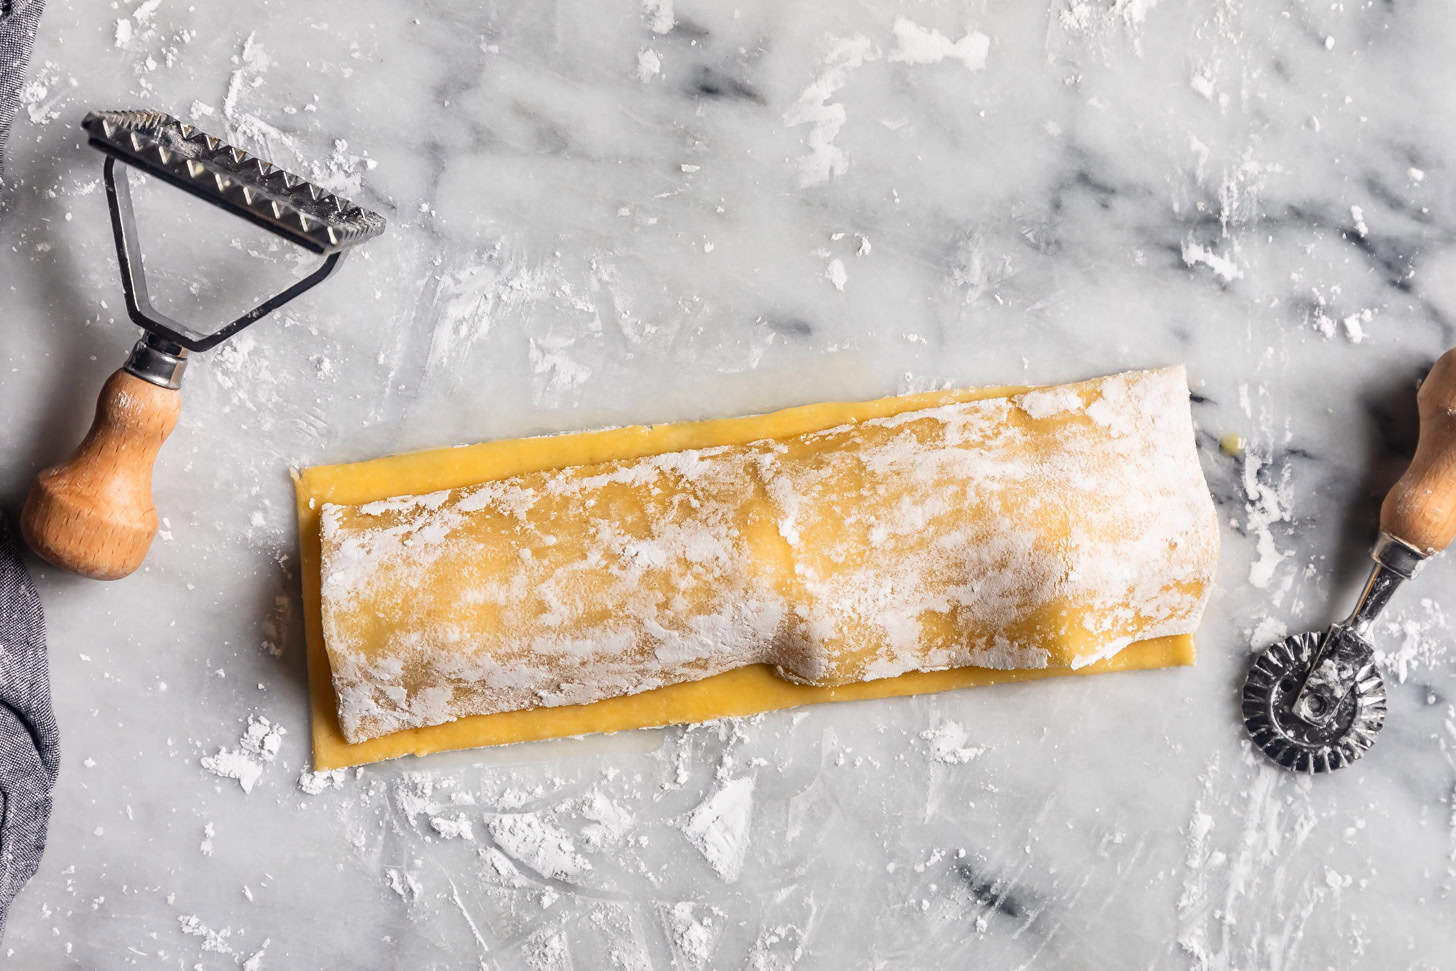
Place the second sheet of pasta over top.
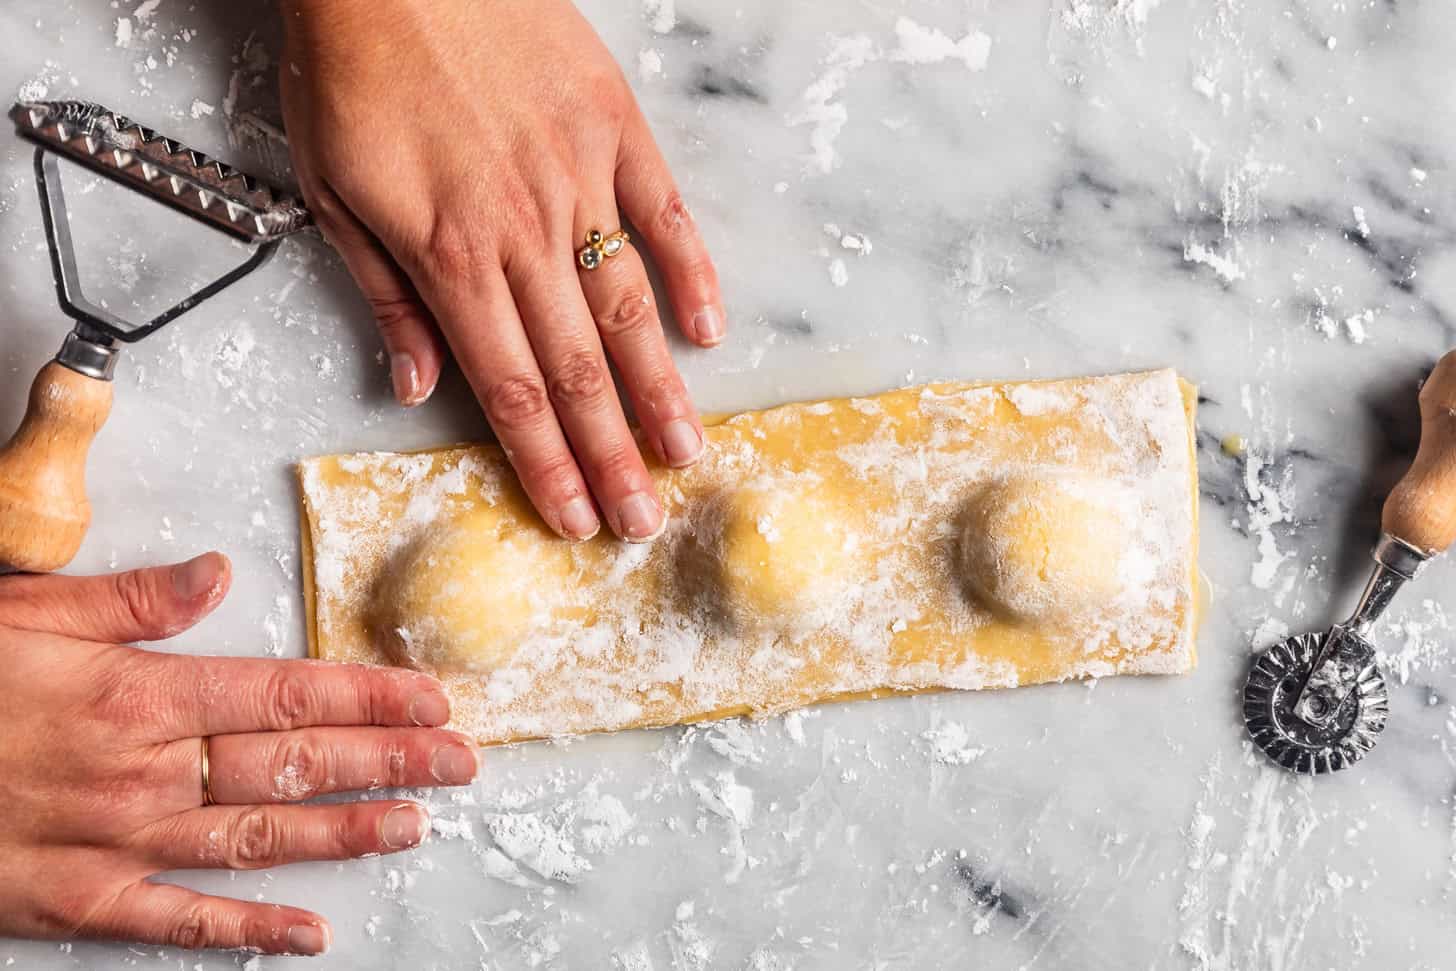
Use your hands to carefully seal the top sheet to the bottom, removing all air pockets from the filling.
If using a ravioli stamp, center the filling on the stamp and press.
OR
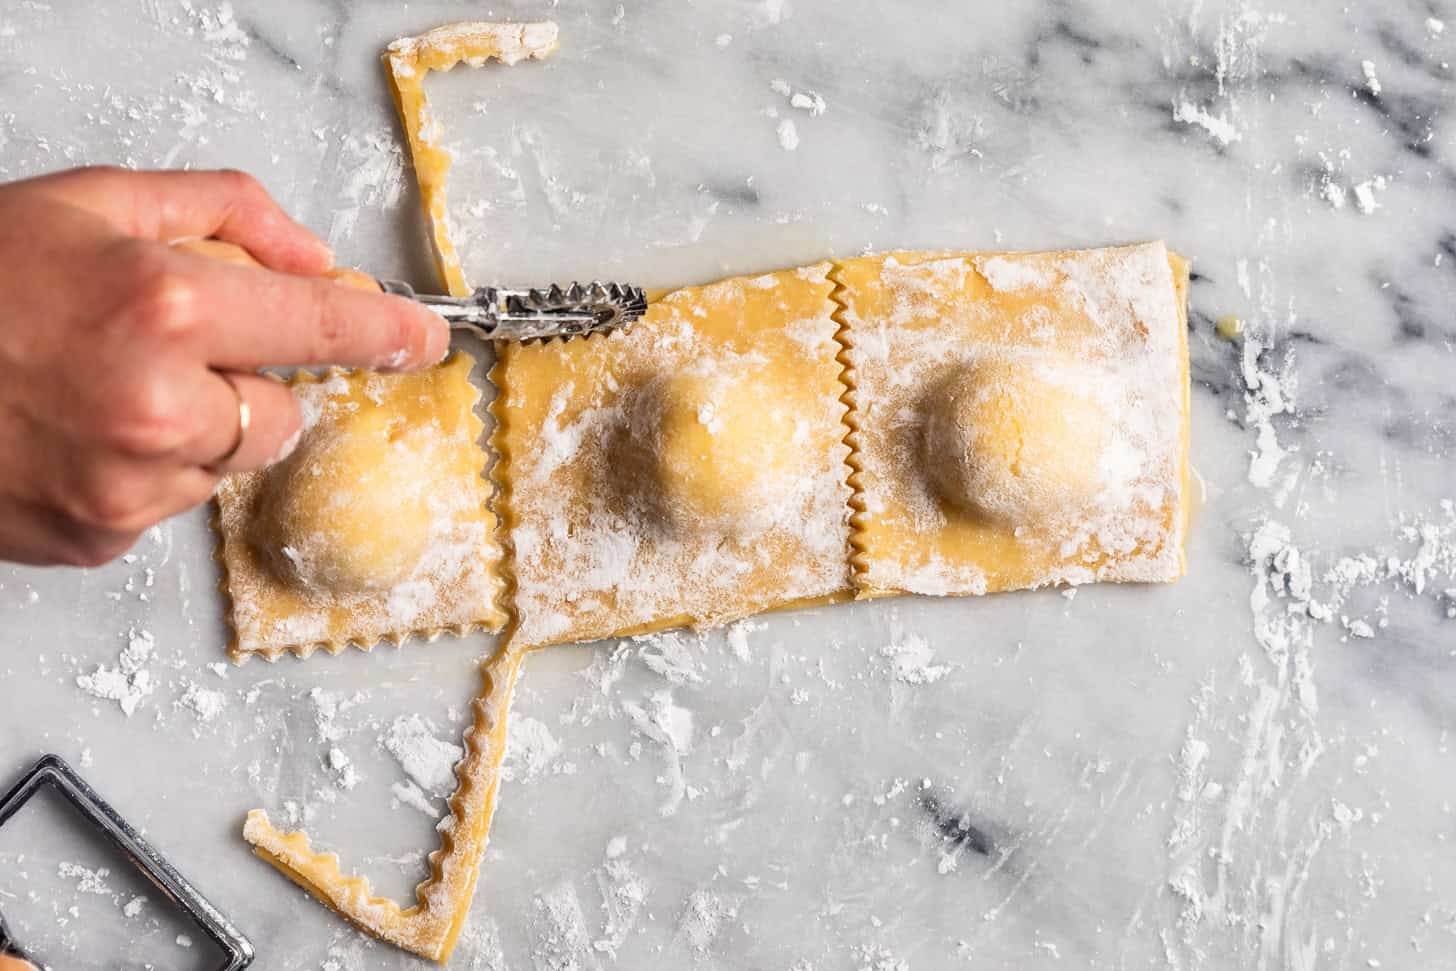
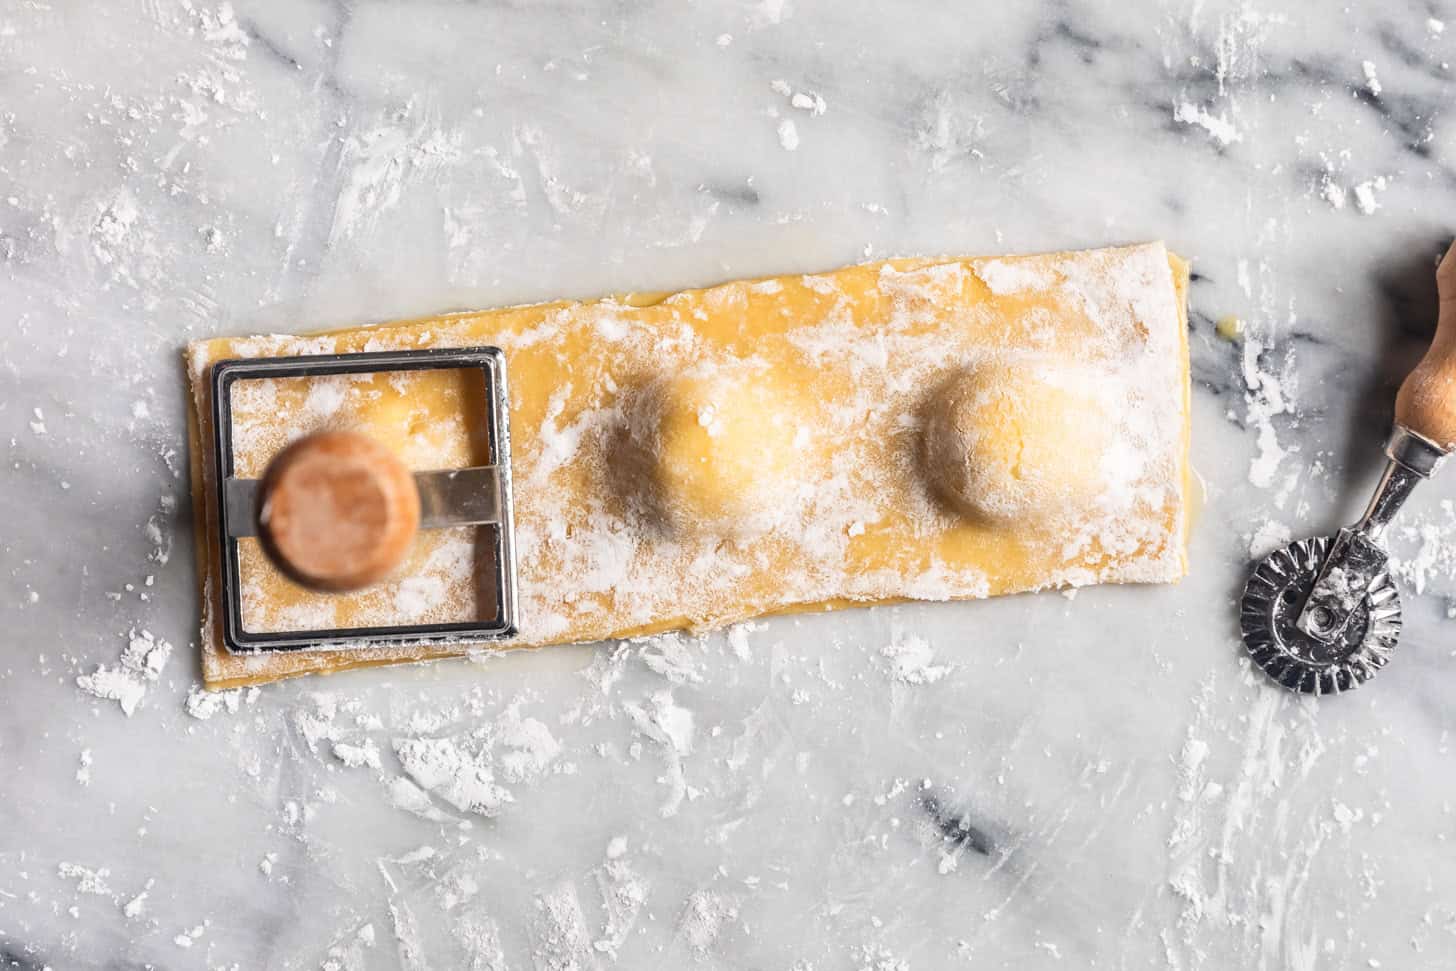
If using the party wheel, cut out the ravioli squares, leaving a ½-inch seal around the filling.
OR
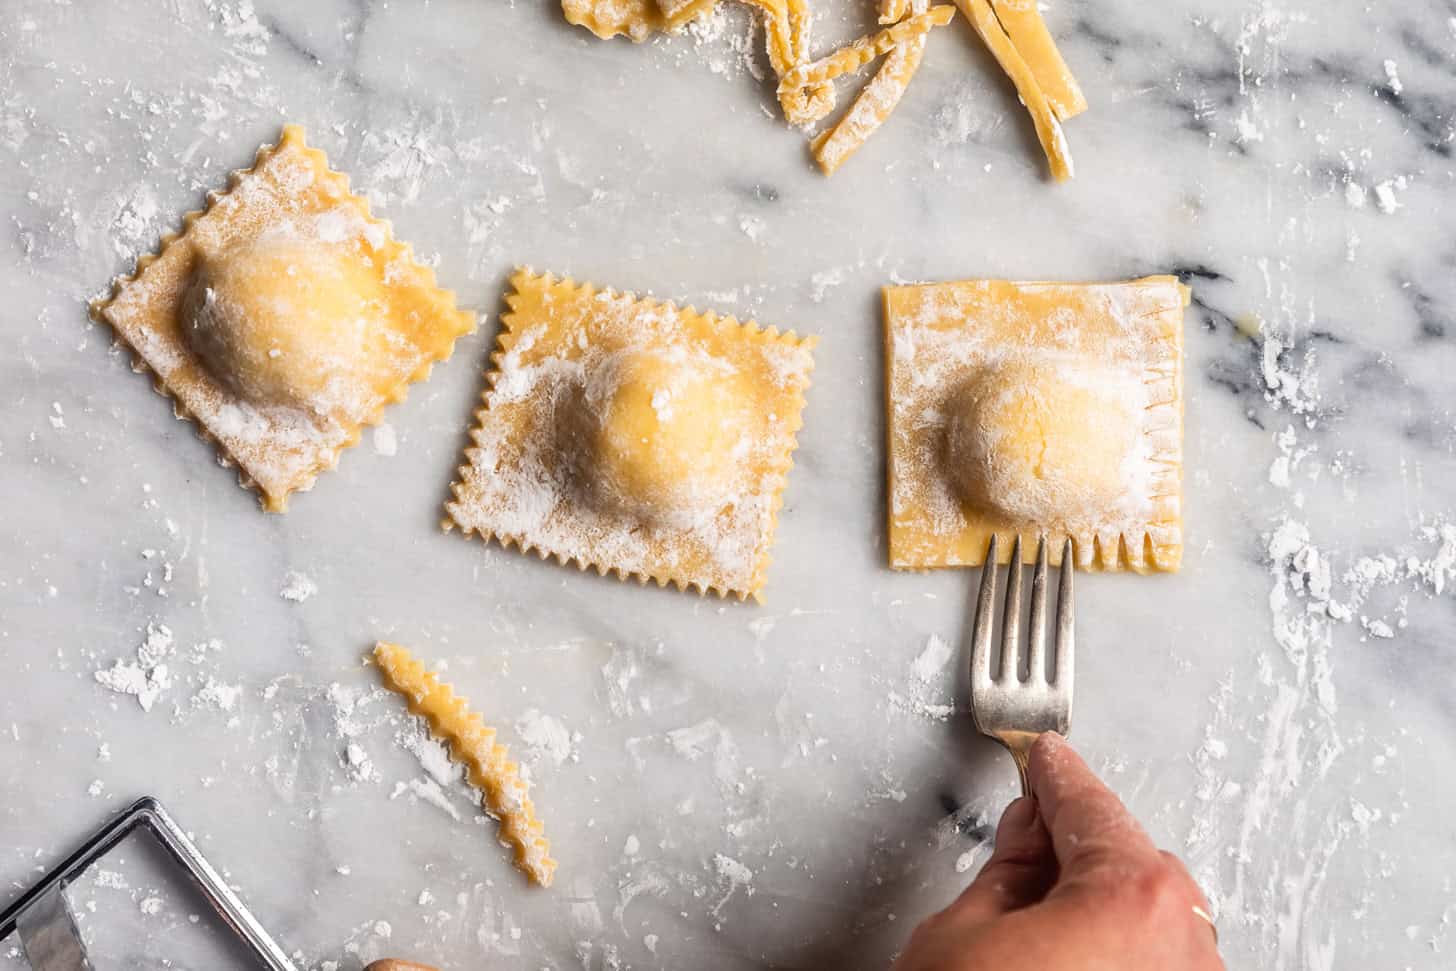
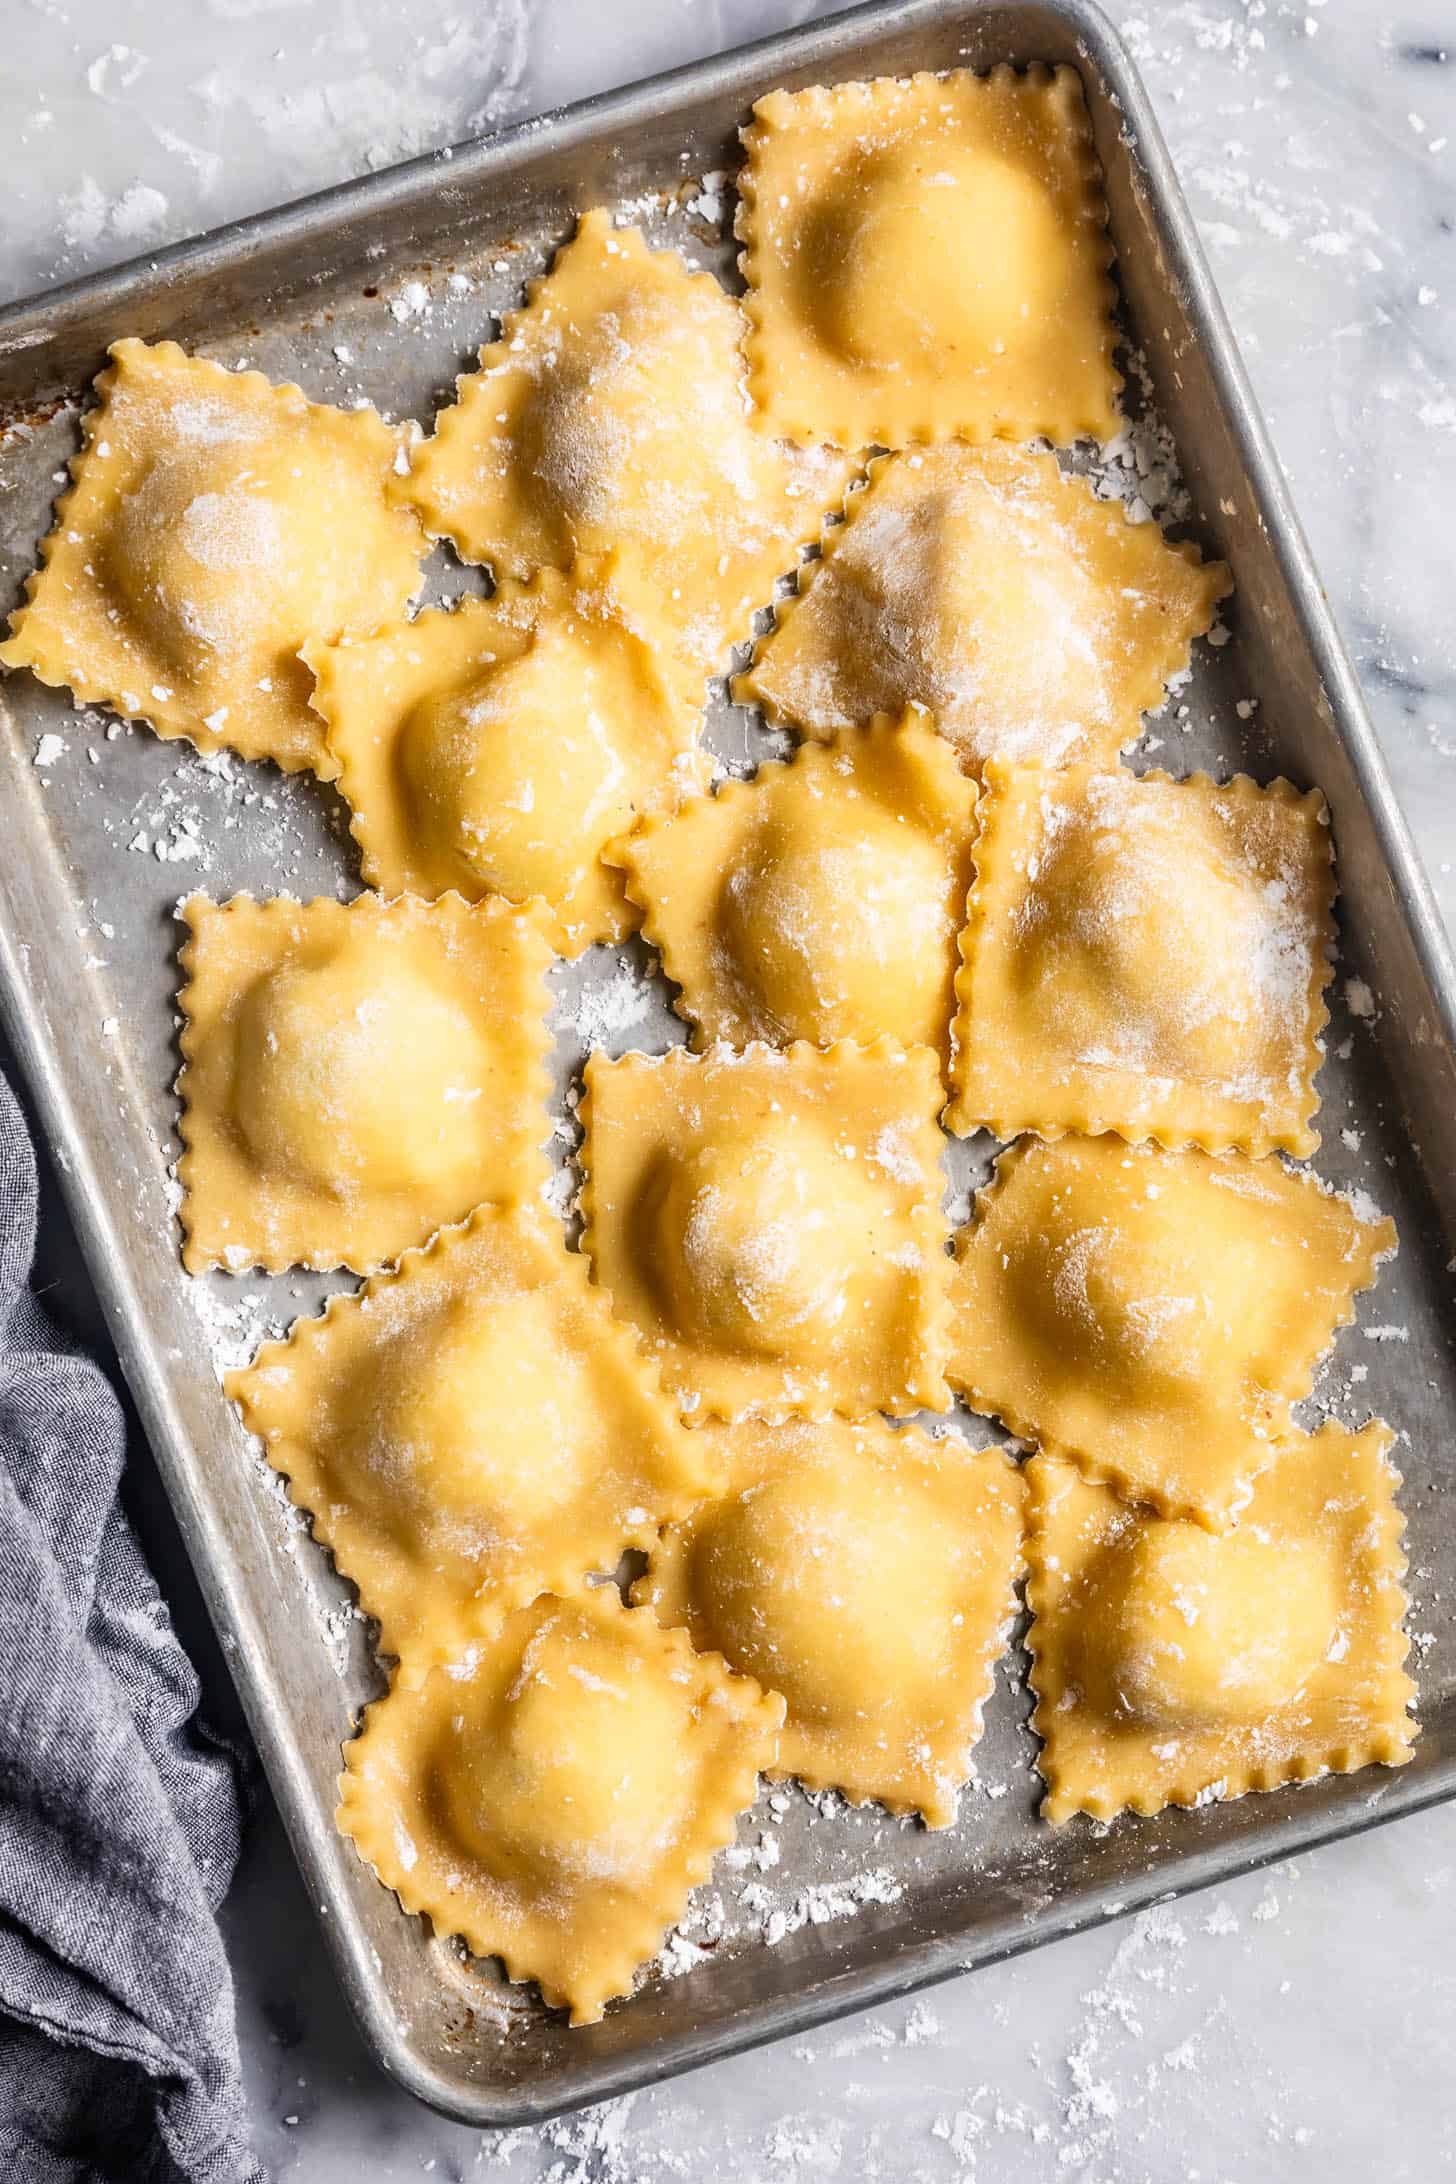
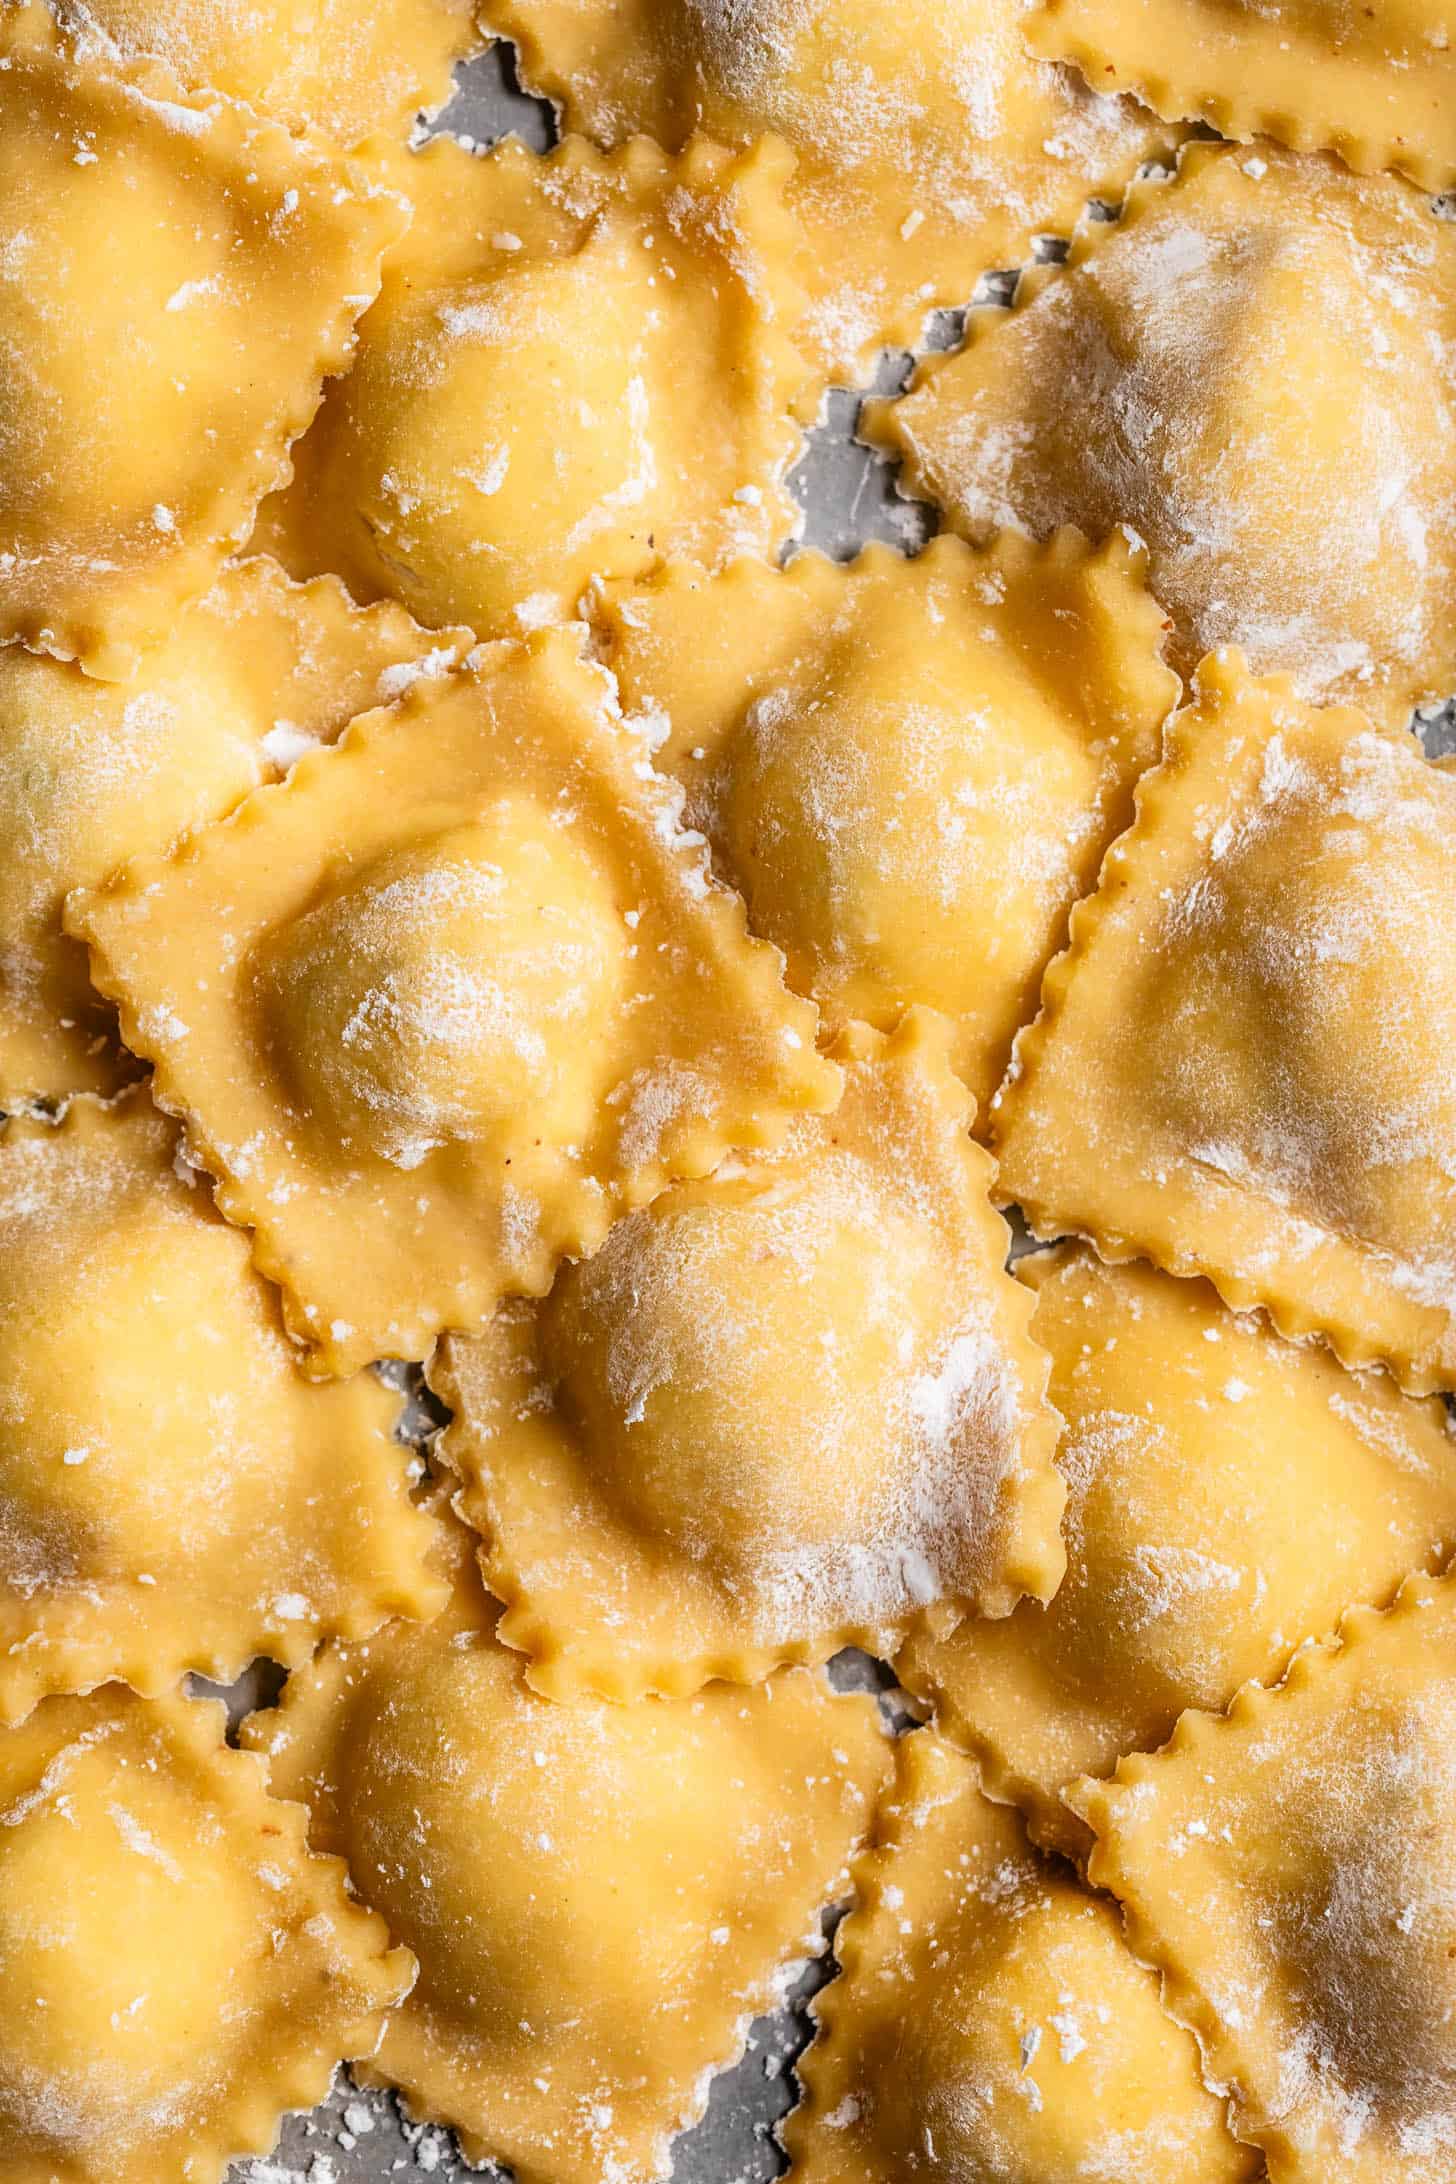
Or, cut out the ravioli squares with a knife, and use a fork to crimp and seal the edges.
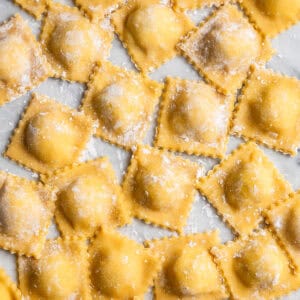
Repeat with the remaining pasta sheets, transferring cut ravioli to a baking sheet dusted with tapioca flour.
TIP: If you find your dough too sticky, be sure to continuously dust it with tapioca flour to prevent sticking. Keep a bowl of tapioca flour on your work surface. After each time you roll, dust both sides with tapioca flour.
Recipe
Homemade Gluten-Free Ravioli (with almond flour)
Ingredients
- 240 g (2 cups + 2 tablespoos) super-fine blanched almond flour
- 82 g (½ cup + 2 tablespoons) Bob's Red Mill tapioca flour, plus more for rolling
- 44 g (¼ cup) Sweet rice flour, also called mochiko; do not substitute white or brown rice flour
- 1 teaspoon xanthan gum, *see note
- ¼ teaspoon kosher salt
- 4 large eggs
- 2 teaspoons extra virgin olive oil
- Egg wash: 1 egg and 1 tablespoon of water
- 8 ounces (1 cup) whole milk ricotta, I strongly recommend Bellwether Farms whole milk basket ricotta
- 2.5 ounces (⅔ cup) shredded part-skin mozzarella
- 1 ounce (⅓ cup) freshly grated parmesan cheese
- 2 teaspoons fresh thyme leaves or basil leaves, minced
- ¼ teaspoon each, salt and pepper
- ⅛ teaspoon ground nutmeg
INSTRUCTIONS
- Sift all the dry ingredients together in a large bowl, creating a well in the middle for cracking the eggs.
- Crack the eggs into the well and give them a quick whisk with a fork. Add the oil to the eggs and begin whisking the eggs and the oil, slowly incorporating more and more of the flour. Continue incorporatin the flour as you whisk, until the dough is too thick to whisk and starts clumping into a ball. Knead the dough, using your palm, until all the flour is incorporated. Wrap the dough in plastic wrap and let it rest for 30 minutes while you prepare the filling.
- To make the three-cheese filling shown here, mix all the filling ingredients in a bowl until well combined. Bring 4-quarts of water to boil in a large pot with a teaspoon of salt.
- After letting the dough rest, transfer the dough onto a surface dusted generously with tapioca flour. Dust the dough well with tapioca flour on all sides and cut into 6 pieces. Use your hands to press one piece at a time on a tapioca-floured surface until it is about ¼ to ½-inch thick, reserving the other pieces in plastic wrap or under a towel.
- Roll out the dough into a thin sheet (about 1/16-1/32-inch thick) using a rolling pin, pasta maker manual hand press, or kitchenaid pasta roller, lightly dusting both sides with tapioca flour as you go.
- If using the the manual pasta press or KitchenAid pasta roller attachment, send the dough through setting 1, fold it in half, dust it with tapioca flour, then send it again. Repeat until it feeds through smooth, then reduce the thickness one stop at a time, dusting the pasta sheet lightly with tapioca flour, until you get to a 2.
- Trim the edges of the pasta sheet so they are smooth and each sheet is 3 inches wide. Dust both sides lightly with tapioca flour and set aside, while you repeat with the remaining dough. Roll the trimmed edges up with the next piece of dough.
- Prepare two sheets of pasta that are the same length on a flour-lined surface or cut a single pasta sheet in half cross-wise so you have two wide sheets that are the same length.
- Prepare the egg wash: whisk the remaining egg with 1 tablespoon of water. Dollop 1 tablespoon balls of filling 1.5 inches apart on one pasta sheet. Brush the edges and between each filling ball with an egg wash. Place the second sheet of pasta over top. Use your hands to carefully seal the top sheet to the bottom, removing all air pockets from the filling.
- Pick your cutting tool! You can use a knife, a pastry wheel cutter, or a ravioli stamp. If using a ravioli stamp, center the filling on the stamp and press. If using the party wheel, cut out the ravioli squares, leaving a ½-inch seal around the filling. Or, cut out the ravioli squares with a knife, and use a fork to crimp and seal the edges. Repeat with the remaining pasta sheets, transferring cut ravioli to a baking sheet dusted with tapioca flour.
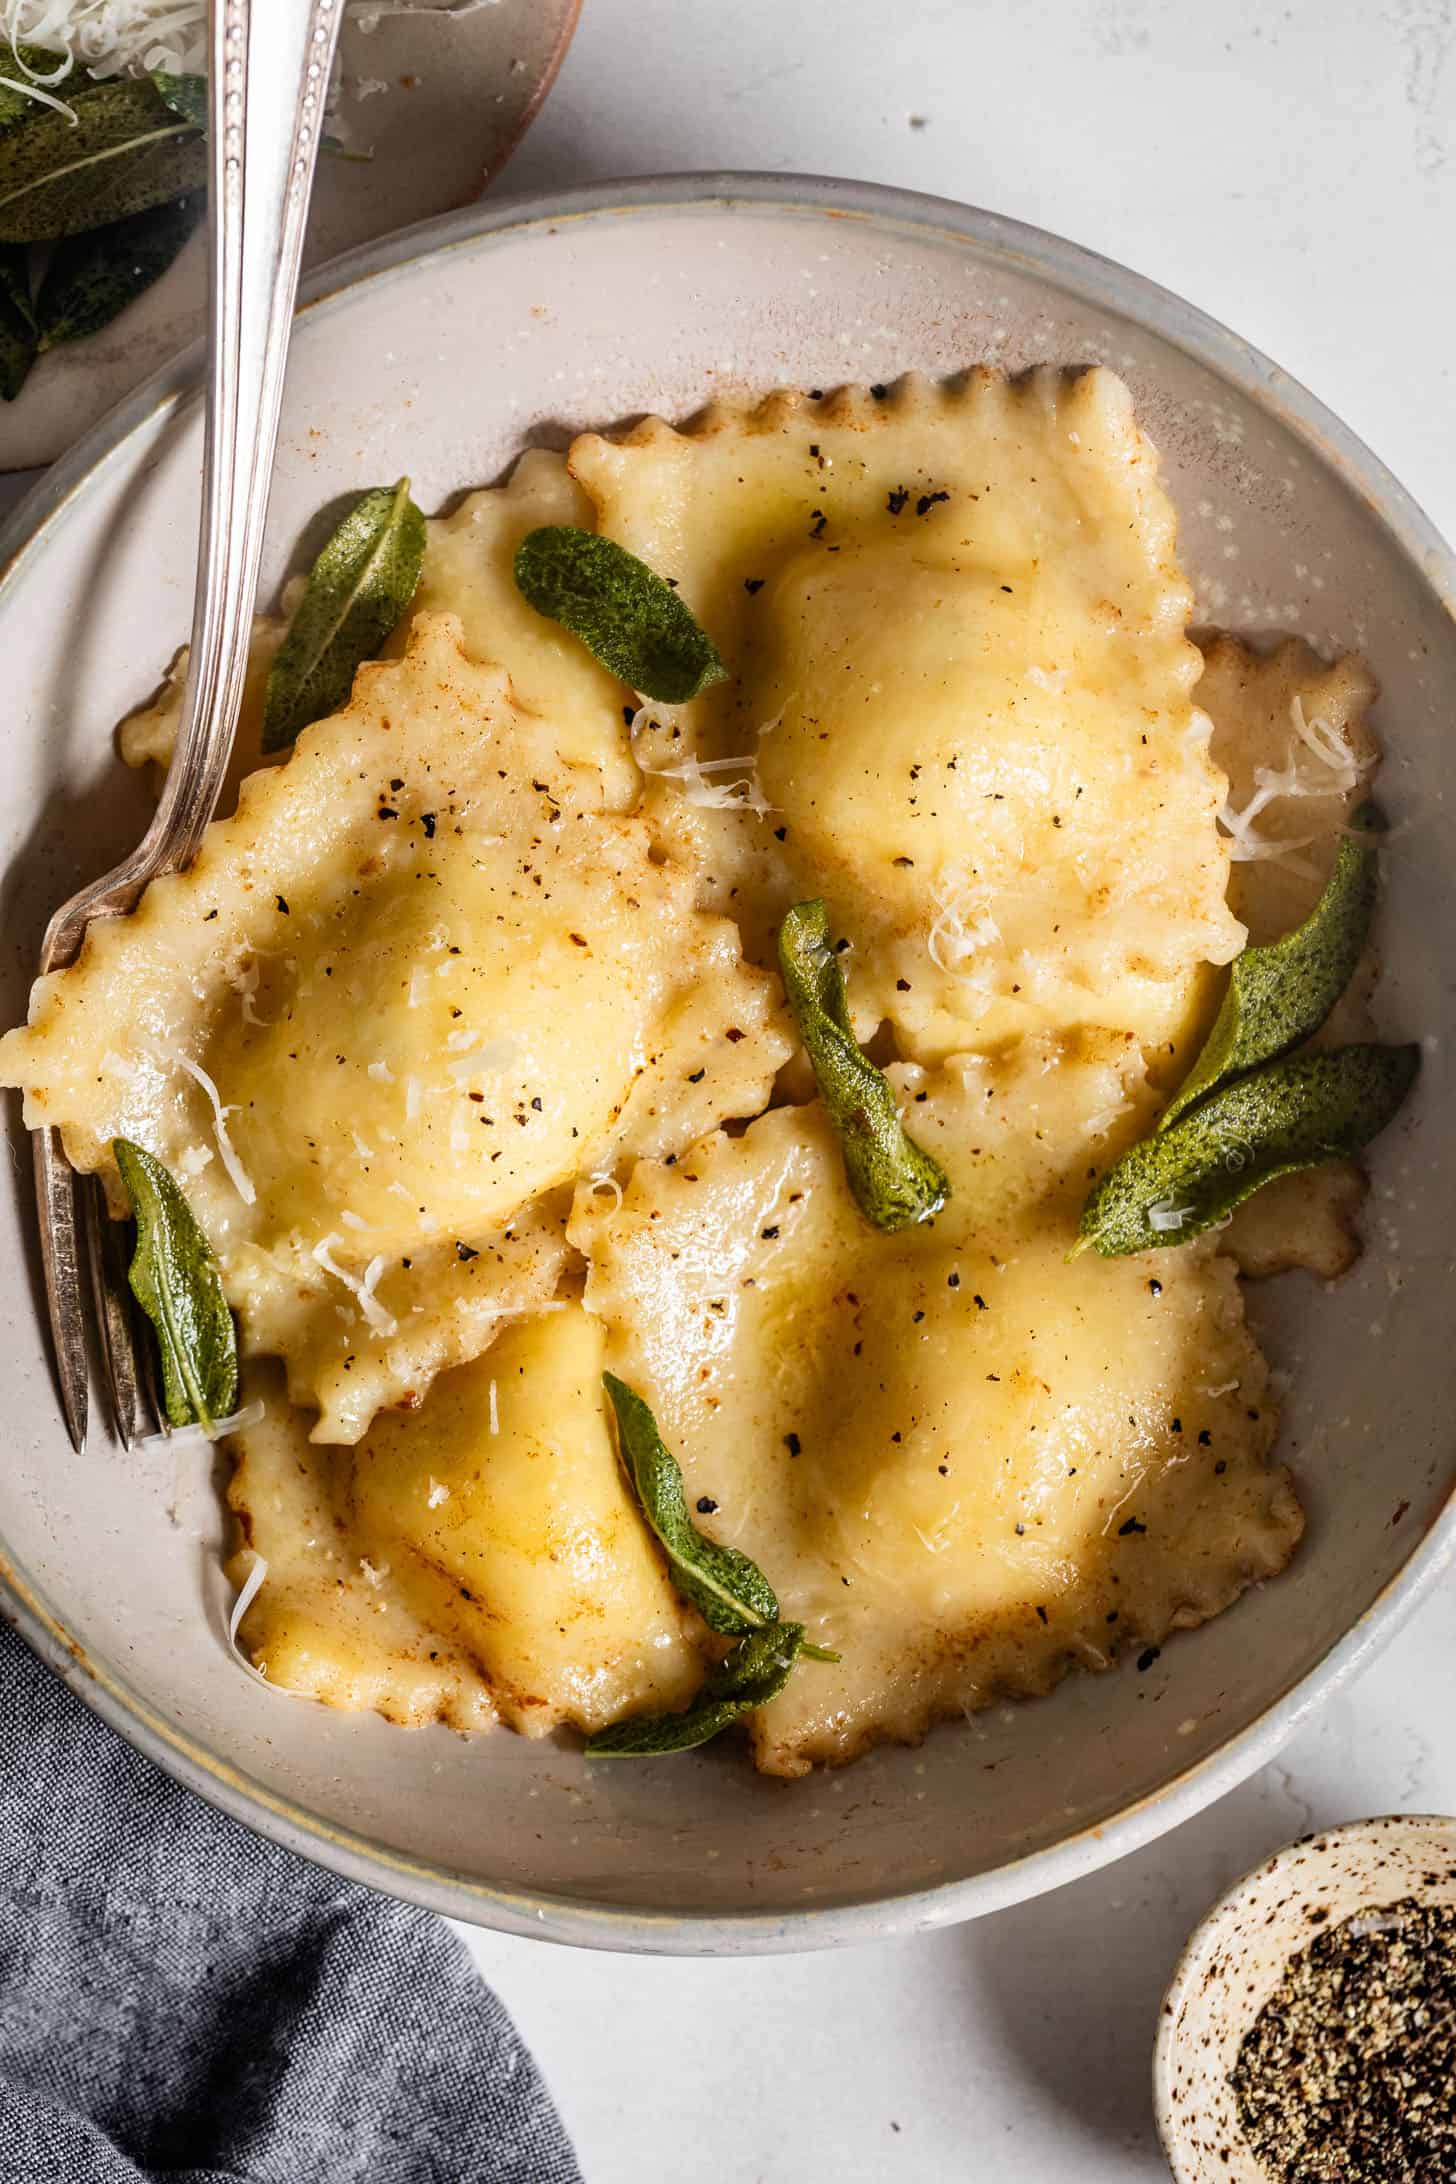
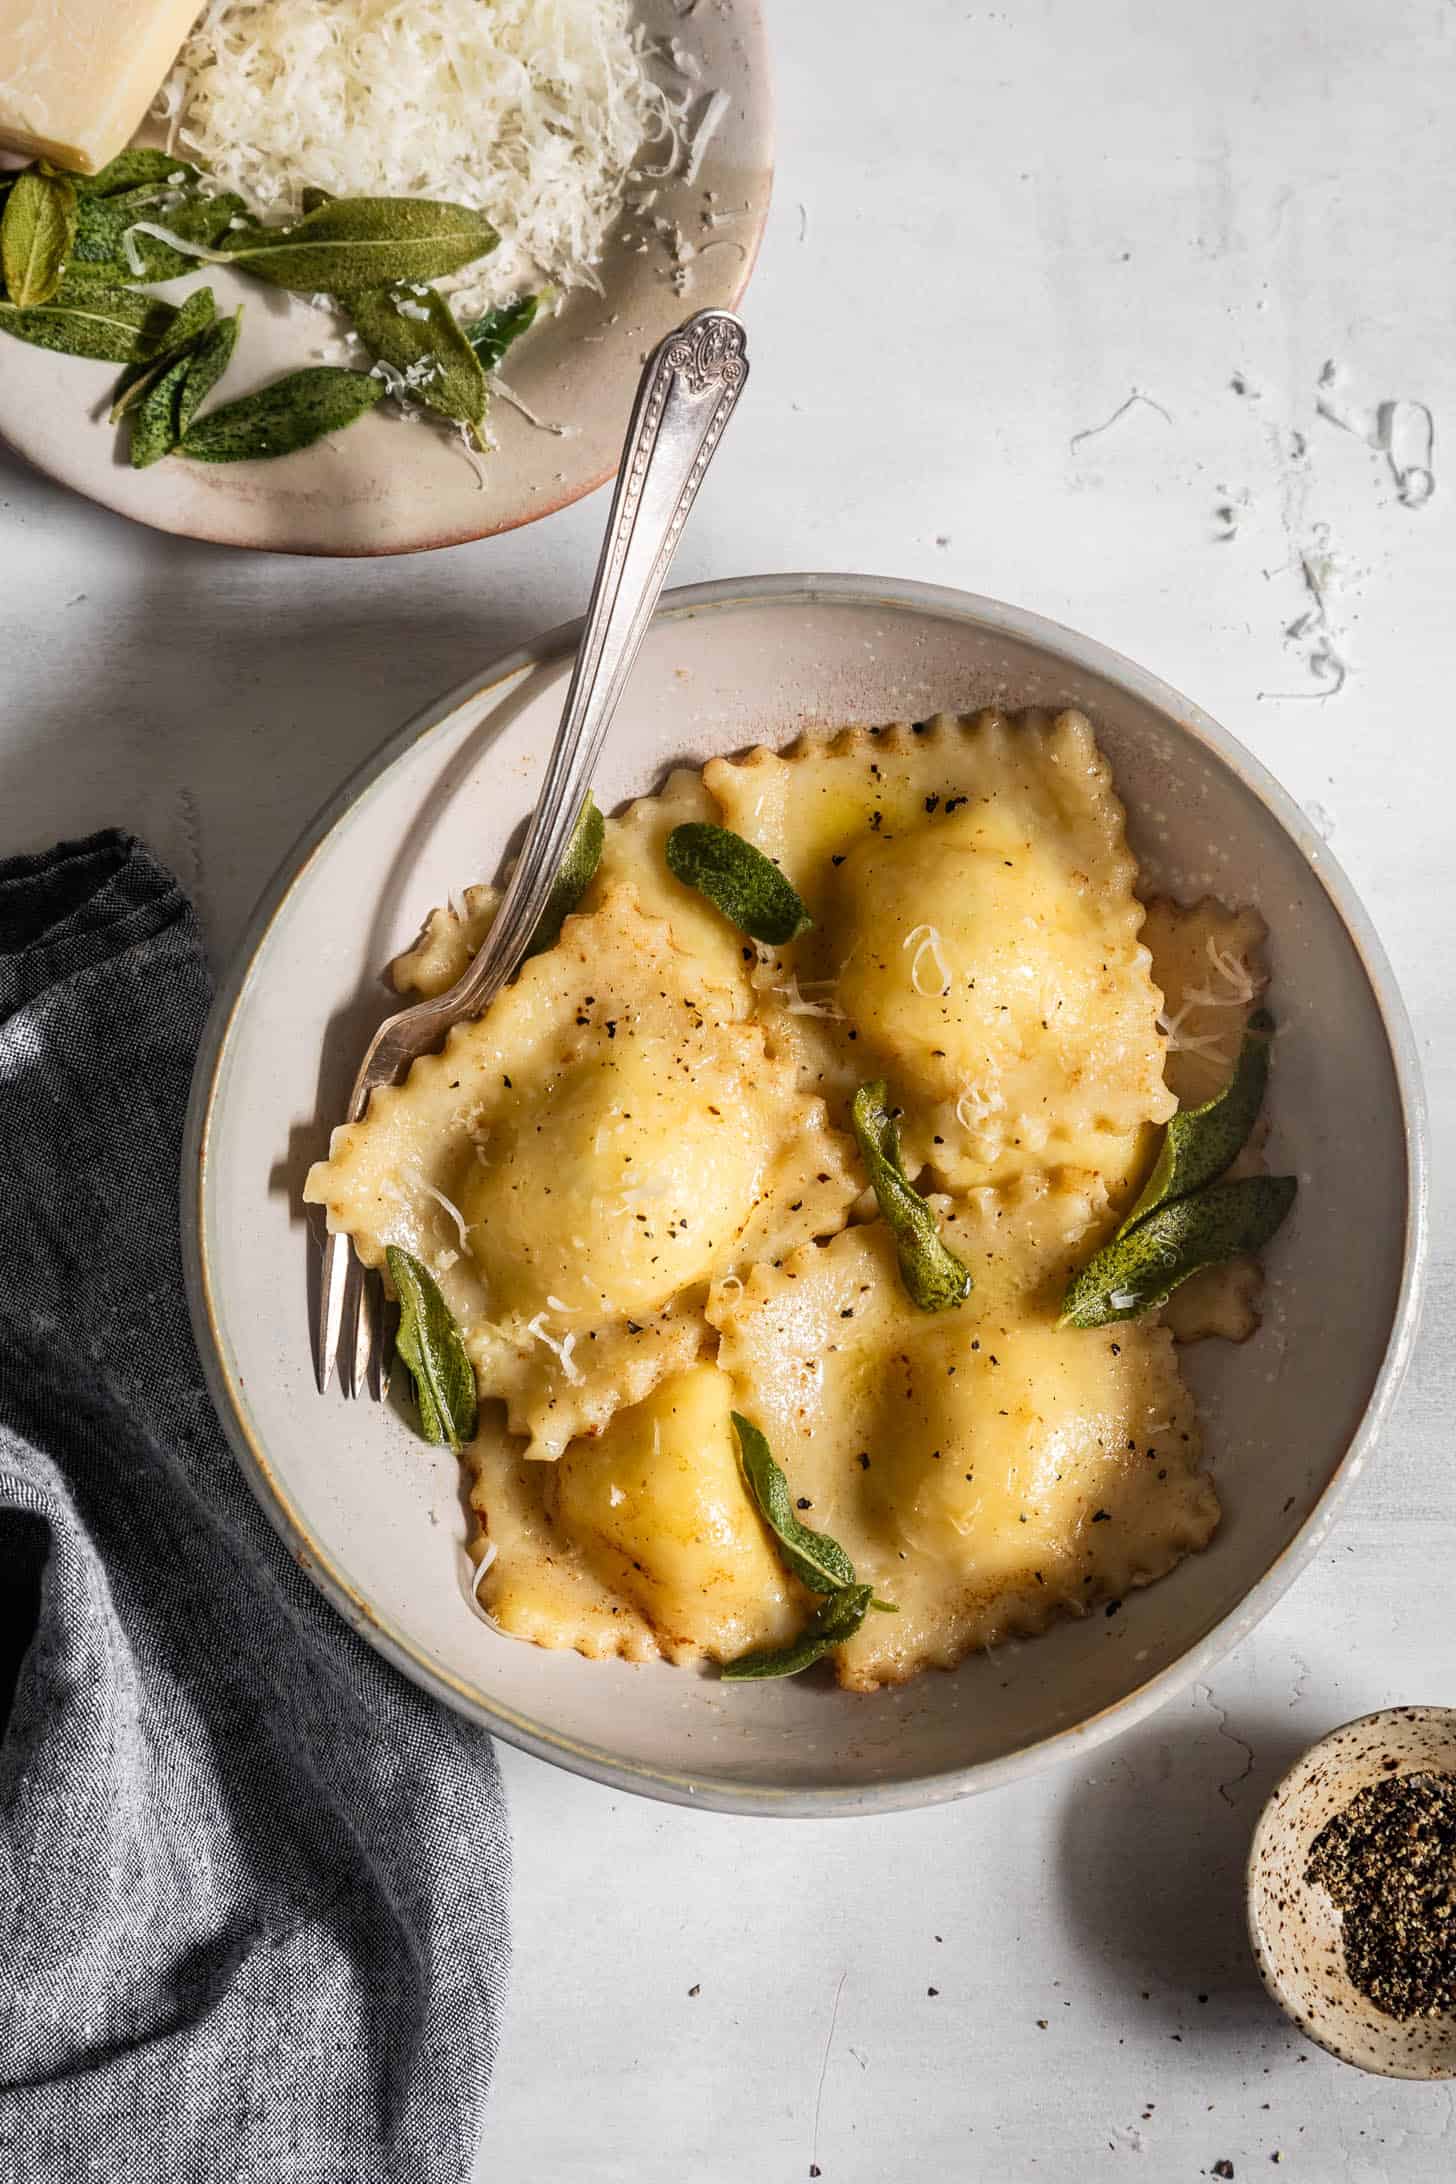
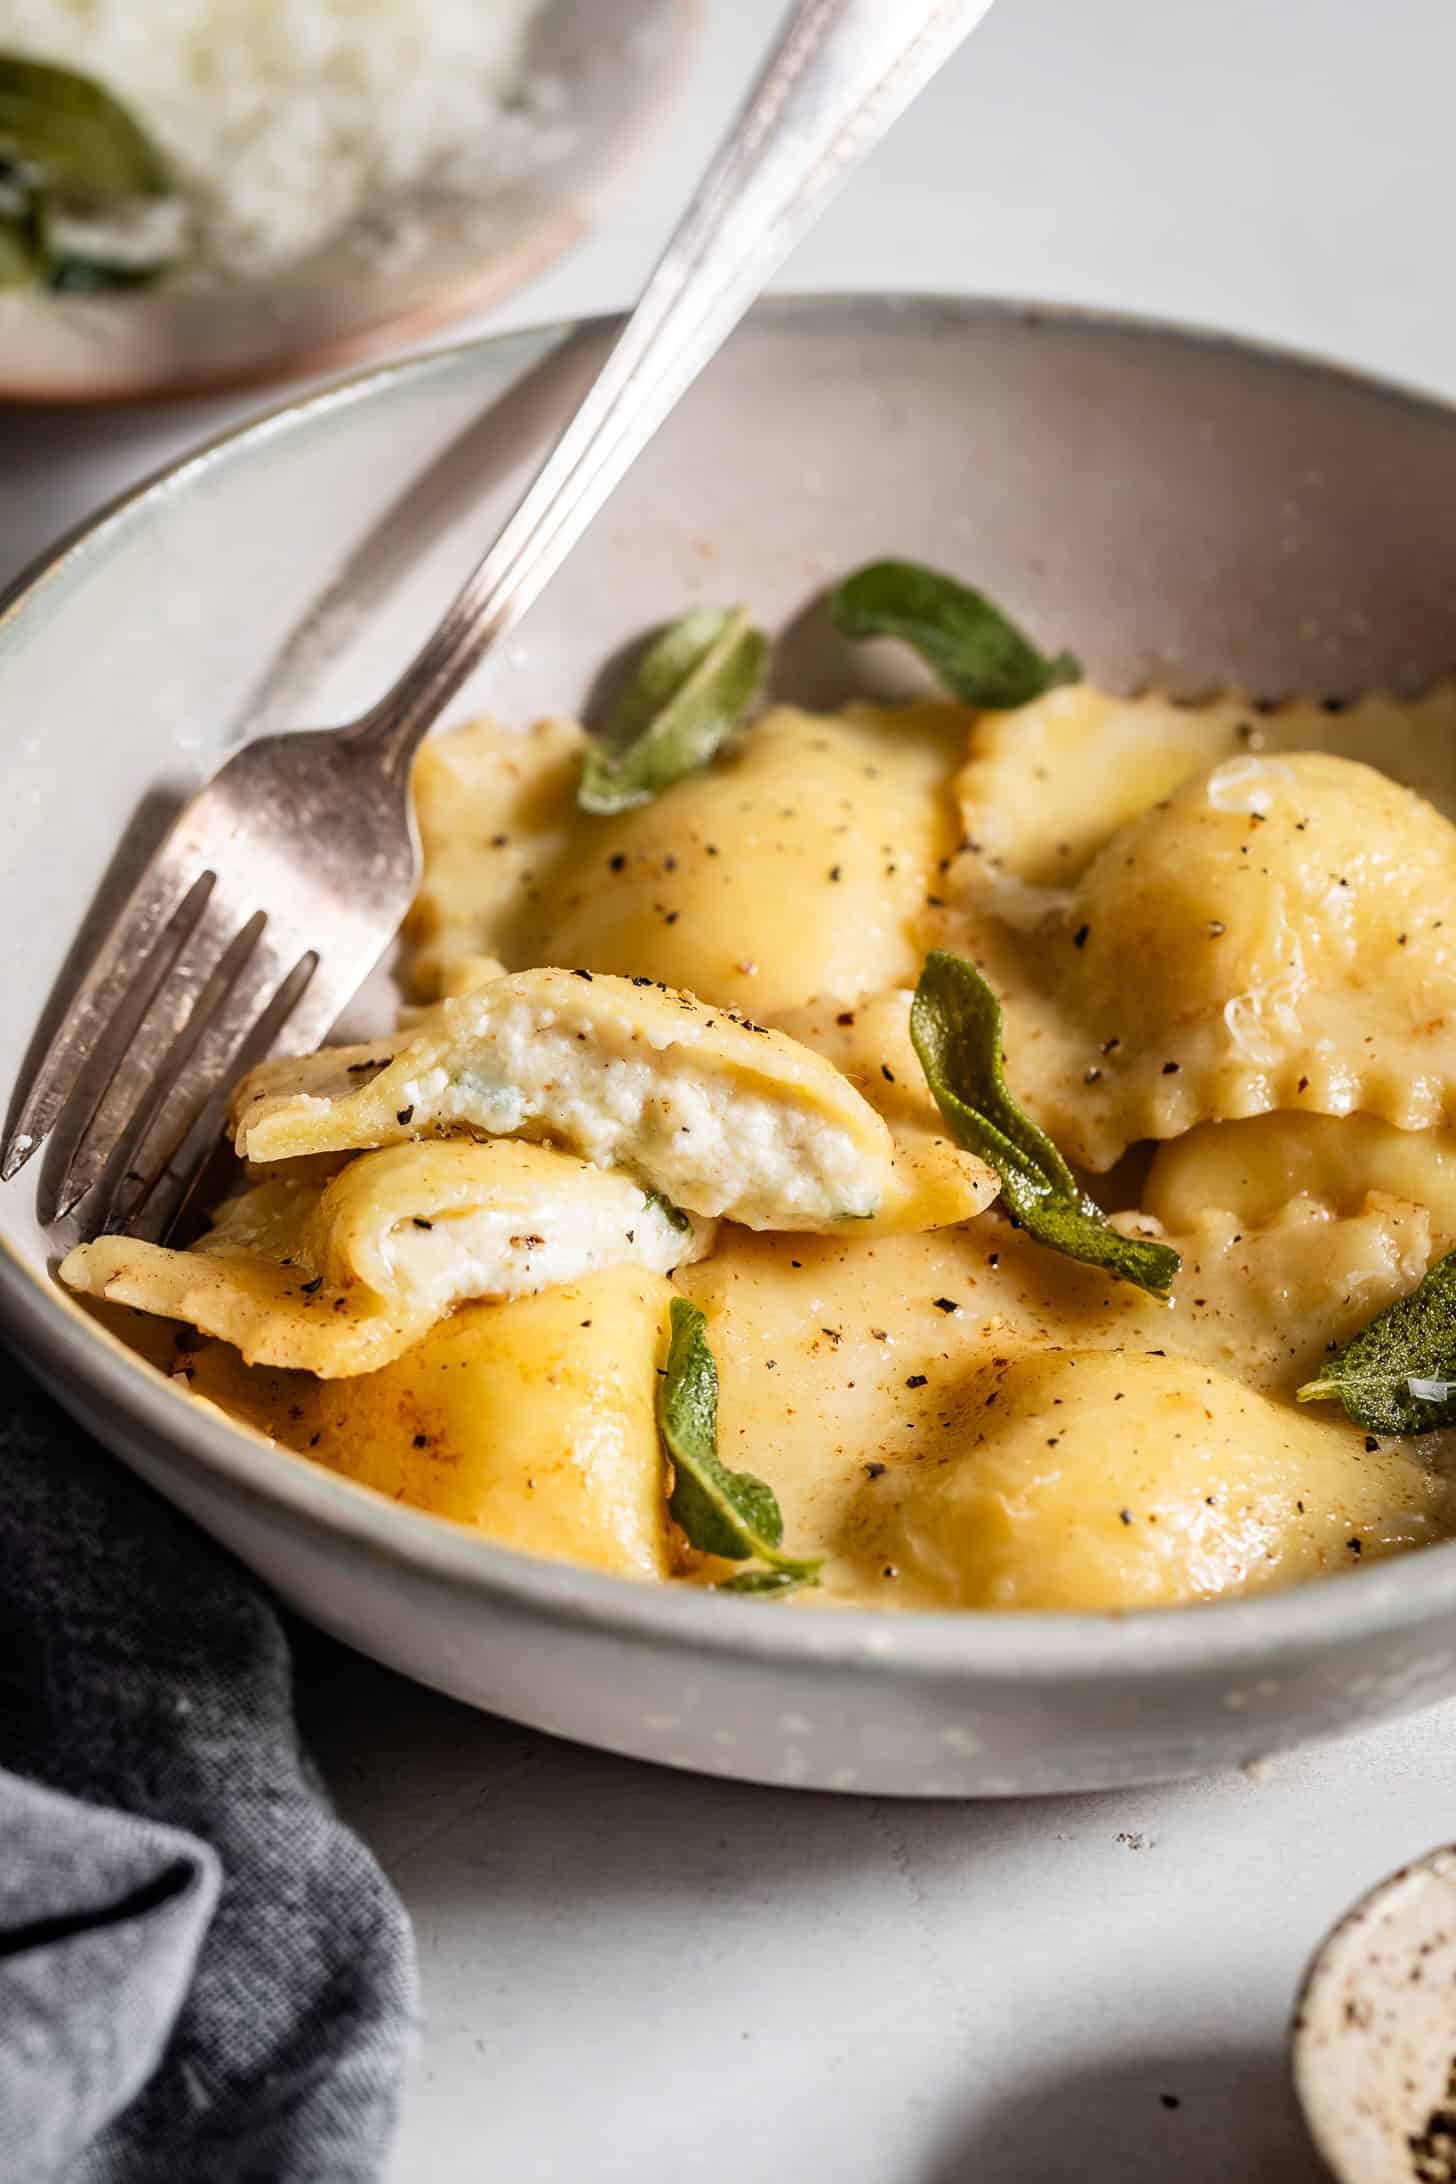
- Cook homemade ravioli in a large pot of salted water for 4 minutes, until they are all floating at the top of the surface. Use a slotted spoon to gently remove ravioli from the water. Top with your favorite sauce, or a simple brown butter and parmesan will do! You can optionally take it a step further and fry the ravioli in melted butter for 1 minute on each side.
Notes
Substituting xanthan gum:
I've tested a version of this gluten-free almond flour pasta that substitutes the xanthan gum for 1 tablespoon psyllium seed husks. The dough is more delicate to work with and to eat than the version with xanthan gum - it will break a part a bit when cooked if rolled too thin. For that substitution, you'll need to let the dough rest 10-15 minutes after you roll it together to let the psyllium seed husks soak up some of the moisture and help with the elasticity. Additionally, don't roll the dough out quite as thin. You can roll it through the pasta maker only on a size 1. However, I recommend hand-rolling this more delicate version with a rolling pin using the alternative method shown here.How to Store Homemade Ravioli
Store homemade gluten-free ravioli in a single layer, or separated with parchment paper, in the fridge for up to 3 days. Alternatively, freeze homemade ravioli (see below) To freeze homemade ravioli, place the homemade ravioli on a baking sheet dusted with tapioca flour in a single layer and place in the freezer until firm, about 30-60 minutes. Then transfer to an airtight freezer bag or container and freeze for up to 6 months. Alternatively, place fresh ravioli directly into a freezer bag in single layers separated with parchment paper and carefully freeze with the bag flat, until the ravioli are firm. These methods will prevent the ravioli from freezing stuck to one another. Cook frozen ravioli directly from the freezer, adding 3 minutes to the cooking time.How to Serve Ravioli
Top with your favorite sauce, or a simple brown butter and parmesan will do! Here are a few of my go-to ways to serve this homemade ravioli:
- Marinara: Serve with your favorite marinara. Top with fresh basil and grated parmesan.
- Sage brown butter and parmesan: Melt butter in a medium saucepan, then add sage leaves, cooking until just crisp. Transfer sage leaves to a paper towel-lined plate. Optional pan-fry the cooked ravioli, then cook any remaining butter until it has browned. Pour the browned butter over the ravioli and top with fried sage leaves.
- Pesto: Toss the ravioli with fresh pesto. Add in some cooked veggies and top with toasted pinenuts.
- Garlic and olive oil: Heat the olive oil in a medium saucepan and add minced garlic. Cook for 30 seconds, then add the cooked ravioli and pan-fry for another 30 seconds. Optionally add cooked mushrooms to this medley.
- Alfredo: Toss with alfredo and fresh parmesan.
Homemade Ravioli Filling Variations
I've filled this ravioli with a classic three-cheese filling, but feel free to get creative! Here are a few other filling options to get your creative juices flowing:
- Ricotta and goat cheese
- Artichoke and goat cheese
- Mushrooms and garlic: minced and sauteed.
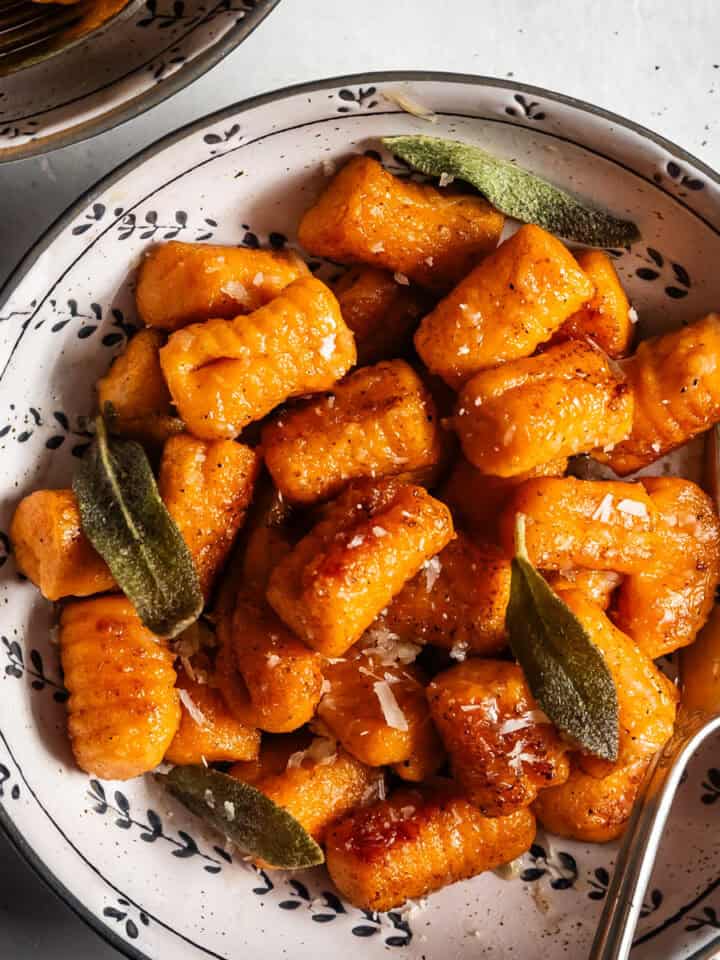
- Roasted butternut squash and sage: Add parmesan or keep it dairy-free!
- Ricotta and cooked spinach
- Italian sausage and ricotta
- Chicken and mozzarella

Tip for Scraps
Homemade ravioli will inevitably produce pasta scraps when you cut out your ravioli. Don't let that beautiful homemade pasta go to waste! Cut it into 1-inch pieces and cook it up in salted boiling water for 3-4 minutes. Toss with your favorite sauce or keep it simple with brown butter and parmesan for the kiddos.
Did you make this recipe? Please leave a review and rating to let me and others know how you liked it!

cyn -
Loved it made it for me and my husband