

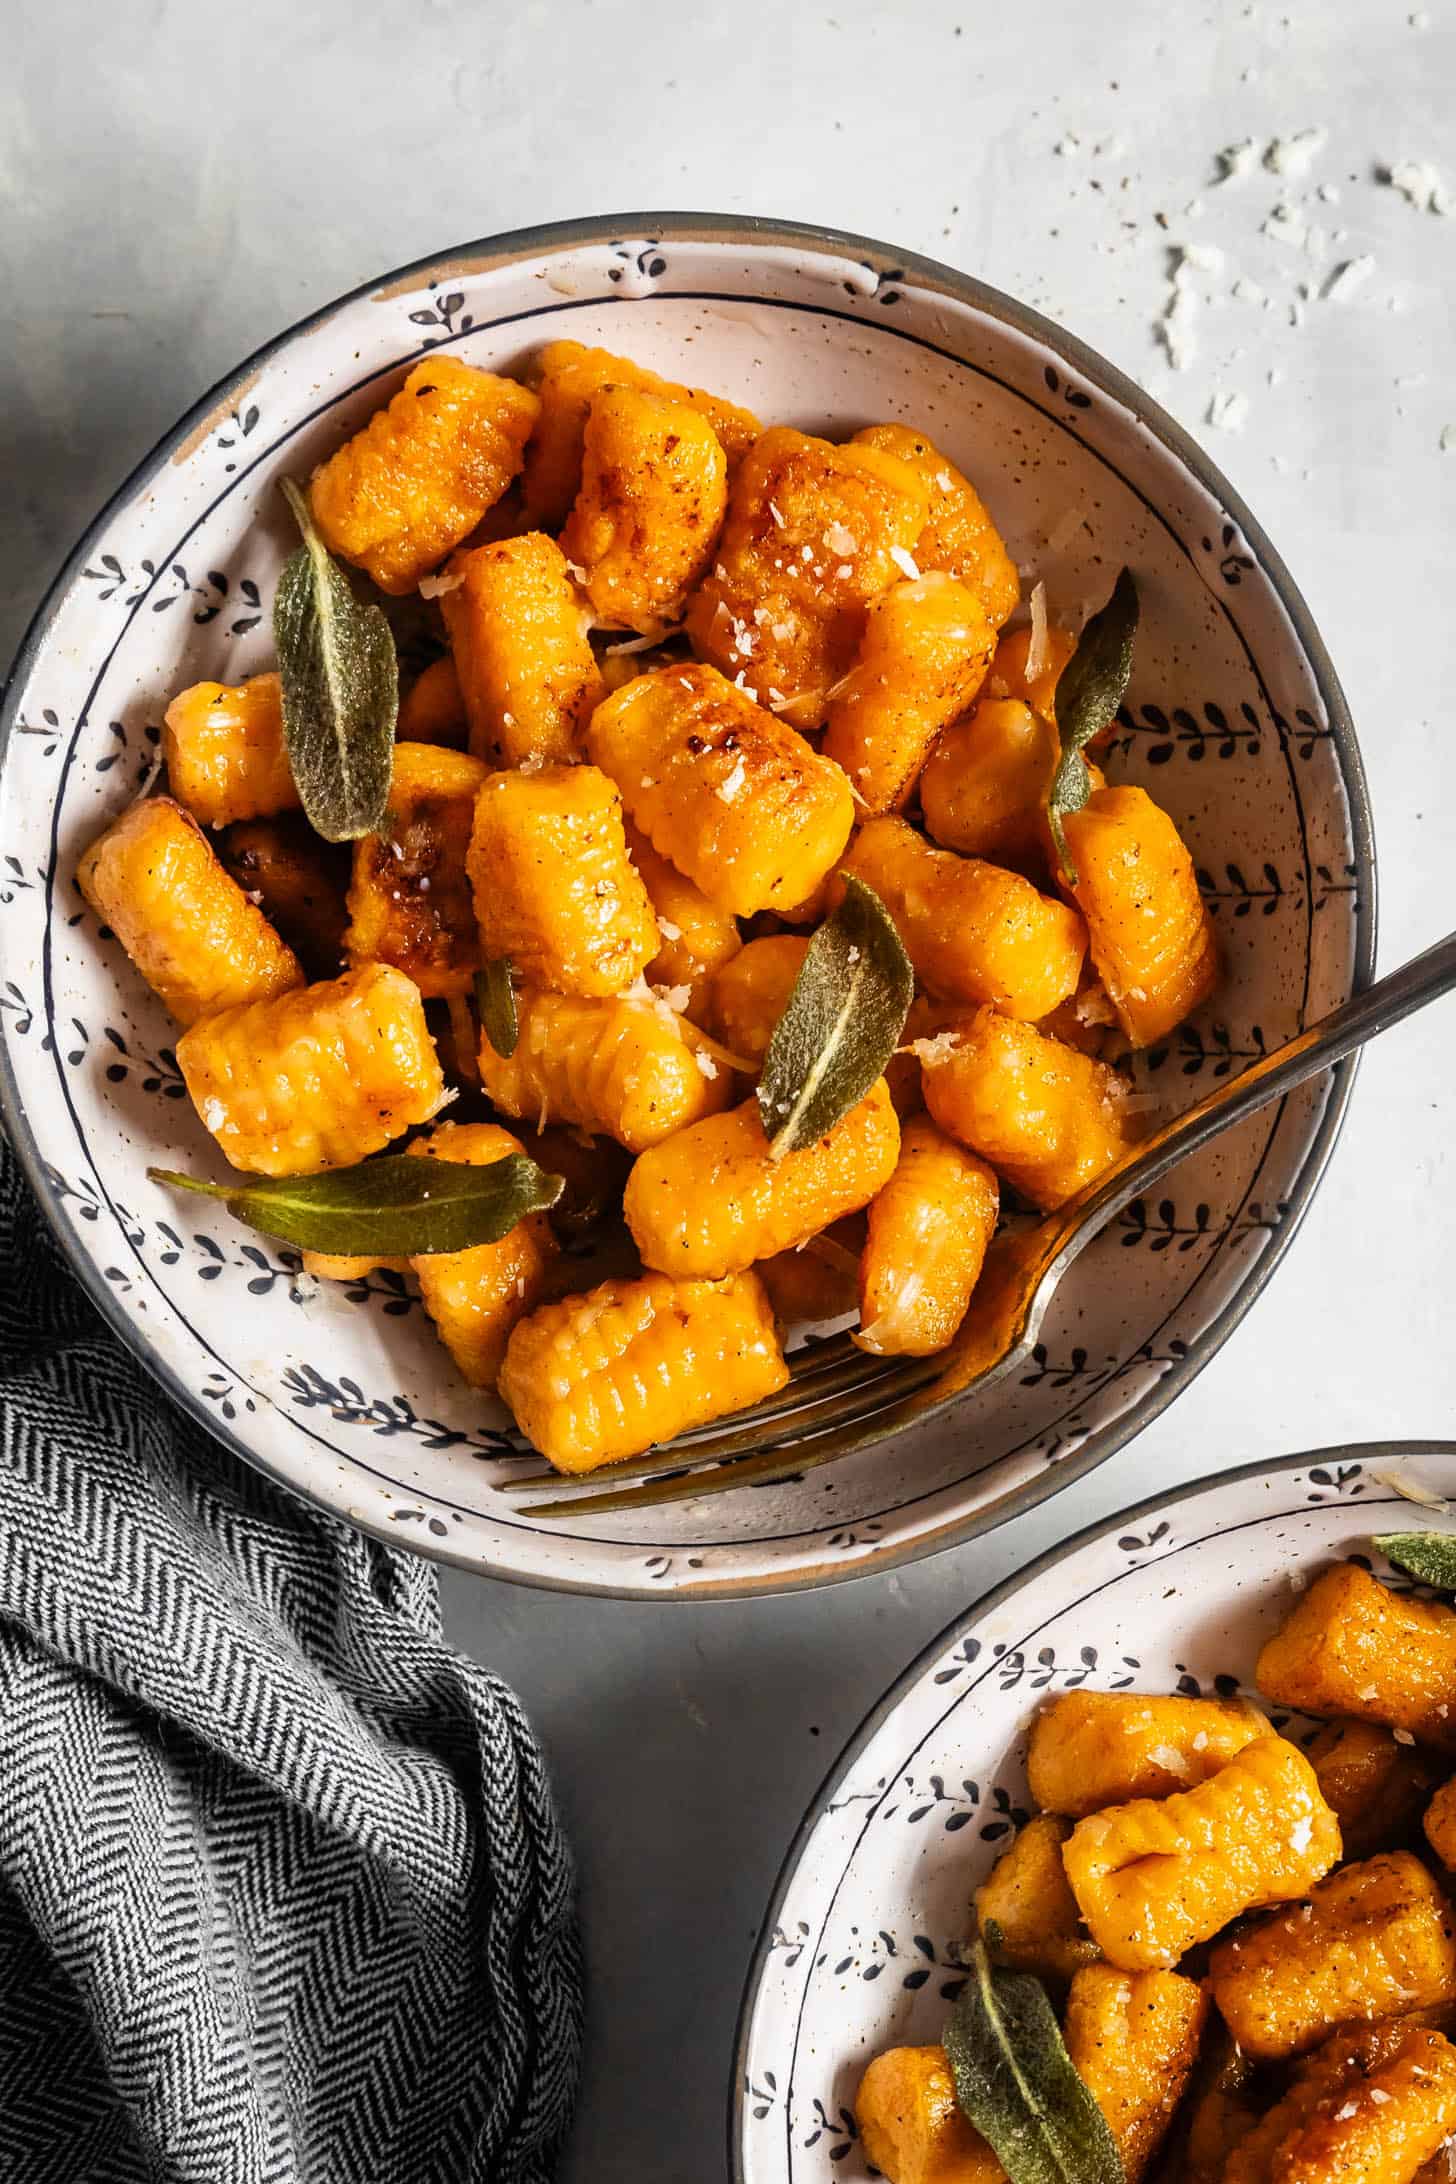
Tender gluten-free sweet potato gnocchi made with roasted sweet potatoes and a gluten-free almond flour base! No fancy equipment needed. This variation on classic gnocchi has a fluffy bite that's neither dense nor chewy. This easy recipe can also be made with butternut squash.
For this delicious variation on my soft and pillowy gluten-free gnocchi, I substitute Yukon Gold potatoes with roasted sweet potatoes. These sweet potato gnocchi have a similar texture to traditional gnocchi but burst with sweet potato flavor that's both buttery and slightly nutty. The best part: they are shockingly easy to make!
Why you'll love this recipe
- Fluffy pillowy texture from almond flour: These gnocchi are light, tender, without being too dense or oddly chewy. It's what makes the perfect texture to my almond flour pasta noodles, too.
- Incredibly easy: No fancy equipment needed. Just mix, roll, and cut.
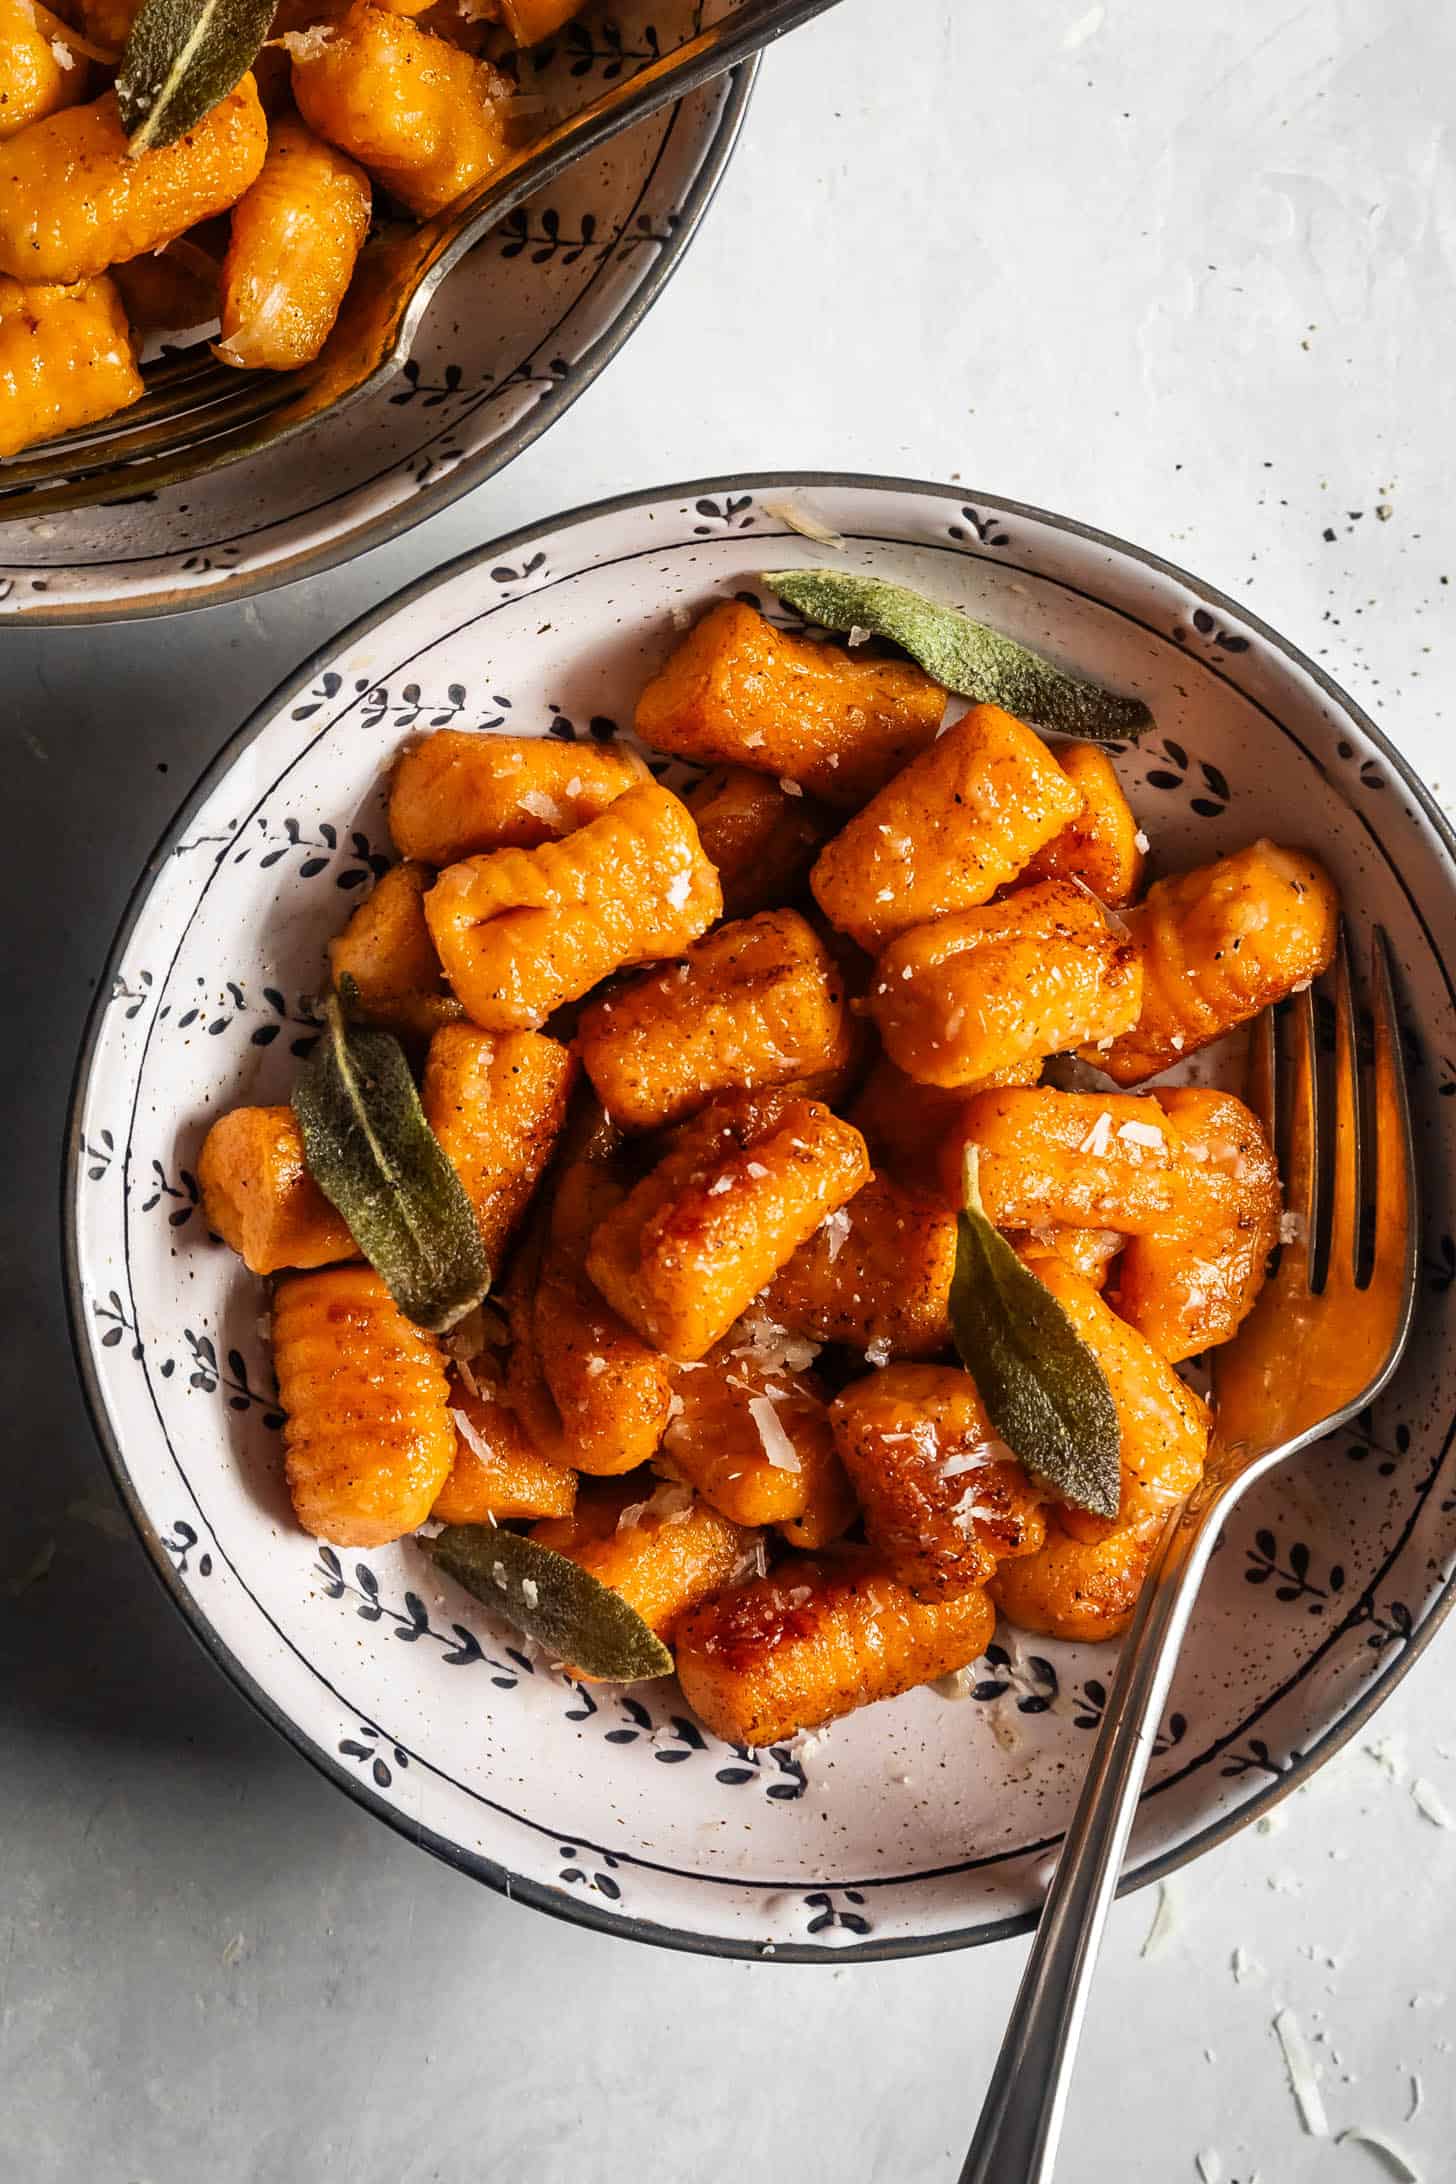
- Super flavorful from: Sweet potatoes bring a subtle sweetness and depth of flavor, so they taste amazing with just a simple brown butter and sage sauce.
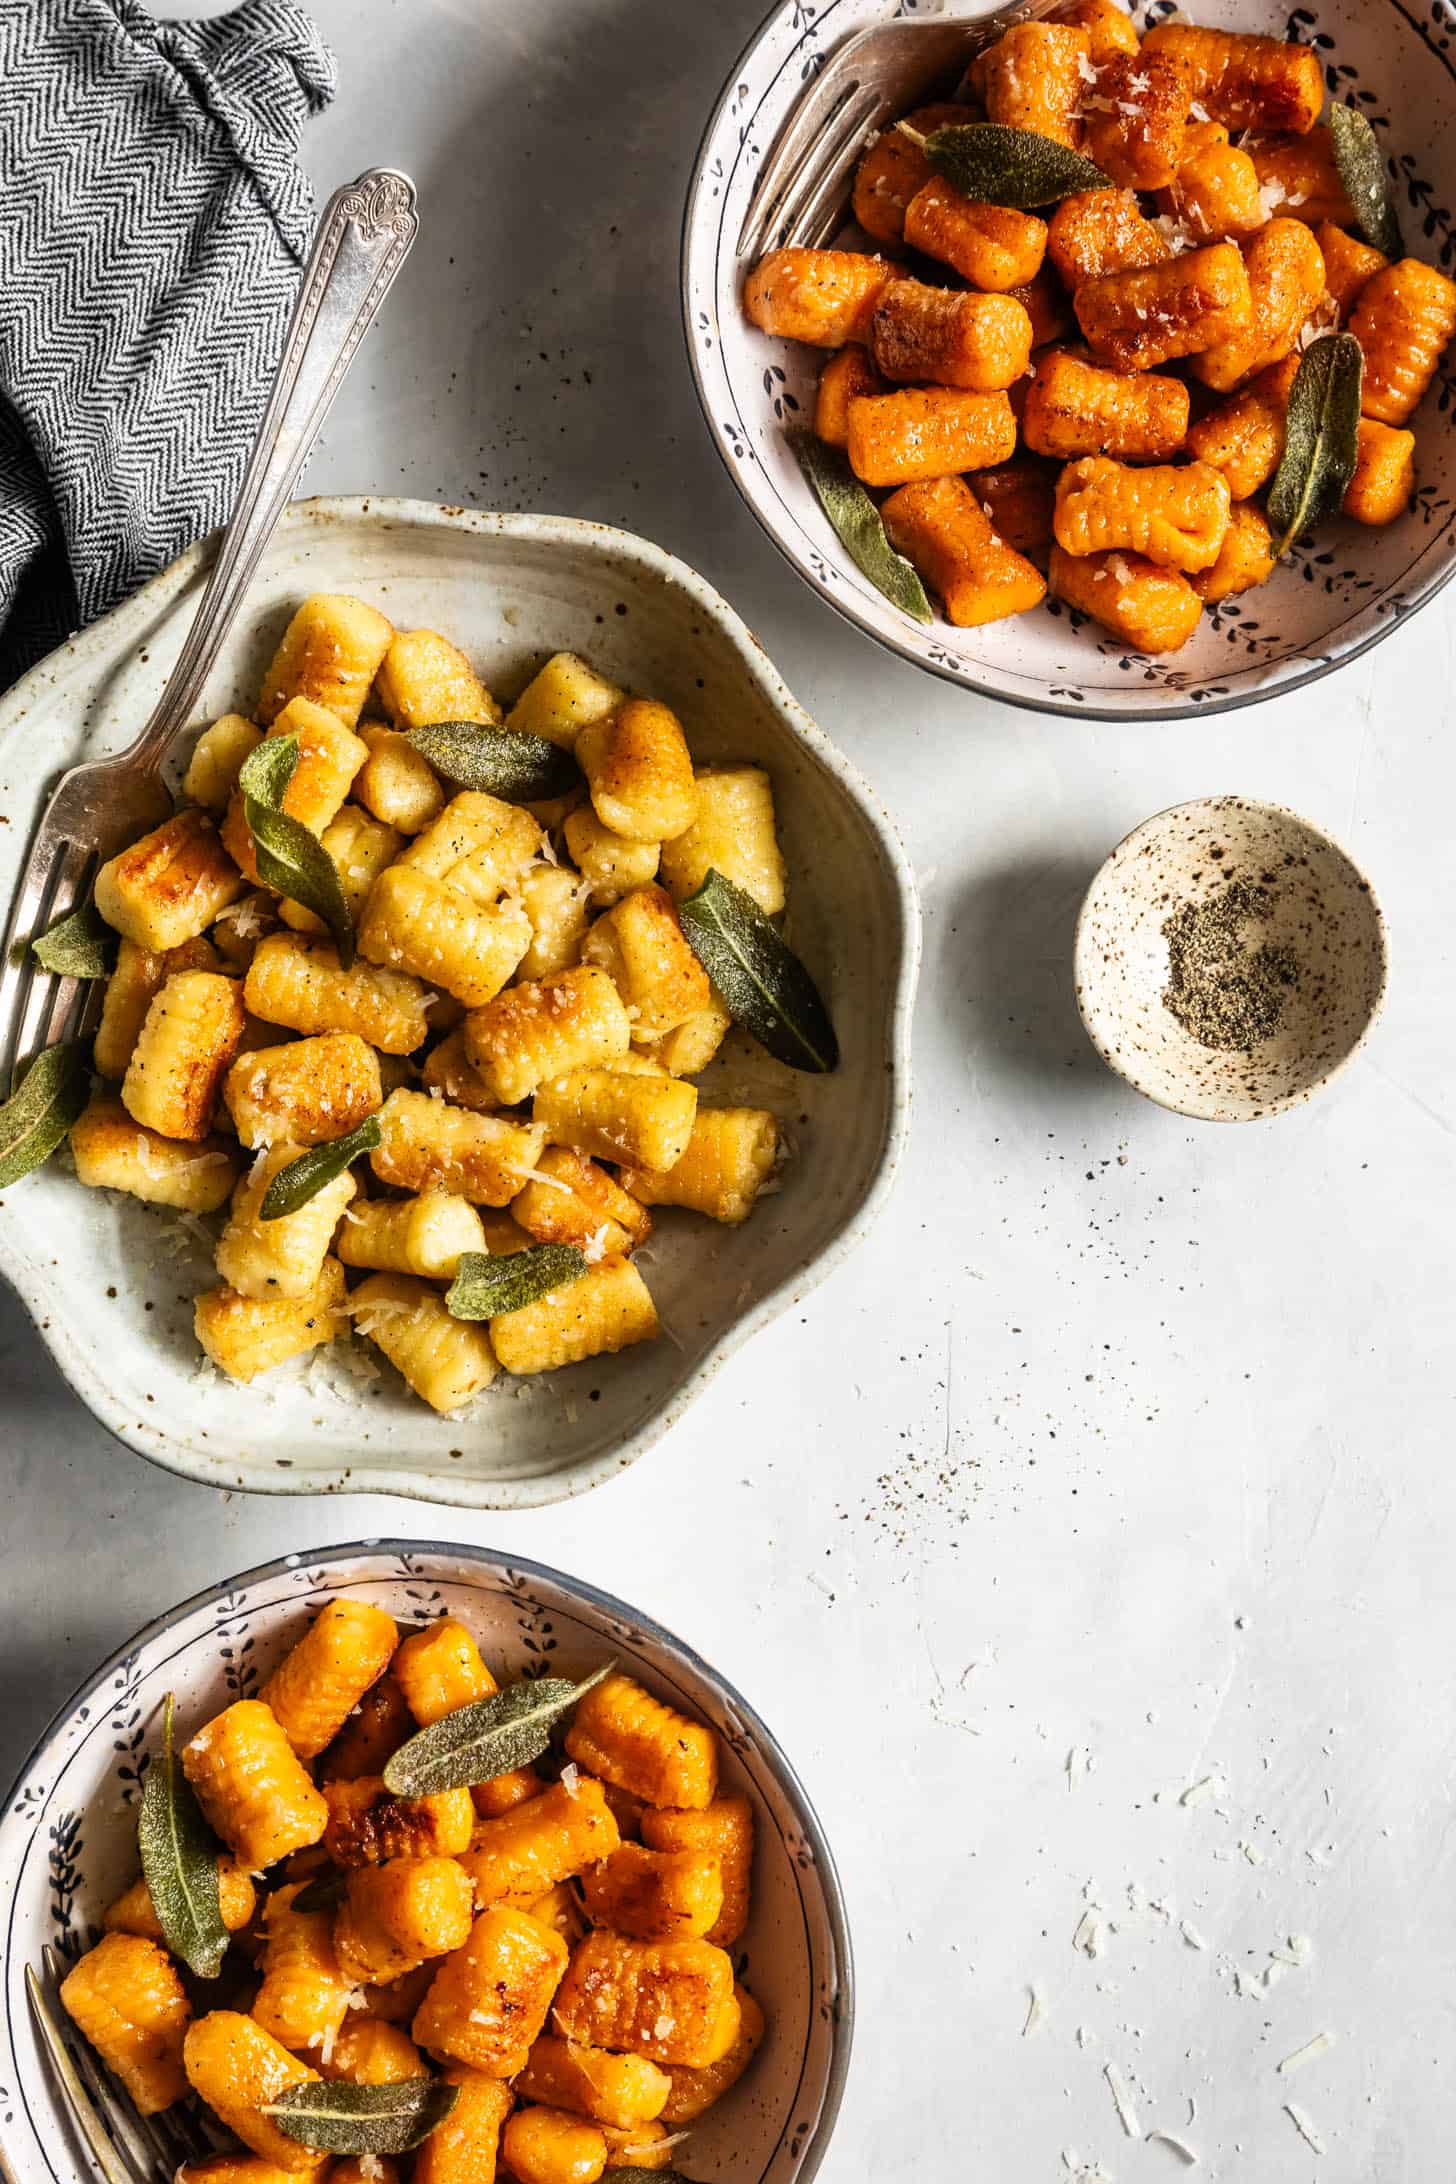
- Versatile: Serve them in a creamy sauce, pan-fry for crisp gnocchi (my personal fav), or add them to a cozy soup! You can also substitute the sweet potato for butternut squash (or another favorite squash!)

Main Ingredients for gluten-free sweet potato gnocchi
This recipe just uses 6 ingredients, including a blend of almond four, tapioca flour, and sweet rice flour for the ultimate fluffy texture.
- Sweet potatoes: Any kind! I love jewel or red garnet. You can also use squash, but see the notes to adjust the recipe slightly!
- Superfine-blanched almond flour: Use Bob's Red Mill.
- Tapioca flour/starch: Use Bob's Red Mill.
- Sweet rice flour: Also called mochiko, sweet rice flour is distinctly different from white rice flour or brown rice flour. Use Koda Farms Mochiko.
- Salt: To enhance the flavors.
- Large egg: To bind the dough together.
- Optional: finely grated parmesan: Adds flavor, but leave out for dairy-free
Why I Roast the Sweet Potatoes
The best, most authentic way to make homemade gnocchi is to roast the potatoes. While many recipes online call for boiling whole potatoes, this is more likely to add too much moisture to your dough. Roasting them, on the other hand, will create a lighter, fluffier gnocchi dough because you won't have to knead in as much flour due to excess water.
For my original homemade gnocchi, I roast the potatoes whole. However, sweet potatoes have more moisture than regular potatoes when baked. So you need two modifications you need to make when preparing sweet potato gnocchi:
- Peel and slice the potatoes into thick slices before roasting. This allows much of the moisture to be released when baking. Do not sub in leftover whole roasted sweet potato or canned sweet potato, as both will add way too much moisture to the dough, making it too sticky to work with.
- Use only 8 ounces of riced sweet potato. Sweet potato is very flavorful, so using less of it will still allow the flavor to shine through!
How to Make Gnocchi
These gluten-free gnocchi are made the exact same way as my traditional gluten-free gnocchi. For even more detailed pictures, check out that recipe!
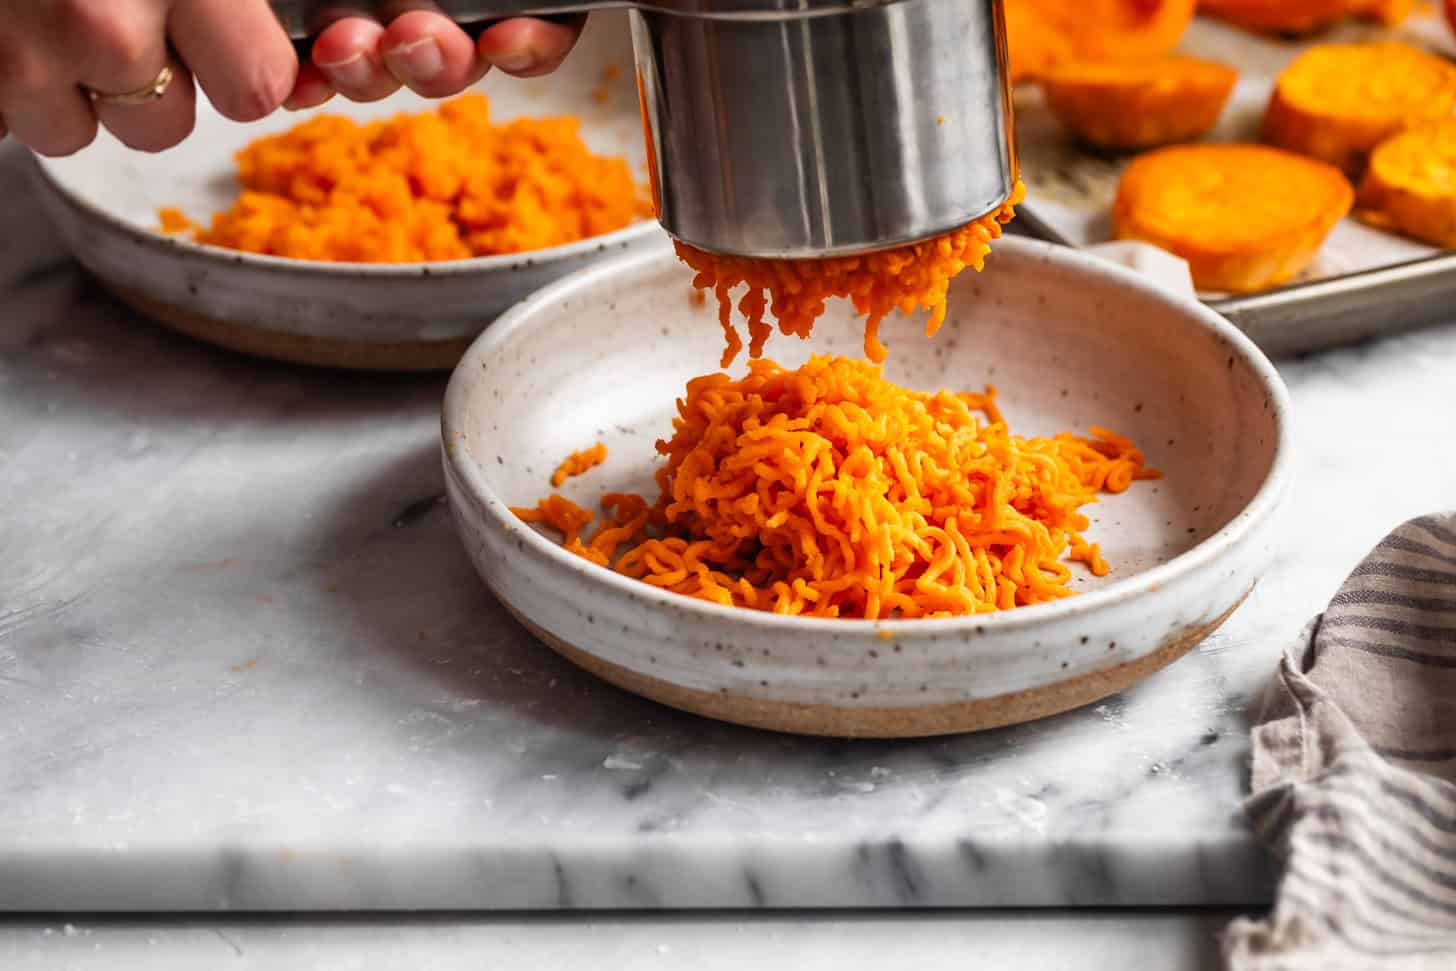
Roast the sweet potato slices then run them through a potato ricer (or mash with a potato masher or fork).
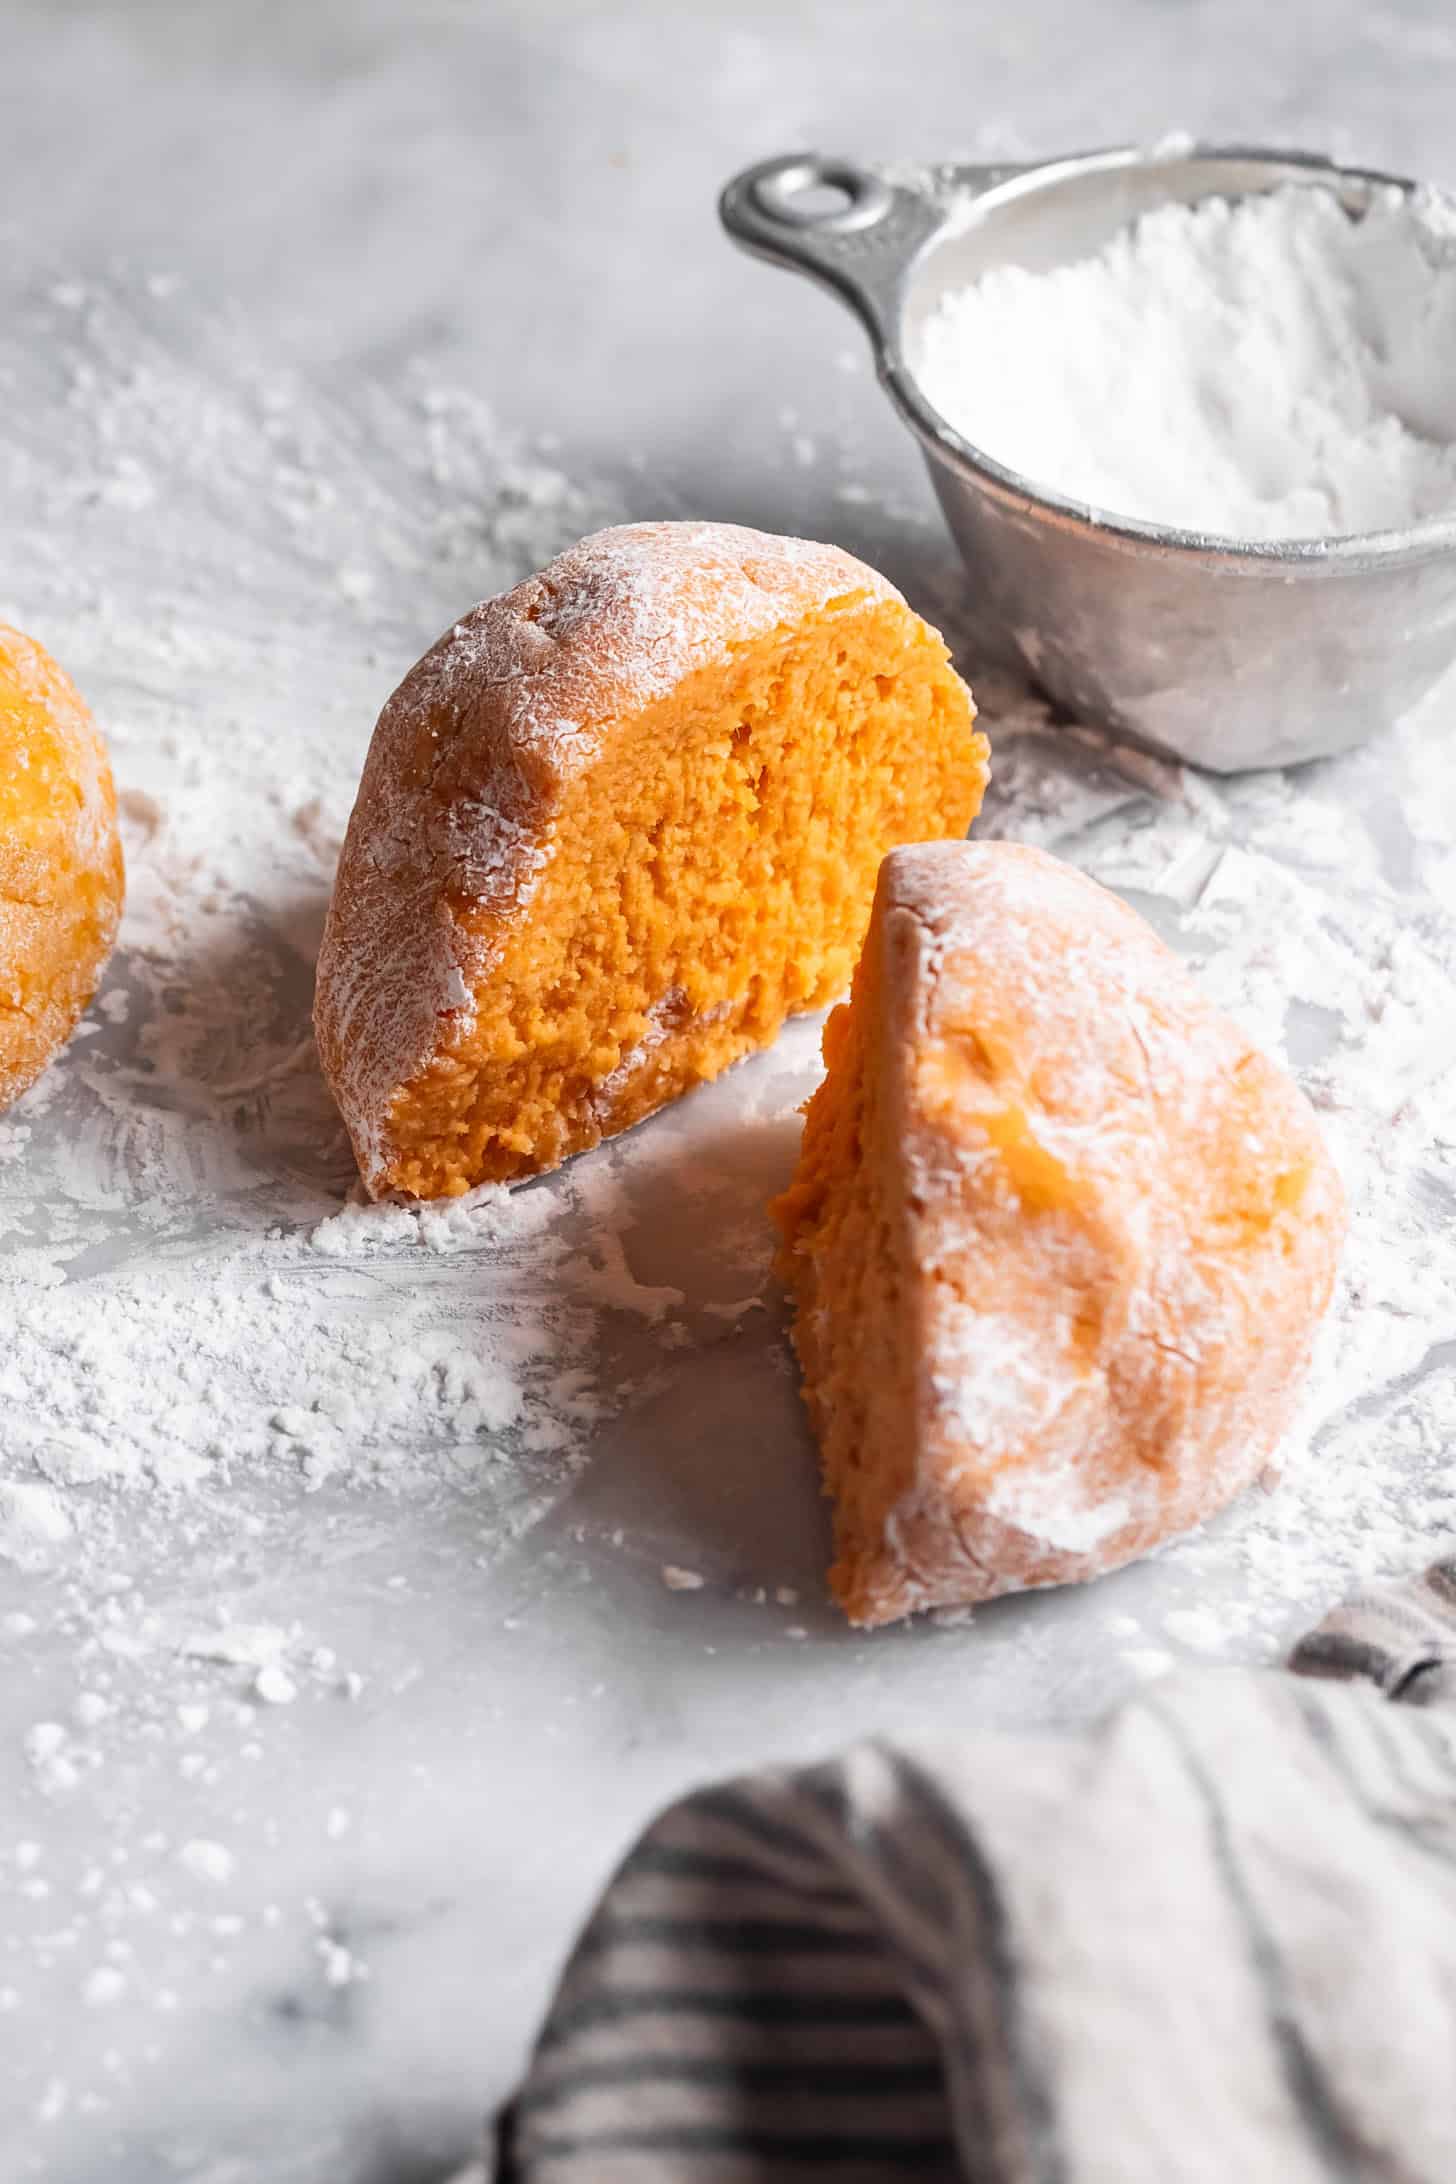
Measure out the weight of the riced sweet potatoes and top with whisked egg then sprinkle with sifted flour. Optionally add grated parmesan. Mix until the dough forms a ball (or two smaller balls). Dust well with tapioca flour and cut into four pieces.

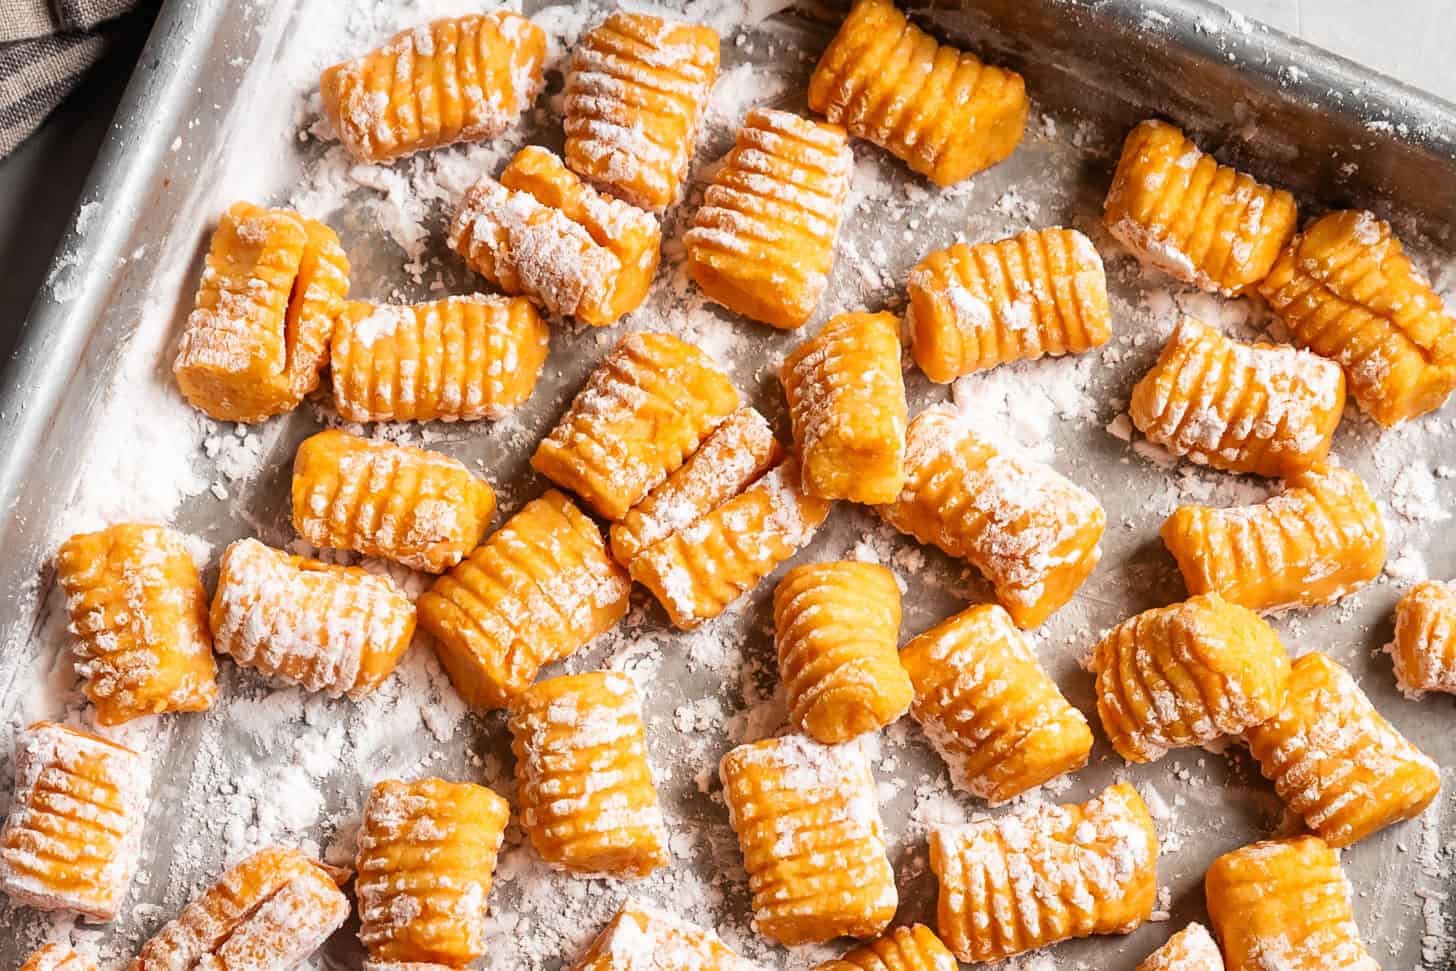
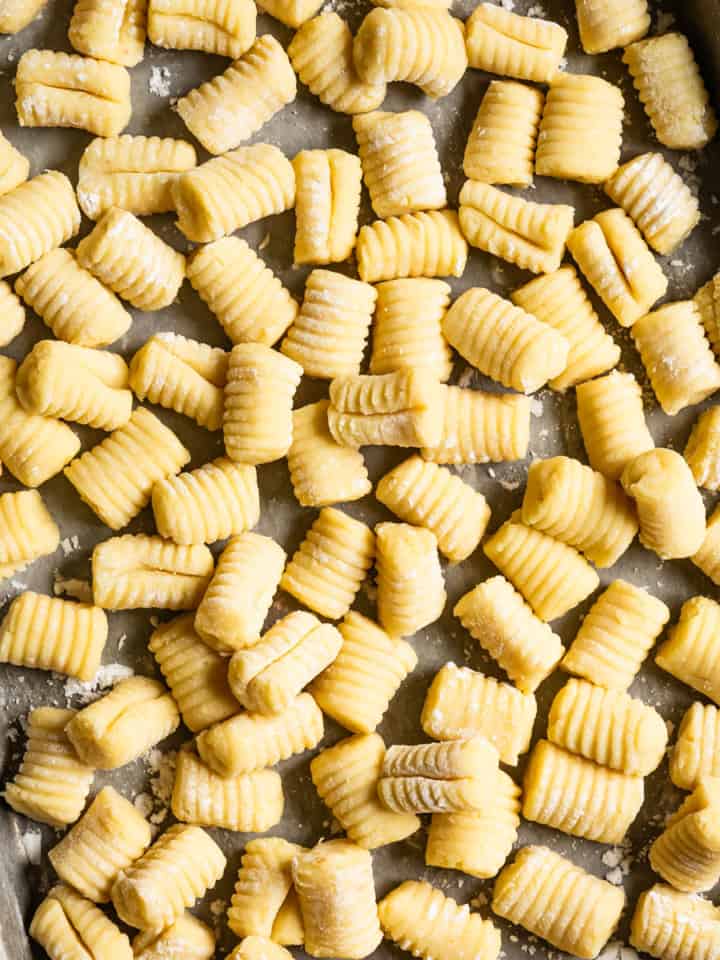
One at a time, roll each piece into a long rope about ½ - ¾-inch in diameter, then cut the rope into ¾ to 1-inch long pieces. Toss well with tapioca flour.
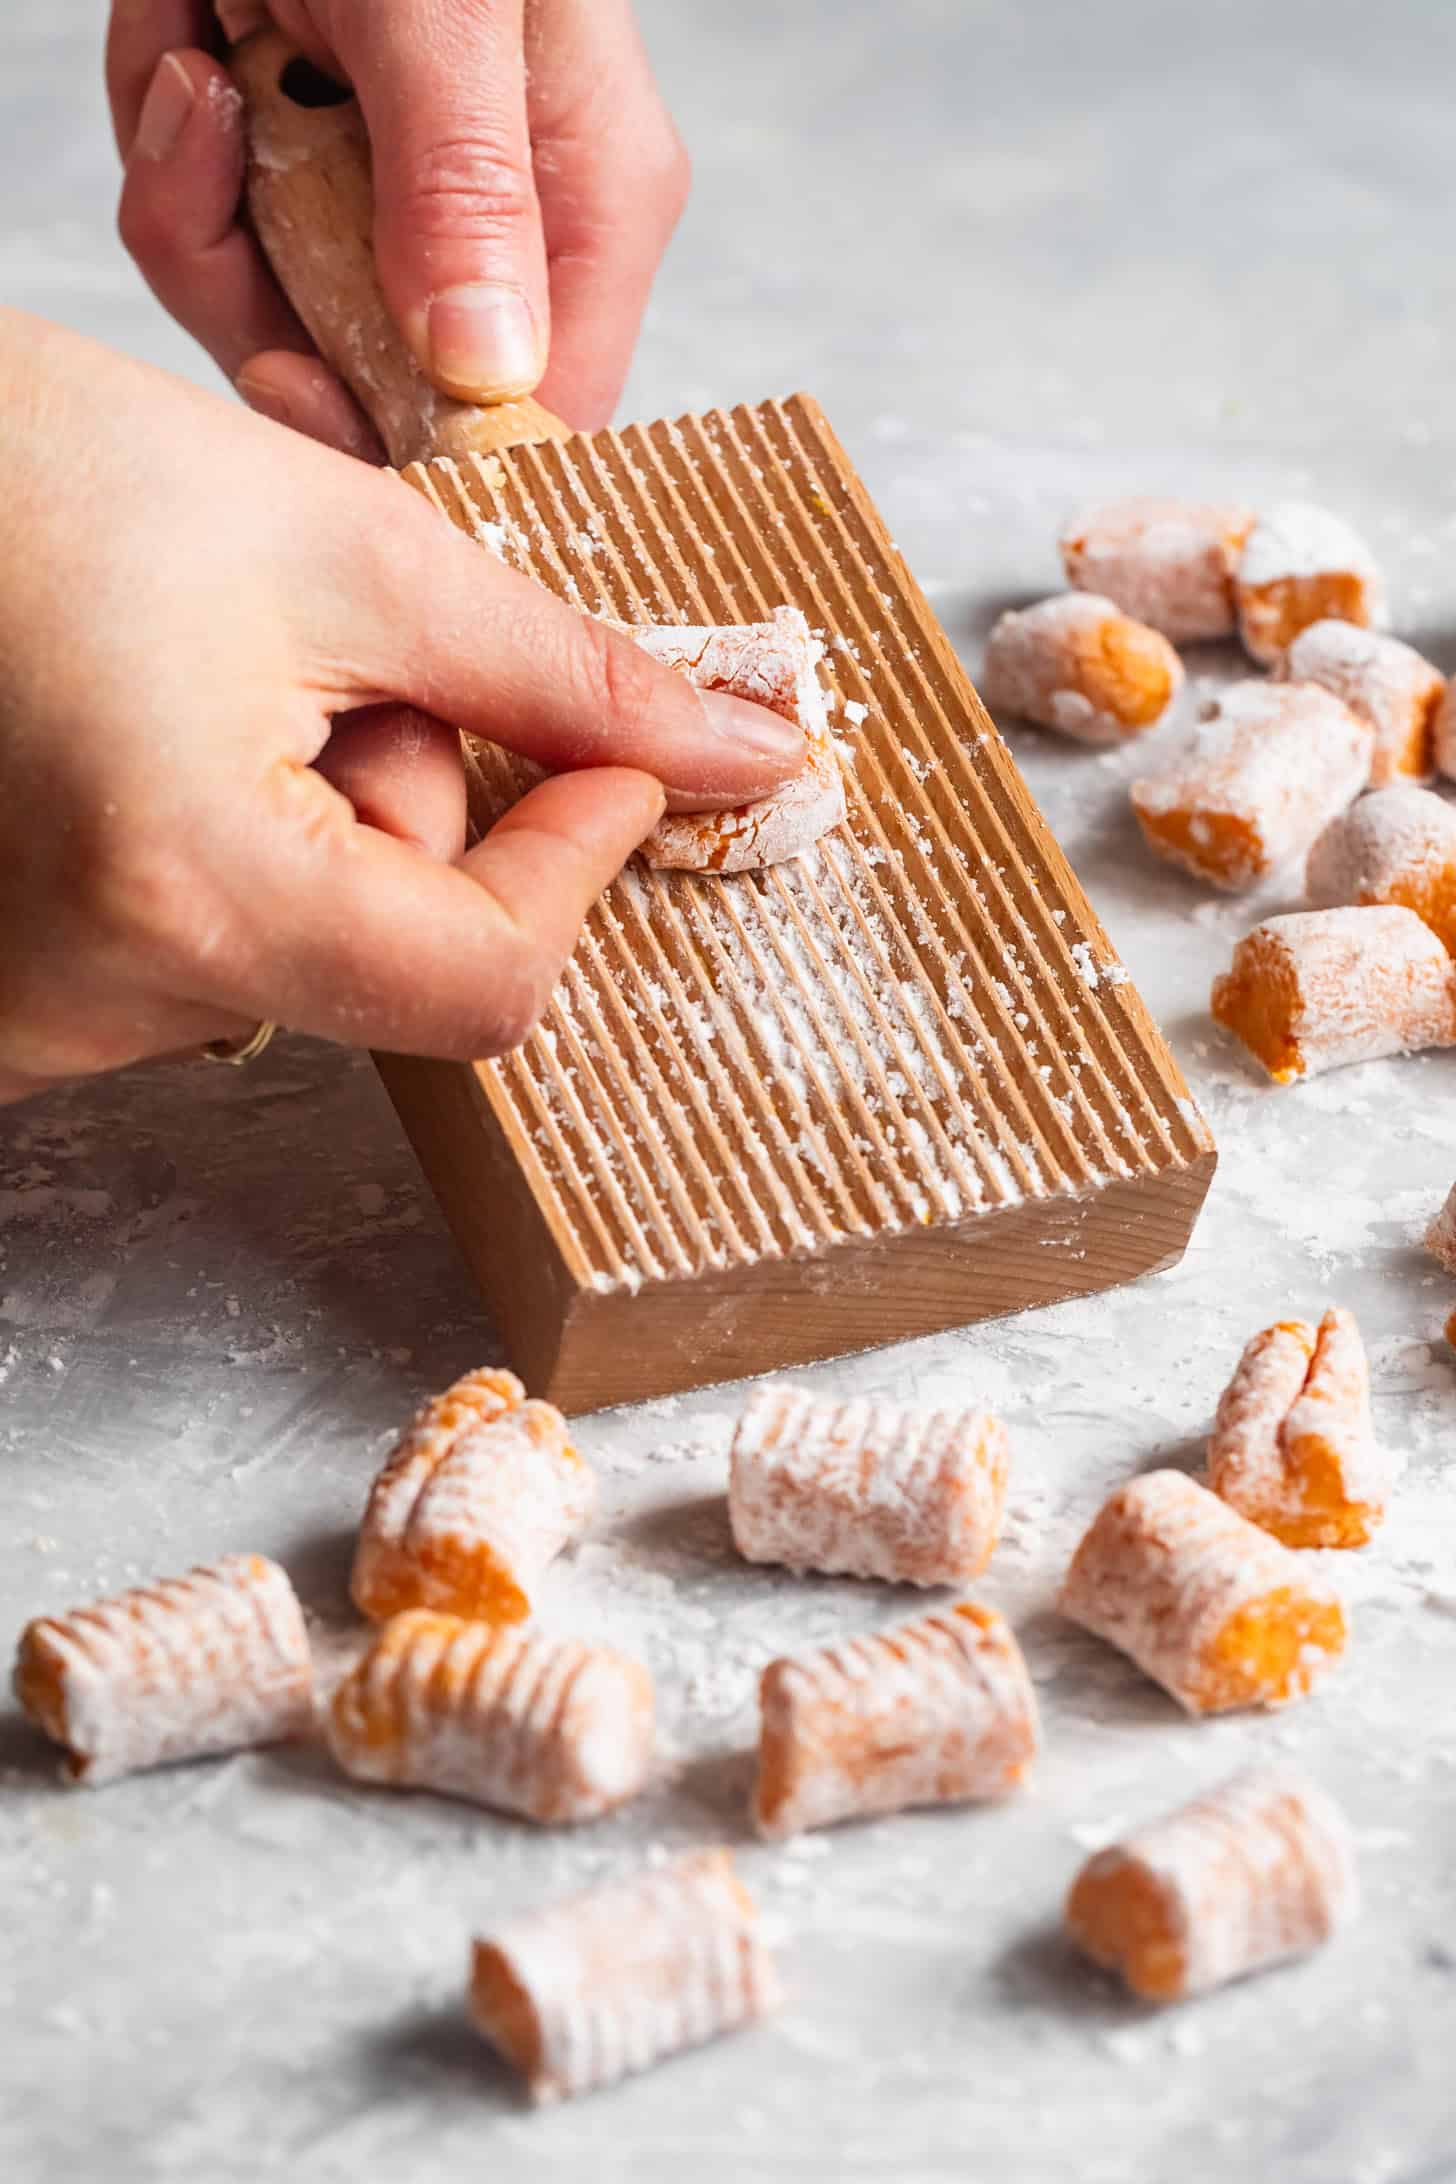
Optional: Roll each piece along a gnocchi board or the tines of a fork using your thumb. When working with sweet potato or butternut squash gnocchi, you will need to be more gentle with your rolling pressure than for potato gnocchi, as the dough is softer.
Texture on Gnocchi
While optional, adding texture to the gnocchi helps trap sauce and flavor when cooked. And it looks pretty too!
With a fork: You can also use the tines of a large fork. Hold the fork upside down, and starting at the top of the tines, use your thumb or fingers to gently press and roll the gnocchi down the back of the fork.
With a gnocchi board: If you can get your hands on a gnocchi board, this is the easiest quickest method. In one motion, use your thumb to gently press and roll the gnocchi down the board. As it rolls, it will create a little divet or crease that rolls up and lightly seals into a closed c-shape.
Gluten-Free Butternut Squash Gnocchi Variation
During butternut squash season, you can also use this same gluten-free sweet potato gnocchi recipe to create a cozy butternut squash gnocchi. You can use this similar method with pumpkin, kabocha, or another favorite squash! Just note that depending on the moisture content of the squash, you may find you need to add just a tiny bit more cooked squash to the dough if it's too dry.
Butternut squash has an even higher moisture content than sweet potatoes, so there are three key tips for this variation:
- Use only 6 ounces of riced butternut squash. Don't worry, you'll still taste the autumnal squash flavor!
- Do not sub in frozen butternut squash, leftover whole roasted butternut squash, or canned pumpkin, as all of these will add way too much moisture to the dough, making it too sticky to work with.
- If not cooking the butternut squash gnocchi right away, store it immediately in the freezer. Place a small baking sheet with gnocchi in a single layer in the freezer for 15 minutes. Once firm, transfer the frozen gnocchi to a freezer bag or airtight container and freeze for up to 6 months. If stored in the fridge, the gnocchi will soak up the tapioca flour and stick to the baking sheet.
Recipe

Soft, Fluffy Gluten-Free Sweet Potato Gnocchi
Ingredients
- 1 lbs (roughly) medium sweet potatoes, peeled and cut into ¾ to 1-inch thick slices*
- 1 tablesopon extra virgin olive oil
- 125 g (1 cup + 2 tablespoons) Bob's Red Mill super-fine blanched almond flour
- 63 g (½ cup + 1 tablespoon) Bob's Red Mill tapioca flour, plus more for rolling
- 40 g (¼ cup) sweet rice flour, also called mochiko; do not substitute white or brown rice flour
- ½ teaspoon kosher salt
- 1 large egg, whisked, room temperature
- 1 ounce (½ cup) freshly grated parmesan cheese, optional
INSTRUCTIONS
Making Sweet Potato Almond Flour Gnocchi
- Toss the sweet potato slices in 1 tablespoon extra virgin olive oil and place on a parchment-lined baking sheet.
- Preheat the oven to 375°F. Roast for 25-30 minutes, depending on the thickness, until tender when pierced with a knife. With the sweet potatoes still hot, send them through a potato ricer or mash them with a potato masher or fork until smooth. It's important that the potatoes are still warm as this will help the dough come together by beginning to cook the starches in the flour. Measure 8oz of riced sweet potatoes (about 1 cup)
- While the sweet potatoes roast, prepare the remaining ingredients. Sift together almond flour, tapioca flour, sweet rice flour, and salt. If using, mix in the parmesan (optional).
- To the measured riced sweet potatoes, top with the whisked egg and the sifted dry ingredients. Mix with a silicone spatula until the dough is evenly combined and forms a ball. The dough should feel like a soft ball of mashed potatoes, but not be too soft and sticky to handle. Add up to 1 tablespoon more almond flour and/or tapioca flour as needed if the dough is too soft and sticky. Form the dough into a ball and dust it well with tapioca flour. Note: The dough will be a bit softer than for traditional potato gnocchi due to the higher moisture content in sweet potatoes. The sweet potato gnocchi should be soft, and only a little bit tacky to the touch, if at all. Because it is softer and stickier, be sure to dust your work surface and the surface of the dough well with tapioca flour, as needed, to prevent it from sticking.
- Dust your work surface lightly with tapioca flour and turn the ball out onto your surface. Cut it into four pieces. Roll each piece into a long rope, about ½ to ¾-inch in diameter. Using a knife or a bench scraper, cut the rope into ¾ to 1-inch pieces. Roll each piece along a gnocchi board or the tines of a fork using your thumb and place gnocchi on a baking sheet dusted with tapioca flour (see pictures above).
Storing Sweet Potato Gnocchi
- Store potato gnocchi in a single layer in an airtight container in the fridge for up to 3 days. Alternatively, place a small baking sheet with gnocchi in a single layer in the freezer for 15 minutes. Once firm, transfer the frozen gnocchi to a freezer bag or airtight container and freeze for up to 6 months. When ready to cook, drop frozen gnocchi straight into the boiling water without defrosting.
- To cook, you can simply boil and drain the gnocchi or boil and then pan-fry the gnocchi to crisp it up on the outside (this, do this). In batches, drop the gnocchi into a pot of salted boiling water and cook until the gnocchi floats to the top, about 2 minutes. Either strain the gnocchi and top with your favorite sauce, or, if frying, melt a tablespoon each of butter and olive oil in a medium cast-iron or non-stick skillet over medium heat while the gnocchi boils. Use a slotted spoon to transfer boiled gnocchi to the hot skillet and fry, tossing, until browned on each side. Transfer to bowl and serve with favorite toppings or sauce. Tip: fry fresh sage in the butter alongside the gnocchi to infuse it with even more flavor!
Notes
Butternut Squash Variation
Replace the sweet potatoes with 1lb small butternut squash, peeled, halved, seeds removed, and cut into ¾ to 1-inch thick slices. After roasting, measure just 6oz of riced butternut squash (¾ cup). When mixed into a dough, the butternut squash gnocchi will feel even more soft, like soft playdough, but with a tacky surface, so be sure to dust well with tapioca flour to prevent sticking. Follow the rest of the recipe as written.Did you make this recipe? Please leave a review and rating to let me and others know how you liked it!


Sara McAllister -
These are great, but I had to usye 2.5x the flour. Using the exact flours, it needs way more flour than you'd think, especially if you plan to use a press to shape them.
Sarah Menanix -
Thanks for sharing! Sweet potatoes can vary a lot in moisture, so it does sound like yours may have been especially wet. That said, this sweet potato gnocchi dough is intentionally much softer than traditional potato gnocchi (softer than you might expect!), and it really benefits from a very gentle touch when rolling and shaping, especially if using a press. I wonder if adding extra flour to get a more classic potato-gnocchi texture is what led to needing so much more flour.
Becky -
I’m wondering for those of us who can’t do any grains, even rice, could a different nut flour or starch work instead?
Sarah Menanix -
While I have not tried it, some readers have tested my almond flour pasta with arrowroot starch in place of the sweet rice flour with success. If you cannot have sweet rice flour, I would try subbing arrowroot starch by weight.