
These buttery, flaky gluten-free pop tarts are filled with strawberry jam and topped with natural pink icing. They're so much more flavorful than store-bought and not dry! So flavorful and not dry! You can use strawberry jam or your favorite variety.
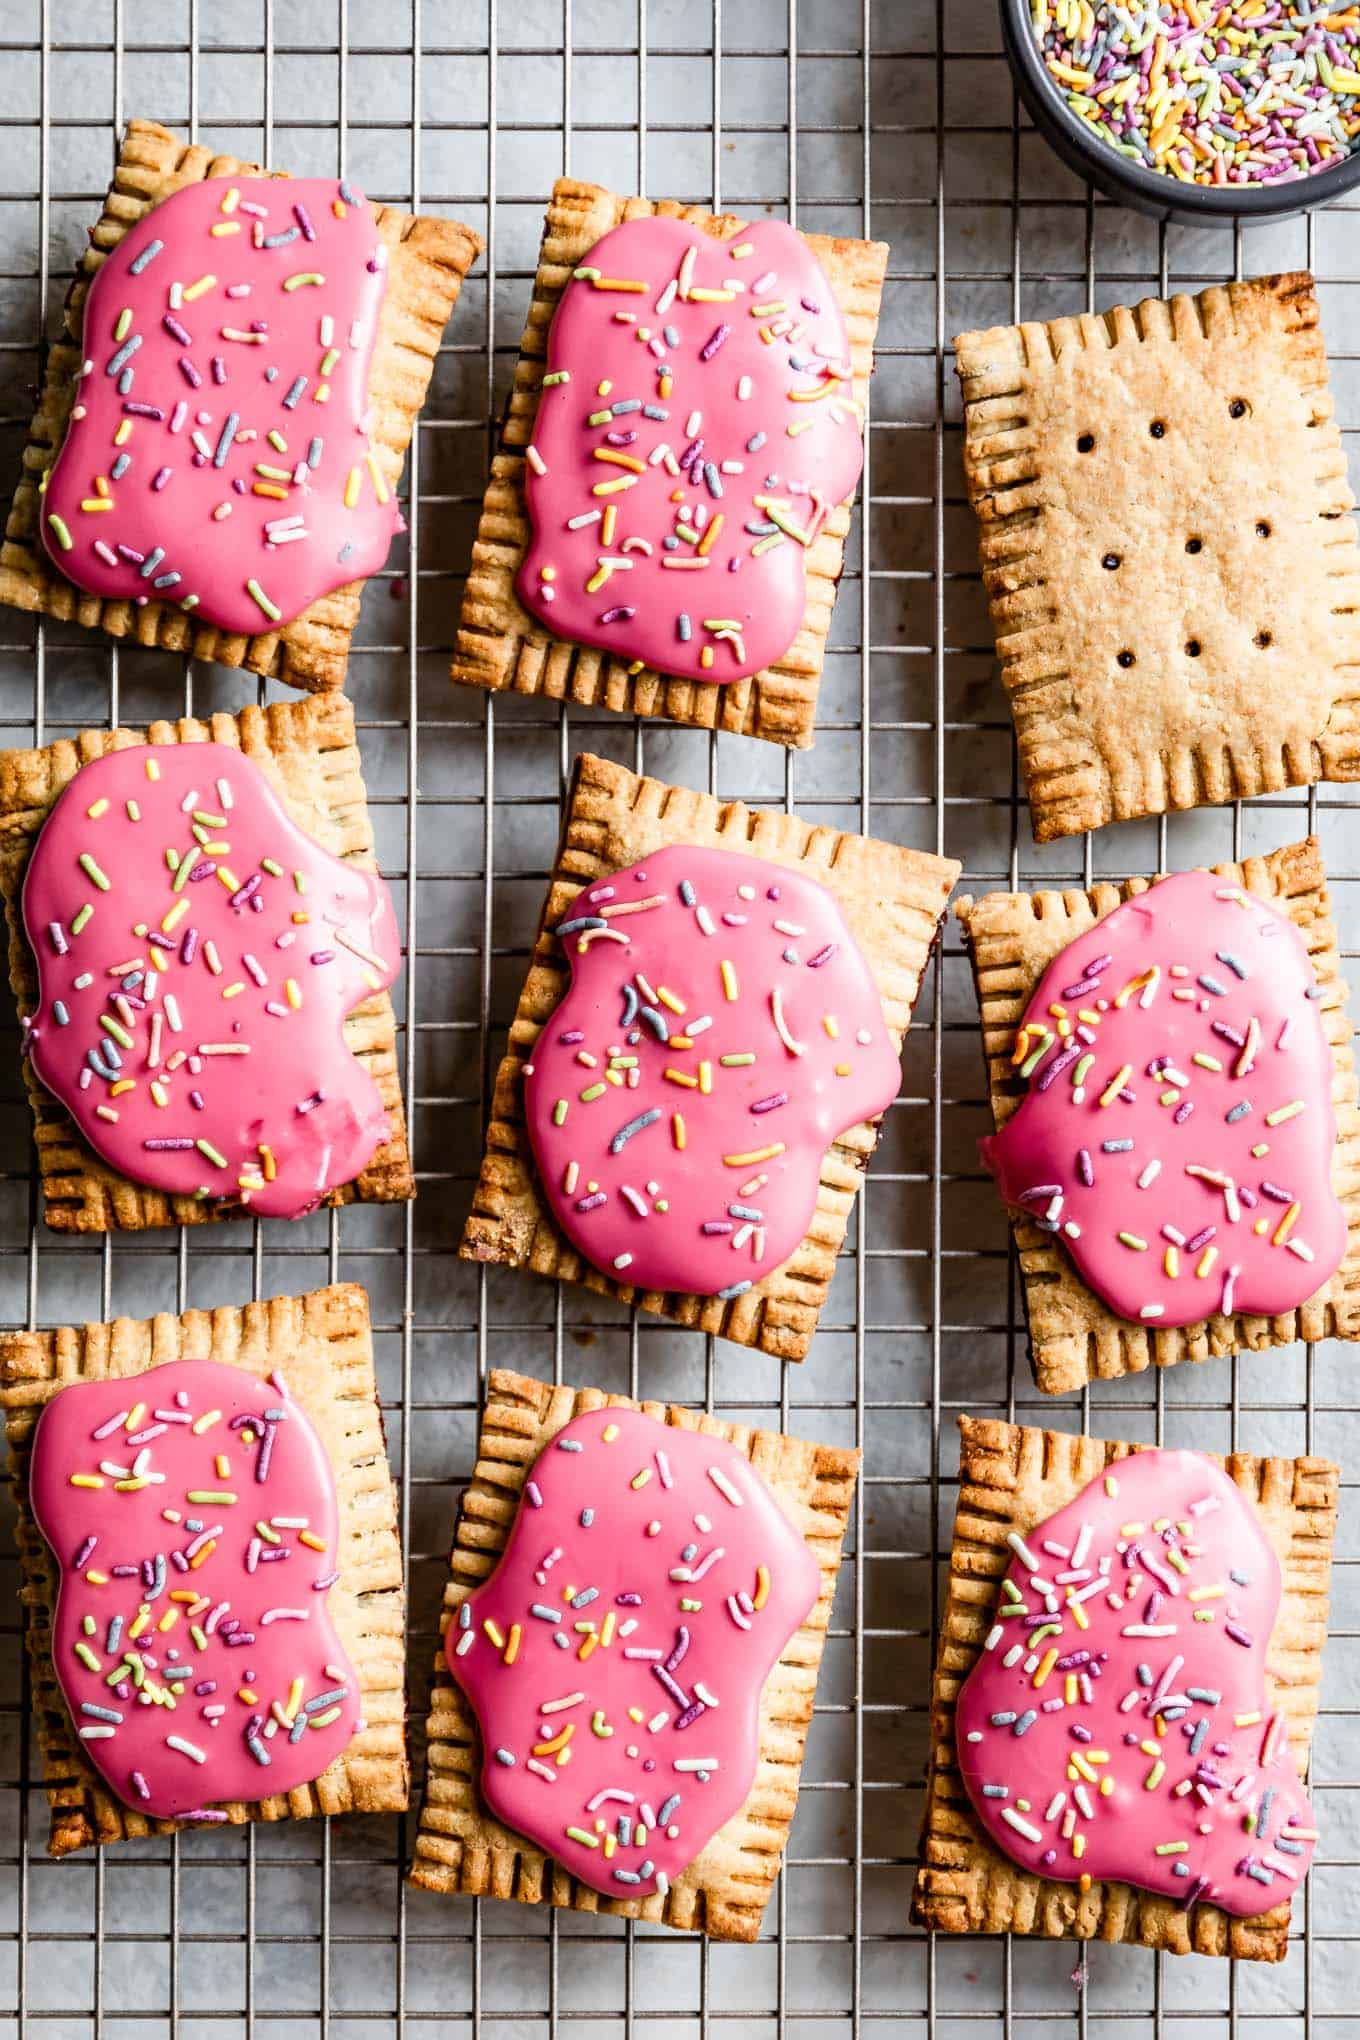
Zoella found my new jar of sprinkles the other day and asked if I would put them on her birthday cake. When I said "sure," she asked if she could bring them to school to show her friends. Zoella, Age 2: Stickers > anything else. Zoella, Age 3: Sprinkles rule the world. So I let my toddler put the sprinkles on the test batch of these hot pink strawberry hibiscus homemade gluten-free pop tarts.
The result was approximately 50% pop tart 50% sprinkles. With all the sprinkles in a pile right in the middle of each homemade pop tart.
Why You'll These Homemade Gluten-Free Pop Tarts
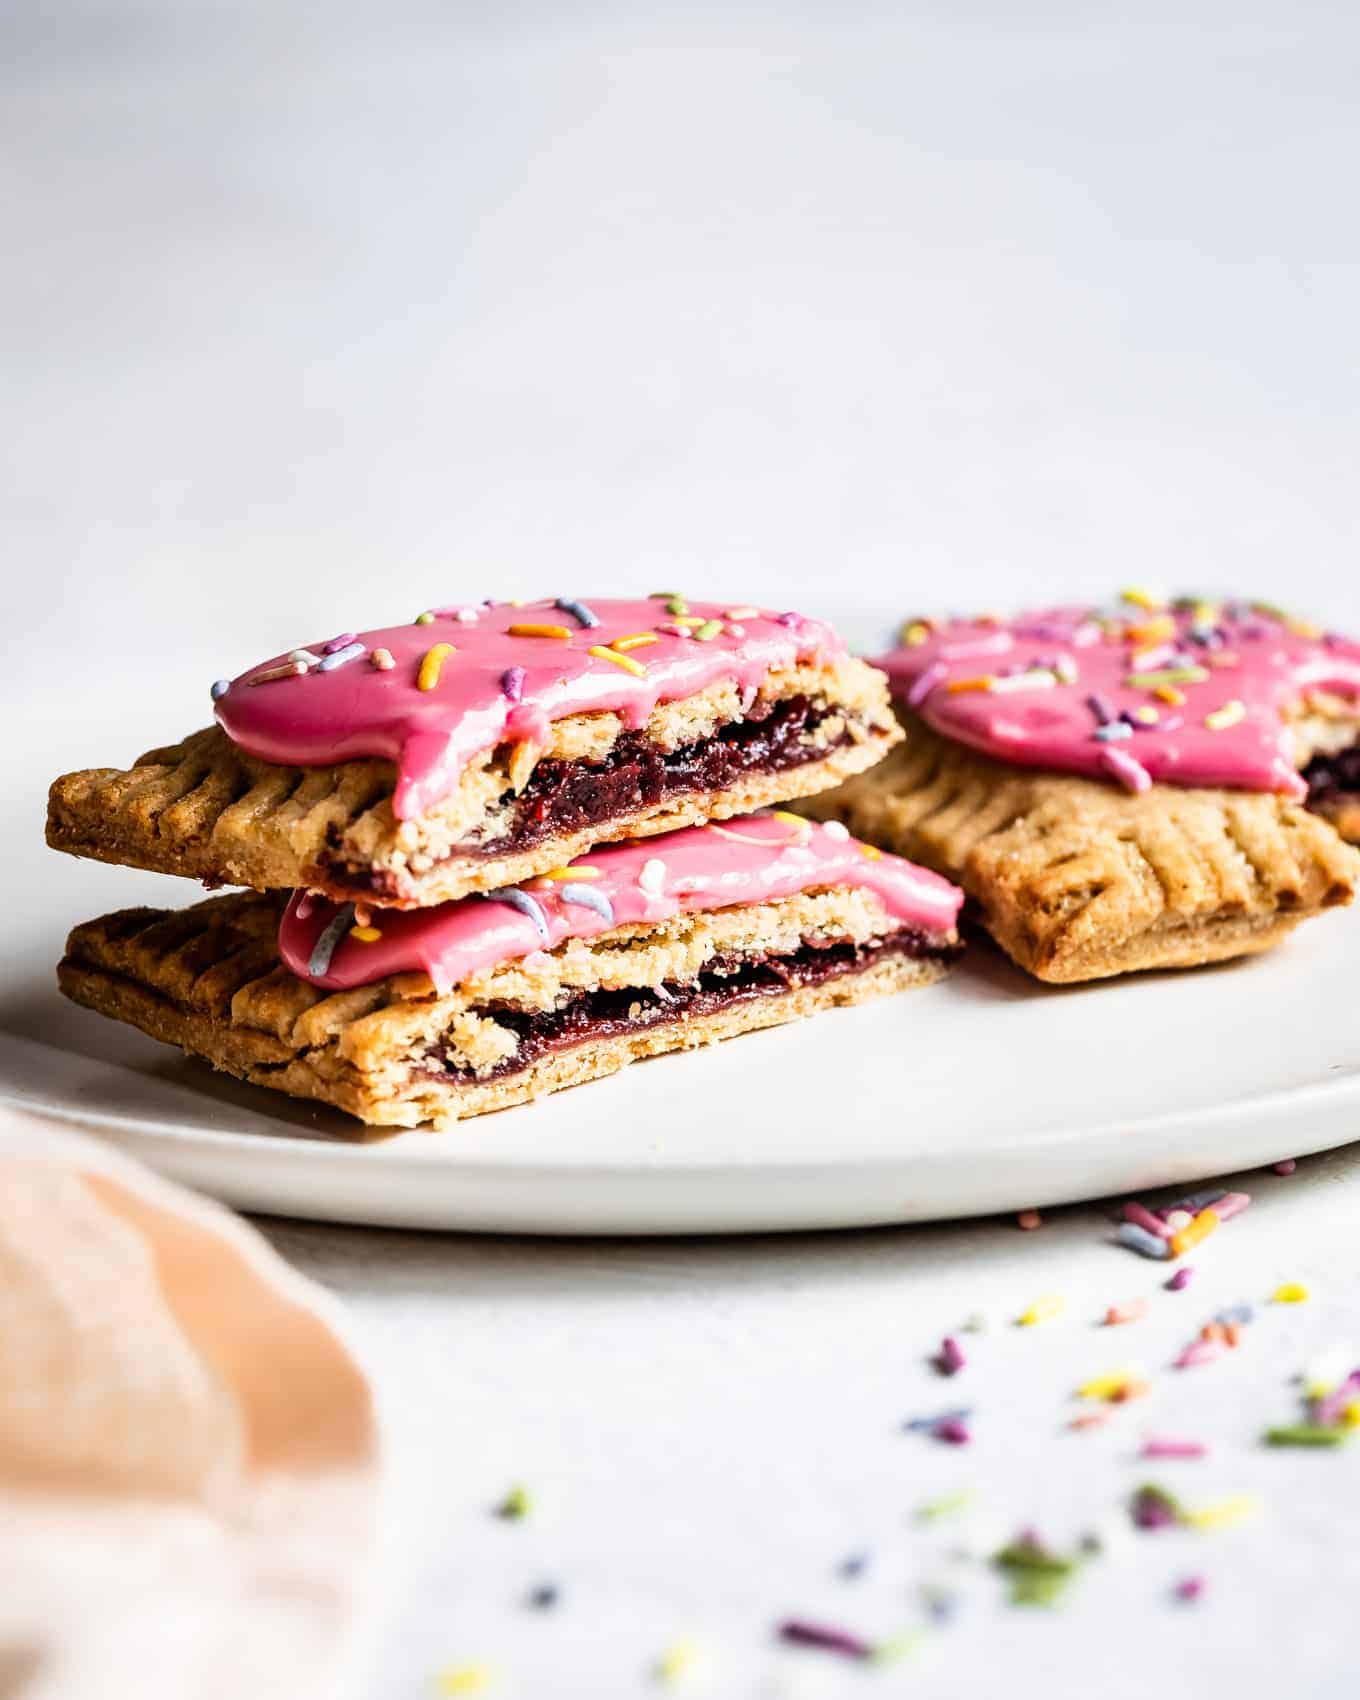
In truth, these homemade gluten-free strawberry pop tarts are pie. Less-oozy strawberry hand pies topped with icing and sprinkles. Yum. They have the best buttery, flaky crust (that's actually flavorful, unlike store-bought!) and are made with whole grains and real ingredients. A hibiscus icing gives them a gorgeous pink coat, topped with fun sprinkles.
I've made the gluten-free pastry with whole-grain oat flour and whole-grain millet flour, similar to my gluten-free pie crust, and then filled them with an easy homemade strawberry jam (or feel free to use store-bought jam!).

How to make homemade gluten-free pop tarts
There are some people who argue that homemade pop tarts should have a crumbly cookie-like dough, but I'm on team flaky pie dough. The flavorful flaky dough gives them their freshly baked quality and makes them taste like the breakfast pastry they're meant to be.
To make a gluten-free pie dough pastry for these pop tarts, I use the same method as a traditional pie pastry, but with a blend of gluten-free flours. Oat, millet, and sweet rice flour create the structure that mimics the basic qualities of whole wheat flour (these are the same three flours I use in my gluten-free chocolate cupcakes). Tapioca flour and xanthan gum make the dough pliable and sturdy enough for rolling without crumbling. The tapioca flour crisps up the crust and, like in Brazilian cheese bread, helps trap air to create an ultra-flaky crust.
For pop tarts that have a higher crust to filling ratio than pie, I use 1.5x my standard crust recipe to make 9-10 pop tarts.
They're Filled with Strawberry Jam!
I've made a strawberry jam without pectin to put inside these homemade strawberry pop tarts. Since we're looking for a smooth thick strawberry jam compote, it benefits from a longer cooking time. A little cornstarch helps thicken the jam so it doesn't ooze off the pop tart dough when filling
The longer cooking time to reduce the strawberries also concentrates their flavor, allowing you to use less sugar. Concentrated flavor also means that even though you can only fit a heaping tablespoon of filling between the two layers of dough, you can still taste the strawberry layer even after it bakes.
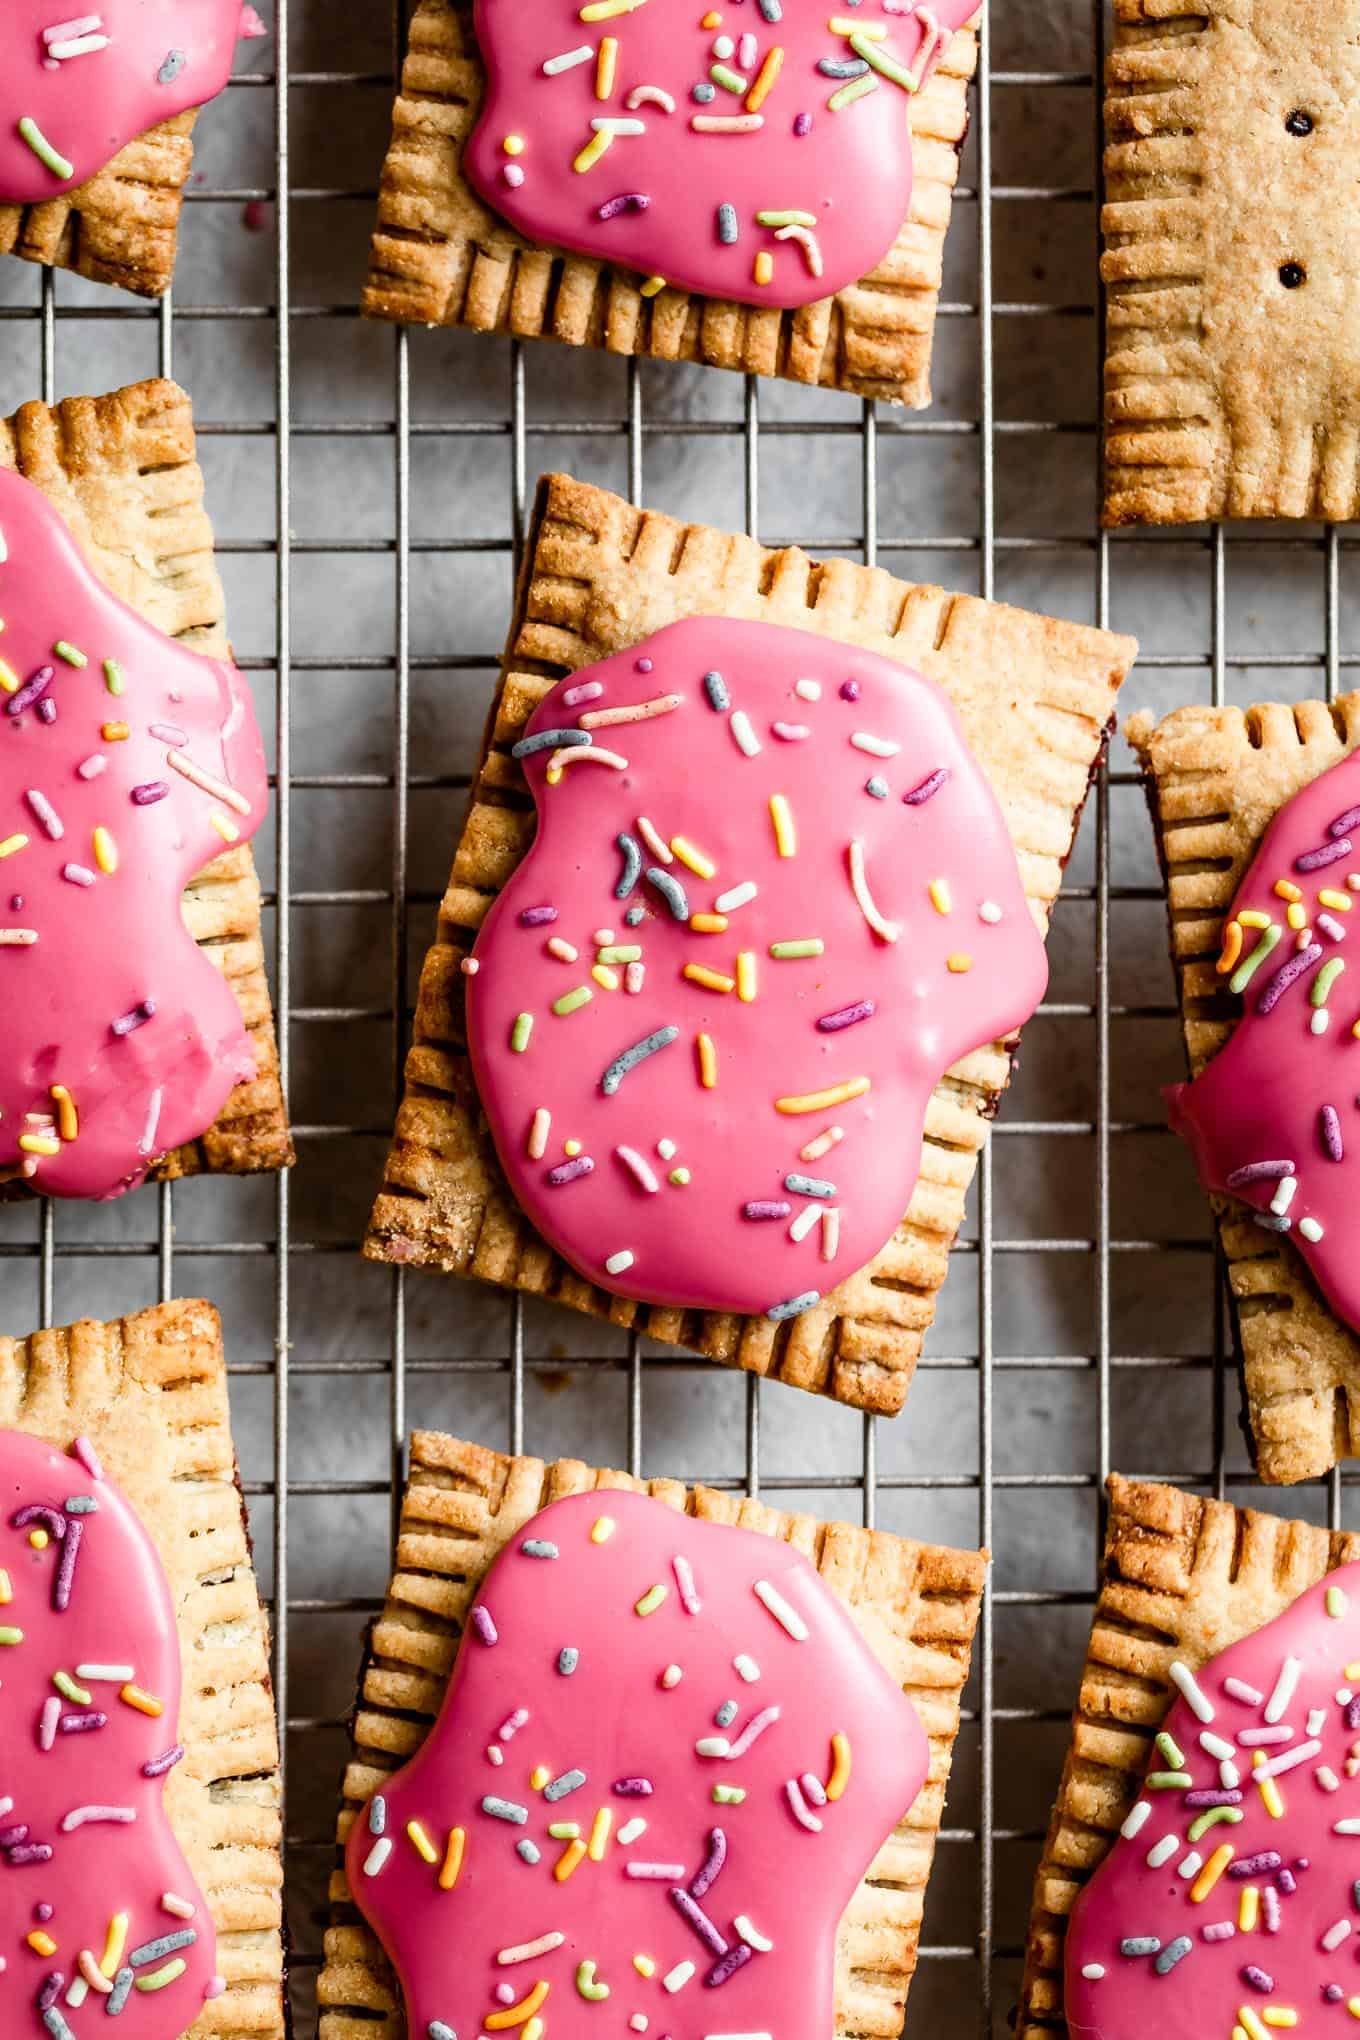
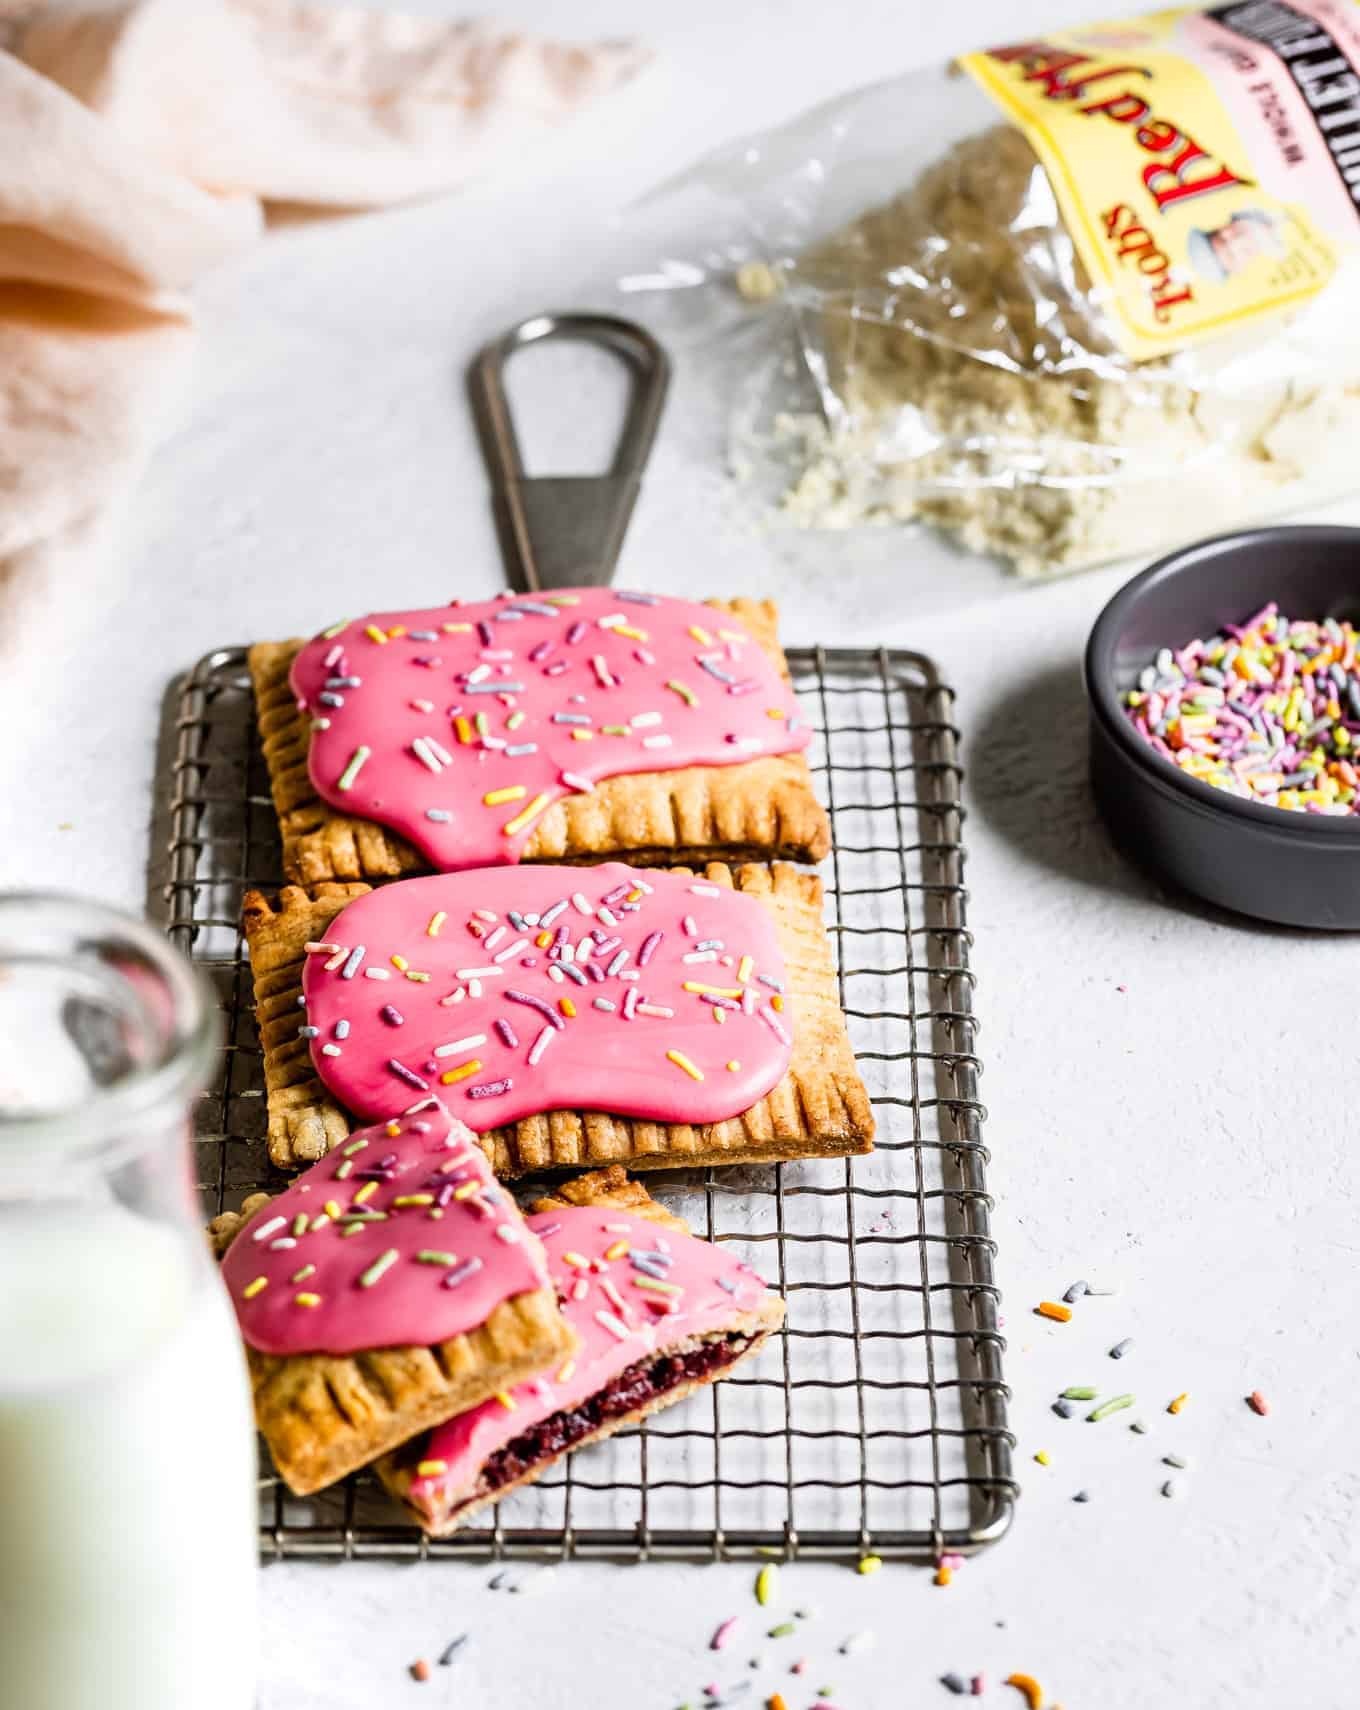
The result is a super flaky pastry hand pie with a thin layer of jammy strawberry filling and a tart blanket of hibiscus icing on top. Isn't it pretty? I use dried hibiscus leaves to make this naturally pink cake frosting, too.
Recipe
Flaky Homemade Gluten-Free Pop Tarts (with strawberry)
Ingredients
- ¾ cup (90 g) Bob's Red Mill gluten-free oat flour
- ½ cup + 1 tablespoon (77 g) Bob's Red Mill millet flour, plus more for rolling
- ¼ cup + 2 tablespoons (60 g) Bob's Red Mill sweet rice flour
- ¼ cup + 1 tablespoon (45 g) Bob's Red Mill tapioca flour
- 1½ tablespoons granulated sugar
- ¾ teaspoon Bob's Red Mill xanthan gum
- ¼ teaspoon+ 1 pinch kosher salt
- ¾ cup cold unsalted butter, sliced into 12 tablespoons
- 4-6 tablespoons ice water
- 1 large egg, whisked
- Optional: 2 tablespoons heavy cream or milk
- 1½ lbs fresh or frozen strawberries, thawed
- 1½ tablespoon fresh lemon juice
- 3 tablespoons granulated sugar
- 1½ tablespoon Bob's Red Mill cornstarch
- 3 tablespoons dried hibiscus tea leaves or 3 hibiscus tea bags
- ½ cup water
- 1½ cups (180 g) powdered sugar, sifted
- ½ teaspoon honey
- Optional: Sprinkles
INSTRUCTIONS
Gluten-Free Pop Tarts
- Whisk together the oat flour, millet flour, sweet rice flour, tapioca starch, sugar, xanthan gum, and salt in a large bowl.
- Add the cold butter and working quickly with your hands, break up the butter into the flour until the largest pieces are about the size of an almond.
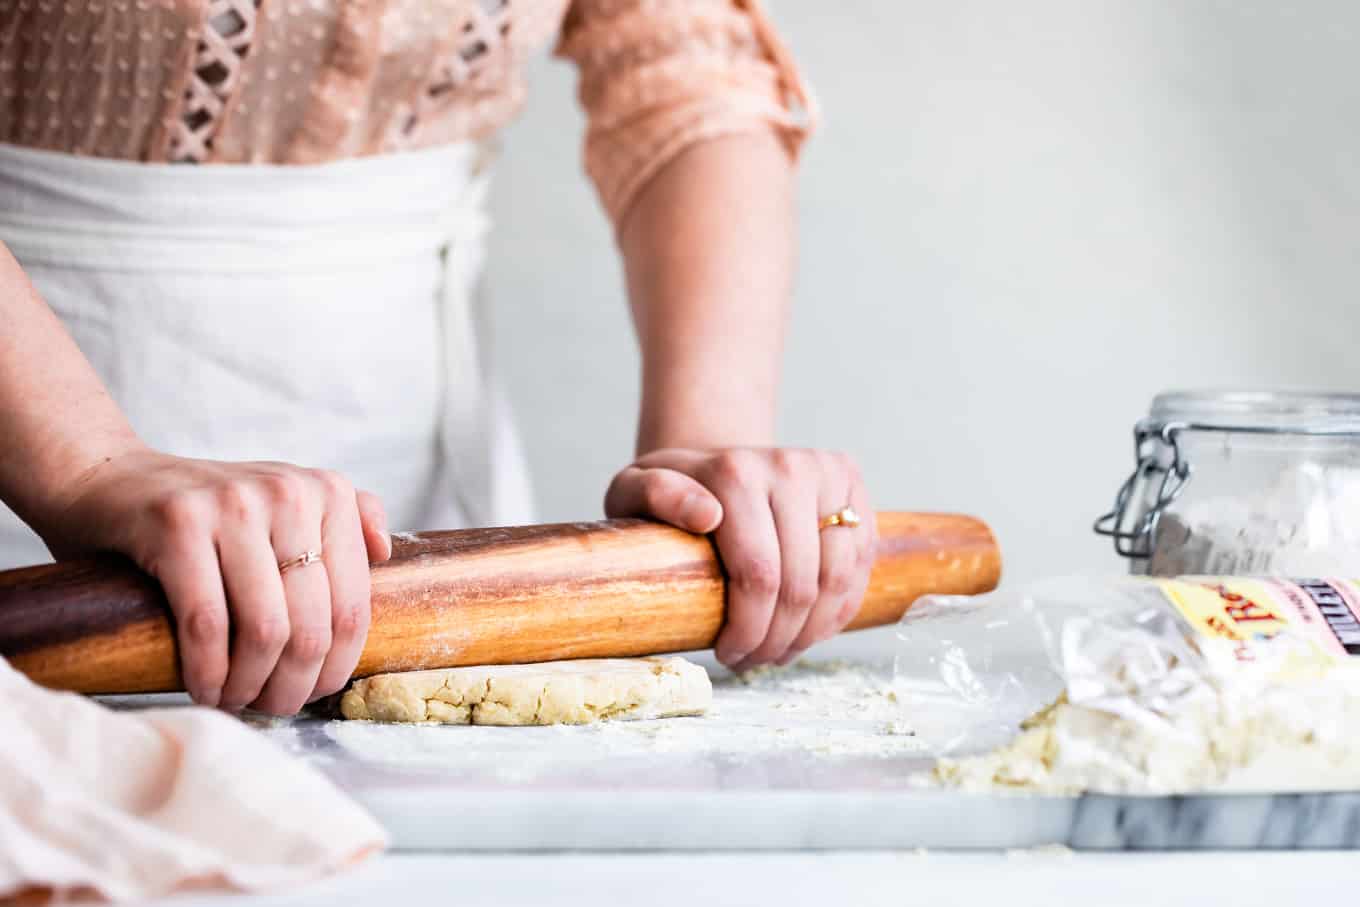
- One tablespoon at a time, dribble in the ice water, combining with a fork or your hands each time, until the dough holds together when pinched with your fingers (add water until it just holds together, but is not sticky. If you need more water, add a teaspoon at a time). Knead the dough until it just comes together. Divide the dough in two.
- Dust your work surface lightly with millet flour and roll each piece out into a ¾-inch thick rectangle. Dust the top of the dough lightly with millet flour and Fold the dough into thirds like a letter and then in thirds once again to form a square. Repeat. Press the dough into a 1-inch thick rectangle. Wrap each piece in plastic and chill for an hour or up to overnight.
- Meanwhile, prepare your strawberry jam, as instructed below) if using homemade.
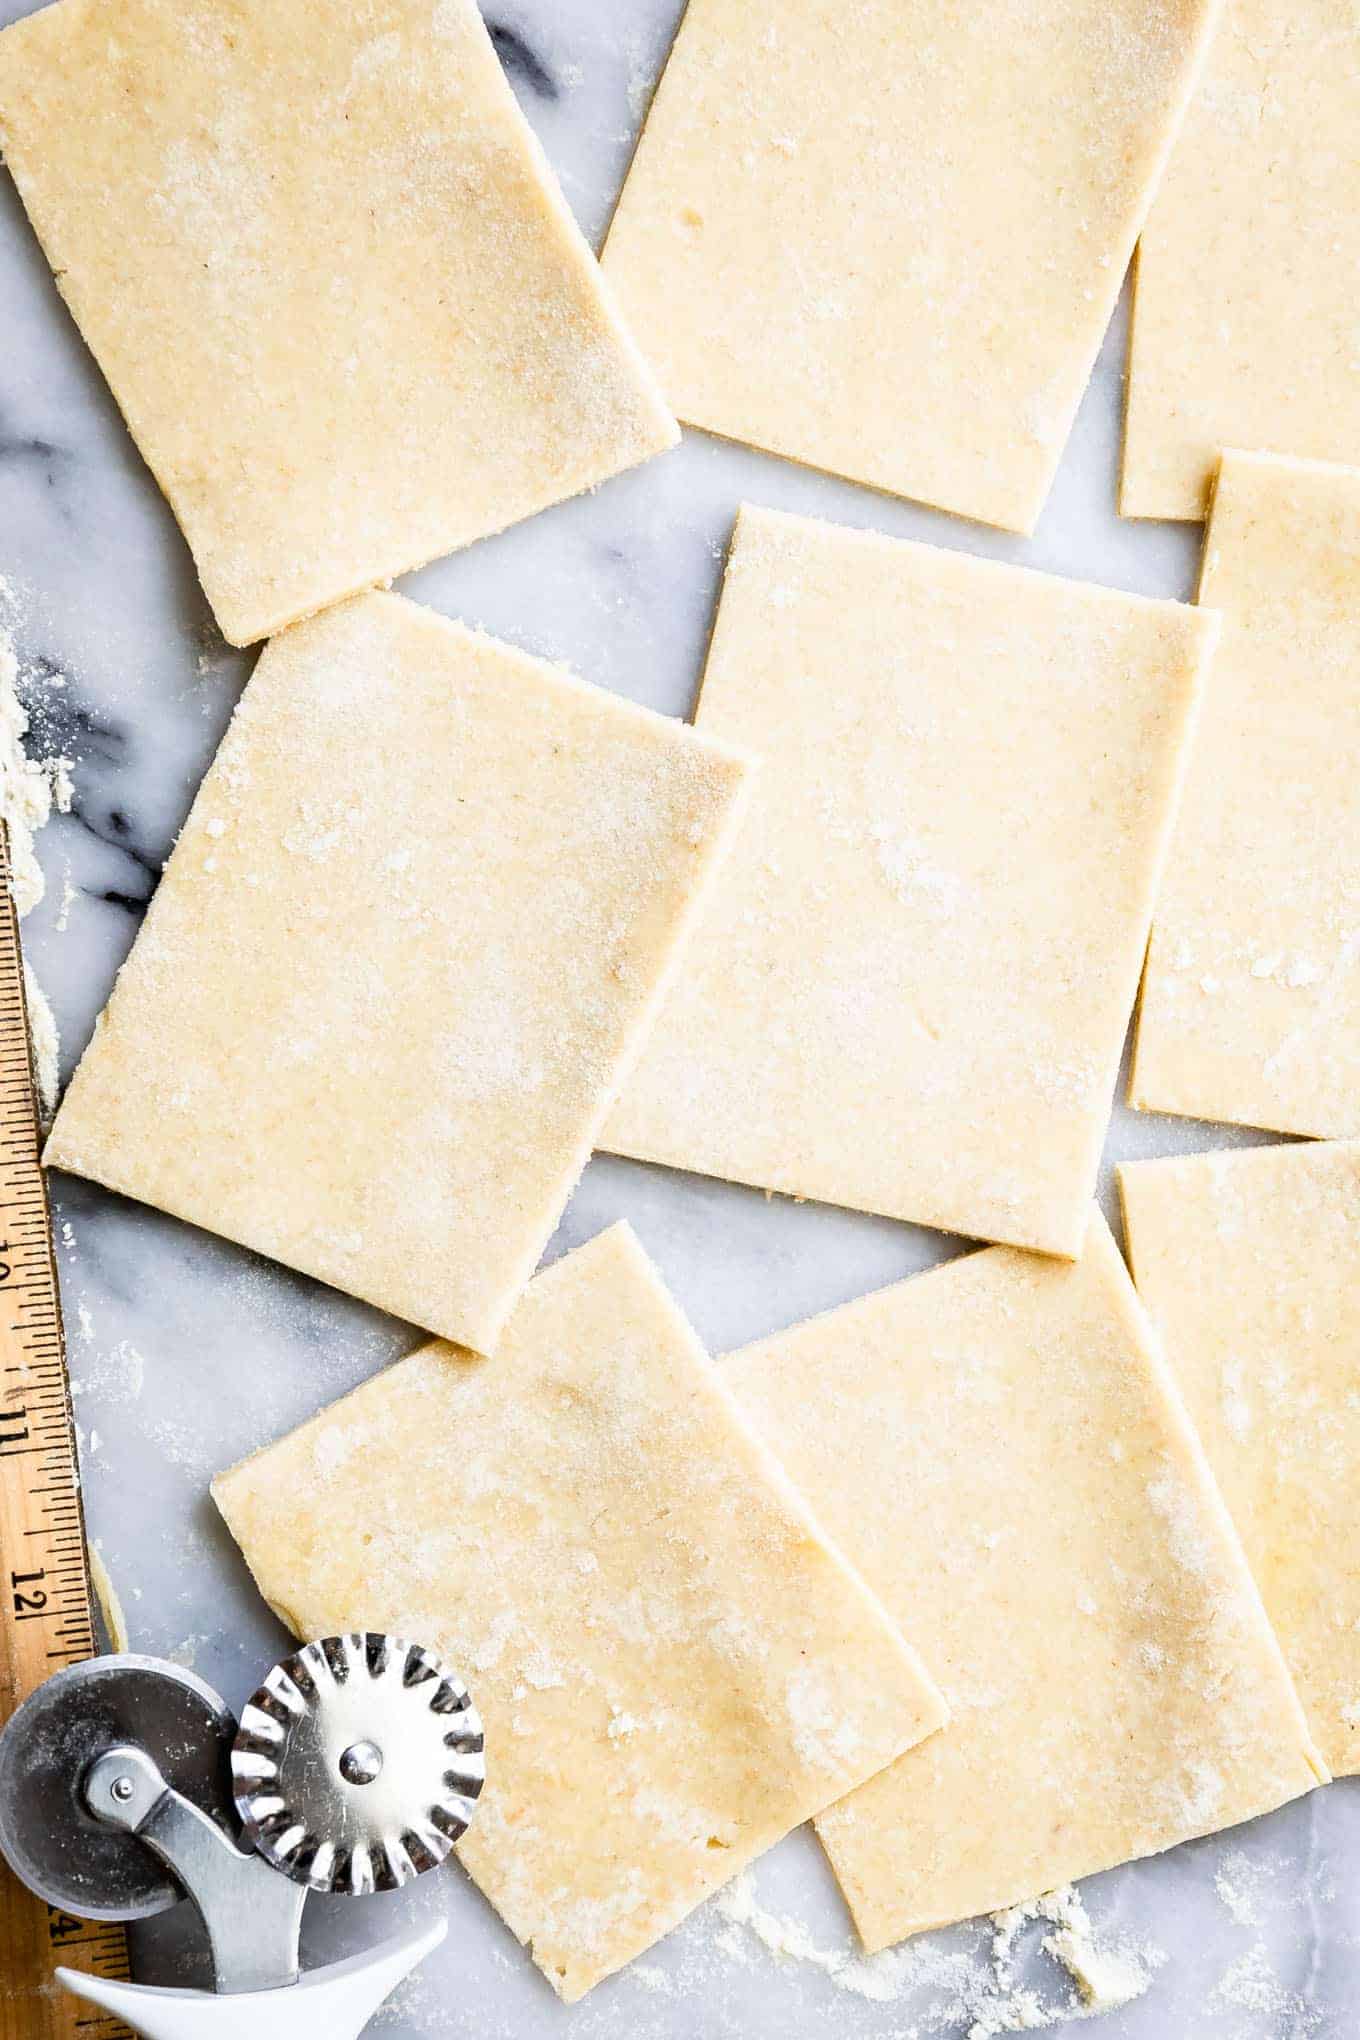
- Dust your work surface slightly with millet flour. Remove one portion of dough from the refrigerator and let sit for 5-10 minutes to soften. Carefully roll into a 9x12-inch rectangle, dusting with millet flour and flipping to keep it from sticking. Repair any cracks as you roll.
- Cut into 9 rectangles, 3x4 inches each, and stack them on a plate in the refrigerator while you repeat with the second portion of dough. If desired, reroll any scraps of dough to make an additional 4x6 rectangle and cut into two smaller 3x4 rectangles.
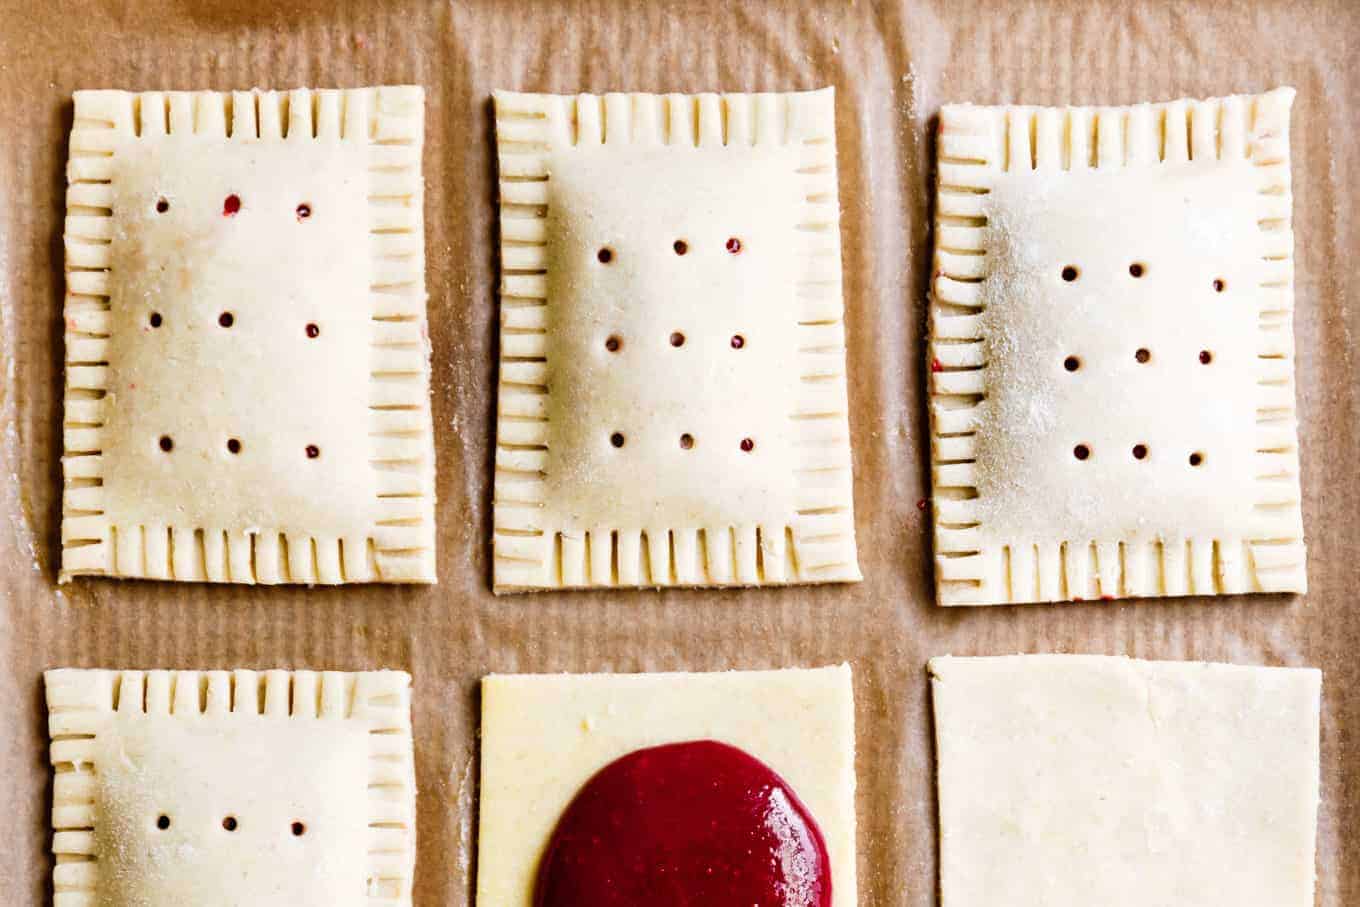
- Brush egg over the entire surface of a rectangle of dough and place 1 heaping tablespoon chilled strawberry jam in the middle. Carefully place a second rectangle on top and press the edges to seal, being careful not to press the jam out of the sides. Use the tines of a fork to crimp the edges. Repeat with remaining rectangles, laying each on a parchment-lined baking sheet about 1-inch apart, as you go. Try not to worry if some of the tops crack just a little - you'll cover them in icing and hide any imperfections.
- Use the end of a chopstick or thick skewer to poke 9 holes in the top of the pastry.to vent out the steam. Chill the pop tarts for 15 minutes while you preheat the oven to 400°F. When the oven is done preheating, brush the top of each pop tart with heavy cream, milk, or the remaining egg wash (the egg wash will make the pop tarts a little more shiny and golden than pictured).
- Bake for 39-42 minutes, until the tops are golden brown and crisp. Remove from heat and using a clean cloth, paper towel, or flat spatula, gently press the pop tarts down to remove any steam and flatten them a bit. Let cool completely before icing.
- Put 1-2 teaspoons of glaze on a pop tart and use a spoon to gently spread it around. Top with sprinkles and repeat with remaining pop tarts.
Homemade Strawberry Jam
- If using frozen strawberries, puree them in a blender until completely smooth. If using fresh strawberries, puree them with ¼ cup water until smooth. Press the puree through a fine mesh sieve into a pot. Whisk the sugar and cornstarch together until combined then add it to the pot along with the lemon juice. Bring it to boil over medium heat, then reduce heat to a low simmer.
- Simmer, whisking occasionally to keep the bottom from scorching, until thick and jammy and reduced to less than half, 40 minutes. Transfer to a bowl and chill in the freezer or fridge until cold, stirring occasionally to help cool it down.
Pink Hibiscus Icing
- Bring water to boil and add hibiscus leaves. Steep for 10 minutes until deep dark red then strain out the tea leaves and chill until room temperature (Use the freezer to speed this up!).
- Add honey and 1½ tablespoons of the brewed hibiscus tea concentrate to the powdered sugar and whisk until smooth. Slowly add more tea, as needed, until it becomes a smooth thick glaze that holds its shape when drizzled onto itself for a few seconds before incorporating back in.

Nick -
Would I be able to use the bobs 1:1 gluten free baking flour for this instead of mixing all of those together?
Mayra -
Hello there! I made your recipe following every single detail, however my result was a great pop tart but for some reason after the first bite they have an aftertaste. I wonder if some of the flours give the aftertaste.
It was yummy at the beginning but then the aftertaste hits
Any thoughts?
Sarah Menanix -
I'd love to help troubleshoot. Is the after taste you're noticing in the crust itself (ie, if you break off just a piece of the crust, do you notice it?) I've not had this happen before (this is a variation on the pie crust I make for all of my pies and it's always a hit), but I wonder: what brand of flours did you use? I have noticed variations in grind and flavor from using different brands (specifically with millet flour).
Mayra -
I was wondering that I could probably over baked them. I live in high altitude and maybe 42mins st 400f is way to long😔. Therefore, the flours reacted funny and the result is the aftertaste 🤦♀️
Sarah Menanix -
Oh - I hadn't thought of that, but that would also make sense! Did the crust get darker than in my photos?
Teri -
Can these be made ahead and frosen? I'd like to try them with a fig filling without icing, I just bought a large bag of organic dried figs from Costco.
Teri -
*frozen. Sorry, I didn't proofread before I submited.
Sarah Menanix -
Ohhh - I don't see why not! Especially if they're not frosted, you can just pop them in the toaster to reheat and they'll stay crisp! I've never tried it though - please let me know if you do!
Sher -
I have never been inspired to make Pop Tarts at home. Until now. These are stunning. And you make me wanna bake. Which is kind of huge.
Karen @ The Food Charlatan -
omg reddit brings out the best, weirdest parts of humanity sometimes. These totally look like ravioli to me!! lol jk they are gorgeous and I'm so sad I'm not eating one right now!!
Alanna -
These are so epic Sarah!!! Such gorgeous photos and recipe. <3
Amber | Loves Food, Loves to Eat -
I'd say that bc ravioli is boiled, and poptarts are baked, they are not the same. These are the cutest poptarts ever!
Sarah Menanix -
But what about baked or fried ravioli?? Lol I mean, I agree with you, but still hahaha
Debbie Feely -
Hi Sarah, Any thoughts on subbing for xanthan gum? I am allergic to that and eggs which makes gluten free baking a bit crazy. I subbed cream cheese for eggs in your snickerdoodles last week. Yum! But xanthan gum is tricky. Thanks!
Sarah Menanix -
Yes! My friend Alanna substitutes 2.5 tablespoons ground chia seeds for xanthan gum in her pie crust. Since this is 1.5x my regular pie crust recipe, I would use 3.75 tablespoons ground chia seeds in place of the xanthan gum - you can grind them up quickly in a coffee grinder!
Laura (A Beautiful Plate) -
Oh my gosh! These are GORGEOUS!!! Such a fun color, and lightyears better than traditional pop tarts in my humble opinion ;)