

Ultra chewy gluten-free blondies with rich toffee notes. Made with browned butter, these almond flour blondies are infinitely customizable with your favorite add-ins!

Why You'll Love This Recipe:
Oftentimes my kids ask to bake cookies, but I simply don't have the energy to deal with scooping cookie dough balls onto a baking sheet and baking them in multiple batches while also managing a toddler who very likely is dumping the entire container of baking powder into the mixing bowl or crushing eggs in his hands like the hulk or, shockingly, both simultaneously.
Enter blondies.
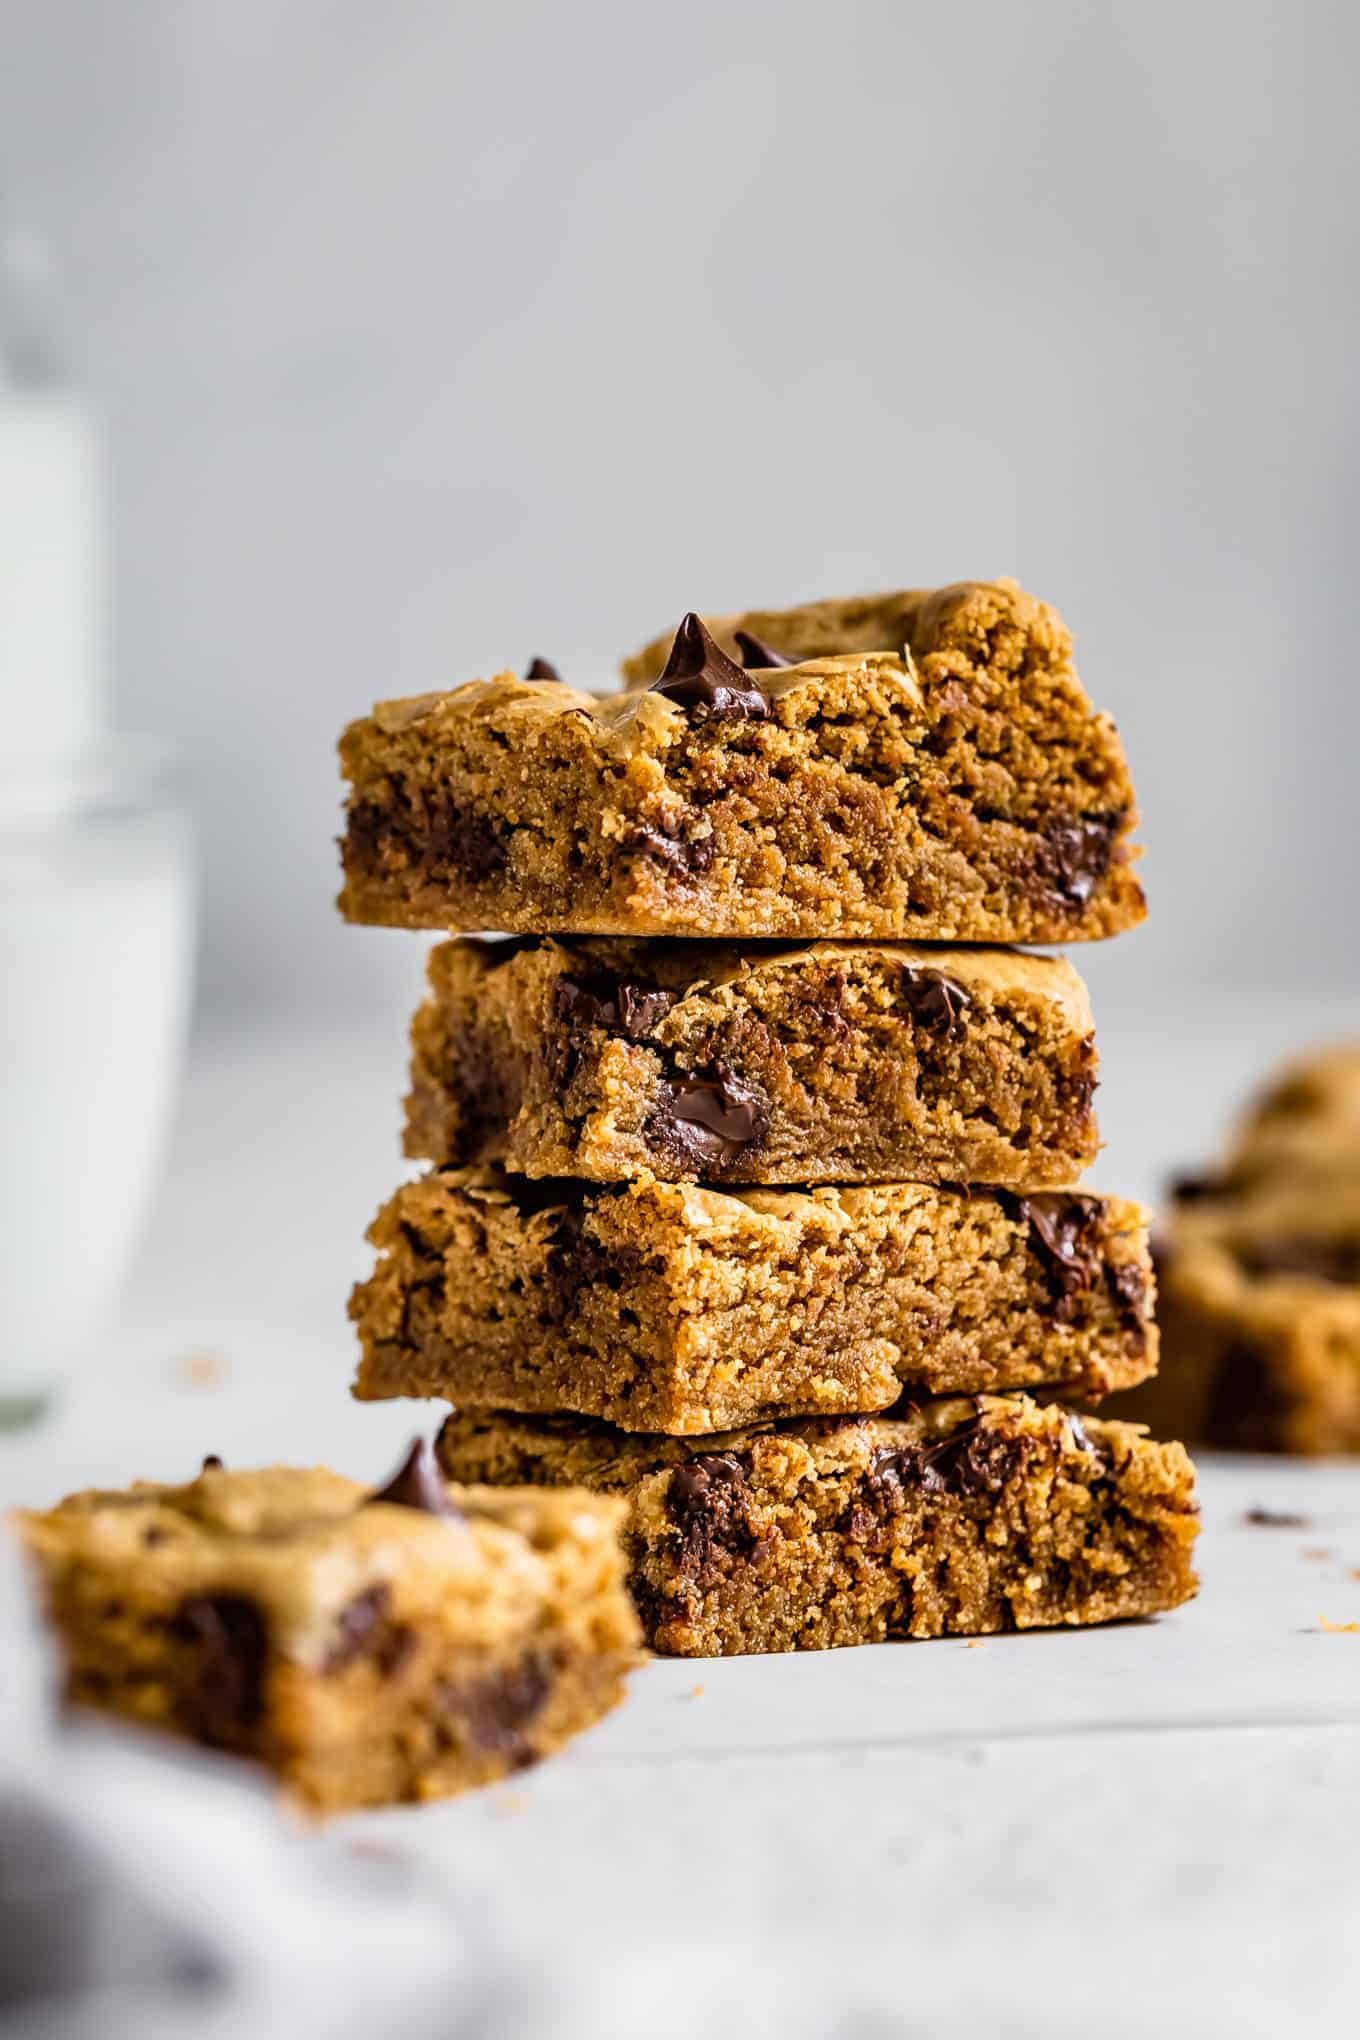
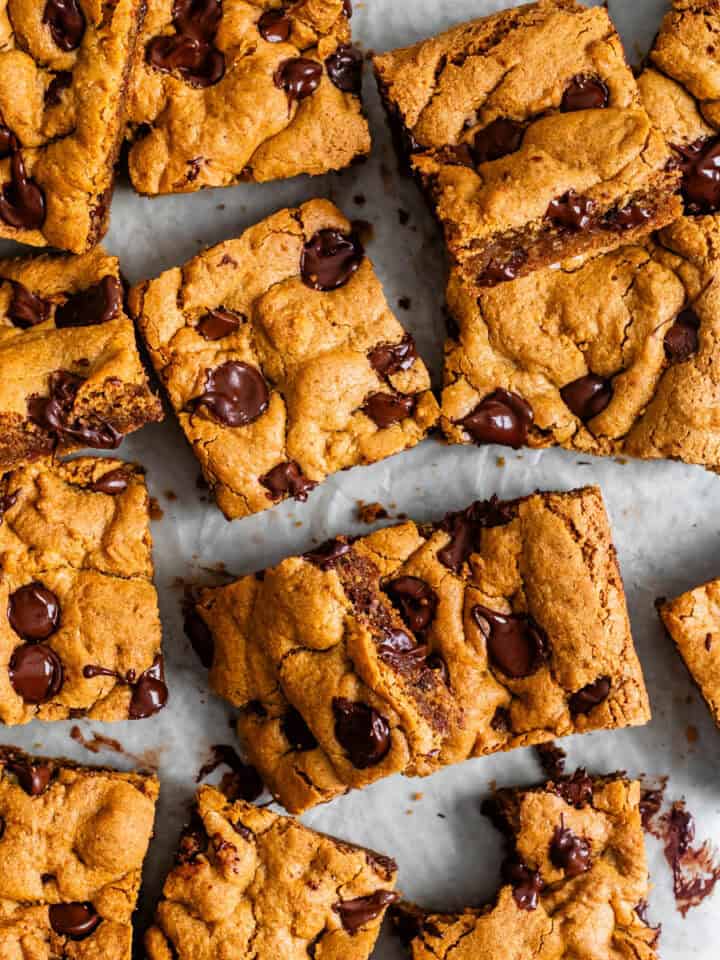
Blondies are more than just cookies baked in a pan. A cross between a cookie bar and a brownie, blondies have the best of both worlds. A vanilla cookie-dough with rich toffee notes from browned butter and dark brown sugar. A crackly top with classic brownie crispy edges and a chewy center.
Imagine the chewy fudgy texture of brownies but without the cocoa powder. Brownies for vanilla-lovers, Baked up into bars that are ultra chewy with crisp edges, deep rich toffee notes, and a subtle nuttiness that further enhances the browned butter notes.
For these gluten-free blondie bars, I use super-fine blanched almond flour as the base flour. Almond flour adds fat and moisture to the recipe, requiring more flour than a traditional blondie recipe. This allows the bars to be thick enough to sustain both a chewy interior and crisp edges, and to hold their form when picked up off the plate. In all my cookie testing, I've found the subtle sweet nuttiness of almond flour to be the most neutral flour to capture the classic cookie flavor and texture.
Tips for Perfect Gluten-Free Blondies
How to make crinkly top blondies
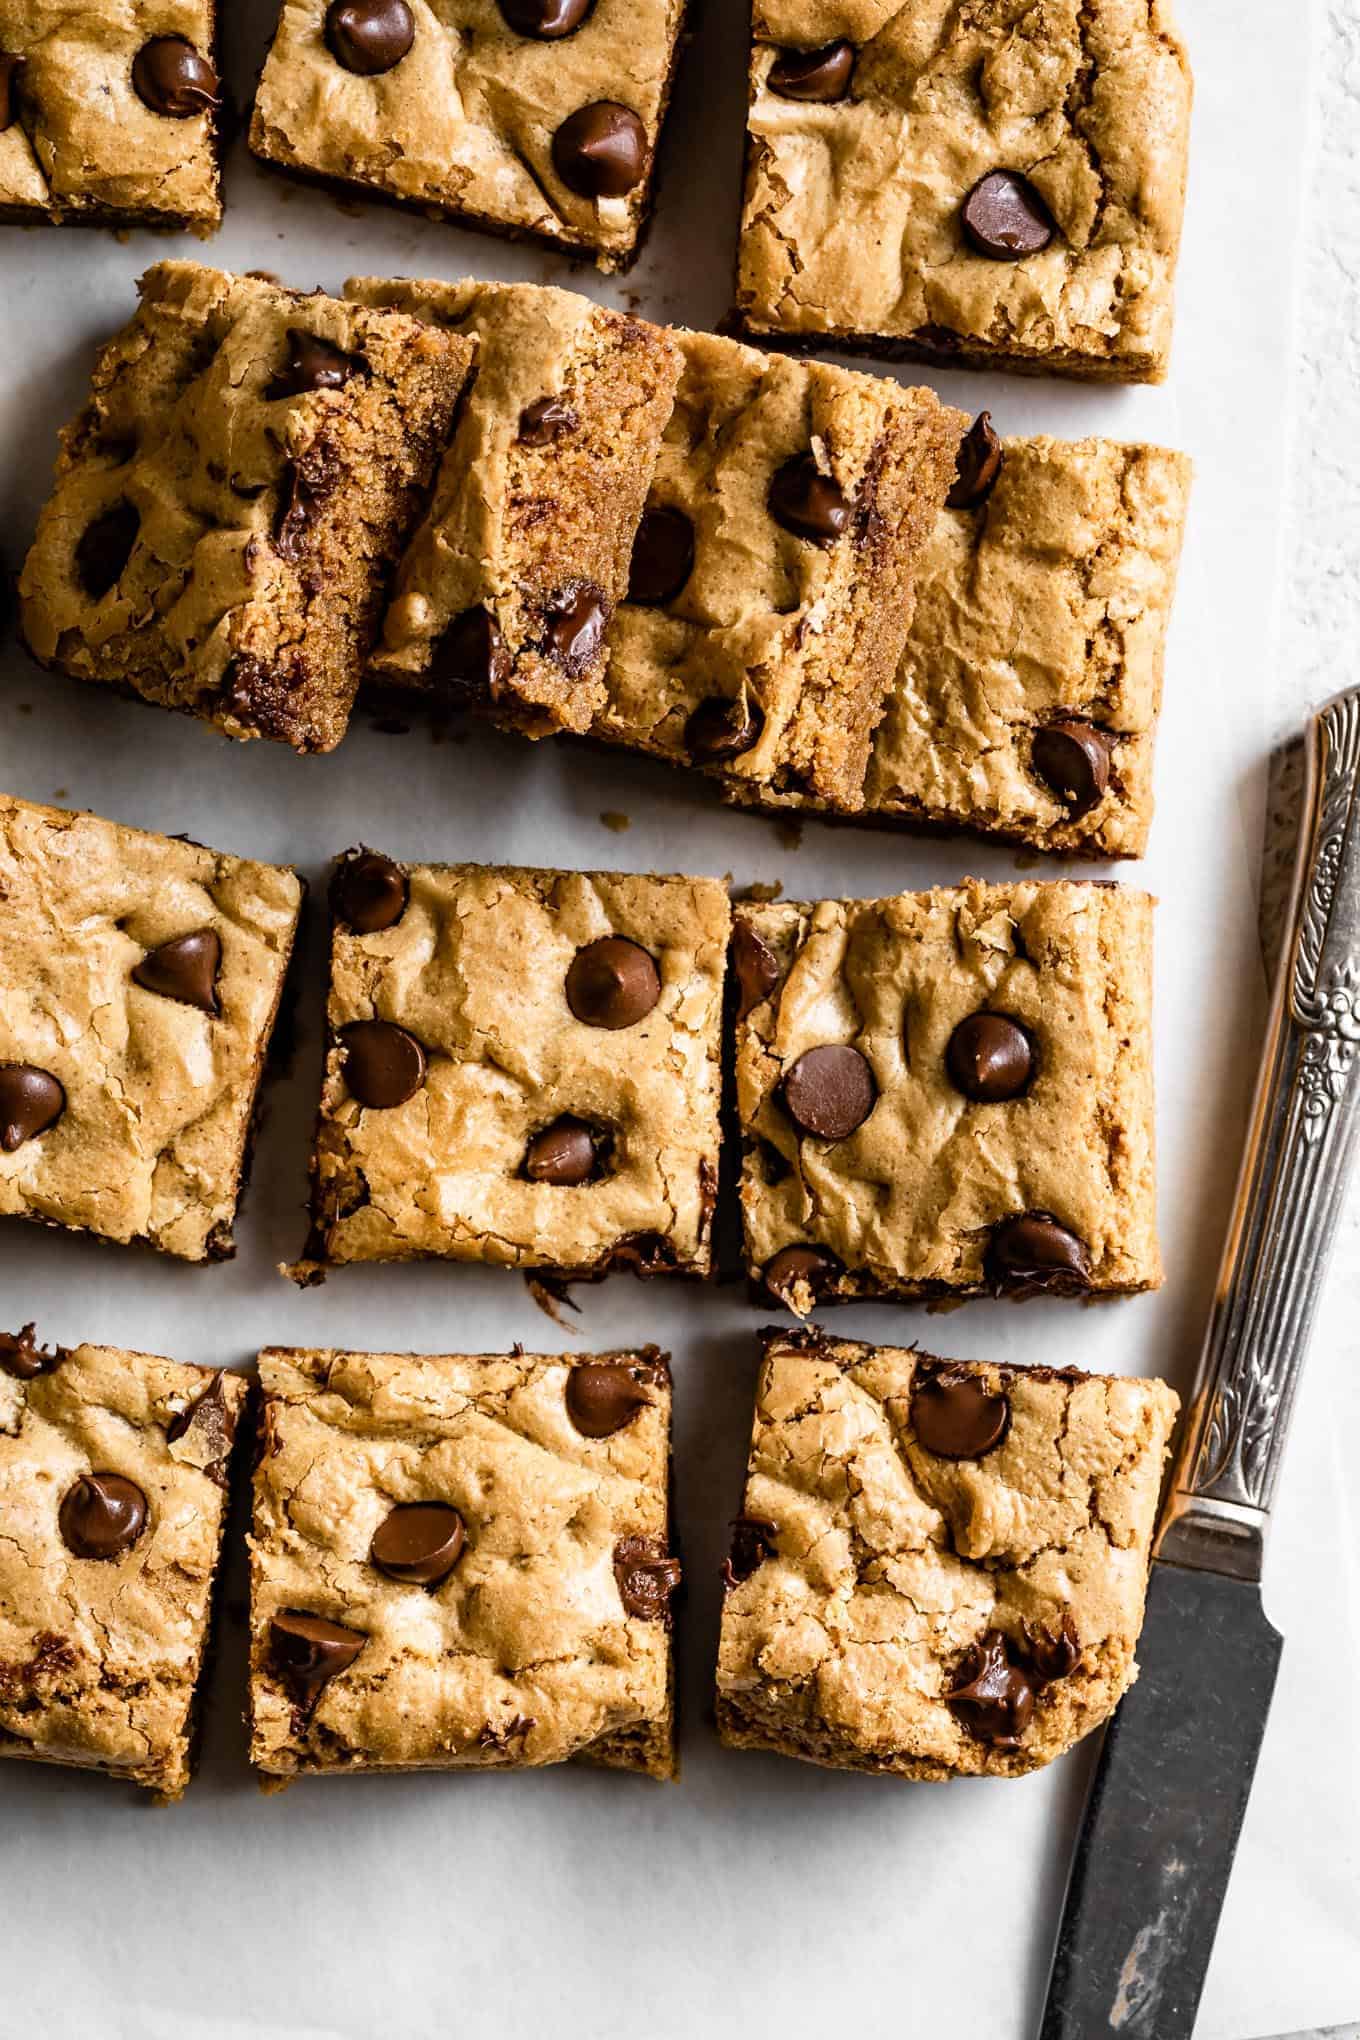
The pinnacle of perfection for both brownies and blondies alike is that paper-thin crisp crackly topping. Here are three tips for achieving that crackly shiny top.
Let the butter cool: Pour the brown butter over the sugar and give it a good mix, but then let it rest at least 10 minutes before adding the egg.
Mix eggs well: When you add the egg, mix it very well. This will put some air into the batter that will help with that crackly top.
Don't overmix dry ingredients: Slowly add the dry ingredients and mix just until combined and not a moment longer. My initial instinct was to mix for another couple of minutes longer like I do with other gluten-free recipes, but I found that this actually releases some of the oils from the almond flour, preventing the crackly topping and producing blondies that are greasy on the bottom.
How to keep blondies chewy and not cakey
Dry ingredients: Weigh your dry ingredients and, as mentioned above, use the specific brand of flour listed in the recipe, Bob's Red Mill. Different brands have different grind texture and will produce different outcomes.
Organic dark brown sugar: Organic dark brown sugar is more moist with a more assertive molasses flavor than conventional. For the chewiest blondies, I recommend using organic dark brown sugar. Conventional will also work, but then I recommend then adding in ½-1 teaspoon of molasses if you've got it and reducing the bake time by 1-2 minutes.
Why are my blondies dry?
For baking blondies, you should err on the side of underbaking or you risk crunchy or dry blondies that are gritty in texture. They're ready when the edges are golden brown and set and the center is set but still feels a bit underdone when gently touched.
If you prefer extra gooey blondies, take them out at exactly 27 minutes, but be prepared that your center may sink. If you prefer blondies that are a bit more sturdy, but still ultra chewy, bake just 1-3 minutes longer.!
Why are my blondies greasy?
Blondies will bake up greasy if they're overmixed, separating more of the fat from the dough. If you find they're a bit greasy on the bottom, let them cool for about an hour off the parchment paper on a wire rack and you'll find the outside less greasy to the touch.
Endlessly customizable blondies
For my blondies, I used semisweet chocolate chips. If you've been here awhile, you'll notice I usually recommend chopped bittersweet chocolate, but I found for these blondies, the chopped chocolate melted and spread throughout the blondies instead of leaving pockets of melted chocolate surrounded by vanilla cookie. I wanted a more classic chocolate chip blondie flavor so I opted for semisweet chips, but if that's how you like it, by all means.
The best part about keeping an excellent blondie recipe in your back pocket is the endless possibilities for adaptation. Add up to 1½ cup add-ins of your choice to the base recipe. Get creative!
Nuts: roasted almonds or toasted pecans, walnuts, macadamia nuts, or pistachios
Chocolate: white chocolate, m&ms, chopped chocolate
Candies: chopped candy bars, sprinkles
Spices: cinnamon, cardamom, ginger, or nutmeg
Dried fruit: Raisins, dried cranberries
Note: I recommend no more than ¾ cup of a single add-in or it will overpower the blondies. With more add-ins you may need to adjust your baking time down, so start checking for doneness around 25 minutes.
Recipe
Brown Butter Gluten-Free Blondies with Almond Flour
Ingredients
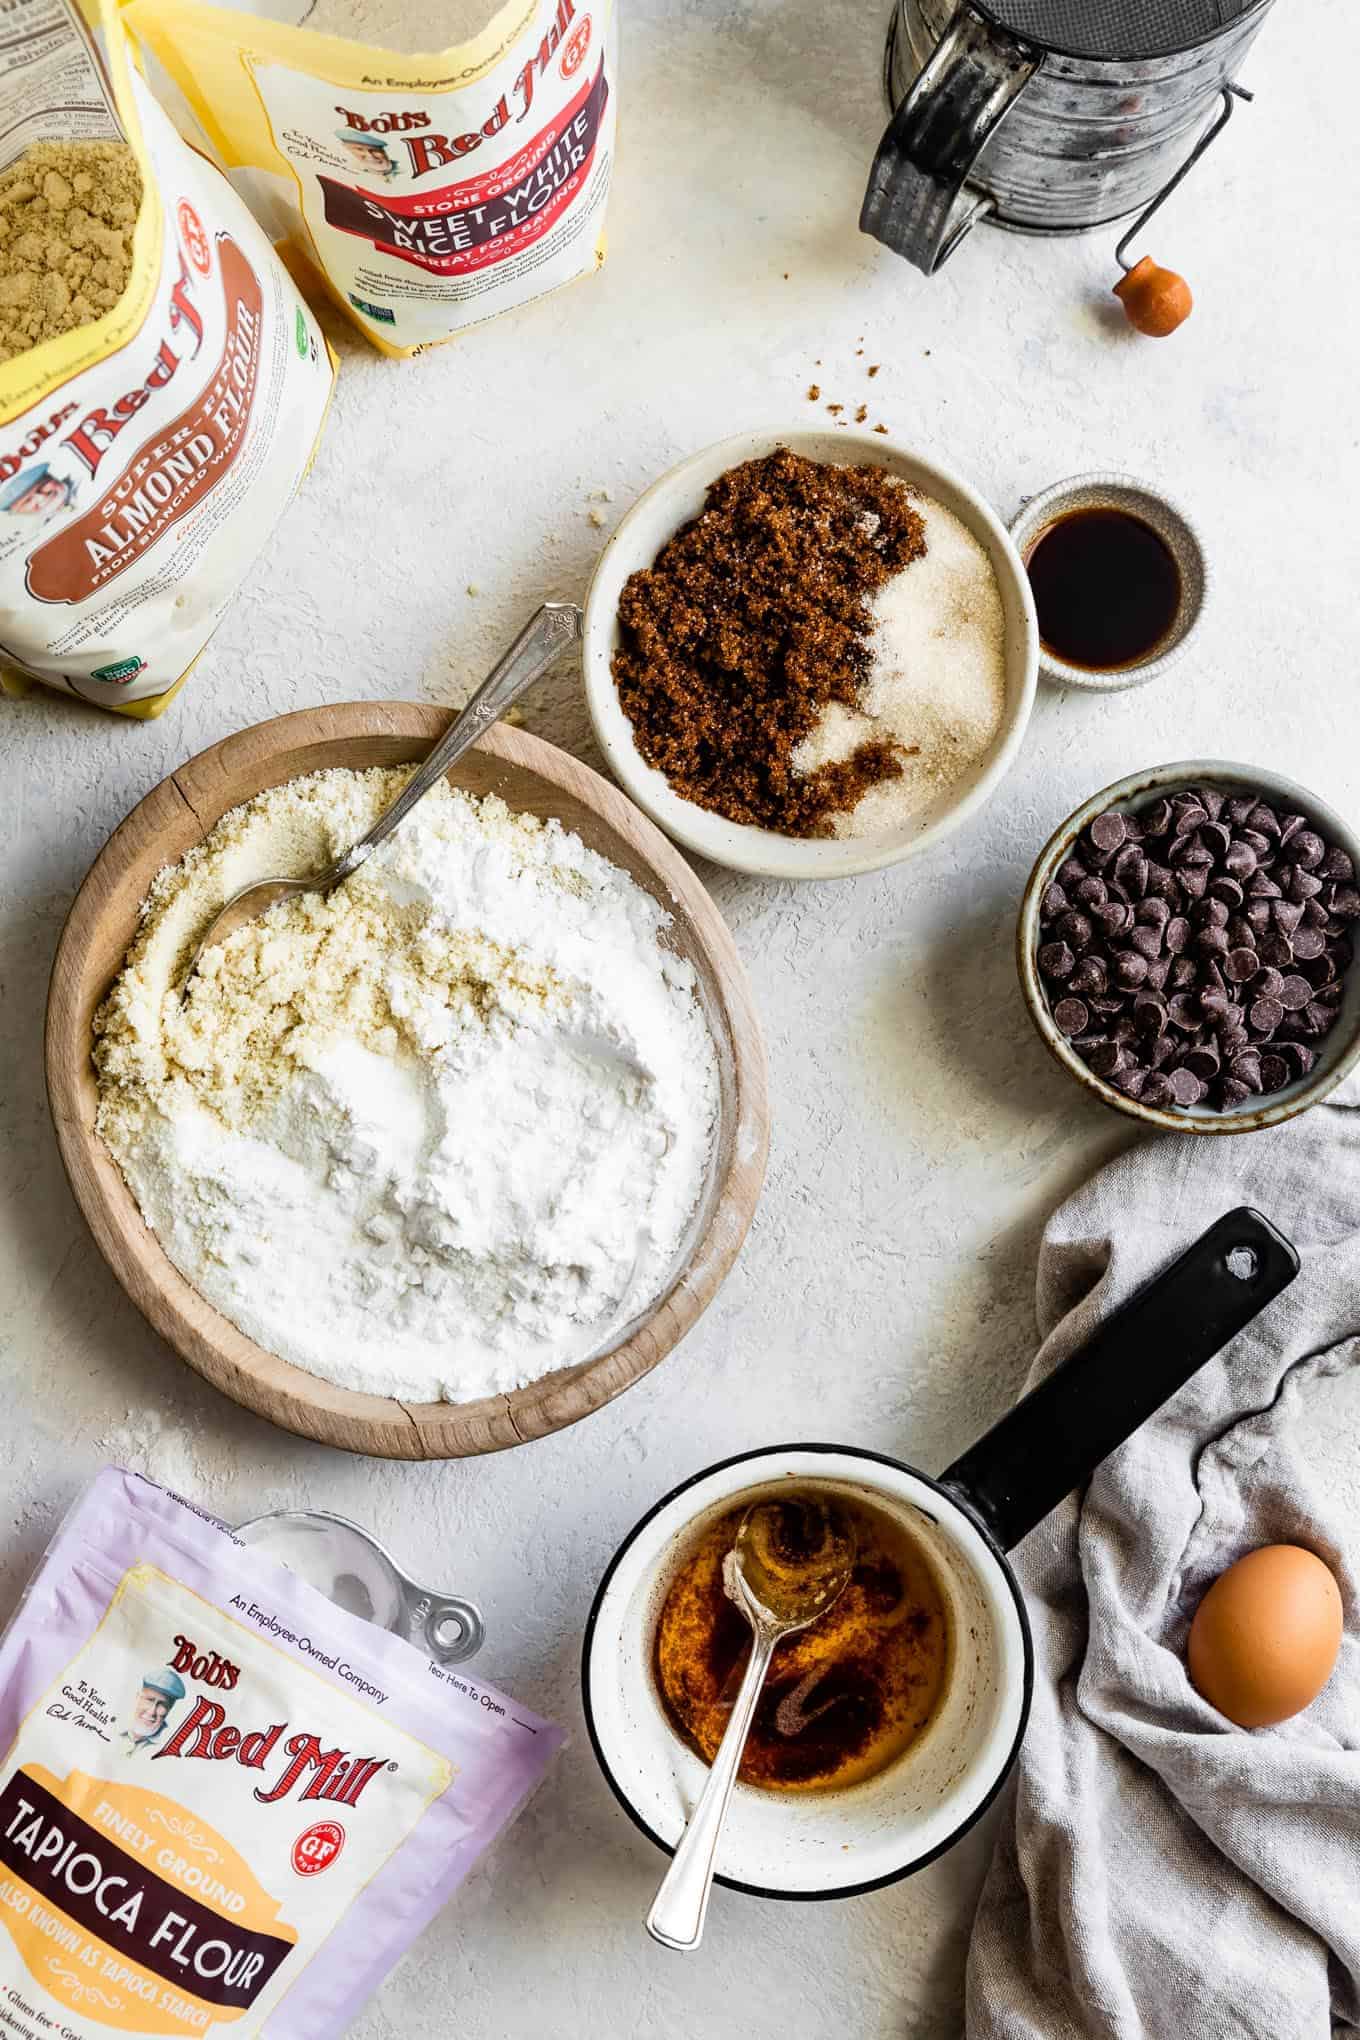
- ½ cup + 2 tablespoons (125 g) dark brown sugar, I recommend organic for the best texture, see note
- ¼ cup (50 g) granulated sugar
- ½ cup (113 g) unsalted butter
- 1 cup (112 g) Bob's Red Mill super-fine blanched almond flour
- ¾ cup (84 g) Bob's Red Mill tapioca flour
- ½ cup (80 g) Bob's Red Mill sweet rice flour, different from "white rice flour" or "brown rice flour"
- ½ teaspoon baking powder
- ⅛ teaspoon baking soda
- ½ teaspoon kosher salt
- 1 large egg, room temperature
- 2 teaspoons pure vanilla extract
- ½ cup + 2 tablespoons semisweet or bittersweet chocolate chips, divided
- Alternative: Add up to 1½ cups total add-ins of your choice: chocolate chips, toasted nuts, white chocolate, m&ms, chopped chocolate, sprinkles, candy bar chunks
INSTRUCTIONS
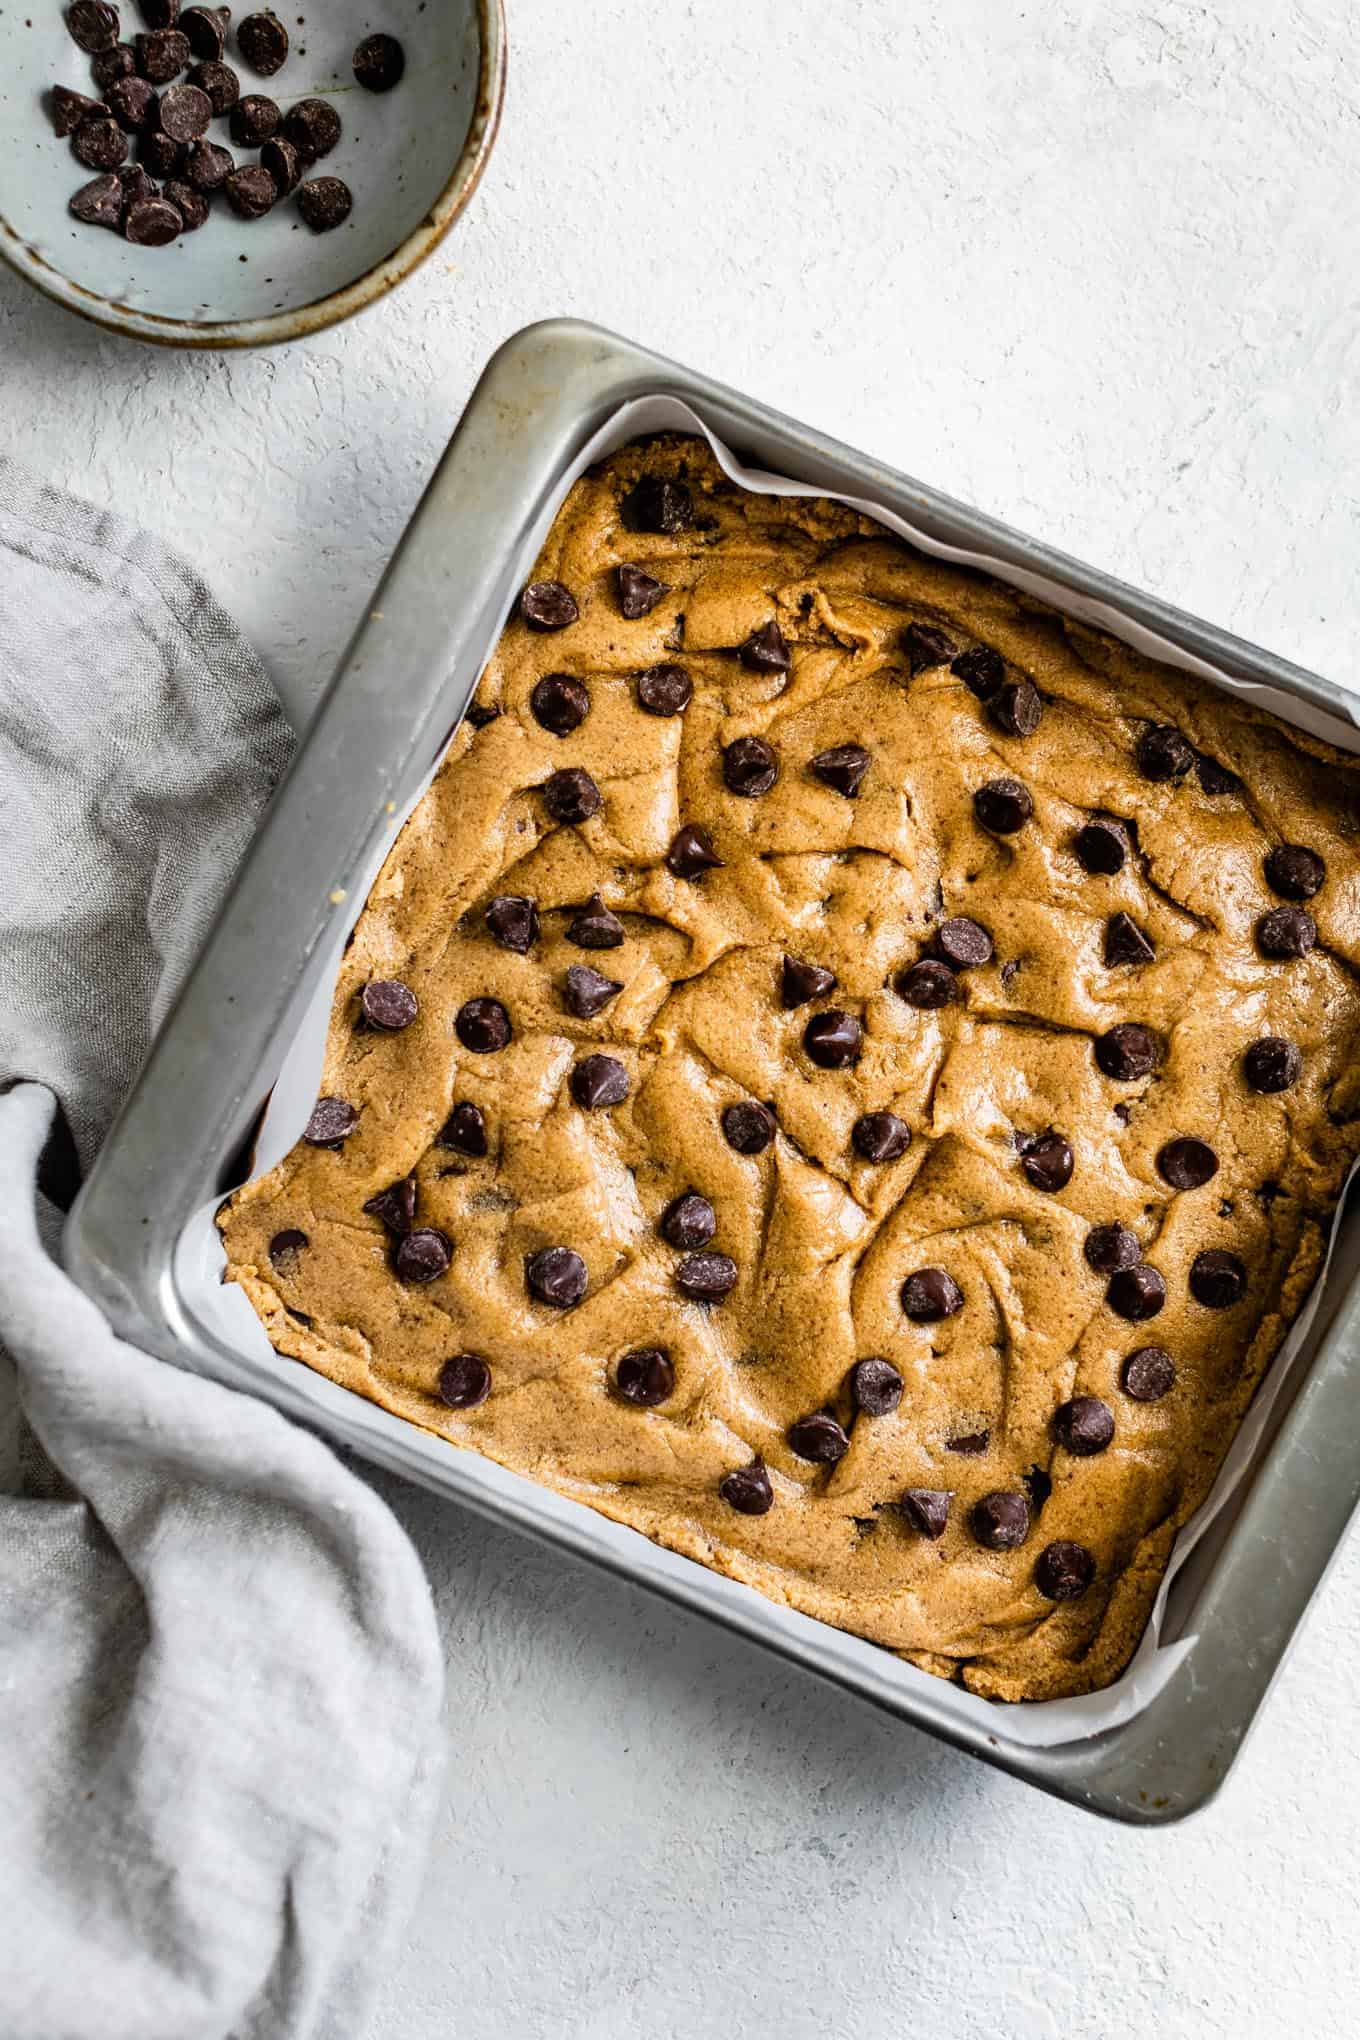
- Preheat oven to 350°F and line an 8x8 metal baking pan with parchment paper.
- Measure the sugars into the bowl of a stand mixer fitted with the paddle attachment or a large mixing bowl with a hand mixer.
- In a small saucepan, melt and brown the butter, taking care not to burn it. It should melt, then foam up, and when the foam begins to subside, it will be light brown and nutty. Pour the browned butter over the sugars and mix to combine. Let cool for at least 10 minutes.
- Meanwhile, sift together the almond flour, tapioca flour, sweet rice flour, baking powder, baking soda, and salt in a medium bowl.
- When the butter has cooled for at least 10 minutes, add the egg and vanilla extract and mix until combined, scraping down the sides as needed. Continue mixing for another minute.
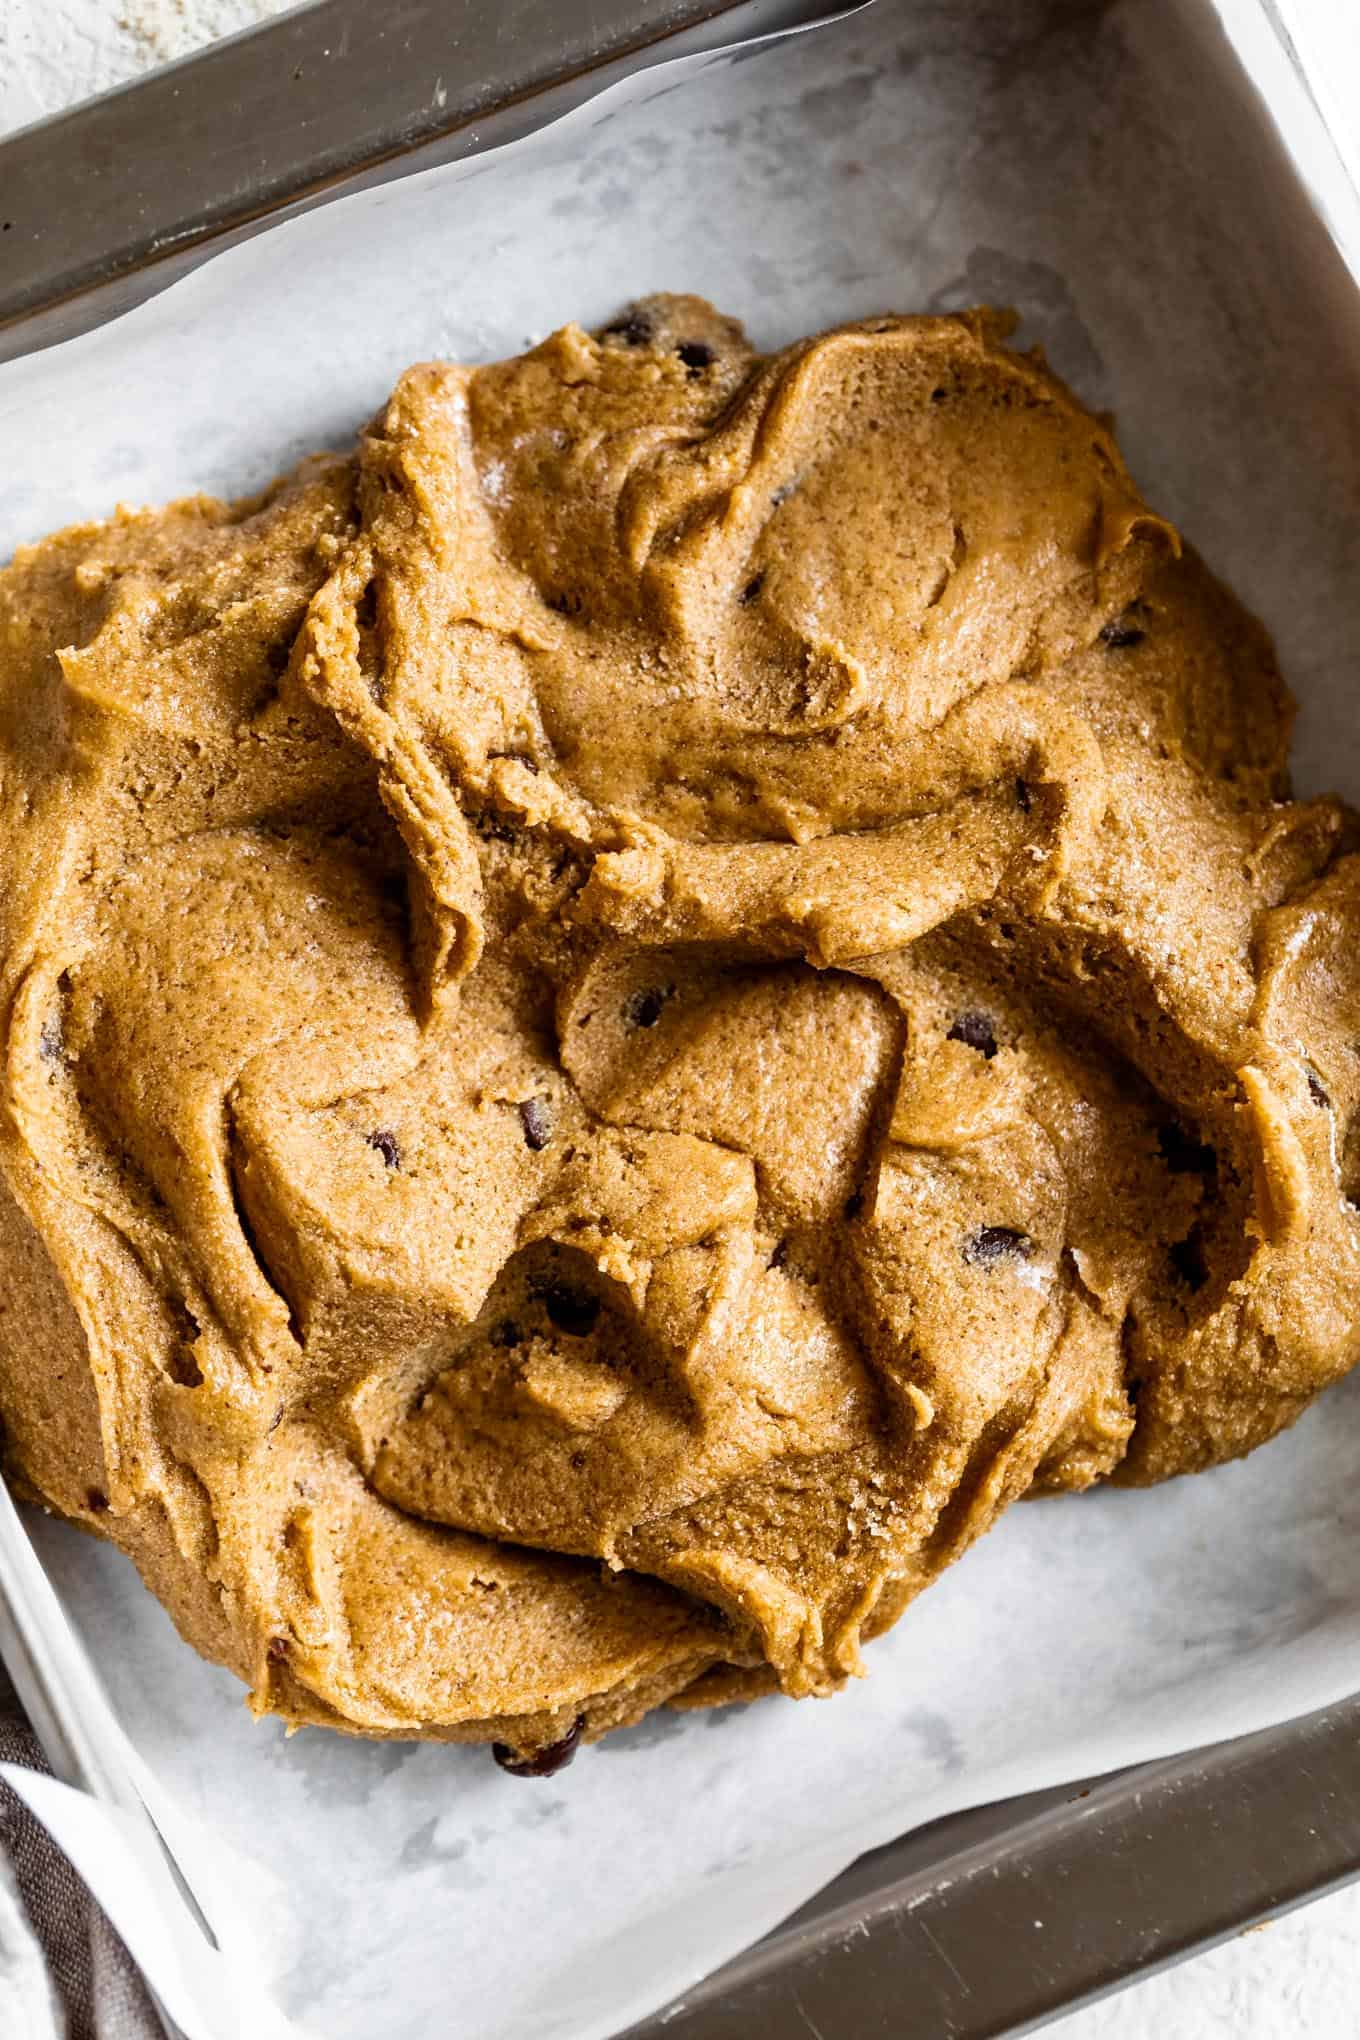
- With the mixer on low, slowly add the dry ingredients, scraping down the sides, and mixing until just combined. Add ½ cup chocolate chips and any mix-ins and mix until just evenly distributed.
- Evenly press the dough into the lined baking pan. Sprinkle the remaining 2 tablespoons of chocolate chips over the top.
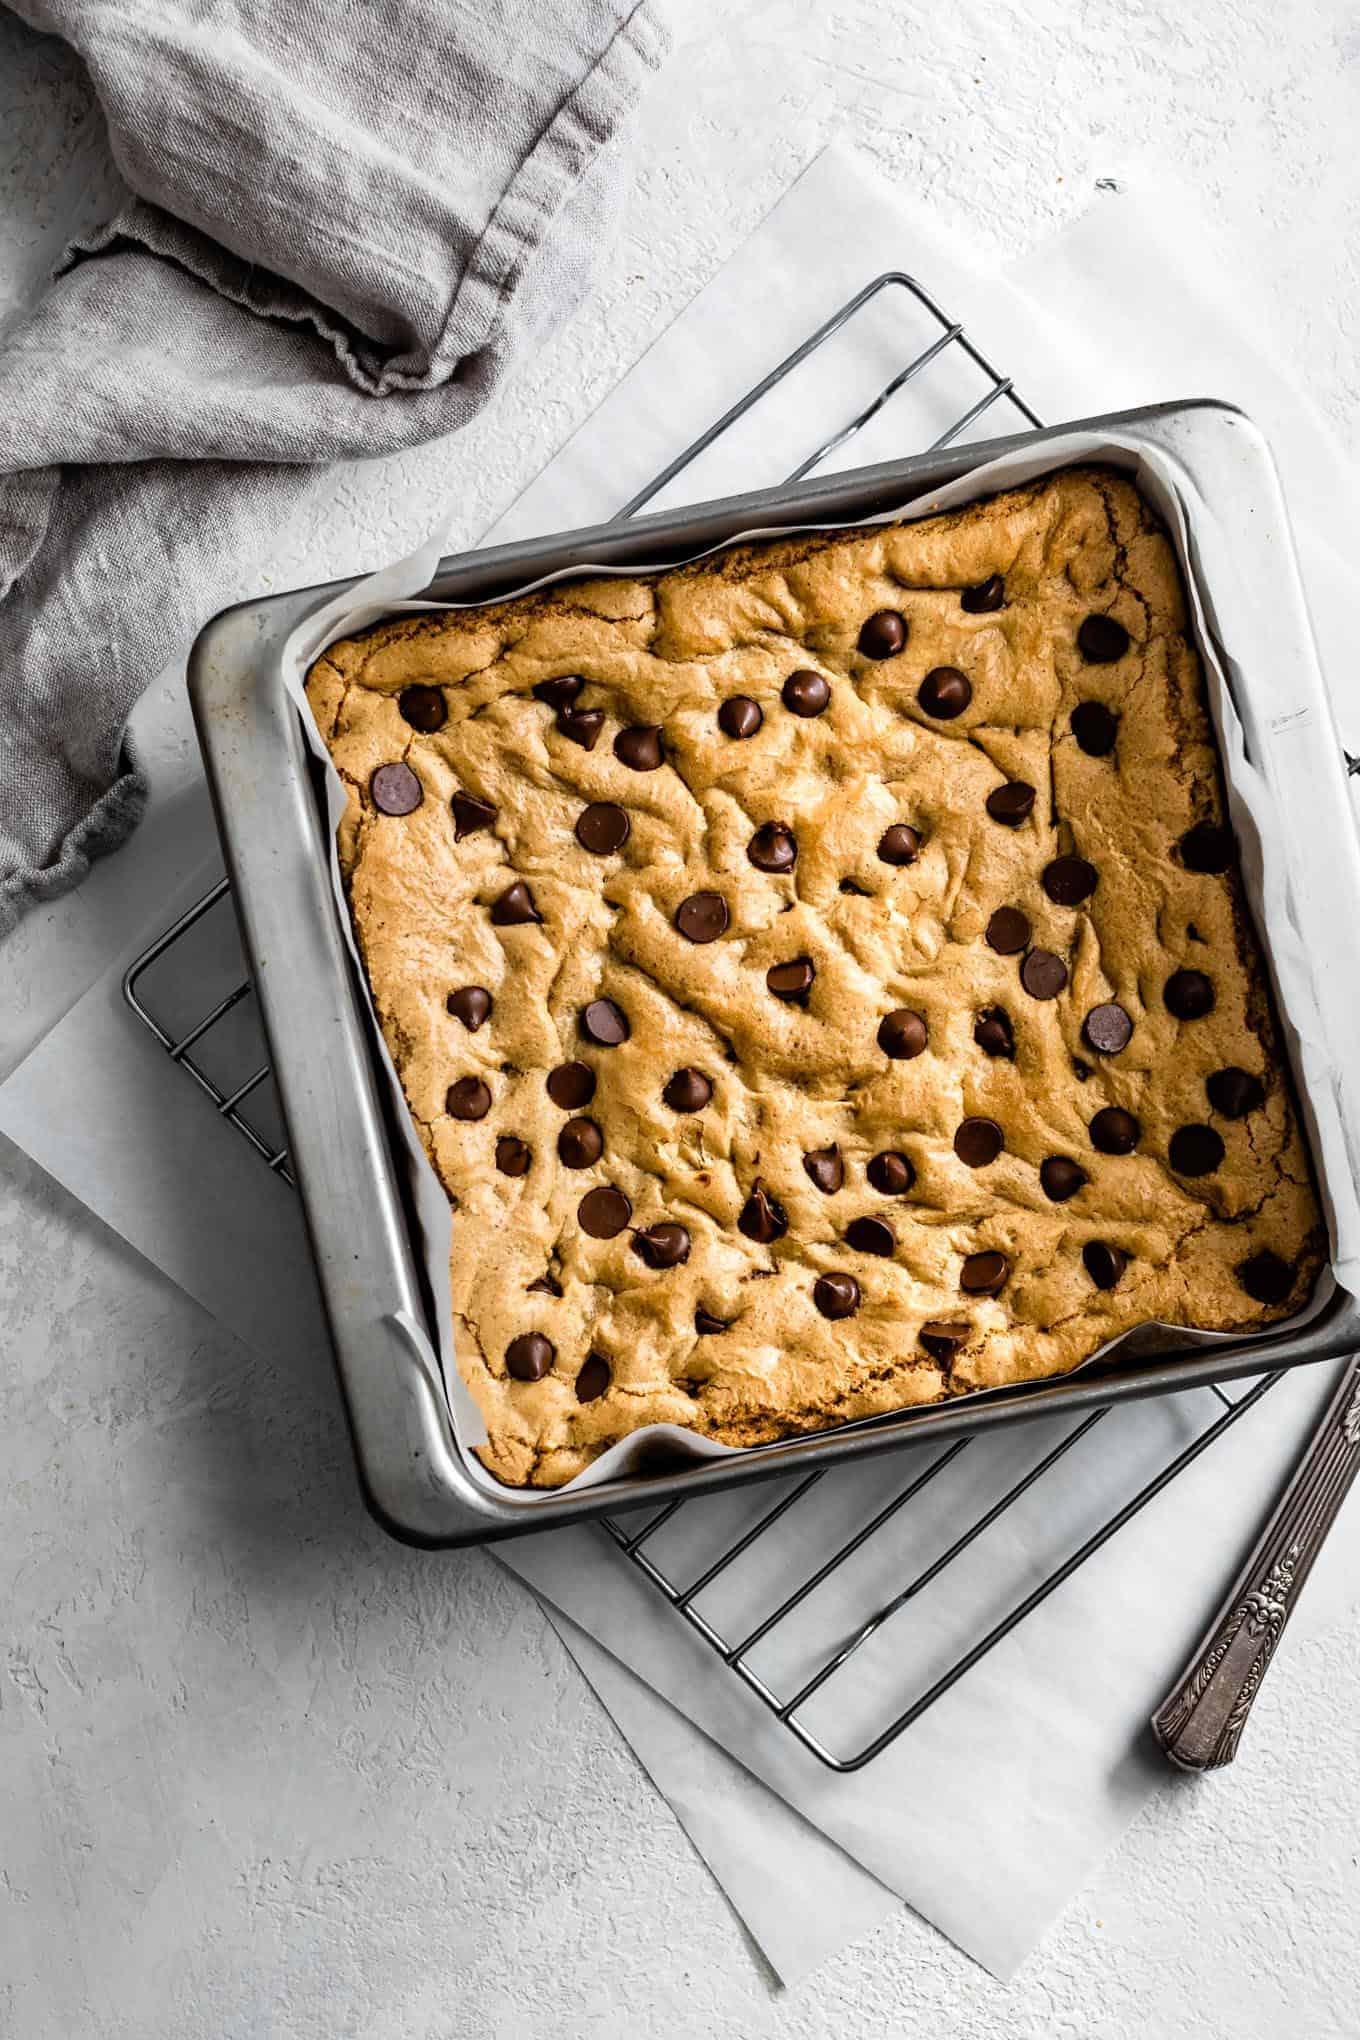
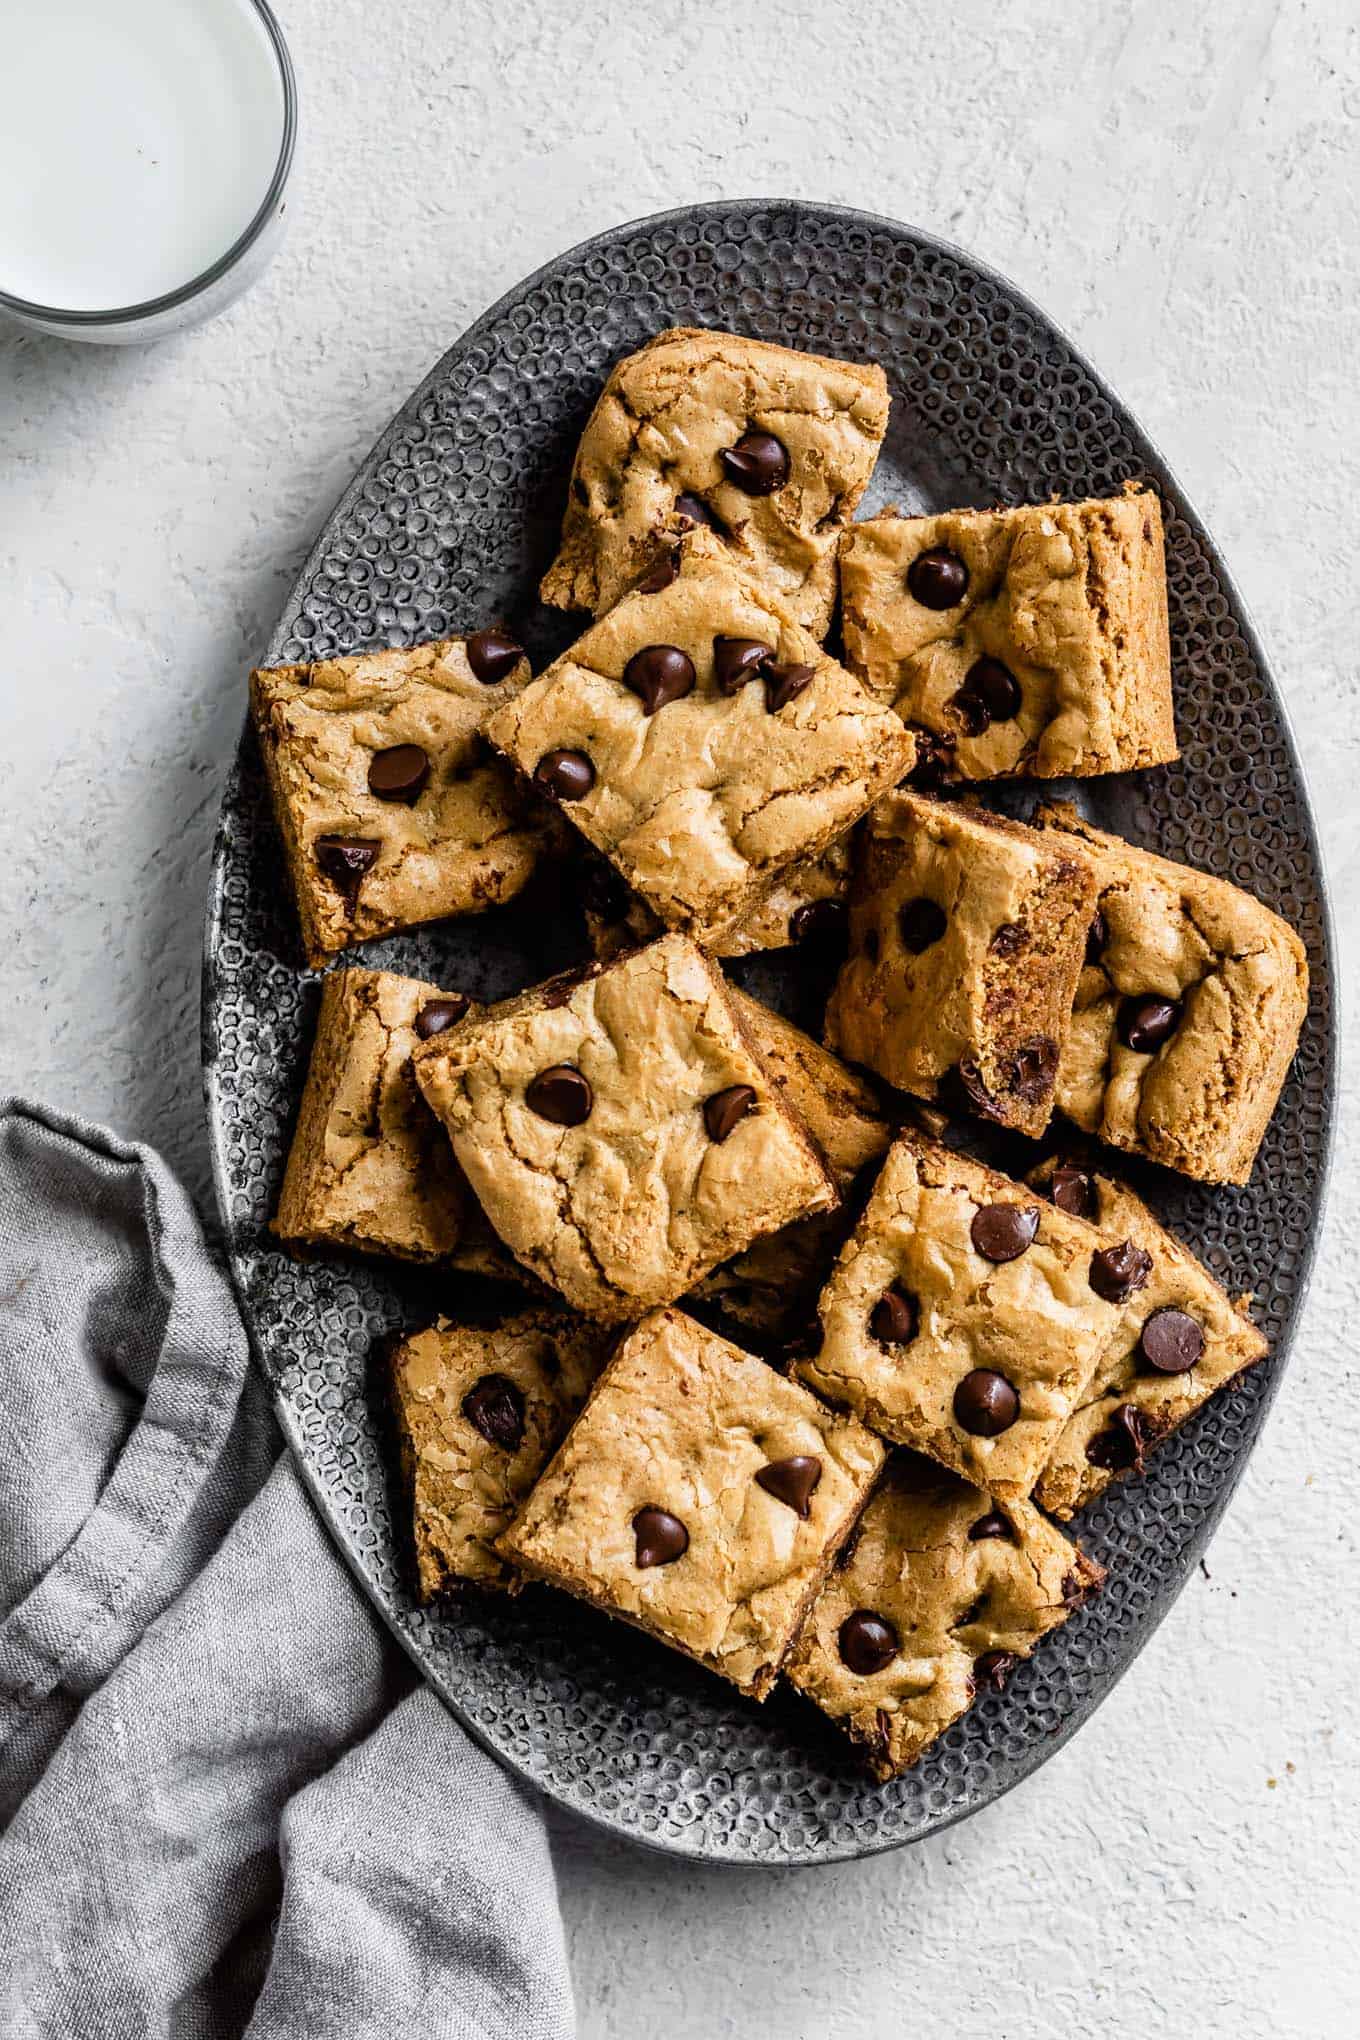
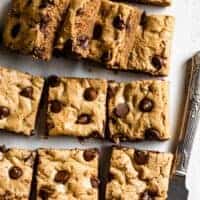
- Bake for 28-30 minutes, until the edges are golden brown and crisp and the top is just set, but still soft. Remove from oven and let cool in the pan for at least 10 minutes before carefully using the parchment paper to lift the blondies out of the pan. Cut into 16 squares and serve.
Notes
- ½ cup + 2 tablespoons (80g) sorghum flour
- ¼ cup + 3 tablespoons (70g) sweet rice flour
- ½ cup + 1 tablespoon (63g) tapioca flour/starch

Emily -
I made these with the nut-free option and light brown sugar instead of dark (didn't have any). Amazing flavor from the browned butter. I also added 1/2 cup of butterscotch chips and sprinkled a bit of flaky salt on top.
The only issue is that my bars were a bit crumbly, which I'm not sure if it's from the brown sugar substitution or something else, but next time I will be adding maybe 1/4 teaspoon of xantham gum to help bind the flours.
Megan H -
Just made these and they are wonderful! Any tips on storing them?
Sarah Menanix -
I store mine in an airtight container on the counter for 1-2 days (though they don't last long in my house:). I think you could also freeze them and defrost before eating - I've not done it with the blondies, but I've done that with cookies!
BRIANNA -
I have made these 4 times now. They are one of the BEST GF recipes out there! Better than non GF ones!
Amanda -
we loved the brown butter flavor in these! turned out perfectly. added chopped walnuts to the top of the bars before baking.
Stacia -
What can I substitute for butter as you have a wonderful list of substitutes but not one for butter, many who are gluten intolerant are also dairy intolerant. Thanks
Sarah Menanix -
I've not tested this recipe without butter, but I think you could substitute a stick plant butter just fine. I've used the Country Crock plant butter with success in a skillet brownie/cookie before!
Carol -
I tried this recipe substituting coconut sugar for brown sugar, and 1/8 cup molasses and 1/8 cup maple syrup.I took it out of the oven at 30 minutes, when the middle was still gooey but not liquidy. It’s WONDERFUL!
Carol -
I love your recipes, and just made your gingerbread yesterday. It will now be my go to. This recipe sounds wonderful. But I don’t eat white or brown sugar. What substitutes would you recommend trying? I generally have success with coconut sugar as a substitute.
Sarah Menanix -
I've tried the recipe using light brown sugar and found it not quite caramel-y enough to my liking, so I think if you use coconut sugar, you'll just need to be sure to take them out of the oven sooner when they still seem a bit underbaked so they aren't too dry. Maybe also add 1-2 tablespoons of maple syrup? The good news is, you don't need to worry about the substitution affecting the spread so that part should be fine!