

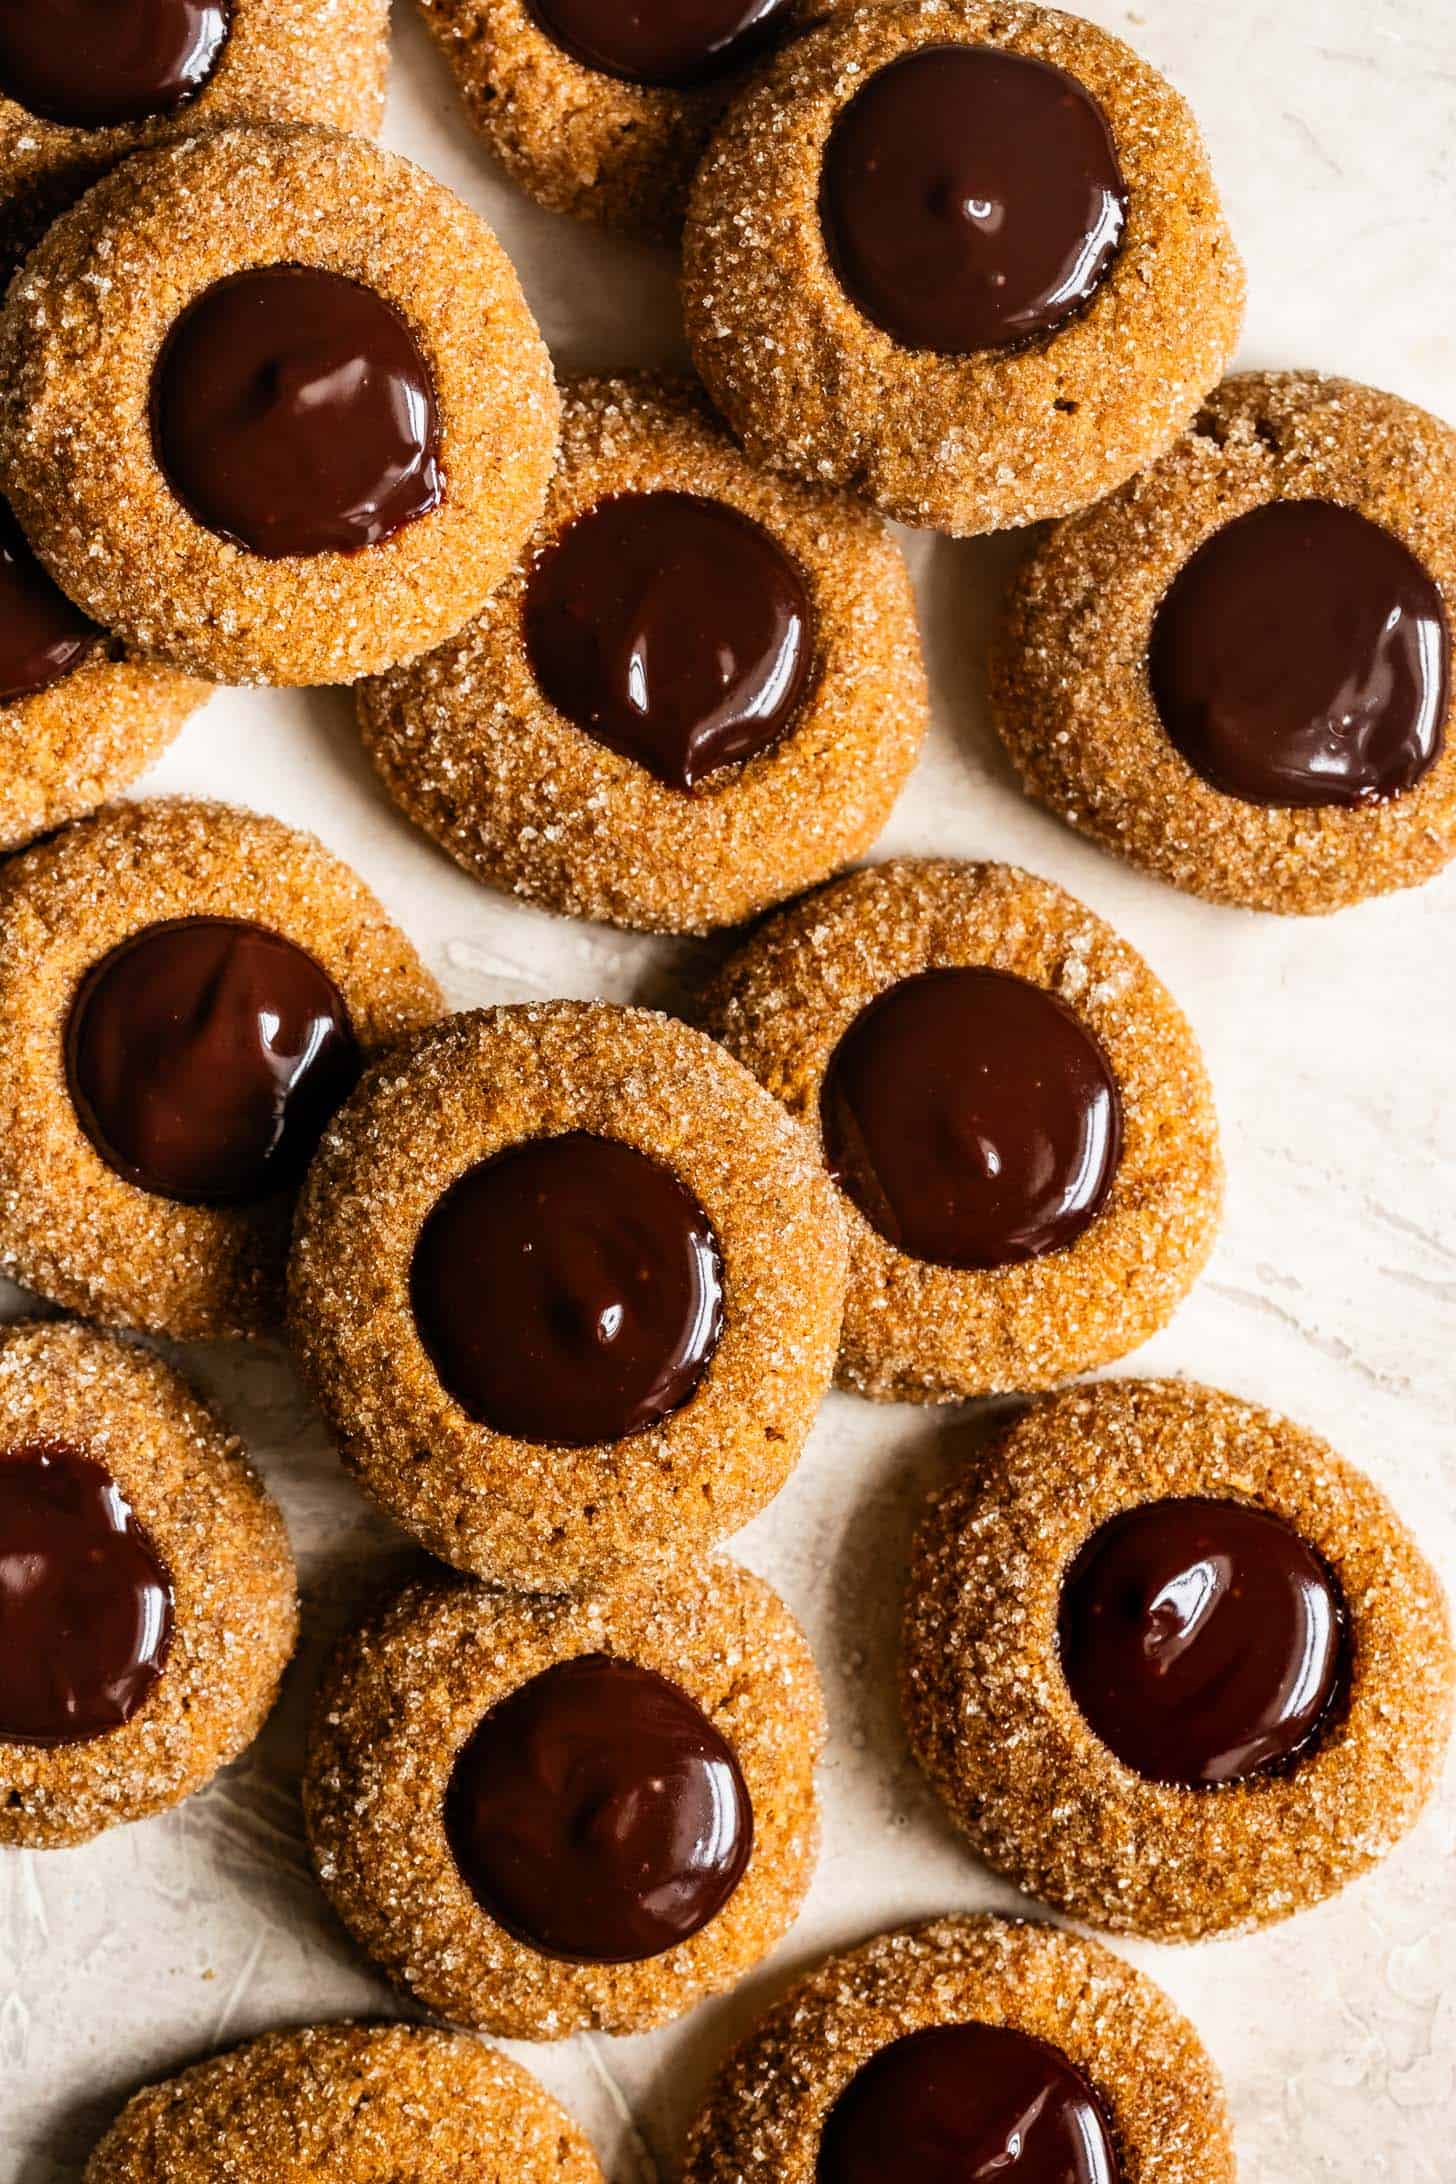
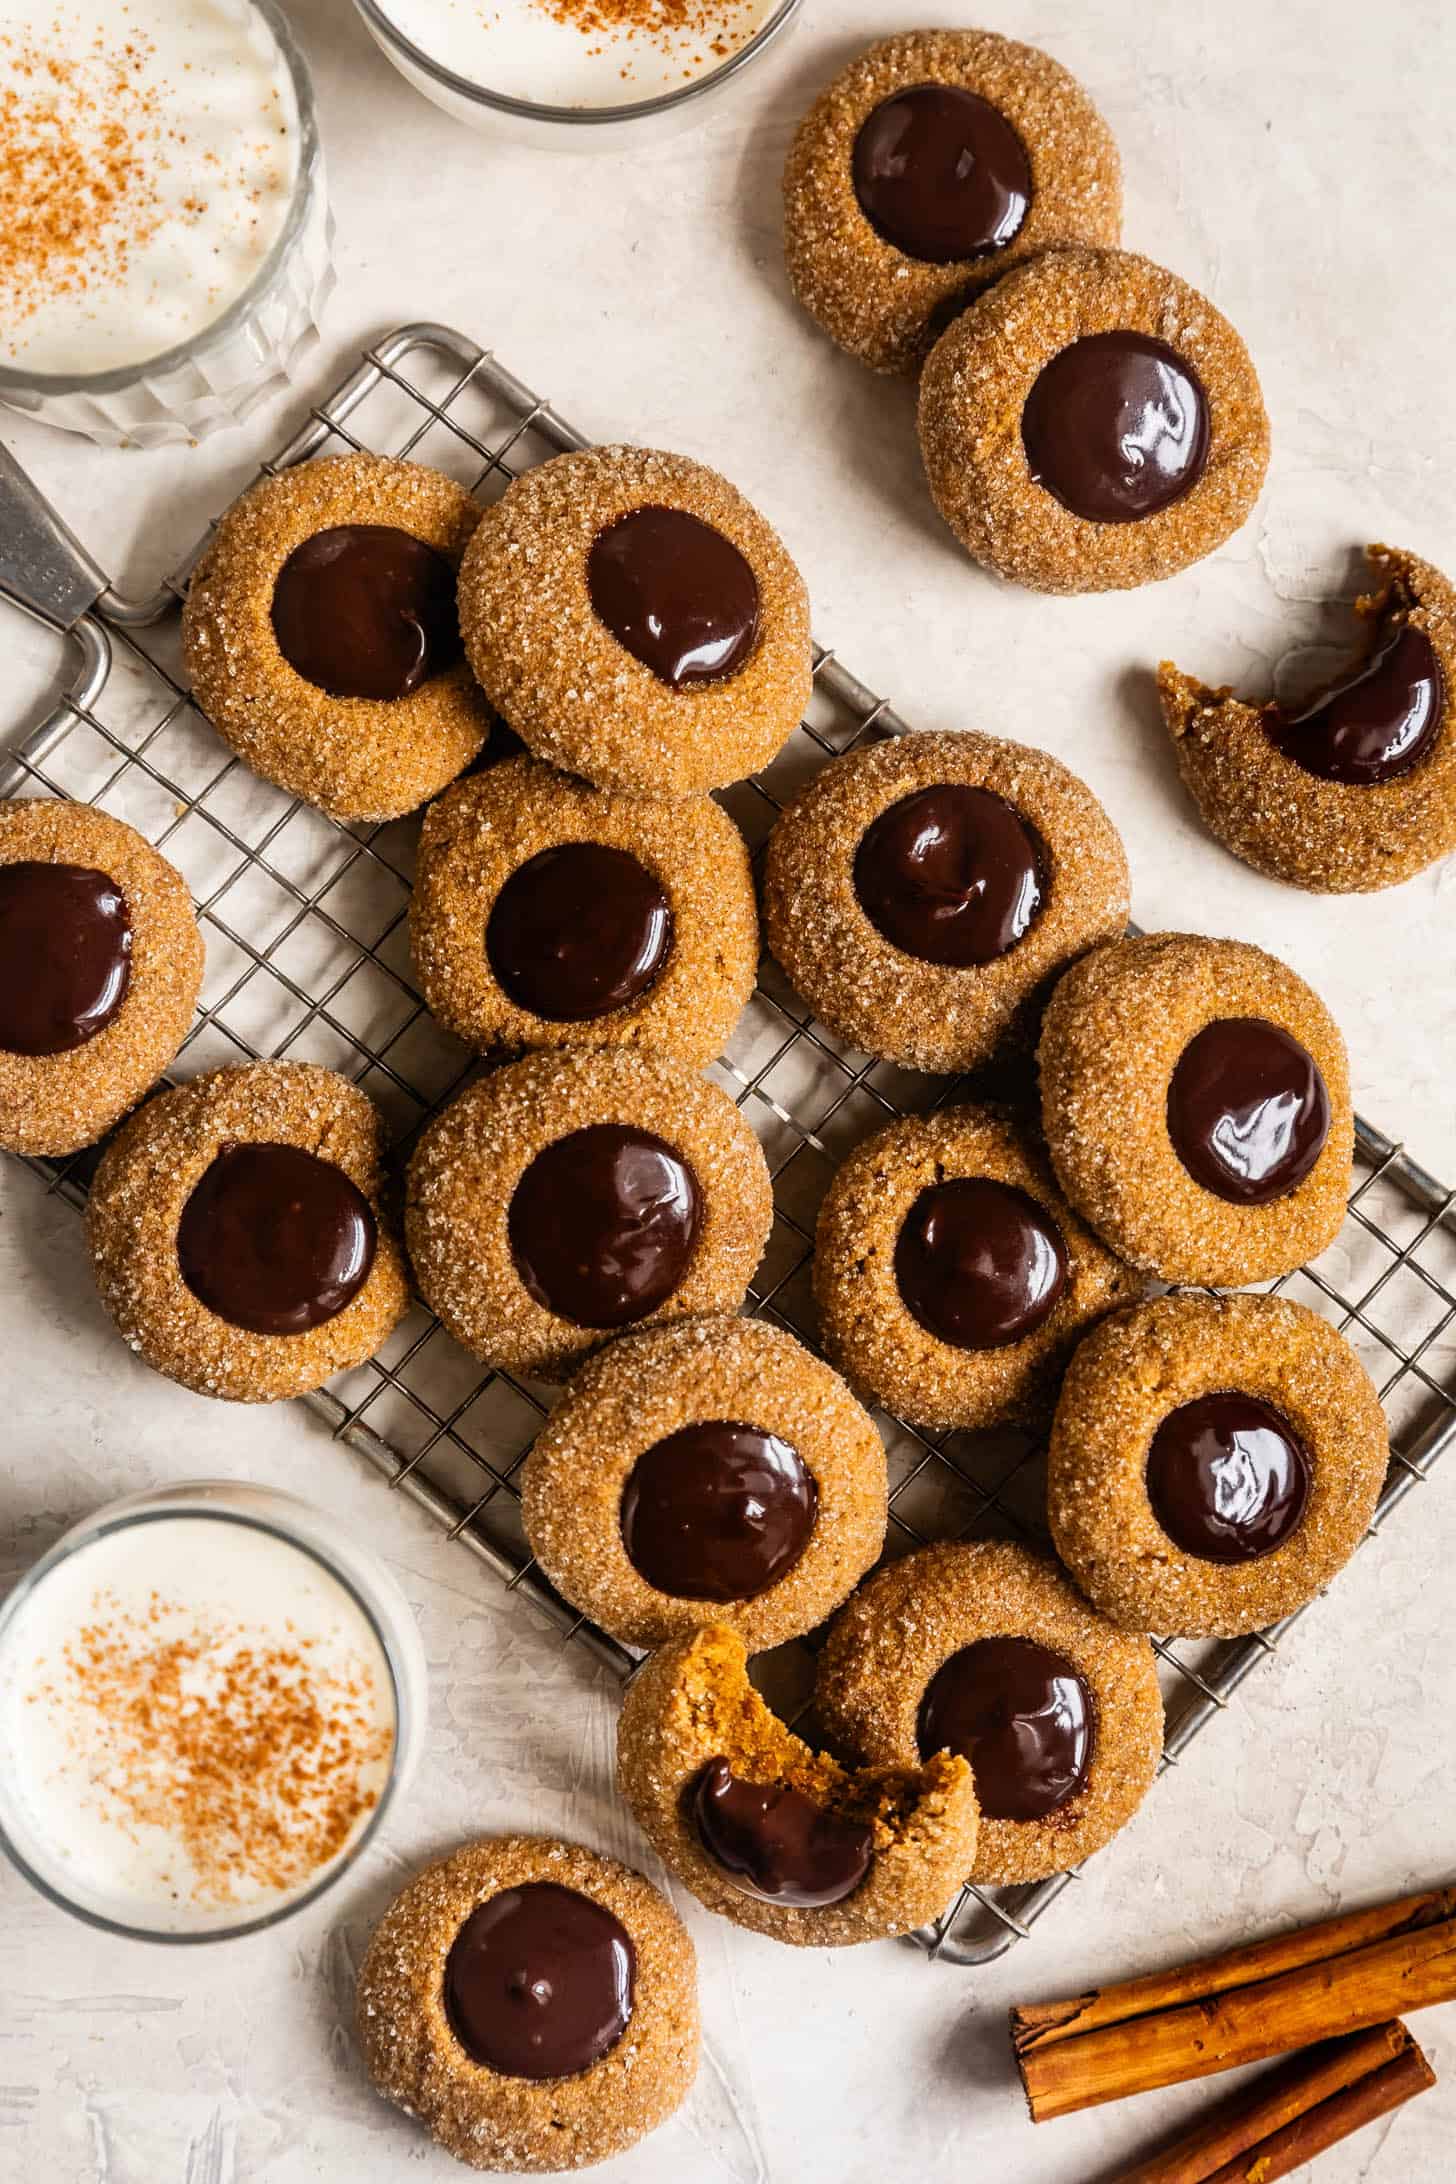
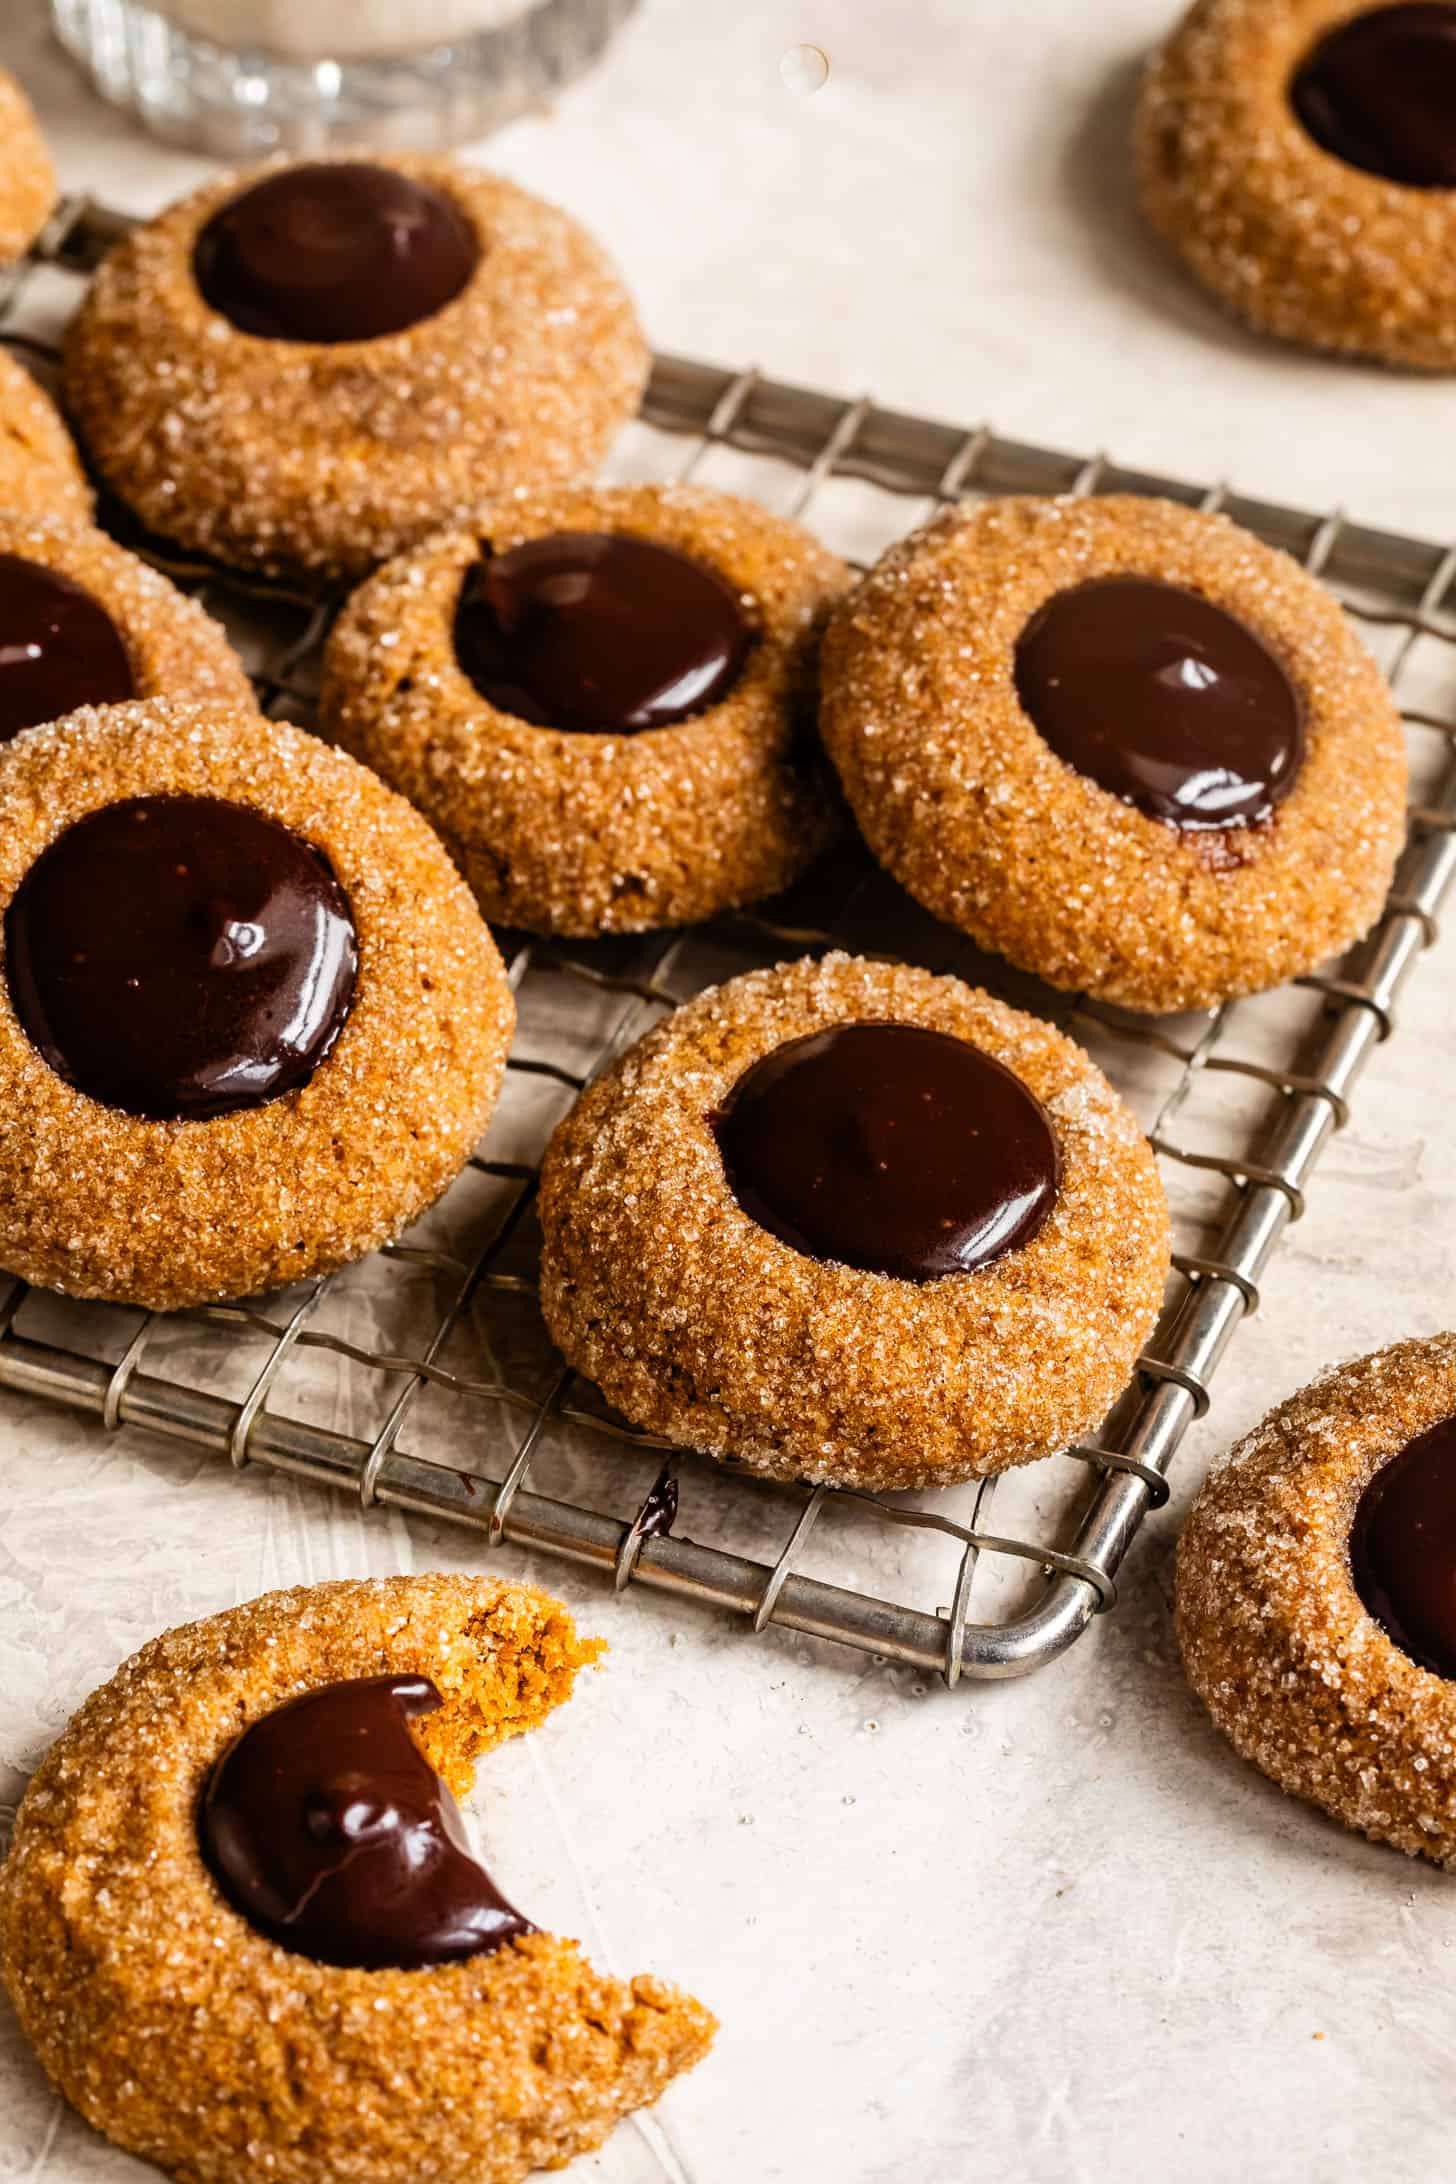
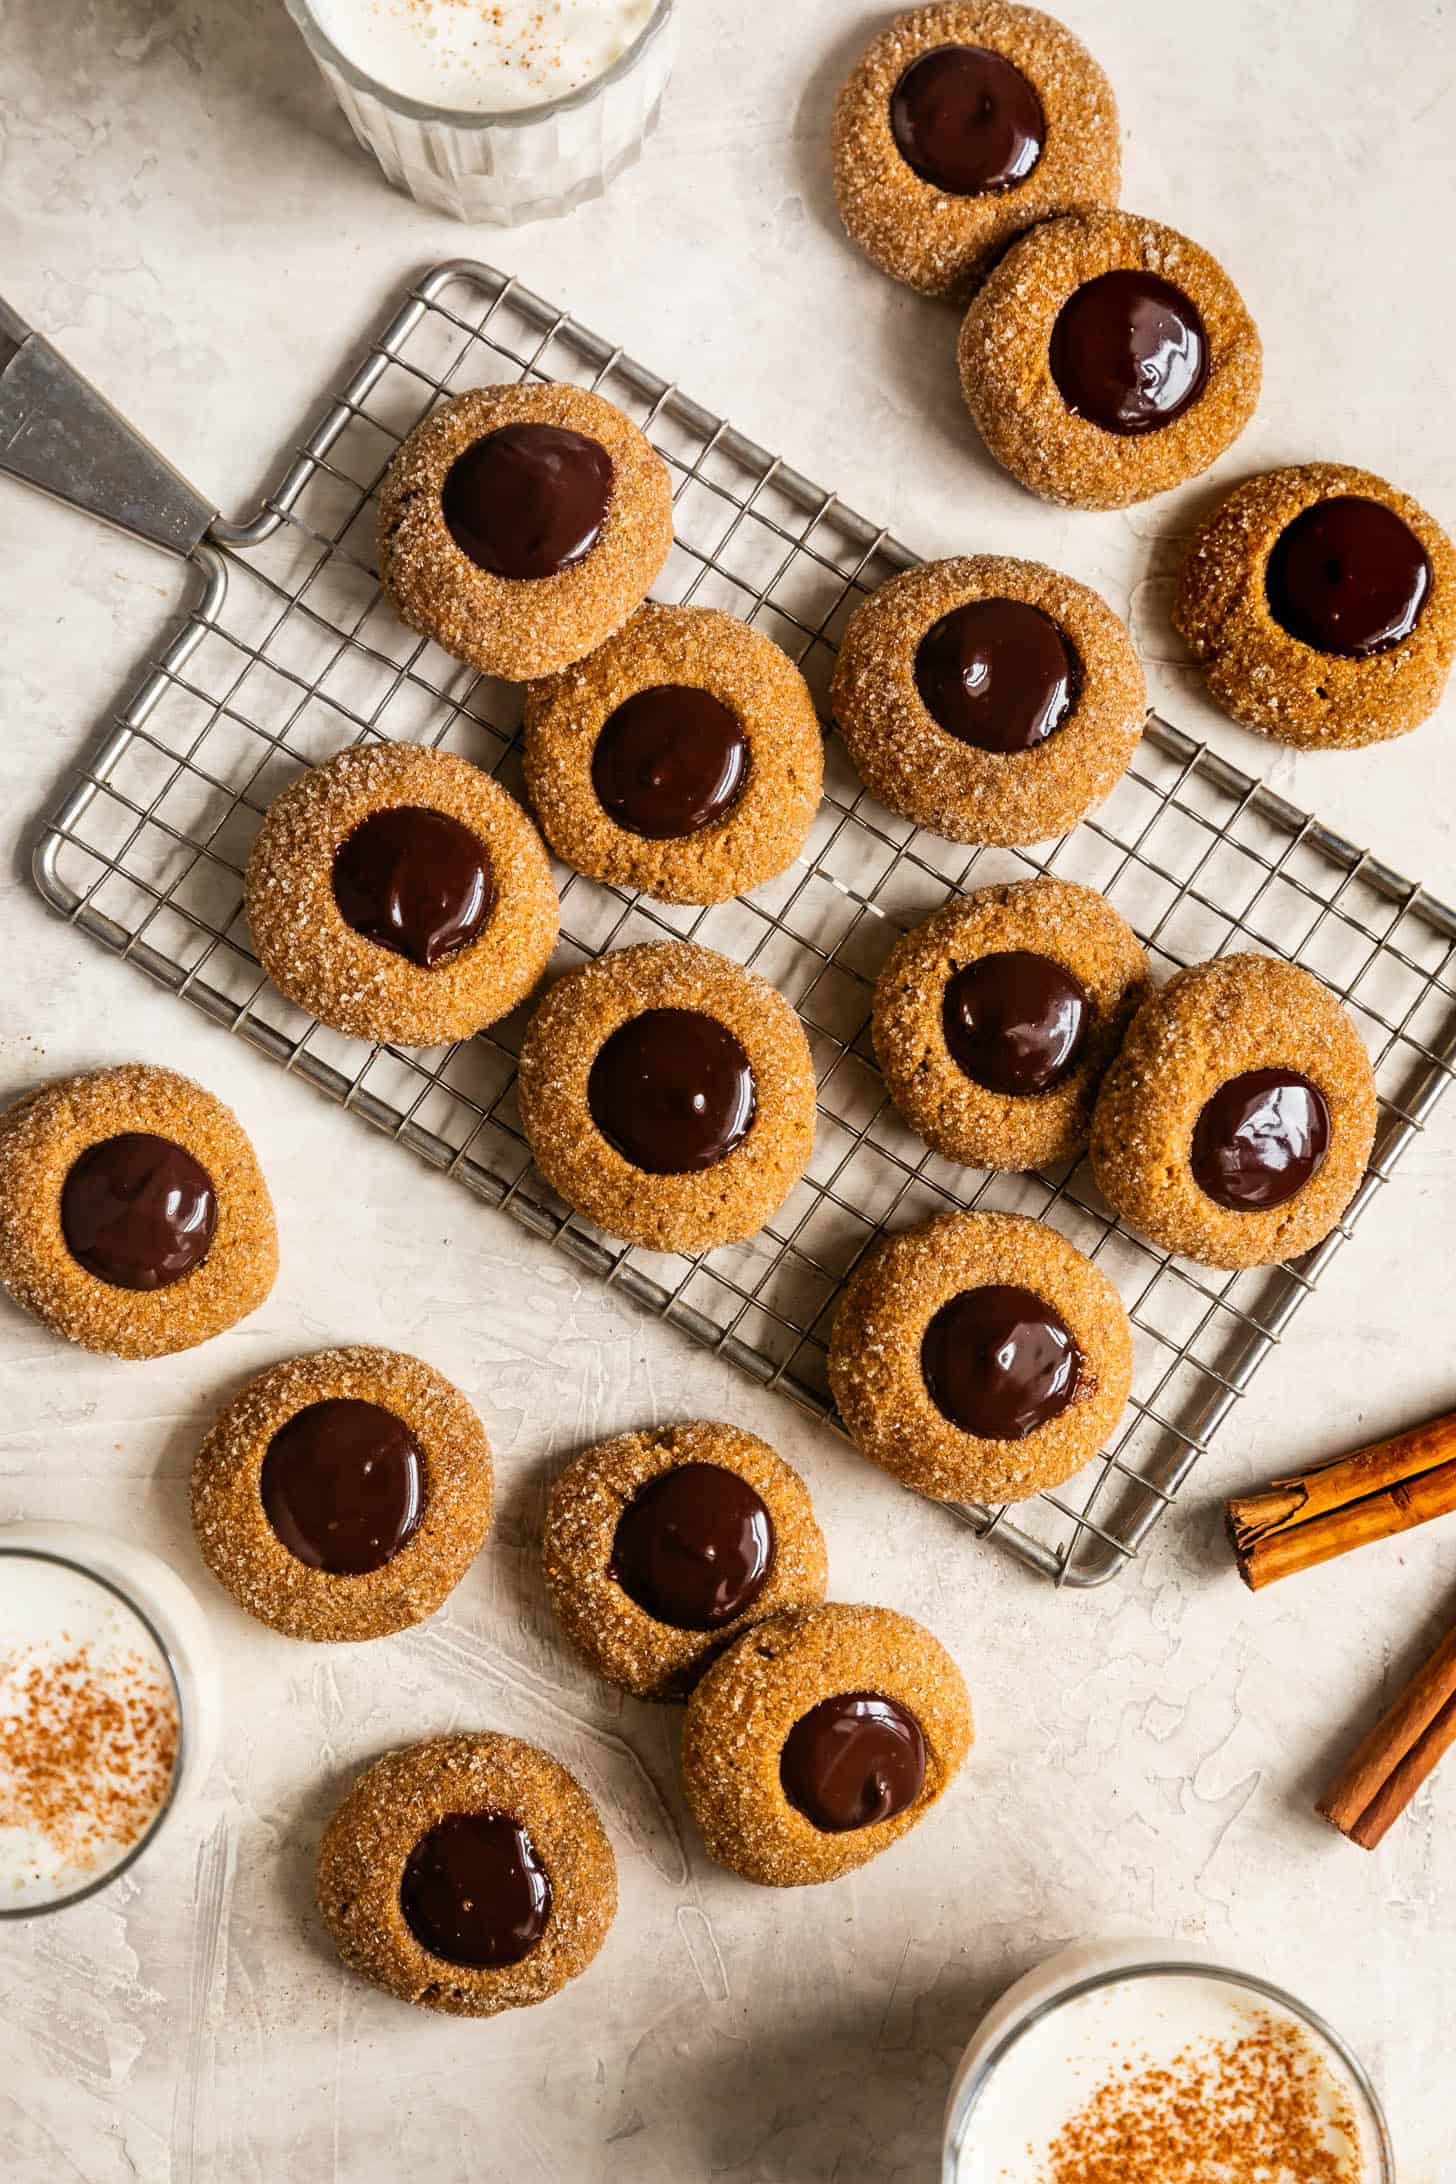
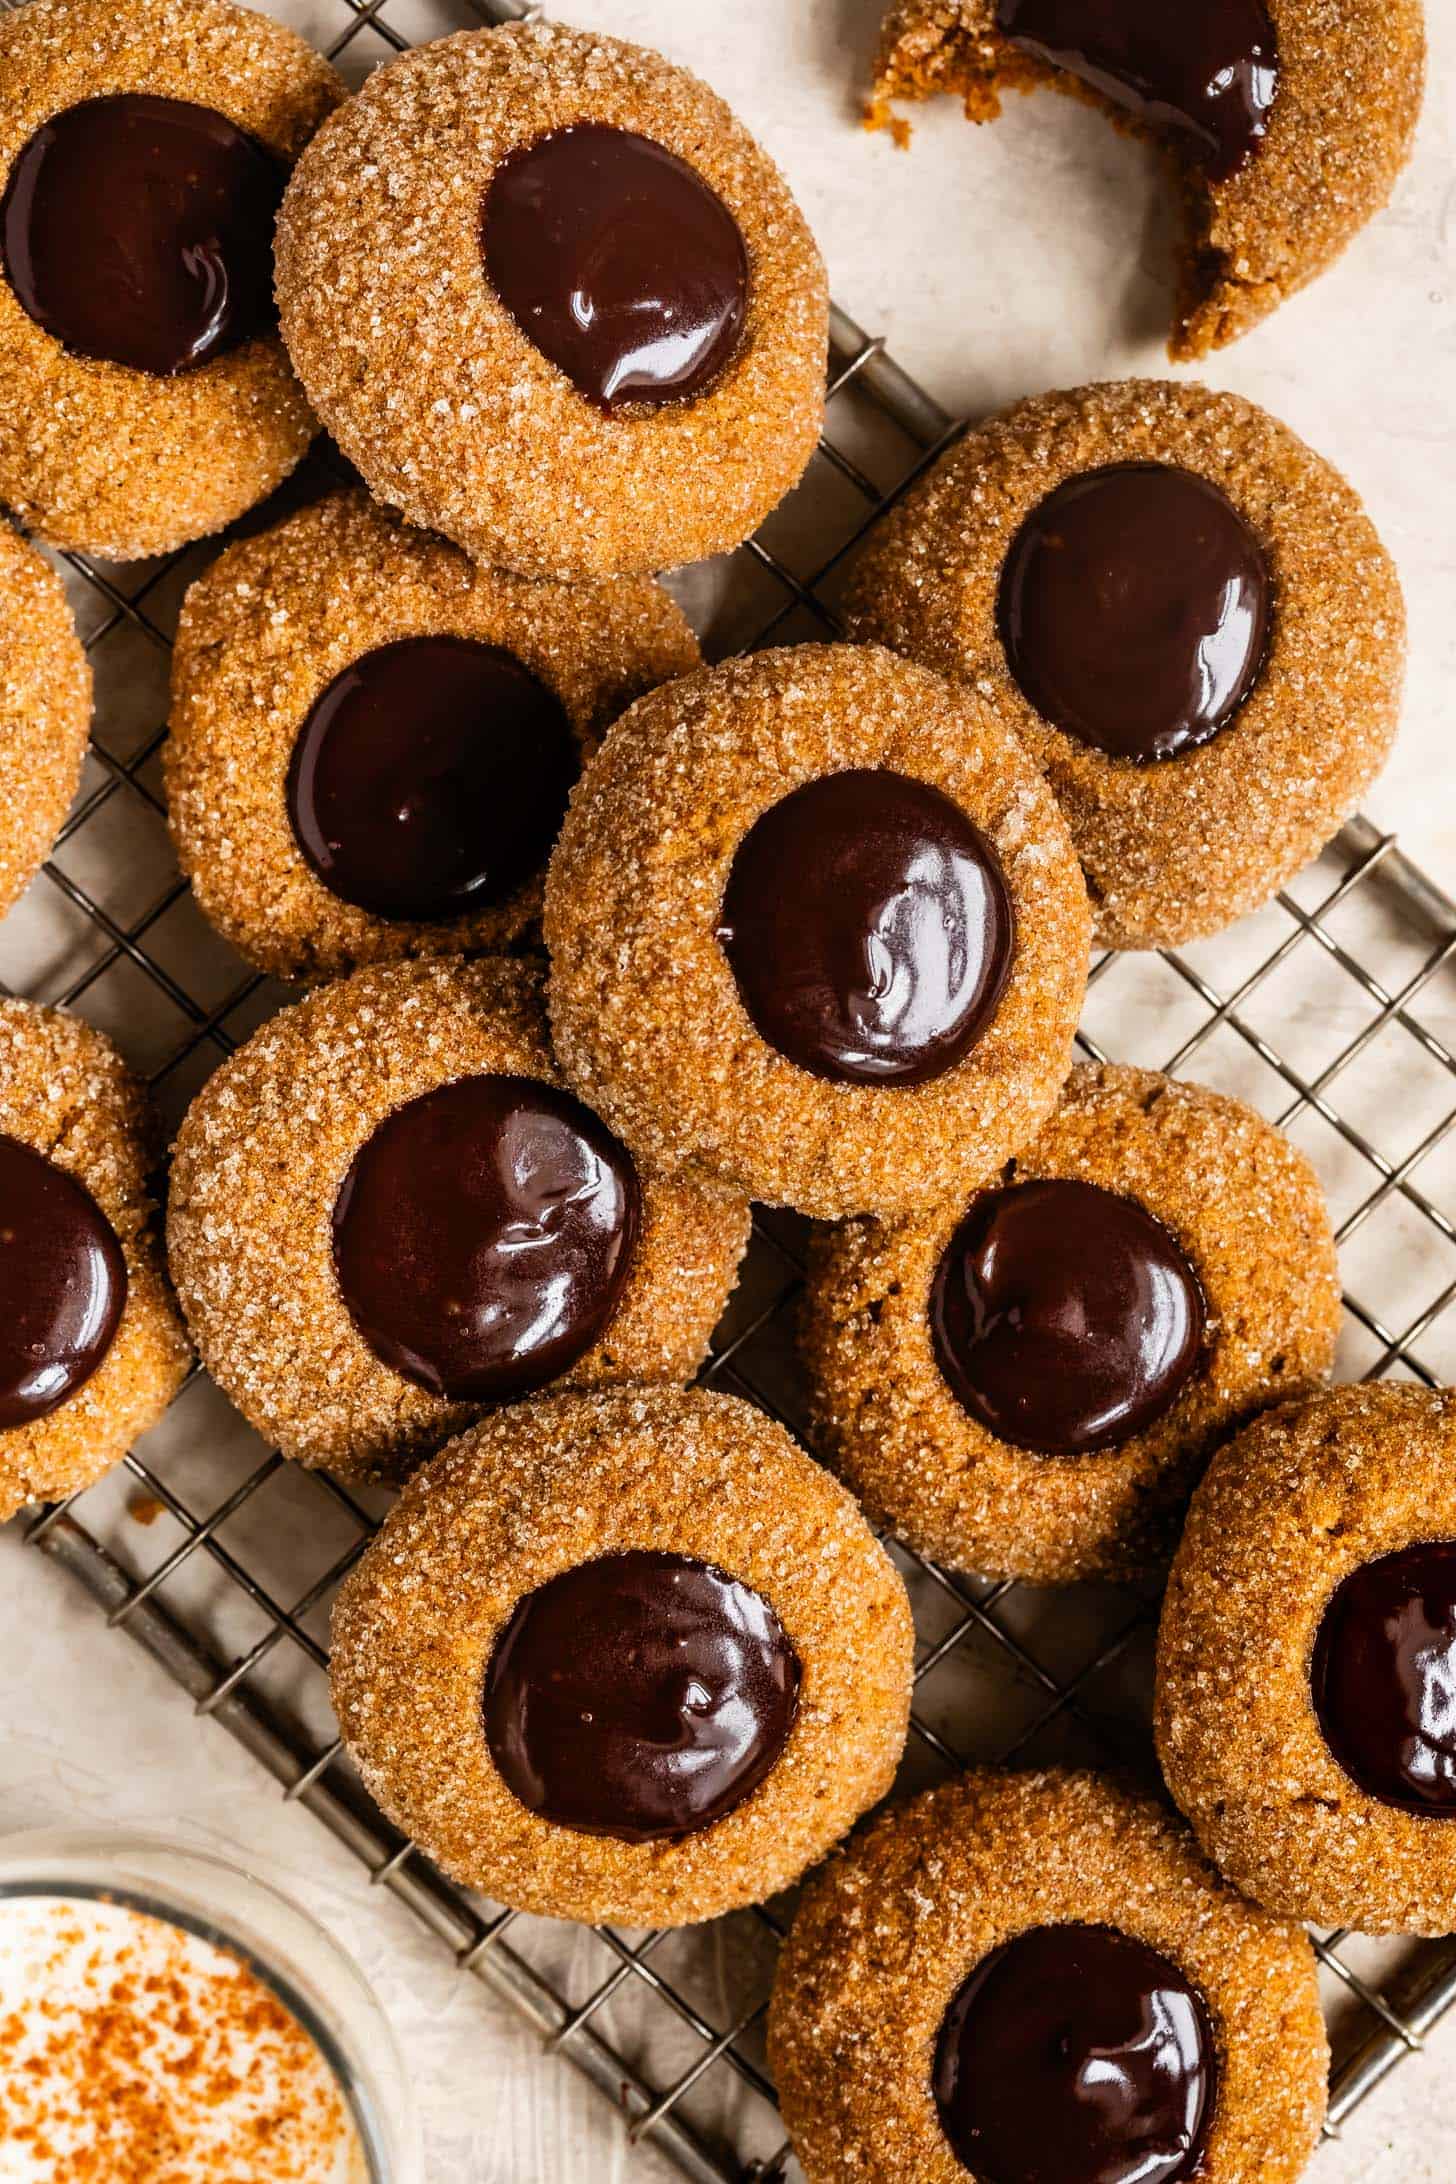
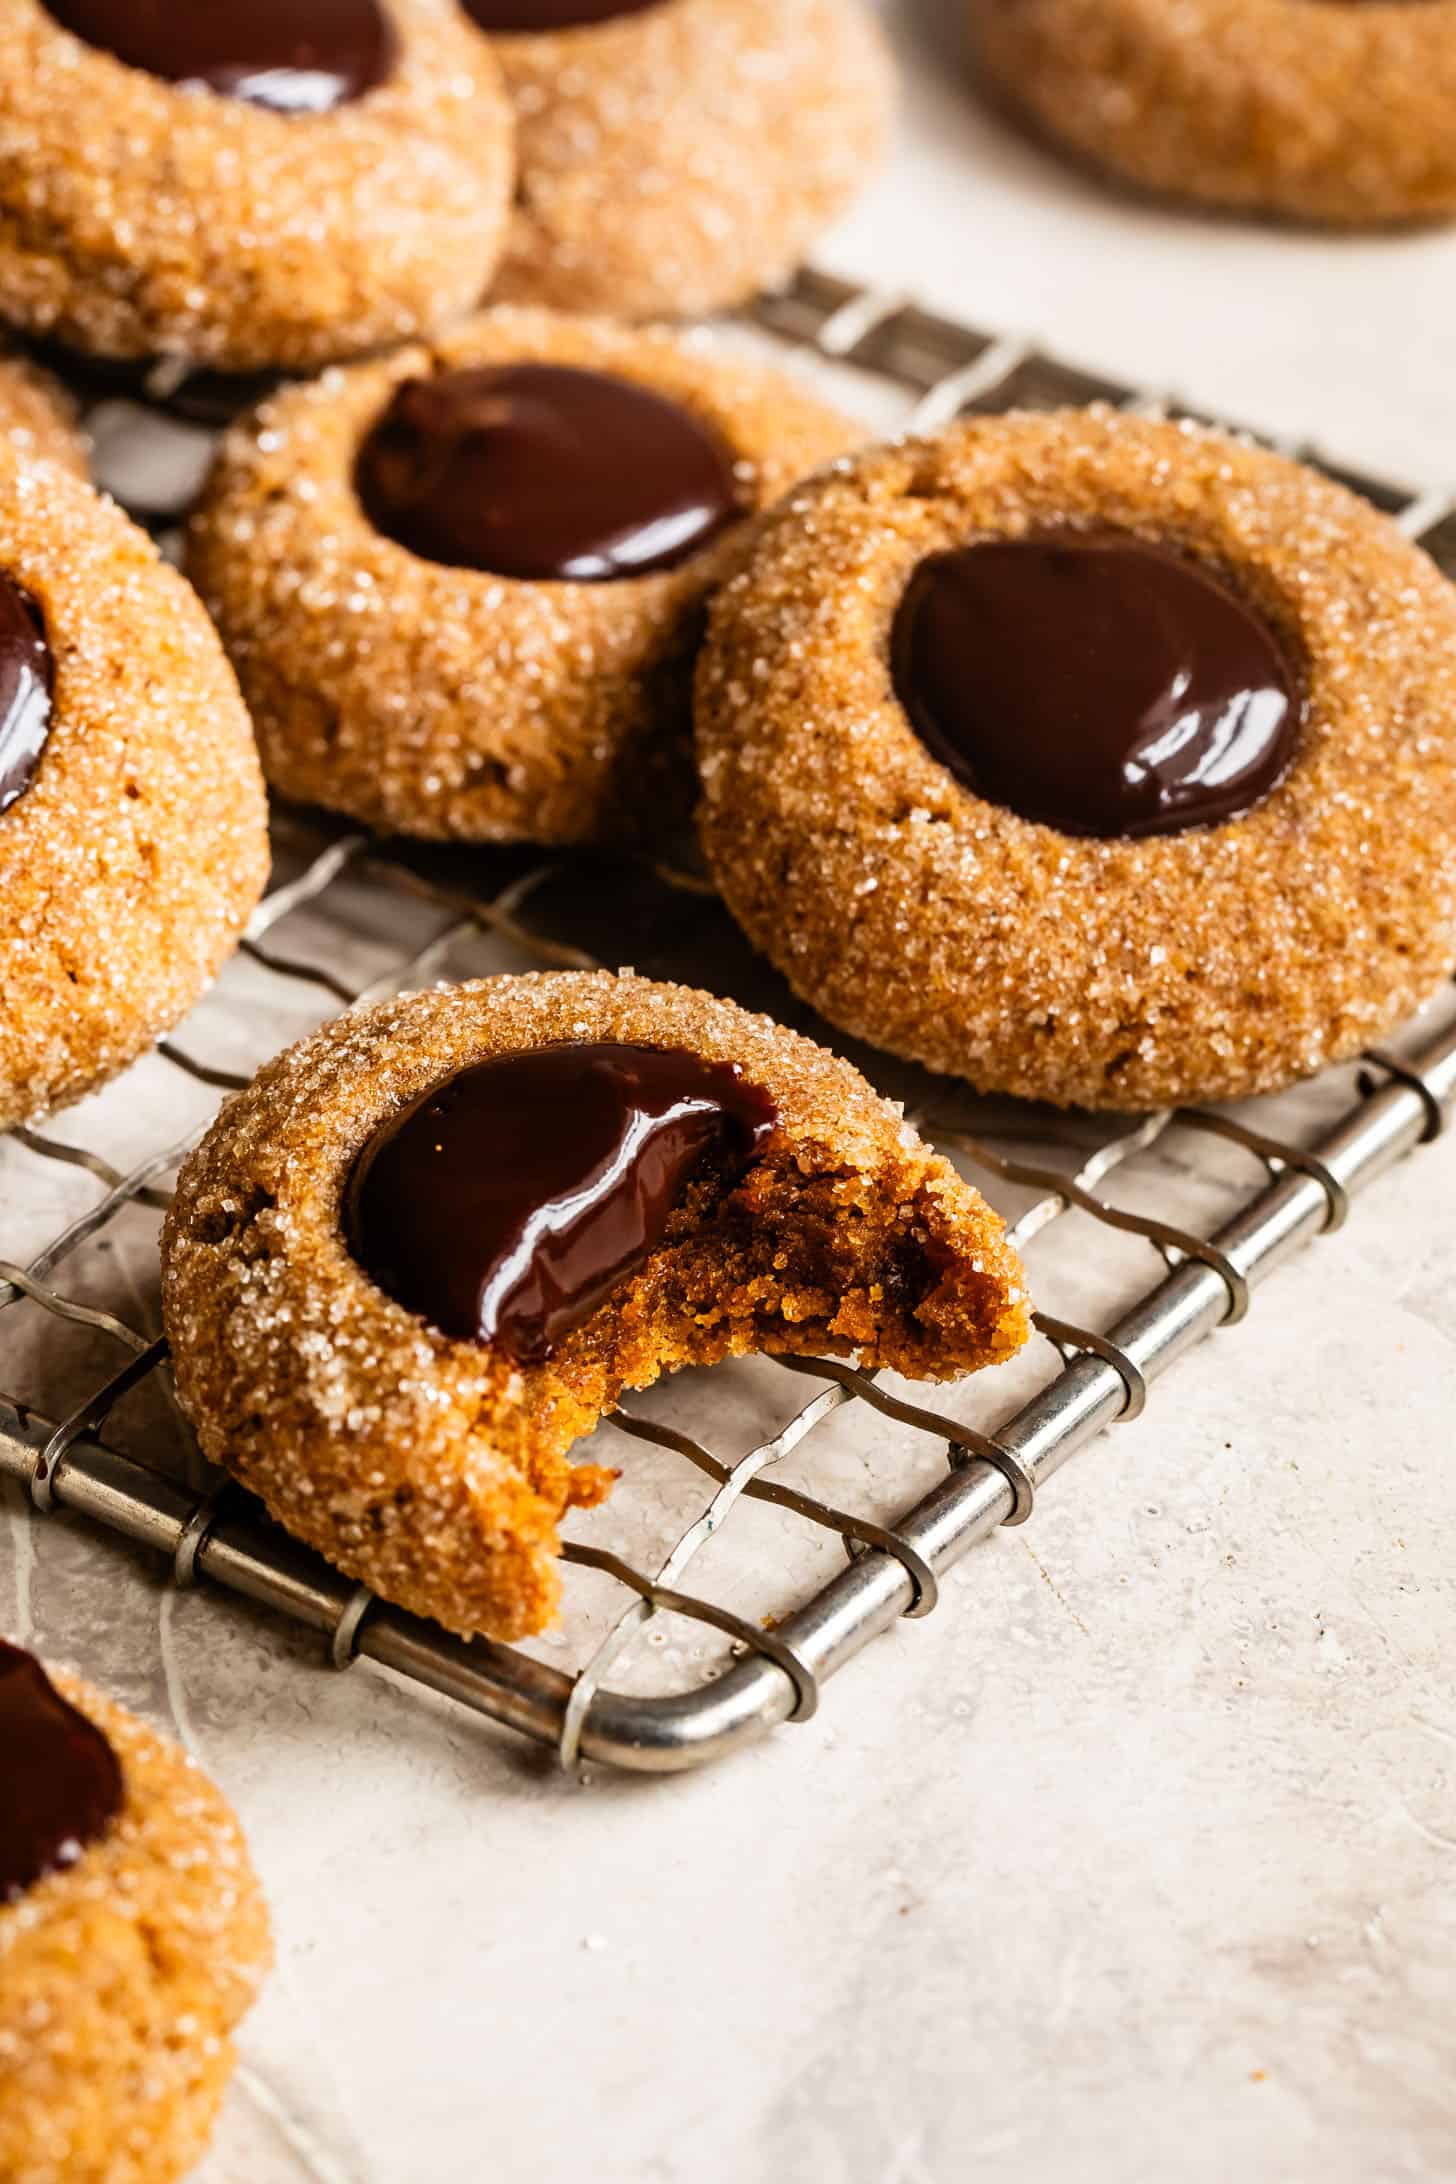
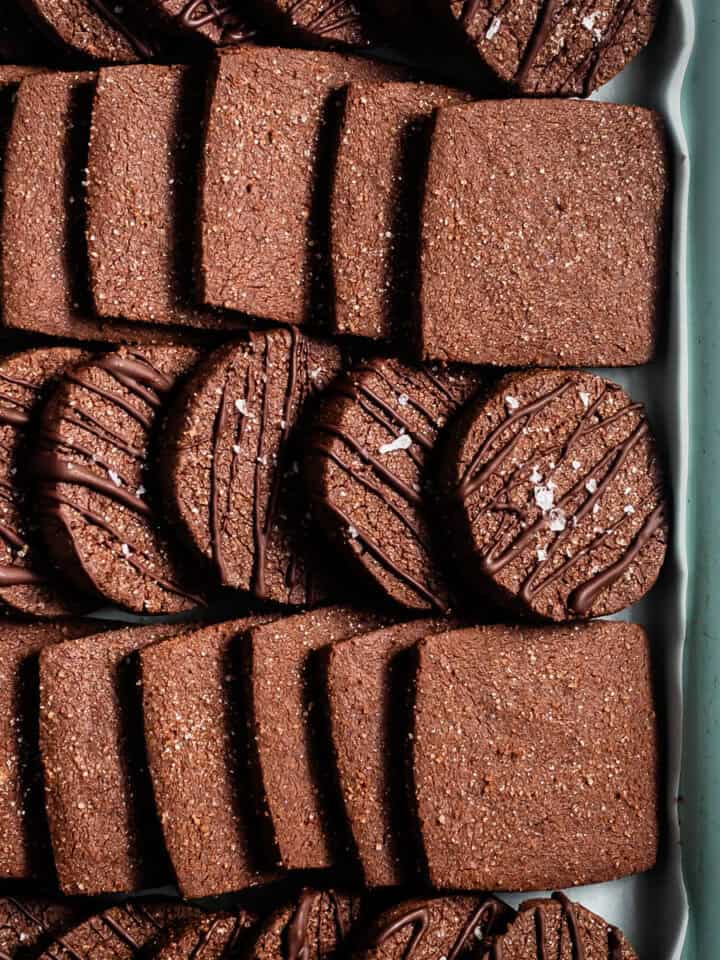
These gluten-free gingerbread thumbprint cookies have a chewy ginger molasses cookie base filled with a creamy spiced eggnog ganache center. The flavors wow the tastebuds, making this cookie the star of any holiday cookie tray.
This post is sponsored by Andronico's Community Markets, a long-term partner of Snixy Kitchen, but the opinions are all my own.
Step aside, sugar cookies - these gluten-free gingerbread thumbprint cookies are about to steal the holiday spotlight. These thumbprints are for when you want something special. A cookie that shocks the tastebuds in all the right ways. They're chewy, warmly spiced, and filled with a creamy eggnog ganache that's pure holiday magic. Perfect for cookie exchanges, festive gatherings, or a cozy night in, these cookies are a must-make this season.
This gingerbread eggnog cookie mash-up was inspired by my gluten-free gingerbread loaf cake with eggnog frosting. Together, the flavors of eggnog and gingerbread exude holiday nostalgia.
Why you'll love these cookies
- Chewy Texture: These cookies are chewy in the center like your favorite ginger molasses cookies, but sturdy enough to hold up to a filling.
- Holiday flavors: Ginger, cinnamon, nutmeg, allspice, and molasses bring that classic gingerbread flavor, while the eggnog ganache adds a creamy, spiced sweetness.
- Gluten-Free without any compromise: Made with a blend of almond flour, tapioca flour, and sweet rice flour for a tender yet sturdy cookie. No one will suspect they're gluten-free!
- Easy to make-ahead: Both the dough and ganache can be prepared in advance for stress-free holiday baking and chilled until ready to use.
- Customizable: Swap the eggnog ganache for traditional ganache, caramel, or your favorite jam for endless variations.

Main Ingredients For the Cookies
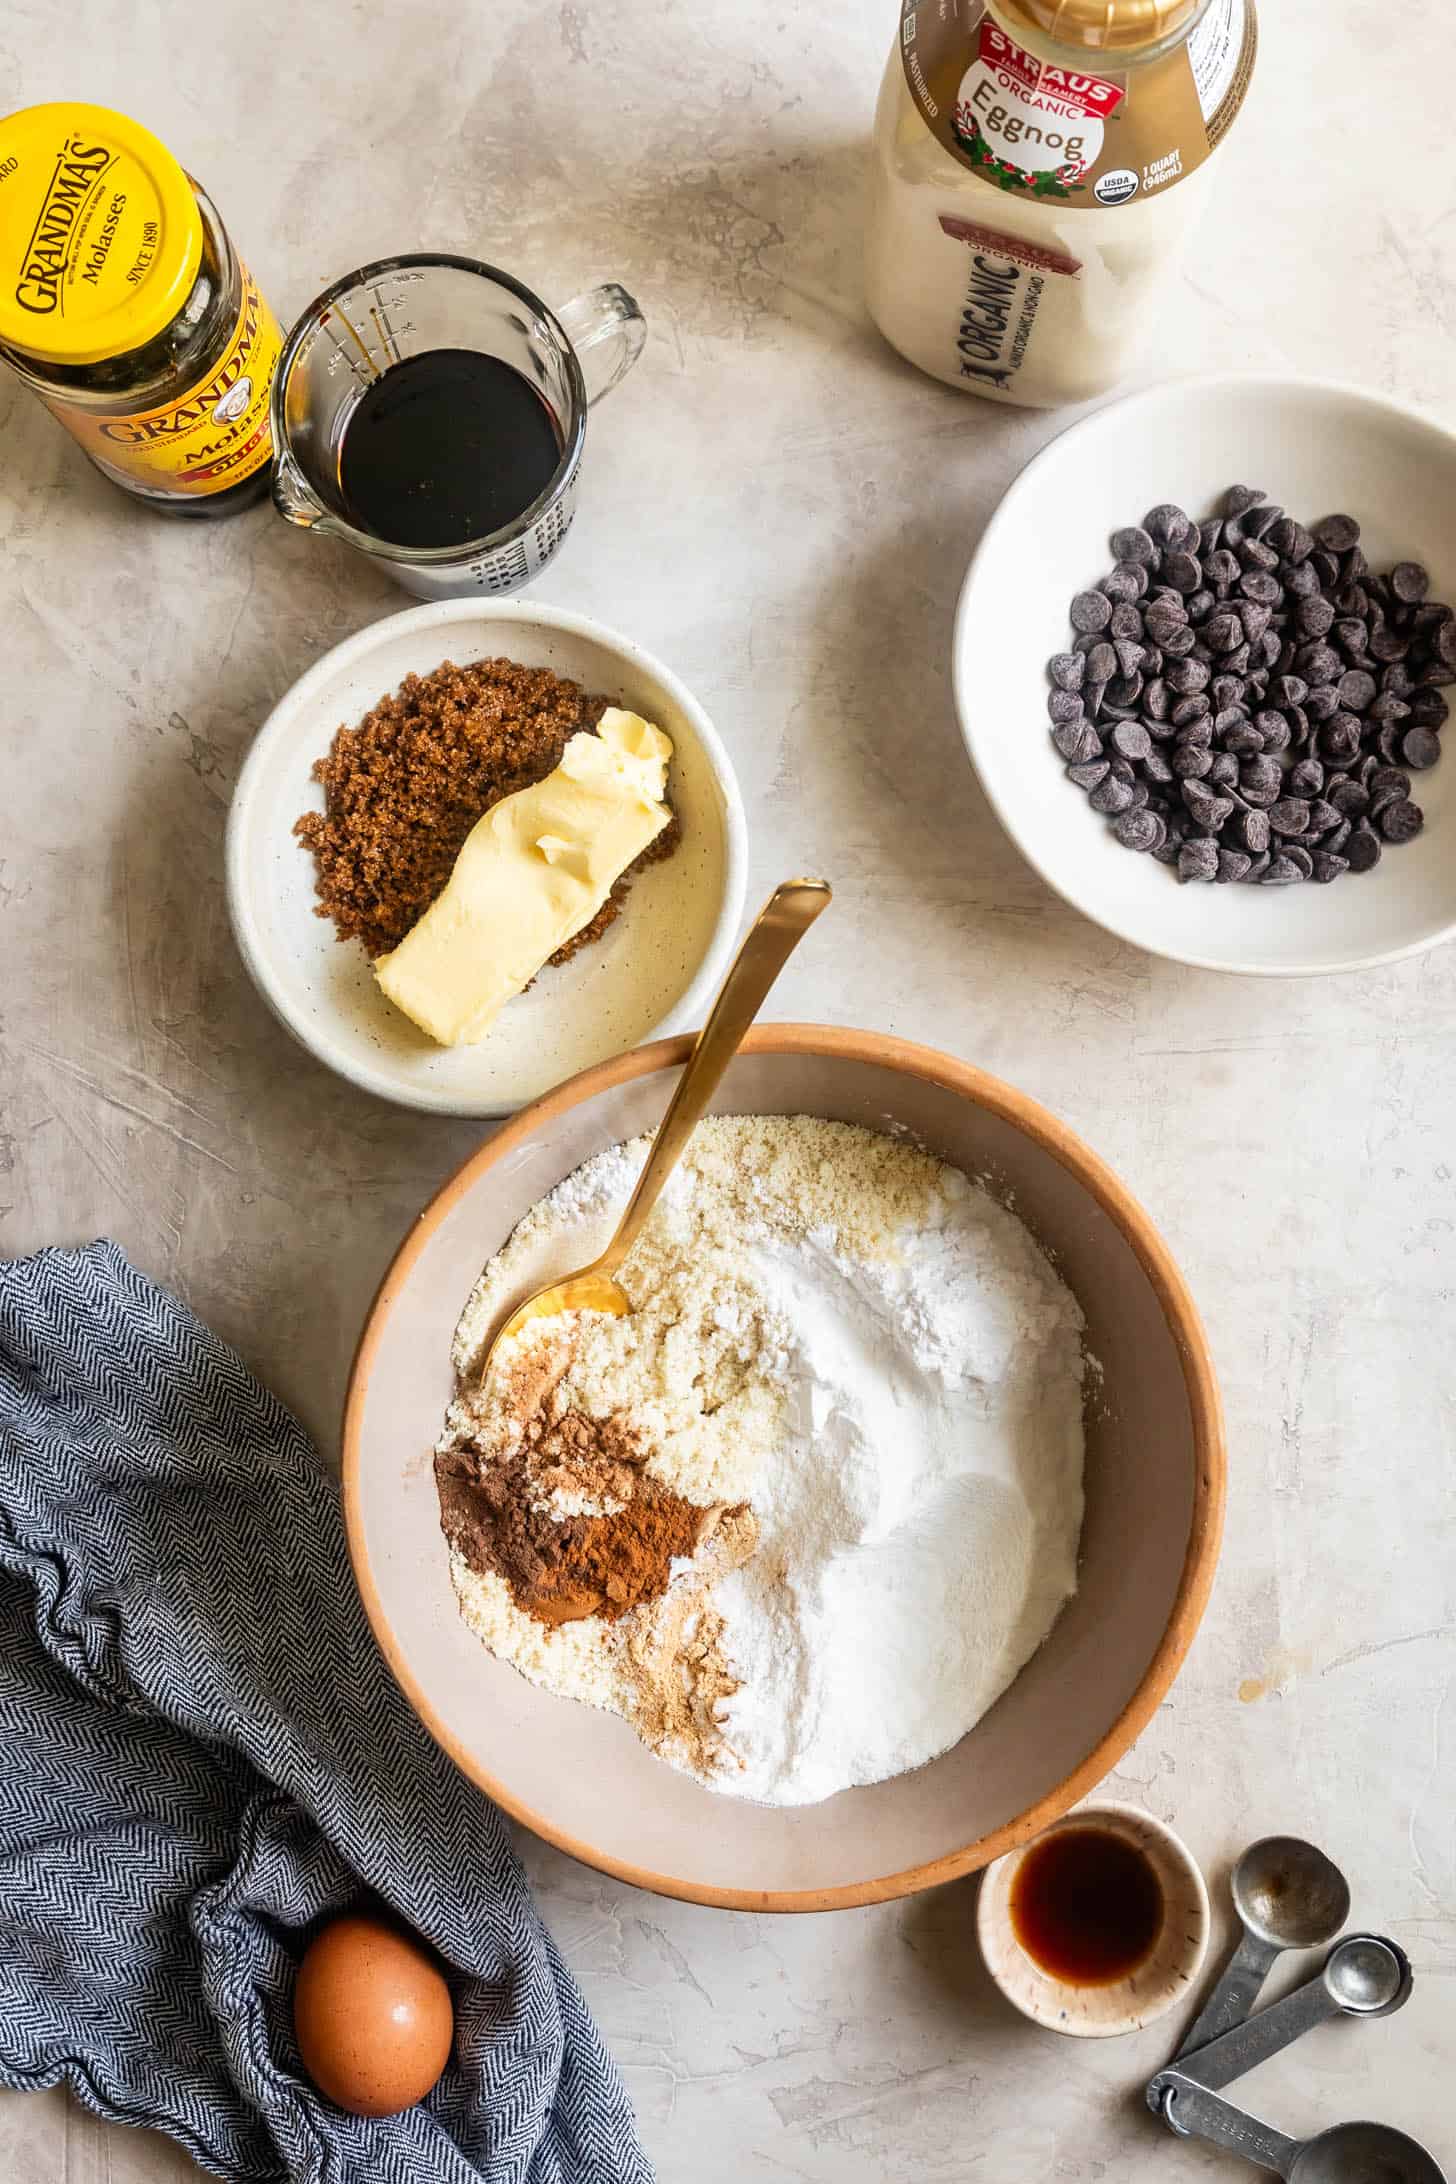
As a gluten-free baker, I know the challenge of finding specialty flours and ingredients. That's why I love shopping at my local Bay Area Andronico's Community Market - they carry everything I need in one place! From almond flour to sweet rice flour, Andronico's has a large selection of Bob's Red Mill gluten-free products, along with all the holiday staples like molasses and eggnog.
It's a one-stop shop for everything needed to whip up these festive gingerbread thumbprint cookies.
Here are the main ingredients you need to make these cookies (along with some baking staples!):
Gluten-Free Gingerbread Cookies
- Super-fine blanched almond flour: Almond flour adds fat and moisture to the dough, so you'll need more flour than a traditional cookie recipe.
- Bob's Red Mill tapioca flour: Tapioca flour adds chewiness and also the crispy edges. I recommend Bob's Red Mill brand as other brands are less finely ground, which I find adds grittiness to the texture
- Sweet rice or mochiko: Sweet rice flour is distinctively different than white rice or brown rice flour. Sweet rice flour is the same flour used to make mochi, and as such, its stickiness helps to bind the cookies together, creating chewiness like a classic molasses cookies.
- Spices: Salt, ginger, cinnamon, nutmeg, allspice
- Dark brown sugar: I recommend organic dark brown sugar as it has a higher molasses content and bakes up chewier
- Unsulphered molasses: Using part brown sugar and part dark unsulphured molasses gives the cookies a full-bodied richness that's all at once sweet yet sophisticated. Here I used Grandma's unsulphured molasses.
Eggnog Ganache
- Semisweet chocolate: chips or chopped
- Eggnog: I used Strauss organic eggnog, which is bursting with flavor and spices. If yours is not as spiced, you can add a pinch of nutmeg and cinnamon to the ganache.
Visit the recipe card for exact quantities!
How to Make Gingerbread Thumbprint Cookies
These cookies are so simple to make that I tested them 5 times in just one afternoon!
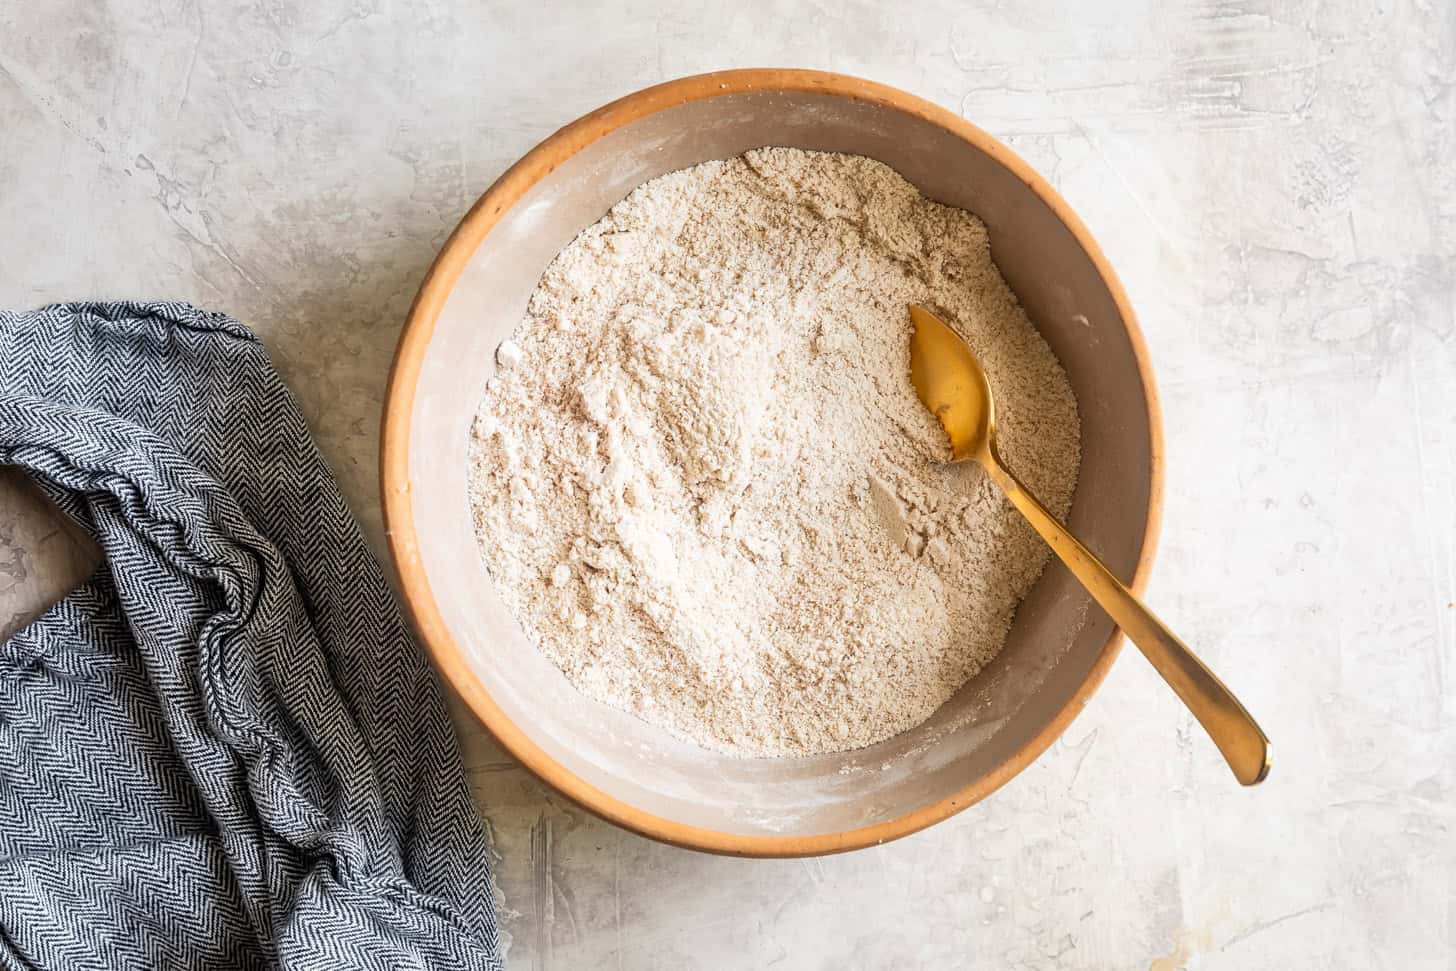
Sift together dry ingredients and set aside.
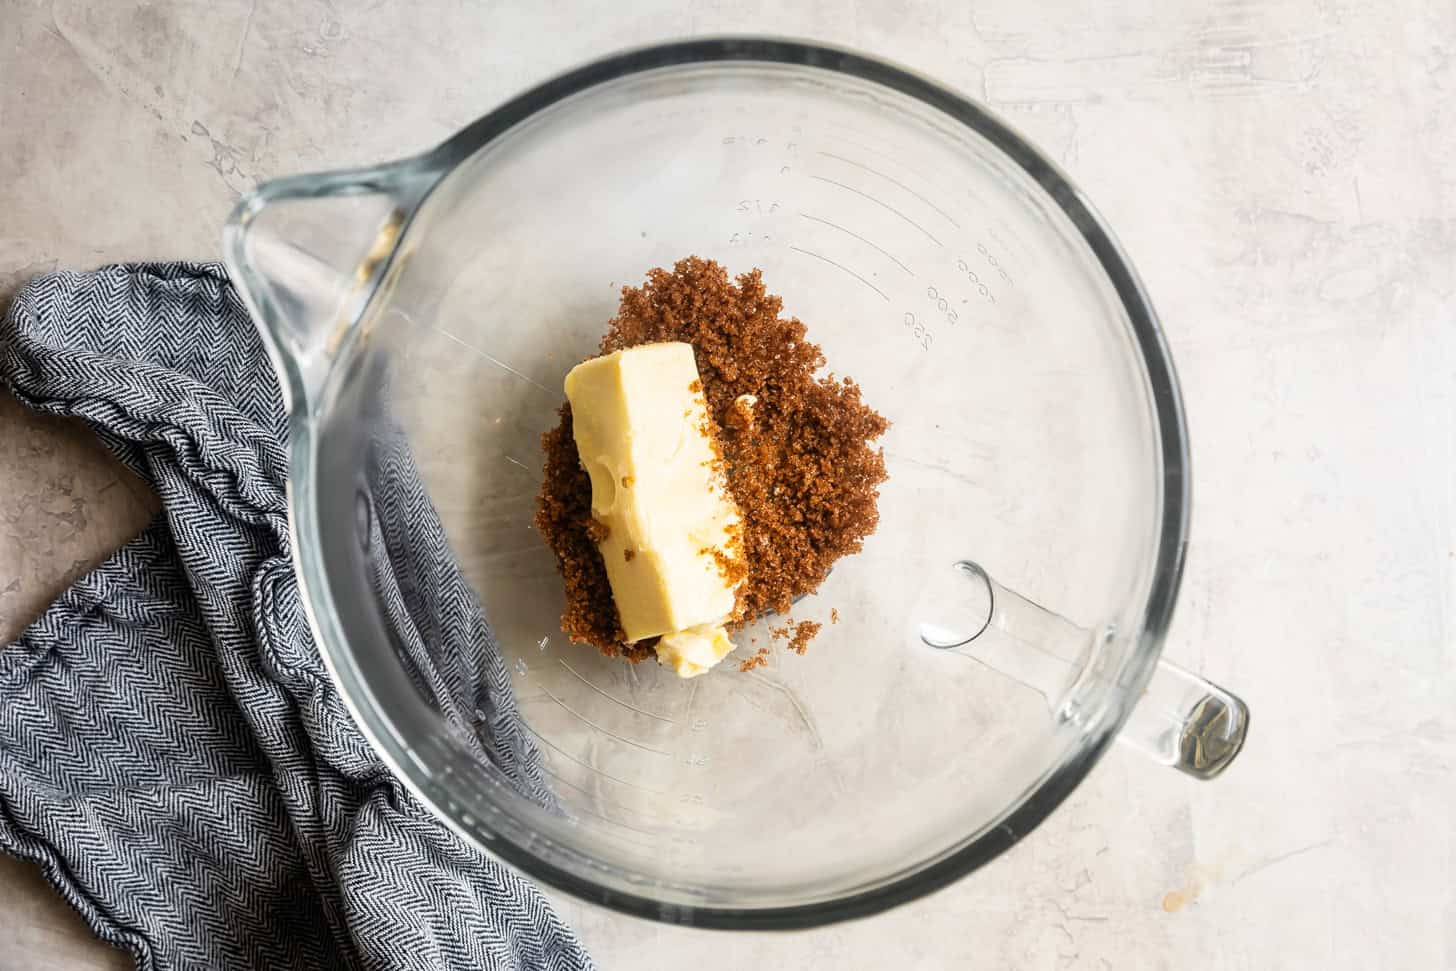
Cream together butter and dark brown sugar.
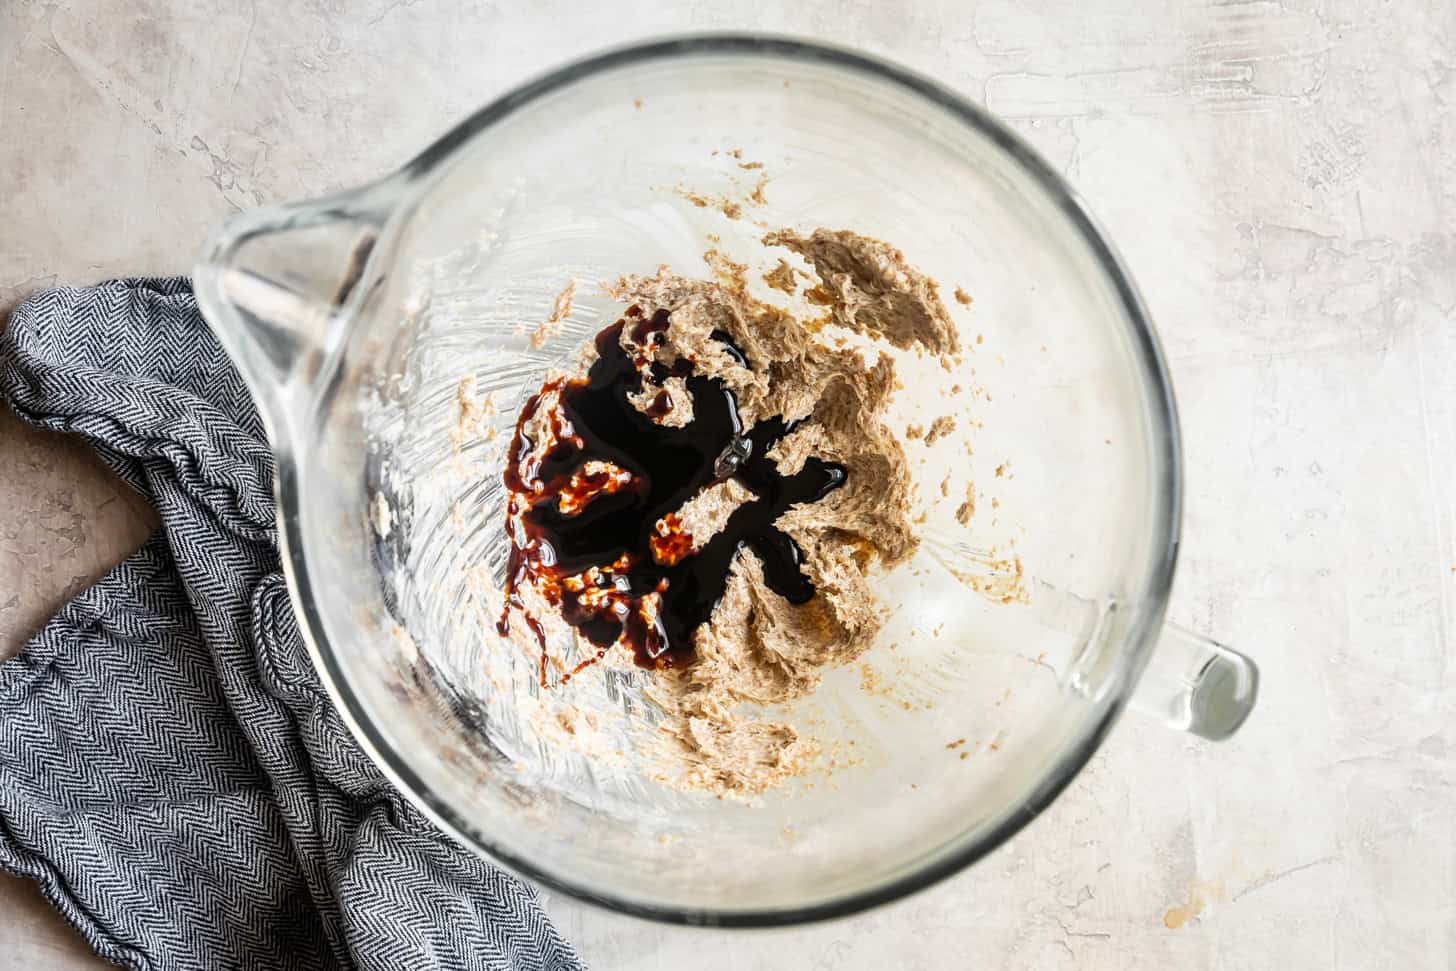
Mix in molasses.
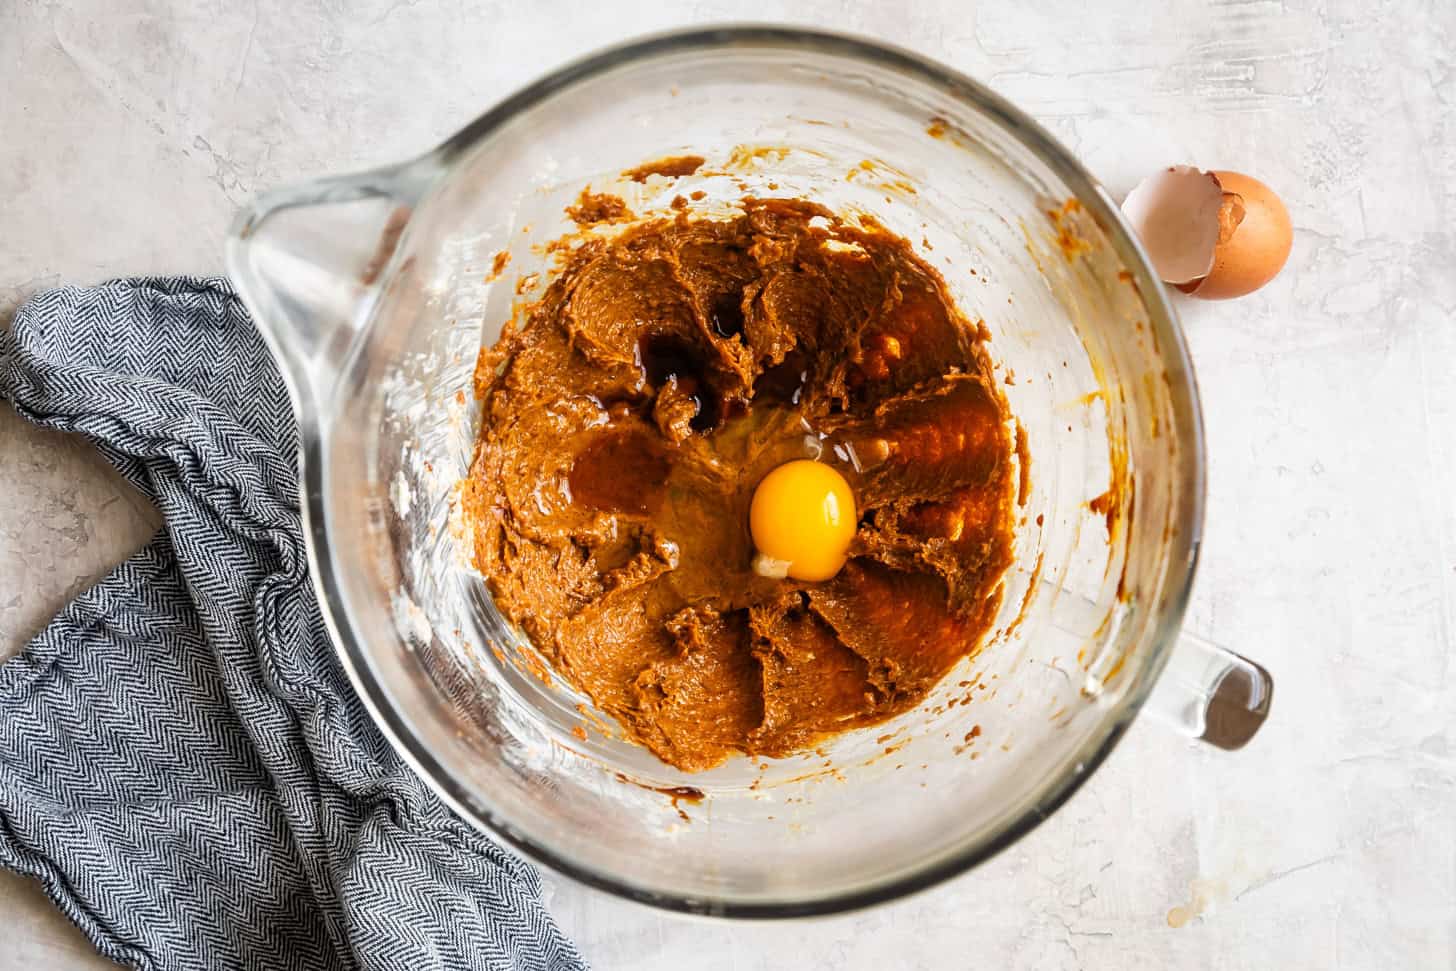
Mix in egg and vanilla until well combined.
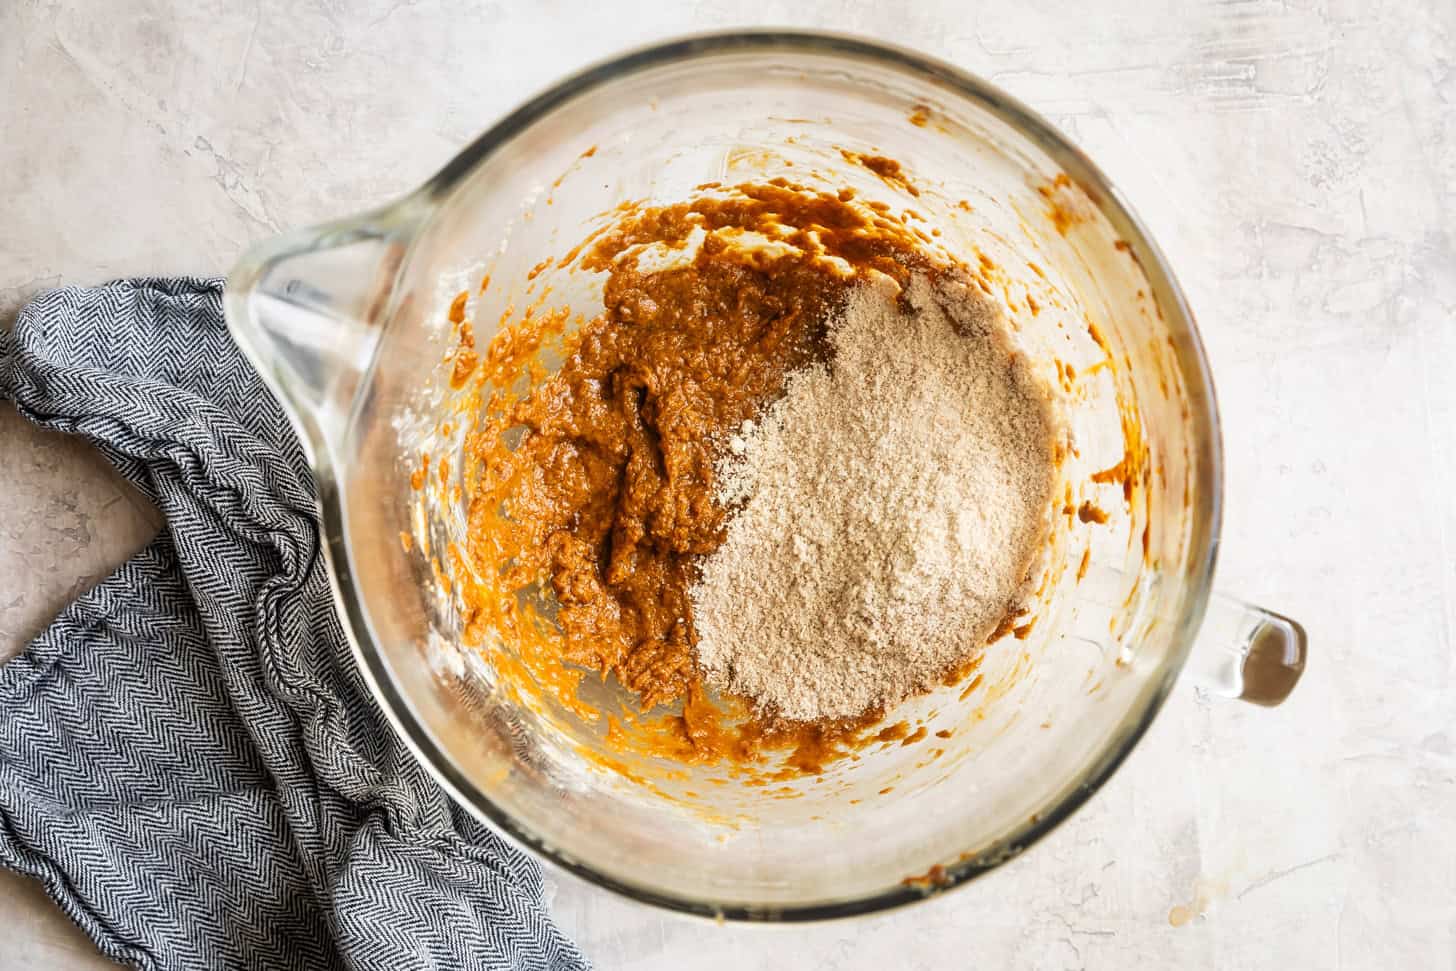
With the mixer on low, slowly add the dry ingredients...
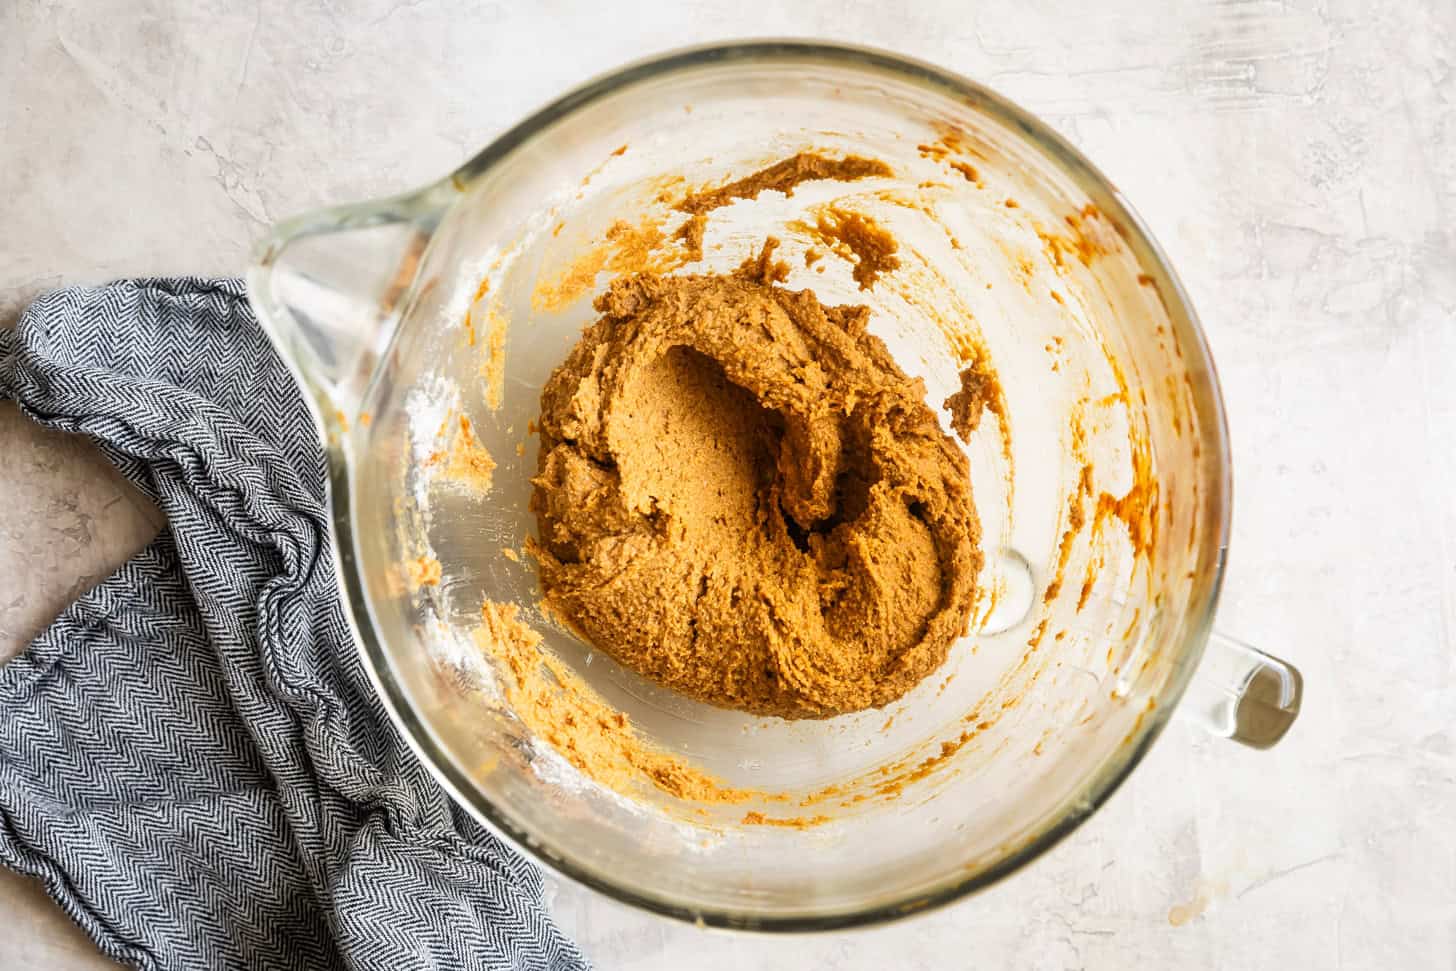
...mixing until just combined. Chill the dough, either in the bowl or wrapped in plastic, until firm enough to roll into balls (1-2 hours in the fridge or 30 minutes in the freezer).
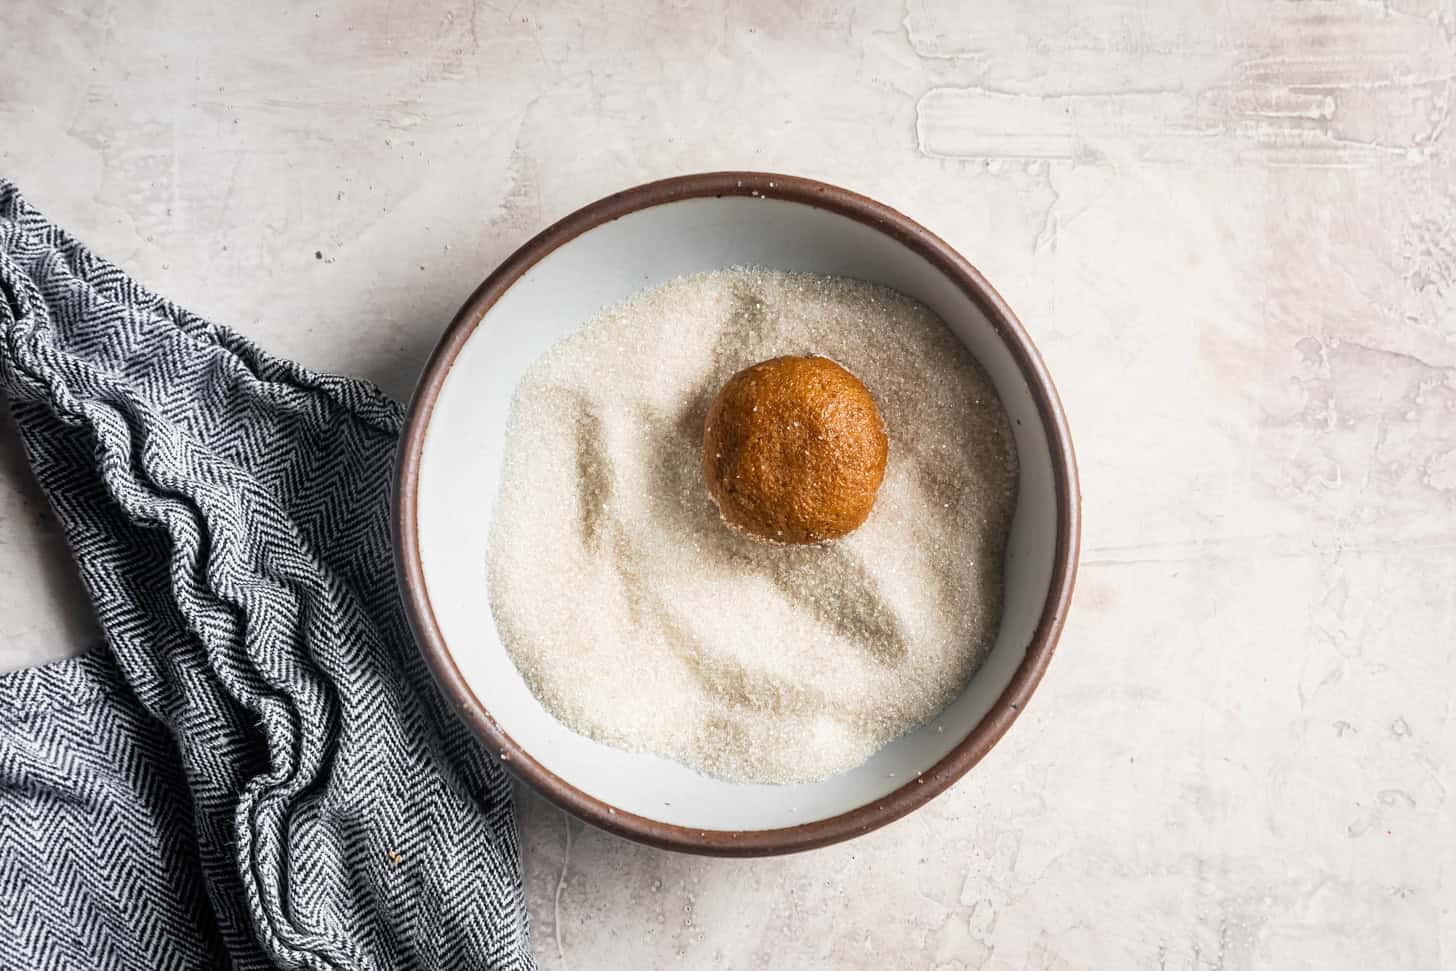
Roll dough into tight 1-inch balls, gently flatten, then toss in sugar to coat.
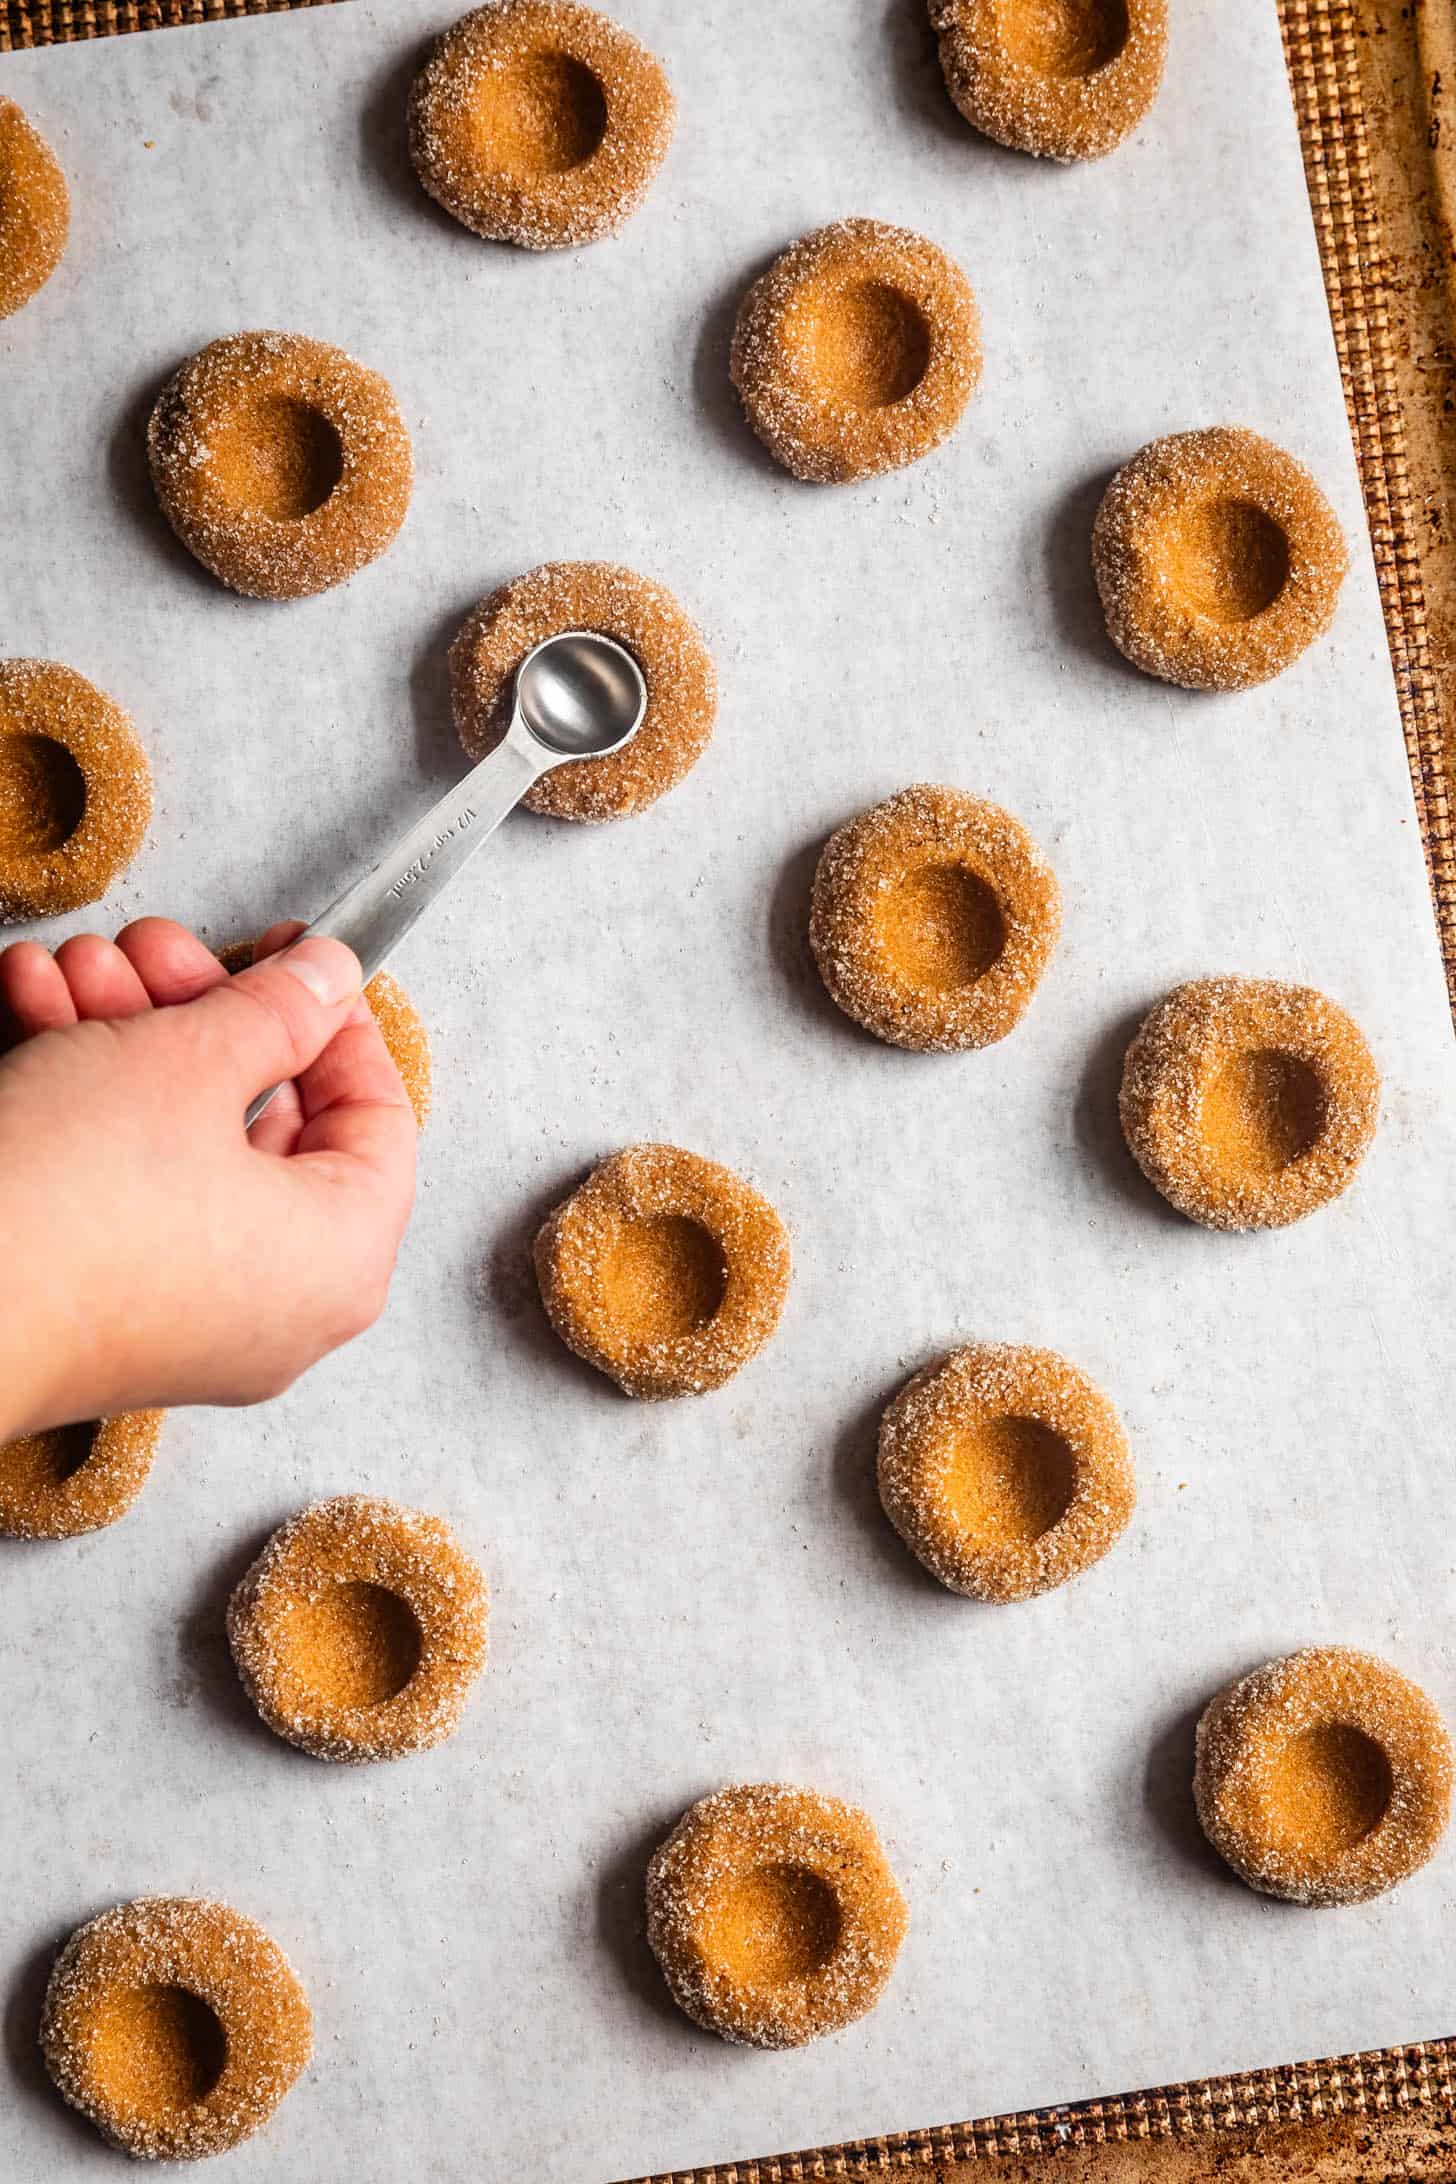
Use your thumb or the back of a ½-teaspoon measuring spoon to make an indent in each disc. Chill (see notes about chilling), bake, and cool.
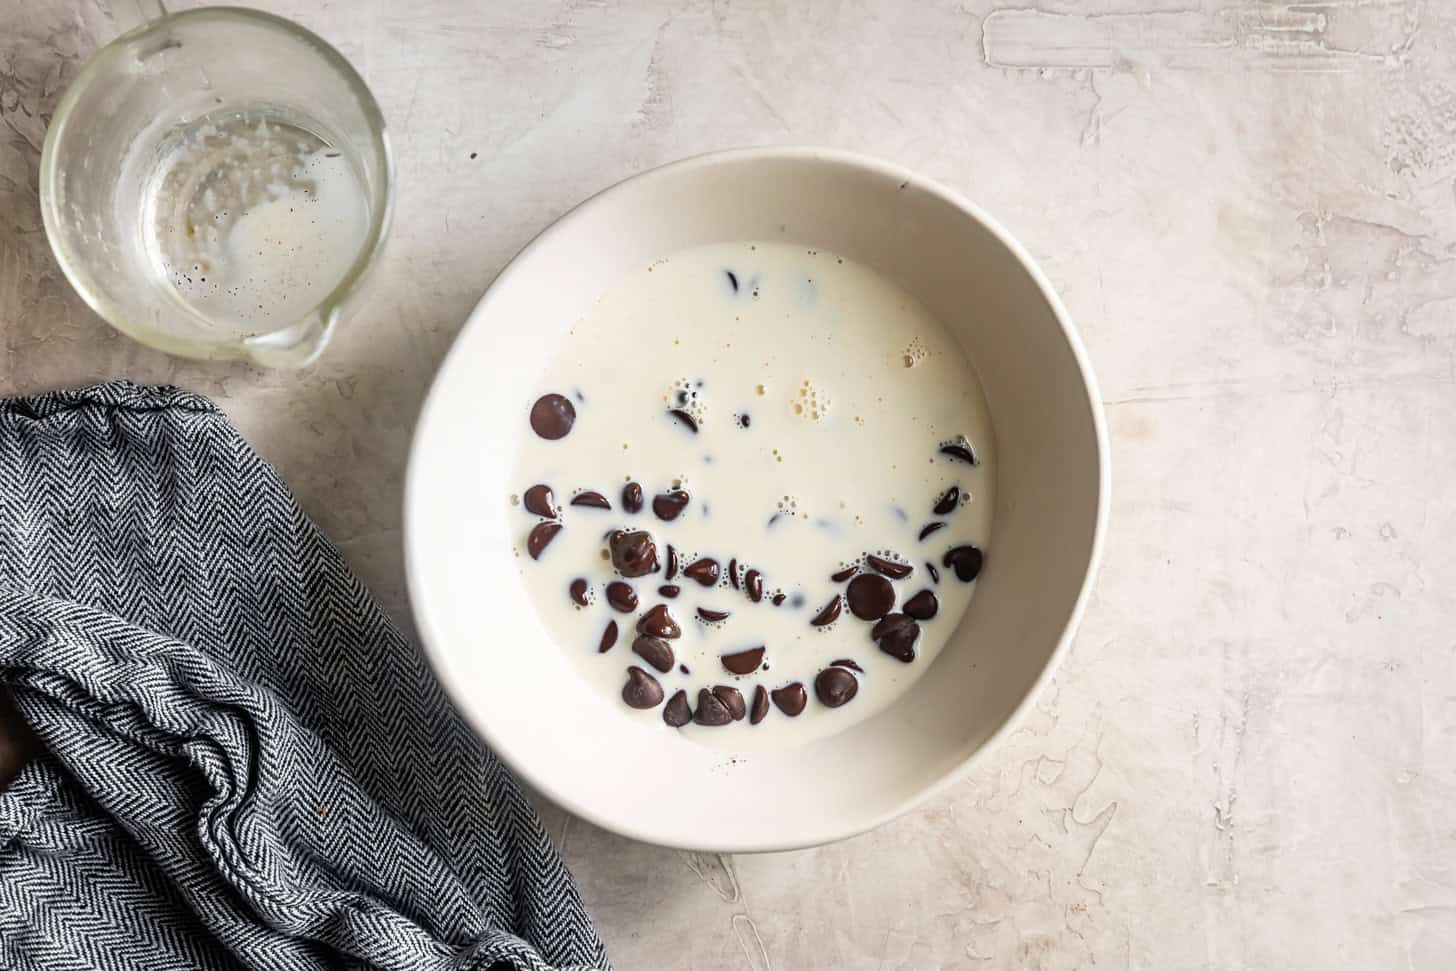
Pour hot eggnog over chocolate chips in a bowl. Let sit for 5 minutes.
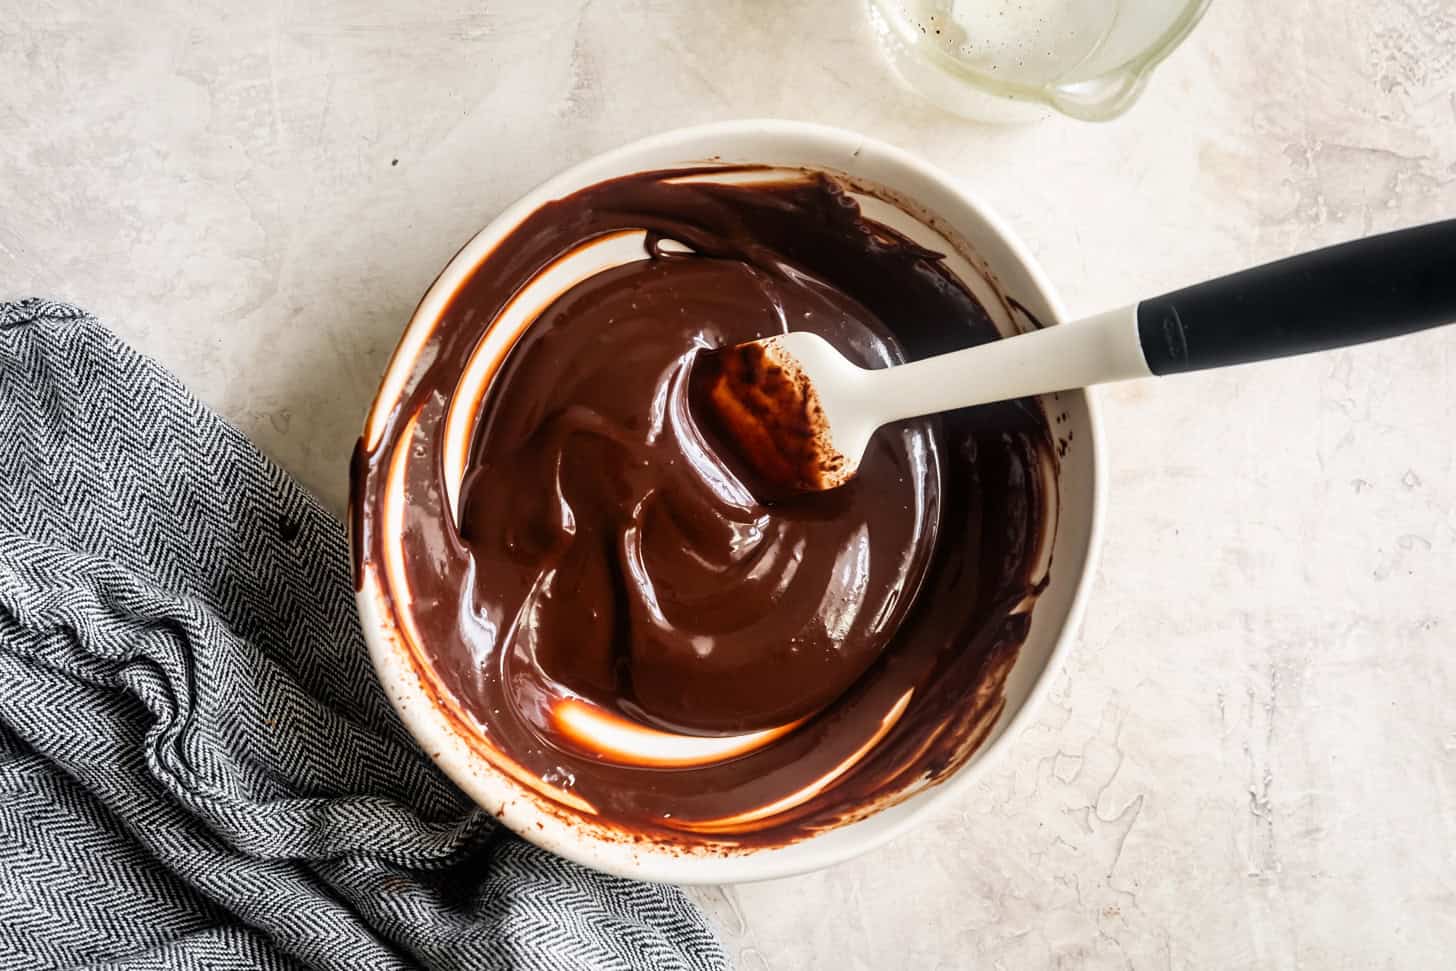
Stir until smooth.
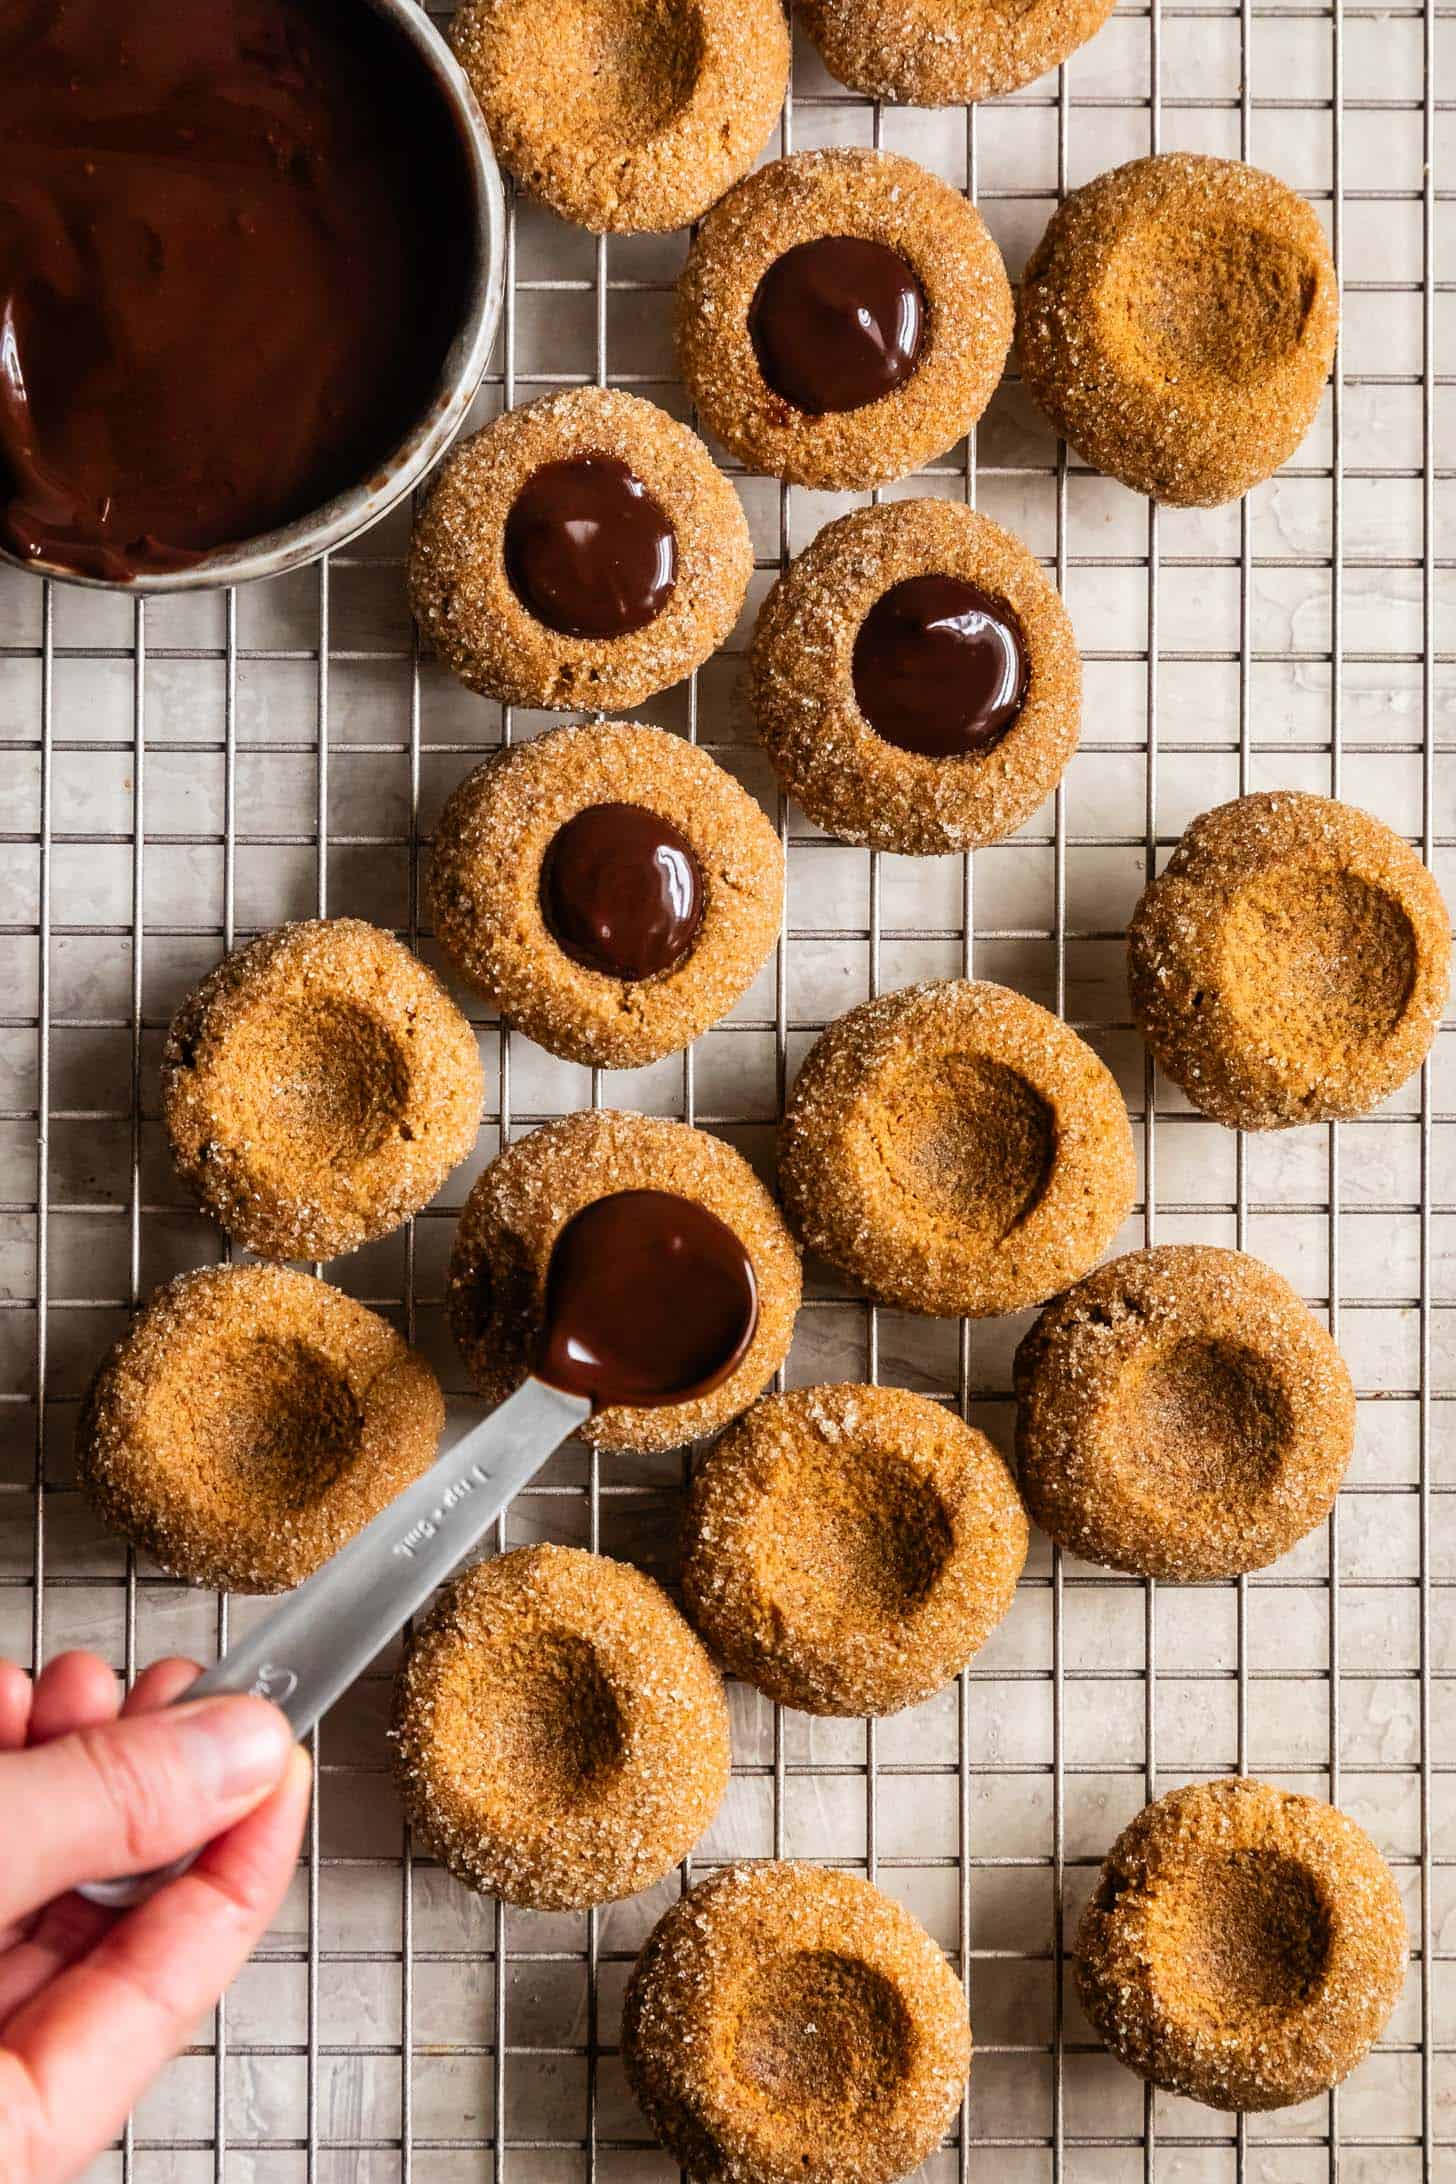
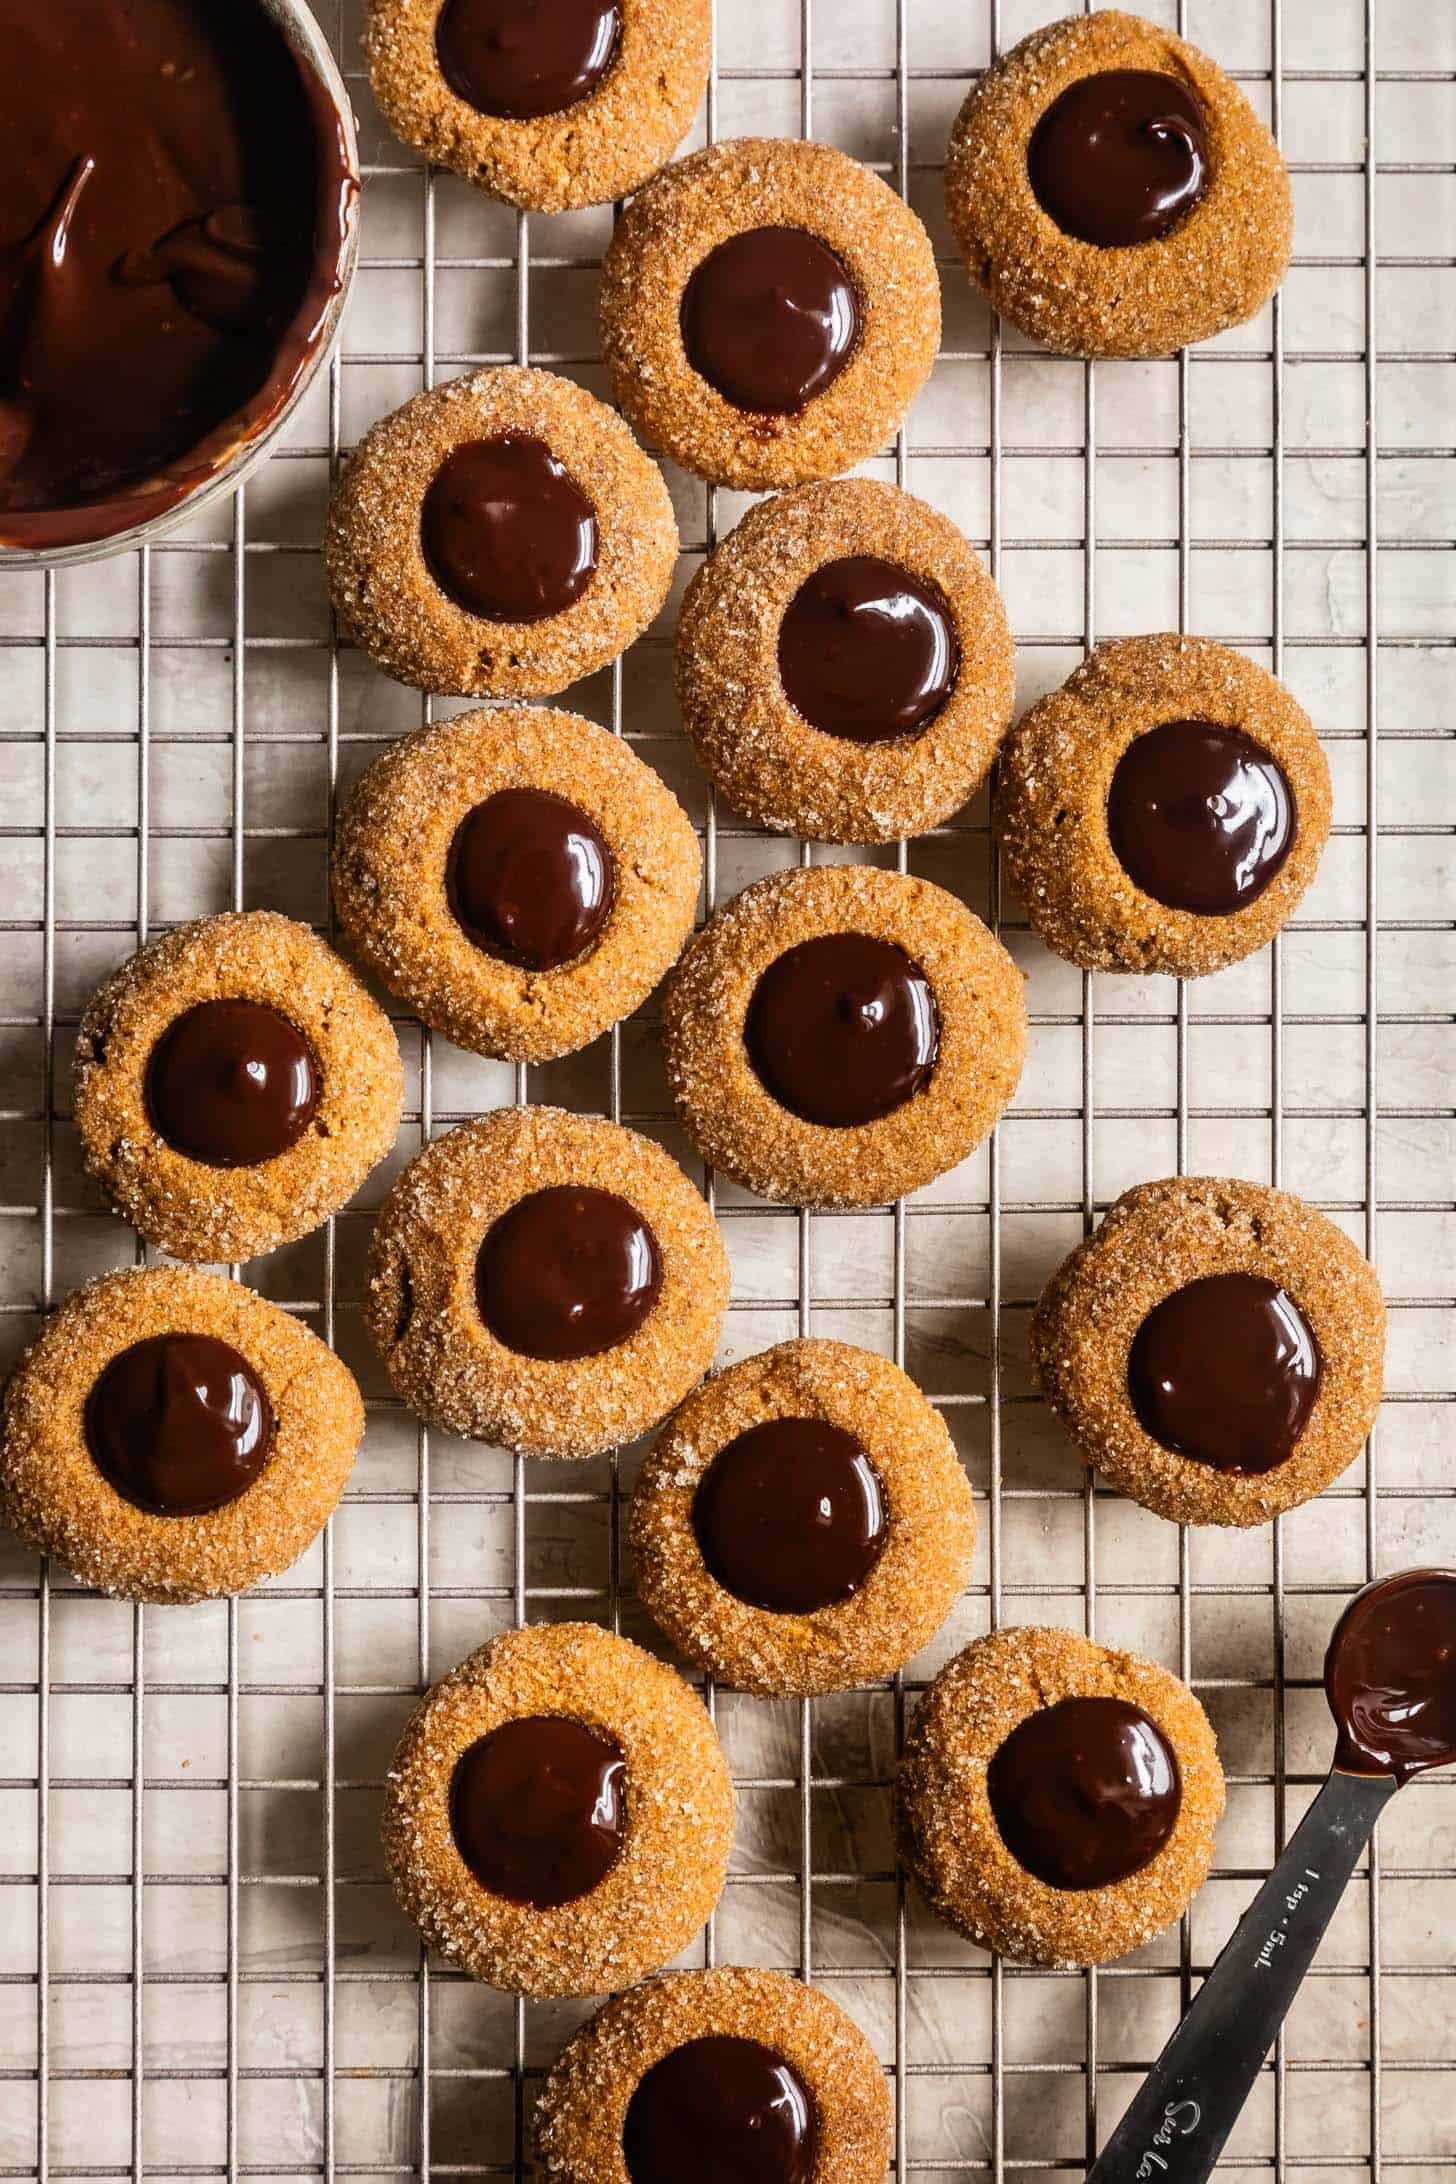
Scoop ganache into each thumbprint and enjoy!
Hint: Whenever I bake cookies, I always bake off 1 or 2 tester cookies first so I can make adjustments as needed. When making off just 1 or 2 cookies, reduce the bake time by 2 minutes before checking for doneness. See below if you find your cookies spread too much.
Making Perfect Thumbprints
Rather than using your thumb, as the name suggests, I find that the easiest way to make perfect "thumbprint" indents that hold the filling is to press a ½ teaspoon measuring spoon into the center.
Chilling the Dough
Chilling the dough prevents the cookies from spreading too much during baking. While you can bake these cookies after just a 30-minute freezer-chill (or 1-2 hours in the fridge), I find the texture and flavor of the cookies is best if you let the rolled-out and "thumbprinted" cookie dough balls chill overnight. With an overnight chill, the flavors deepen, and the cookies get more chewy, while still maintaining their "thumbprint" shape.
If you don't want to wait to chill the dough overnight, give the rolled-out cookies a quick freezer chill while you preheat the oven.
Chocolate Eggnog Ganache
The eggnog ganache is a luscious holiday-inspired filling that takes these thumbprint cookies to the next level. By swapping the heavy cream for eggnog, the ganache infuses a creamy, spiced sweetness into the semisweet chocolate base, creating a perfectly balanced flavor.
Thumbprint Filling Variations
While I'm partial to the gingerbread, eggnog, and chocolate pairing, here are a few other options you can use to fill your thumbprint cookies that would be very delicious. Get creative - you could even mix and match!
- Add Rum: An optional splash of rum or rum extract deepens the eggnog essence!
- White Chocolate Eggnog Ganache: Swap the semisweet chocolate for chopped white chocolate. The result is a bit sweeter but has a more pronounced eggnog flavor.
- Jam: Replace the ganache with a dollop of raspberry or apricot jam.
- Caramel: Replace the ganache with a dollop of store-bought or homemade caramel sauce.
- Apple or Pear Pie Filling: Instead of ganache, cook up some stovetop apple pie filling (or use pears!) to dollop in the center.
For traditional thumbprint cookies, see my classic jammy gluten-free thumbprint cookie recipe or for a pie-based spin, check out my gluten-free apple pie cookies or gluten-free cherry pie cookies!
How to make the cookies ahead
Cookie Dough: The gingerbread dough can be prepared and chilled in the fridge up to 5 days in advance or in the freezer for up to 3 months. In fact, the dough benefits from a longer chill time! If you're baking from the freezer, add 1-2 minutes to the bake time.
Ganache: The ganache can also be made a day ahead and stored in the fridge; just bring it to room temperature before using.
How to store the cookies
Store the cookies in an airtight container at room temperature for up to 3 days. You can also store the cookies in an airtight container in the freezer for up to 3 months. Defrost at room temperature before enjoying!
Recipe

Gluten-Free Gingerbread Thumbprint Cookies with Eggnog Ganache
Ingredients
- 140 g (1¼ cups) super-fine blanched almond flour
- 56 g (½ cup) Bob's Red Mill tapioca flour
- 60 g (¼ cup +
2 tablespoons) sweet rice flour, also called mochiko; do not substitute white or brown rice flour - ½ teaspoon kosher salt
- 1½ teaspoon ground ginger
- 1½ teaspoon ground cinnamon
- ¼ teaspoon ground nutmeg
- ¼ teaspoon ground allspice
- 6 tablespoons (85 g) unsalted butter, room temperature
- 50 g (¼ cup) dark brown sugar
- 1 large egg
- 85 g (¼ cup) molasses, 85g
- 1 teaspoon pure vanilla extract
- ¼ cup granulated sugar, for rolling
- ½ cup (3 ounces) semisweet chips
- ¼ cup (60 g) eggnog
- Pinch kosher salt
INSTRUCTIONS
- In a medium bowl, sift together the almond flour, tapioca flour, sweet rice flour, salt, and spices. Set aside.
- In the bowl of a stand mixer fitted with the paddle attachment or a large mixing bowl with a hand mixer, cream together the butter and dark brown sugar until well combined, 2-3 sides, scraping down the sides. Mix in the molasses followed by the egg and vanilla.
- With the mixer on low, slowly add the dry ingredients, mixing until just combined, scraping down the sides as needed. Chill the dough, either in the bowl or wrapped in plastic, until firm enough to roll into balls (1-2 hours in the fridge or 30 minutes in the freezer).
- Once firm, place the ¼ cup granulated sugar in a bowl. Roll 1-1½ tablespoons of dough into a tight 1-inch ball. Tip: use a small cookie scoop for even cookies. Gently flatten into a disc and toss the disc in the bowl of sugar to coat. Place 1½-inches apart on a parchment-lined baking sheet and carefully and slowly use your thumb or the back of a ½-teaspoon measuring spoon to make an indent. Repeat with the remaining dough.
- At this step you have two choices: place your cookie sheet in the freezer (especially if your dough has softened a bit while you rolled them all out!) while you preheat the oven OR chill the cookies overnight. Both work, but I find the texture and flavor of the cookies are at their best if you let the rolled-out and "thumbprinted" cookie dough balls chill overnight. With an overnight chill, the flavors deepen, and the cookies get more chewy, while still maintaining a defined "thumbprint" shape.
- When ready to bake, preheat the oven to 350°F. Working in batches if needed, bake the cookies on the middle rack for 8-10 minutes (8 min if baking immediately, 10 min if they've been frozen for longer than an hour). The edges should be just set, while the centers may look slightly under baked - err on the side of underbaking for the chewiest cookies! Let cool on the baking sheet for 3-5 minutes before using a thin metal spatula to transfer to a wire rack to cool completely.
- While the cookies cool, make the ganache. Place the chocolate chips and salt in a heat-proof bowl. In a small saucepan over medium-low heat or in a cup in the microwave, heat the eggnog until just simmering, but not yet boiling. Pour the hot eggnog over the chocolate chips and let sit for 5 minutes, then stir until completely smooth. Set aside until your cookies are completely cool. Note: If your ganache thickens too much while your cookies cool, just zap it in the microwave for 10 seconds to soften it up again.
- Scoop just under 1 teaspoon ganache into each thumbprint. Enjoy immediately, but let the ganache set up for at least an hour before stacking them on any cookie platters.
Video
Notes
Did you make this recipe? Please leave a review and rating to let me and others know how you liked it!


Comments
No Comments