
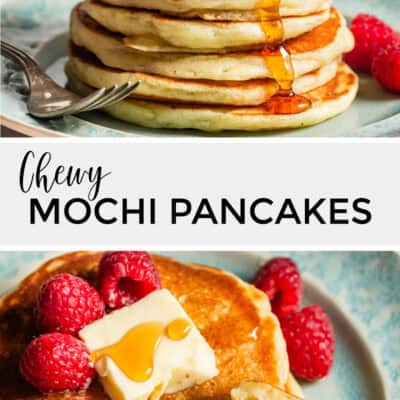
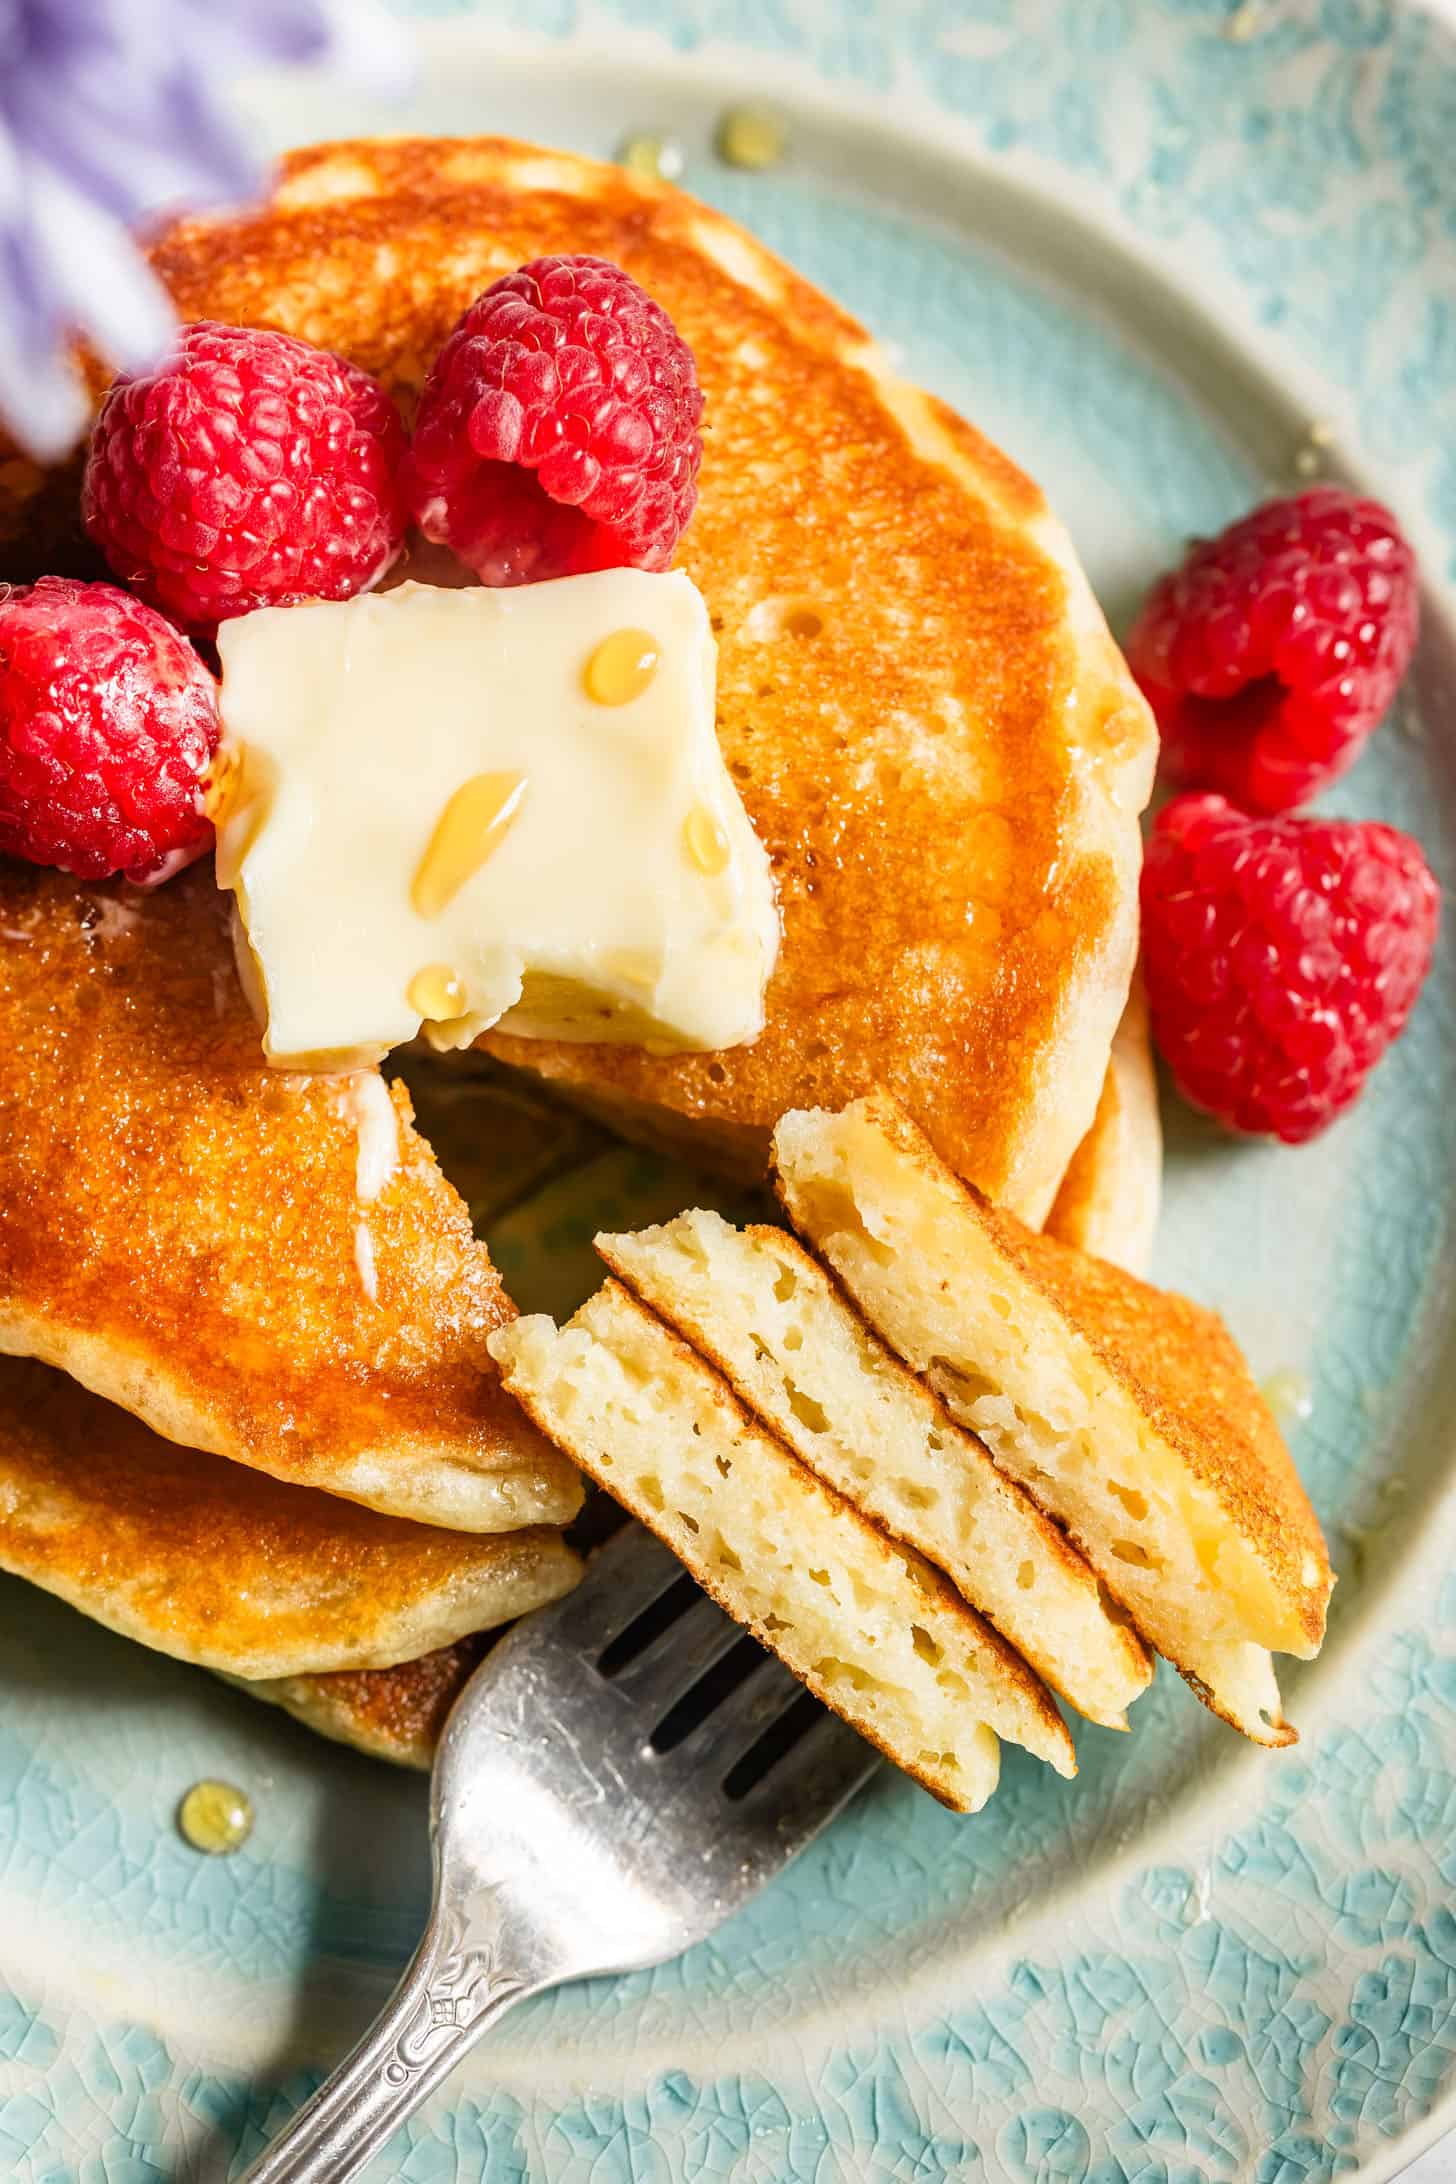
These ultra-chewy mochi pancakes are a mochi lover's dream: soft, stretchy, and laced with vanilla. They're a very easy, naturally gluten-free pancake, with a magical texture! You only need sweet rice flour for the batter and a few other classic pancake ingredients. The mochi pancakes are lightly sweetened, so you can top them with delicious extras, and the bouncy, chewy mochi texture is one you'll crave.
This post is sponsored by Andronico's Community Markets, a long-term partner of Snixy Kitchen, but the opinions are all my own.
I don't know when it happened exactly, but at some point, I became the mochi baker in my friend group. Probably because I lured them into friendship with this sweet, chewy, sticky mochi cake. I mean, when you hand someone mochi (of any form) they can't help but swoon and smile. It just hits that perfect chewy-sweet comfort zone, every time.
So, if you really want to show Mom you love her this Mother's Day, you'll serve up a stack of these ultra-chewy mochi pancakes.
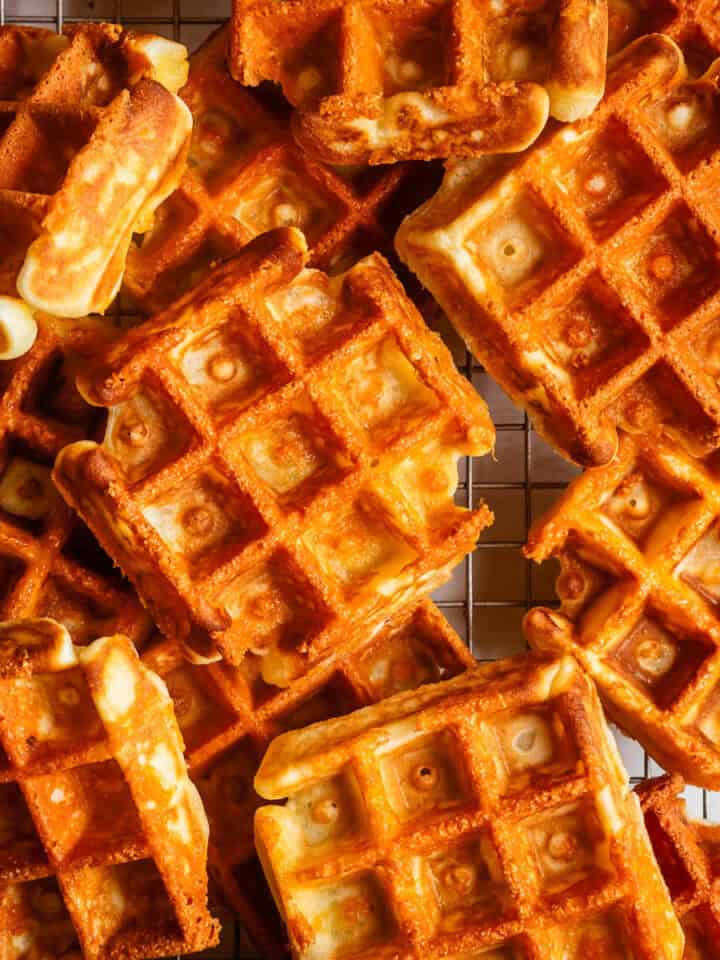
I make my savory cheesy mochi waffles regularly, but also longed for a sweet mochi breakfast option. I started with that waffle recipe as a base, but used buttermilk to thicken the pancake batter and give them a richer, more complex flavor. These mochi pancakes are incredible - soft, stretchy, bouncy, and lightly sweetened.
Reasons I'm Smiling for Mochi Pancakes
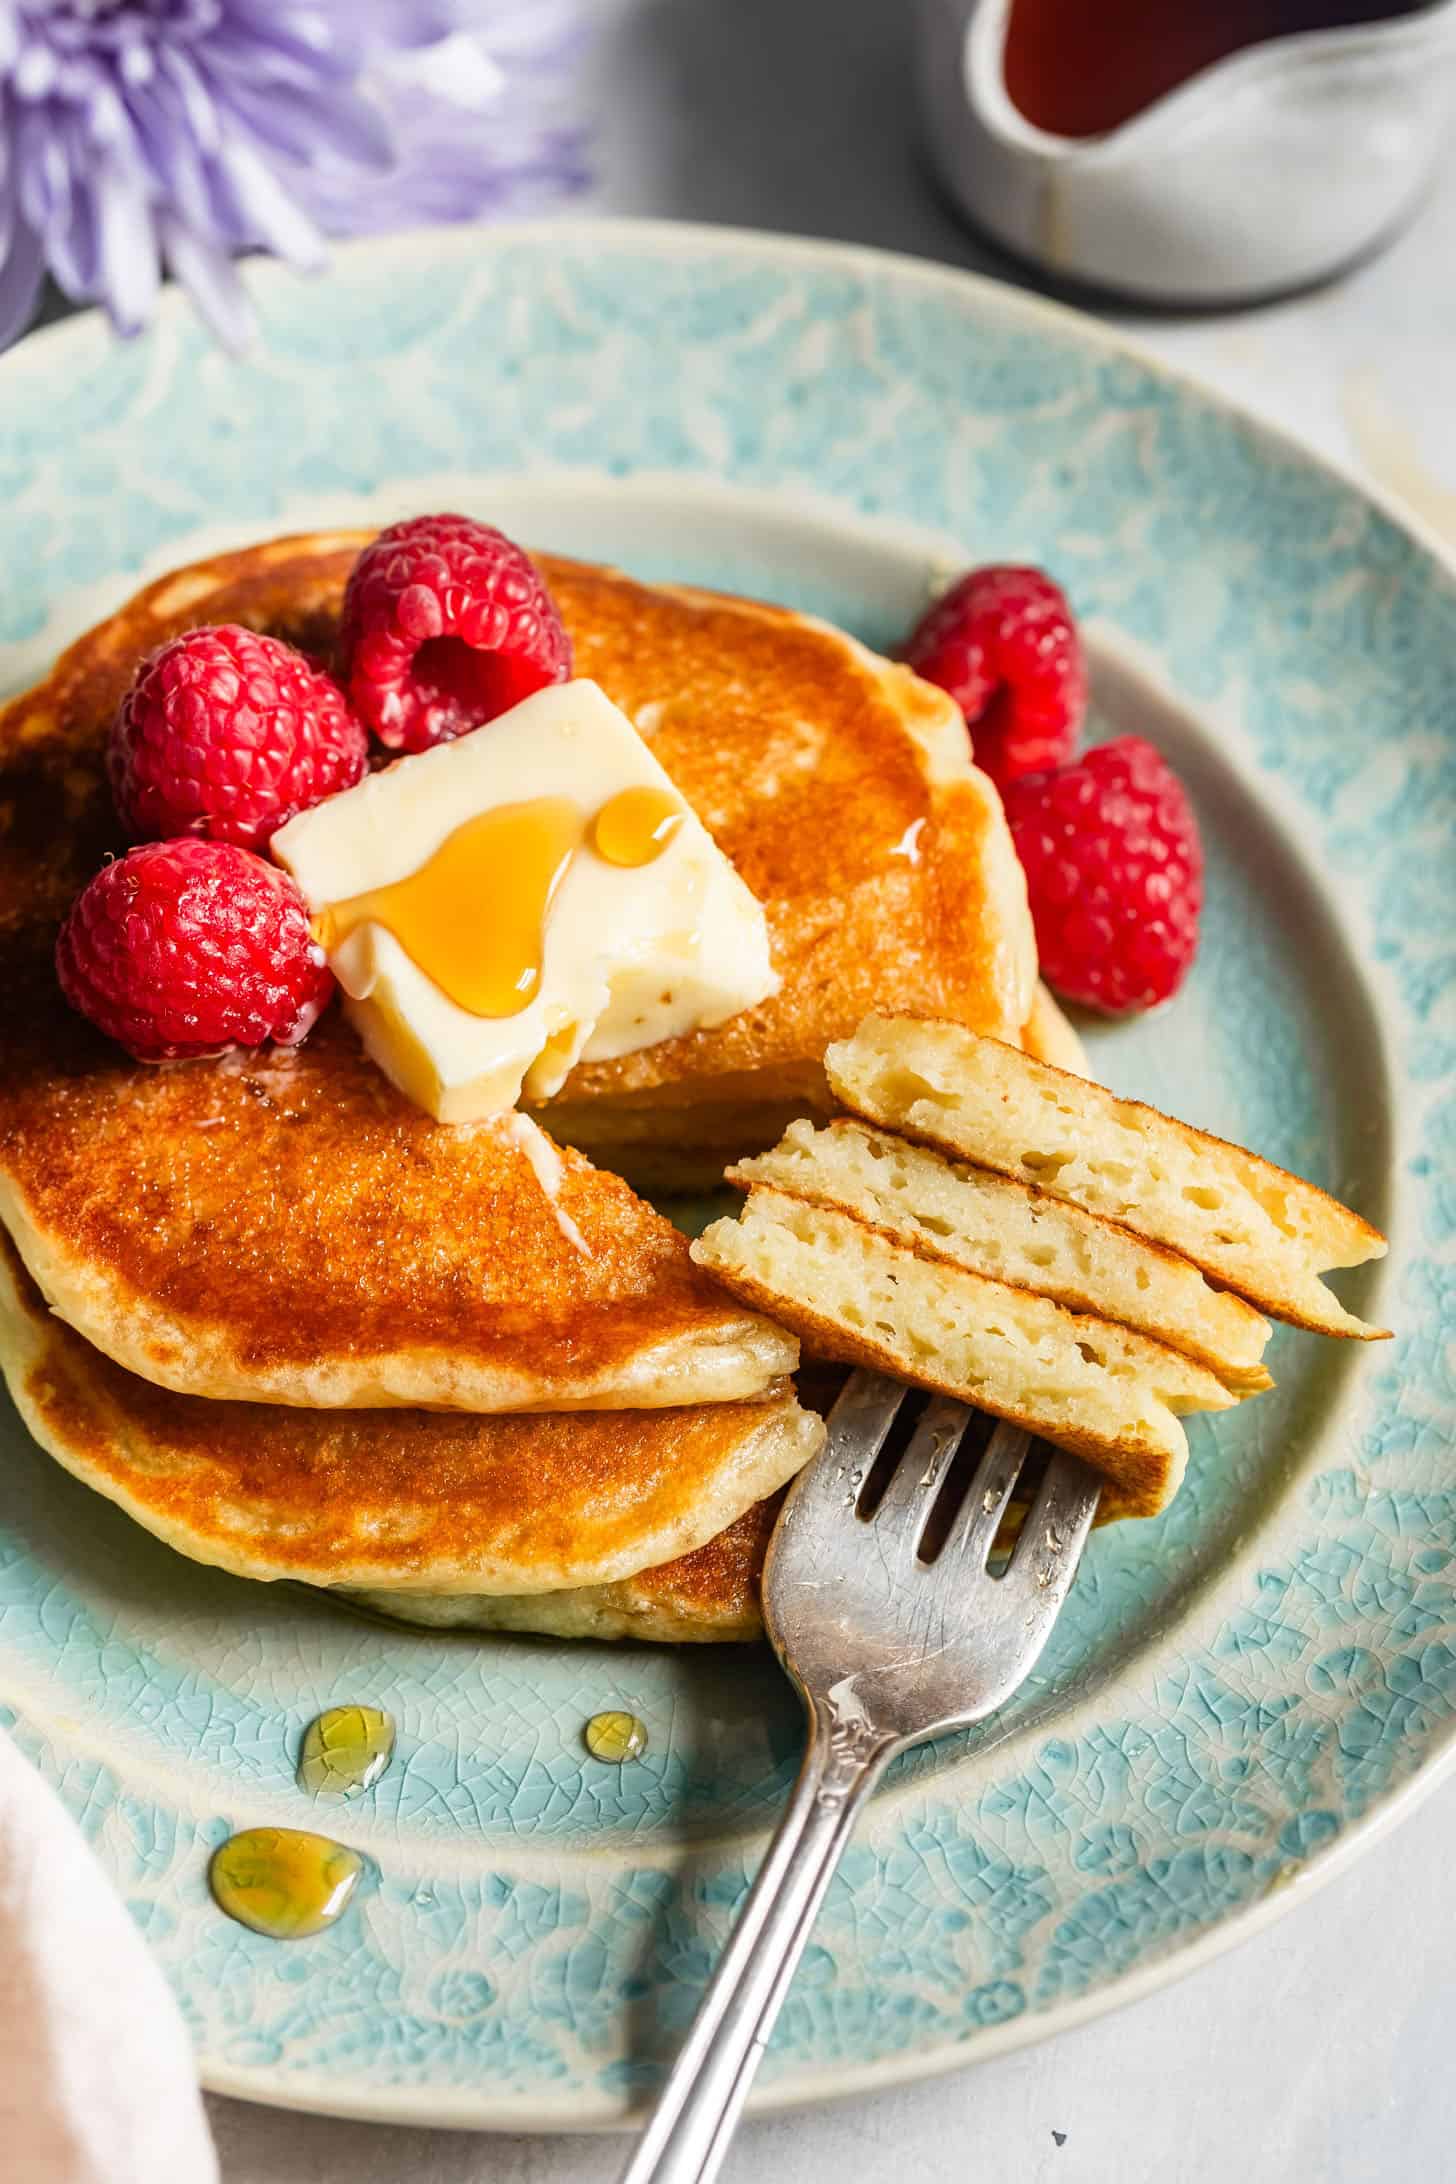
- That chewy texture, tho: These mochi pancakes have a satisfying ultra-chewy texture that's all at once soft, tender, and oh-so strechy (but never dense or gummy!).
- Naturally gluten-free with just one flour: I developed this recipe to use one single flour, unlike many gluten-free pancake recipes. The great thing about mochi is that it's naturally gluten-free! You'll use just mochiko (sweet rice flour), so that you can make them at the drop of a hat without any complicated ingredients.
- Lightly sweet and flavorful: I like my pancakes just lightly sweetened so you can add toppings and maple syrup to suit your preference. Even so, they're so flavorful thanks to the vanilla and buttermilk, making them delicious enough to eat right off the pan without any toppings.
No All-Purpose Flour
Most recipes online for mochi pancakes use a combo of all-purpose flour and mochiko, but when I tested these pancakes with ap gf flour + mochiko, the pancakes were mostly fluffy with only a very slight chew. A great classic pancake, but decidedly not mochi. In fact, that's basically what's going on with my fluffy oat flour gluten-free pancakes made with mochiko - LOVE THESE, but again: not mochi.
For mochi pancakes, I want that ultimate classic chewy mochi texture - the kind that stretches and pulls and puts a smile on your face. The all-mochiko version is exactly that! Plus, this makes them naturally gluten-free! Win-win.
What is Mochiko and Where to get it (Hint: Andronico's)
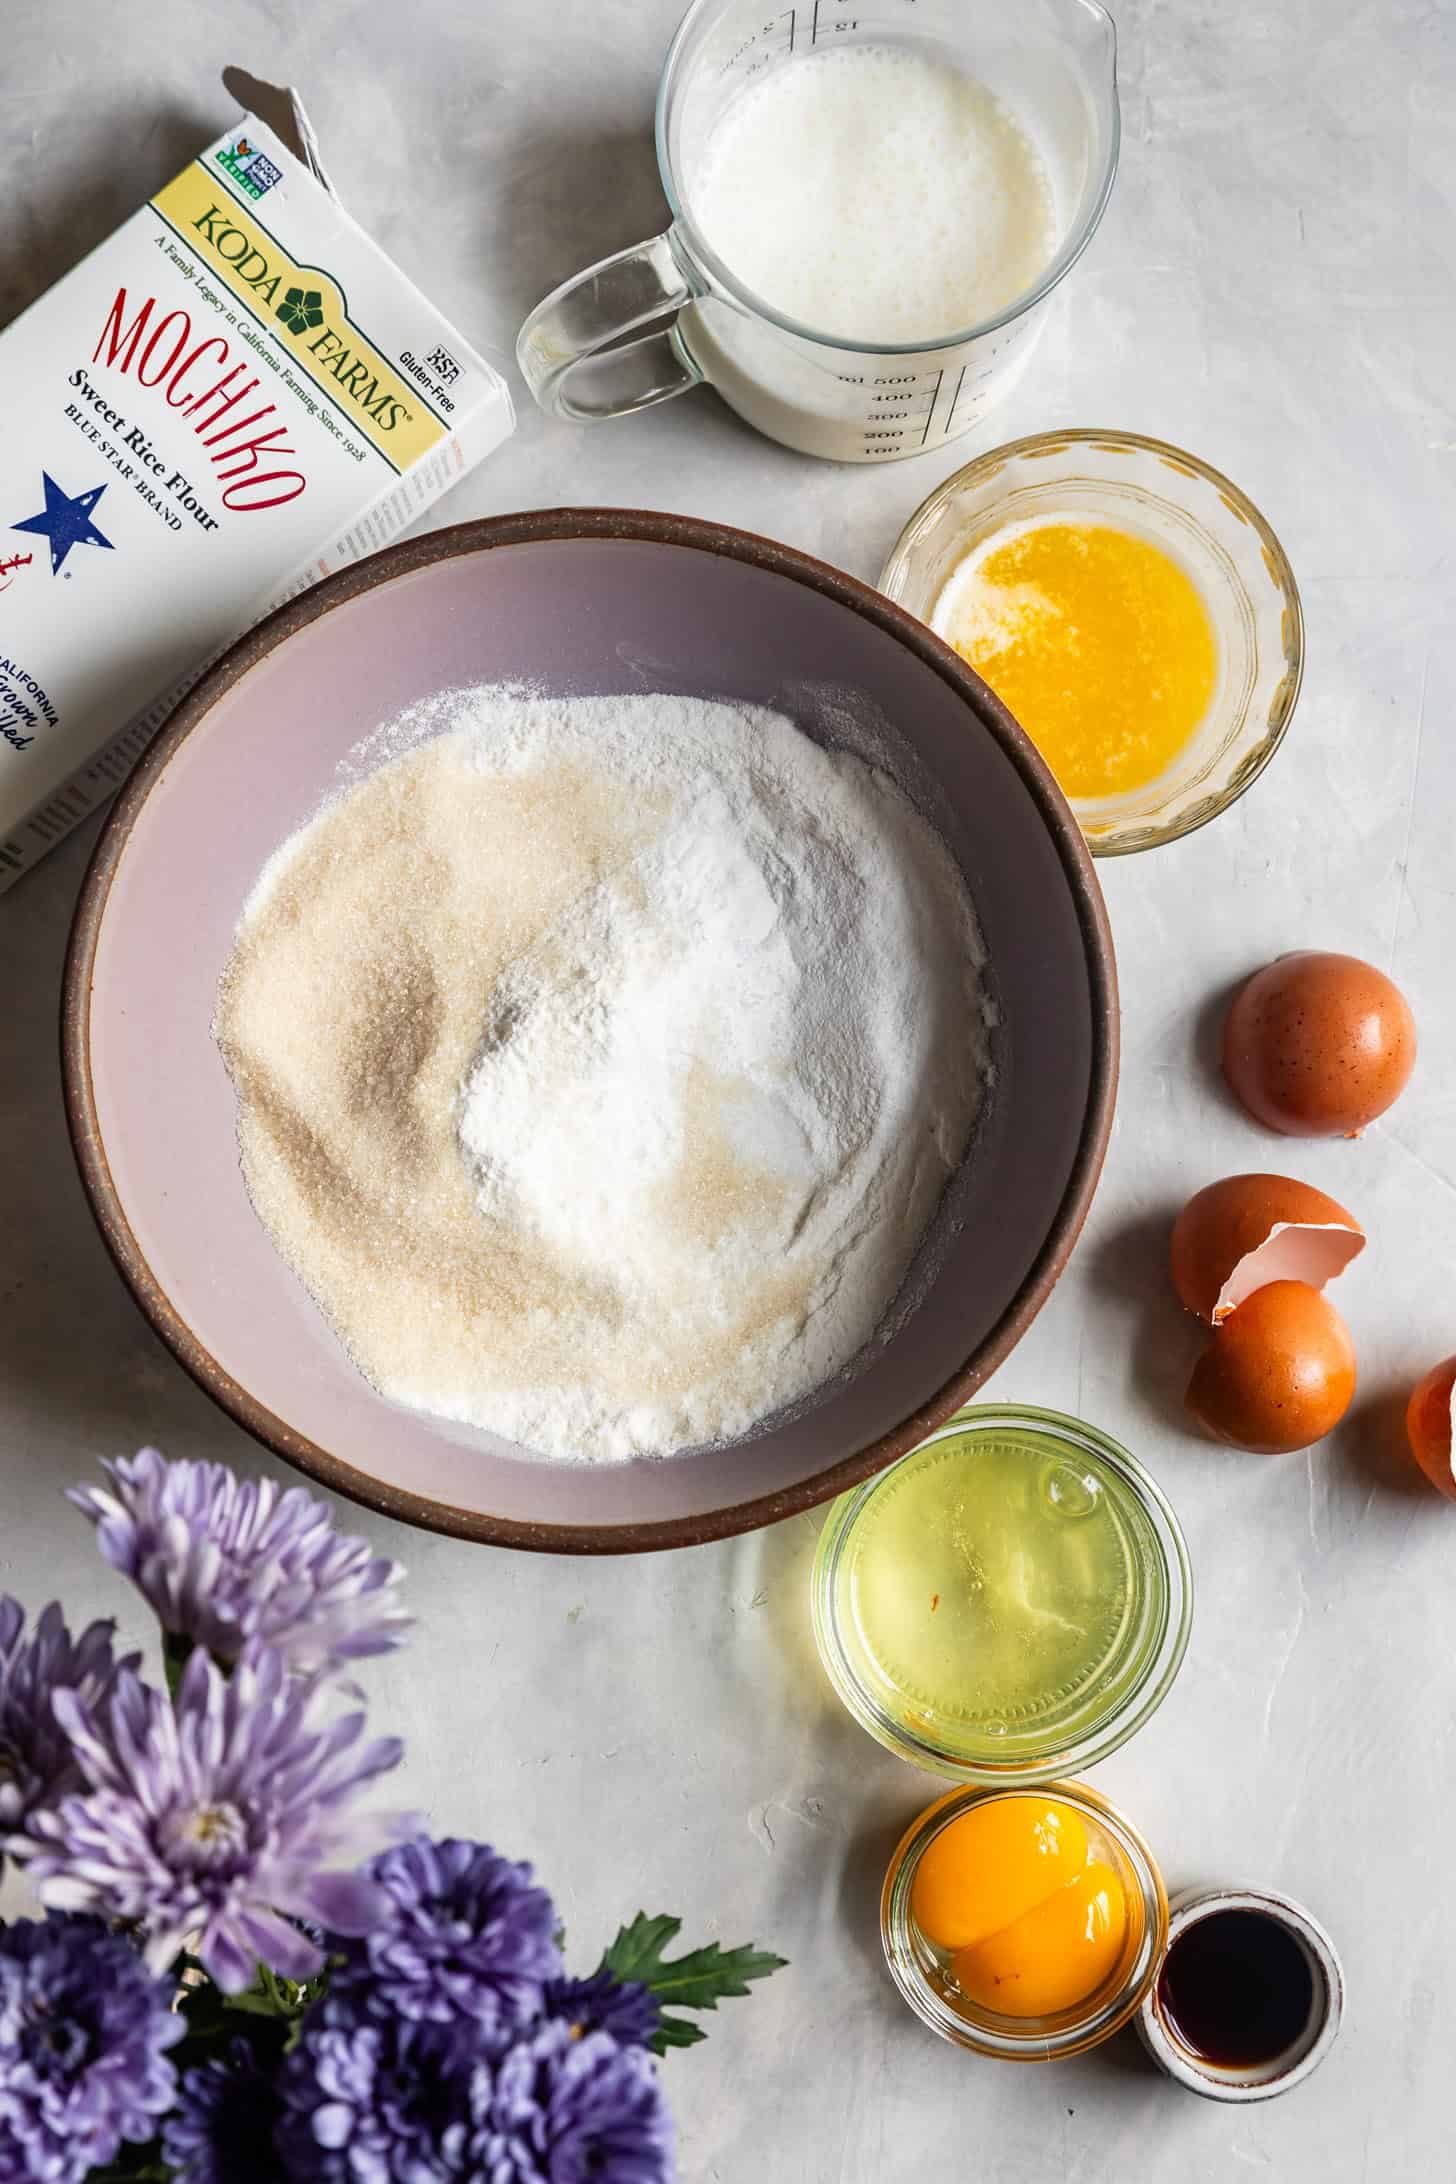
Also called sweet rice flour or glutinous rice flour, mochiko is the flour used to make mochi. Made from sticky rice, it's what creates the stretchy chewy texture of mochi. Because of that, it's also a gluten-free baking powerhouse, so if you're like me, mochiko is a pantry staple. For making mochi, I prefer Koda Farms mochiko, which I find at my local Bay Area Andronico's Community Market. Look in the International or Asian Foods aisle!
While you're there, I recommend stocking up on mochiko, because you'll want to make these pancakes again and again. Aaaannd, you might as well also grab what you need for chocolate mochi donuts and this crowd-pleasing matcha mochi cake.

Behind the Chew: What's in the Mix
- Mochiko: This recipe uses just one flour, mochiko - the very same one to make this butter mochi cake! Look for Koda Farms Mochiko (pictured above).
- Melted butter: This gives the pancakes the classic butter mochi flavor.
- Buttermilk: I tested the recipe using buttermilk versus a milk + vinegar sub. While the texture is indistinguishable, the flavor of the buttermilk was noticeably richer and more complex. If you don't have buttermilk handy, don't let that stop you: the milk + vinegar will still create a delicious pancake!
- Egg: Room temperature, with the yolk and white divided. Folding in the egg whites last helps gently lighten the batter without overmixing, keeping the pancakes tender and perfectly chewy rather than dense and gummy.
Crafting the Ultimate Mochi Stack
Here's how to create flavorful, soft, ultra-chewy gluten-free mochi pancakes cooked to golden brown perfection with just one flour!
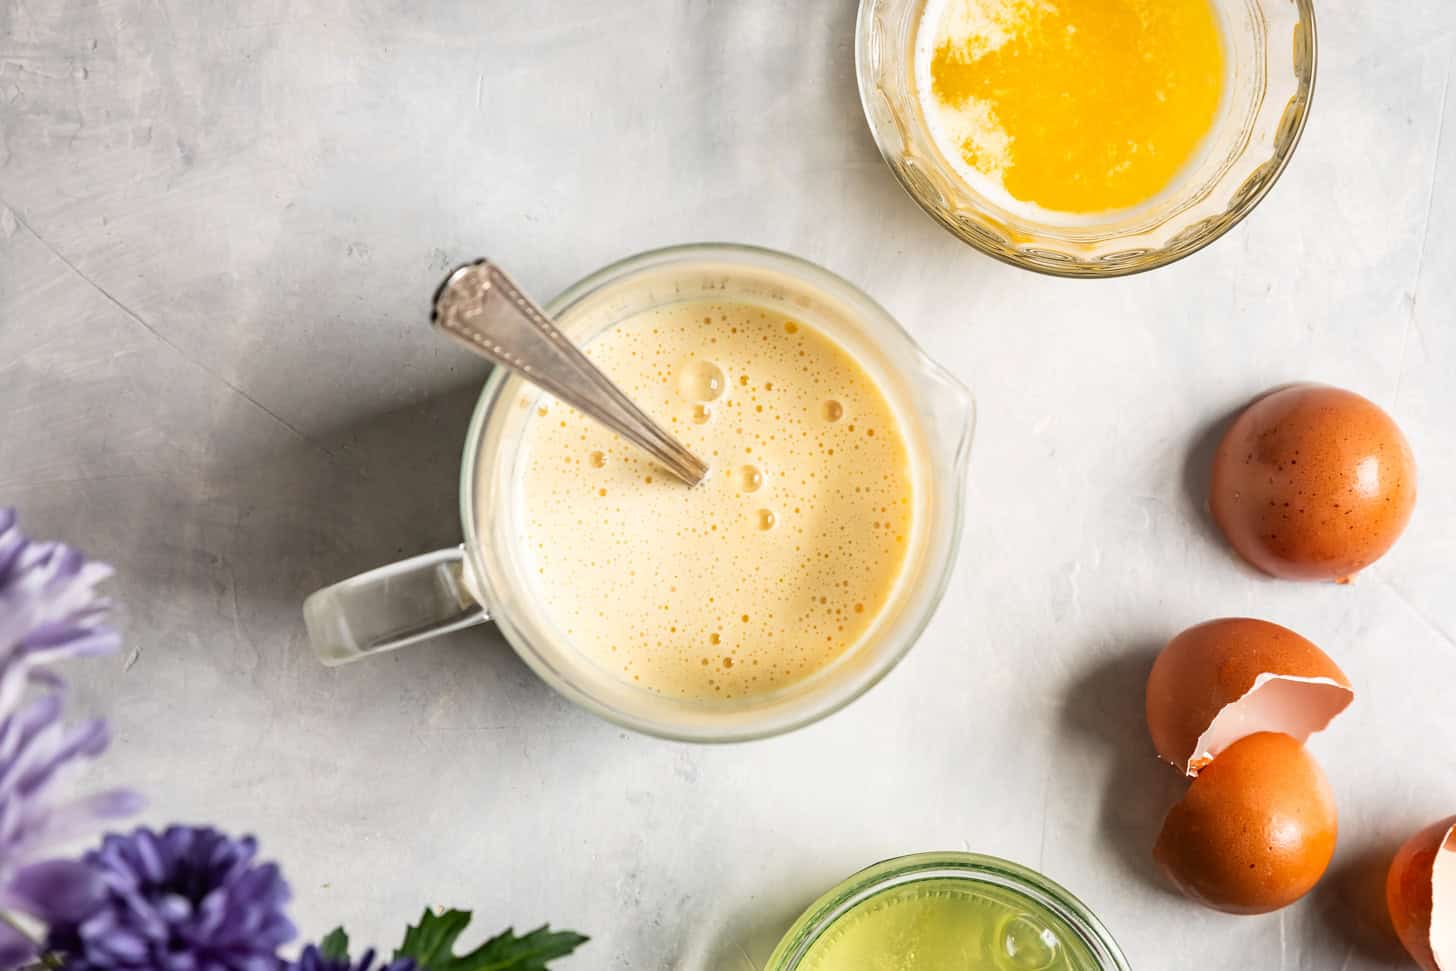
Whisk the buttermilk, egg yolks, and vanilla until well combined.
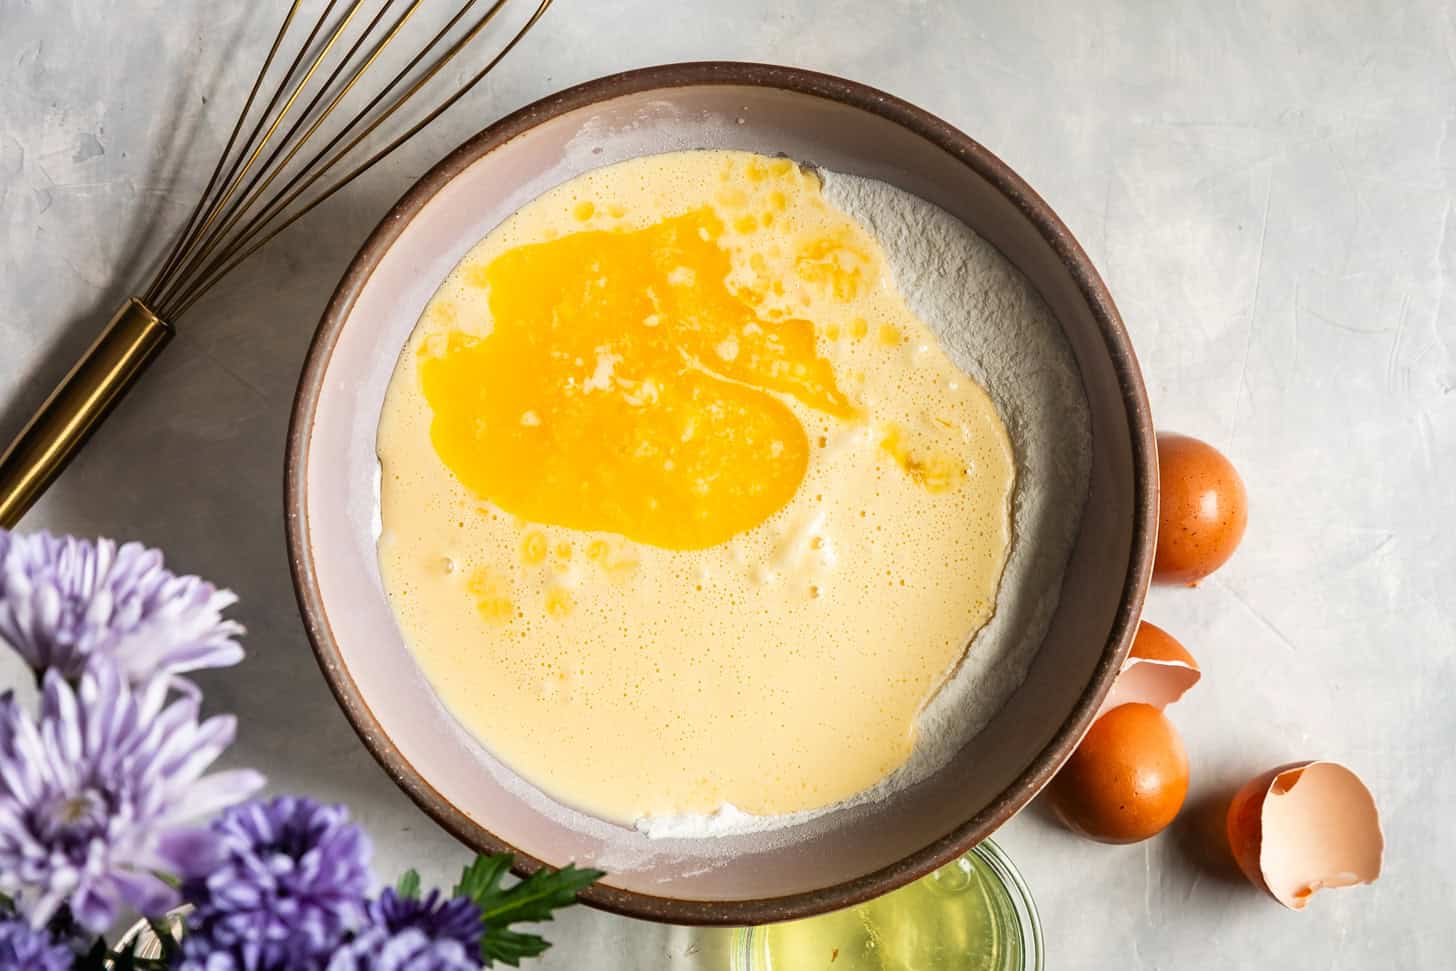
Whisk together the dry ingredients, then pour the buttermilk egg yolk mixture and melted into the bowl.
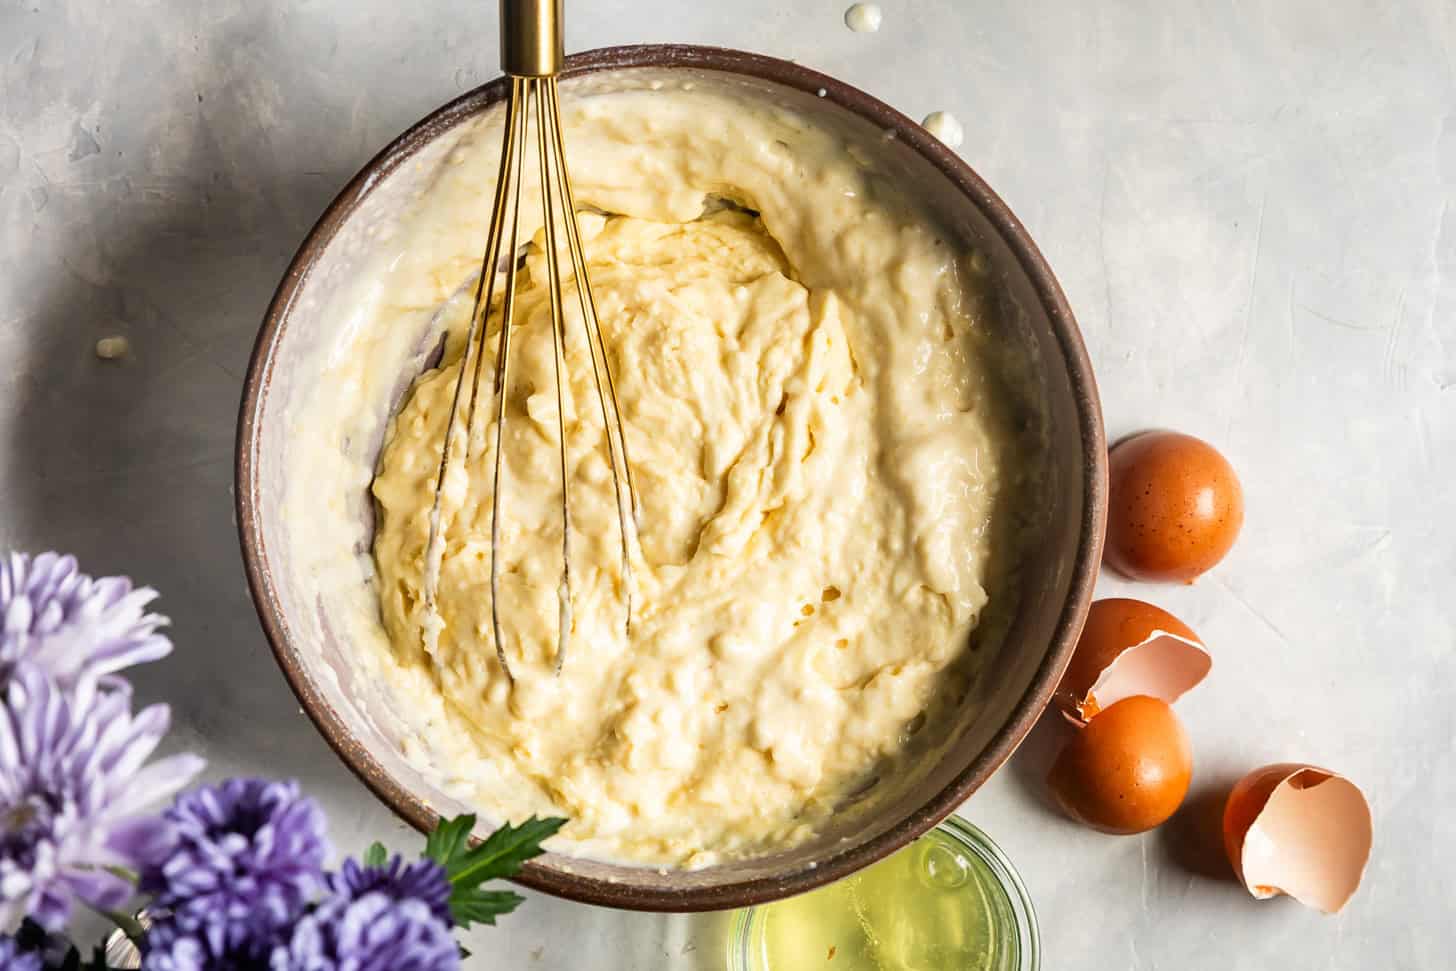
Whisk until almost combined, but with plenty of clumps remaining and even some dry streaks of flour.
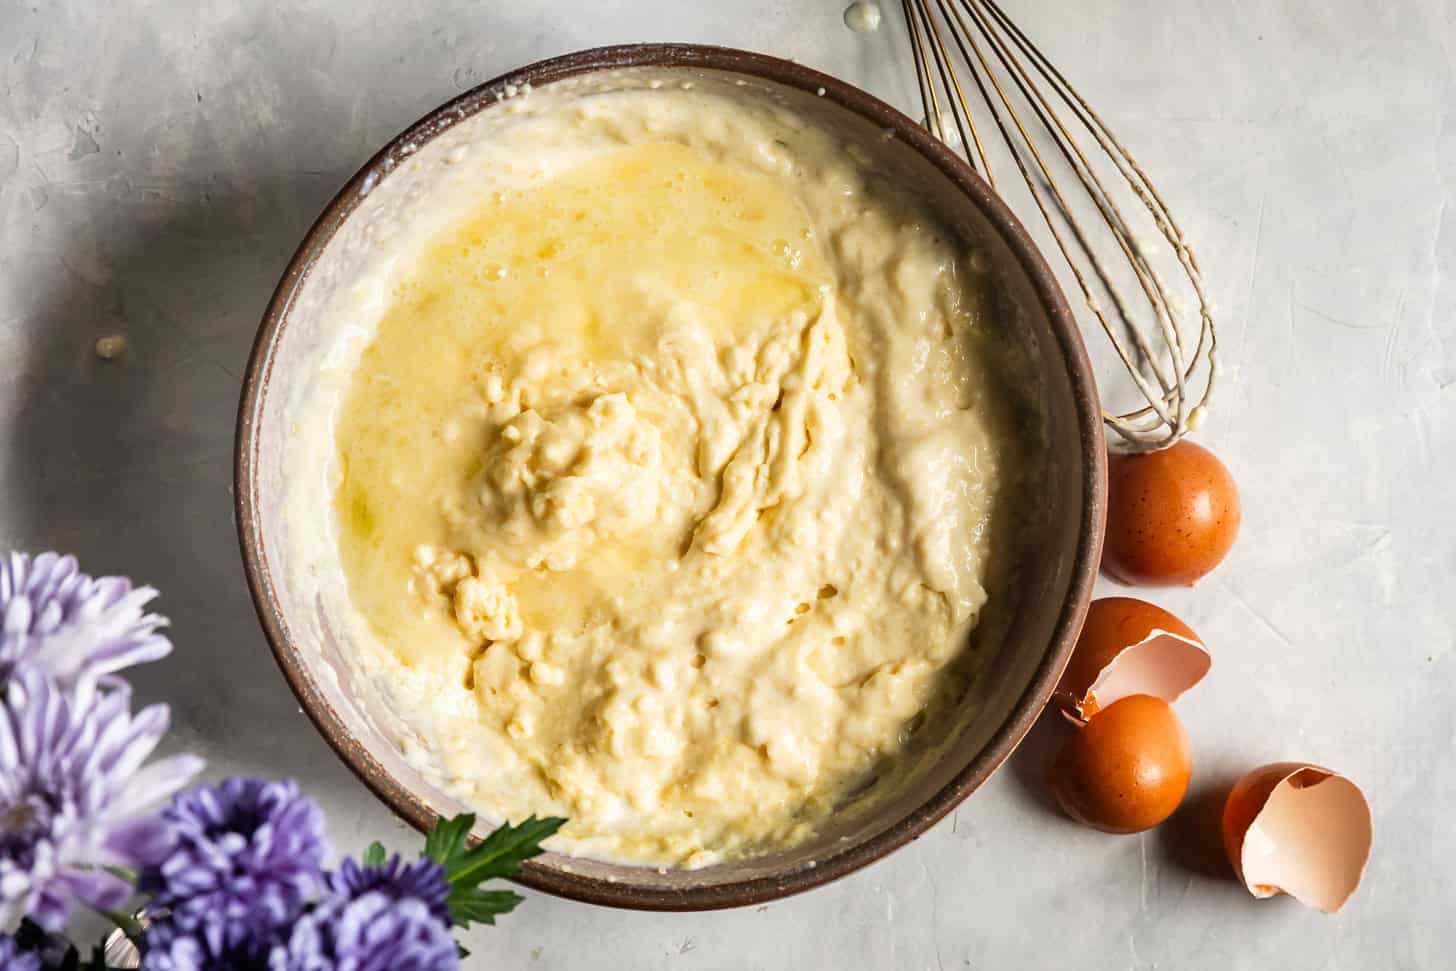
Give the egg whites a quick whisk with a fork then pour them into the batter.
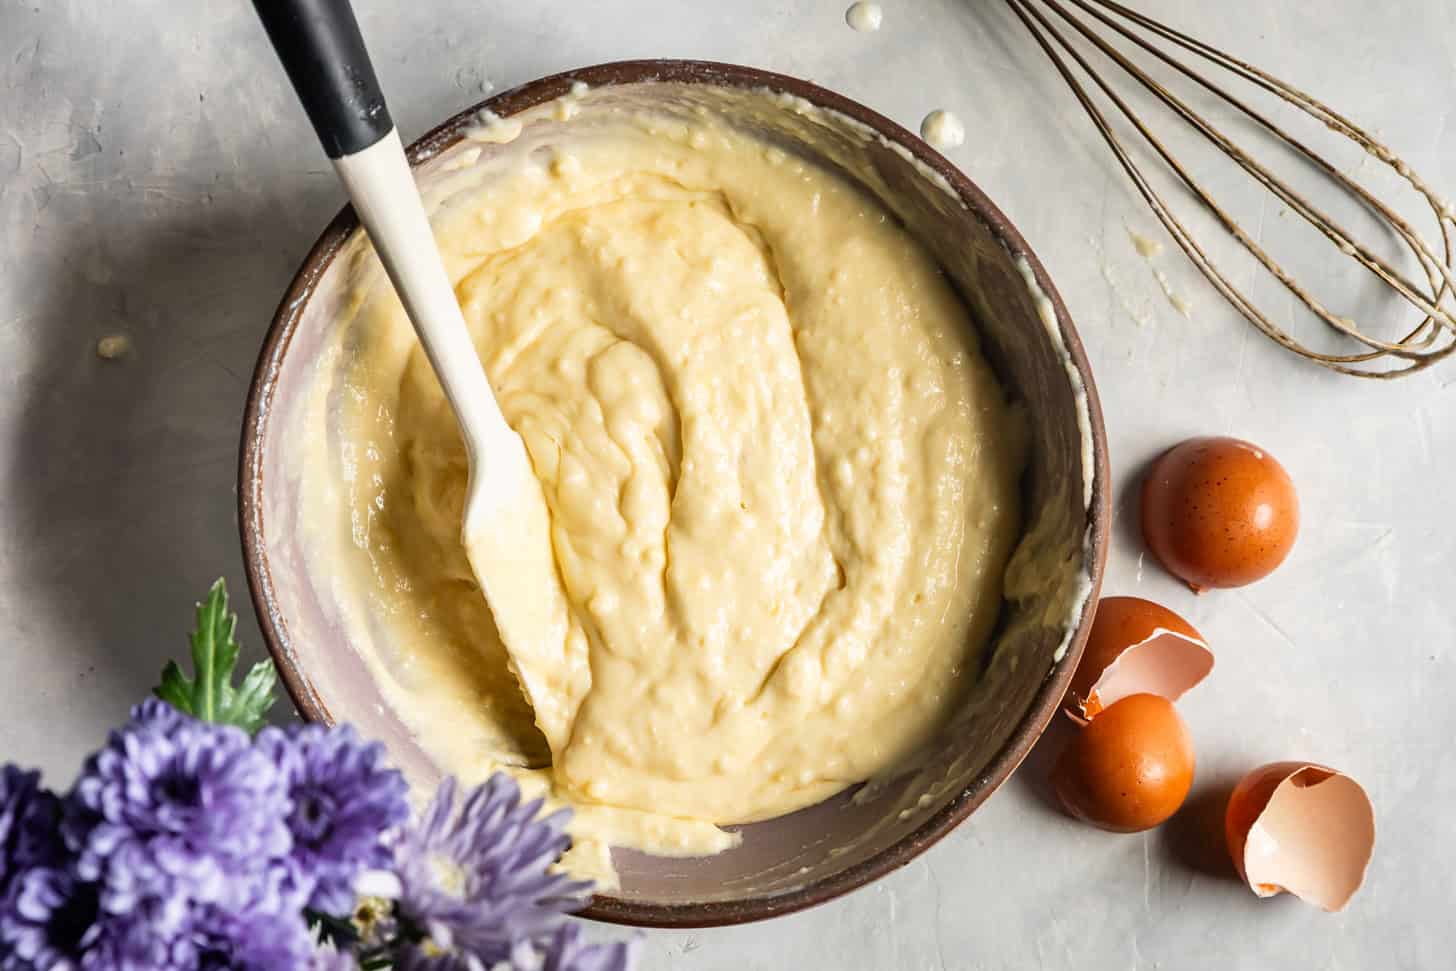
Gently fold the egg whites into the batter until just combined with no streaks of egg white remaining. There will still be clumps in the batter, but you shouldn't see any dry streaks of flour.
Note: Take care not to overmix the batter. Overmixing can make the texture dense and rubbery instead of soft and chewy, because sweet rice flour gets extra sticky when overworked.
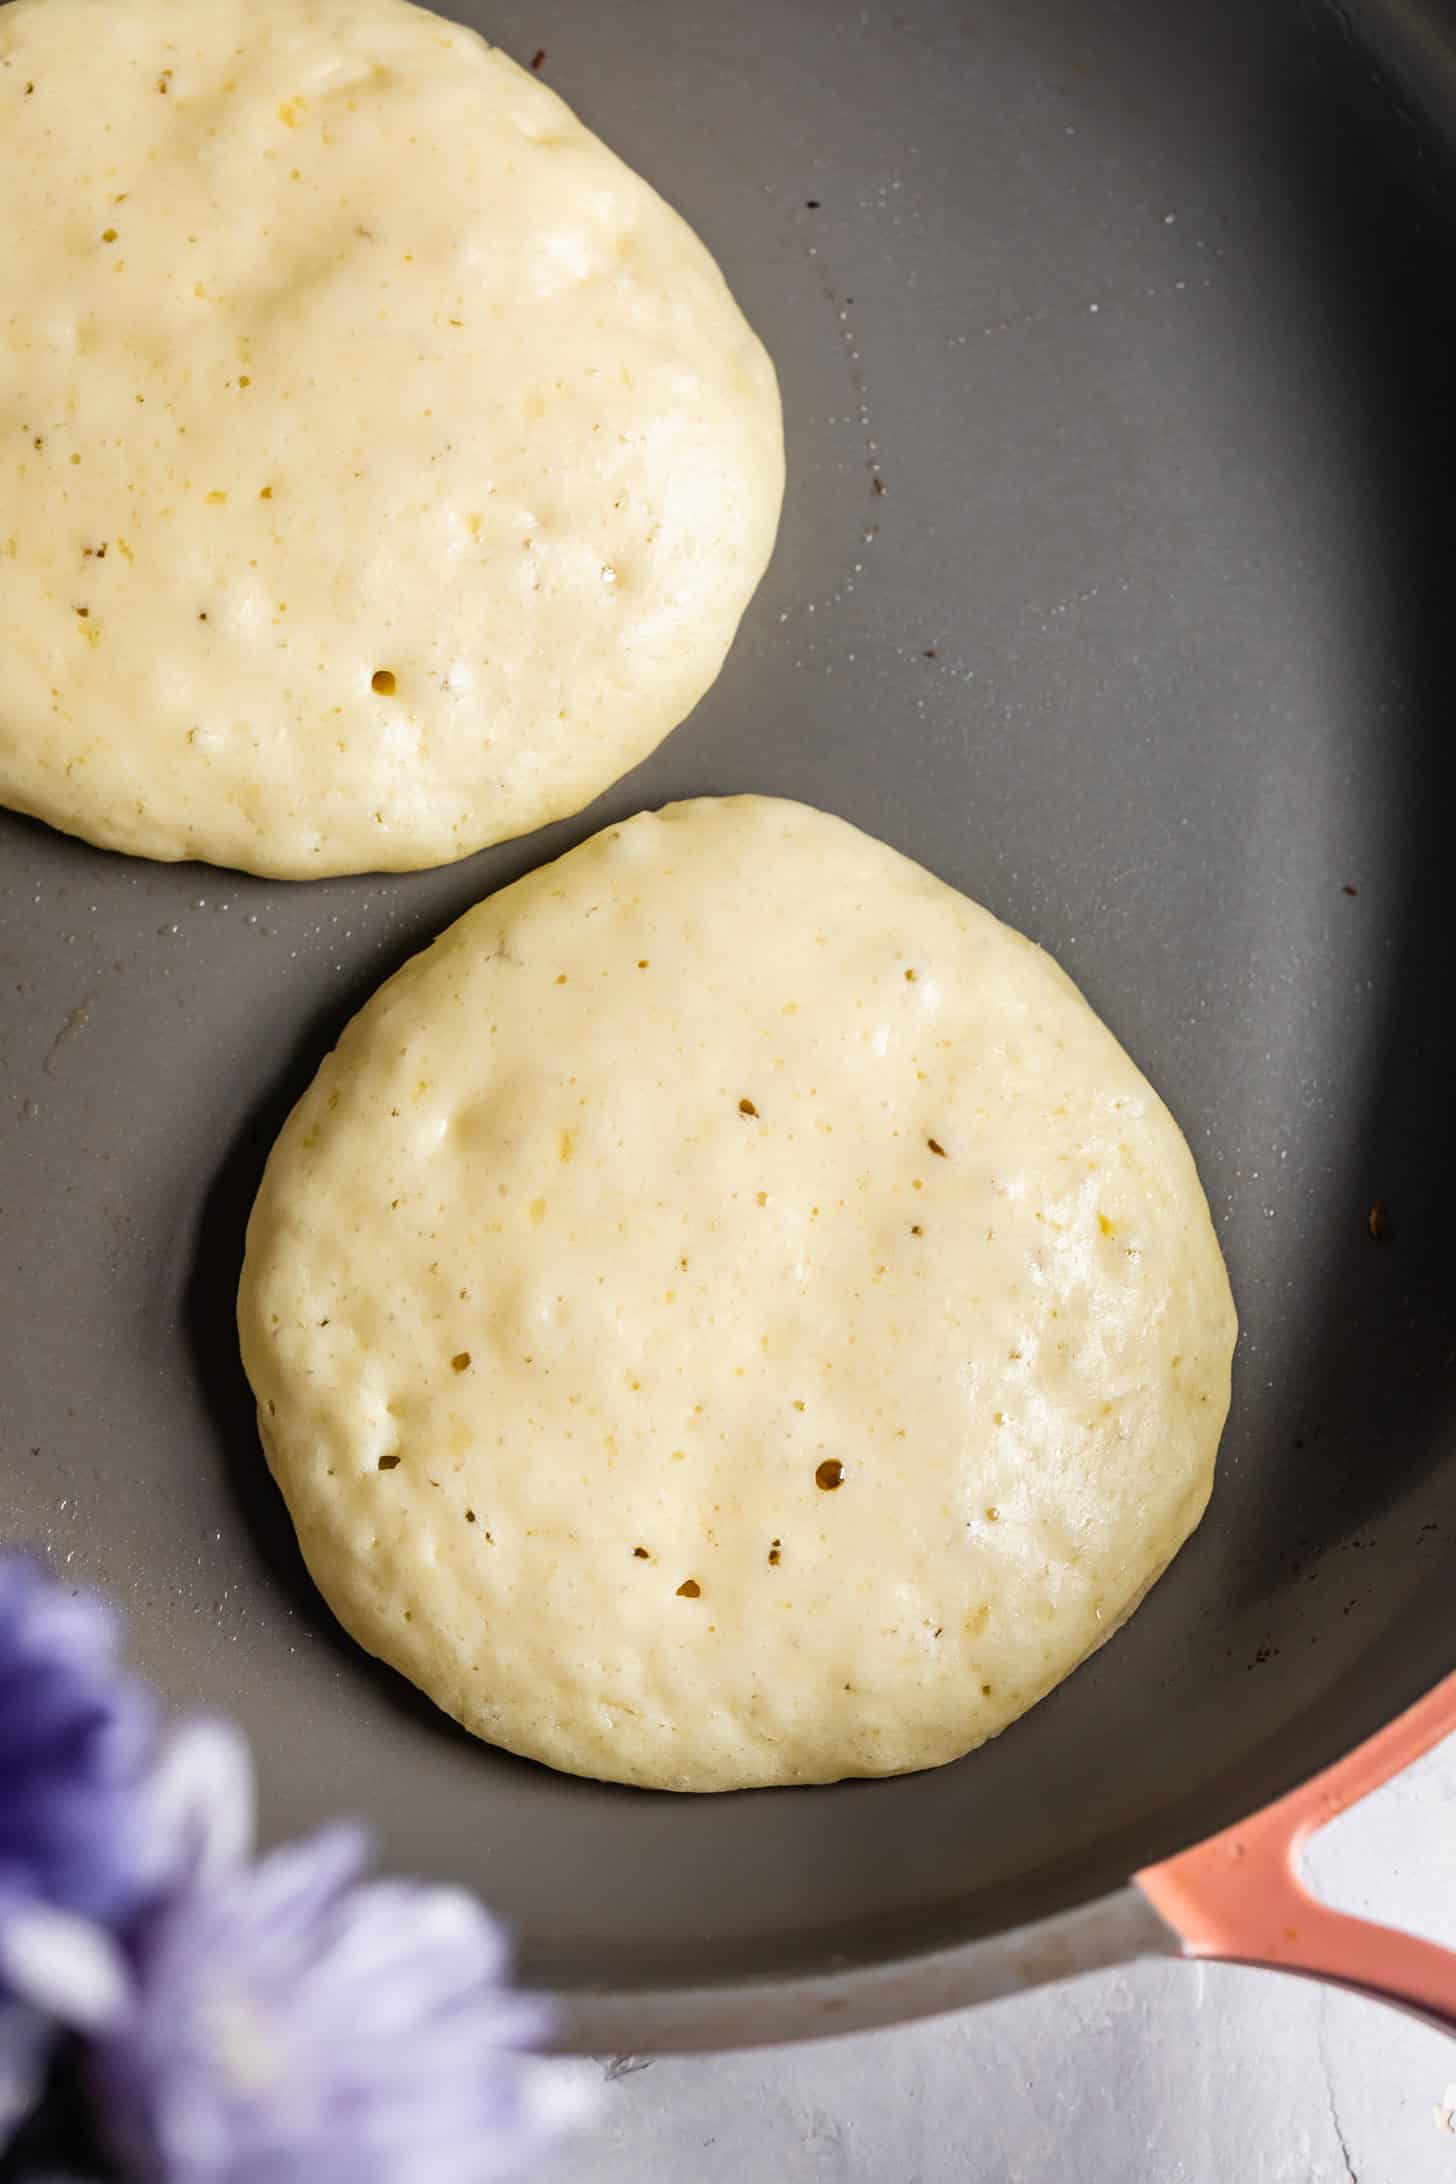
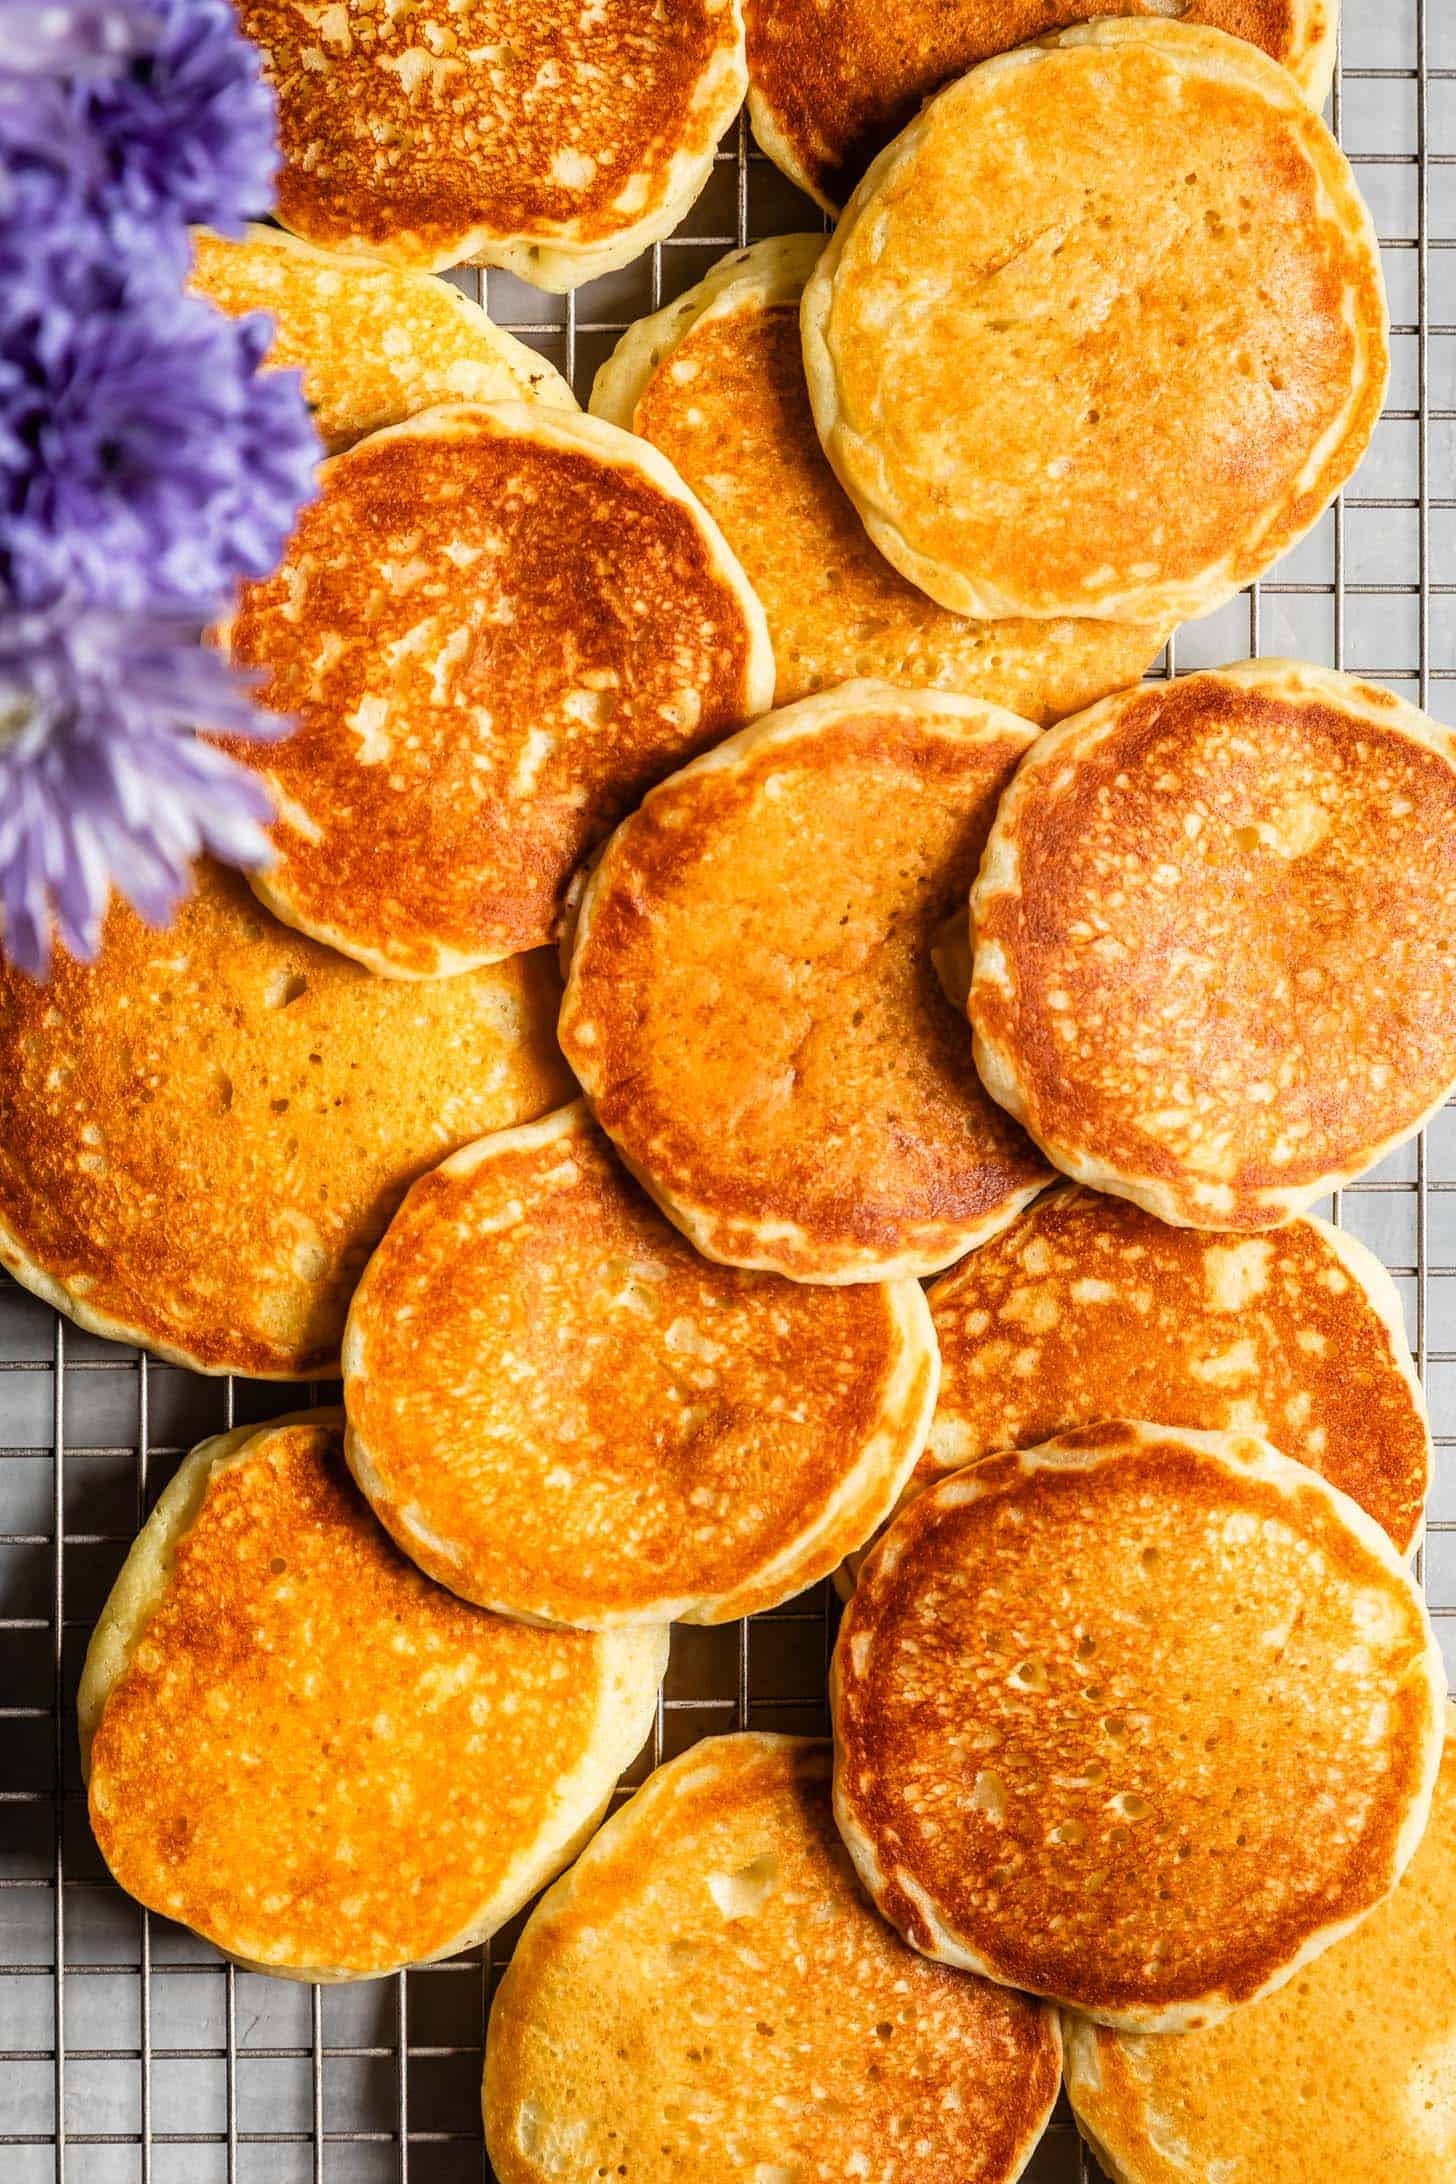
Scoop ¼ cup of batter onto a lightly greased preheated skillet or griddle and cook until bubbles appear on the surface. Flip and cook until the other side until golden brown. Repeat.
Tip: I recommend having multiple pans going to make pancake flipping go quicker!
Dressing up your Mochi Pancakes
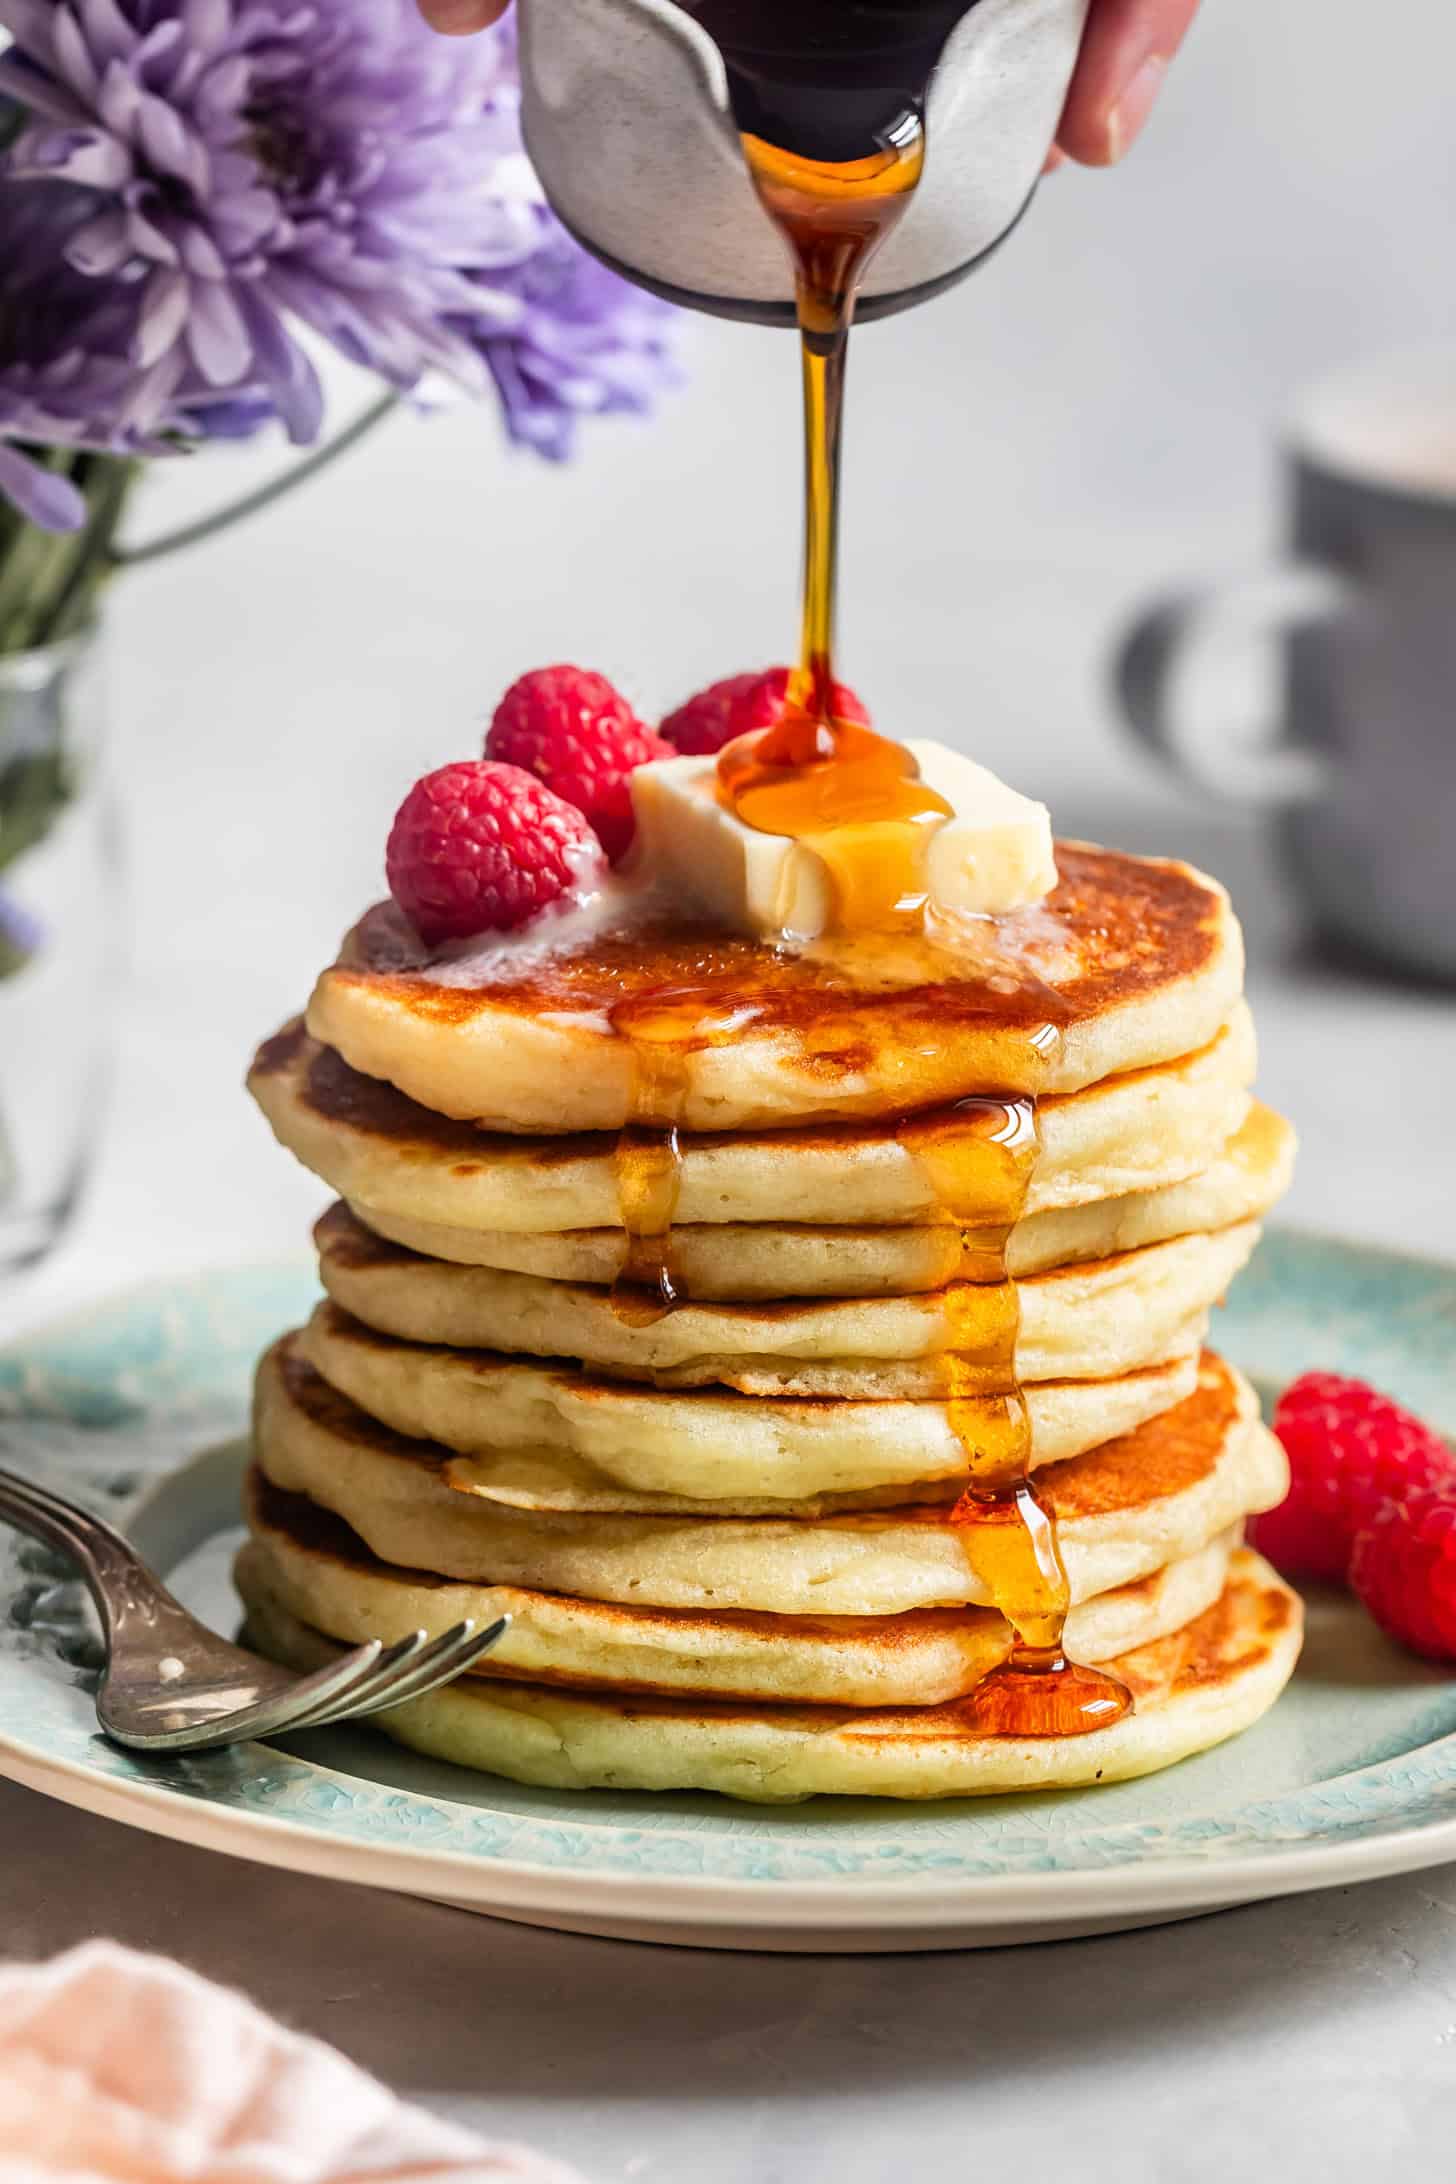
These mochi pancakes are delicious enough to eat straight from the pan without any fanfare, but you can also serve them like classic pancakes in a stack. Top with a pat of butter, a drizzle of maple syrup, a dollop of whipped cream, fresh berries, or a dusting of powdered sugar.
Create a DIY pancake brunch bar with all the toppings, or deliver a breakfast-in-bed flapjack tower to Mom (with a vase of flowers!).
Recipe

Easy, Chewy Mochi Pancakes
Ingredients
- 320 g (2 cups) Mochiko Sweet Rice Flour, Koda Farms Brand
- 50 g (¼ cup) granulated sugar
- 2 teaspoons baking powder
- ½ teaspoon baking soda
- ½ teaspoon kosher salt
- 2 cups (454 g) buttermilk, *
- 2 teaspoons pure vanilla extract
- 2 large eggs, room temperature and divided
- ¼ cup (2 ounces) unsalted butter, melted, plus more for the pan, as needed
INSTRUCTIONS
- In the measuring cup, whisk the buttermilk, egg yolks, and vanilla until well combined.
- In a medium mixing bowl, whisk together the mochiko, sugar, baking powder, baking soda, and salt. Whisk in the buttermilk-egg yolk mixture and melted butter until almost combined, but with some dry streaks and plenty of clumps remaining.
- Give the egg whites a quick whisk with a fork then gently fold them into the batter until just combined with no streaks of egg white remaining. There will still be clumps in the batter, but you shouldn't see any dry streaks. Take care not to overmix the batter - overworking can make the texture dense and rubbery instead of soft and chewy.
- Preheat a non-stick skillet or griddle on low or medium-low heat (adjust the heat for the size of your burner: I use my large burner on low and my small burner on medium-low). Brush with a very thin layer of melted butter.
- Scoop ¼ cup of batter onto preheated pan (tip: use a trigger ice cream scoop!) and cook until bubbles appear on the surface and the bottom is golden brown, 2-3 minutes. Flip and cook until the other side until golden brown, 2-3 minutes. I recommend having multiple pans going to make pancake flipping go quicker! Repeat with remaining batter. To keep pancakes warm while you repeat with remaining batter, put cooked pancakes on a wire rack placed over a baking sheet in the oven on the lowest heat.
Video
Notes
Did you make this recipe? Please leave a review and rating to let me and others know how you liked it!

Jennifer C -
I just got back from Hawaii and loved the mochi pancakes! As soon as I got home I found this recipe, ordered the flour and finally got to making them. Subbed for the buttermilk because I never have that on hand and I used applesauce instead of eggs. Besides having to add a little extra liquid, these are AMAZING! The immediately brought me back to my Hawaiian breakfasts! Thank you!!!!