

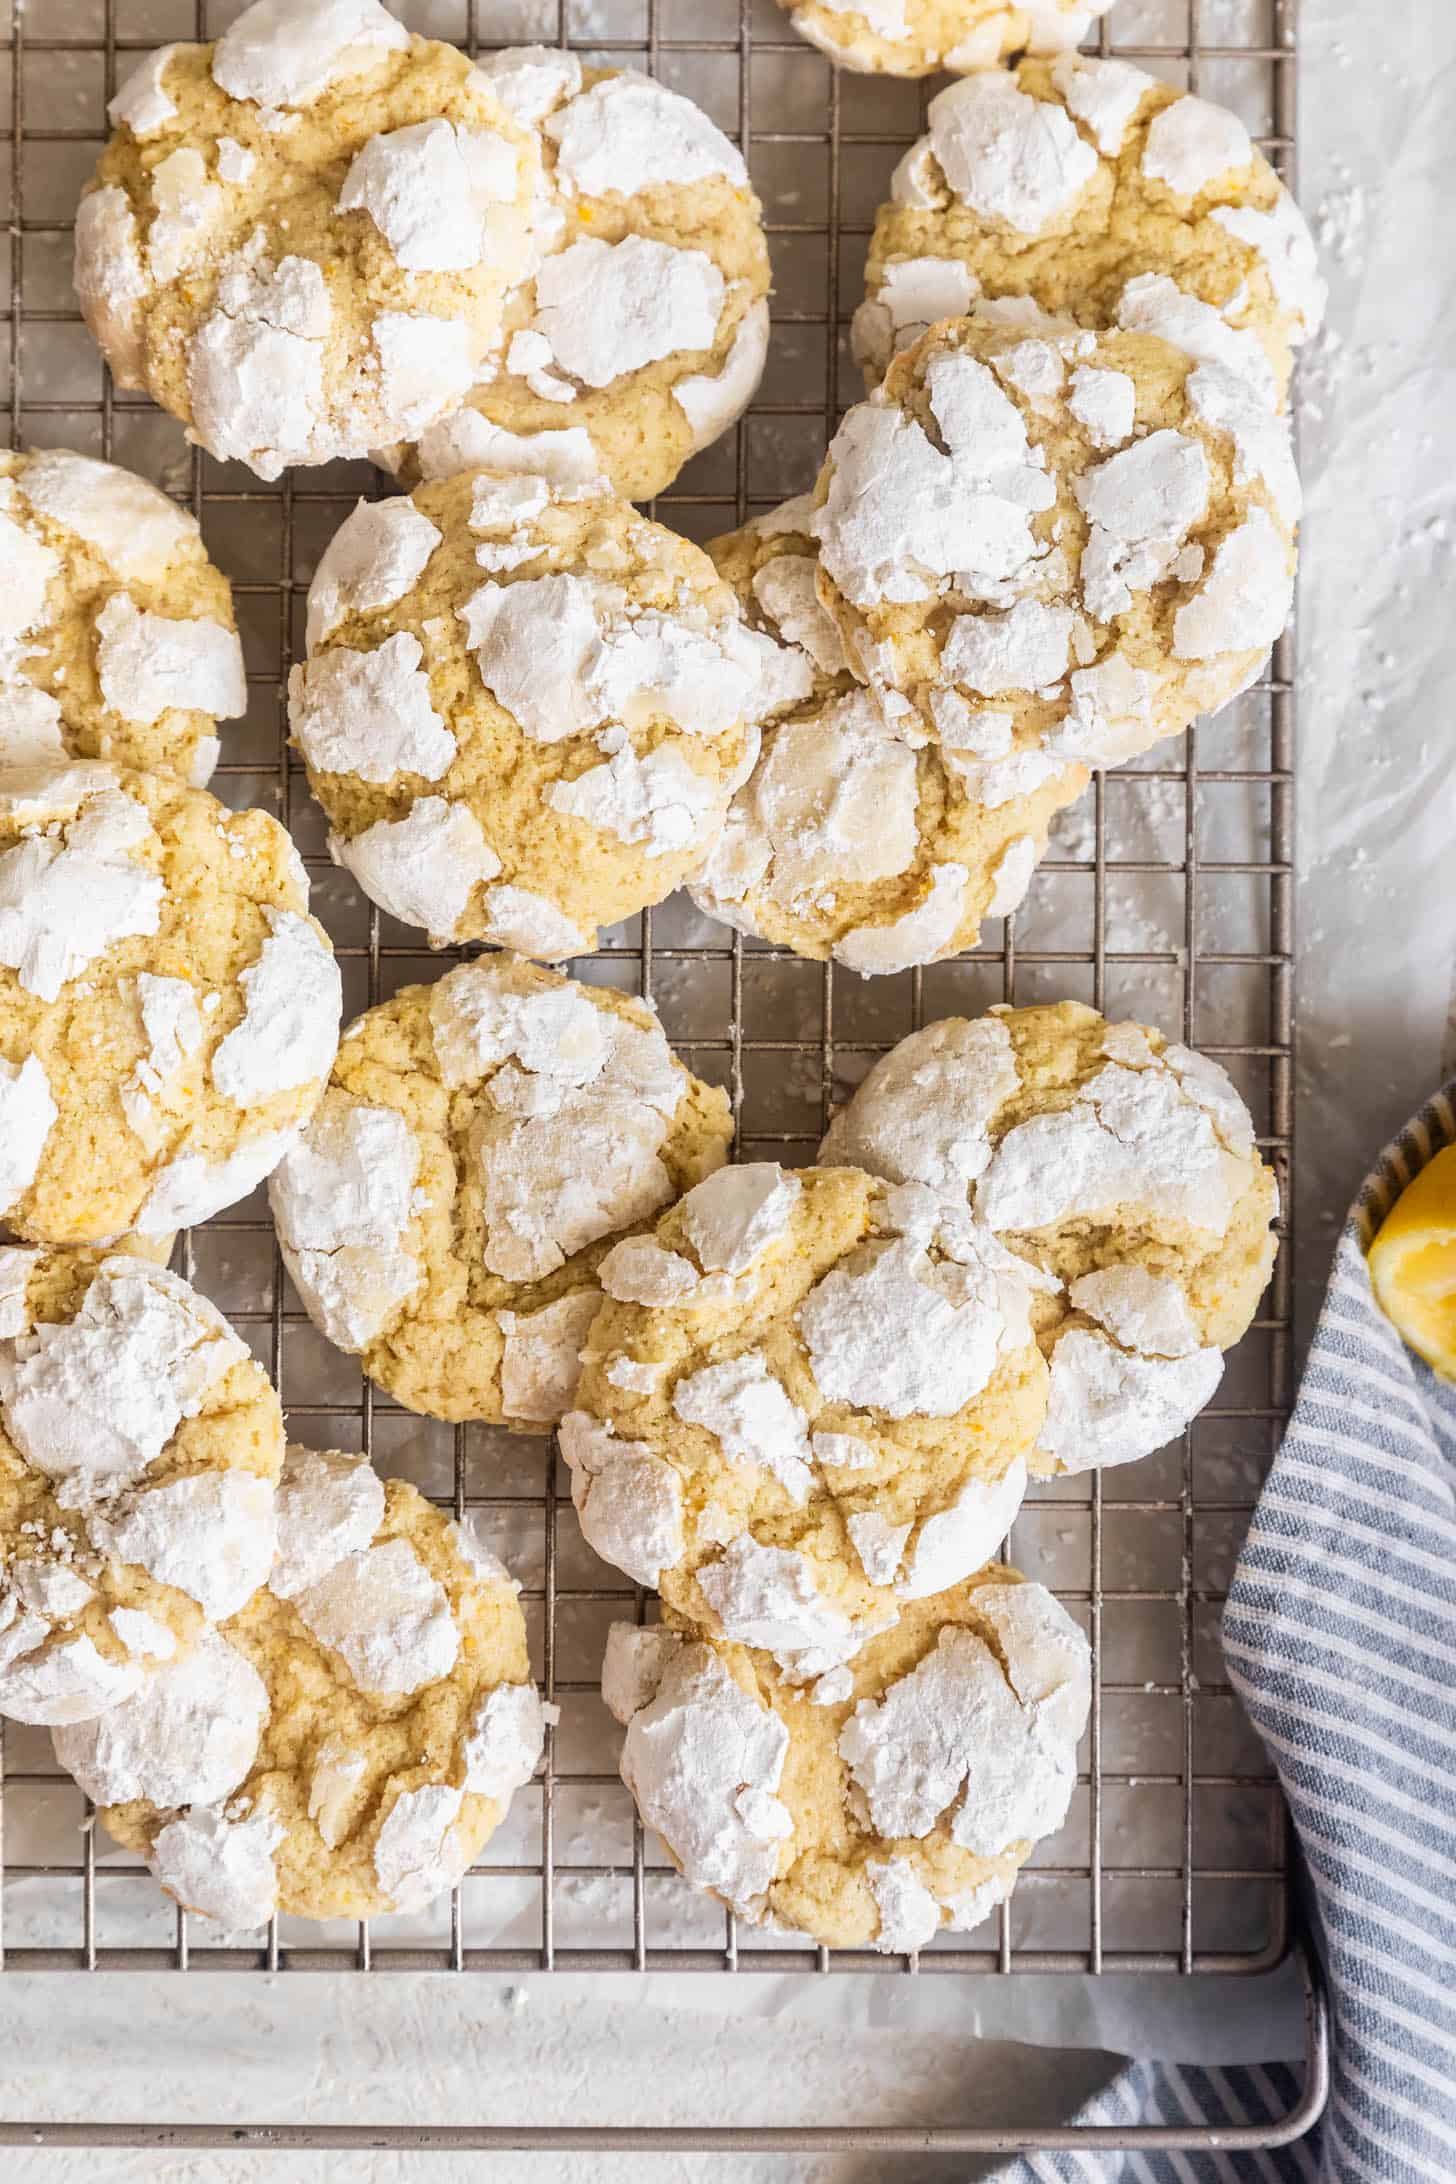
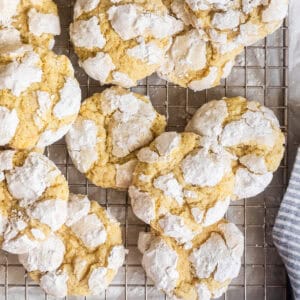
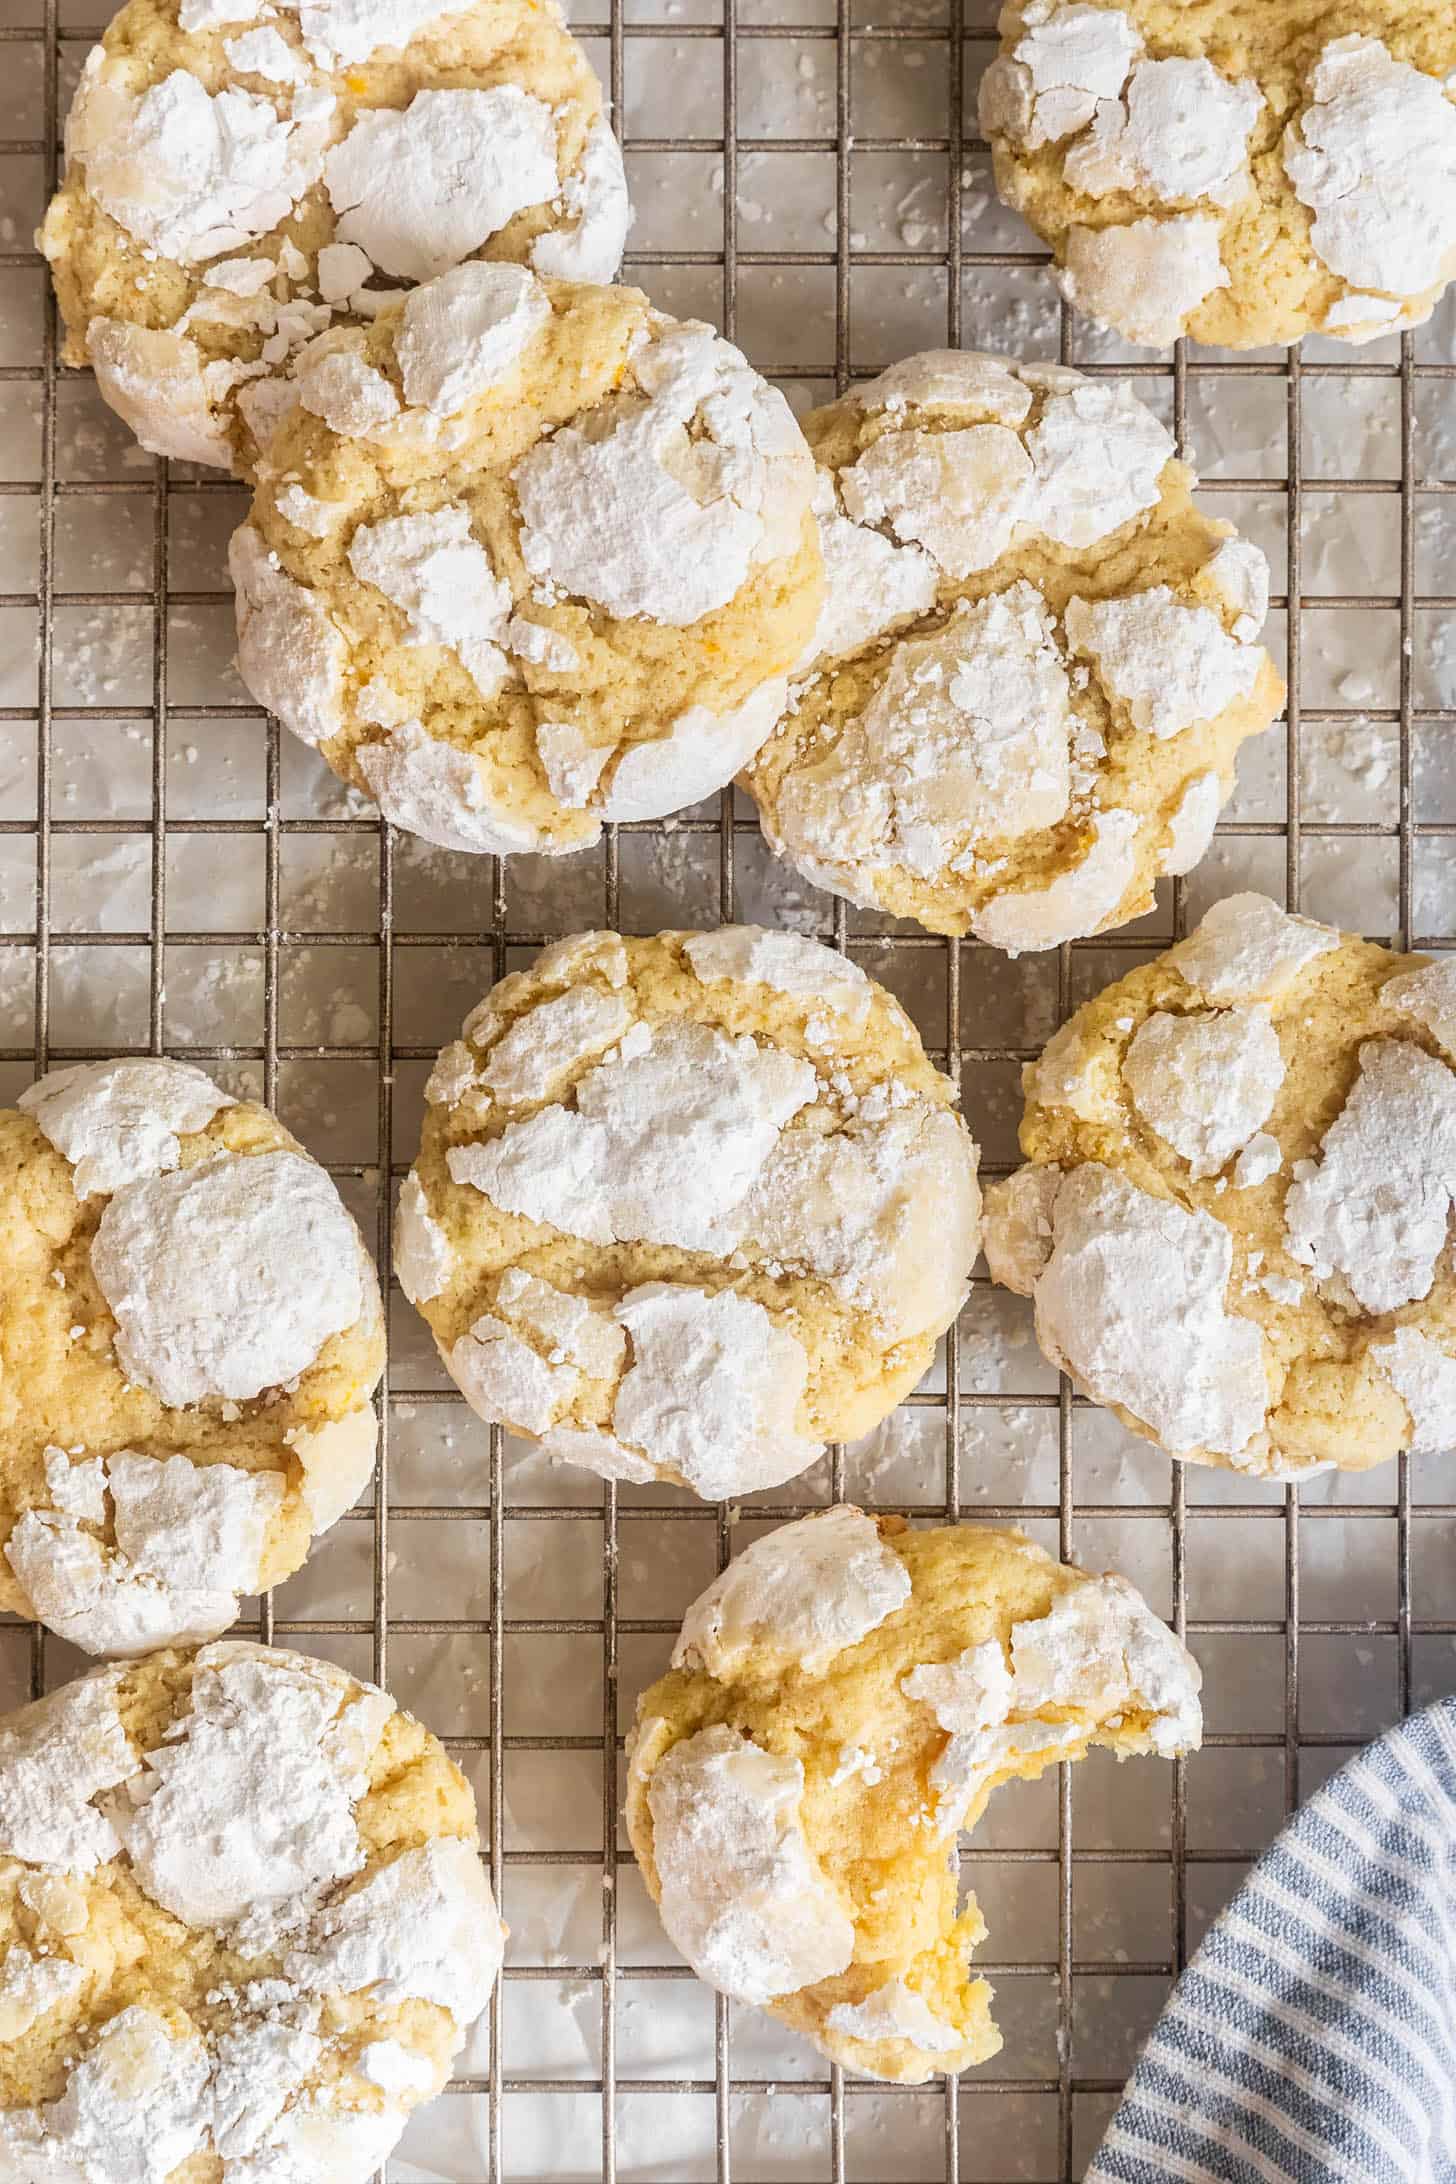
With loads of fresh lemon, these gluten-free lemon crinkle cookies are super easy to make. Perfectly balanced between tart and sweet, these cookies taste like fresh squeezed lemonade in cookie form. Made with an almond flour base, the sugary crackles bake up crisp with a tender melt-in-your-mouth center. Adjust the bake time for an intensely chewy or a pillowy soft cakey cookie, depending on your preference.
New life motto: when life gives you lemons, make gluten-free lemon crinkle cookies. My baby lemon tree is finally producing in full force this year and I feel like I've officially made it as a homeowner. I mean, can you really call yourself a Californian if you don't have a lemon tree? Or at least a generous neighbor with a citrus surplus.
I've got both. Not only do I have my own lemons, but I'm also part of an underground lemon exchange, whereby I volunteer to teach math in Zoella's class, and in exchange, her teacher leaves lemons on my rocking chair in the middle of the night. In turn, I bake them into these chewy lemon cookies to share.
Fair warning: once you make these cookies, your friends will repeatedly ask for them. Expect late-night texts like, "Do you have any more of THE cookies?" You might even find yourself entangled in a lemon cookie black market.
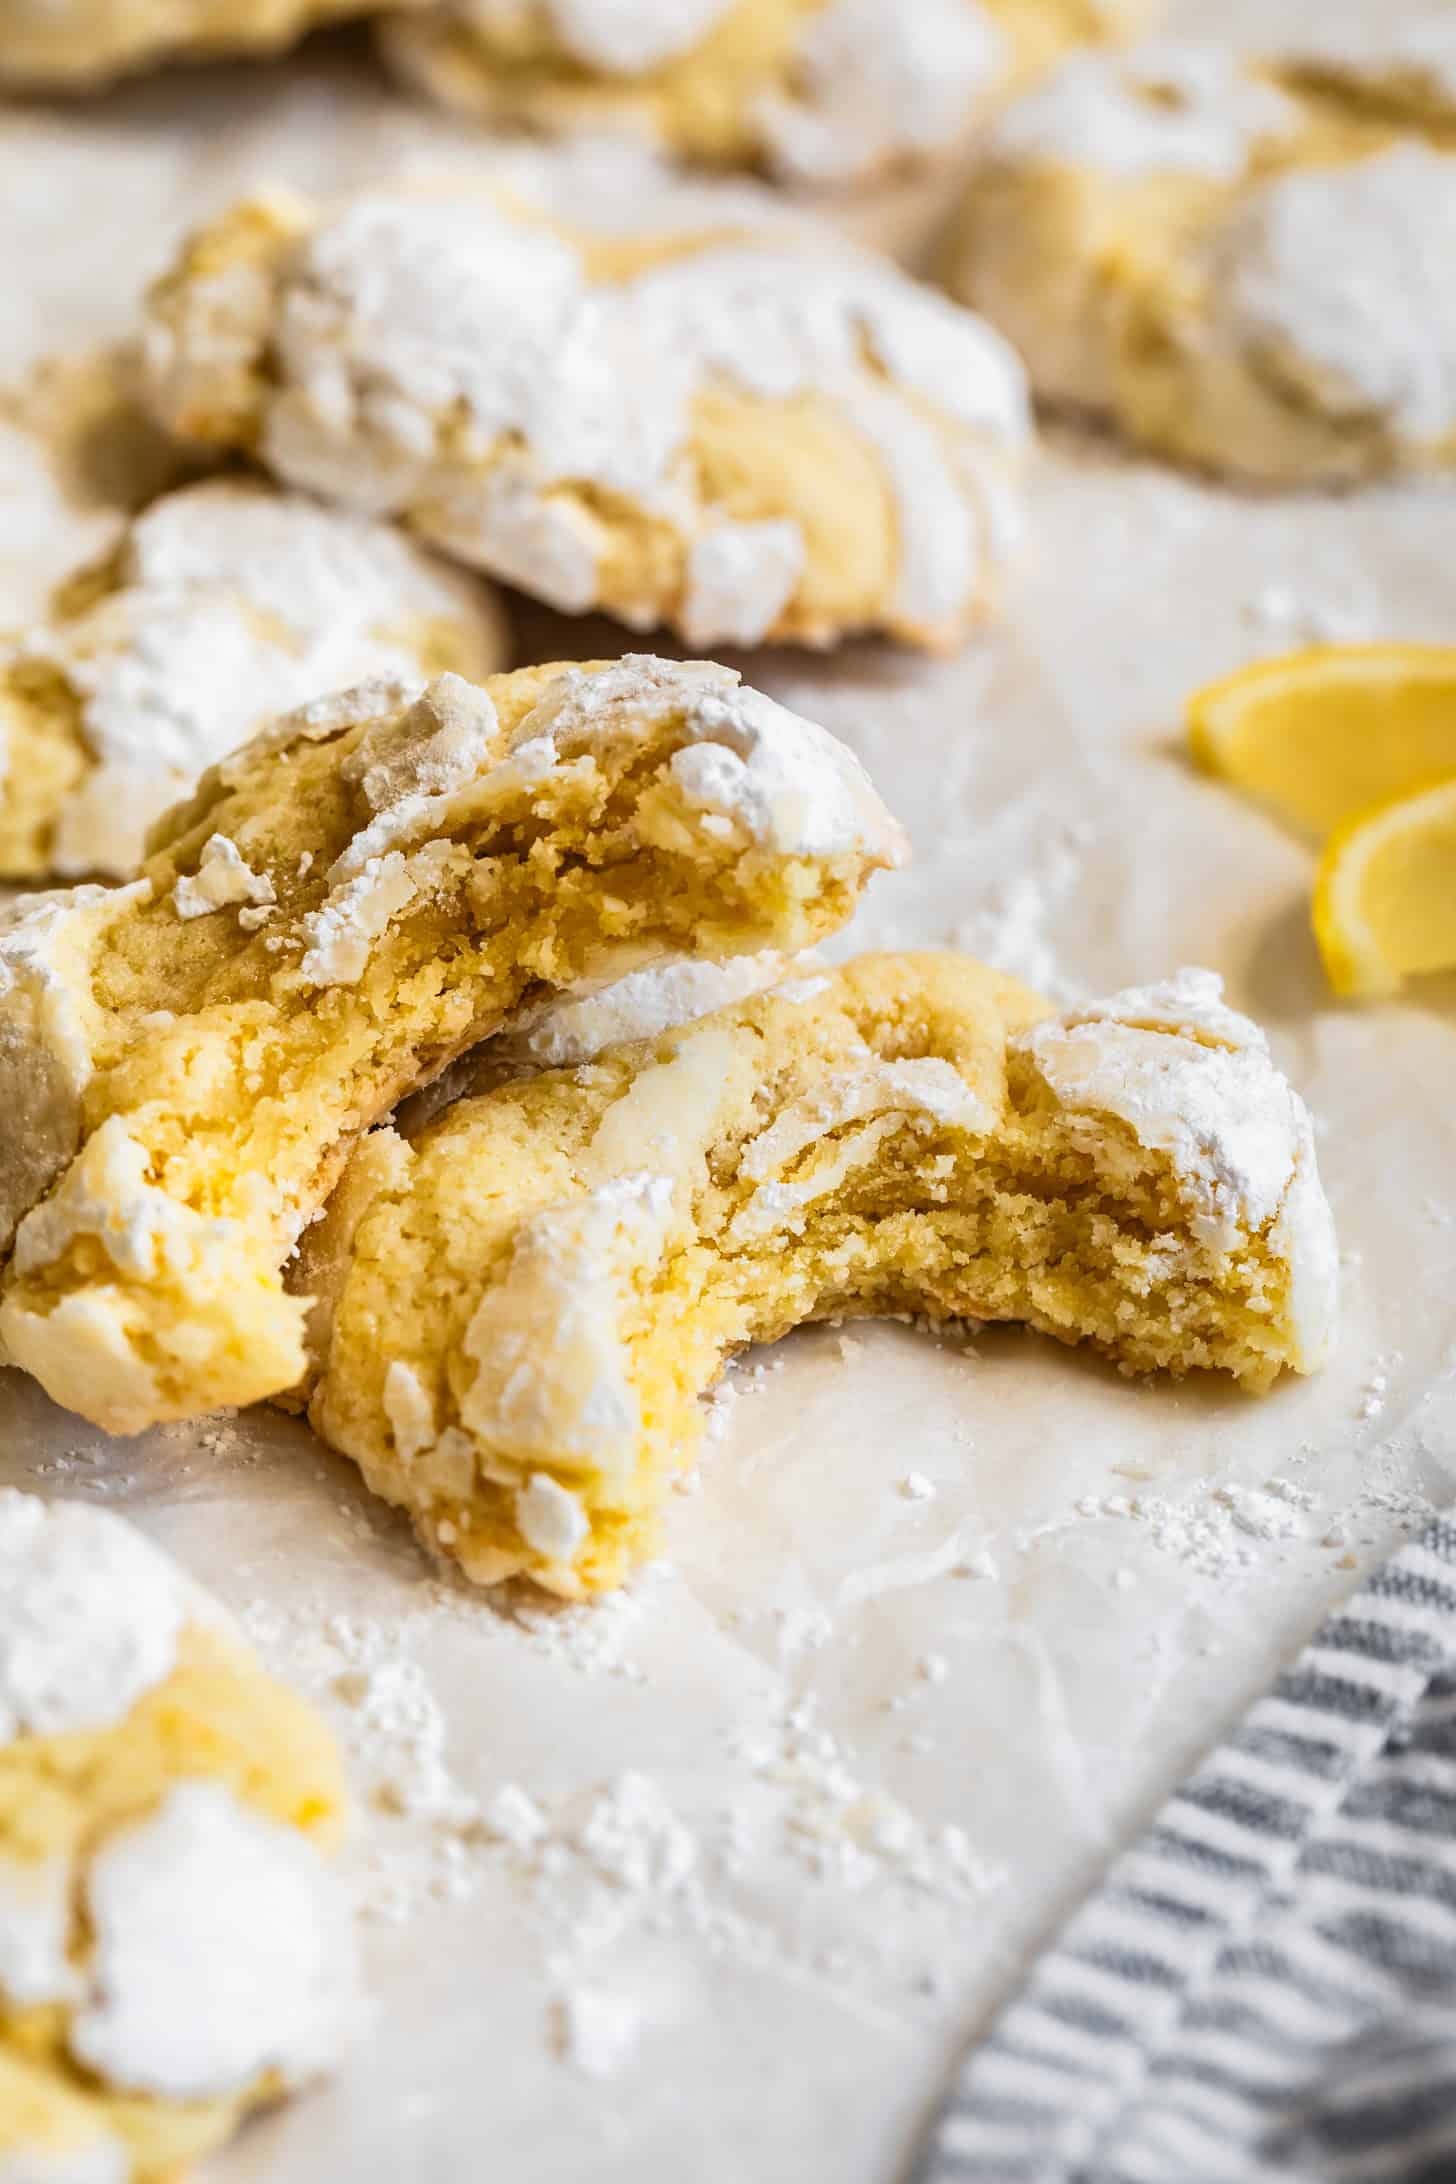
These lemon crinkle cookies are a mash-up between my chewy gluten-free lemon cookies and my gluten-free chocolate crinkle cookies and the result is a crisp-edged cookie with a melt-in-your-mouth center that tastes like a spoonful of lemon curd.
I didn't hold back on the lemon!
With two packed tablespoons of lemon zest and 3 tablespoon of lemon juice, these cookies burst of lemon flavor like no other cookie. We're talking about the most lemony cookie you can imagine - a perfect marriage between tart and sweet.
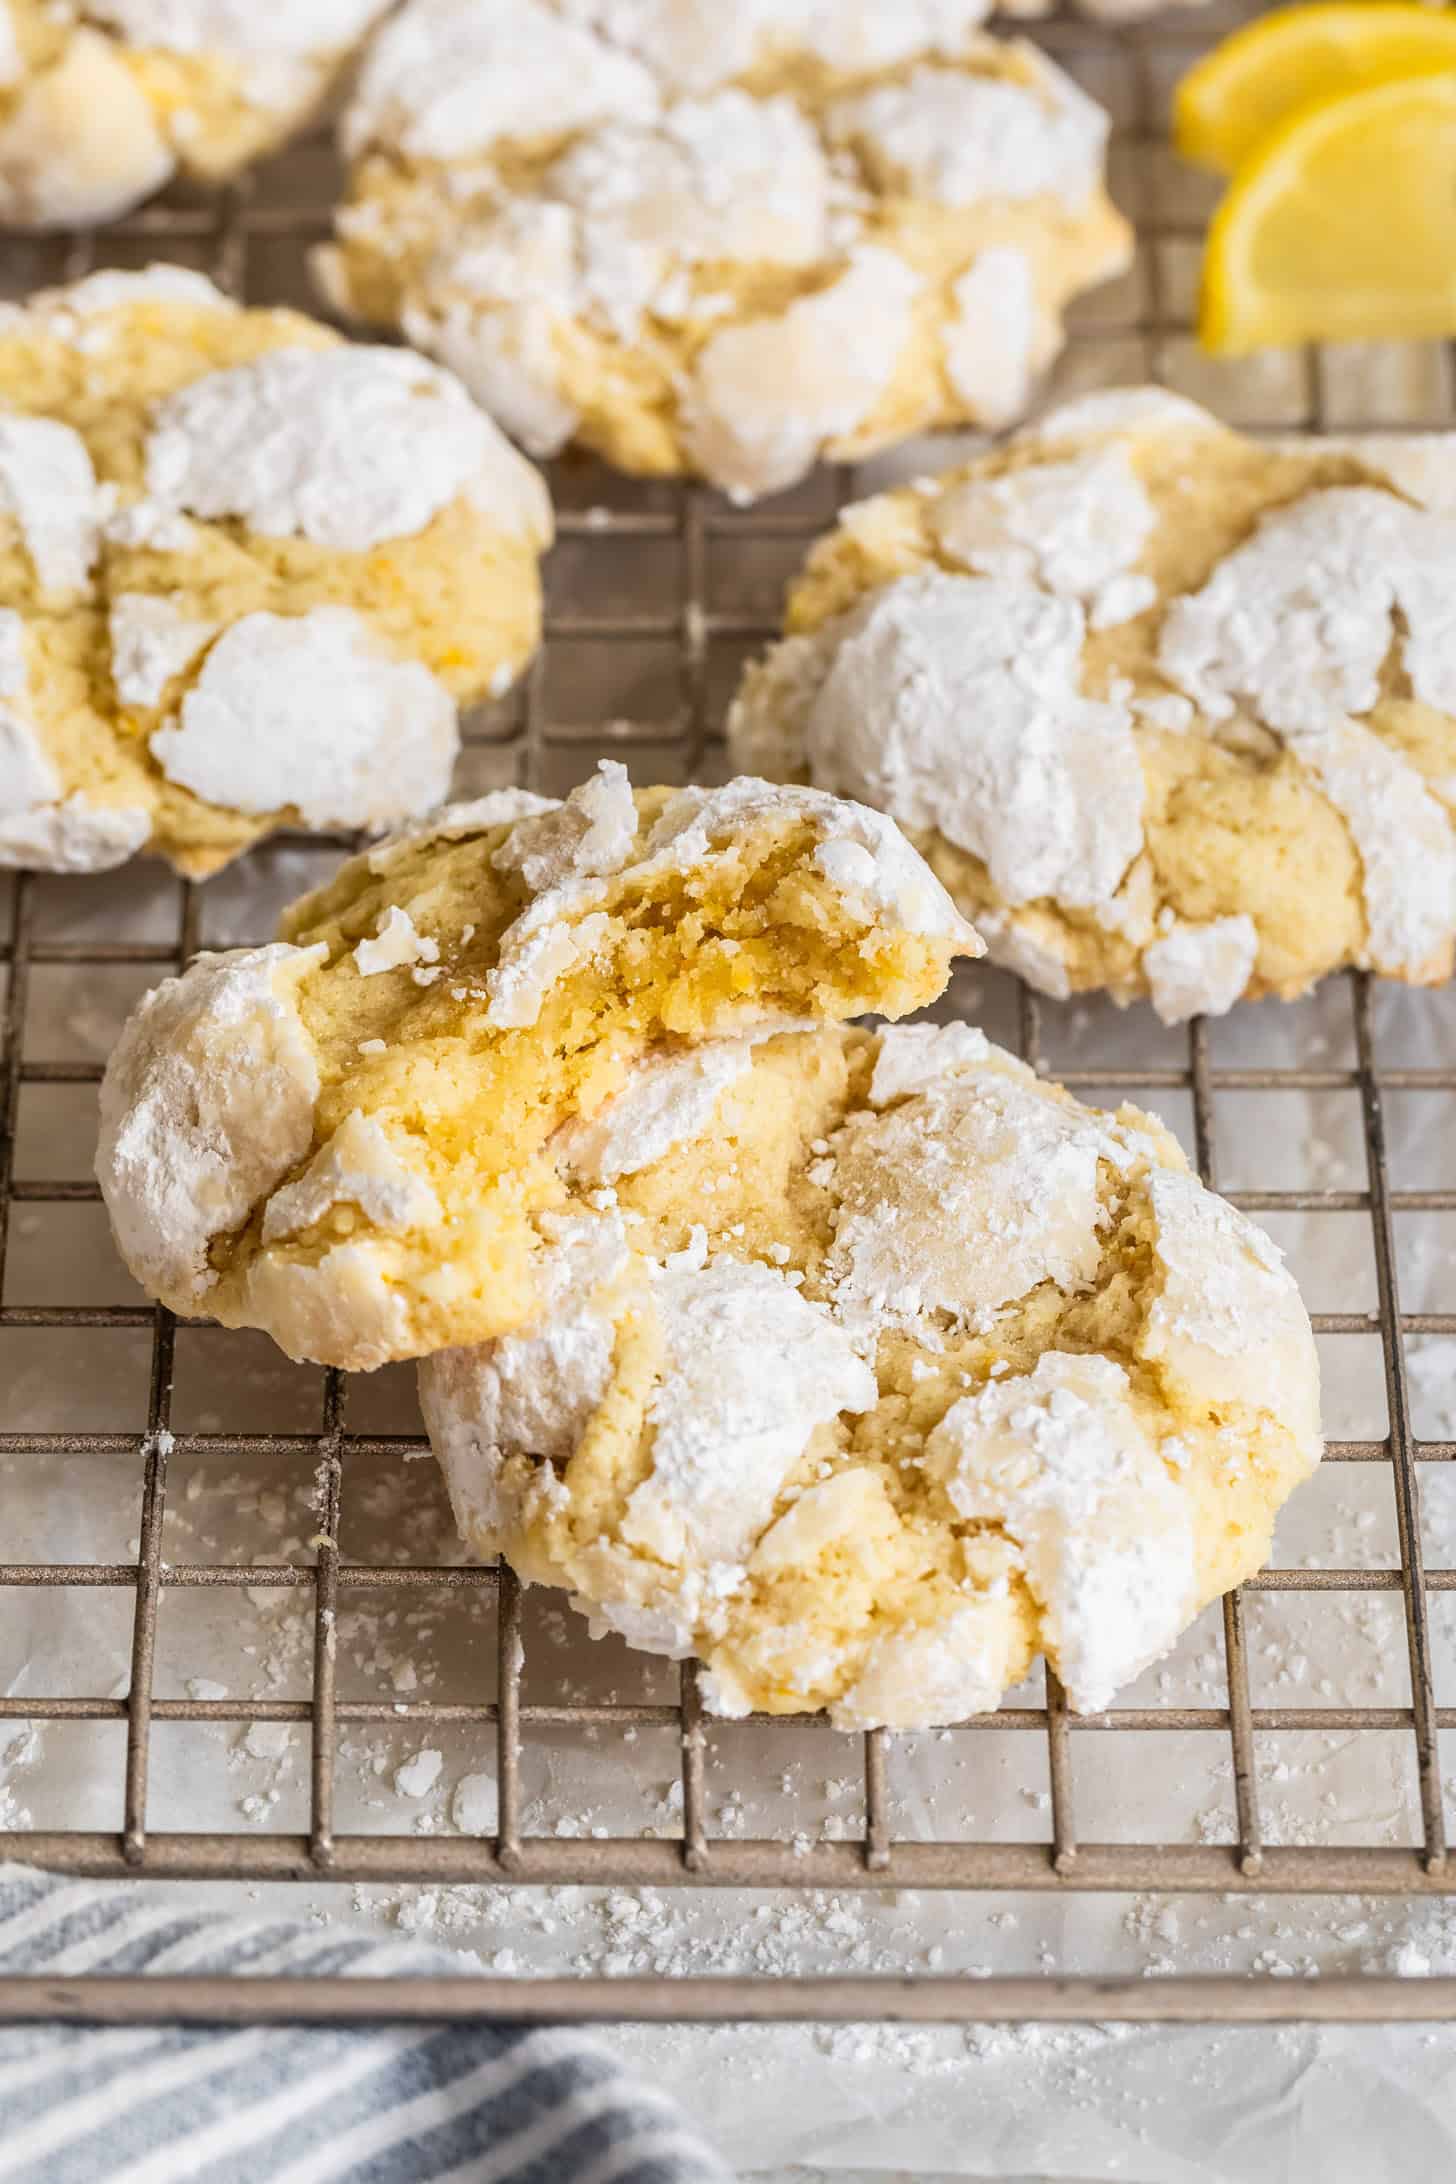
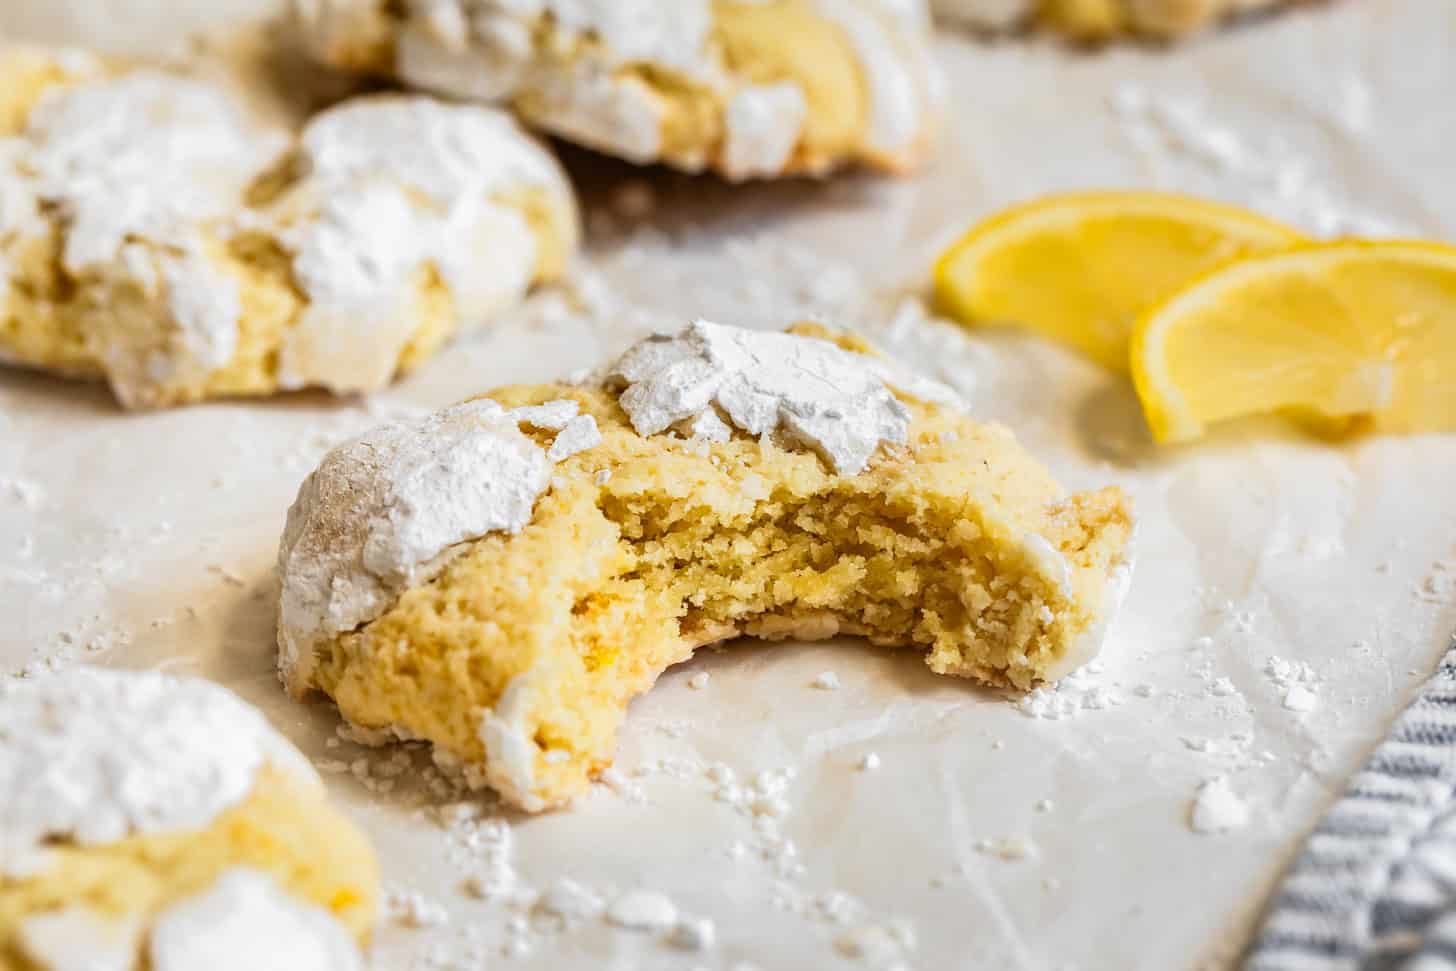
They puff up creating a crisp cracky shell that gives way a tender mighty lemon center that can be baked up to your own texture preference! By just adjusting the baking time, your cookies can be either extra chewy to soft and cakey--both are delicious. We're a split household: half of us prefer these lemon cookies with dense chewy center and the other half prefer them with a pillowy cakey center. So, do what do: bake one sheet for team chewy and one sheet for team cakey.
These cookies are really simple to make, and with my scoop before chilling method, they only need a very brief chill before baking!
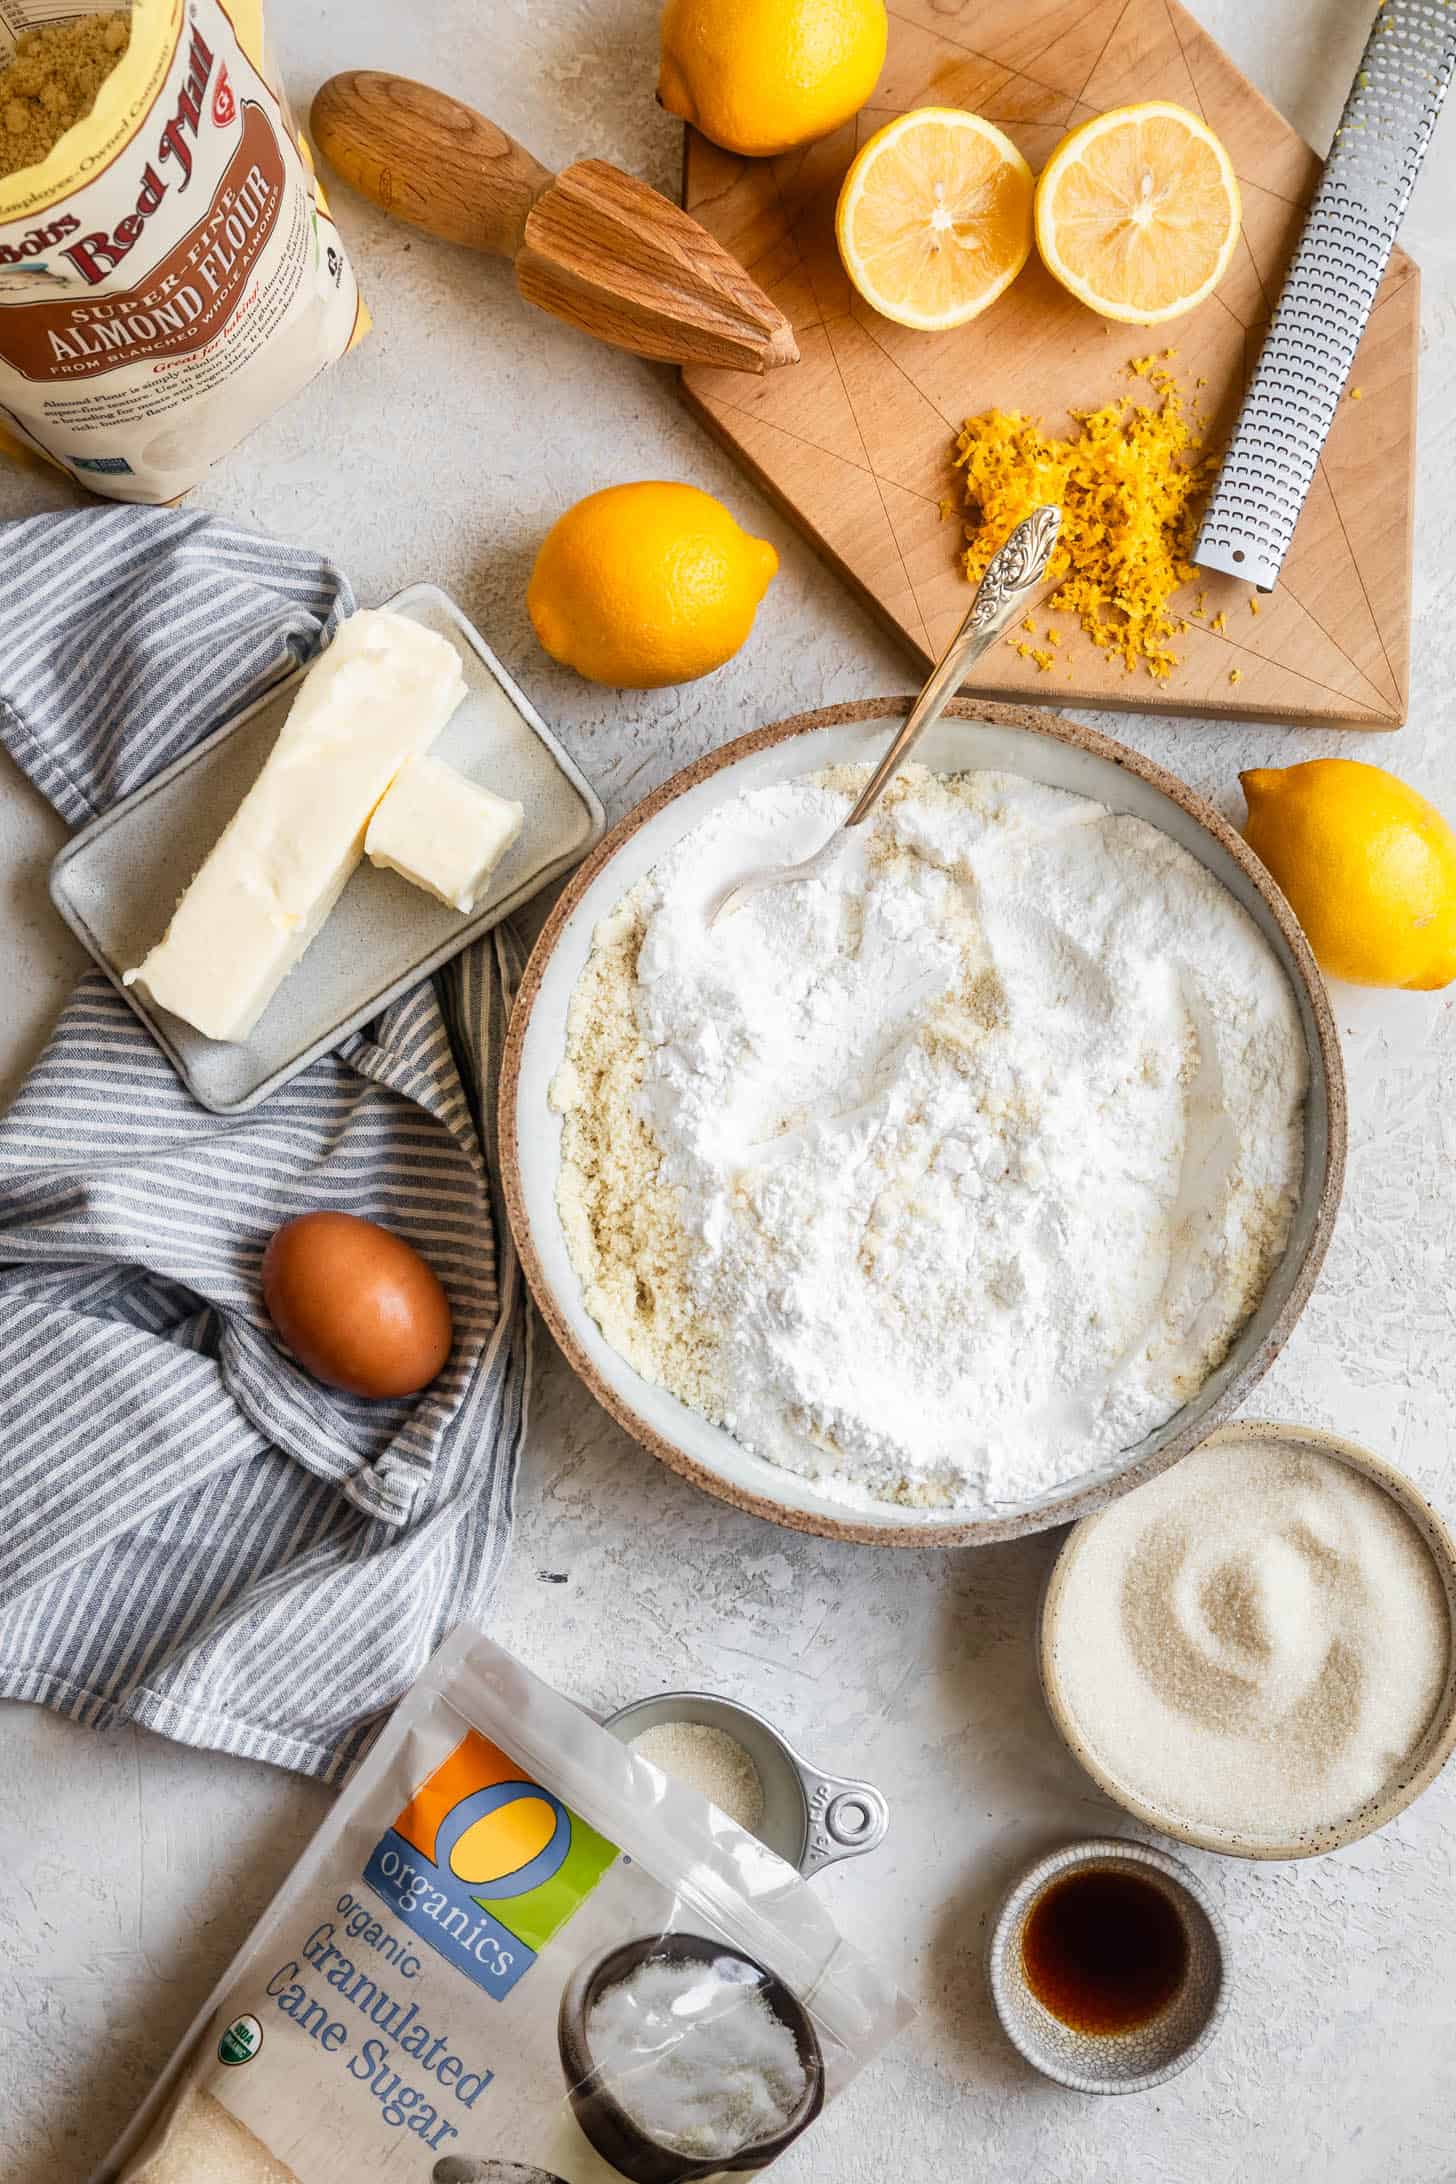
Key Ingredients:
- Sweet rice flour: Also called mochiko or glutinous rice flour, sweet rice flour is distinctively different than white rice or brown rice flour (so don't try to substitute with those or your cookies wil be gritty!). Sweet rice flour is the same flour used to make mochi, and as such, it contributes to the chewiness of the cookie cente
- Superfine blanched almond flour: Superfine blanched almond flour adds bulk to keep the dough from being too soft without drying out the cookie. It imparts the cookie moisture and a subtle nutty sweetness.
- Tapioca flour: Like sweet rice flour, tapioca flour offers chewiness, but it also is what helps create the fluffiness and crispy edges. The tapioca helps the crackly cookie puff up in the oven.
- Unsalted butter: Soften your butter to room temperature will help your butter and sugars cream together. In addition to using more flour than many other cookie recipes, this recipe uses more unsalted butter to help the cookie spread still.
- Granulated sugar: This cookie uses only granulated sugar and no brown sugar to keep the flavors bright and lemon-forward.
- Lemon juice and lemon zest: If you don't have a lemon tree, look for organic unwaxed lemons for zesting.
- Baking soda: 1 whole teaspoon to make it extra puffy!
- Powdered sugar (aka confectioner's sugar): for rolling and creating the beautiful cracks.
How to Make These Crinkle Cookies
Just a few easy steps and a short chill and you're on your way to the most delicious cookies of your life. Start by sifting together the dry ingredients and setting them aside.
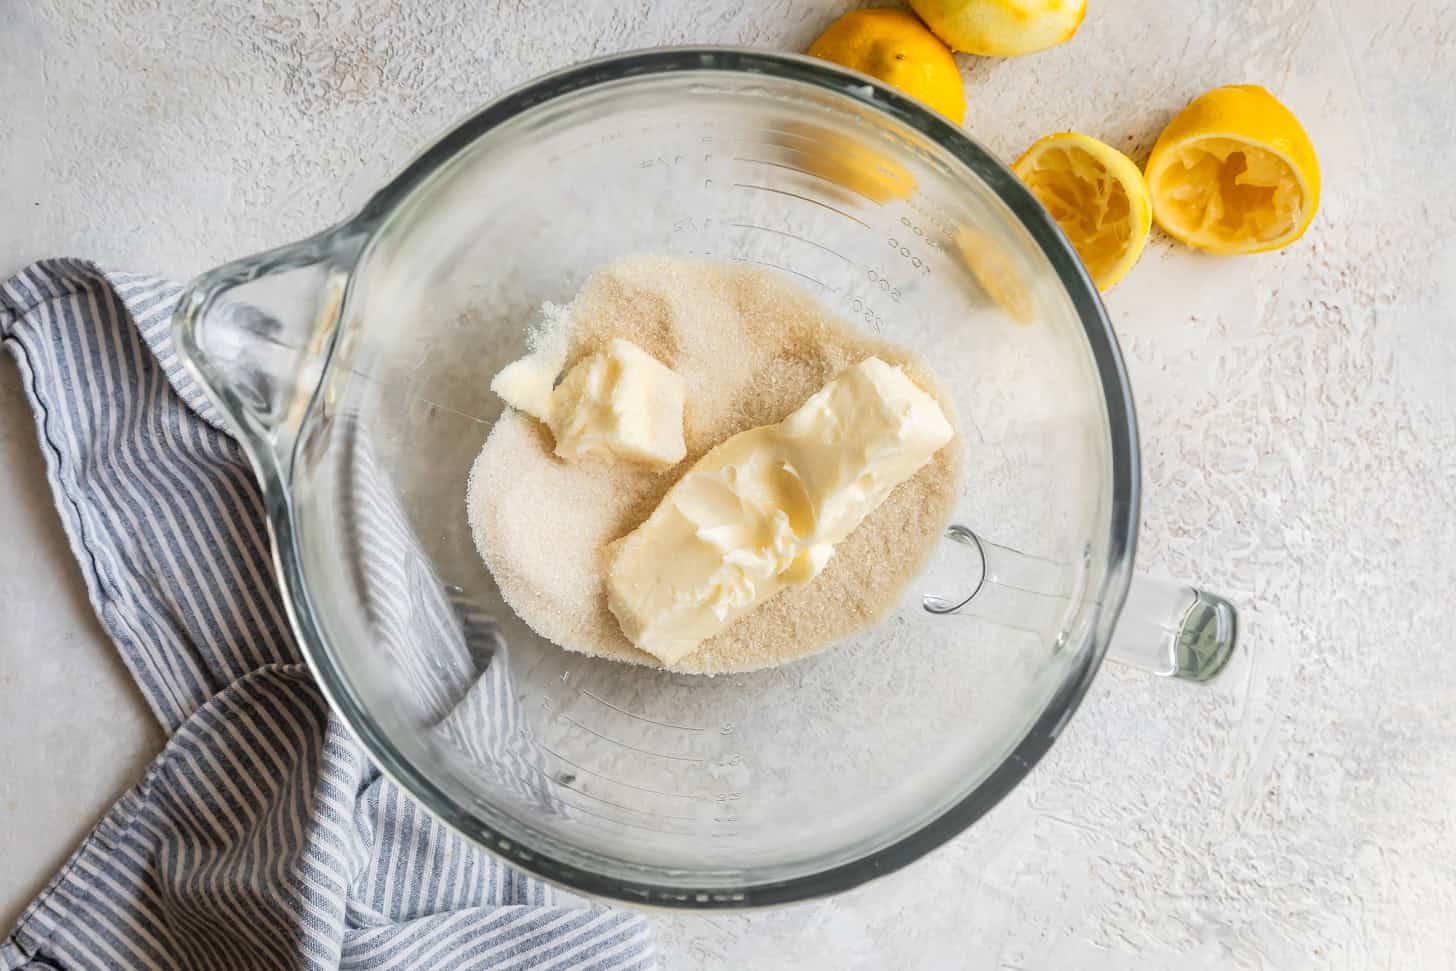
Cream together the softened butter and granulated sugar. You can use a stand mixer or a bowl with a hand mixer.
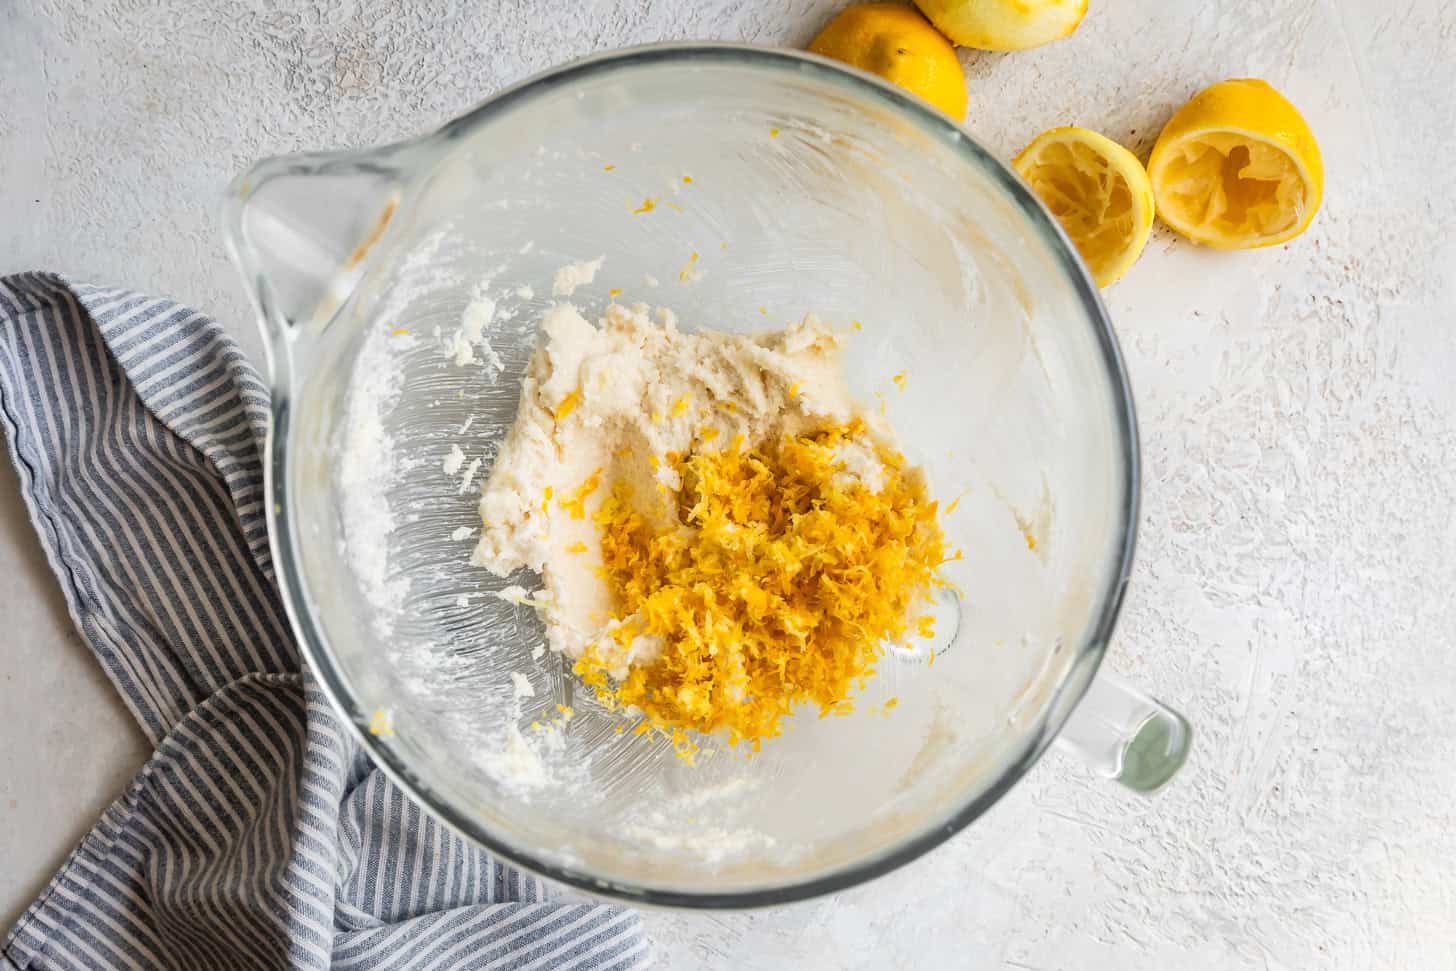
Mix in the lemon zest on high for 1 minute to release all the yummy lemon oils.
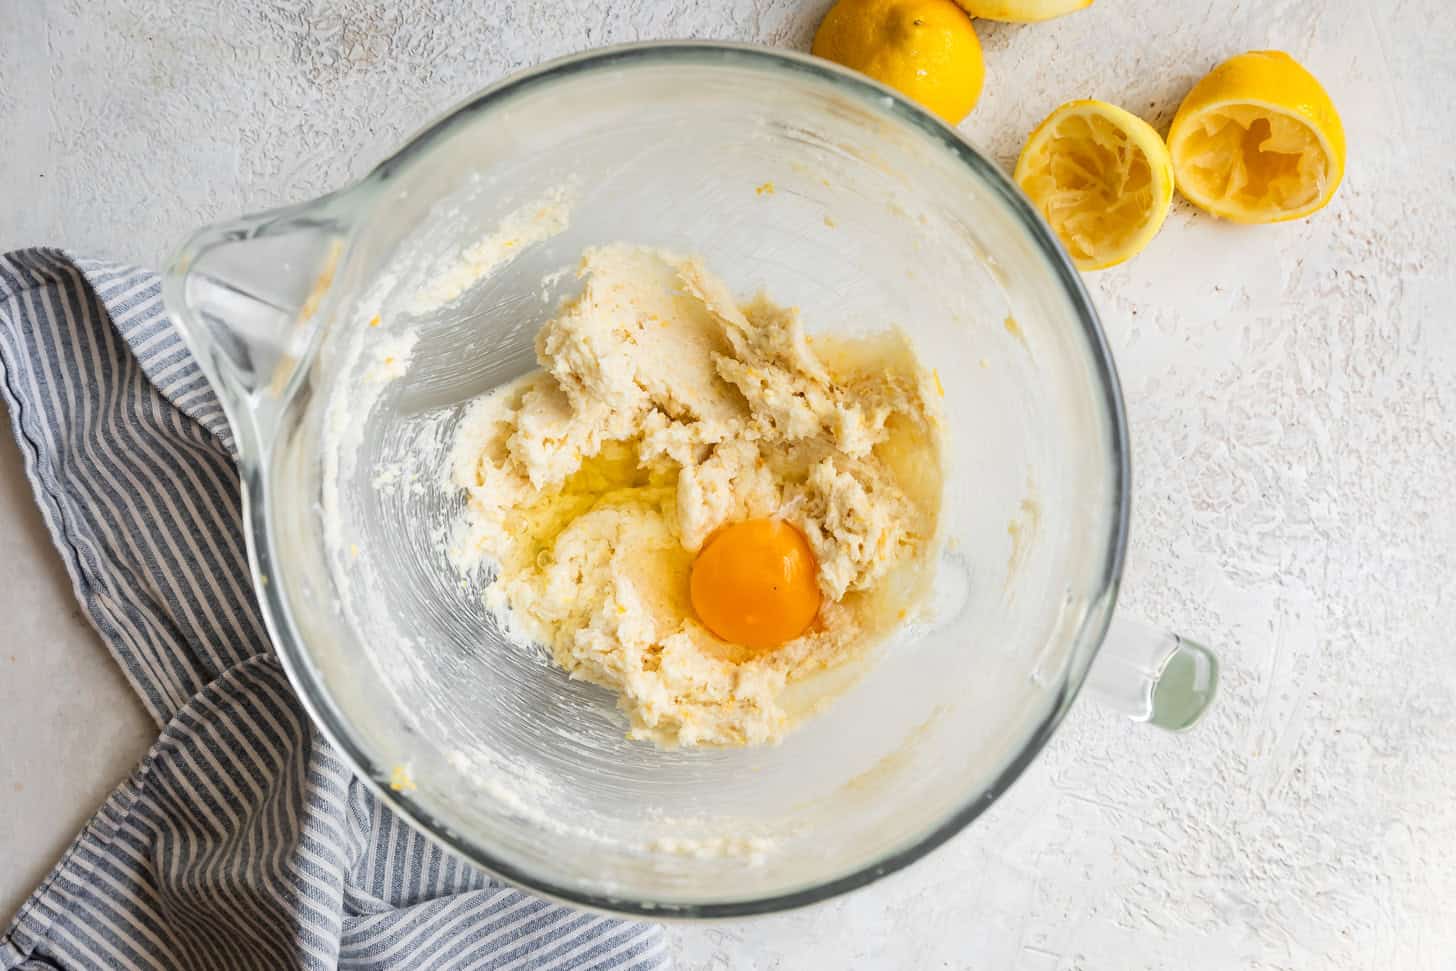
Mix in the egg...
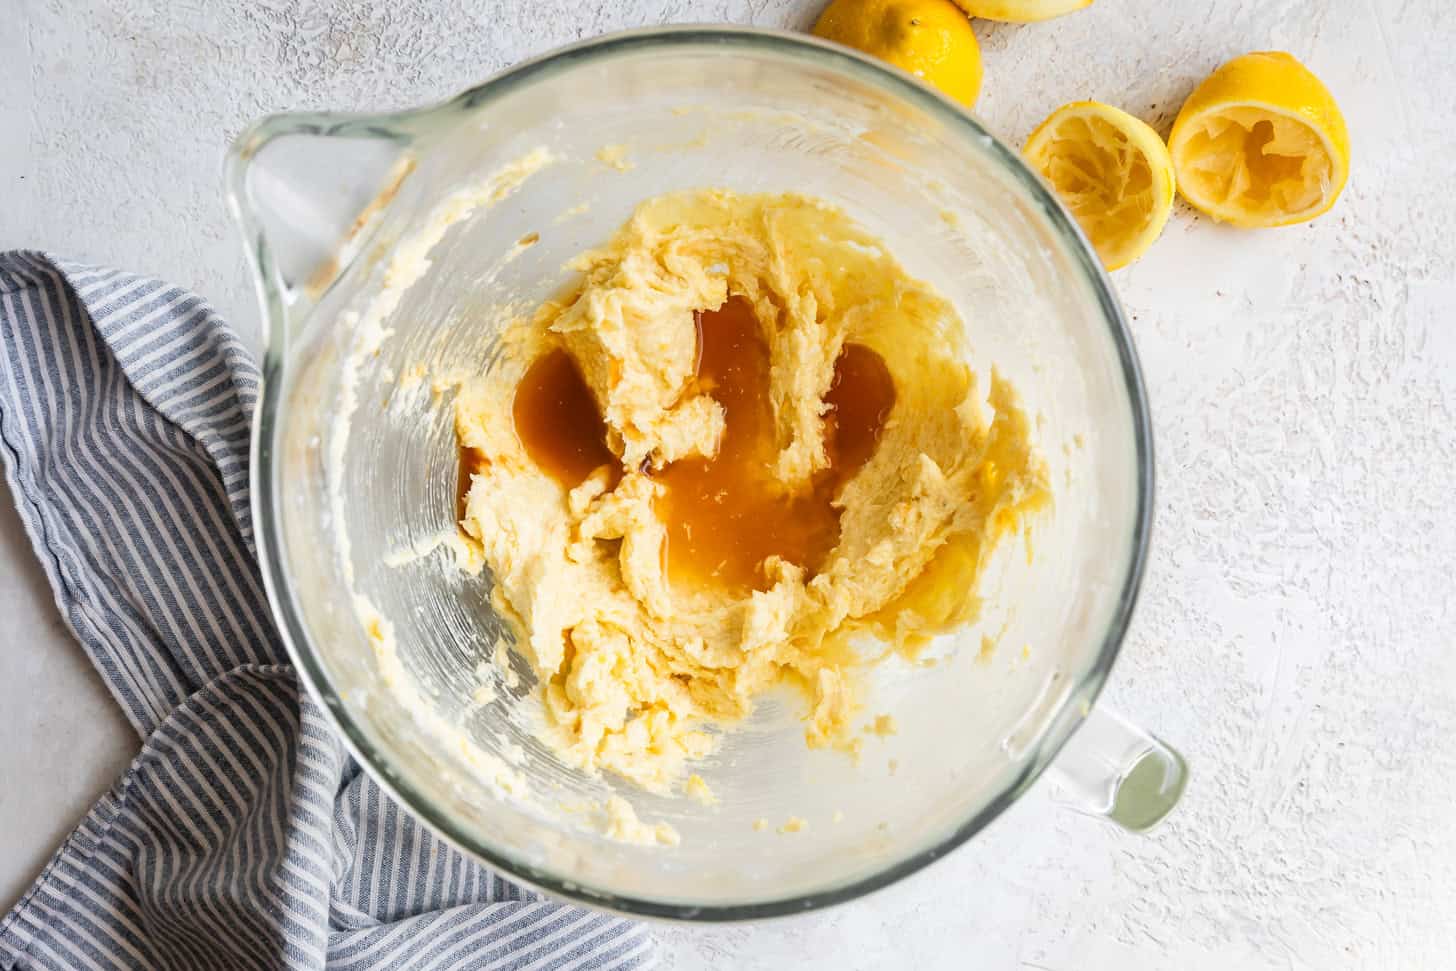
...followed by the lemon juice and lemon zest. The dough will look separated and possibly curdled at this stage - never fear!
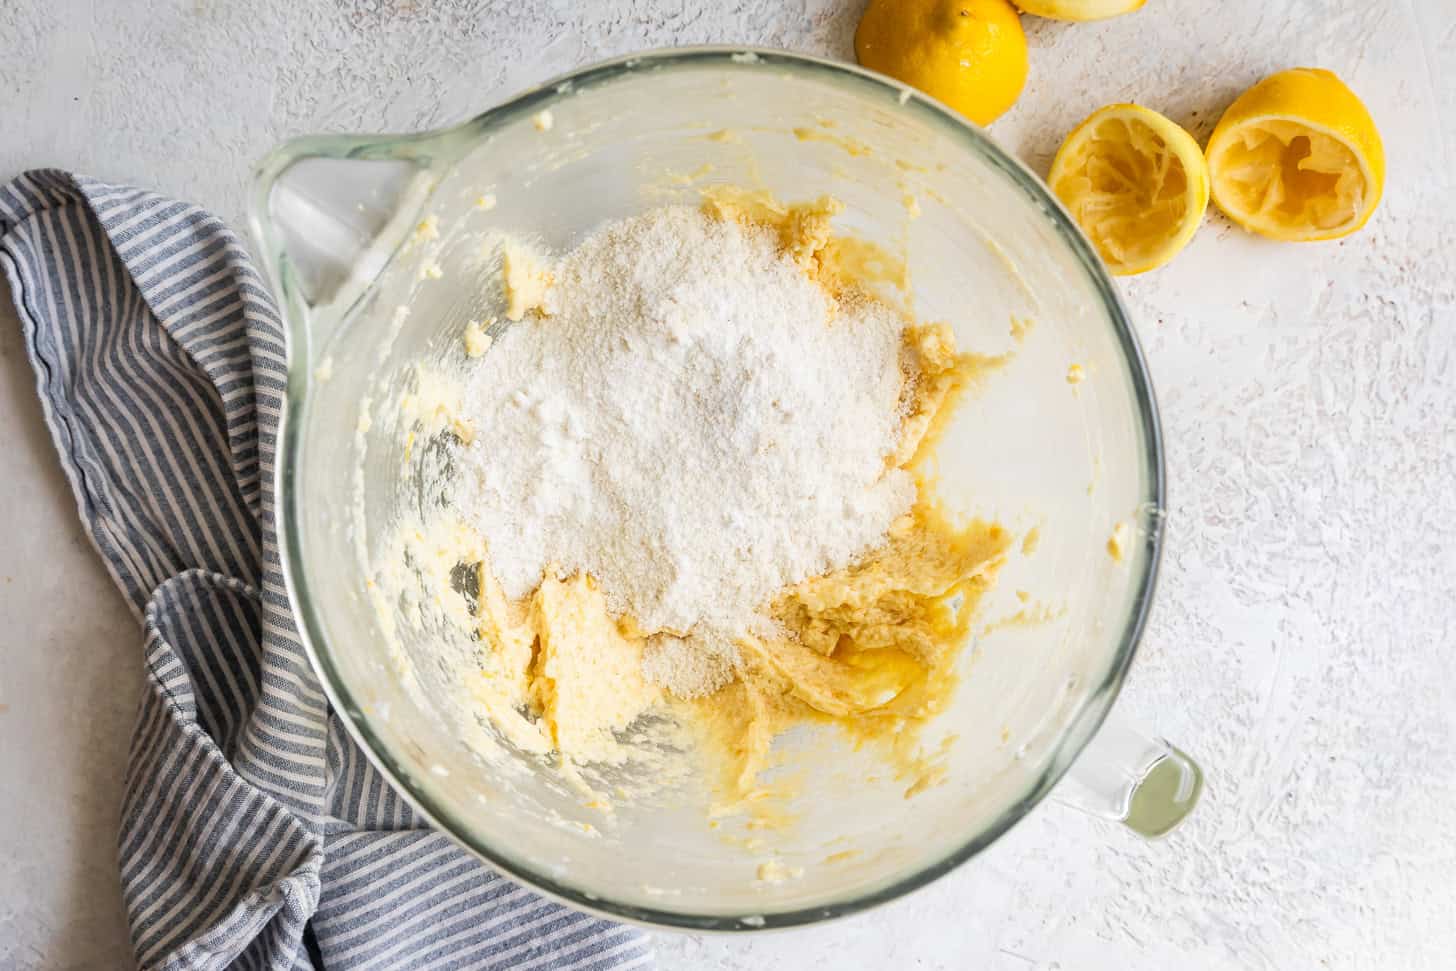
With the mixer on low, slowly add the dry ingredients until just combined, scraping down the sides and bottom as needed.
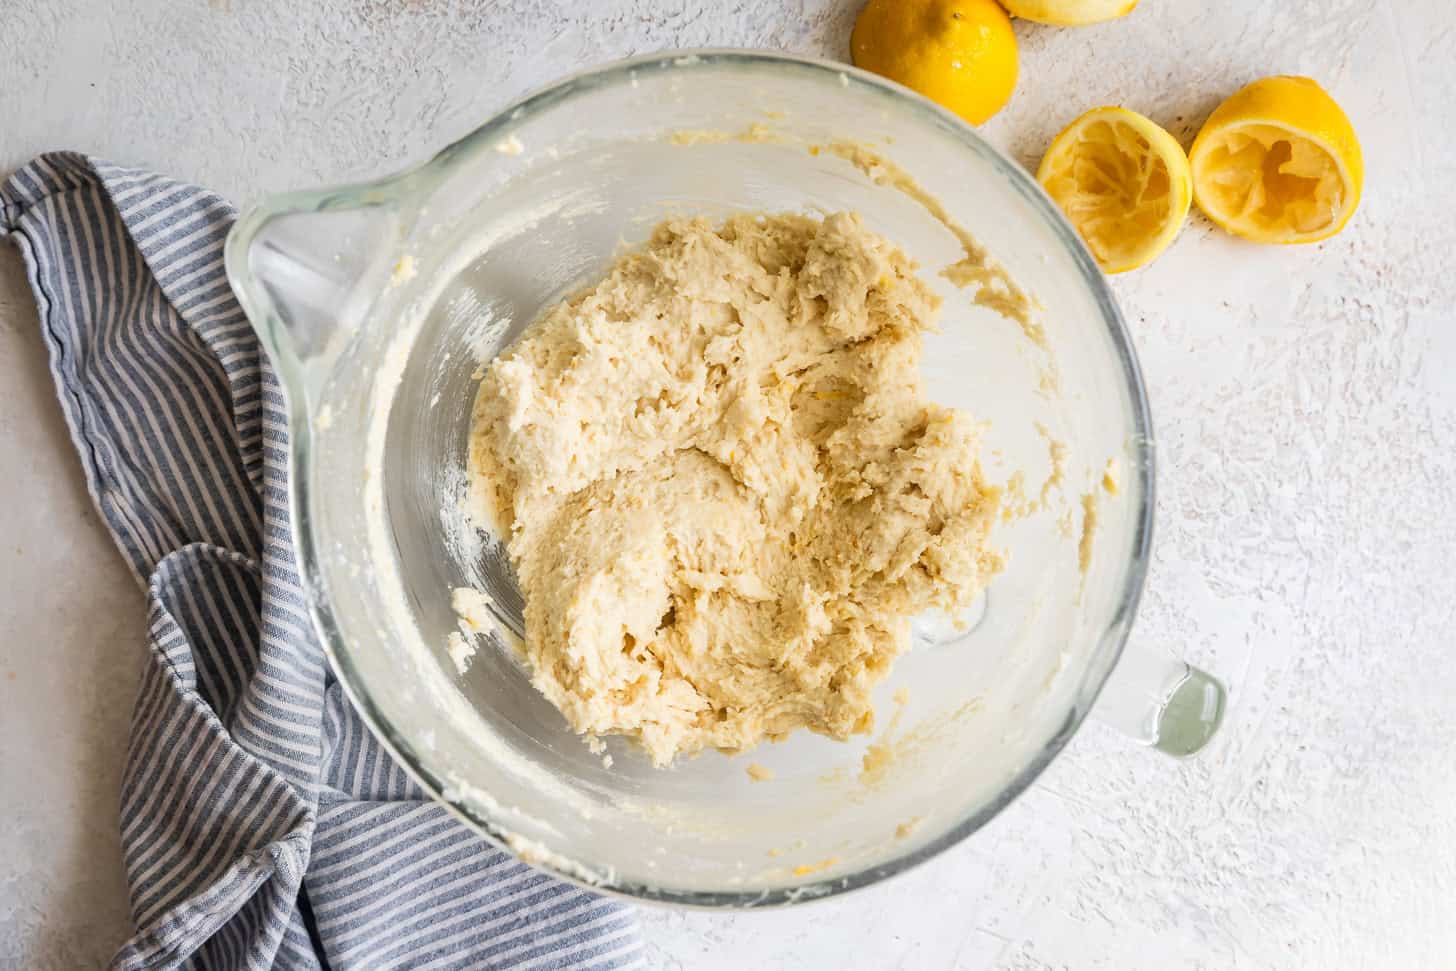
Try not to over mix the dough or the almond flour will release moisture.

Scoop into balls on a small baking sheet close together. Chil.
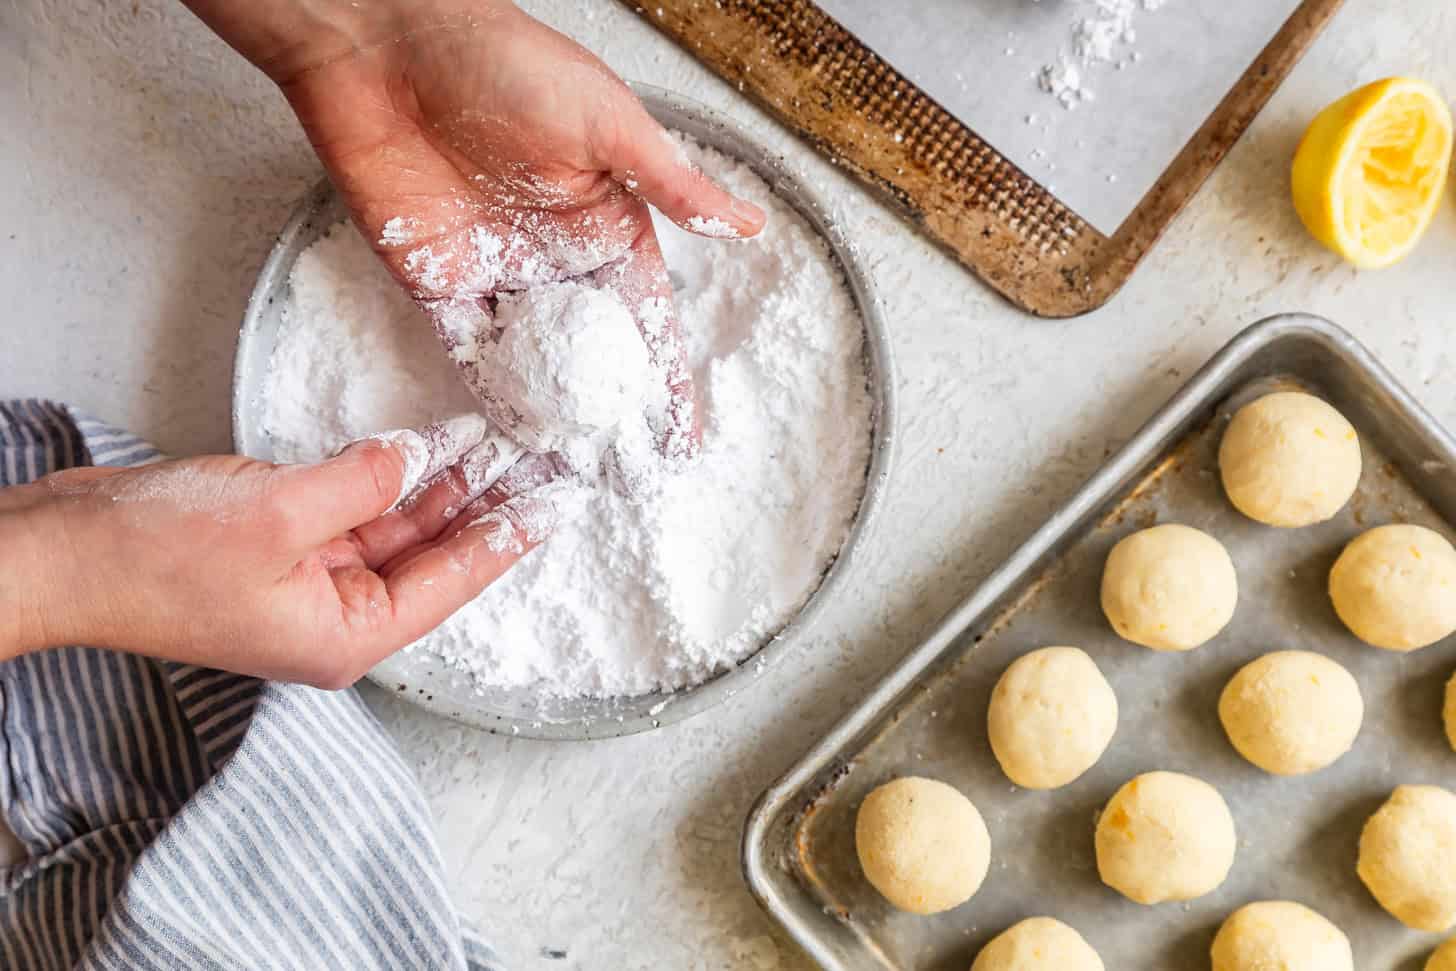
Roll each chilled cookie dough into a smooth ball then roll in the powdered sugar, packing it on tight.
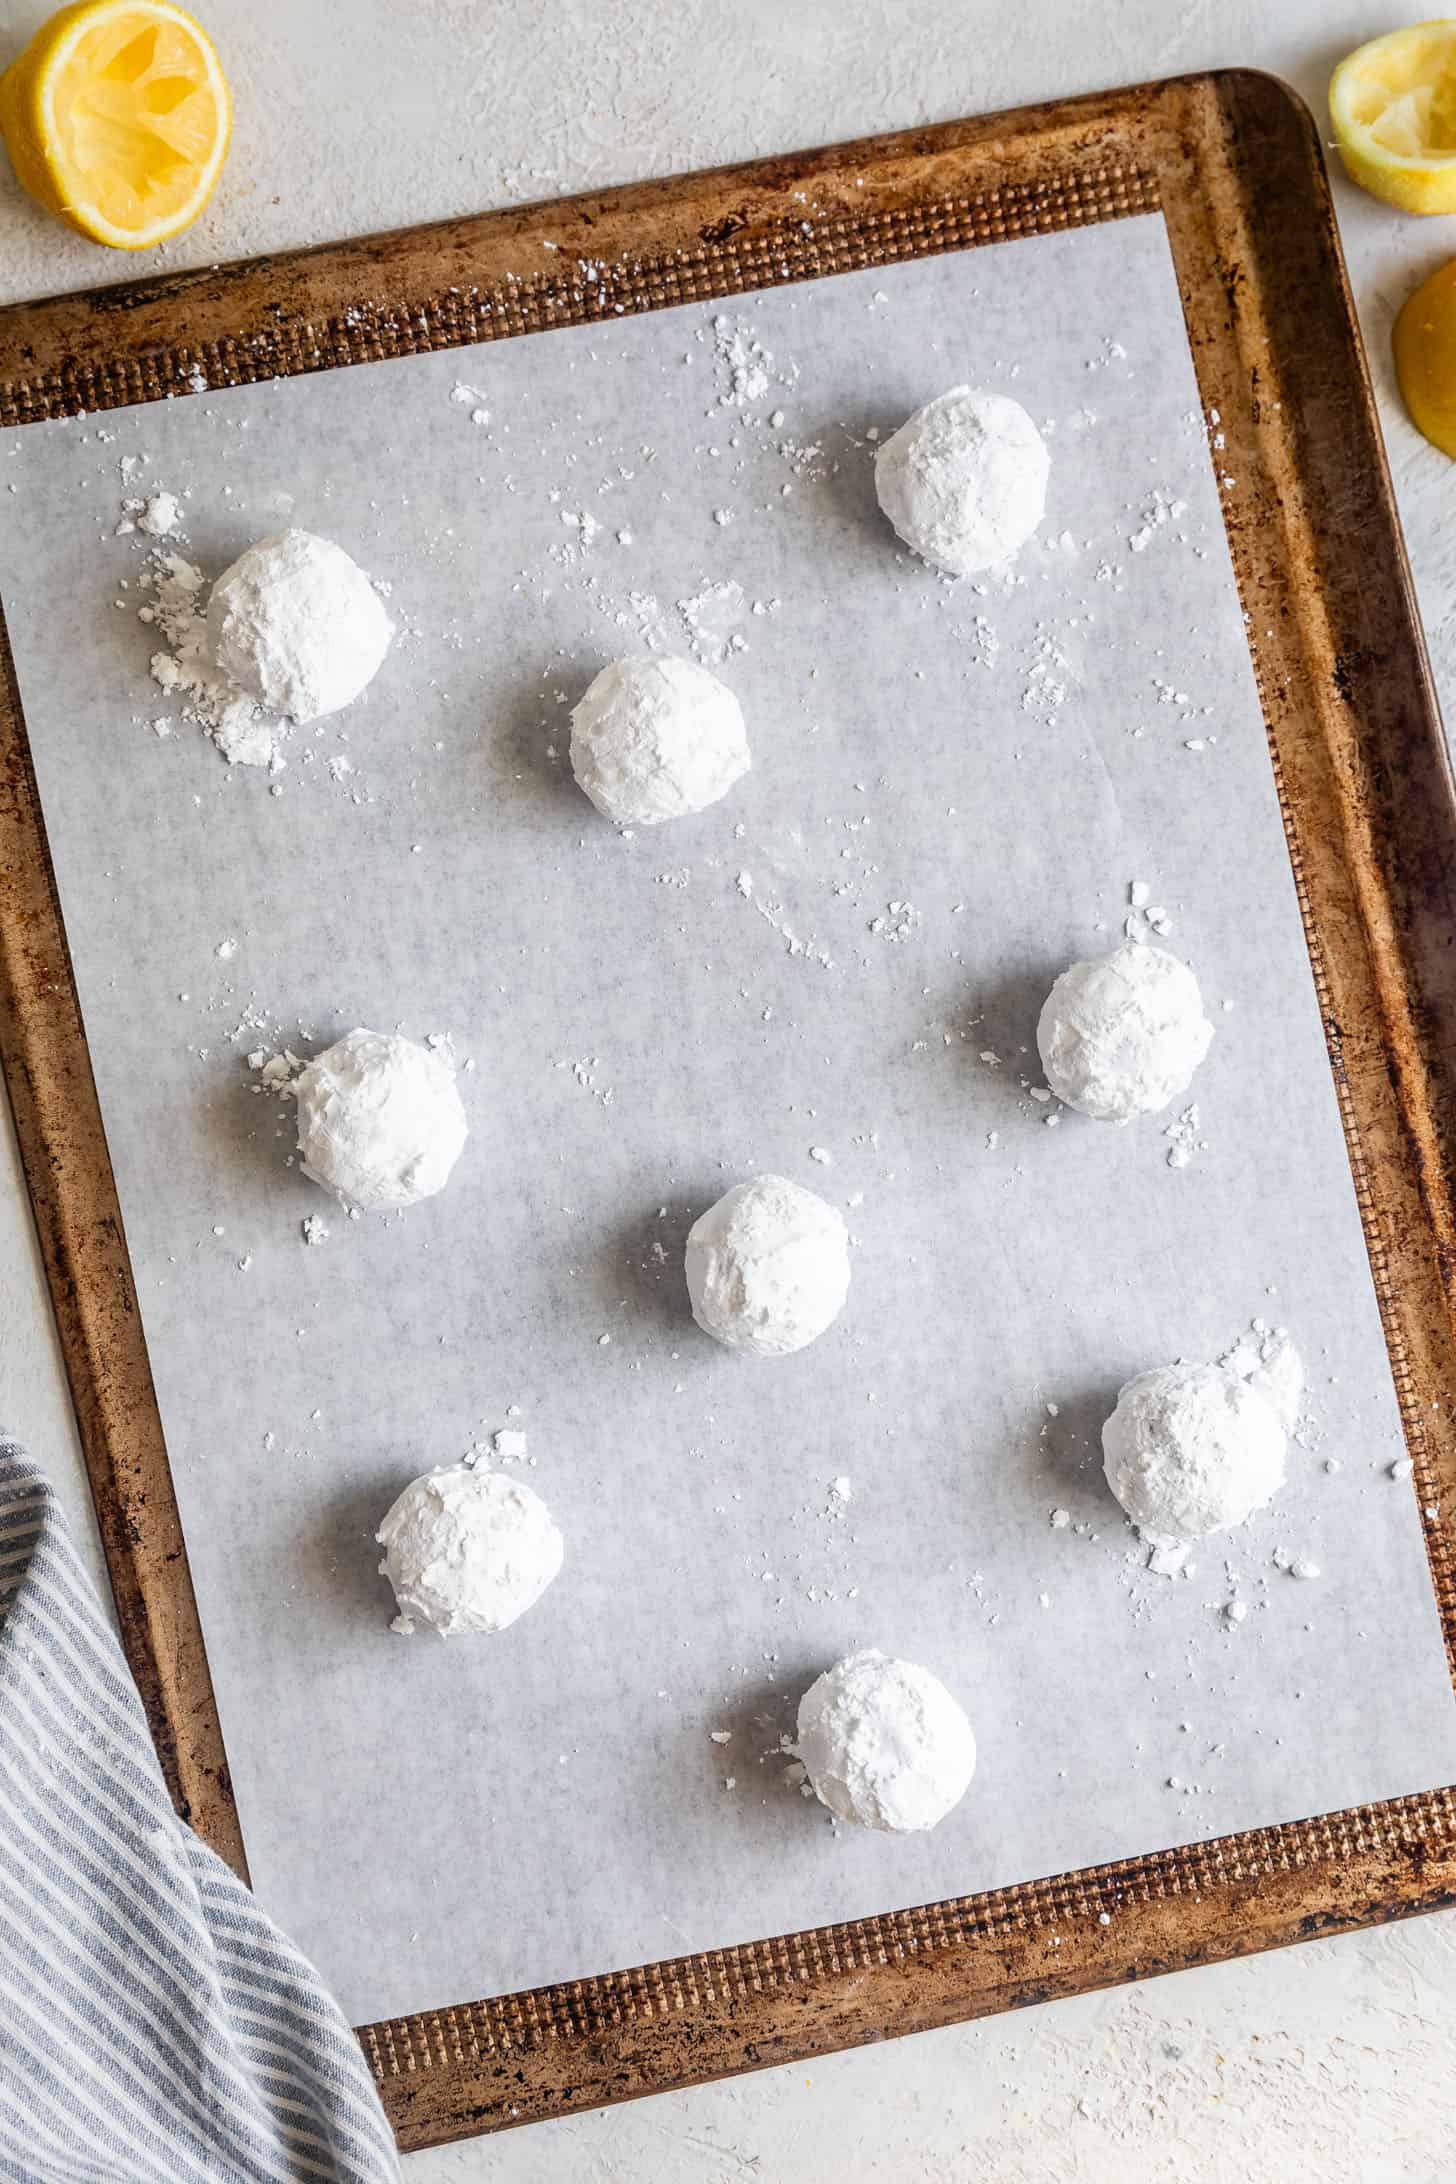
Transfer to a baking sheet and bake!
Store any cookie dough balls in the fridge for up to 3 days!
Recipe
Easy Chewy Gluten-Free Lemon Crinkle Cookies
Ingredients
- 170 g (1 cup + 1 tablespoon) sweet rice flour, also called mochiko; do not substitute white or brown rice flour
- 140 g (1¼ cups) super-fine blanched almond flour
- 147 g (1¼ cups + 1 tablespoon) Bob's Red Mill tapioca flour
- 1 teaspoon baking soda
- ½ teaspoon kosher salt
- 10 tablespoons (141 g) unsalted butter, room temperature
- 200 g (1 cup) granulated sugar
- 2 tablespoons lemon zest, from 2-3 lemons
- 1 large egg, room temperature
- 3 tablespoons freshly squeezed lemon juice
- 1 teaspoon pure vanilla extract
- 1 cup powdered sugar, for rolling
INSTRUCTIONS
- In a medium bowl, sift together the sweet rice flour, almond flour, tapioca flour, baking soda, and salt. Set aside.
- In the bowl of a stand mixer fitted with the paddle attachment or in a large bowl with a hand mixer, cream together the softened butter and granulated sugar over medium speed for 3 minutes. Scrape down the sides and mix in the lemon zest on high for 1 minute. Mix in the egg, followed by the lemon juice and vanilla until thoroughly mixed, scraping down the sides as needed. Note: the dough will seem to separate at this step, don't worry and carry on!
- With the mixer on low, slowly add the dry ingredients until just combined, scraping down the sides and bottom as needed. Try not to over mix the dough or the almond flour will release moisture.
- Scoop 2-tablespoon-sized balls (I recommend a medium cookie scoop) onto a small baking sheet close together. Chill the cookie dough balls on the baking sheet for at least 30 minutes or up to 3 days in the fridge (cover if storing for longer than 2 hours) or 10 minutes in the freezer.
- Preheat the oven to 350°F and line a large baking sheet with parchment paper.
- With your palms, roll each chilled cookie dough into a smooth ball. Place the powdered sugar in a small bowl and roll each cookie dough ball in the powdered sugar, packing it on tight. Transfer coated balls to a baking sheet, placing them 2 inches apart.
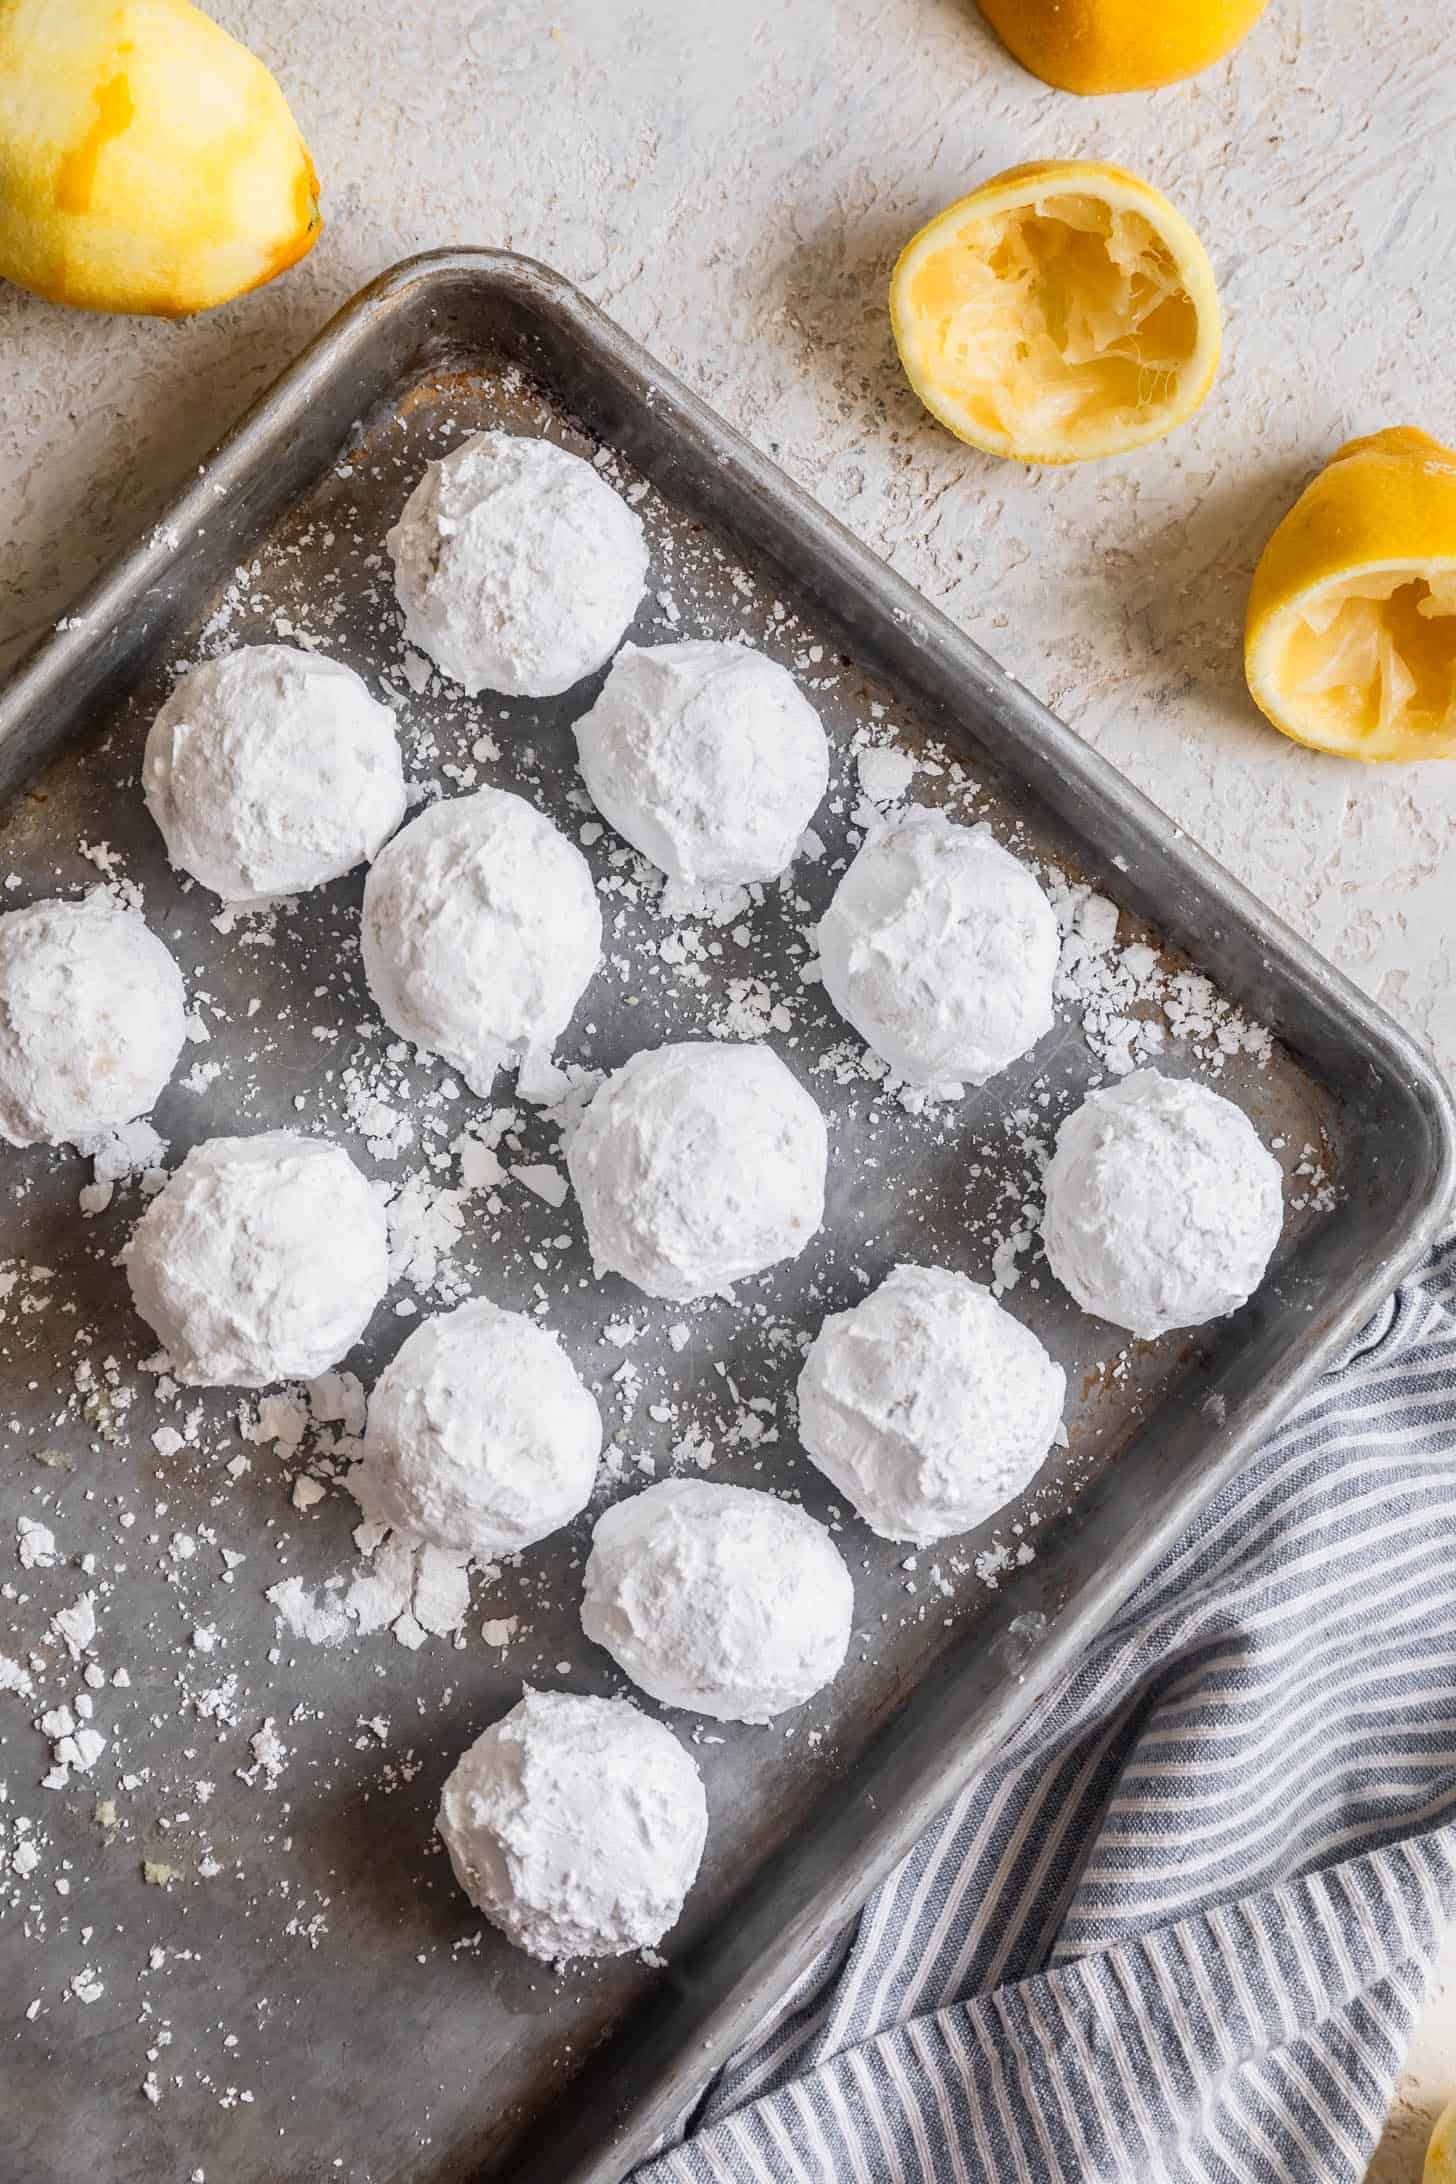
- In batches, bake the cookies on the middle baking rack for for 10-13 minutes (10 minutes for chewy cookies, 12-13 for cakey cookies). For chewy cookies, the centers beneath the cracks will still look a bit moist and underbaked. For cakey cookies, the bottom edge will just ever so slightly turn golden brown while the centers look just set. Remove from oven and let cool on the baking sheet for 5 minutes before transferring to a wire rack to cool completely.
Video
Notes
Nut-Free Substitutions
My daughter requested these for her birthday at her (nut-free) school, so I developed this nut-free version. The taste is almost identical with a slightly more wholesome flavor and less pronounced yellow color. For a nut-free version, replace the almond flour, sweet rice flour, and tapioca flour with the following measurements:- 140g (¾ cup + 2 tablespoons) sweet rice flour
- 119g (1 cup + tablespoon) tapioca flour
- 112g (1 cup + 1 tablespoon) gluten-free oat flour
Make-Ahead & Storage Instructions
Chill the unbaked cookie dough balls in the fridge for up to 3 days, either before or after they've been rolled in powdered sugar. To freeze, store the unbaked cookie dough balls without the powdered sugar coating for up to 3 months. When ready to bake, let them sit at room temperature for 20 minutes as you preheat your oven, roll them in powdered sugar, and bake, adding 1 minute to the bake-time. Or, store fully baked cookies in an airtight container at room temperature for up to 3 days or in the freezer for up to 3 months.Chilling the Dough
If you're impatient, you can certainly bake these cookies without any chill, but they'll spread more and bake up thinner. In my opinion, they're still quite delicious, but the most delicious cookie with the best texture comes after a brief chill. But because I don't like waiting, here's my trick: Scoop the cookie dough into balls before chilling shortens the chill time to just 20-30 minutes in the fridge (or 10 in the freezer!).
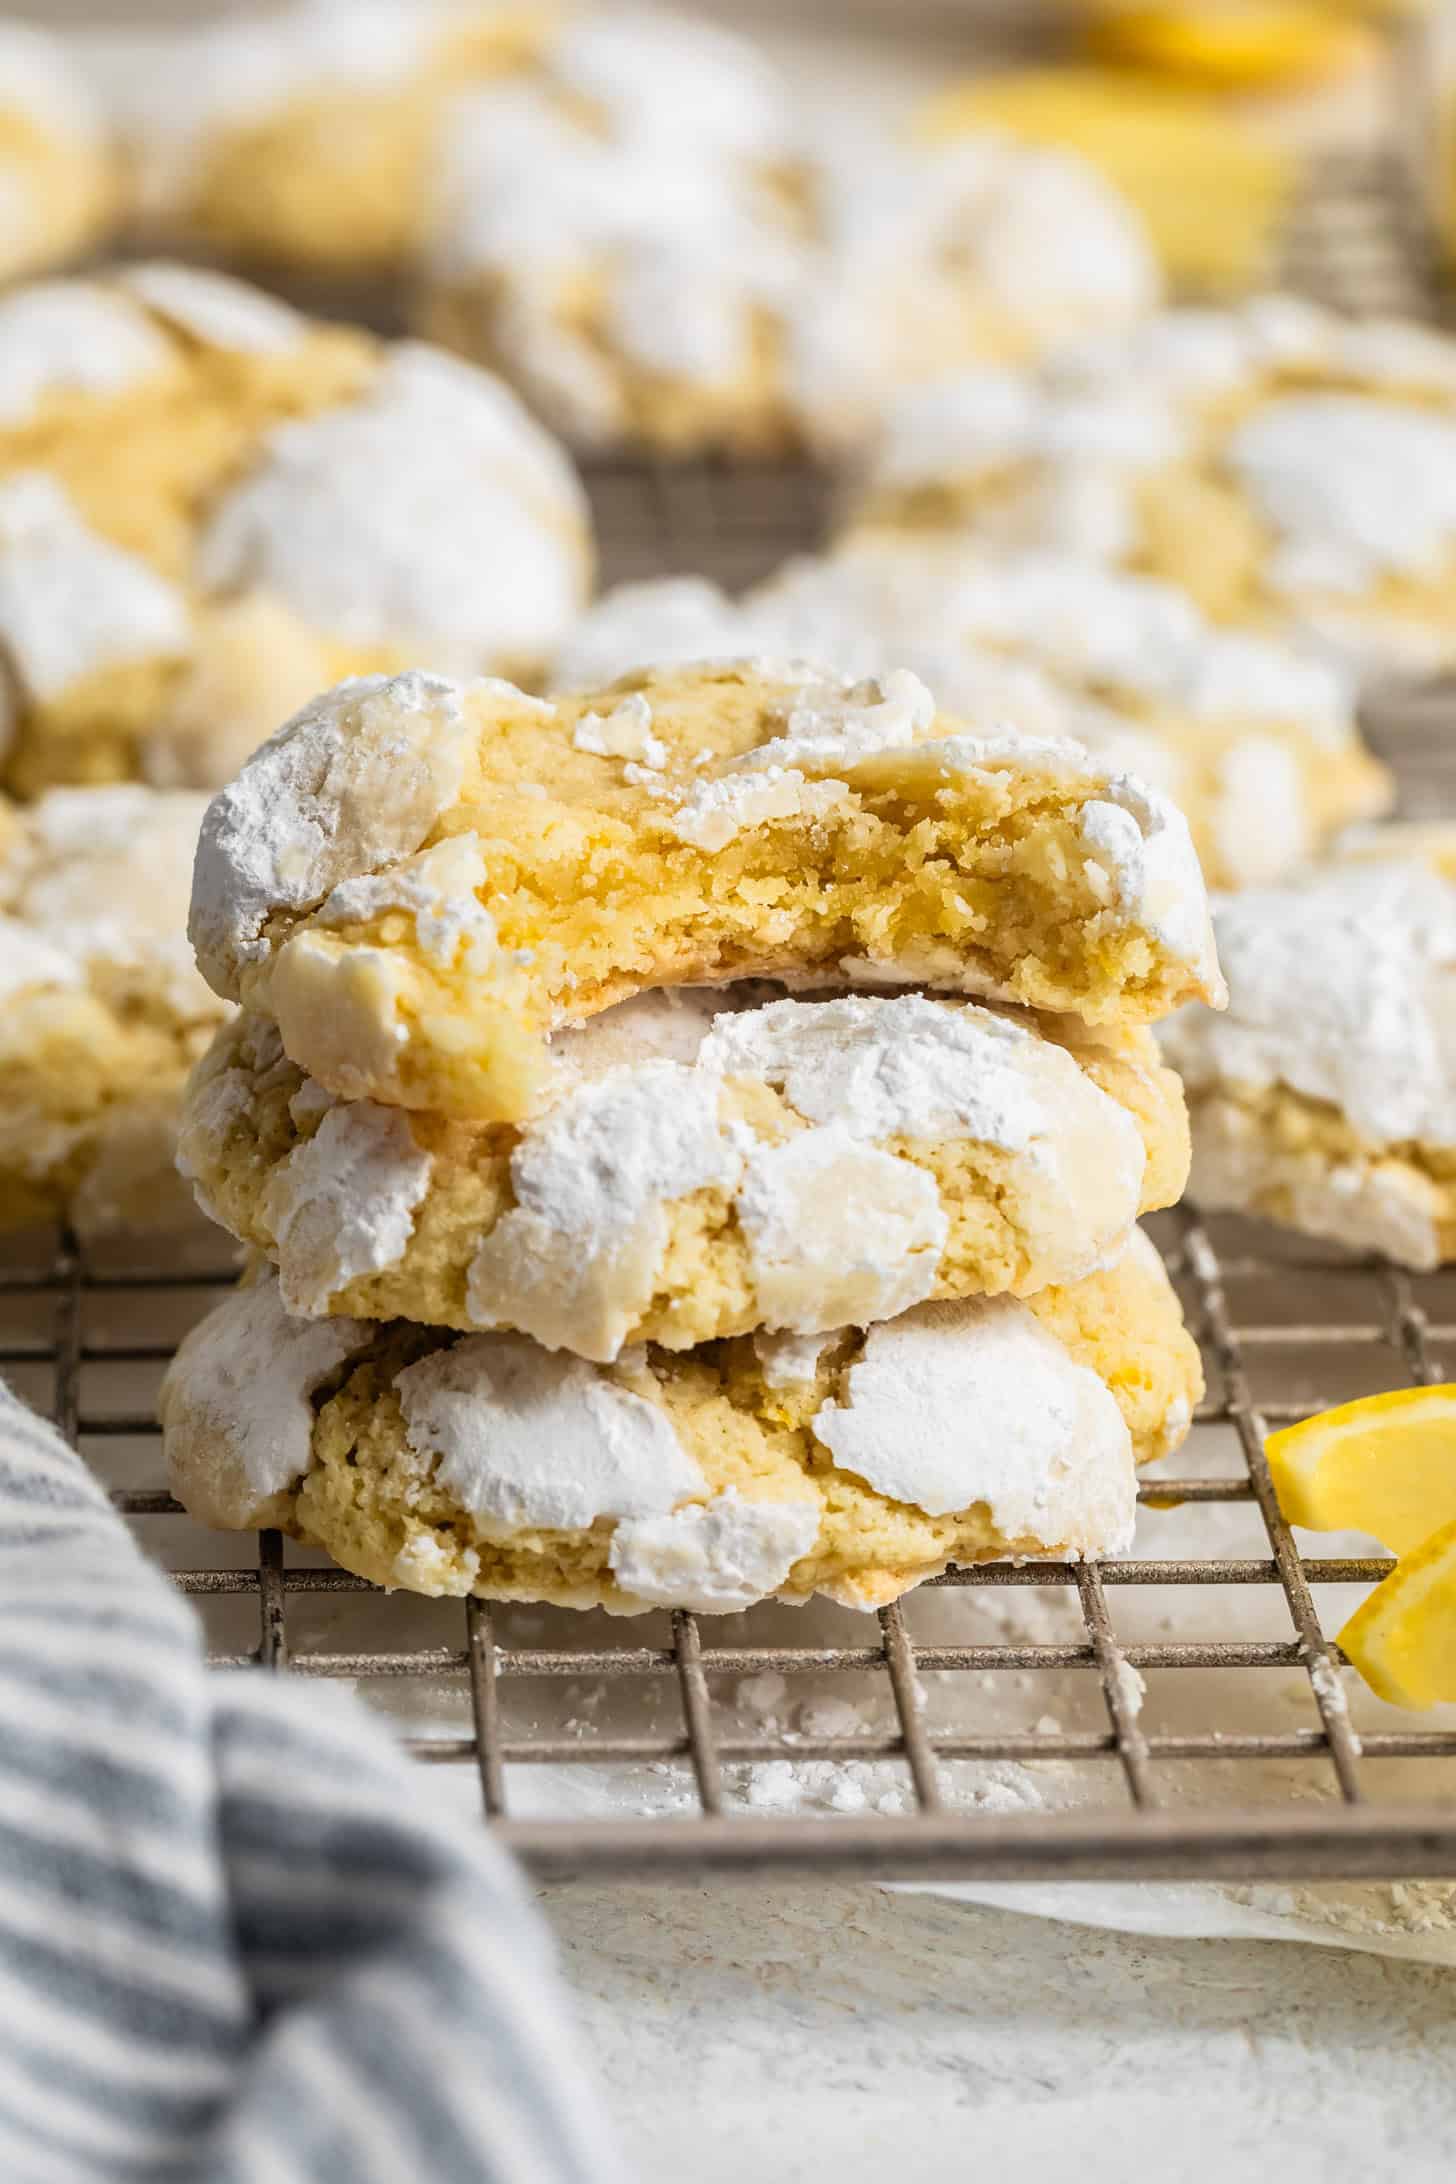
Team Chewy or Team Cakey
Bake for 10-11 minutes for dense chewy cookies with centers that relax as they cool (my personal fav). Add 1-2 minutes to the bake time for pillowy soft cakey cookies that stay puffed up (my husband's fav). Both versions melt-in-your mouth. You can't mess these up.
In the photo above, the top cookie is the chewy version and the bottom cookie is the pillowy cakey version. See below for more pictures.
Did you make this recipe? Please leave a review and rating to let me and others know how you liked it!

Comments
No Comments